
Would you like to create a Groundhogg optin form for your WordPress website to capture leads?
Groundhogg is a WordPress CRM and marketing automation plugin that helps businesses manage customer relationships and automate email marketing campaigns directly from their WordPress dashboard. It offers features such as contact management, email sequences, lead scoring, and sales funnel automation to help users nurture leads and convert them into customers.
In this tutorial, we will learn how to integrate MailOptin with Groundhogg, allowing you to start capturing and saving leads to your Groundhogg account using an email sign-up form.
Why Use Groundhogg and MailOptin Together?
Combining Groundhogg and MailOptin brings together the best of both worlds. Groundhogg offers powerful email marketing and CRM capabilities directly from your WordPress dashboard, allowing you to design and send newsletters, post notifications, and automated emails with ease.
MailOptin, on the other hand, excels at creating high-converting optin forms and popups. Together, they form a formidable duo for lead generation and email marketing.
Steps to Create a Groundhogg Opt-in Form
Follow these steps to set up the Groundhogg optin form on your site using MailOptin:
Step 1: Install and Activate MailOptin Plugin
To install the MailOptin plugin on your WordPress site, visit the pricing page and select a plan. After purchasing, download the plugin’s zip file.
Log in to your WordPress dashboard, navigate to the Plugins page, click “Add New,” and then select “Upload Plugin.” Select the zip file and click “Install Now”.
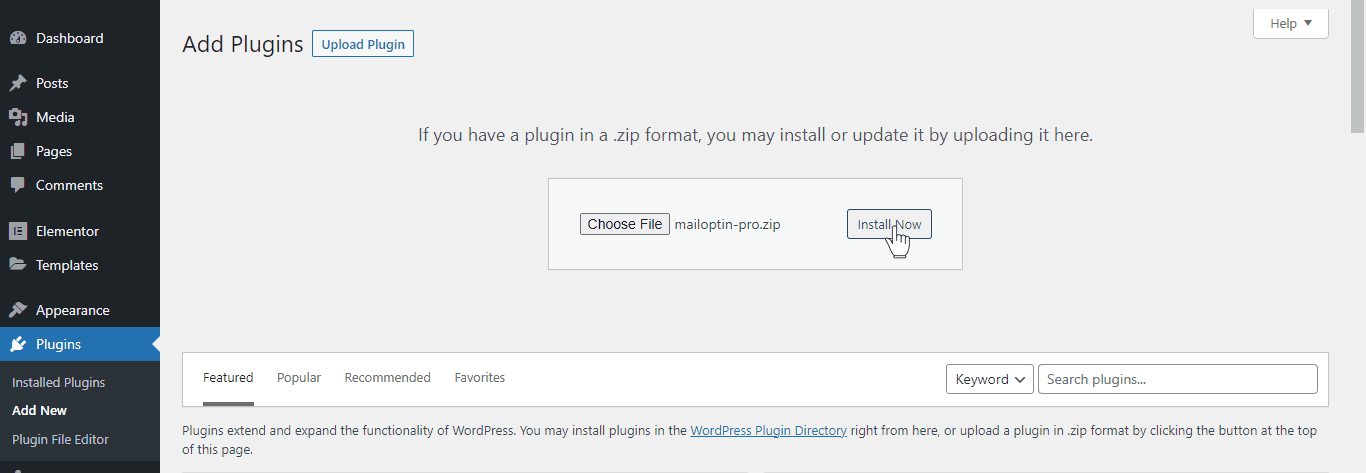
After installing the plugin, activate it by clicking ‘Activate Plugin’.
Step 2: Connecting MailOptin with Groundhogg
Next, connect MailOptin to your Groundhogg account. If you don’t have Groundhogg plugin enabled on your website, go to Plugins >> Add New.
Search for Groundhogg. Then, click “Install Now” and follow with “Activate” to enable the plugin.
Now that you have installed and activated Groundhogg on your website, the integration will be live automatically. You don’t need to do any additional setup or settings.
Step 3: Create a New Optin Campaign
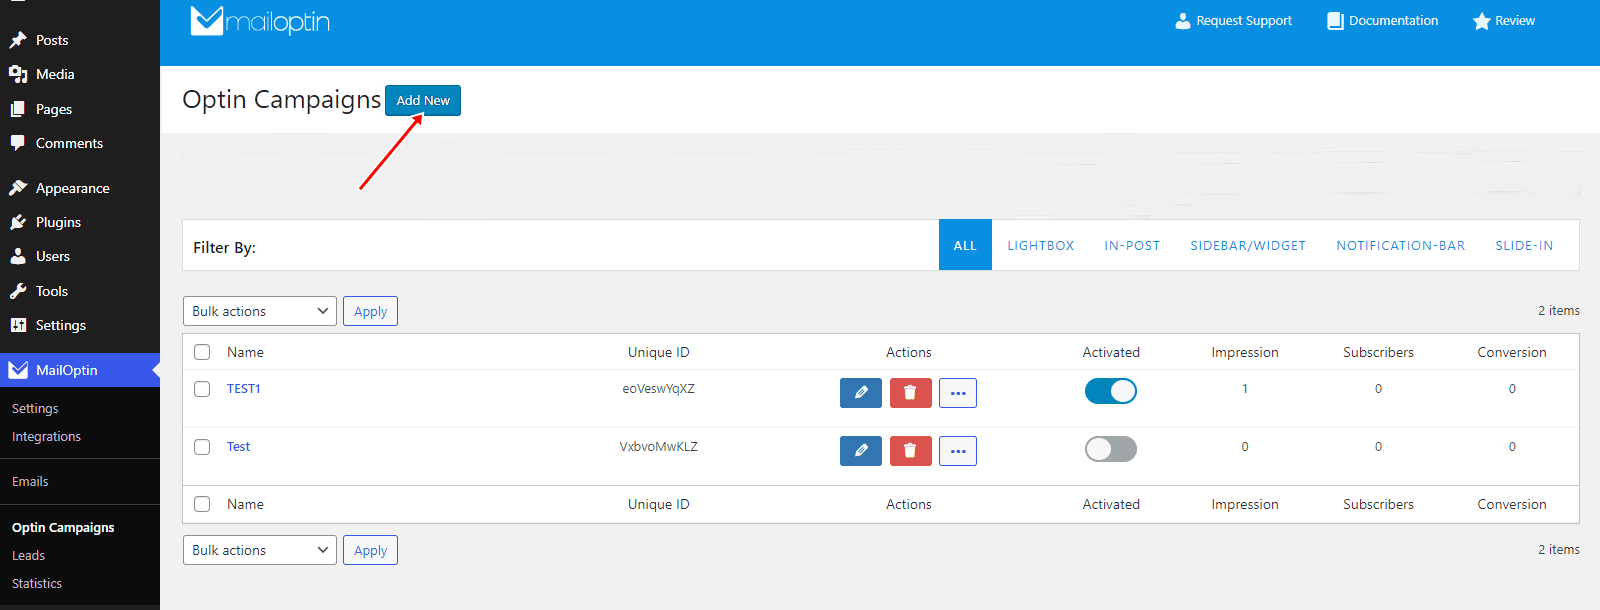
Go to the Optin Campaign page and click the Add New button at the top to create an optin form.
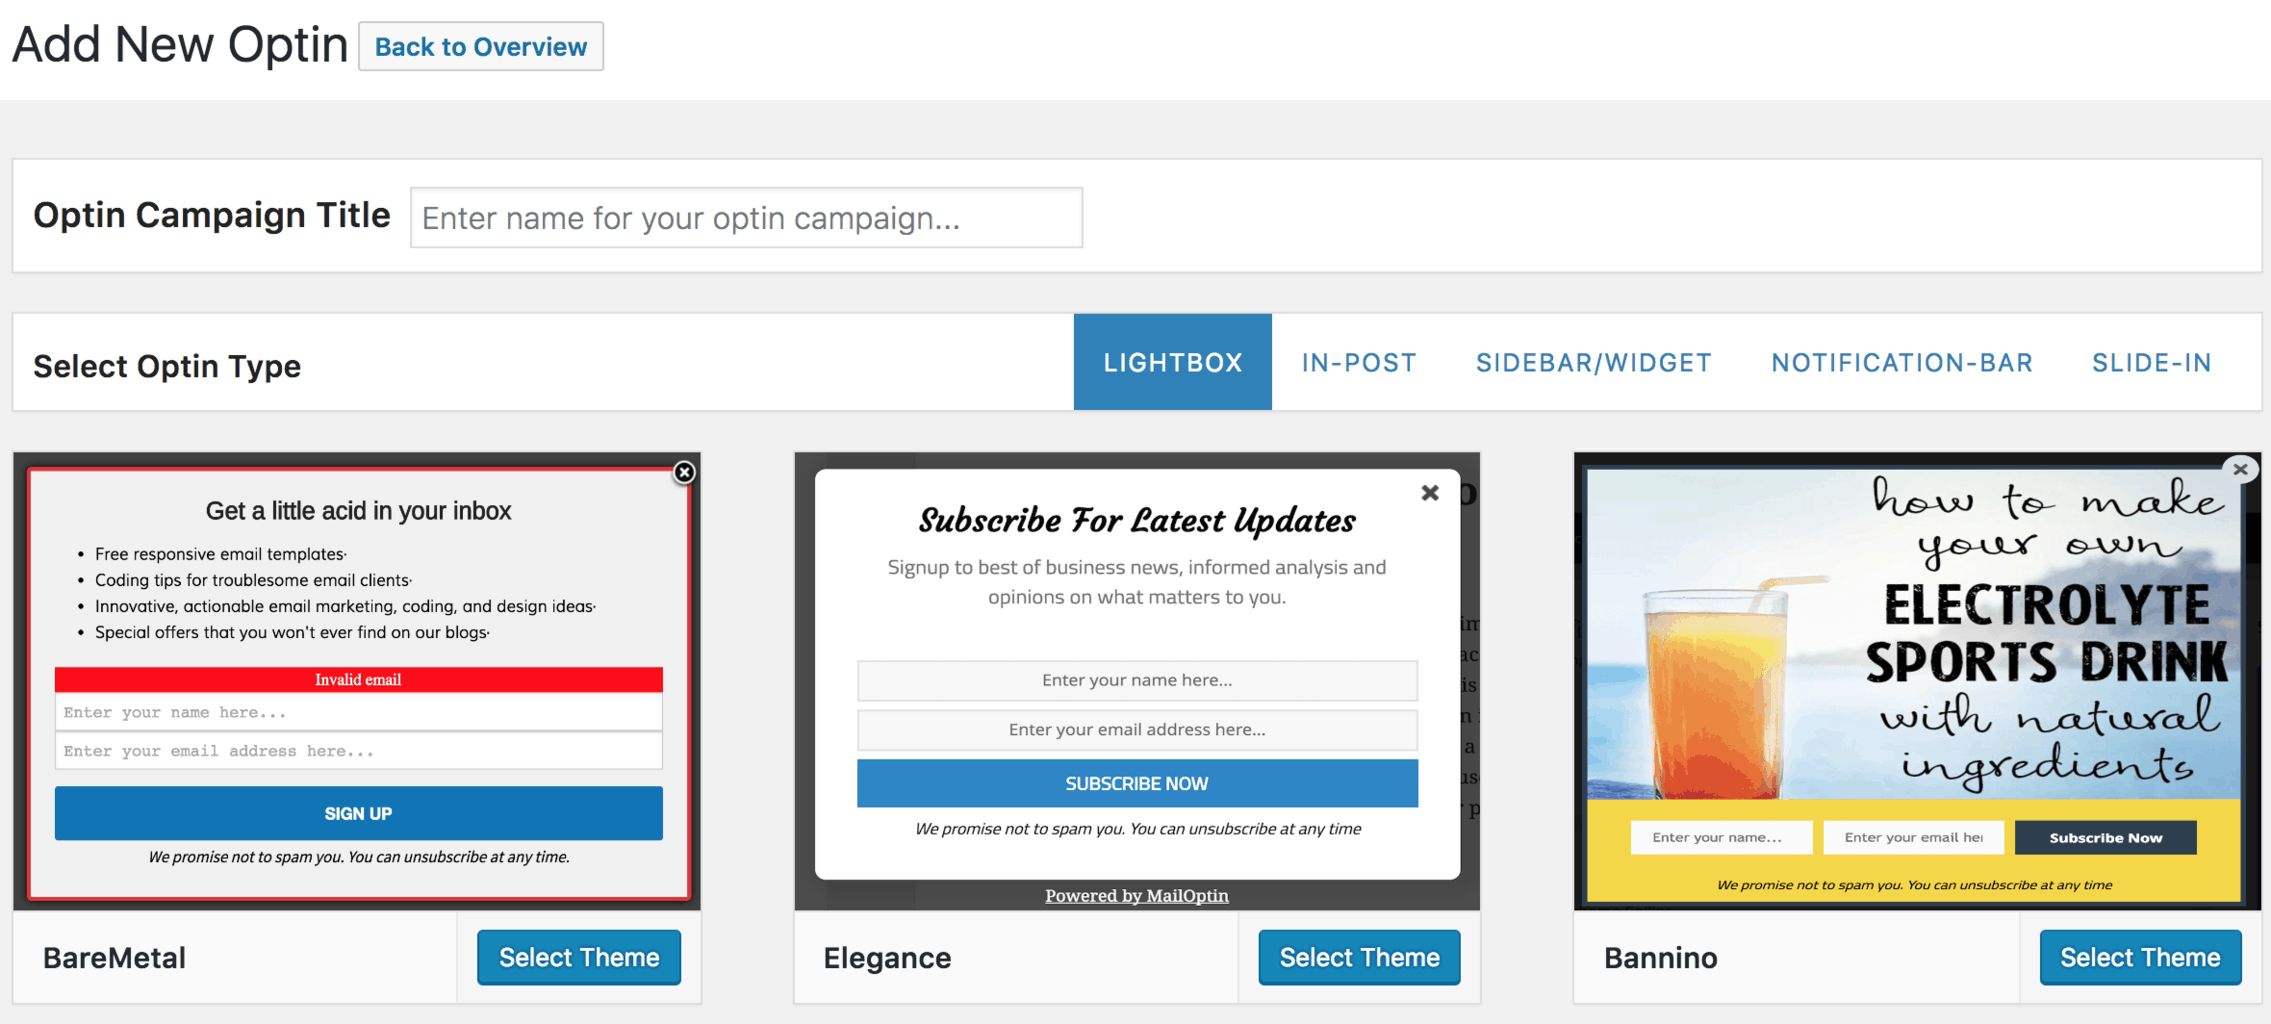
Enter a title for the campaign, select the optin type (for this tutorial, we’ll choose lightbox), and click the optin form design you want.
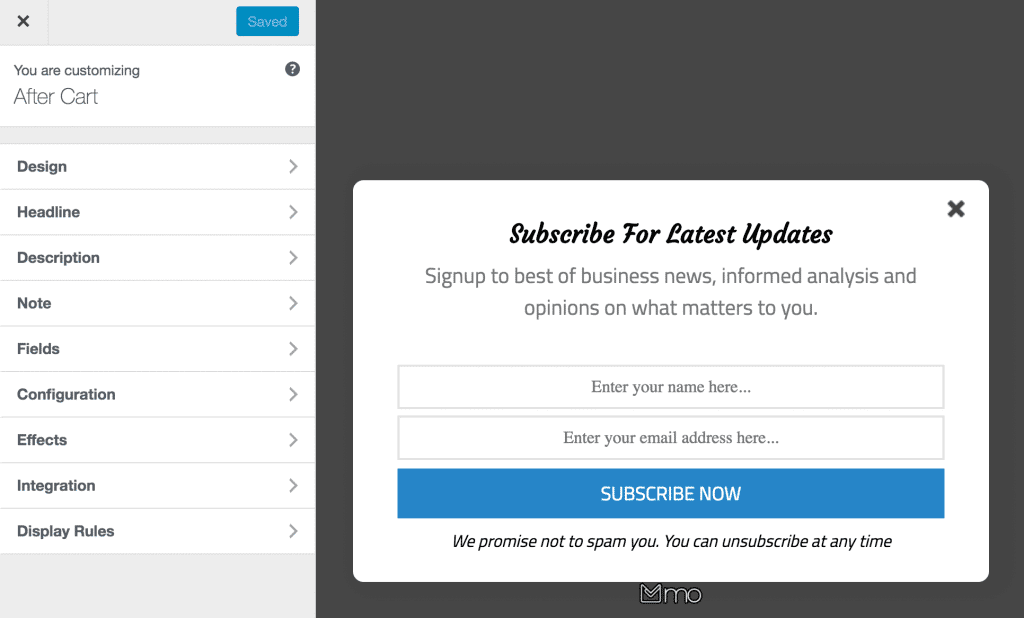
You will then be redirected to the form builder where you have options and the flexibility to customize the optin form to your heart’s content.
See: Adding Extra Fields to Your Optin Form
After customizing the form, open the Integration panel and select Groundhogg as the integration option. You can also choose tags to assign to leads, select the contact owner, and specify the opt-in status.

To display the opt-in on your site, toggle the activate switch to ON at the top (near the “Save Changes” button).
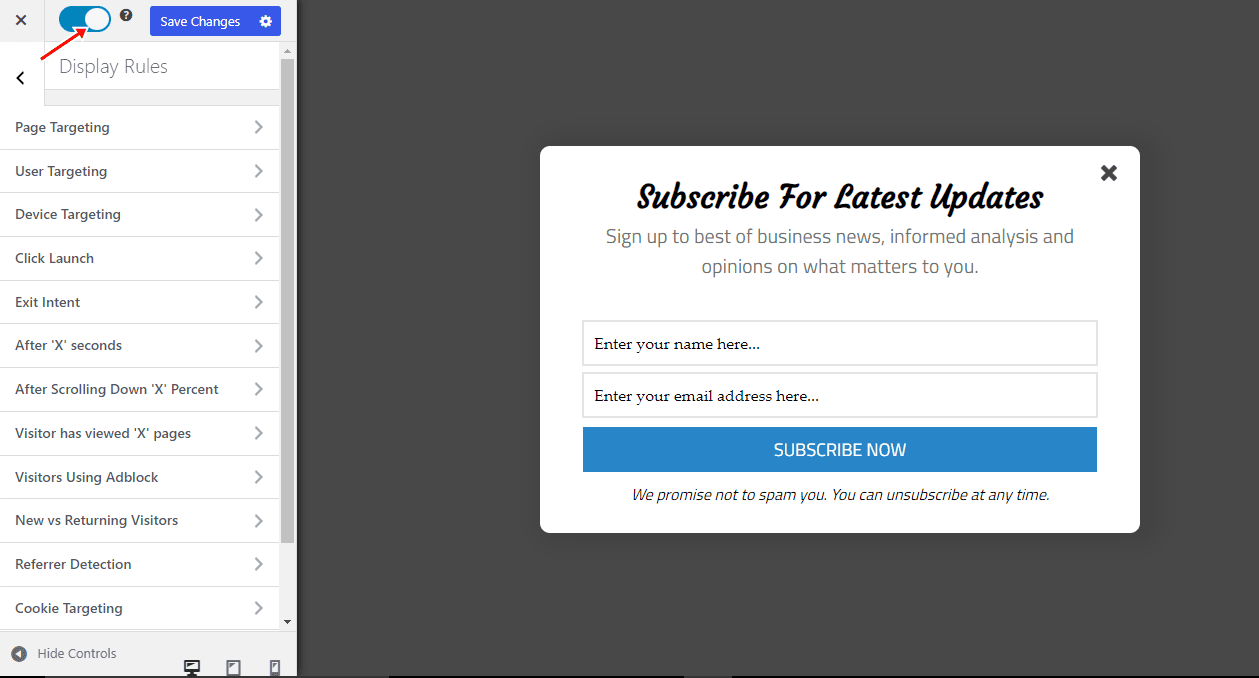
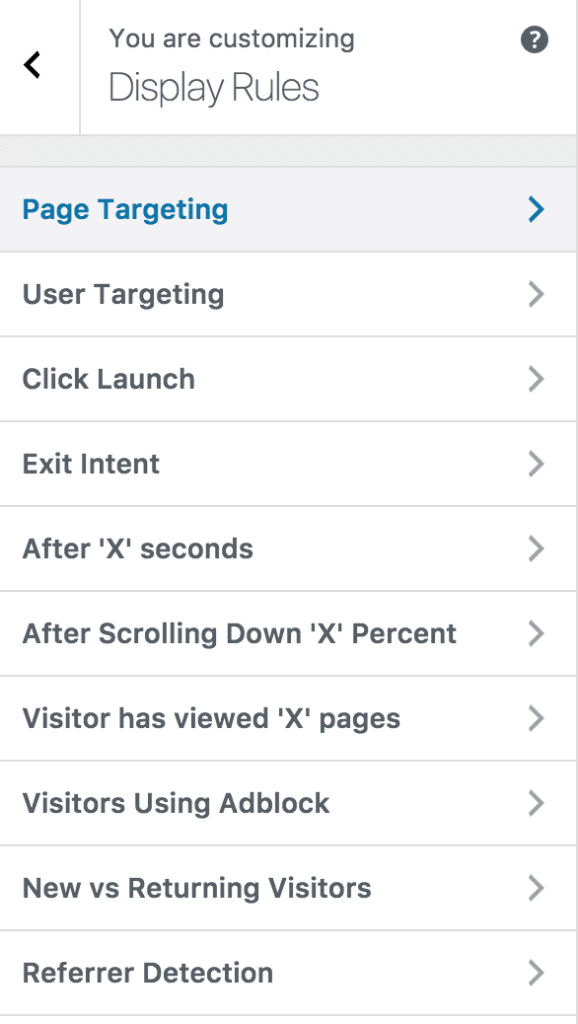
Navigate to the “Display Rules” panel.
If you want the opt-in form to be displayed everywhere (all pages) of your WordPress site, also check “Globally load optin.” Otherwise, use page-level targeting and triggers to determine where and how the opt-in will be displayed on your site.
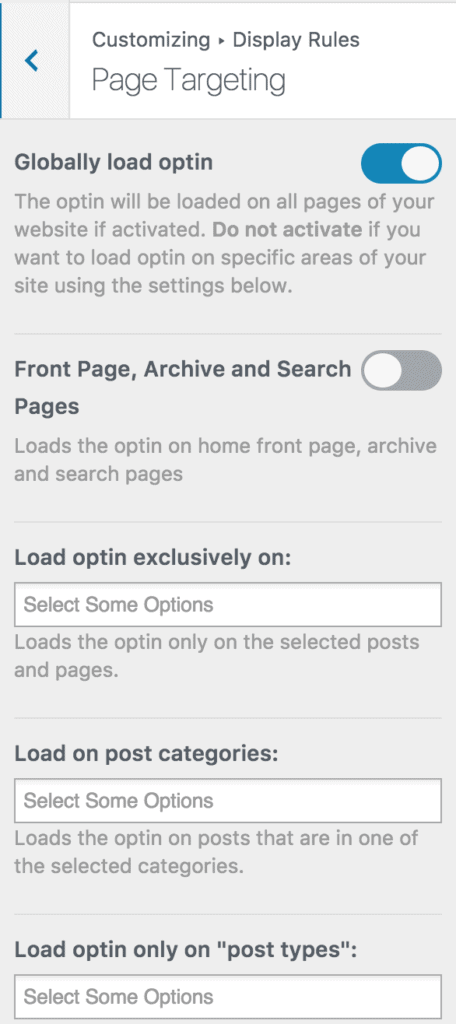
Finally, save the changes. Preview your website, and you should see the optin displayed. If it doesn’t appear, be sure to clear the cache of your website and browser.
Ready to capture leads in WordPress to Groundhogg?
Integrating Groundhogg with MailOptin offers a powerful solution for capturing leads and enhancing email marketing efforts on your WordPress website.
By following the steps outlined in this guide and optimizing your optin forms, you can effectively grow your email list and engage your audience.
Follow the guide below to learn how to create other popular types of email opt-in forms, and don’t forget to select Groundhogg as the integration.