How to Create Paid Newsletter Subscription with WordPress
In recent years, paid newsletters have become increasingly popular for writers, bloggers, and businesses to monetize their content.
If you’re considering starting a paid newsletter subscription, you may wonder where to start. Fortunately, if you have a WordPress website, creating a paid newsletter is a straightforward process.
In this article, we’ll guide you through the steps necessary to set up a paid newsletter subscription using WordPress, including selecting a payment gateway, creating a subscription form, and configuring your website to deliver the content to your subscribers. By the end of this article, you’ll have all the information you need to start monetizing your content with a paid newsletter.
Let’s get started!
What Are the Advantages of Paid Newsletter?
Paid newsletters offer several advantages to both content creators and subscribers. Here are some of the critical benefits of offering a paid newsletter subscription:
- Monetization: The most apparent advantage of a paid newsletter subscription is that it lets you monetize your content. This provides you with a steady revenue stream that can help support your content creation efforts.
- Control: When you offer a paid newsletter subscription, you have more control over your content and audience. You can choose what content to include in your newsletter and who to send it to without worrying about social media algorithms or other external factors.
- Deeper Connection with Subscribers: Paid newsletter subscribers are often more invested in your content and brand than casual readers. This allows you to build a deeper relationship with your audience and foster community.
- Data Ownership: When you use social media or other third-party platforms to distribute your content, you’re often at the mercy of their data policies. With a paid newsletter subscription, you own the data and can use it to improve your content and marketing efforts.
- Less Reliance on Ads: If you rely on advertising revenue to support your content, a paid newsletter subscription can be a way to reduce that reliance. By offering a paid subscription, you can diversify your revenue streams and reduce the impact of changes to advertising policies or algorithms.
Now that we know how effective a paid newsletter can be, let’s look at how to create it with WordPress.
How to Create Paid Newsletter Subscription with WordPress
To create a paid newsletter in WordPress, we’ll use the MailOptin and ProfilePress plugins.
We’ll use ProfilePress to create paid newsletter user roles and membership plans, while the MailOptin plugin to create newsletters and send them to paying subscribers directly from within WordPress.
Let’s look at detailed steps on how to achieve this.
1. Install ProfilePress and MailOptin Plugin
We can use the free ProfilePress plugin to create membership plans, but for sending newsletters from WordPress, we’ll need to purchase the premium version of the MailOptin plugin.
Let’s start by installing the ProfilePress plugin first.
Install and Set Up ProfilePress Plugin
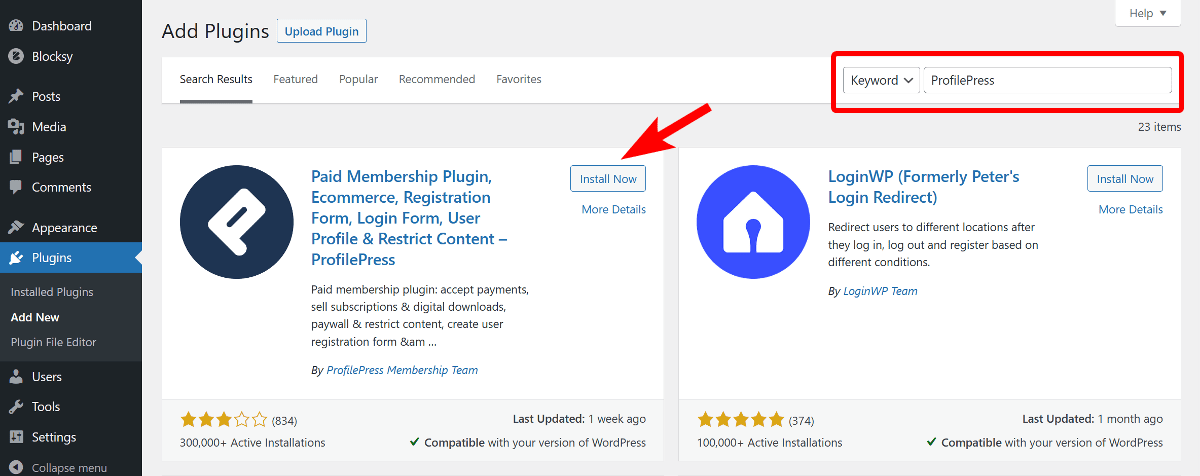
To add ProfilePress to your WordPress website, log in to your dashboard and navigate to Plugins > Add New. In the search bar on the top right-hand side, type in “ProfilePress.” The first result that appears should be the ProfilePress plugin. Proceed to install and activate it.
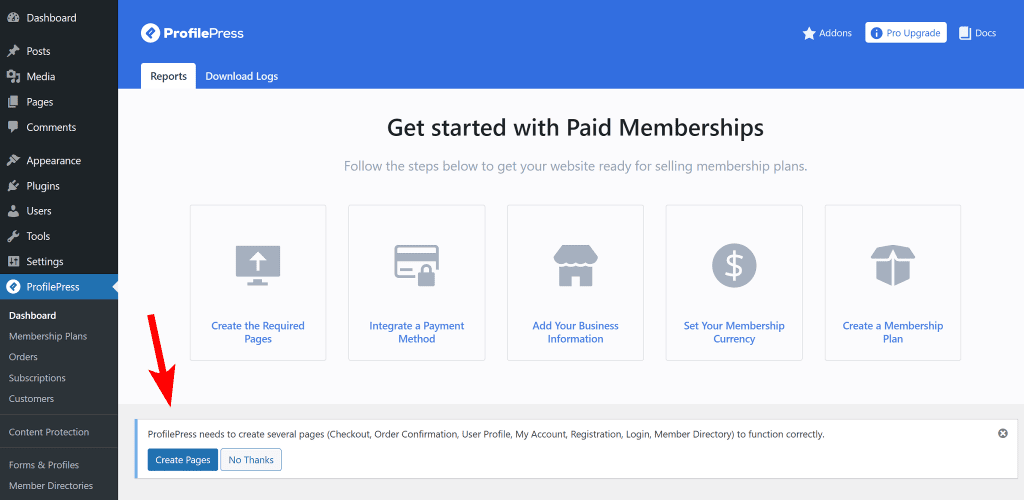
For ProfilePress to function correctly, it needs to create pages such as Checkout, Order Confirmation, User Profile, My Account, Registration, and Login.
To create these pages automatically, go to ProfilePress > Dashboard and click the Create Pages button at the top.
After these pages are created, you’ll be taken to the plugin’s settings page, where you must select the newly created page next to each name.
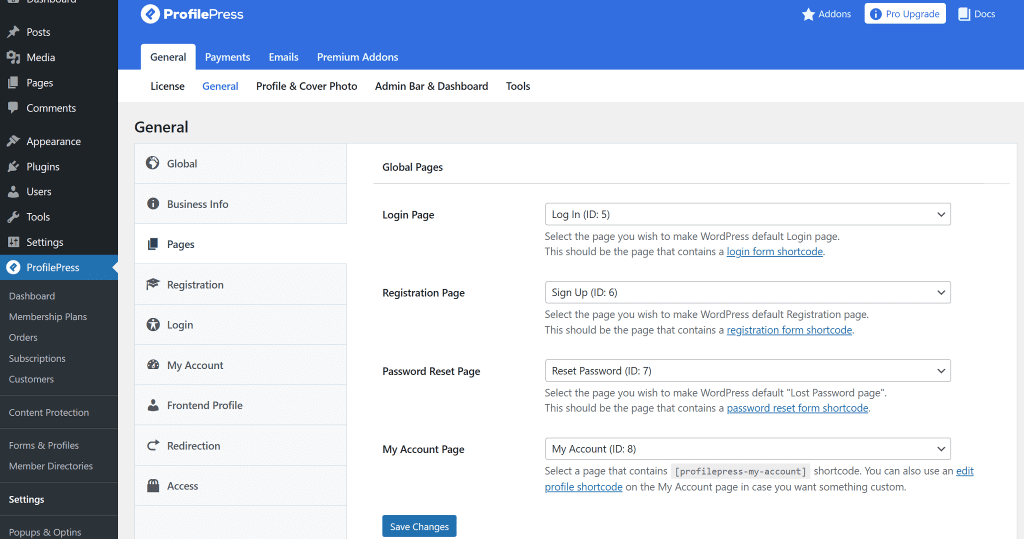
Once done, click the Save Changes button at the bottom.
Install and Set Up MailOptin Plugin
We also need to install the MailOptin plugin. Don’t have the MailOptin plugin? Purchase a license from the pricing page.
Once complete, you will receive a download link for the plugin and a license key. Keep this license key safe, as we will need it for activation later.
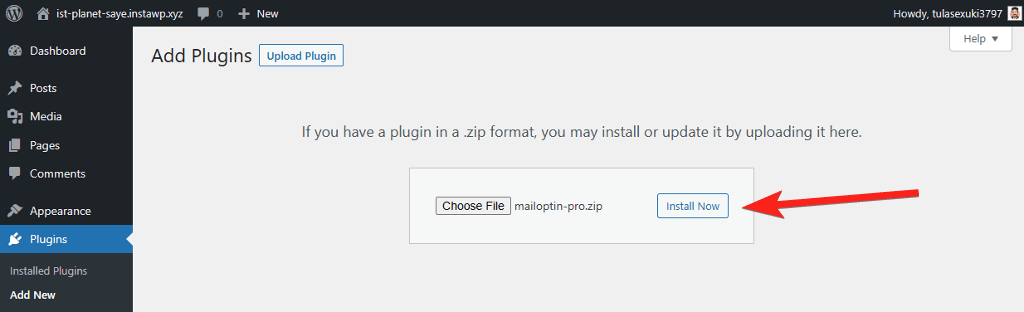
To install MailOptin, navigate to your WordPress dashboard and click Plugins > Add New. From there, click the Upload Plugin button at the top. Select the MailOptin file from your computer and click Install Now.
2. Create a Paid Newsletter Subscription Plan
Creating a paid newsletter subscription plan using ProfilePress is easy. ProfilePress allows you to create multiple membership plans with different prices and access, but we’ll focus on creating a single plan.
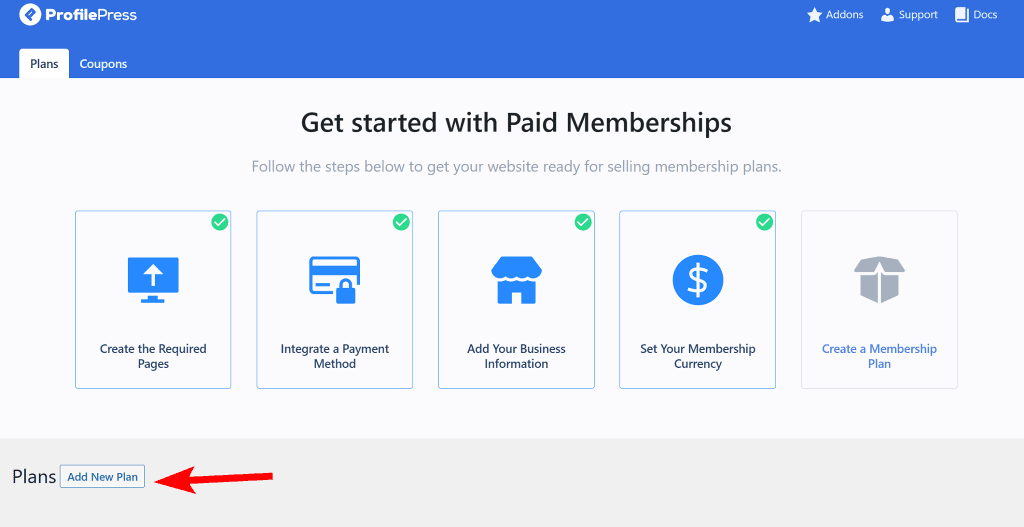
ProfilePress provides a 5-step Get Started guide in the plugin dashboard to help you set up paid newsletter membership plan on your website. We have already completed the first step, so let’s proceed to the next one.
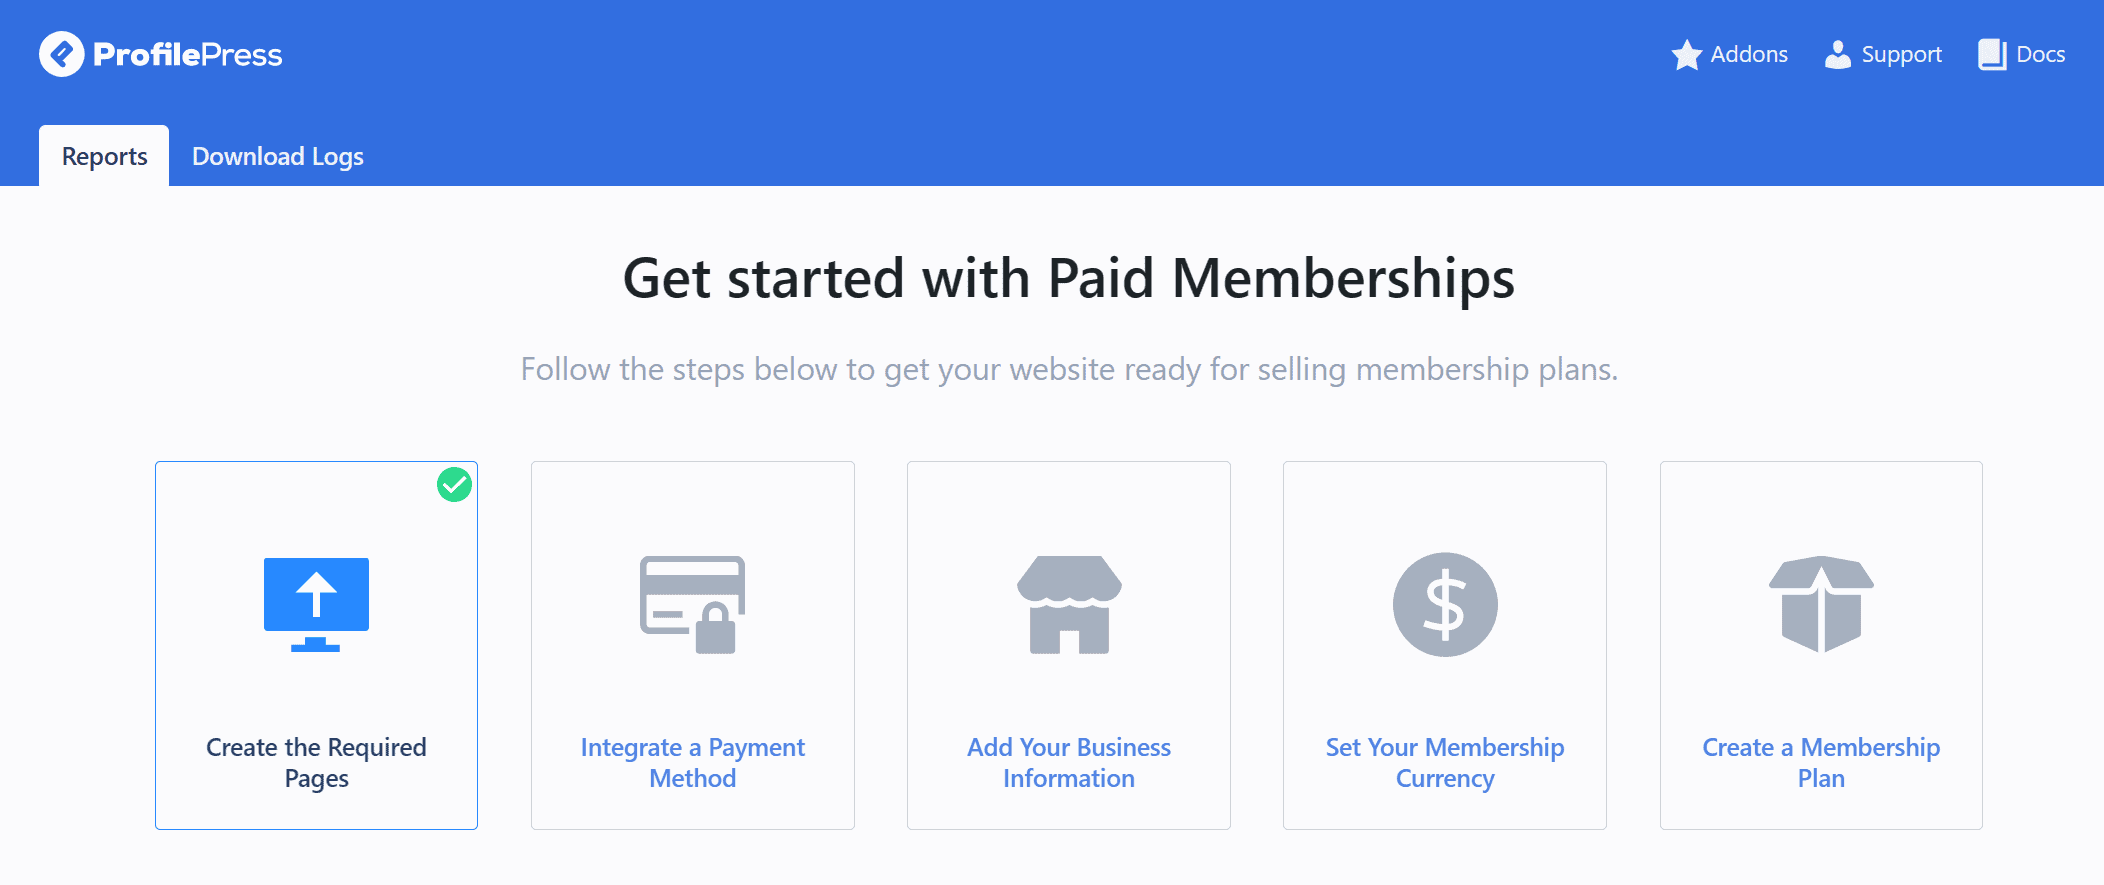
Integrate a Payment Method
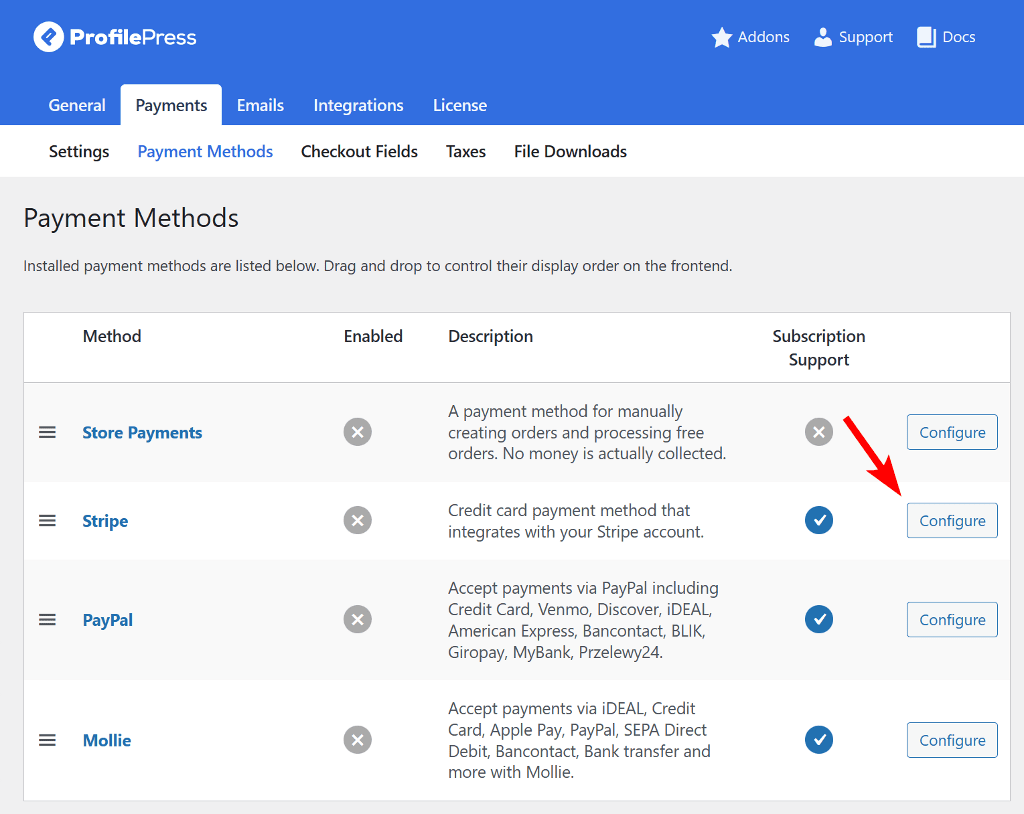
Click the Integrate a Payment Method button to take you to the Payments page. Alternatively, you can navigate to ProfilePress > Settings > Payments to access the same page. ProfilePress integrates with various payment gateways; however, with the free version, only Stripe is available.
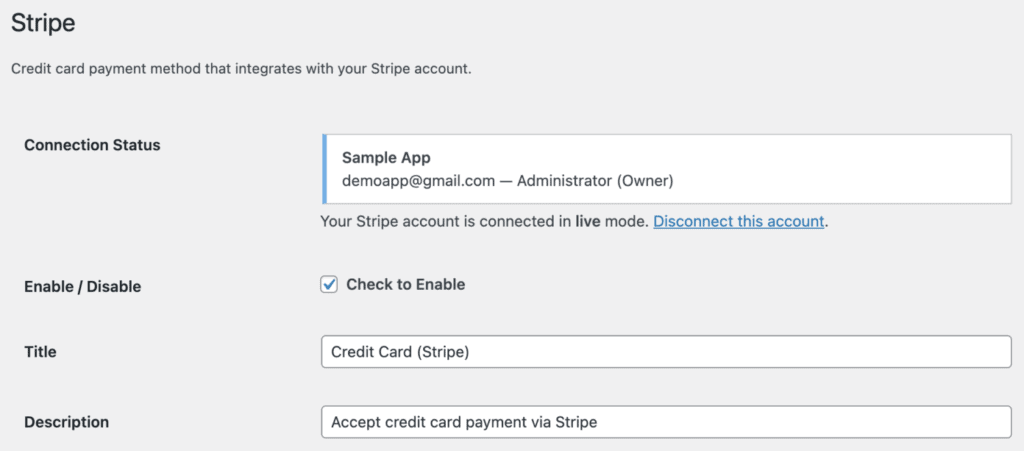
To set up Stripe on your website, click the Configure button next to the option.
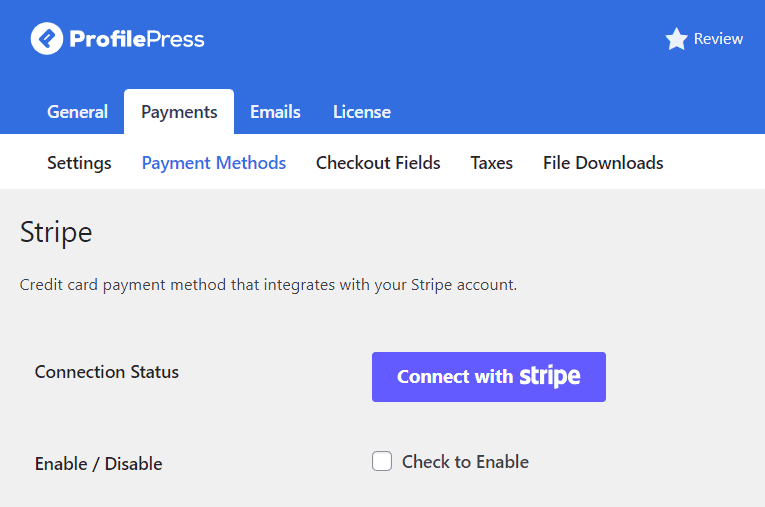
You will then be directed to another page where you can click the Connect with Stripe button to connect ProfilePress to your Stripe account on the Stripe website. This will allow for seamless payment processing on your website.
This will take you to Stripe.com, where you’ll be prompted to create a new Stripe account or log in to your existing one.
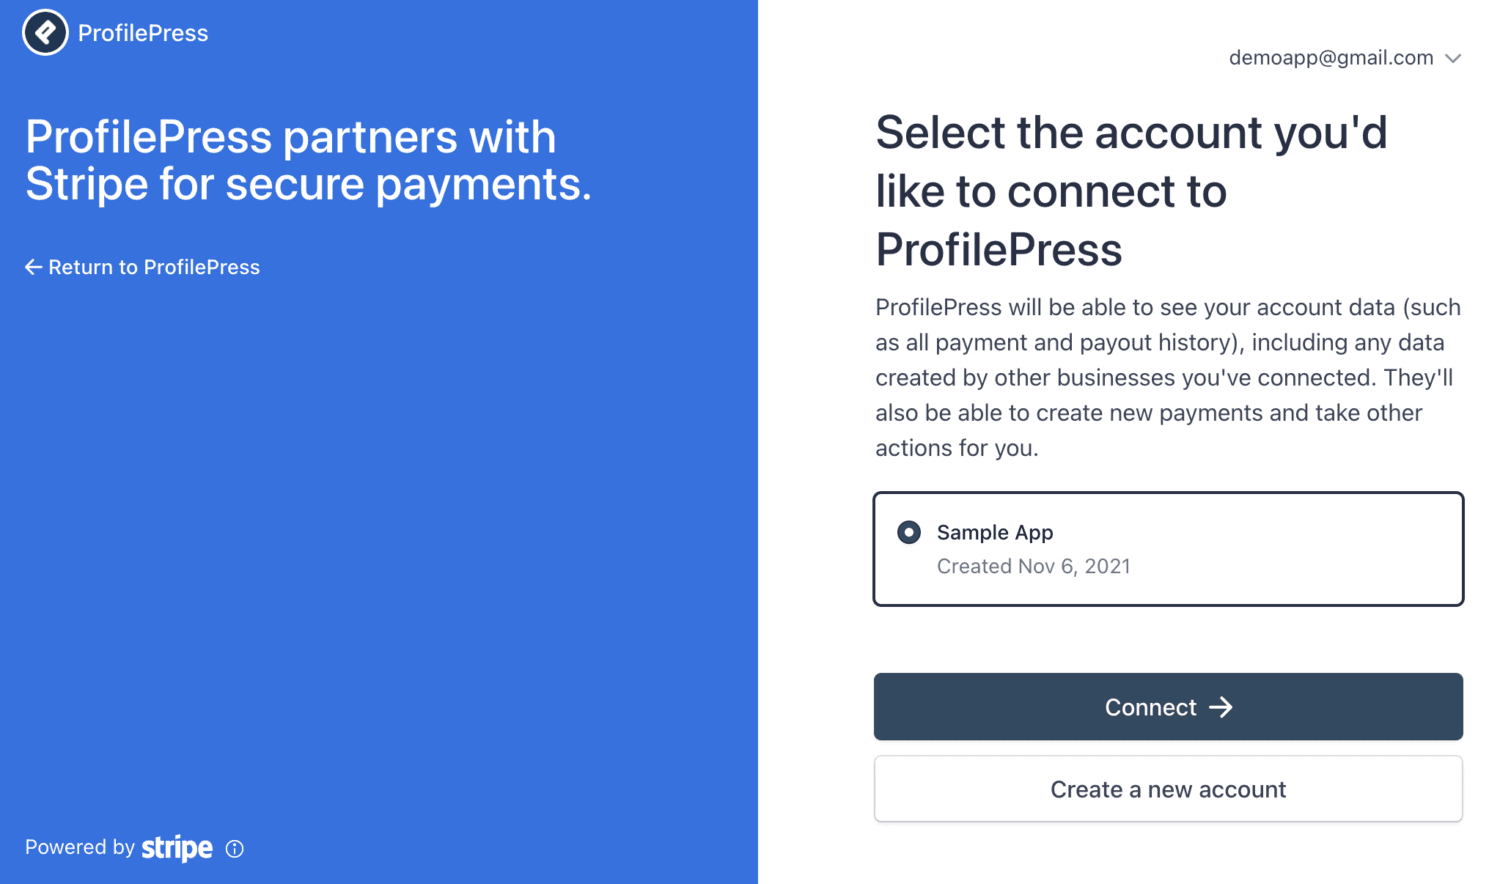
Upon completing the form, the website page will automatically reload.
Next, enable the payment method by checking the Enable / Disable option. You can also edit the Title and description on the checkout page.
Once that’s complete, let’s move on to the next step and add your business information.
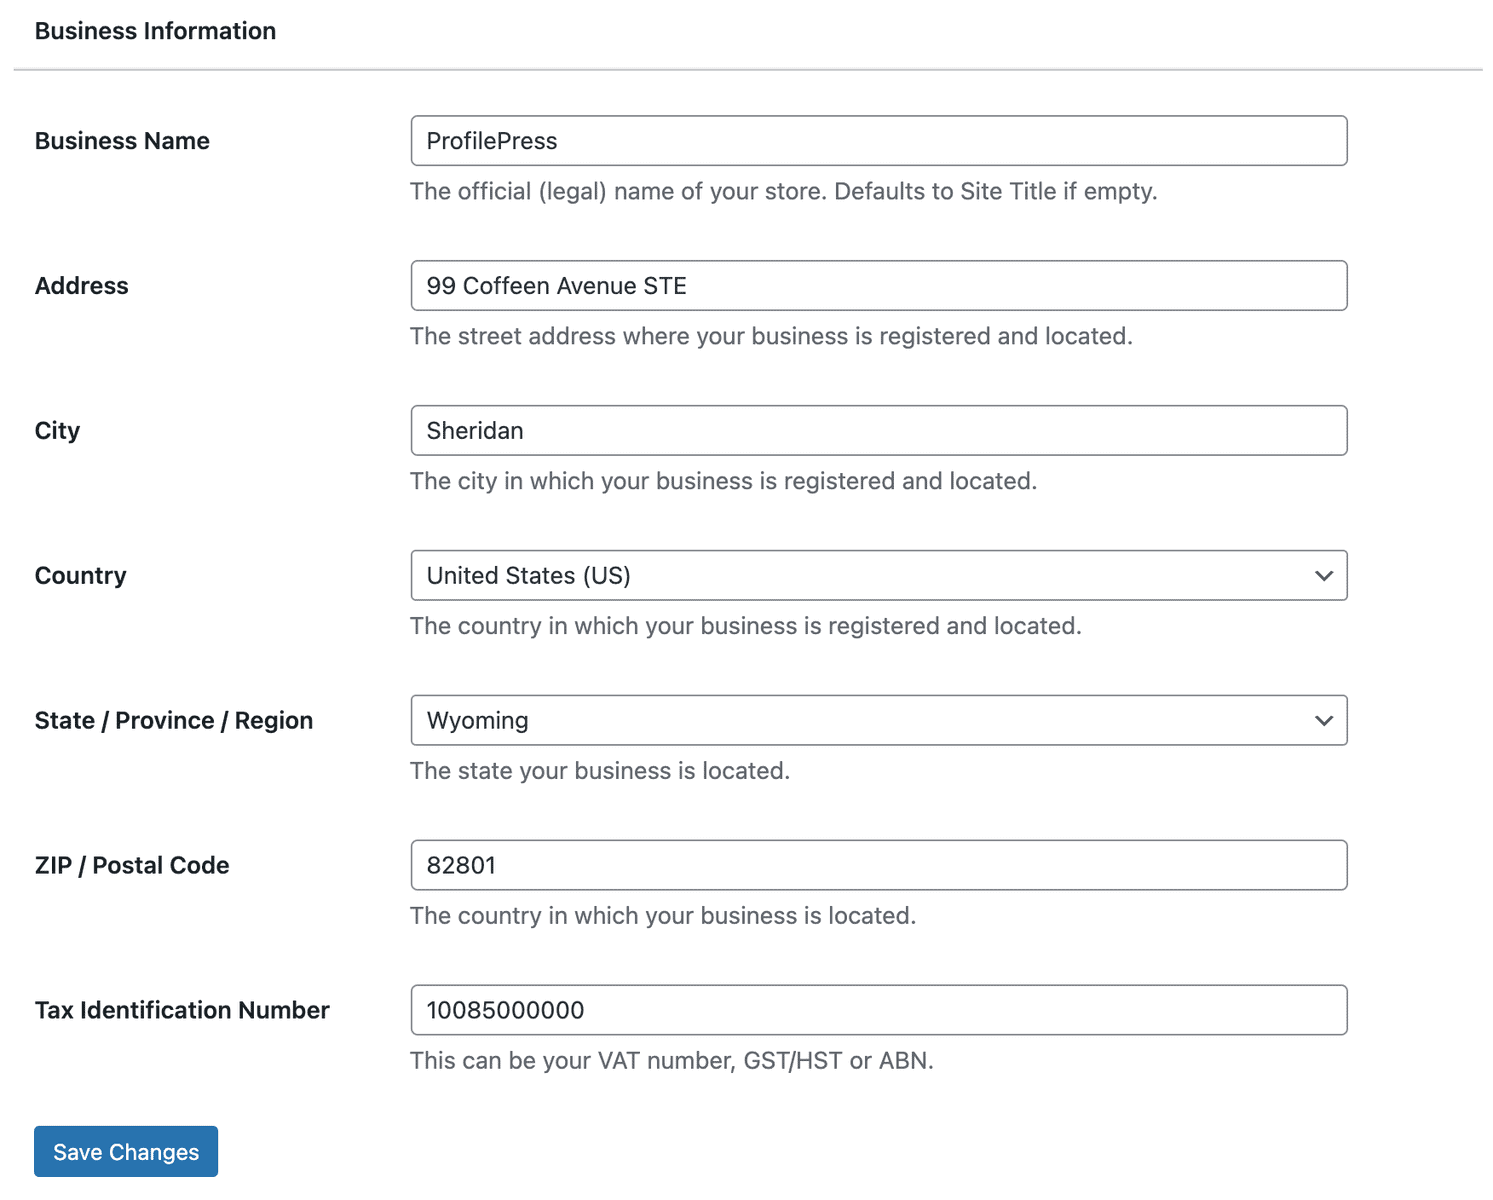
Add Your Business Information
Go to the page and provide your business name, address, and tax identification number. Once you’ve filled in all the information, click the Save Changes button at the bottom.
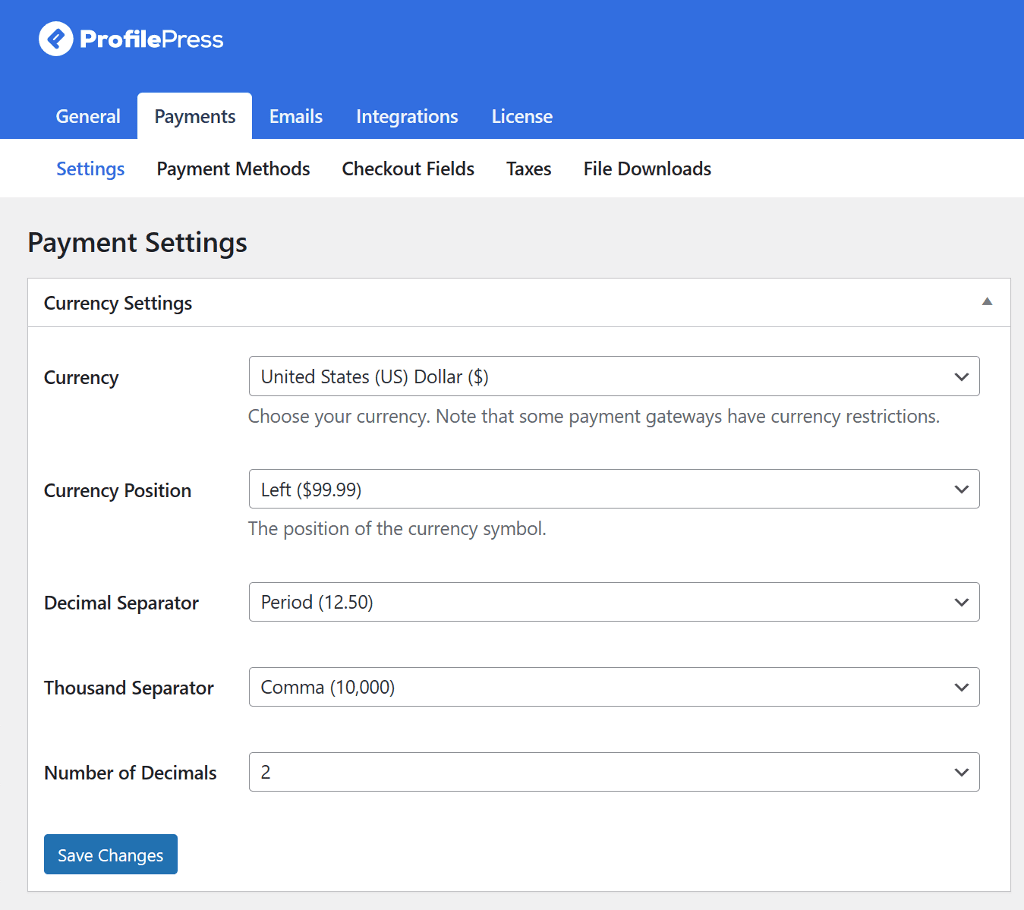
Set Your Membership Currency
With ProfilePress, you have the flexibility to choose your preferred currency. The default currency is USD, but you can easily switch to any of the world’s major currencies by clicking the dropdown menu and selecting your preferred option. You can also set the currency position, decimal and thousands separator.
Next, scroll down to set the checkout settings. Here, you can tick the One Time Trials option to prevent users from using the free trial of a plan multiple times. You can also edit the “Agree to Terms” checkbox text.
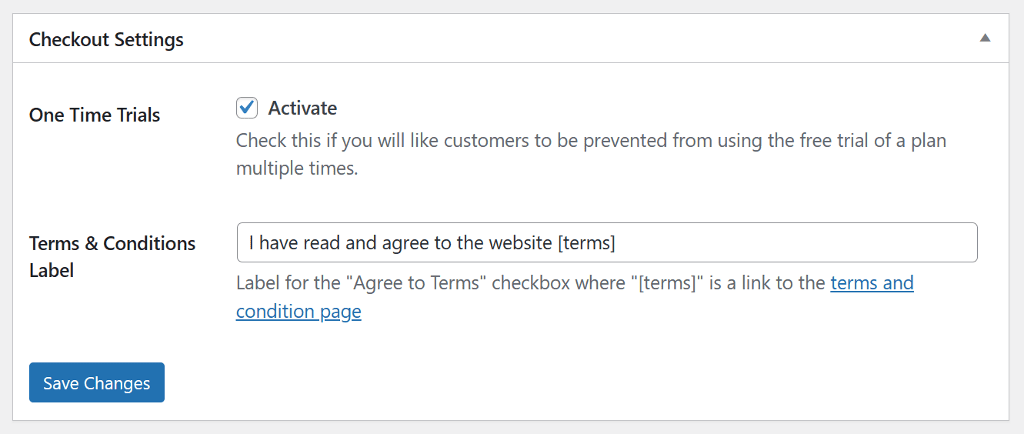
Remember to save your changes and move on to the receipt settings.
Here, you can disable receipt generation for free orders and specify the URL customers will be redirected to if they click on the logo on the receipt. Add a thank you note or edit the receipt button label.
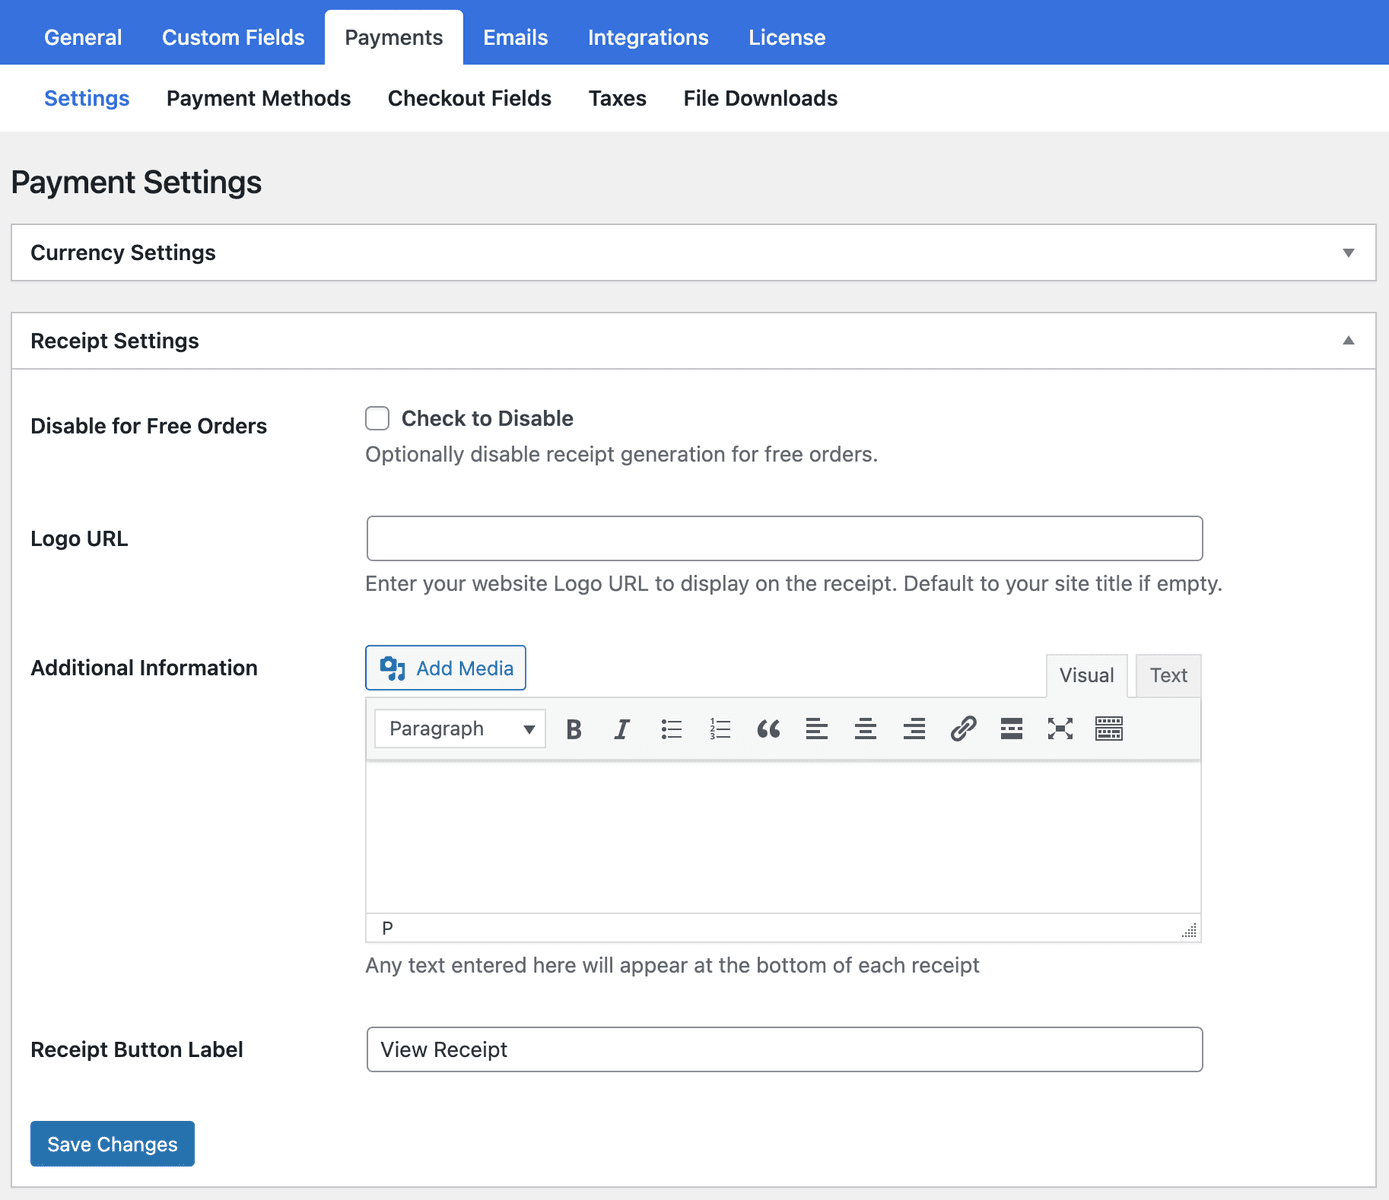
When you’re all done, click the Save Changes button at the bottom of the page.
Create a Membership Plan
The next step is essential as we’ll create the membership plan for our paid newsletter. Click the Create a Membership Plan button and then the Add New Plan button.
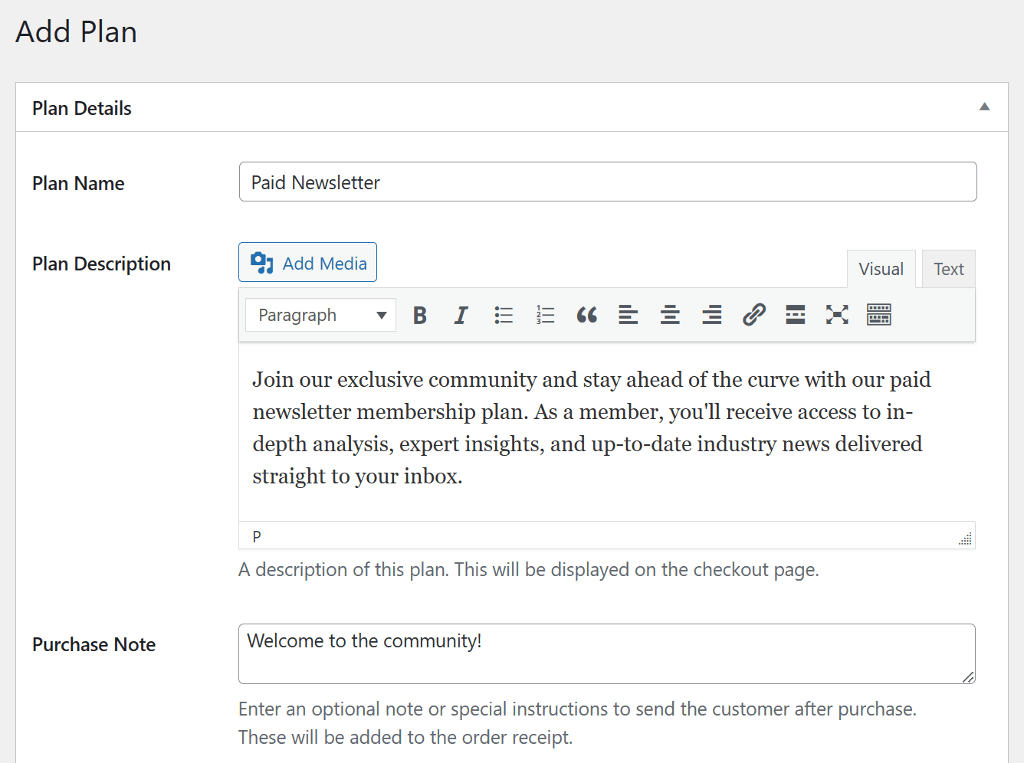
Name your plan and add a short description explaining what your paid newsletter is about. Make sure to choose a simple and self-explanatory name. You can also optionally enter a Purchase Note which is a great place to add a thank you note or usage instructions.
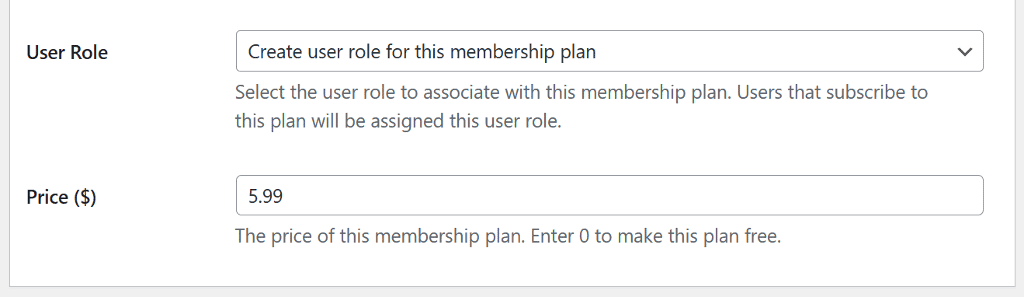
Next, you can select the user role associated with the plan. It’s recommended to choose “create user role for this membership plan” to create and associate a new role with the plan. This way, anyone subscribing to this plan will have a user role assigned, and we can use that in MailOptin to send the newsletter.
Finally, enter a price for your paid newsletter membership plan.
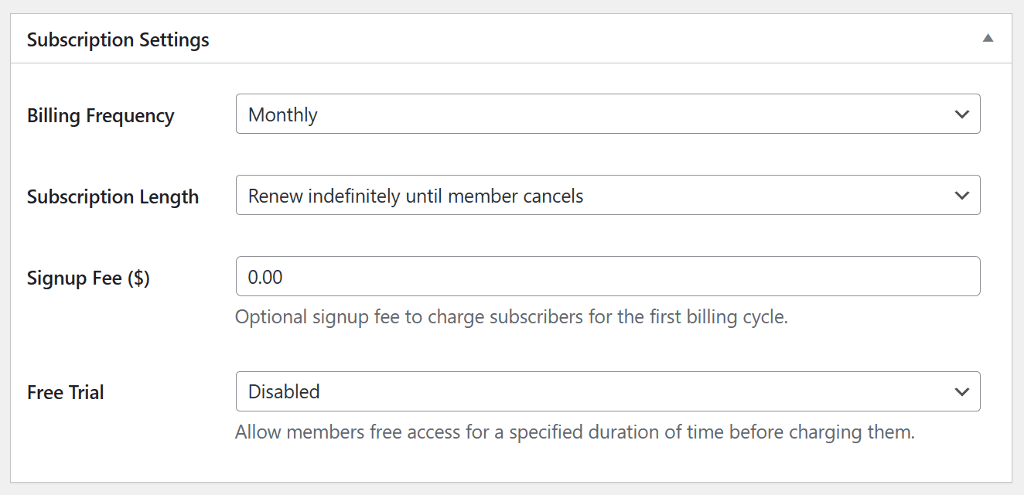
Scroll down to the next set of settings which allows you to fine-tune your subscription by setting the billing frequency and subscription duration.
You can choose from monthly, weekly, daily, quarterly, every six months, yearly, or one-time payment options for billing frequency. You can select a fixed number of payments for the subscription duration or have it renew automatically until the member cancels. For our paid newsletter subscription, we’ll keep the duration to renew indefinitely until the member cancels.
If you want to charge a one-time fee in addition to the membership plan price, you can set that in the Sign-up fee box.
If you want to offer your members or customers a free trial to your paid newsletter, you can set the duration before they are charged. Don’t want to offer a free trial? You can have the option disabled.
Once you’ve finished making all your changes, click the Save Plan button to publish the membership plan for your paid newsletter.
Now that our membership plan is ready, let’s look at how to add it to the website so that users can easily subscribe to the plan.
Let Users Buy the Membership
Adding the membership to the front end of the website will allow users to buy your paid newsletter subscription. After you publish your membership plan, ProfilePress generates a unique checkout link.
You can add this link anywhere, for example, on your pricing page, using a button or hyperlink to allow users to purchase the paid newsletter membership plan.
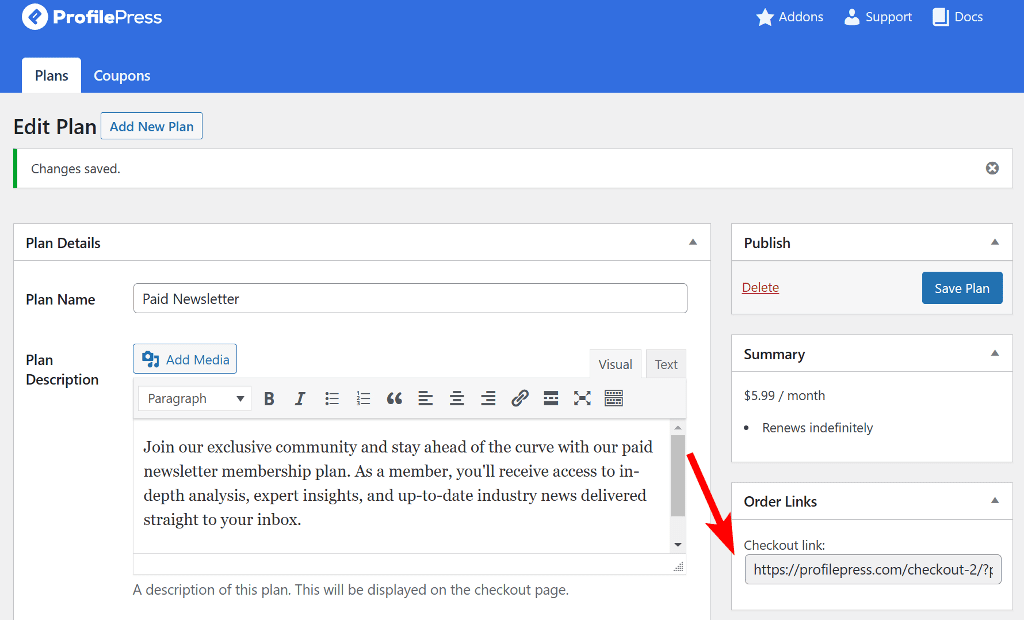
The link directly takes the user to the checkout page, where they can fill out their information and complete the purchase.
The ProfilePress part is complete. Let’s now look at how we’ll use MailOptin to create newsletters in WordPress and send them to paid subscribers.
3. Create a Newsletter using MailOptin
MailOptin integrates with several popular email marketing software, including Mailchimp, Campaign Monitor, Sendy, Constant Contact, AWeber, ConvertKit, MailerLite, GetResponse, Klaviyo, ActiveCampaign, Brevo (Sendinblue), SendGrid, Mailjet, Keap Max Classic (Infusionsoft), Zoho Campaigns, Moosend, Vertical Response, NewsMAN, CleverReach, iContact, Mailgun, E-goi, Elastic Email, WooCommerce, MemberPress, Easy Digital Downloads, Paid Memberships Pro, LearnDash, GiveWP, Restrict Content Pro, Tutor LMS .
For this tutorial, we’ll show you how to create a paid newsletter and send it to your list from within WordPress.
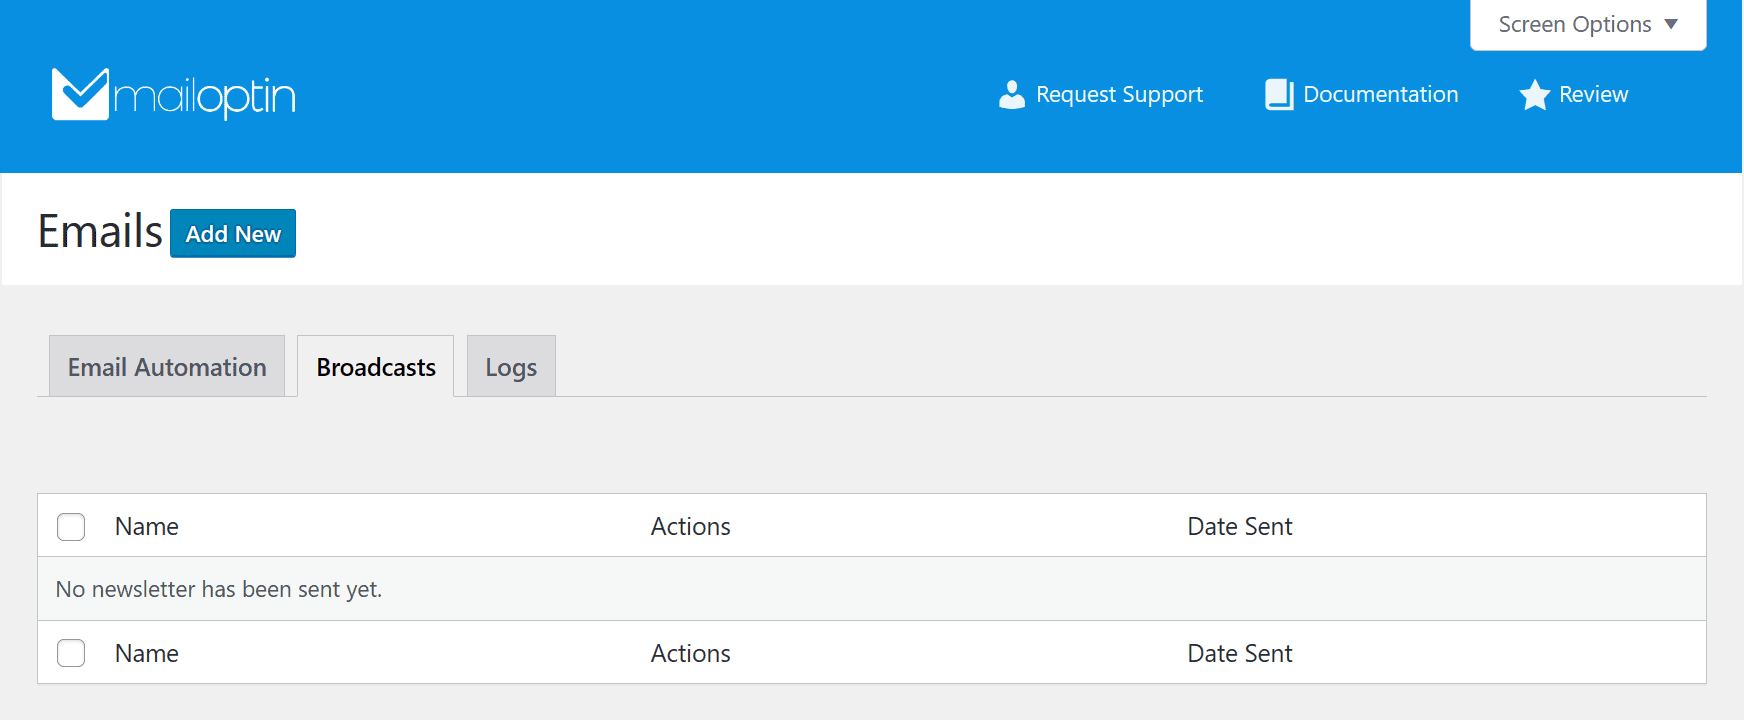
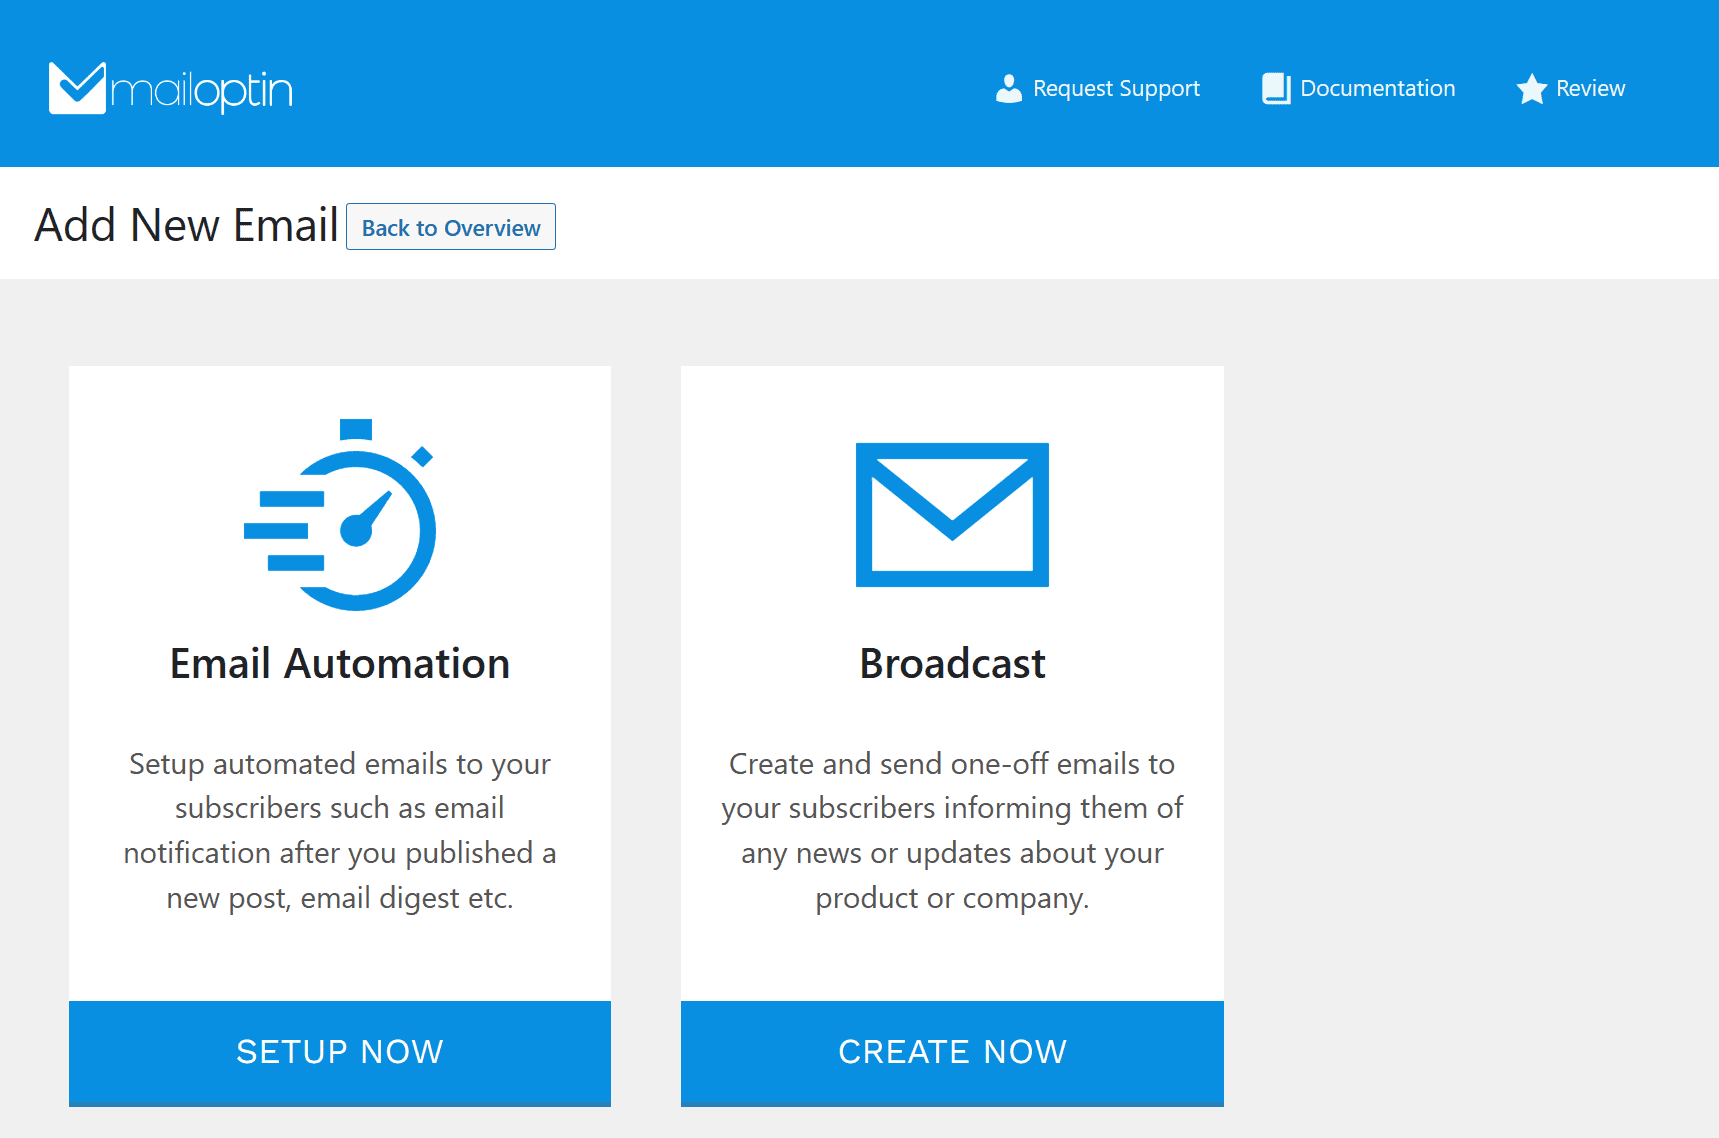
To create a newsletter within WordPress, go to MailOptin > Emails and click the Add New button.
For a one-off email, choose to Create Now under Broadcast.
Next, enter your subject line and select the pre-designed template. Alternatively, you can code your template using HTML if you prefer.

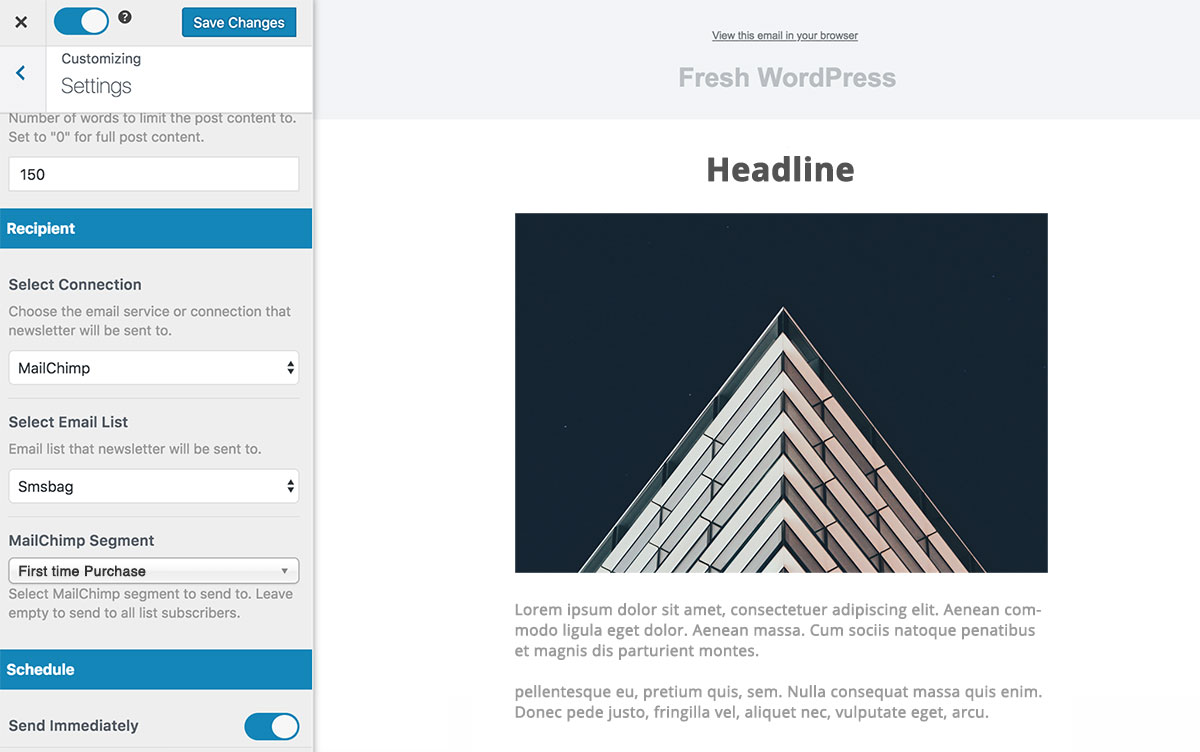
After you select the template, the MailOptin newsletter editor will load, which has an interface similar to the WordPress customizer.
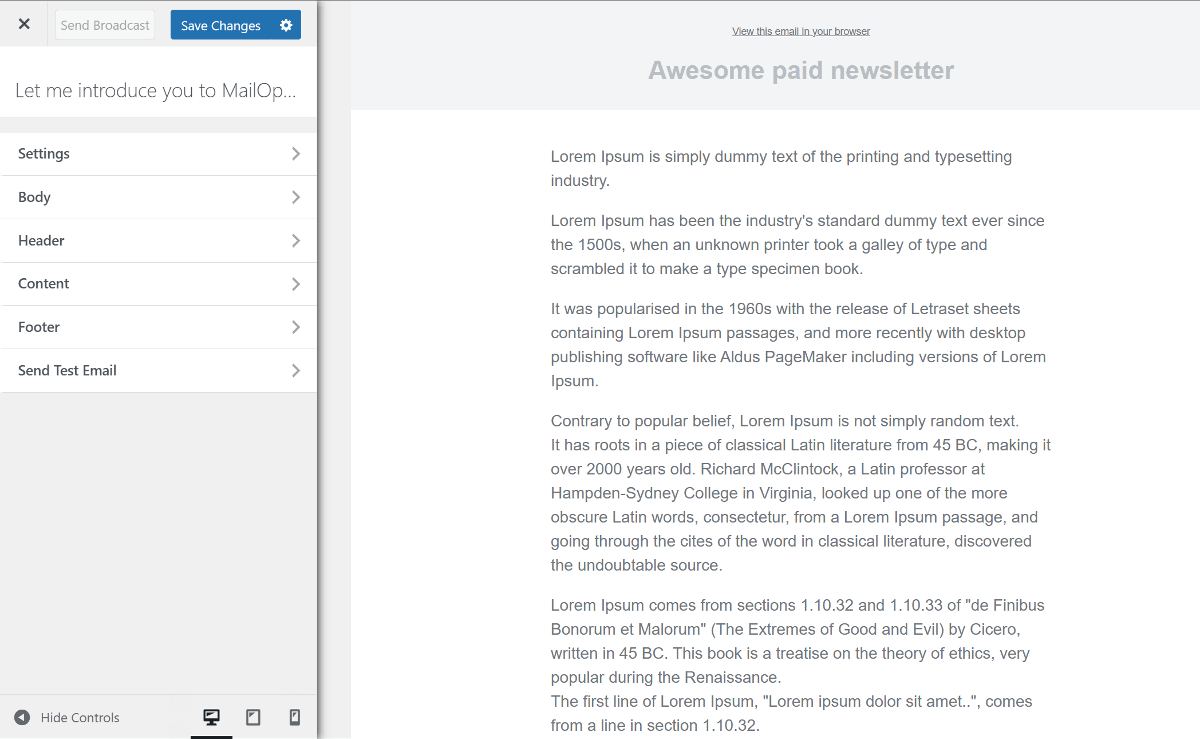
The navigator on the left-hand lets you customize the look and feel of the template.
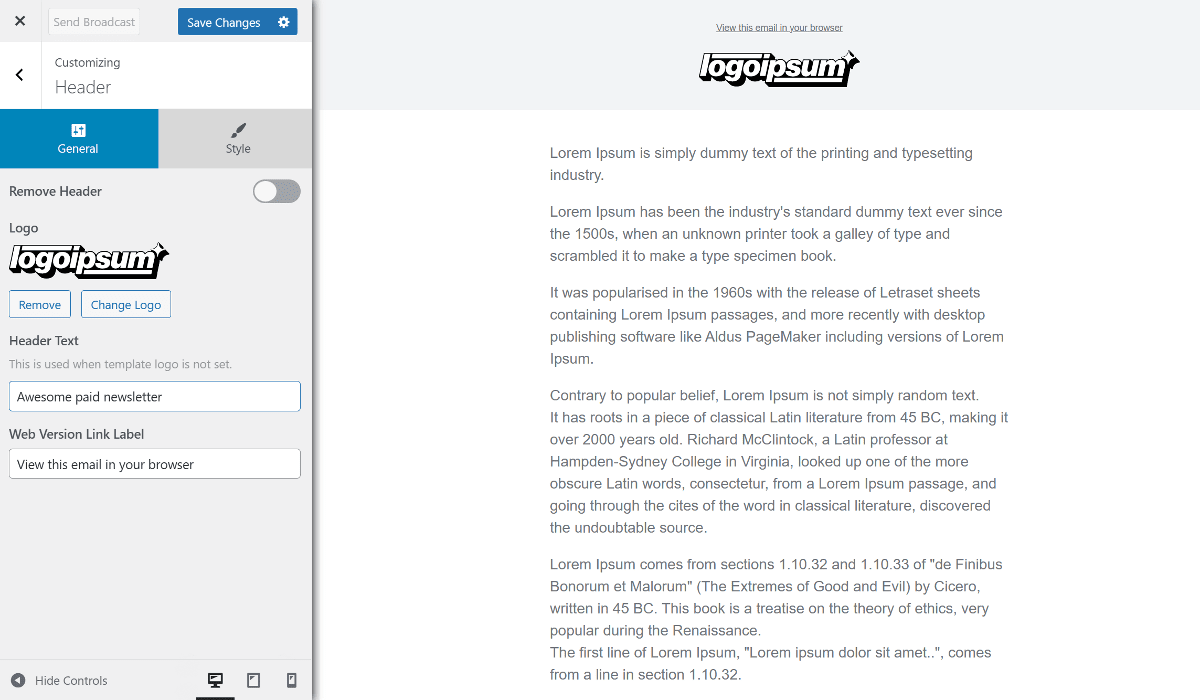
You can customize the header by adding a logo, changing the header text, and changing the background color.
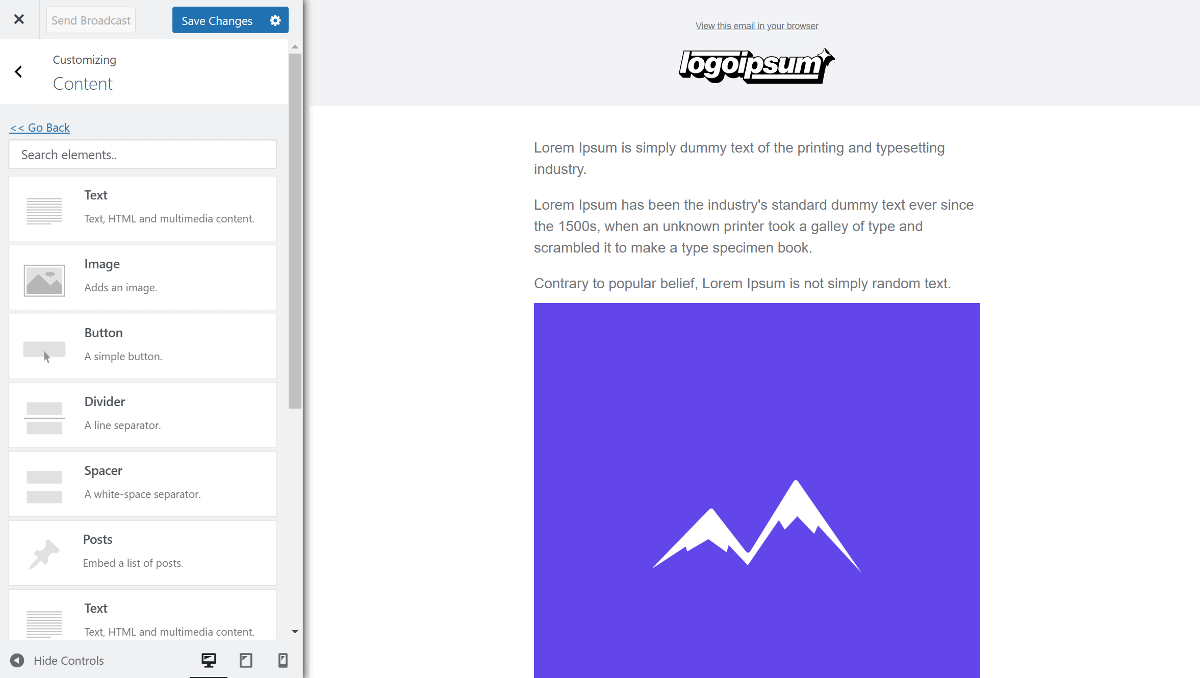
Next comes designing the main content part, where you can use the drag-and-drop editor to add different elements. The elements include text, image, button, divider, spacer, and post.
Same as the header, you can also customize the footer with the same options.
Once your newsletter is ready, you can send a test email to check if everything works correctly.
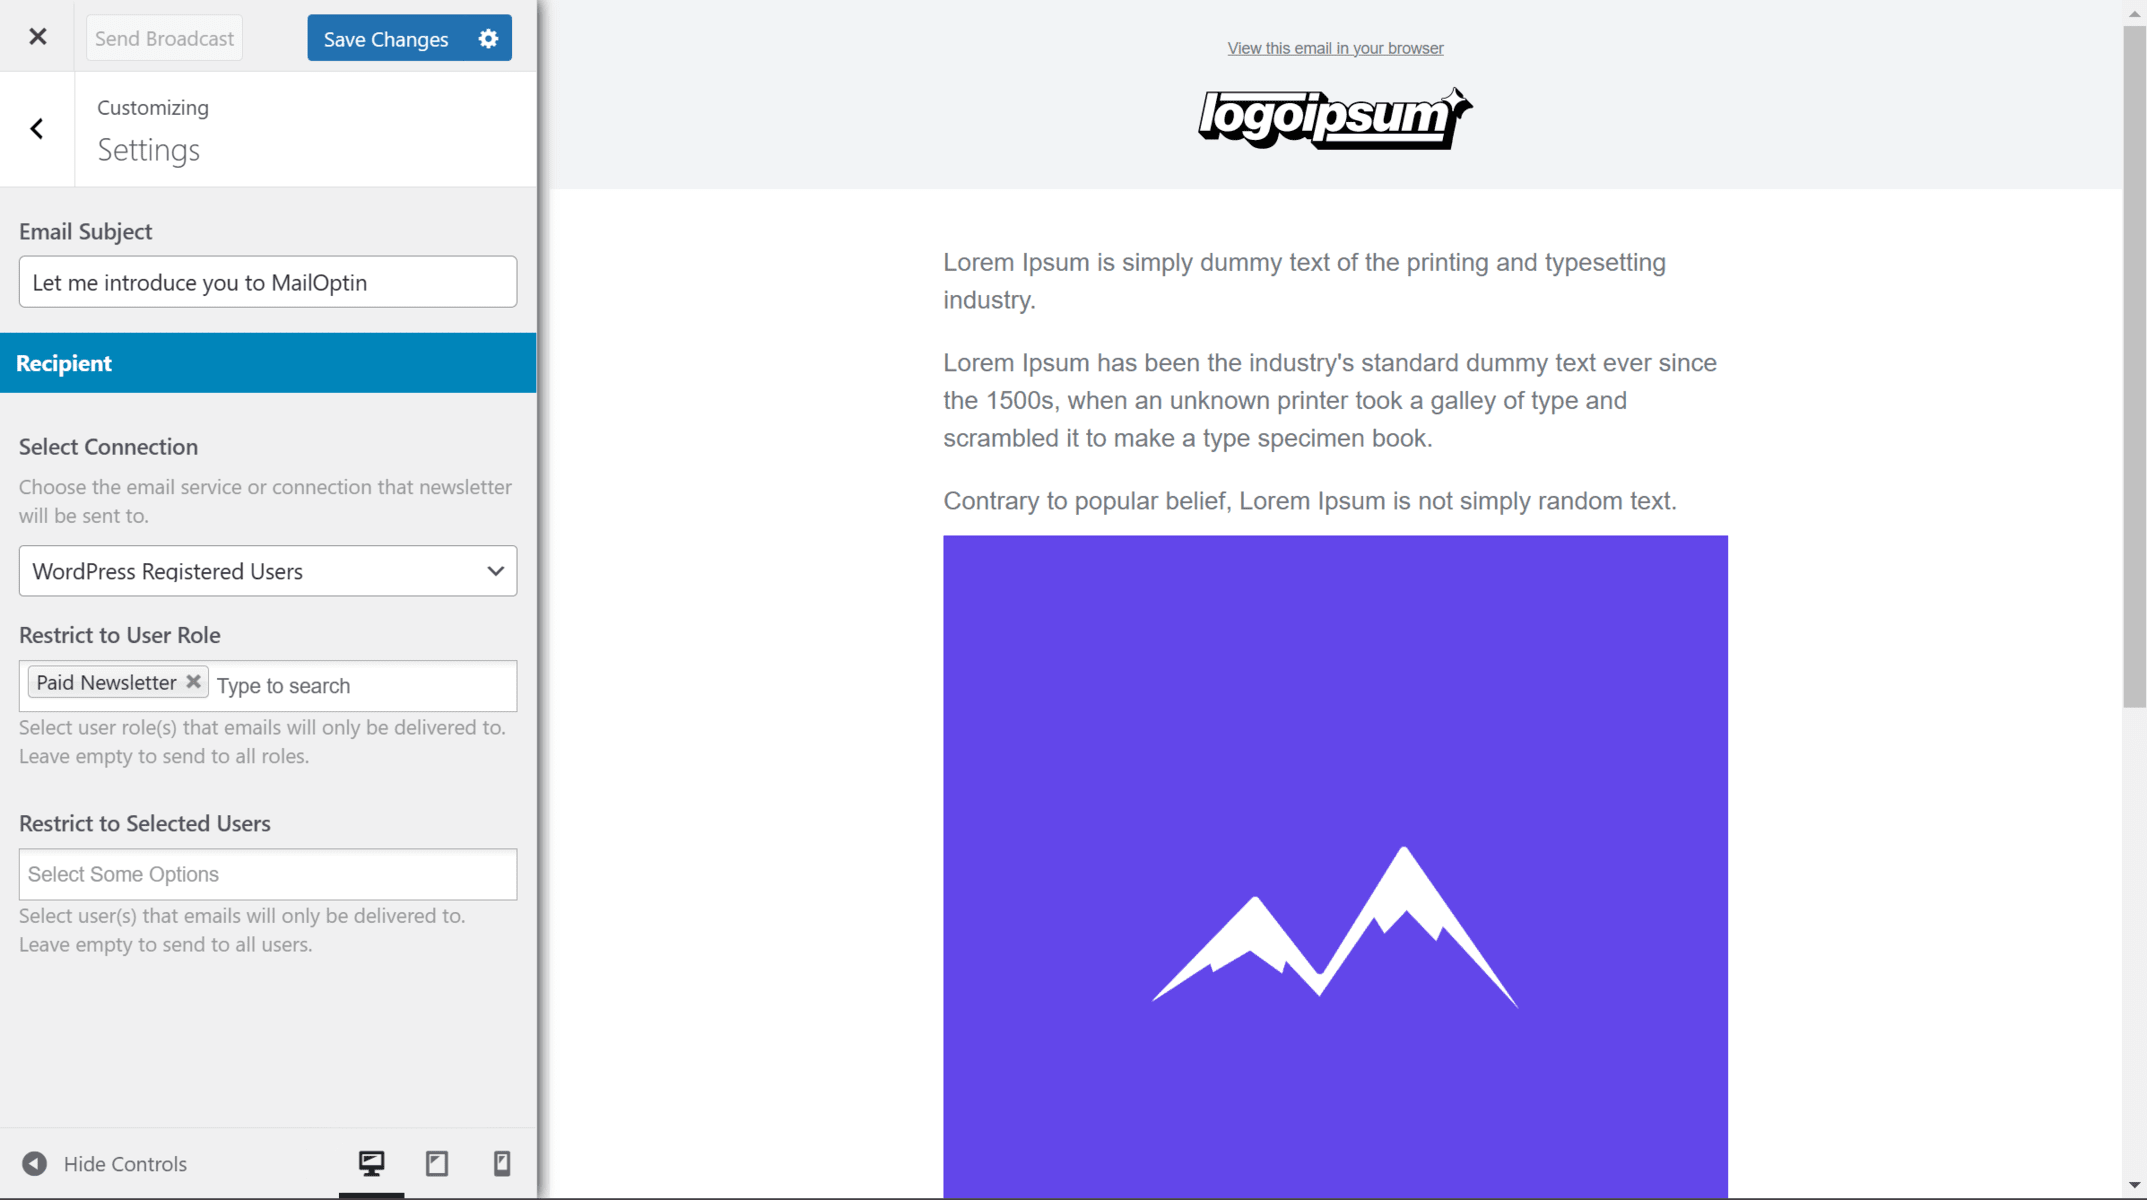
If everything is as expected, go to the Settings tab, and under recipient, select connection as WordPress registered users and restrict it to paid newsletter user role.
Once everything is done, click the Save Changes button at the top and then the Send Broadcast button.
That’s it! Your email newsletter designed within WordPress will be delivered to your paid subscribers.
Bonus: Syncing ProfilePress Members with Your Email Marketing Software
ProfilePress has a feature that lets you connect to Mailchimp or Campaign Monitor to subscribe your customers and users to your email list in your email marketing software.
By syncing subscribers and users with Mailchimp or Campaign Monitor, you can create precise segmentation and send emails tailored to their preferences and specific needs.
Connect ProfilePress to an Email Newsletter Service
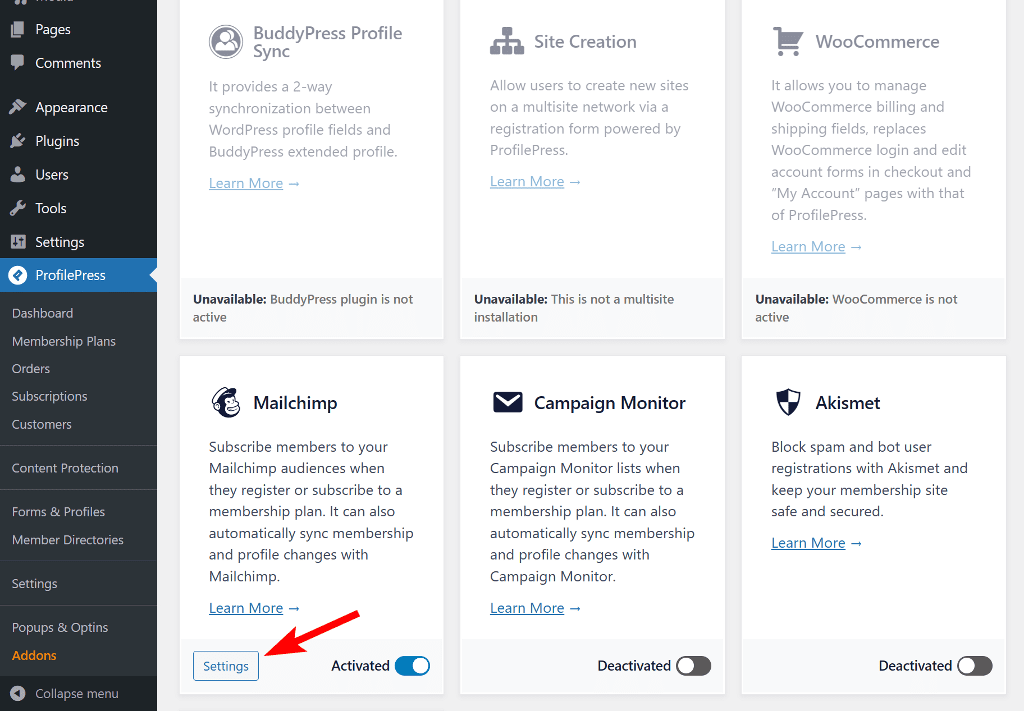
After setting up the premium version of the ProfilePress plugin, you can navigate to ProfilePress > Addons and activate either ESP addons.
For this article, we’ll demonstrate the steps for Mailchimp, but you can check out our documentation article for Campaign Monitor.
After you activate the Mailchimp addon, you’ll see a new Settings button next to the toggle. Click on the option, and the Integrations tab on the Settings page will open.
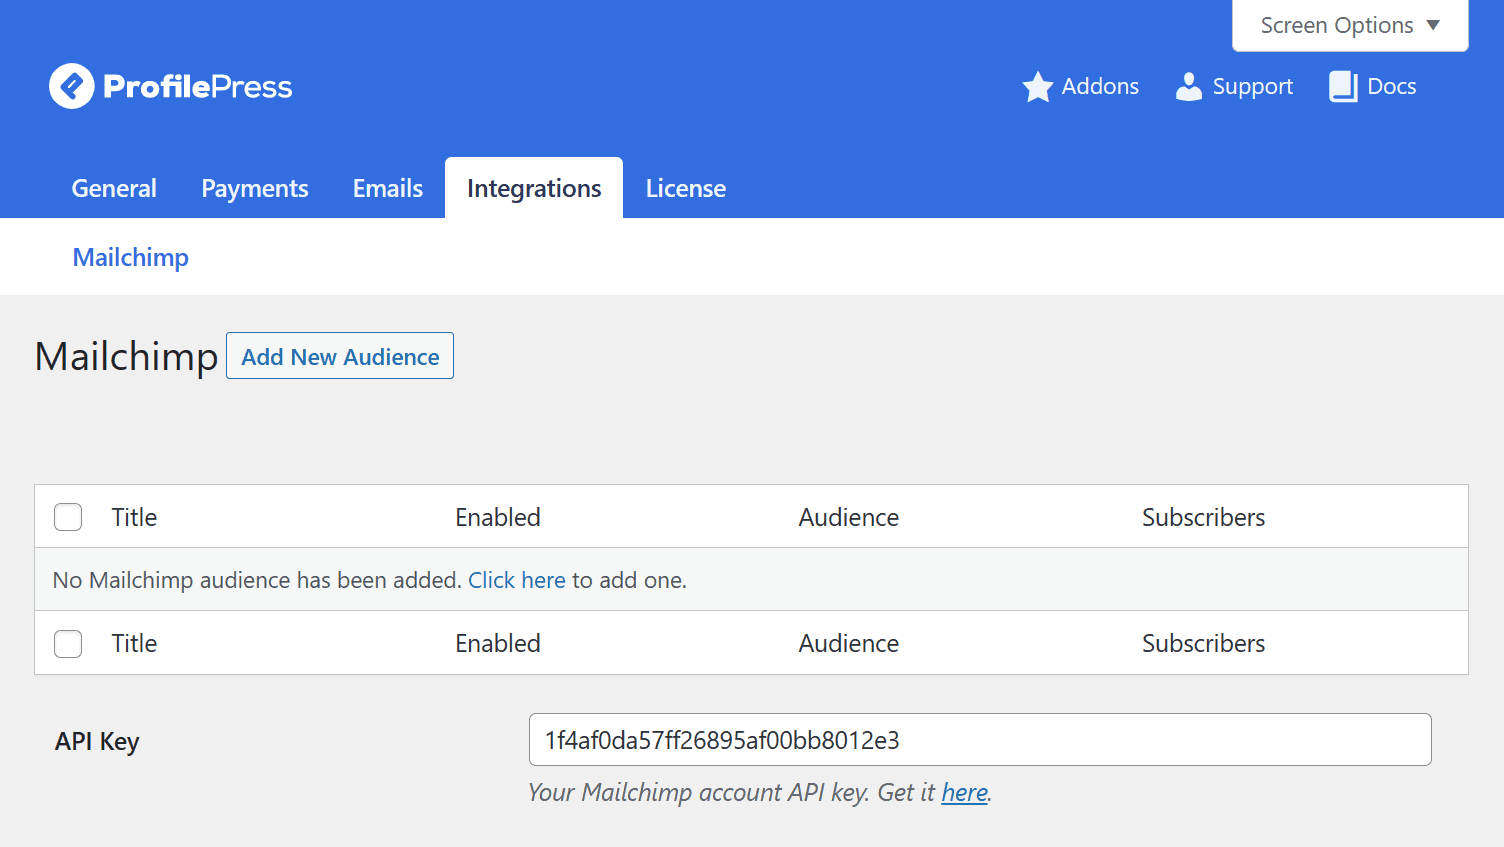
You’ll need to connect the Mailchimp API to automatically add users who purchase your paid newsletter subscription to the Mailchimp mailing list.
If you already have your Mailchimp account API key, you can paste it into the box. If you don’t have one, click on the Get it Here link below the box to navigate the Mailchimp API page (you will be required to log in to your Mailchimp account).
Next, please untick the Checkout Subscription Checkbox because we want to add all paying members to the email list automatically.
Scroll down and check the box for Enable Auto-sync to allow the plugin to listen to changes in your WordPress user base and membership subscriptions and automatically sync them with Mailchimp.
For example, if your members or users update their profile information or change their account email address, their profile in Mailchimp will be updated to reflect the changes.
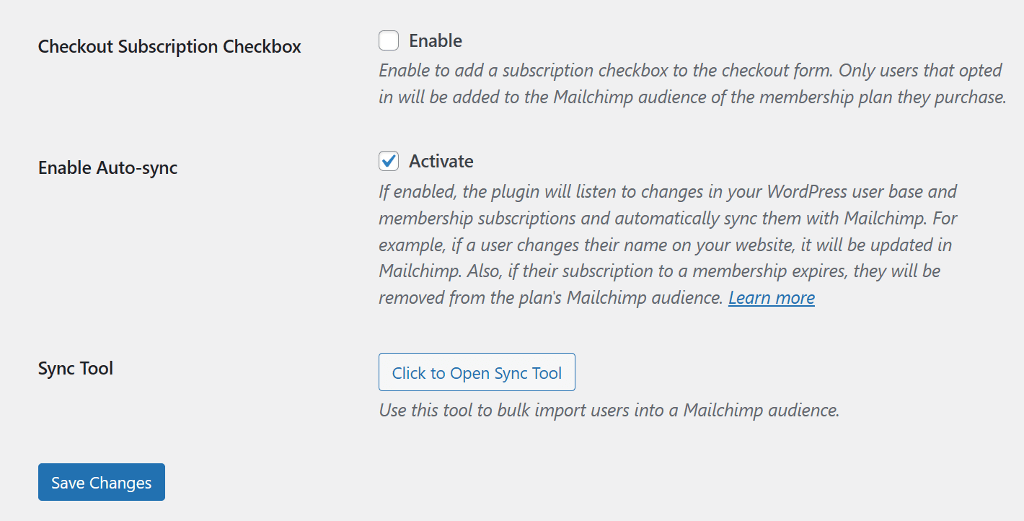
Once done, click the Save Changes button to save the API key and update changes.
Next, we will create an audience list to add paid newsletter members.
Create Paid Newsletter Audience
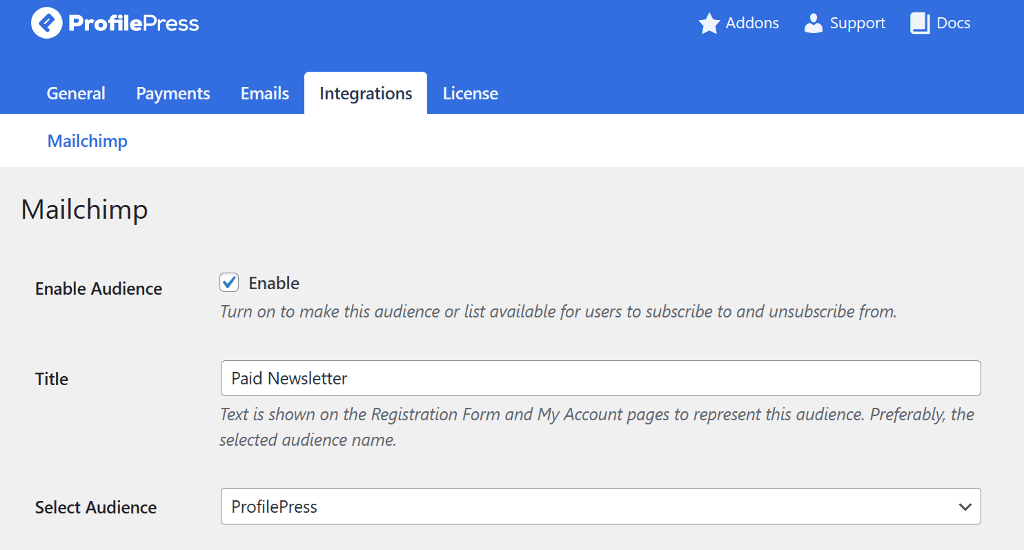
Navigate to ProfilePress > Settings > integrations. On the Mailchimp page, click the Add New Audience button at the top and check the box for Enable Audience.
Next, enter a name and select the audience or email list to add members, customers, or users that purchase or subscribe to your paid membership plan.
After that, map the fields and scroll down to select the tag we created above. Once everything is complete, click Save Changes at the bottom to publish it.
Now, whenever someone buys your membership, they’ll automatically be added to the Paid Newsletter audience in Mailchimp.
You can then use MailOptin to email your customers or subscribers in Mailchimp whenever you publish a new post, send them a roundup or email digest of published posts, and send one-off emails or broadcasts.
Note that MailOptin supports sending emails to subscribers or contacts in the following email marketing software and CRMs and plugins: Mailchimp, Campaign Monitor, Sendy, Constant Contact, AWeber, ConvertKit, MailerLite, GetResponse, Klaviyo, ActiveCampaign, Brevo (Sendinblue), SendGrid, Mailjet, Keap Max Classic (Infusionsoft), Zoho Campaigns, Moosend, Vertical Response, NewsMAN, CleverReach, iContact, Mailgun, E-goi, Elastic Email, WooCommerce, MemberPress, Easy Digital Downloads, Paid Memberships Pro, LearnDash, GiveWP, Restrict Content Pro, Tutor LMS .
Conclusion: Create Paid Newsletter Subscription with WordPress
Creating a paid newsletter subscription using WordPress is a great way to provide exclusive, high-quality content to your subscribers while generating income for yourself or your business.
With the right tools and plugins like MailOptin and ProfilePress, you can streamline setting up a paid newsletter and managing subscriptions.
By following the steps detailed in this guide, you can start monetizing your content today and enjoy a steady source of income for years to come.