How to Create an Email Newsletter in WordPress 2024
Newsletters are a powerful tool to connect with your subscribers and generate traffic to your website. However, designing them can be daunting, especially if you lack experience with email marketing tools.
But what if we told you that creating newsletters has become easier than ever if you know how to use WordPress?
In this comprehensive guide, we’ll take you through every step of creating a newsletter in WordPress using the MailOptin newsletter plugin — from creating opt-in forms to designing your newsletter.
Get ready to take your email marketing game to the next level!
Benefits of Using WordPress and MailOptin for Newsletter Creation
WordPress and MailOptin are a powerful combination for creating and managing WordPress newsletters. Here are some benefits of using these tools:
- Easy to use – WordPress and MailOptin are user-friendly, even for those without technical knowledge. You can quickly and easily design and send newsletters without spending hours learning how to use the plugin.
- Flexibility – MailOptin is flexible and versatile, allowing you to customize your newsletter design to suit your needs. Also, it integrates seamlessly with a range of email service providers.
- Optin forms – The MailOptin plugin has beautiful optin forms and lead generation tools to help you quickly grow your email list and reach a wider audience.
- Automation – It offers various automation features, such as new post notifications and posts email digest, saving you time and effort managing your newsletter.
As you can see, using WordPress and MailOptin for newsletter creation provides a comprehensive email marketing solution. Let’s look at the step-by-step guide for using MailOptin to create email newsletters on WordPress.
How To Create a Newsletter in WordPress – Step by Step
MailOptin is the best WordPress newsletter plugin available as it not only lets you use WordPress to send newsletters, but you can also use it to capture leads using the various optin forms.
1. Setting up MailOptin
The MailOptin plugin is easy to set up. Follow our guide, and you should have the MailOptin up and running on your website in no time.
Purchase MailOptin Premium
To get started, you’ll need to purchase the MailOptin premium, which offers all the necessary features to create newsletter and optin forms.
Head over to the MailOptin website and purchase the Pro version or higher. After purchasing, you’ll receive an email with the license key and a link to download the plugin.
Install and Activate the MailOptin Plugin
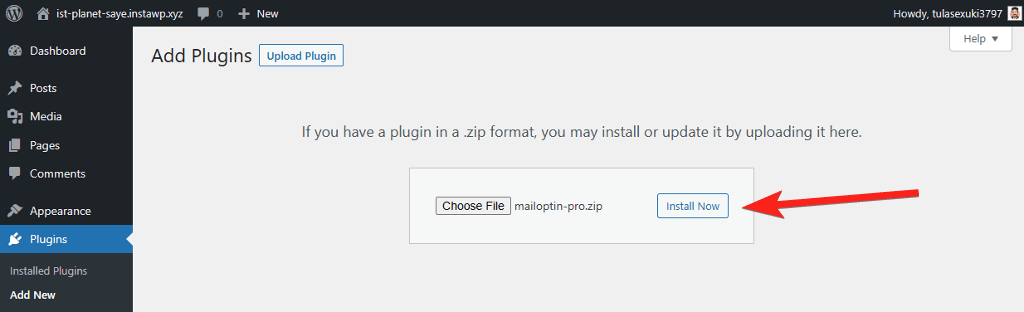
Once you have the MailOptin plugin, you will need to install and activate it on your WordPress site. To do this, first, log in to your WordPress dashboard and navigate to the Plugins page. Click on Add New and then click Upload Plugin.
Next, choose the plugin’s zip file that you downloaded and then click on Install Now. Finally, click on Activate to begin using the plugin.
Next, we need to verify the license to unlock the premium features of the plugin. To do so, navigate to MailOptin > Settings and switch to the License tab at the bottom.
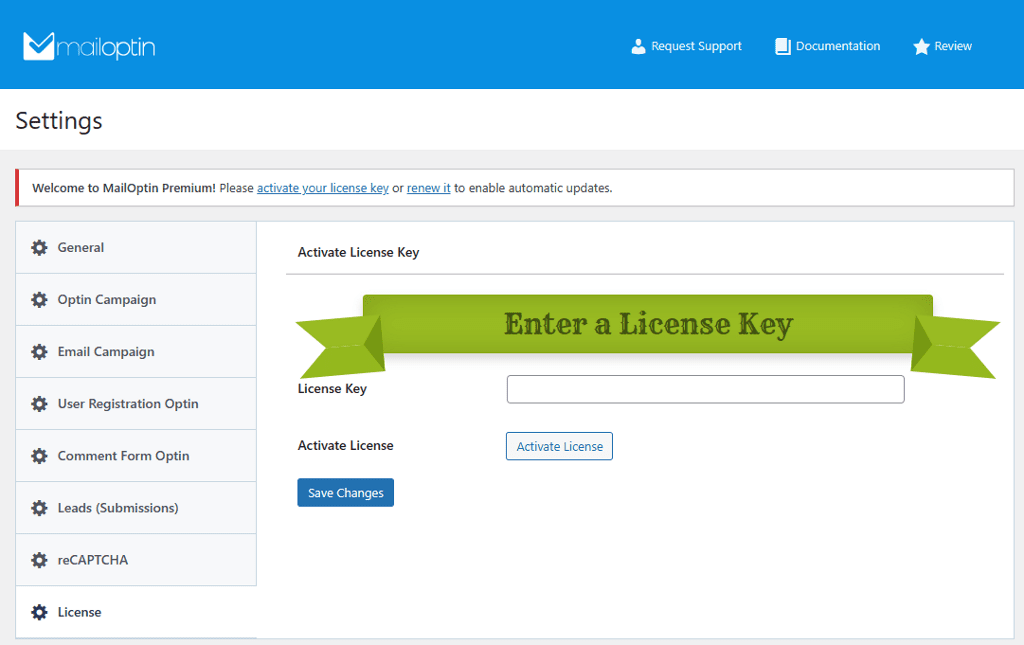
Copy the license key from the purchase email or account page and paste it into the box provided. Then, click the Activate button, and you’re all set.
Connect To Email Service Provider (Optional)
MailOptin integrates with all major email marketing platforms, such as MailChimp, Salesforce, Microsoft Dynamics 365, Drip, AWeber, ConvertKit, MailerLite, Constant Contact, GetResponse, Sendy, Campaign Monitor, ActiveCampaign, Brevo (Sendinblue), Gist, Klaviyo, Sendlane, Mailster, Vertical Response, Mailjet, HubSpot, Ontraport, Moosend, MailPoet, Zoho CRM, Zoho Campaigns, Keap Max Classic (Infusionsoft), HighLevel, Omnisend, Flodesk, Beehiiv, Benchmark Email, SendFox, iContact, Mailgun, E-goi, SendGrid Email Marketing, Elastic Email, GoDaddy Email Marketing, weMail, FluentCRM, CleverReach, NewsMAN, Facebook custom audience. This lets you directly save all your leads and email subscribers into the email marketing platform. And you can also use MailOptin to send newly published post notifications, email digests, and broadcast/newsletters to your list subscribers directly from WordPress.
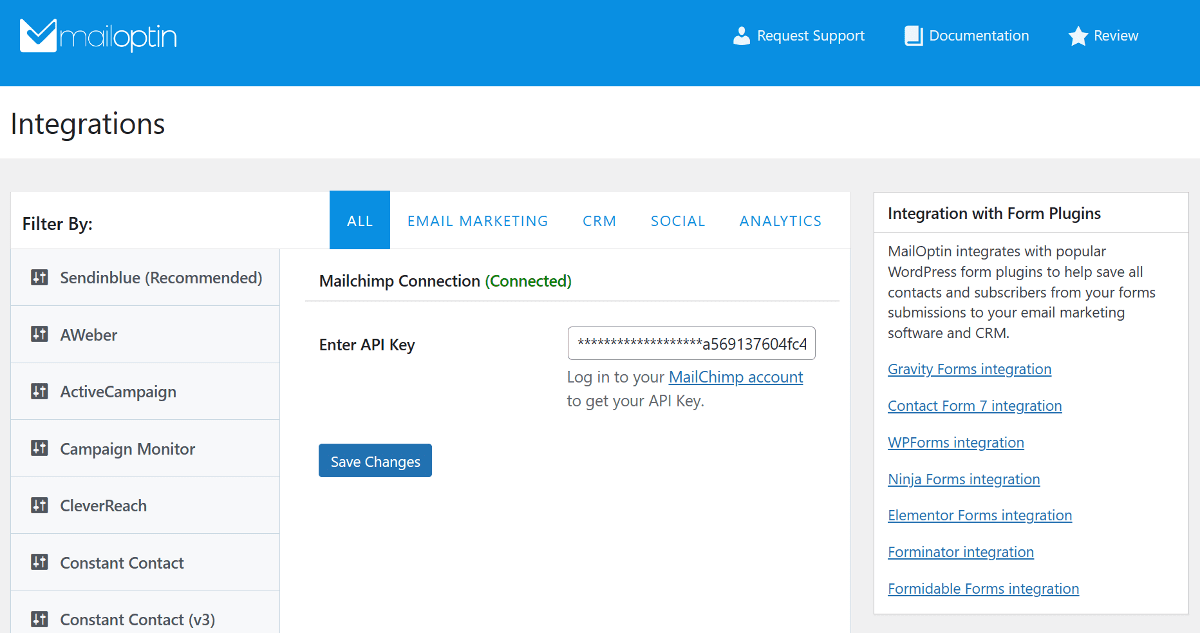
To connect MailOptin with a third-party email service provider, navigate to MailOptin > Integrations and choose your preferred email marketing provider. Then, enter the API key in the designated box and click Save Changes.
If you need the API key, click the link below the box to be redirected to the ESP website and generate a new API key.
Once you’ve set up the MailOptin plugin, let’s look at how to create optin forms using it.
2. Designing Optin Forms in MailOptin
Opt-in forms or sign-up forms are essential for website owners to collect email addresses that can later be used to send the newsletter.
MailOptin provides a range of opt-in forms, including Popups, Sidebar, Notification Bars, Slide Ins, Scroll popups, and many more. Popup forms are one of the most popular lead generation forms, and in this tutorial, we’ll show the steps to create them.
Create Popup Opt-In Forms
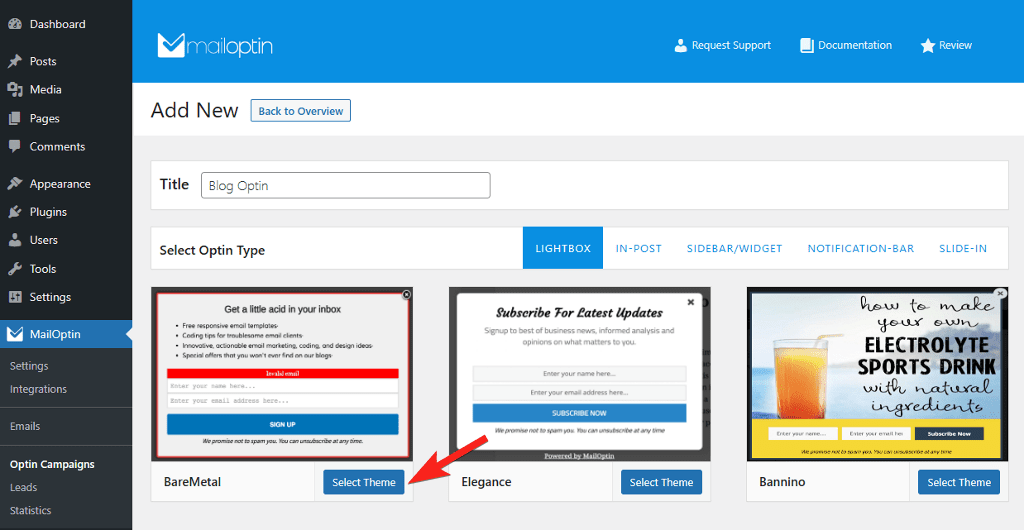
To create a pop-up optin form using MailOptin, navigate to the Optin Campaigns page and click on Add New button at the top.
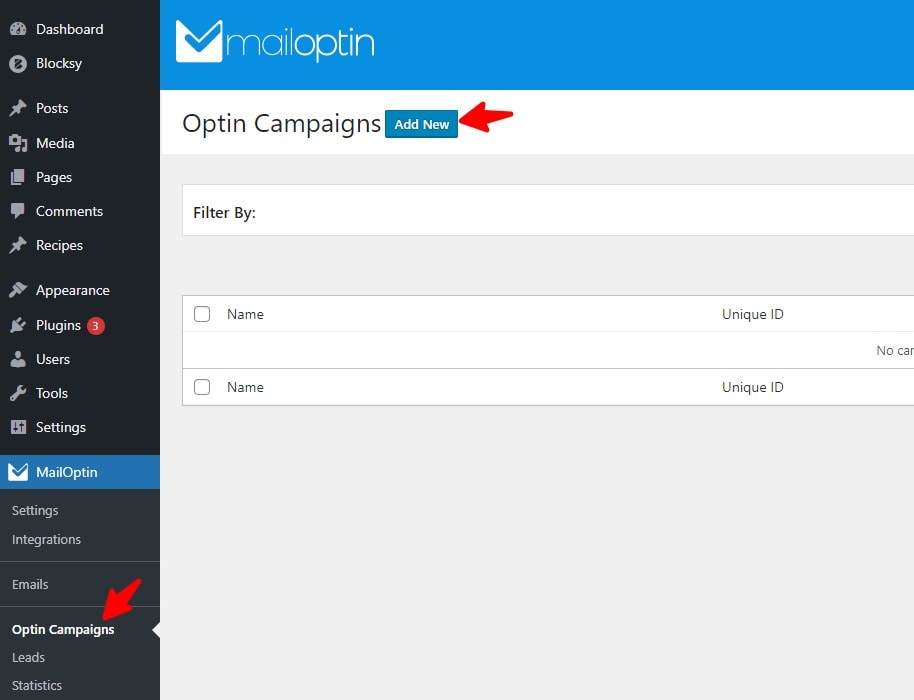
Give your optin a name, and under Lightbox, select the template you want to use. MailOptin offers a wide selection of pre-built layouts, each with a unique style and design.
After selecting your layout, you can customize your opt-in form by editing text, colors, images, and custom fields.

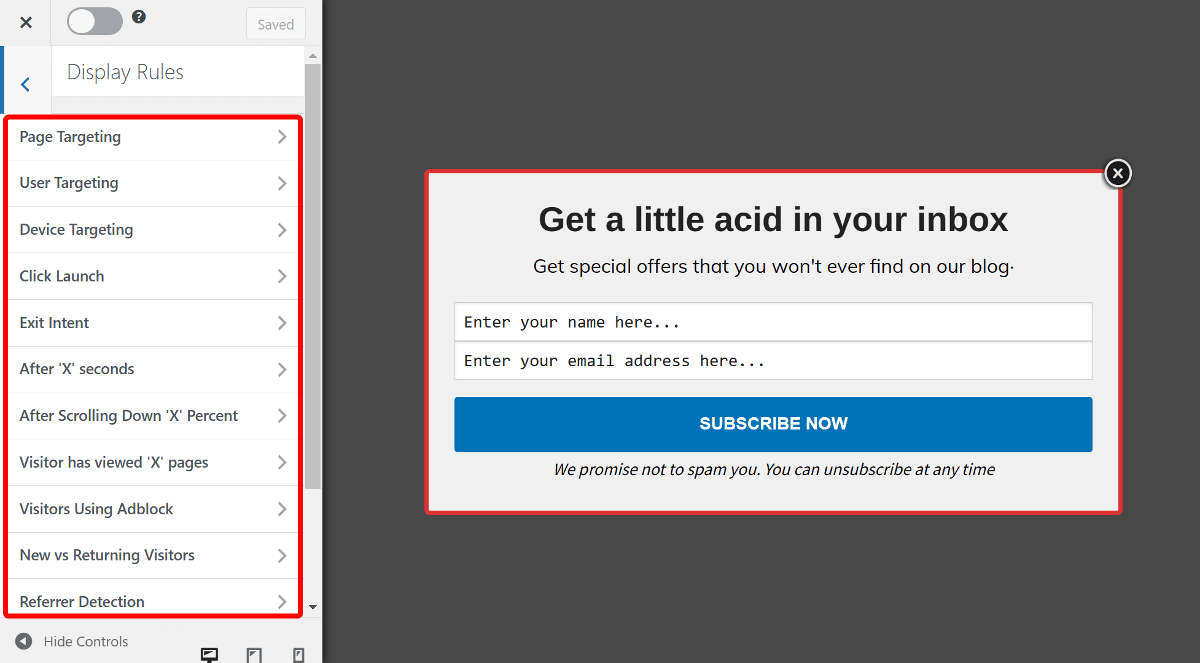
Next, you can set the display rules for your pop-up optin form. You can show the form on specific website pages, set delays for when the form will appear, or use the exit intent.
Exit intent is an excellent feature that detects when a visitor might be about to leave your site and displays the pop-up form to encourage them to sign up.
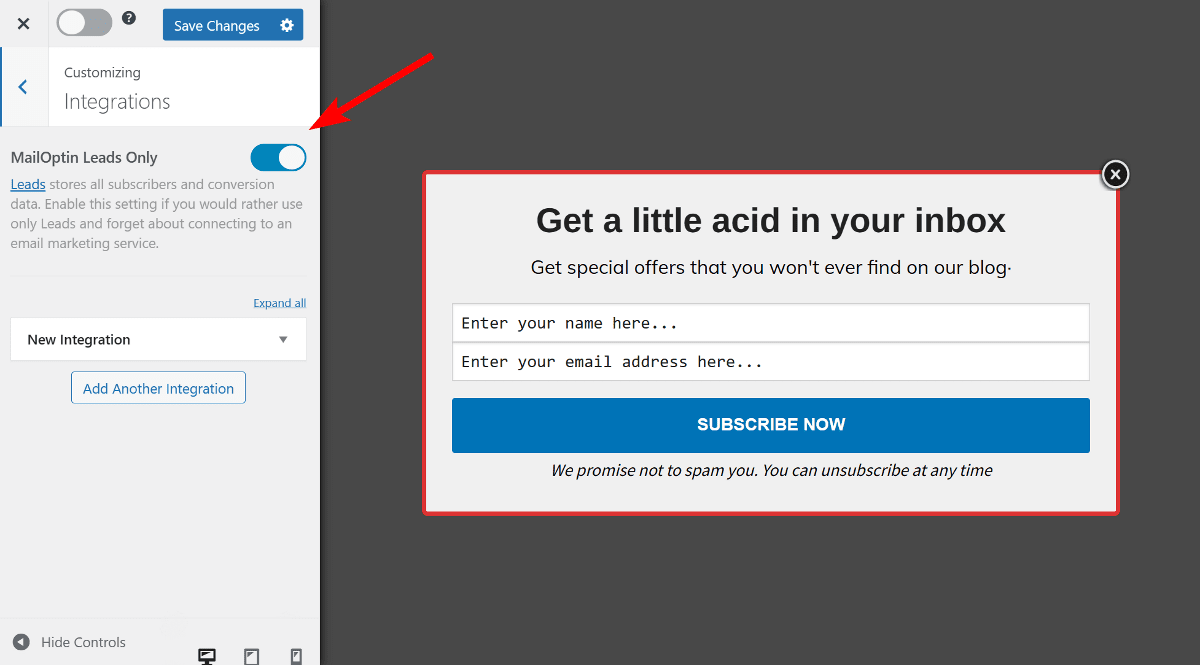
You can also choose the email list where new subscribers’ email addresses will be saved. We’ll use the MailOptin Leads option for this tutorial, which saves all your leads in the website database.
To configure MailOptin Leads, open the Integrations section and toggle the MailOptin Leads Only.
After making all the necessary changes, click the Save Changes button at the top and activate the toggle switch.
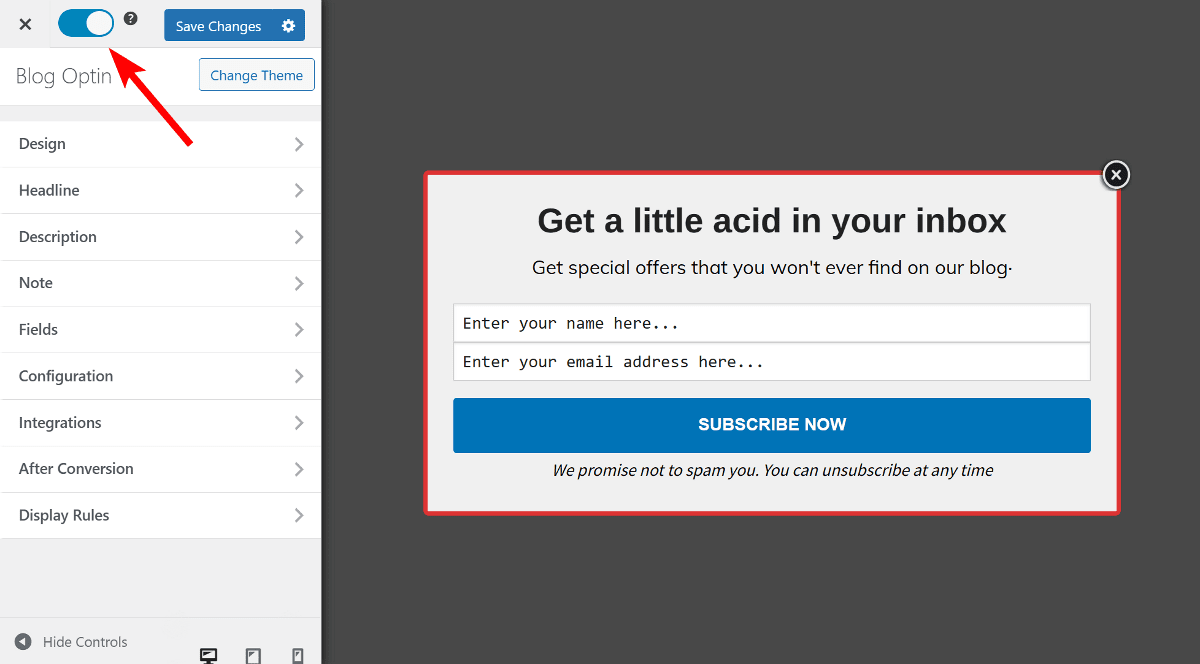
This will make your optin form live on the frontend, allowing visitors to subscribe to your contact list.
Next, let’s look at how to create and send newsletters to subscribers signing up using the optin form.
3. Designing Newsletters using MailOptin
Once your opt-in form is published and visitors start subscribing to your website, it’s time to start sending them newsletters.
MailOptin offers Broadcast as well as an Email Automation feature. For this tutorial, we’ll focus on the Broadcast feature that allows you to create and send email campaigns to your subscribers manually.
To start creating newsletters in MailOptin, navigate to MailOption > Emails and click the Add New button at the top.
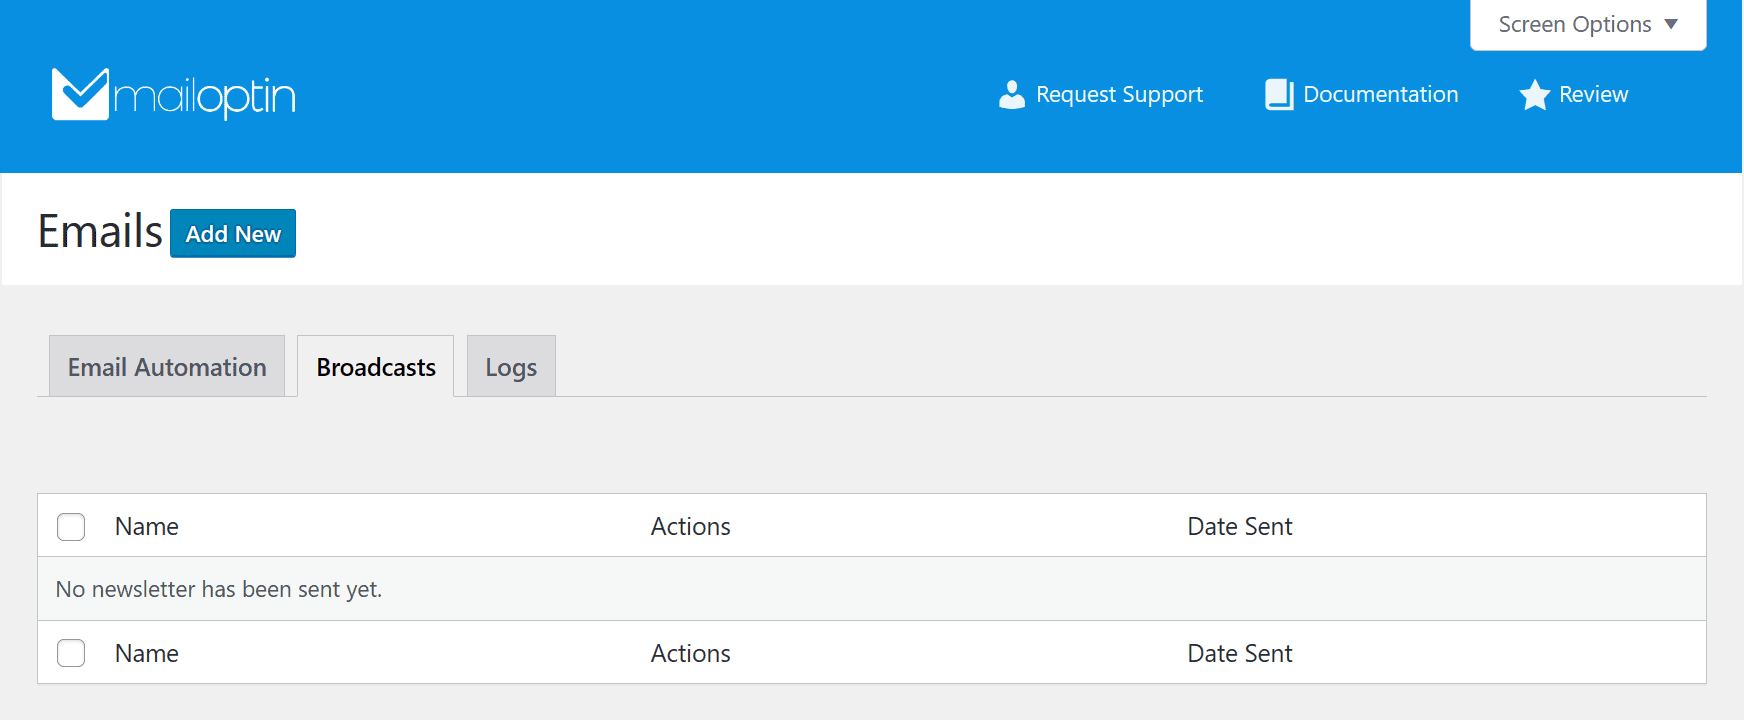
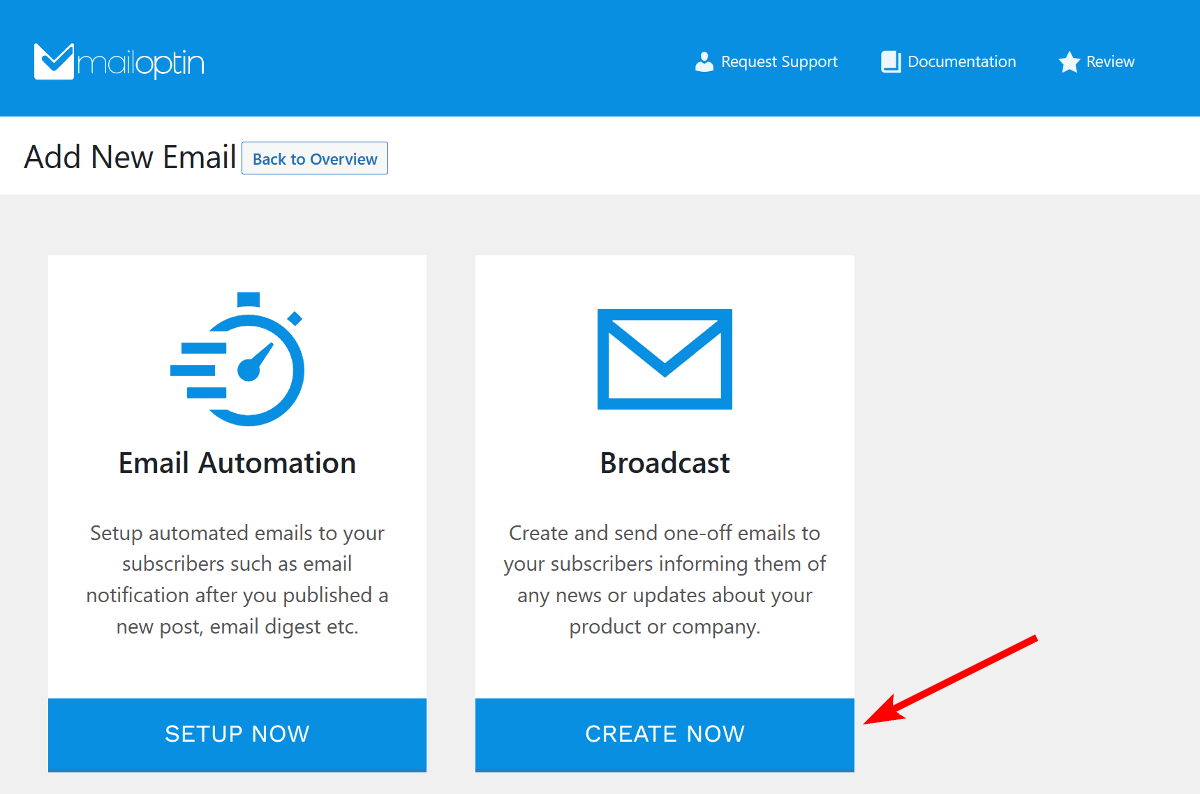
MailOption will give you two options where you need to select Broadcast.
On the next page, MailOptin will prompt you to enter the email subject. Enter it and then select an existing email template or create a new one. For this tutorial, we will opt for the existing template.

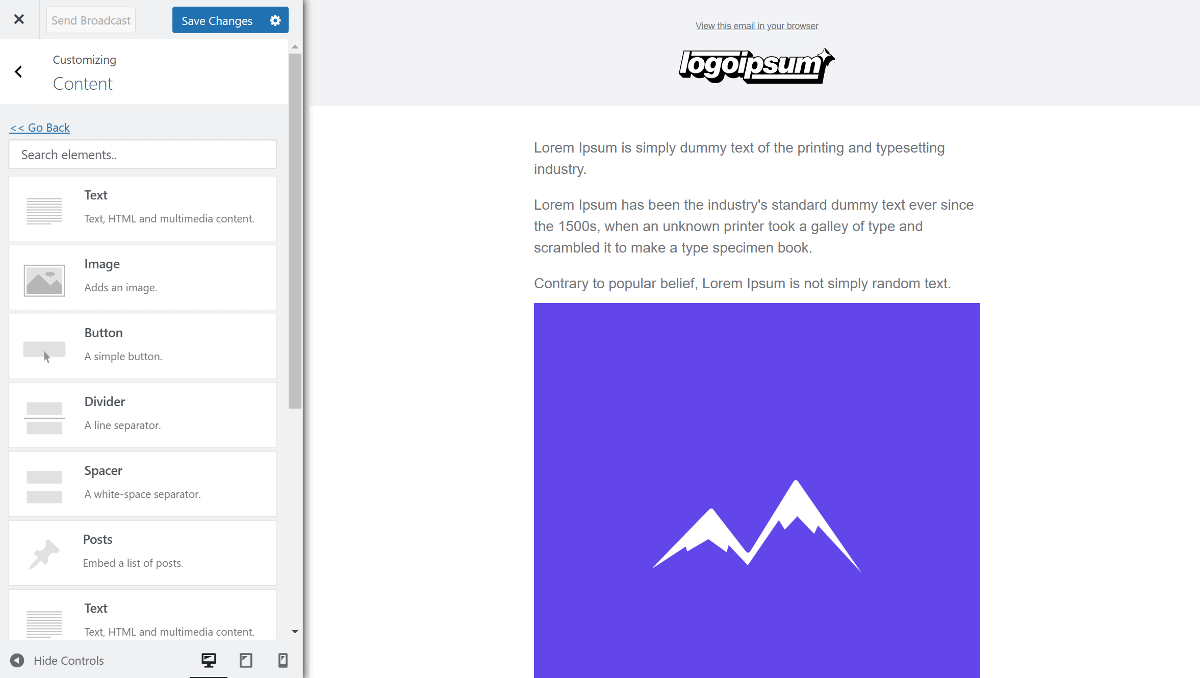
Once you have selected the template, MailOptin’s email builder will load. It has an interface similar to the WordPress customizer, which makes designing newsletters as easy as creating a webpage.
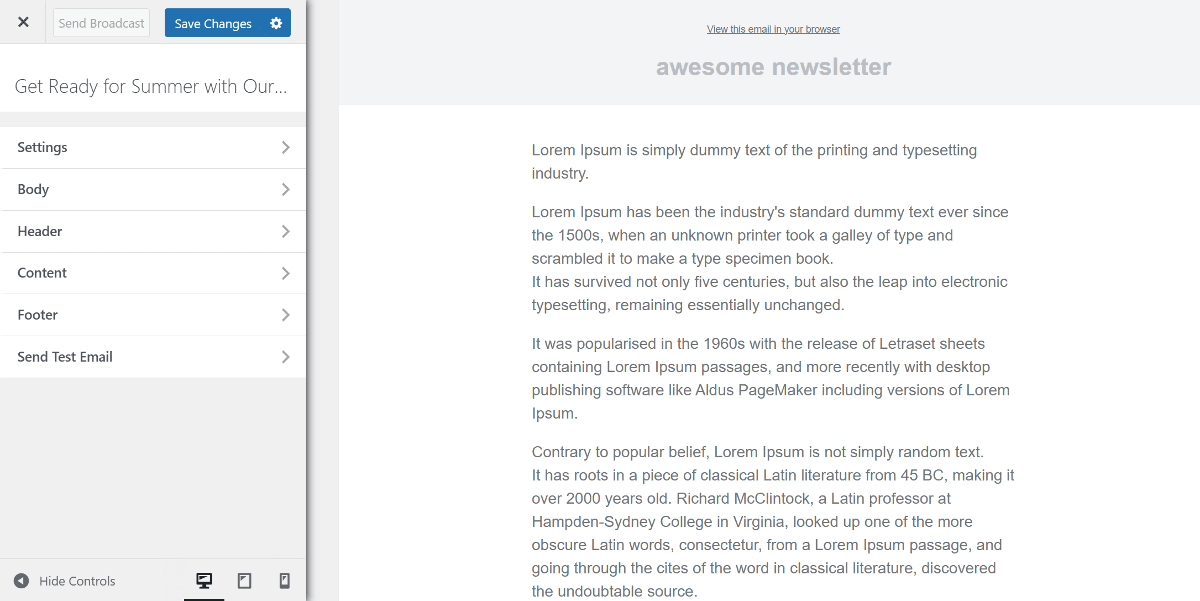
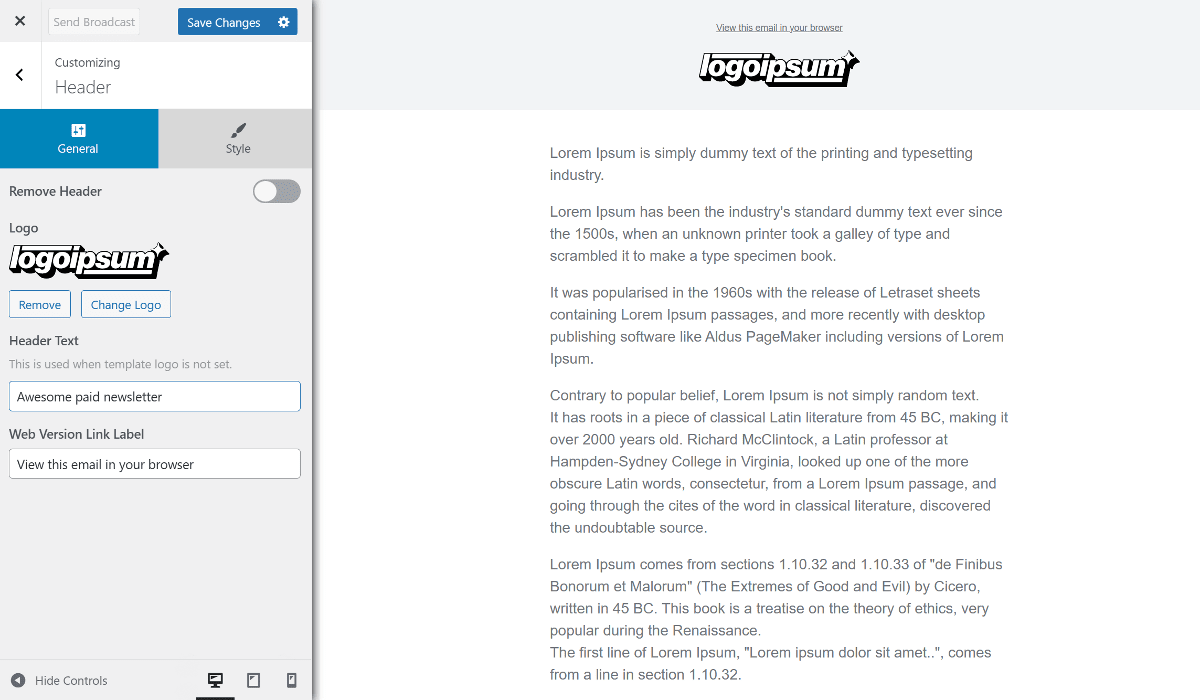
The navigator on the left-hand lets you customize the look and feel of the template. You can customize the header by adding a logo, changing the header text, and changing the background color.
The email builder has a drag-and-drop editor that lets you easily add text and images and even create call-to-action buttons.
After you’ve finished editing the newsletter content, let’s test it before sending it to your entire email list.
4. Testing and Publishing the Campaign
After designing your newsletter, it’s important to ensure everything works correctly before publishing the campaign. The best way to do this is to send test newsletters to yourself or a few known email addresses.
To send a test newsletter in MailOptin, navigate to Send Test Email section from the sidebar, enter the email address, and click the Send button.
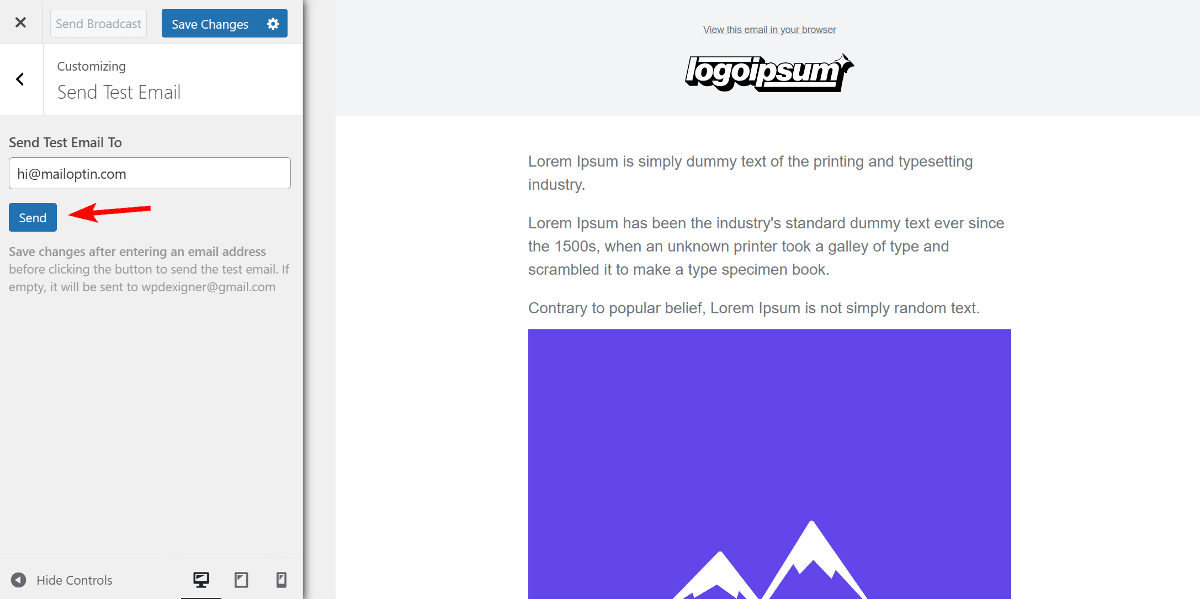
MailOptin will send a copy of the newsletter to the email address you enter. This allows you to review and check the newsletter for errors before delivering it to your subscribers.
Aside from checking for errors, testing your newsletter helps ensure your emails look good on every device.
After testing and ensuring everything works correctly, navigate to the Settings section, select the Email Recipient as MailOptin Leads, and click the Save Changes button.
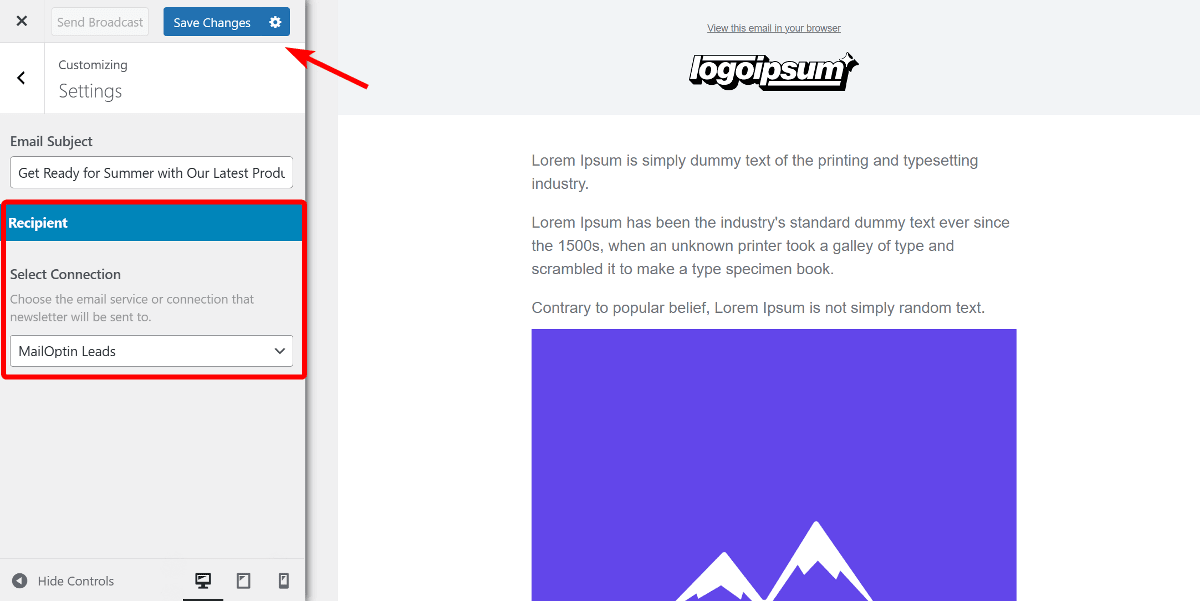
If you have connected an email marketing software like Mailchimp, you can select that from the dropdown. MailOptin also allows you to send newsletters to WordPress-registered users, which is useful for LMS or community websites and for creating paid newsletters.
Clicking the Save Changes button will make the Send Broadcast button active, which you can click to send your newsletter campaign to all your email subscribers.
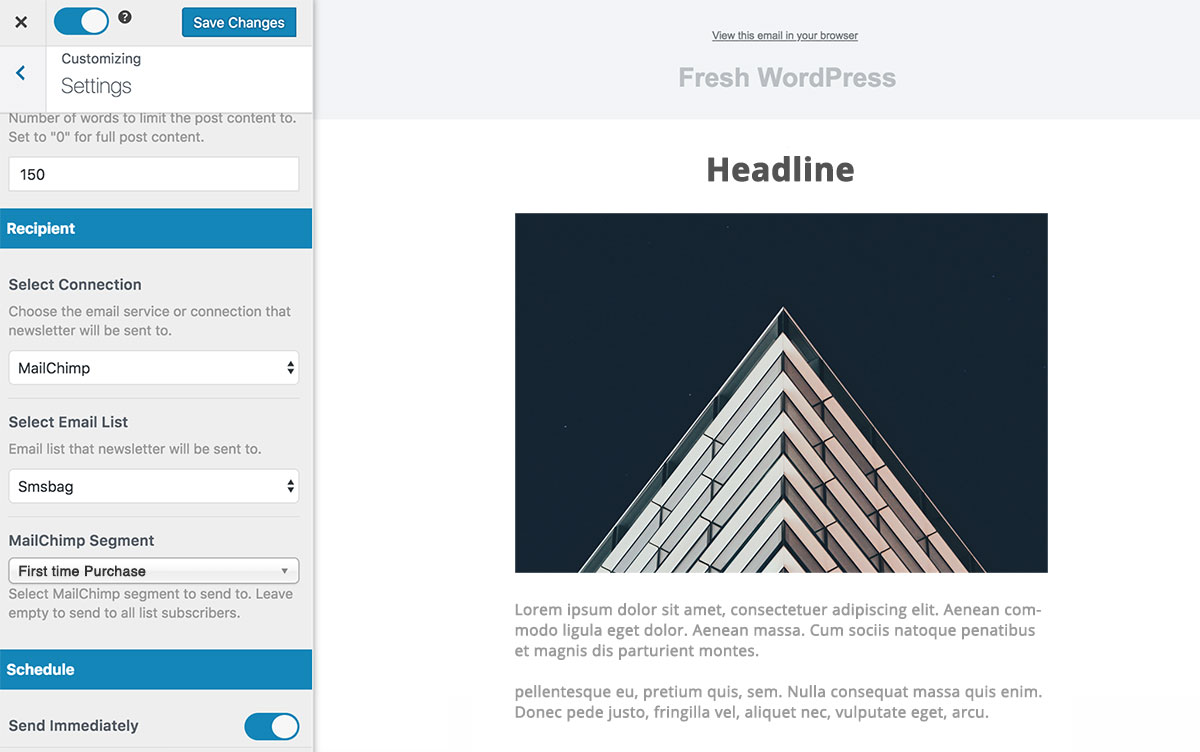
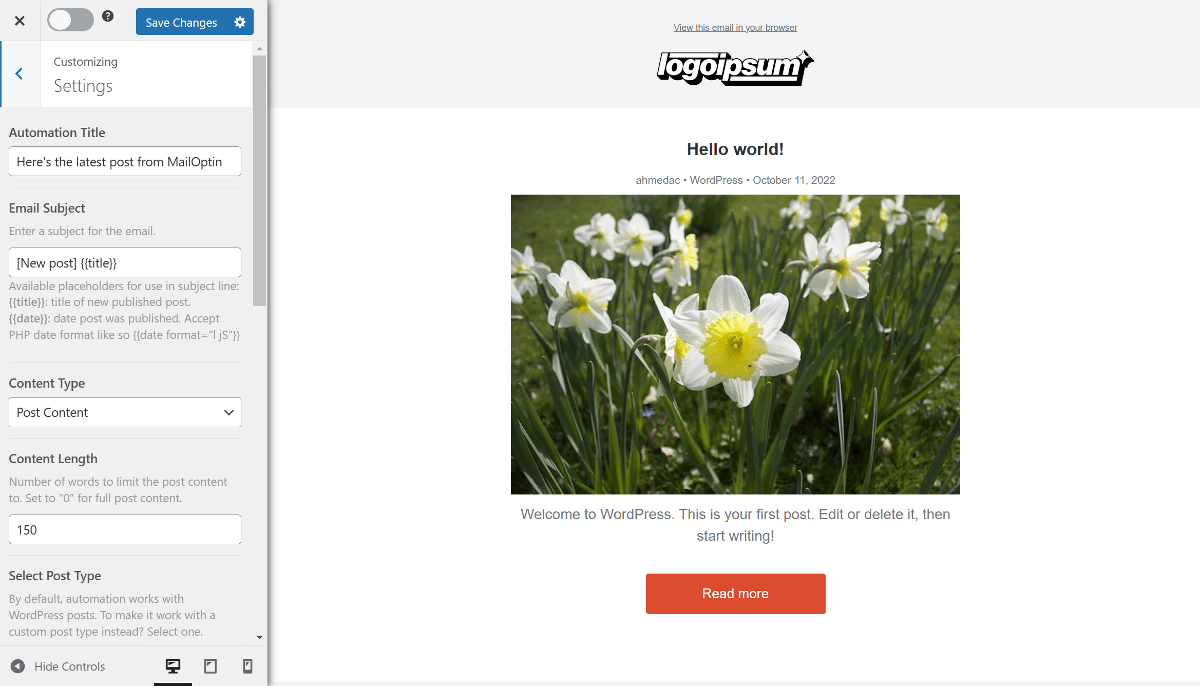
If you select Email Automation as your email type, you can choose to have a new post notification or round-off of the latest post from your website. This is a great option when you don’t want to commit to writing newsletters but want to keep your readers engaged.
If you choose the send the latest post notification, readers will receive a short snippet of your post with a link to read the whole article on the website.
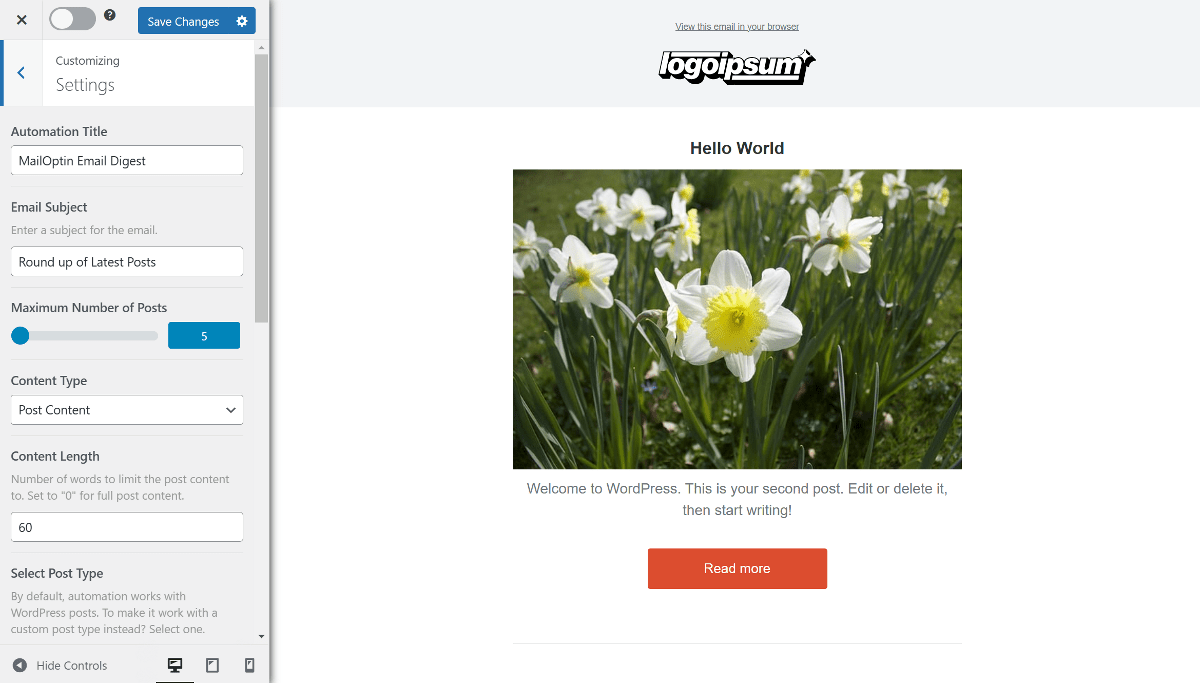
If you choose email digest, MailOptin will add all your recent posts in a single email with a link to read them on the website. Also, it gives you settings to customize the content and automation behavior as you prefer.
That’s it! Isn’t it easy to use WordPress to create your newsletters?
Final Thoughts
Creating a newsletter in WordPress is an efficient way to connect with your subscribers and promote your website and its products and services.
With the help of MailOptin, designing newsletters and opt-in forms becomes much easier without any learning curve. The article explains creating newsletters from scratch by setting up MailOptin, designing opt-in forms, and designing newsletters.
We also looked at the intuitive drag-and-drop builder and the endless customization options available with MailOptin.
So, what are you waiting for? If you haven’t already, purchase the MailOptin plugin, set it up, and begin crafting and publishing newsletters to keep the conversation going with your subscribers while expanding your business’s visibility with every email you send.