How To Add Email Subscription Forms To WordPress
Adding email subscription forms to your WordPress blog allows you to collect emails from your website visitors and market to them later.
Unlike social media and search engines, you have direct access to your email subscribers. You don’t run the risk of waking up one morning only to find out that your social media accounts have been suspended or a recent algorithm update has tanked your search engine rankings.
There is only one problem. Adding email subscription forms to WordPress-powered websites has traditionally been hard. This tutorial tries to show you an easy way to do it.
By the time you are done reading this post, you should have an idea of how you can easily add different types of email subscription forms to your WordPress website.
To follow along with this post, you need to have MailOptin installed on your blog.
Installing MailOptin
MailOptin is a free and popular email marketing plugin. It makes it easy to collect emails from your visitors and subscribe them to an email list.
To install MailOptin:-
First, log in to your WordPress admin dashboard, then click on Plugins->Add new to open the plugins installation page.
Next, type MailOptin in the plugin search box, then press enter.
Locate MailOptin on the list of plugins, then click on the Install Now button.
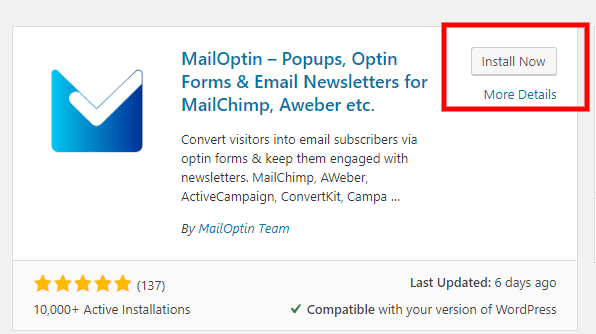
After WordPress installs MailOptin, click on Activate to activate the plugin.
That’s all. MailOptin is now installed and activated on your website. Before you can start collecting emails, we need to connect your email service provider.
Connecting Your Email Service Provider to MailOptin
Out of the box, MailOptin allows you to collect emails from your website visitors and notify them whenever a new post is published. You can also send them one-off broadcast messages from the admin dashboard.
Where MailOptin shines, however, is its ability to integrate directly with any email marketing software on the internet.
For example, you can connect MailChimp and automatically add new email subscribers to a MailChimp list. You can then send them targeted and automated messages or use any of the features offered by your email marketing software.
To connect your email marketing software to MailOptin:-
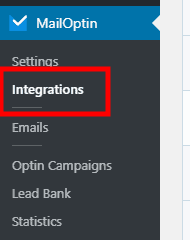
First, open the integrations page by clicking on MailOptin->Integrations.
Next, locate and then click on the name of your email service provider that you use.
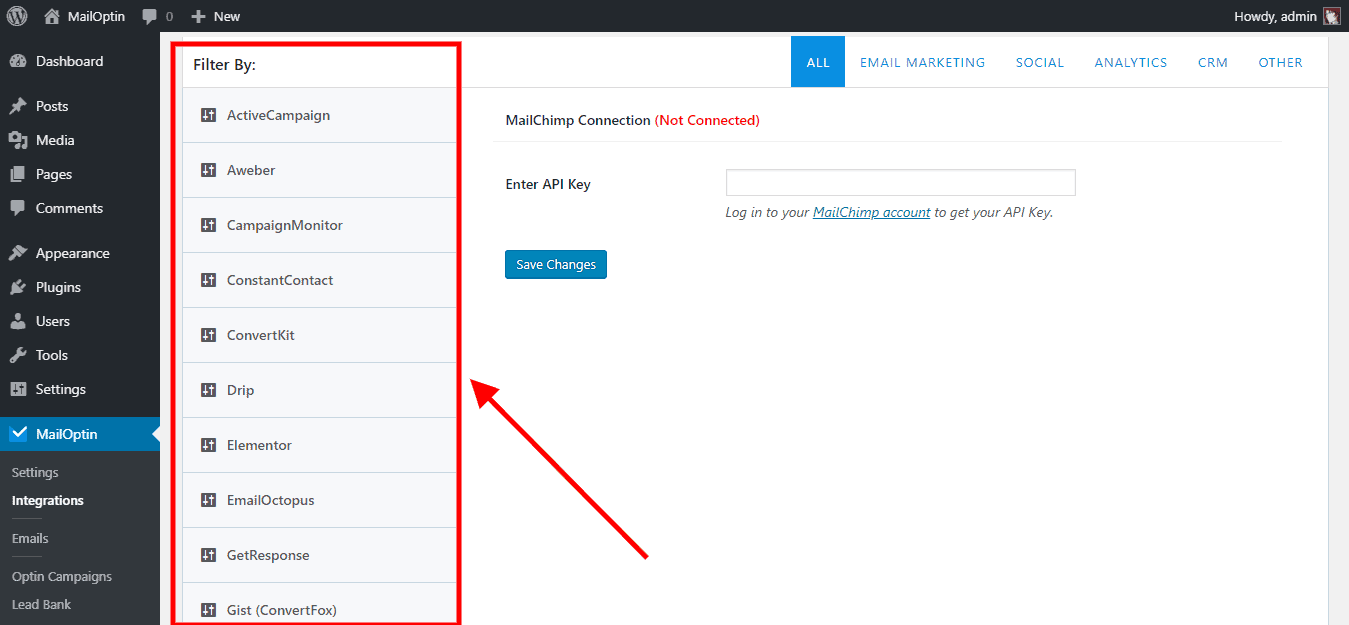
Fill the form that appears on the right then click on the save changes button.
If the connection is successful, you should see a text telling you that the connection was successful.

From now on, any email address that is collected will be directly added to the service provider that you set up.
In the rare cases where your email provider is not on the list, you can use a feature of MailOptin known as custom HTML to connect with your email software. We will talk about this feature later in the tutorial.
For now, let us see how you can add an email subscription form to your blog’s sidebar or any other widget area.
Adding An Email Subscription Widget To Your Sidebar
Most WordPress themes have widget areas where you can add things such as search forms and links to popular posts.
This is a great place to add an email subscription form. It does not affect the main blog content and also converts well.
To add a subscription form to a widget area:-
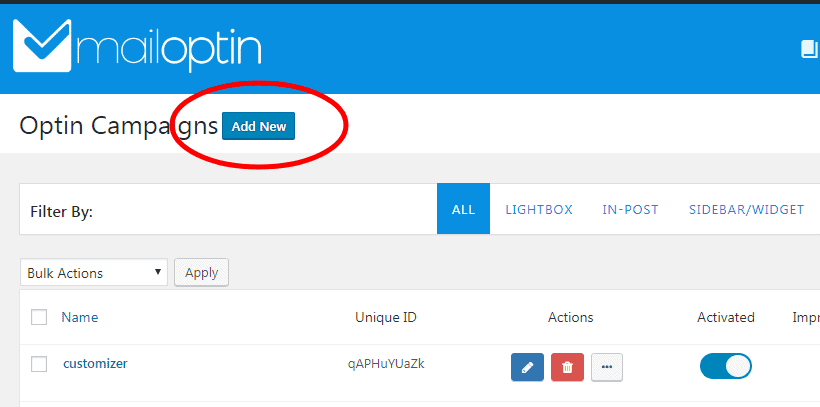
First, click on MailOptin->Optin Campaigns to open the campaigns page.
Next, click on the Add New button at the top of the page to add a new Optin campaign.
Then enter the name of your new Optin campaign on the next page.
Next, scroll to the Select Optin Type section then click on Sidebar/Widget. This tells MailOptin that we will add this campaign to a widget area.

Finally, select the theme/template that you want to use for this opt-in campaign. MailOptin will then open the opt-in campaign customizer.
Click on the integrations panel to set up your email service provider and select the list where emails will be saved to. If you did not set up an email service provider, you can instruct MailOptin to just collect and store the emails.
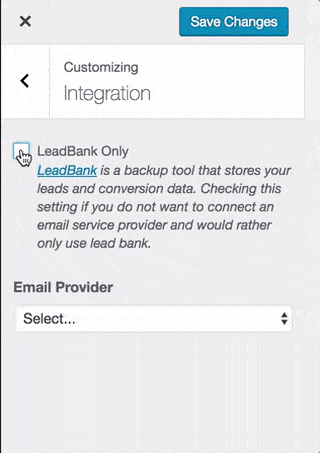
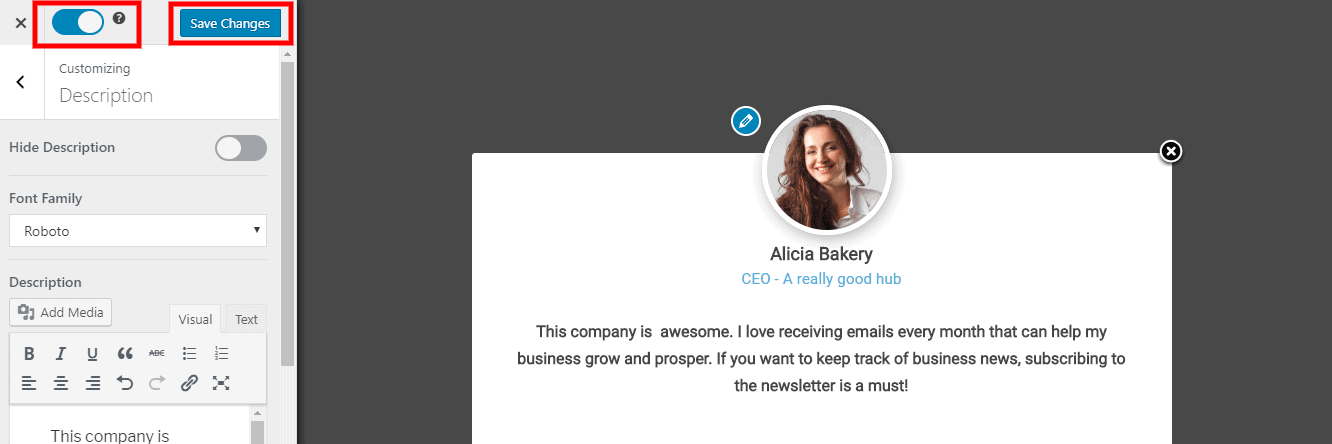
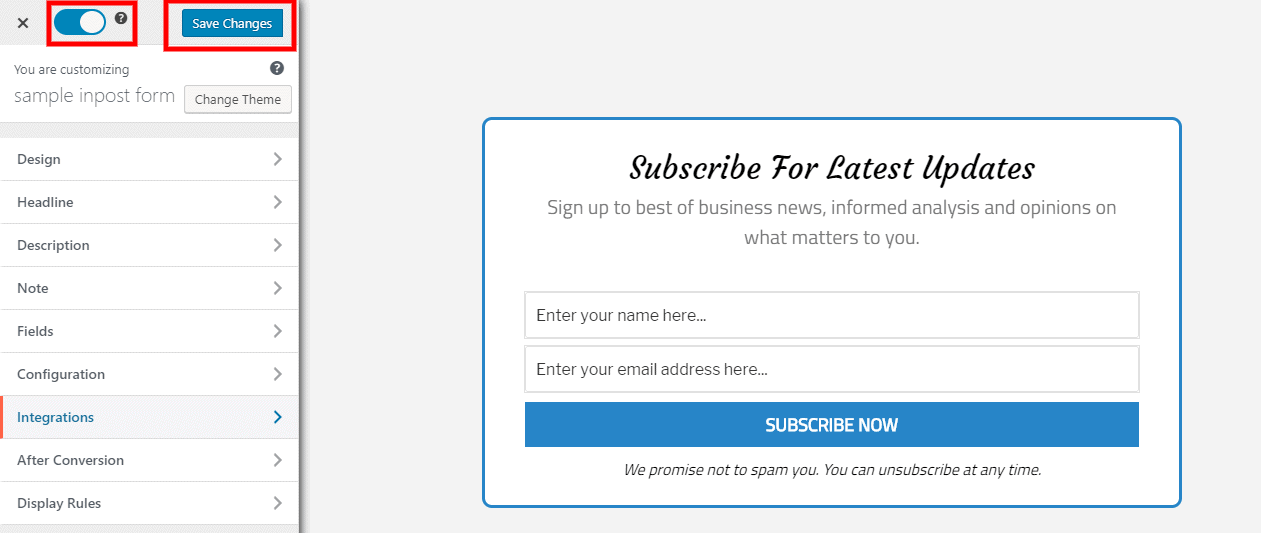
The customizer also allows you to configure the appearance of your campaign. After making all your changes, click on the save changes button to save the changes.
Finally, click on the switch next to the Save Changes button to activate this opt-in campaign.
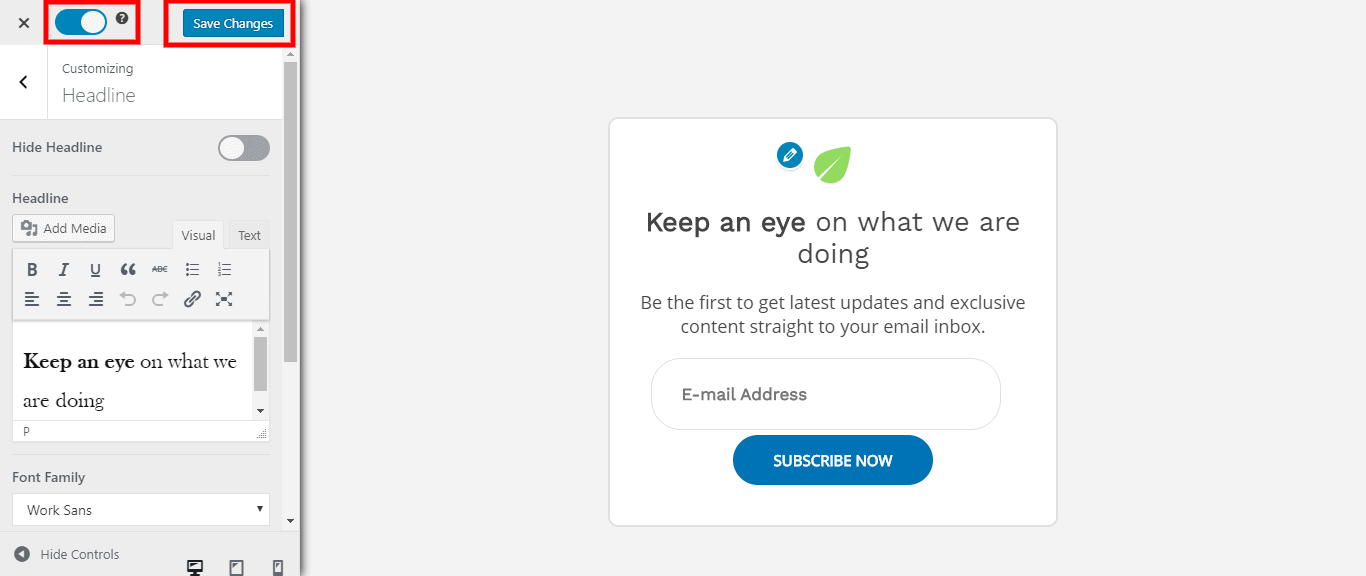
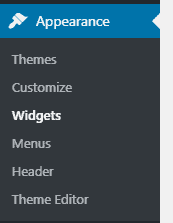
Next, click on the X button to go back to your admin dashboard. Open the widgets page by clicking on Appearance->Widgets.
Locate the MailOptin widget and drag it to the widget area of your choice.
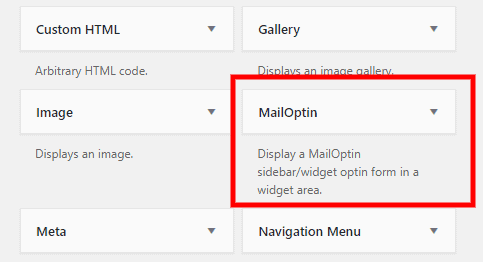
Finally, select the opt-in form you wish to add then save the changes.

That is all. You can now visit the front page to see it in action.

Creating Lightbox/Popup Email Subscription Forms
No matter what people say about popups, these email subscription forms have a very high conversion rate. This is why MailOptin makes it very easy to add them to your website.
The procedure is the same as the one we used to add an email subscription widget, except for a few changes.
Here is how to create an email popup form in a few easy steps:-
First, click on MailOptin->Optin Campaigns to open the campaigns page.
Next, click on the Add New button at the top of the page to create a new Optin campaign.
Give it a name so that you can easily identify it in the campaigns overview page.
Next, scroll to the Select Optin Type section then click on Lightbox. This tells MailOptin to display this campaign in a popup.
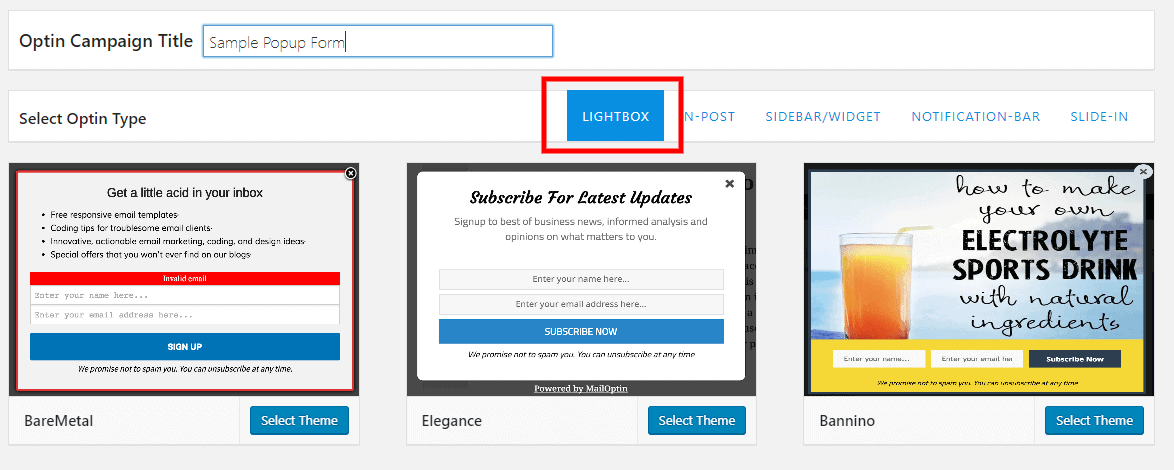
Finally, select the theme/template that you want to use for this popup opt-in campaign. MailOptin will then open the opt-in campaign customizer.
Click on the integrations panel to set up your email service provider and select the list where emails will be saved to. If you did not set up an email service provider, you can instruct MailOptin to just collect and store the emails.
The customizer also allows you to change how the form should look and when it should display.
For example, you can set up the popup to display after the user clicks on something on the page, starts scrolling or after a few seconds.
You can also restrict the popup form to specific pages, categories or even post types. This is particularly helpful in case you wish to offer a content upgrade.
When you are done configuring the popup, click on the Save Changes button to save your changes.
Finally, click on the switch next to the “Save Changes” button to activate this opt-in campaign.
Finally, click on the X button to go back to your admin dashboard.
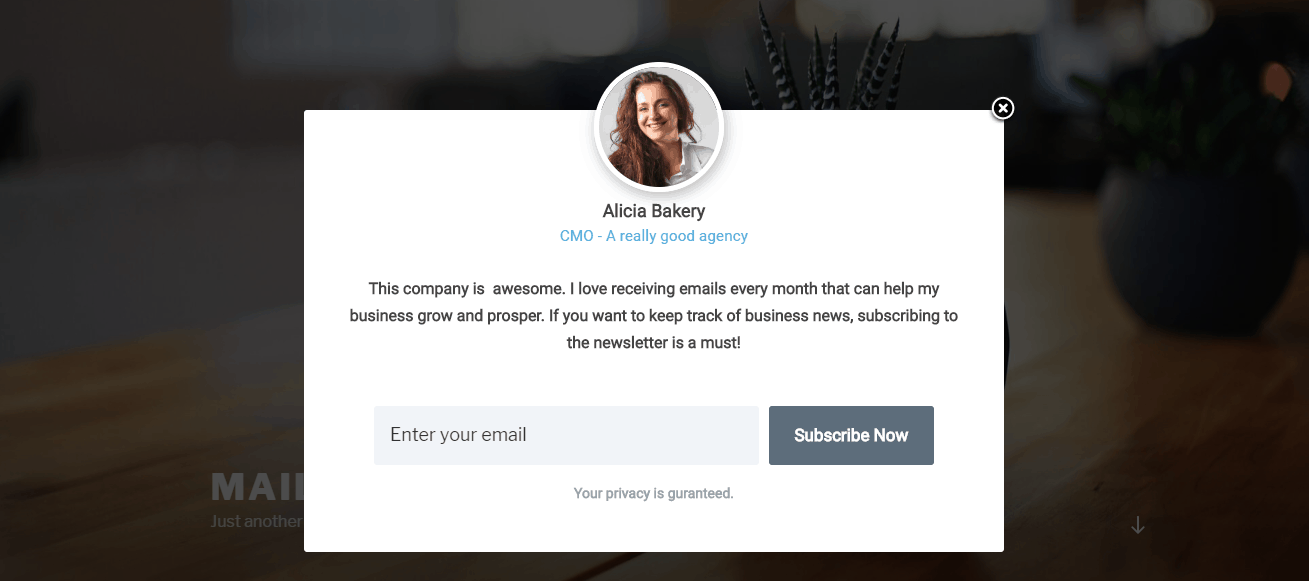
Now whenever you visit your website’s front-page, MailOptin will display an email subscription form inside a popup. After users subscribe or close the popup, it will stay hidden so that it doesn’t interfere with the user’s normal browsing behavior.
The next section shows you how to embed the sign-up form inside your post content.
Insert Email Sign Up Forms In Your Post Content
What better place to insert an email subscription form than inside the post content? The user is already engaged with your content and is, therefore, more likely to subscribe.
MailOptin allows you to insert email subscription forms before, within or after any content on your website.
To do that:-
First, click on MailOptin->Optin Campaigns to open the campaigns page.
Click on the Add New button at the top of the page to create a new Optin campaign.
Then give it a name so that you can easily identify it in the campaigns overview page.
Next, scroll to the Select Optin Type section then click on In-Post. This tells MailOptin to display this campaign in a popup.
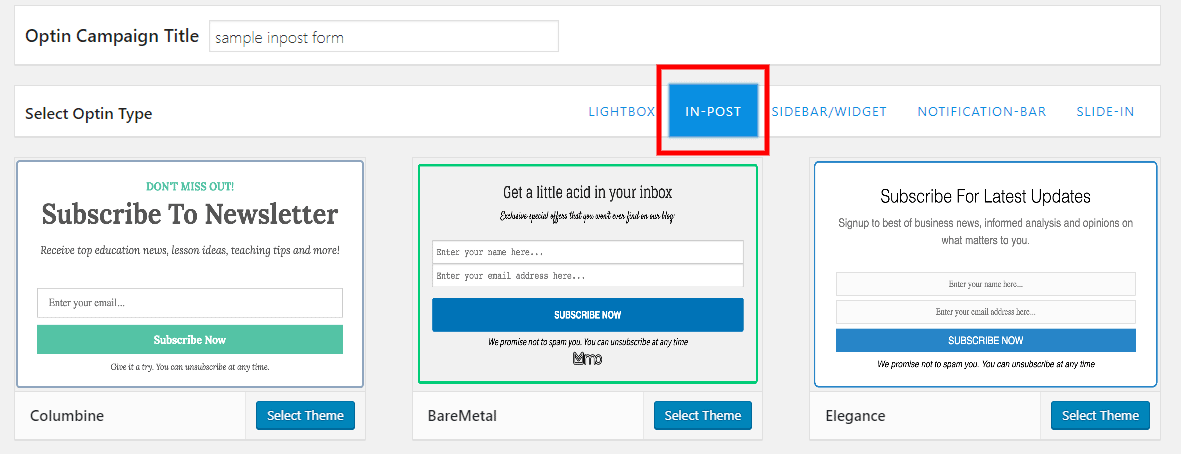
Finally, select the theme/template that you want to use for this opt-in campaign. MailOptin will then open the opt-in campaign customizer.
Click on the integrations panel to set up your email service provider and select the list to save email subscribers to.
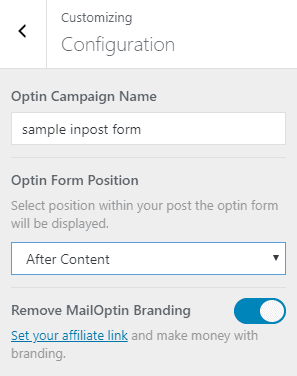
The customizer also allows you to change how the form should look and whether it should appear below or after the post content.
To configure this, click on the configuration panel then select the position for this opt-in campaign.
After configuring the popup, click on the Save Changes button to save your changes. Then activate the opt-in campaign.
Finally, click on the X button to go back to your admin dashboard.
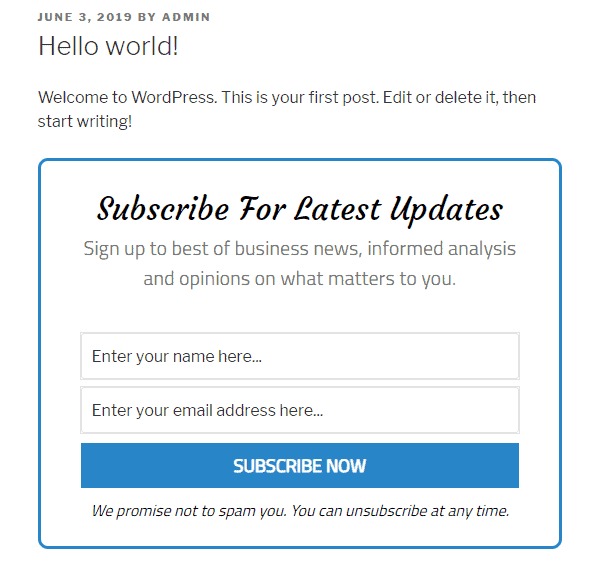
Now whenever you visit your website’s front-page, MailOptin will display an email subscription form before or after post content.
Sometimes you may want to embed your form within the post content. Luckily, MailOptin provides shortcodes that you can use to do this.
Adding Other form types
The three forms discussed above are the main forms you can add to your WordPress website. MailOptin also offers two more form types that you can add.
Notification Bar Optin Form
This form appears at the very top or bottom of the website. They grab the visitors attention without taking much space. Notification bar forms are non-intrusive and convert highly.
This tutorial walks you through the process of creating a notification bar form.
Slide-In Widget Form
This is a widget that slides in from the bottom left or bottom right of the screen. It contains an email subscription form and allows your visitors to sign up form your email list without taking away their attention from the main content.
This tutorial shows how to easily create slide-in widget forms and display them on your WordPress website.
Conclusion
Now that you know how to add email subscription forms to your WordPress website, you can go ahead and learn about the best email marketing strategies.