How to Use Custom HTML in Your Opt-in Forms
MailOptin gives you complete control over the appearance of your opt-in fields. You can attach an unlimited number of custom fields to your campaigns.
You can also connect the campaigns to more than 15 email providers and CRM tools.
This covers most of the use cases out there.
But what if you use an email provider that has no official integration with MailOptin?
Worry not. As from version 1.12.15.0, MailOptin allows you to replace your opt-in fields with custom HTML.
This opens a world of limitless integrations with MailOptin.
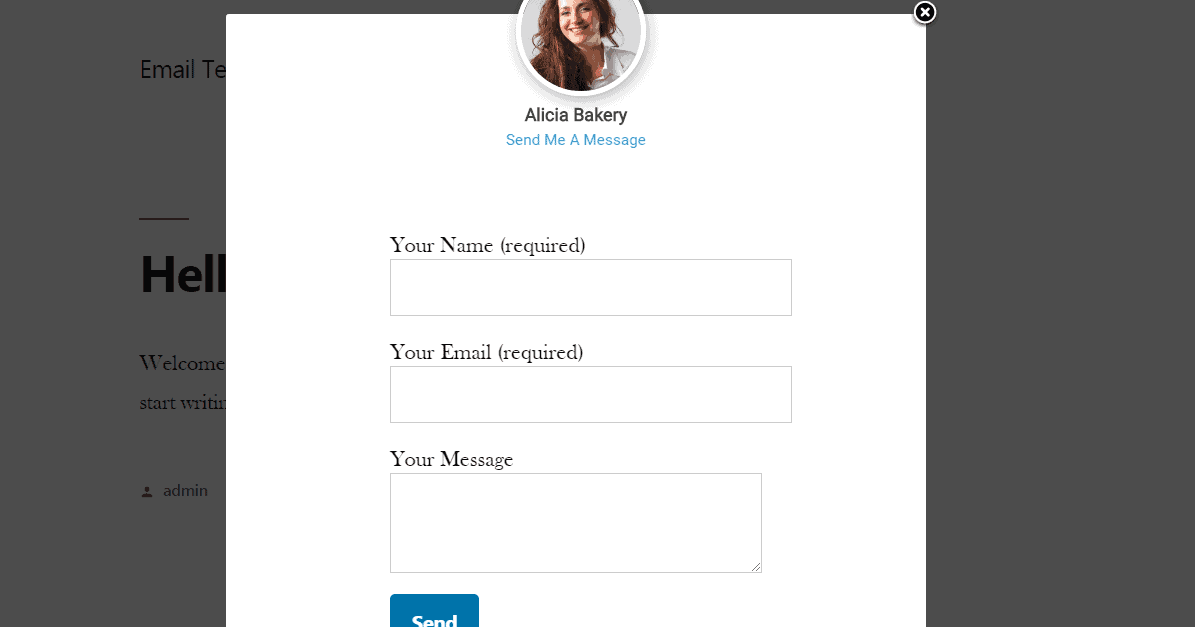
For example, you can integrate MailOptin with Contact Form 7 by replacing the default fields with a contact shortcode as shown in the screenshot below.
With this, a user can send you a message instead of subscribing to your email list.
You can take this a step further and attach a click trigger to the campaign. This will display the lightbox whenever a user clicks on a link on the page. For example, you can attach a click handler to the contact link.
To replace the default fields with custom HTML, you need to follow two steps:
Step #1: Open the Opt-in Campaign customizer
In your admin dashboard, click on MailOptin->Optin campaigns to open up the opt-in campaigns overview page.
Next, create a new opt-in campaign by clicking on the Add New button.
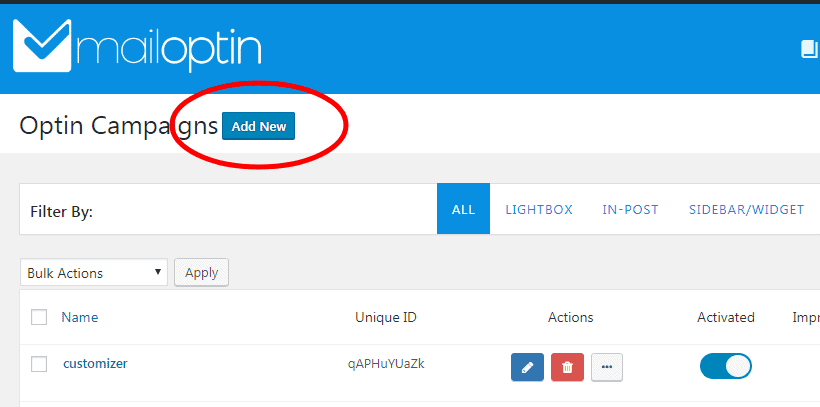
After creating a new campaign, MailOptin will open the campaign customizer.
You can also open the customizer by clicking on the blue pencil icon.

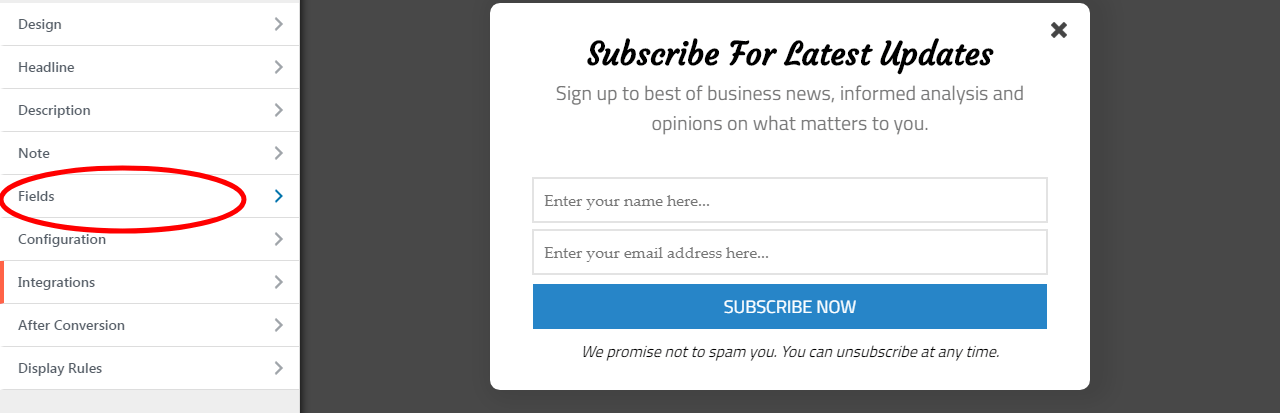
Step #2: Replace The Default Fields with your Custom HTML
The final step is to replace the default opt-in fields with your custom HTML
To do this;
First, click on the fields panel to open the fields option…
… then click on the Use Custom HTML toggle.
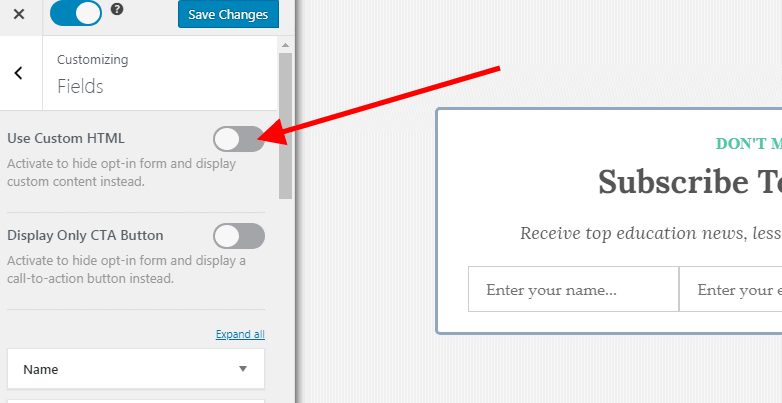
You will see a new code editor appear. Copy and paste your custom HTML into the editor.
For example;
If you are a MoonMail user, you can copy their form embed code…

and paste it into the code editor as shown in the picture below.

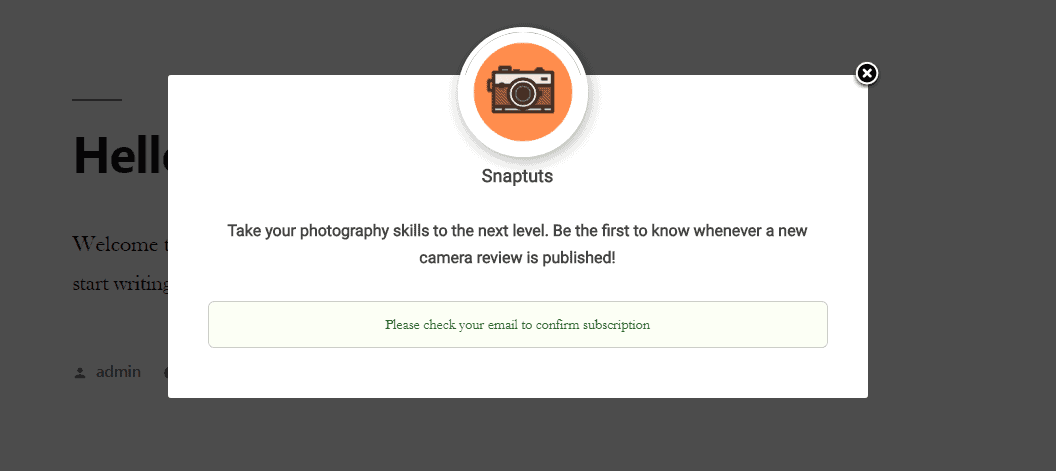
Save the opt-in campaign and visit your website’s front page. You will notice that the MailOptin lightbox contains your MoonMail’s subscription form…
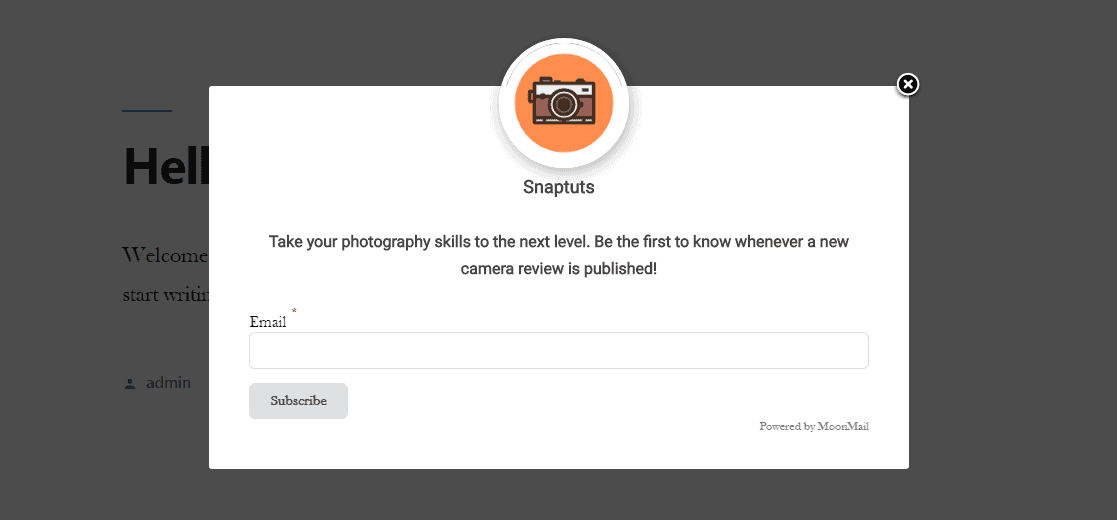
… and you can subscribe to your MoonMail list using the form.
Your custom HTML will always adapt to the style of your opt-in campaign template.
MailOptin also allows you to specify custom CSS. If the styles don’t match, specify your own CSS.
You can also disable the title, description and not to design your own form from scratch.
Conclusion
In this tutorial, you learned how to integrate MailOptin to Contact Form 7 and MoonMail.
However, don’t just stop there. You can use the custom HTML feature to integrate MailOptin to virtually any service you can think of.