How to Display WordPress Popup on Link/Button Click
Do you want to create a popup that displays when visitors click a link or a button on your site?
Creating popups on your WordPress website can help increase newsletter sign-ups, boost product sales, and effectively convey important messages. They allow you to capture attention swiftly and guide visitors to take action.
In this article, we’ll show you how to set up a popup that appears when someone clicks a link or button using the MailOptin Click Launch feature.
This technique is particularly popular among internet marketers and bloggers who offer content upgrades, where extra content or resources are available only after the visitor opts in with their email address.
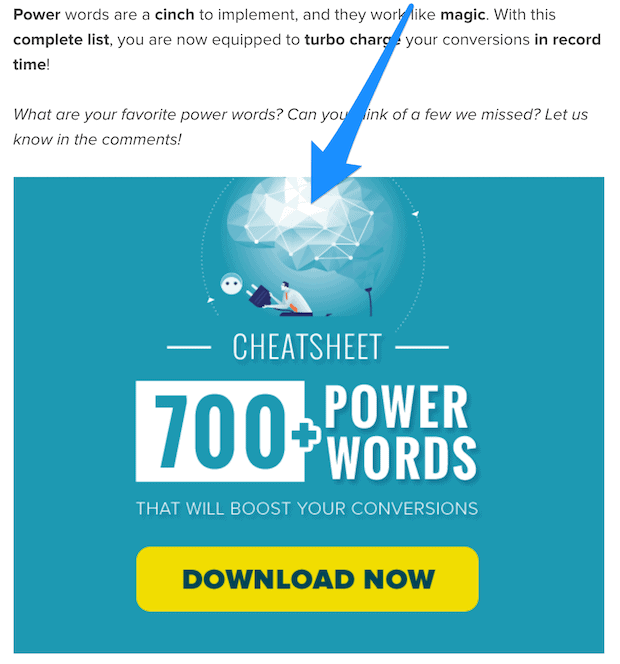
Below is an example of an image content upgrade that displays an email subscription form after clicking it. Users only get the promised resource after they subscribe.
Why Are Popups on Link/Button Click Effective?
Popup forms triggered by links or button clicks are highly effective due to the Zeigarnik effect, a psychological principle suggesting that people who initiate an action are more inclined to complete it. When a user clicks on a link or button to open your popup, they’ve already demonstrated interest. As a result, they’re more likely to engage with and complete the form that appears.
Other reasons why popups on link or button clicks are effective include:
Alignment with User Intent: Users who click a link or button show interest in what it offers. Popups triggered by these clicks match the user’s intent and provide relevant content or actions. For example, clicking a link to get a free ebook and seeing a popup asking for an email address is a natural and expected progression. This alignment makes users more likely to respond positively to the popup.
Less Intrusive: Popups that appear randomly can be annoying and disruptive. However, popups that appear after a user clicks a link or button are less intrusive because they are directly tied to the user’s action. This makes them feel like a part of the browsing experience rather than an interruption.
Higher Conversion Rates: Because click-triggered popups appear when users are already interested, they tend to have higher conversion rates. Users are more likely to engage with the popup, fill out a form, or make a purchase because they are already thinking of taking action.
Creating WordPress Popup on Link/Button Click
The best way to create a link/button click popup is by using MailOptin. It is a most popular lead generation & automated newsletter plugin for WordPress. It gives you all the tools you need to grow and automate your email list. It allows you to create, customize, and showcase professional popups on your WordPress site.
Install & Activate MailOptin
To begin, you will need to buy a MailOptin license. Then, download the plugin from the welcome email or your MailOptin account.
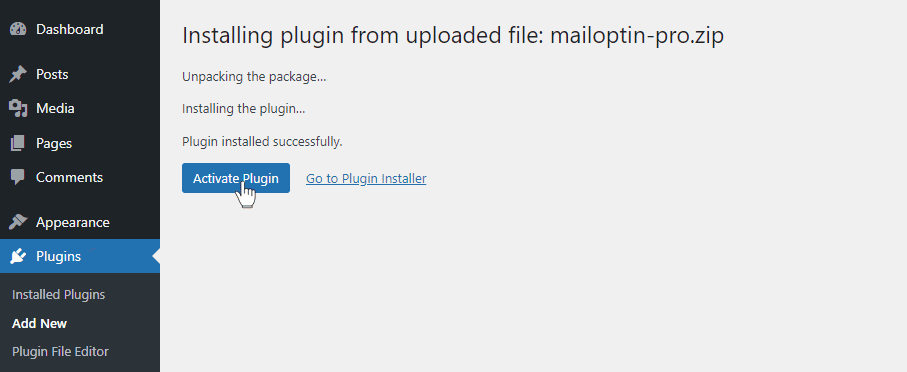
Next, log in to your WordPress admin dashboard. Go to the Plugins page. Click the Add New button and Upload Plugin.
Then click on Choose File to select the downloaded plugin zip file. Click Install Now.

After installing the plugin, activate it by clicking ‘Activate Plugin’.
Create a New Campaign and Activate on Link/Button Click Popups
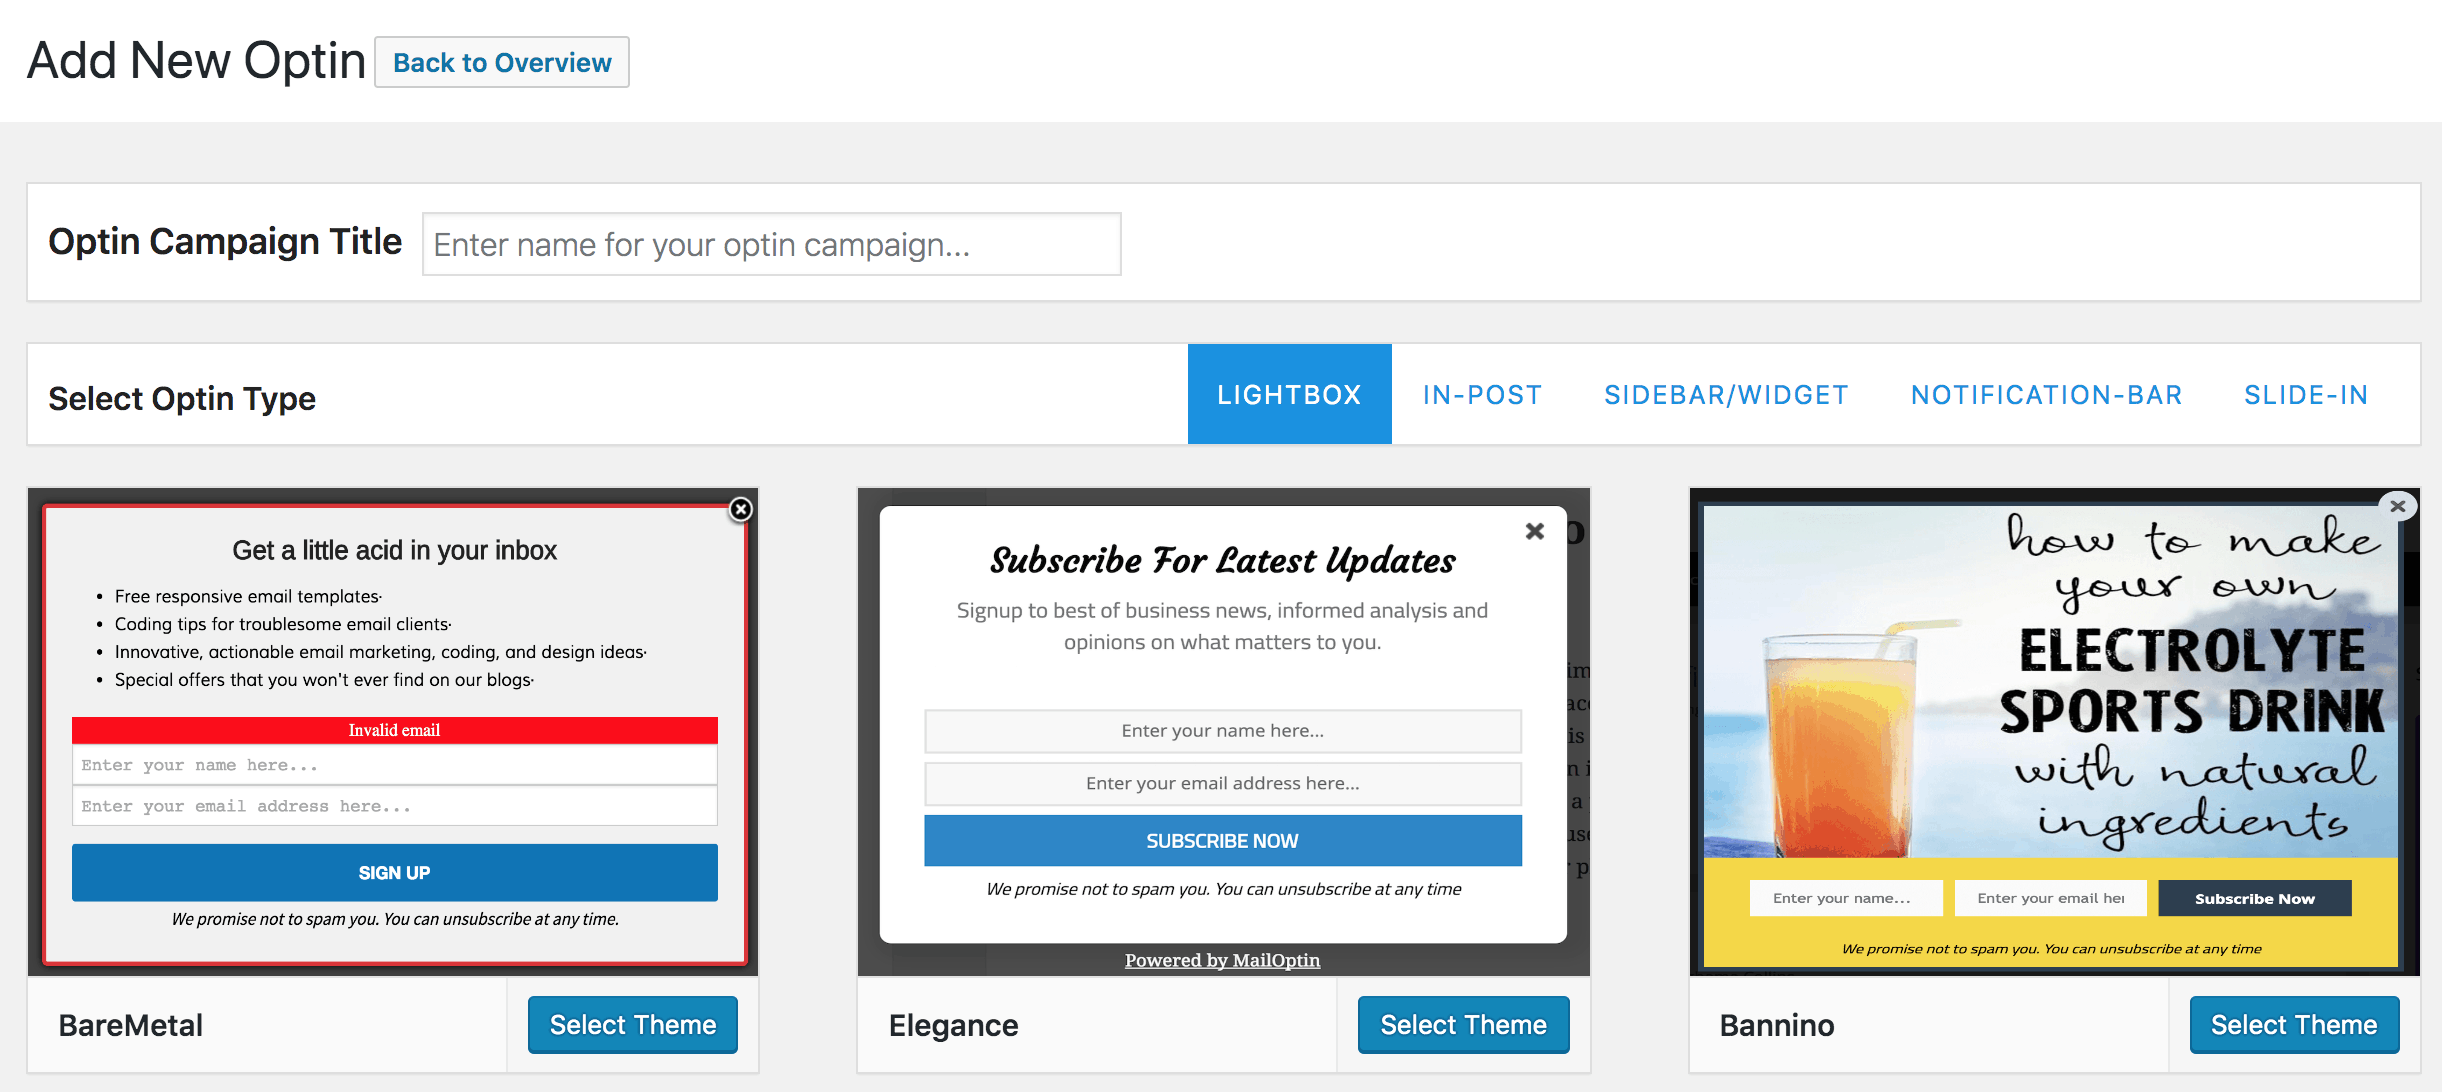
Go to MailOptin > Optin Campaigns > Add New, then name the campaign. Next, select Lightbox type.
Click launch is available only to lightbox or popups, slide-ins, and notification bar optin forms.
Next, you will be redirected to the campaign customizer, where you can customize the opt-in form any way you like.
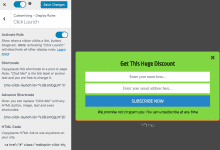
When done, open Display rule >> Click Launch panel and activate the rule.
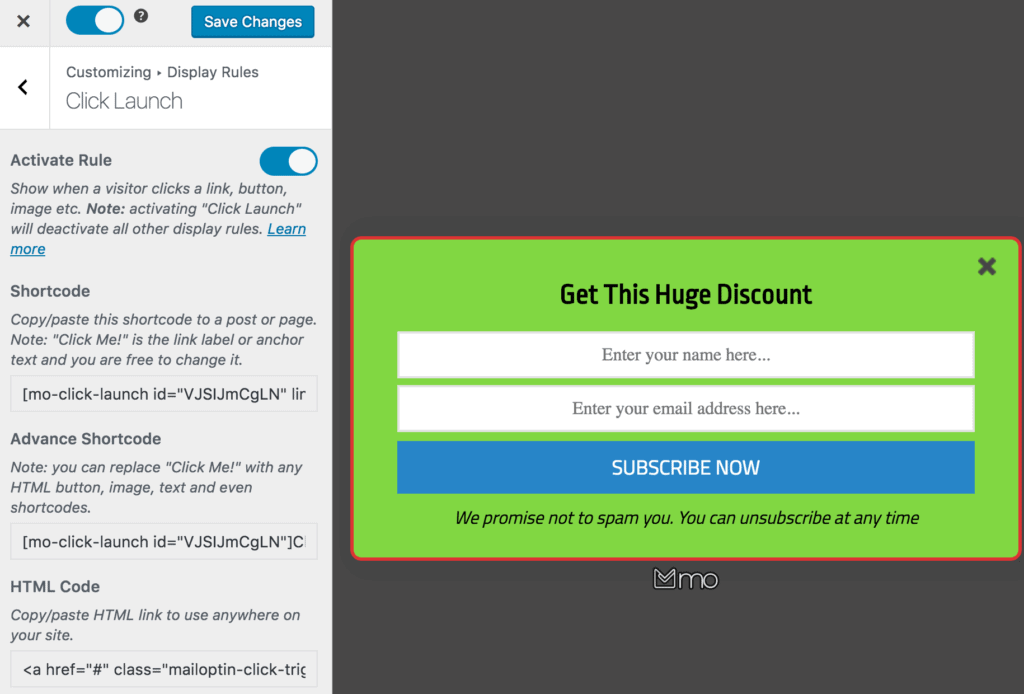
Having done this, copy any of the shortcodes or HTML code and paste them on the post or page you wish to offer a content upgrade or a click-to-launch opt-in form.
Remember to activate the opt-in form (by toggling the switch at the top-left corner to the right) and save your changes.
Saving the shortcode to a WordPress post or page will output a link that reveals the opt-in form when clicked.
Let’s go over the shortcode and HTML code available.
Simple Shortcode
The shortcode looks similar to
[mo-click-launch id="VJSIJmCgLN" link="Click Me!"]
where “VJSIJmCgLN” is the optin unique identifier and “Click Me!” is the link label or anchor text you can change.
Advance Shortcode
This shortcode allows you to trigger an optin display using elements other than a link, such as images, call-to-action buttons, videos, and even shortcodes from other plugins that output some form of content.
If you want to make a button or an image trigger an opt-in form display when clicked, the advance shortcode can be used.
Button:
This example assumes your theme has a button shortcode.
[mo-click-launch id="VJSIJmCgLN"]
[button type="button" label="Click Me!"]
[/mo-click-launch]
Image:
[mo-click-launch id="VJSIJmCgLN"]
<img src="https://mailoptin.io/img/smiley.gif" alt="Smiley face">
[/mo-click-launch]
You can even use it for links similar to the simple shortcode above like so:
[mo-click-launch id="VJSIJmCgLN"]Click Me![/mo-click-launch]
HTML Code
If shortcodes aren’t your thing or for reasons best known to you, you prefer to use the HTML link, feel free to use it.
The code is in this form:
<a href="#" class="mailoptin-click-trigger" data-optin-uuid="VJSIJmCgLN">Click Me!</a>or
<a href="#" class="mailoptin-click-trigger-VJSIJmCgLN">Click Me!</a>
So basically, the optin unique ID (in our example VJSIJmCgLN) is appended to the class mailoptin-click-trigger and added to the link, button, or whatever element that will trigger the optin.
Here’s an example of how it can be implemented using a button in the Elementor page builder.
Below is a GIF demo of the “click launch” optin trigger.

Creating popups that appear when visitors click a link or button on your WordPress site is a powerful way to boost engagement, drive conversions, and convey important messages effectively. The best part is you don’t need any coding skills to add these popup boxes to your website using the MailOptin Click Launch feature.
We hope this article helped you learn how to display a WordPress popup when a link or button is clicked on your website.