How to Create MailPoet Optin Forms to Capture Leads

Do you want to create a MailPoet optin form for your WordPress website to capture leads?
MailPoet is a WordPress email marketing plugin popular among WordPress site owners and businesses.
In this tutorial, we will learn how to integrate MailOptin with MailPoet so you can start capturing and saving leads with an email sign-up form to your MailPoet account.
Why Use MailPoet and MailOptin Together?
Combining MailPoet and MailOptin brings together the best of both worlds. MailPoet offers powerful email marketing capabilities directly from your WordPress dashboard, allowing you to design and send newsletters, post notifications, and automated emails with ease.
MailOptin, on the other hand, excels at creating high-converting opt-in forms and pop-ups. Together, they form a formidable duo for lead generation and email marketing.
Steps to Create a MailPoet Opt-in Form Using Mailoptin
Follow these steps to set up the MailPoet optin form on your site using MailOptin:
Step 1: Install and Activate MailOptin Plugin
Begin by installing the MailOptin plugin on your WordPress website. To do this, purchase the Pro version of the plugin. Head to the pricing page and buy a plan that fits your needs.
After you buy a plan, log in to your account. Under Account Dashboard, click Download Plugin to get the zip file.
Next, log in to your WordPress admin dashboard and go to the Plugins page. Click the Add New button and then Upload Plugin.
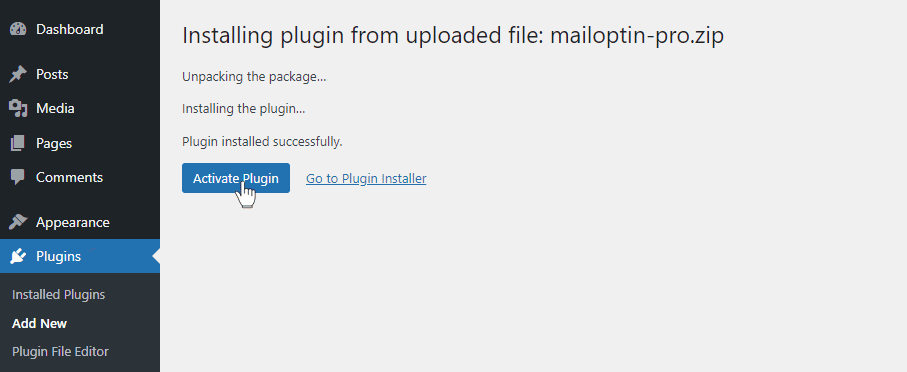
Then, click Choose File to select the downloaded plugin zip file. Click Install Now.

After installing the plugin, activate it by clicking ‘Activate Plugin’.
Step 2: Connecting MailOptin with MailPoet
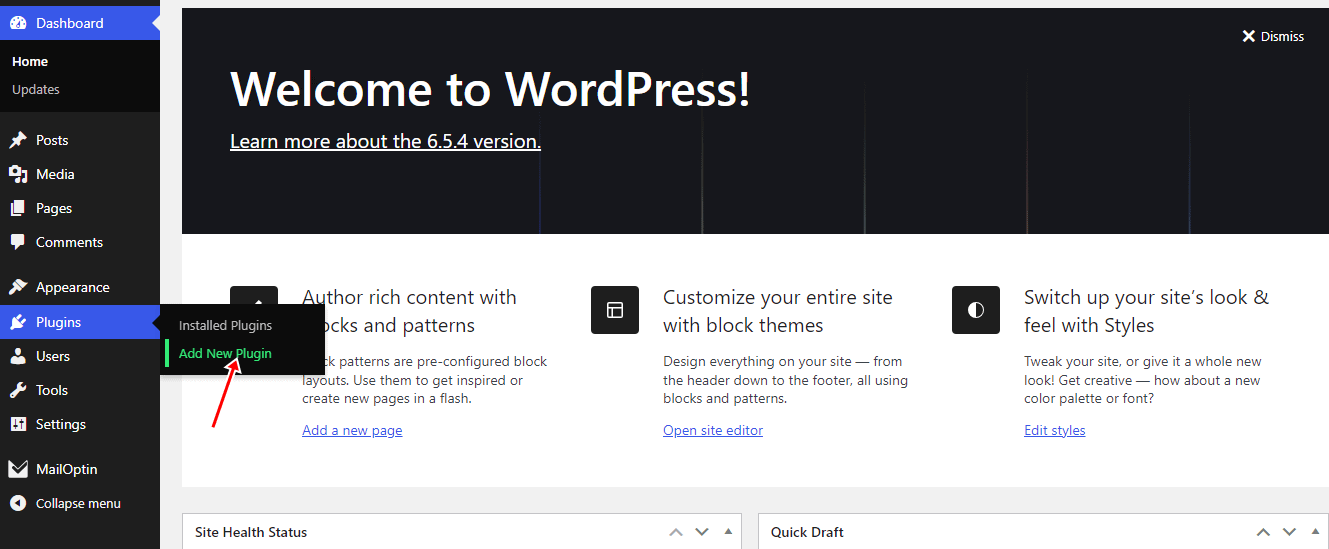
To do this, open up the Plugins » Add New menu.
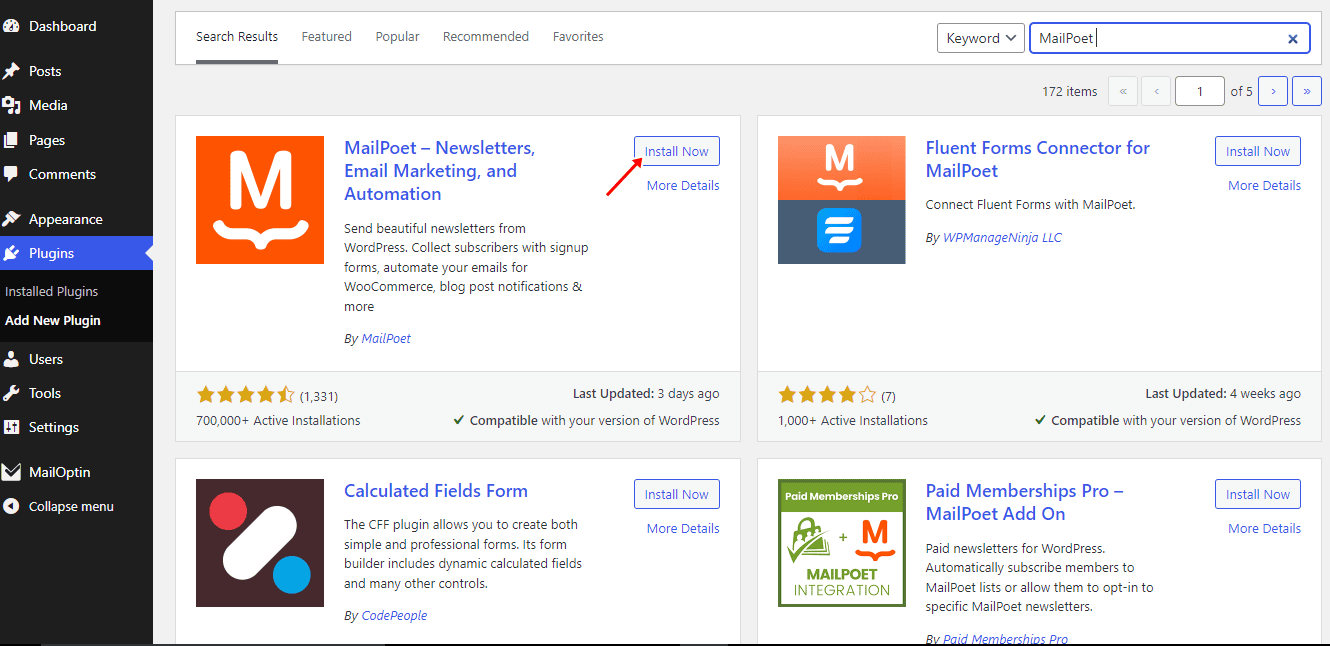
Search for MailPoet, Then, click “Install Now,” followed by “Activate” to enable the plugin.
Now that you have installed and activated MailPoet on your website, the integration will automatically be live. No additional setup or settings are required.
Step 3: Create a New Optin Campaign
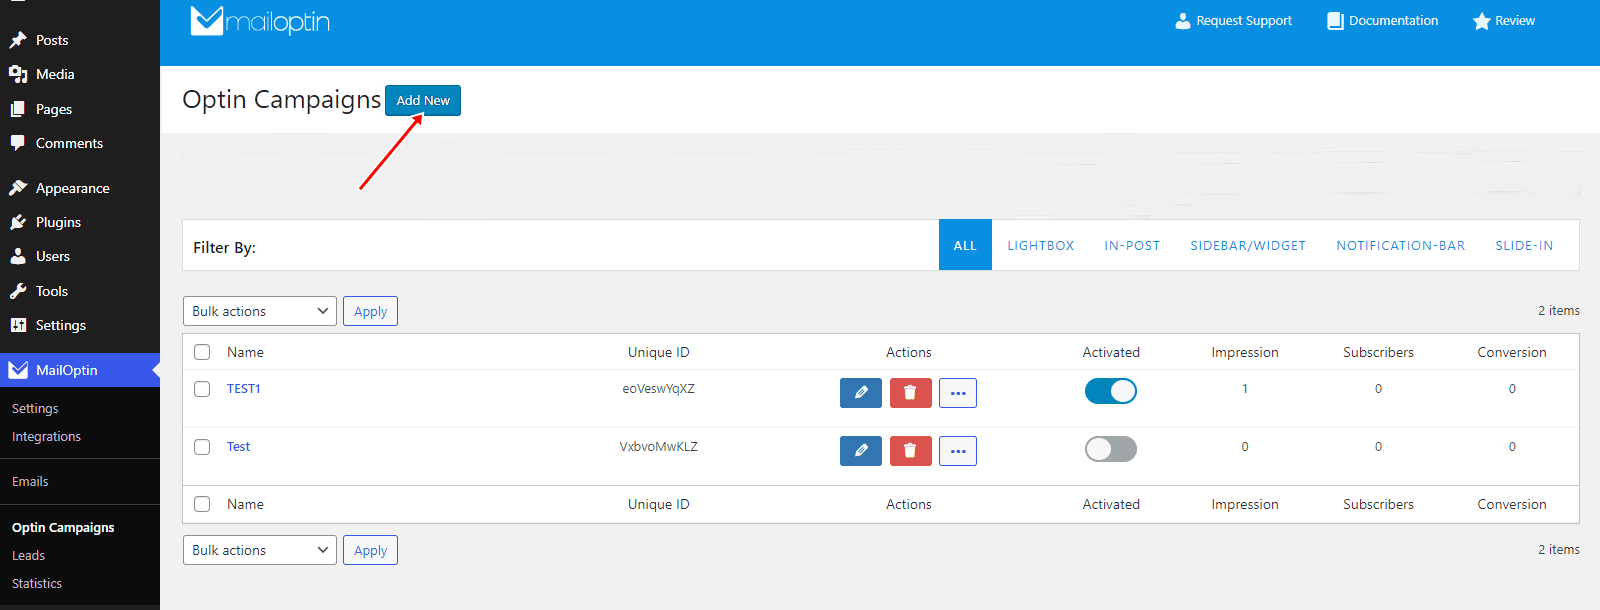
Go to the Optin Campaign page and click the Add New button at the top to create an optin form.
Enter a title for the campaign, select the optin type (for this tutorial, we’ll select lightbox), and click the optin form design you want.
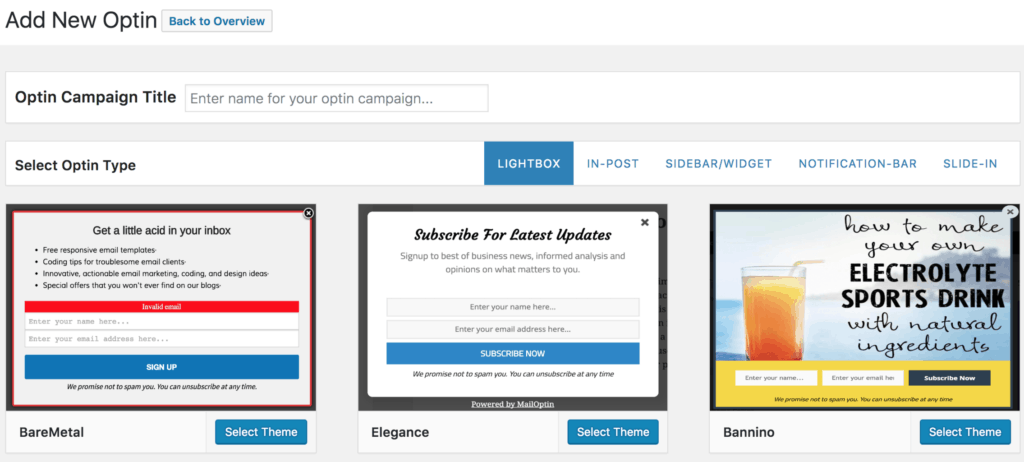
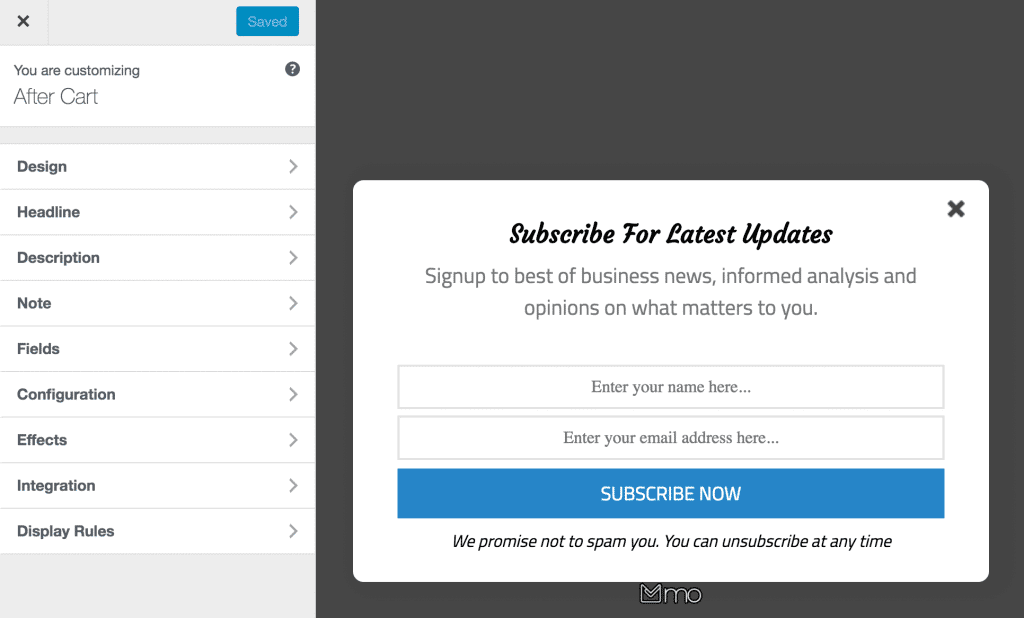
You will then be redirected to the form builder where you have options and the flexibility to customize the optin form to your heart’s content.
See: Adding Extra Fields to Your Optin Form
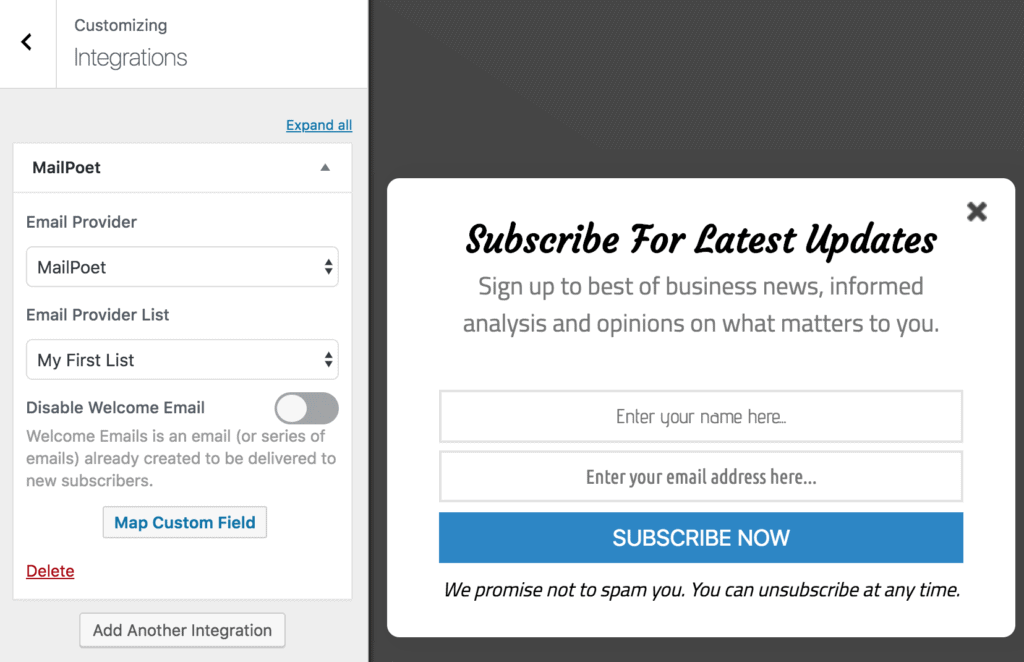
After customizing the form, open the Integration panel, Select MailPoet from the Email Provider dropdown and choose the MailPoet list to subscribe users to. You can also toggle the option to disable the welcome email. Here’s a guide on how to enable or disable MailPoet’s double optin.
To actually get the opt-in to display on your site, toggle the activate switch ON at the top (close to the “Save Changes” button).
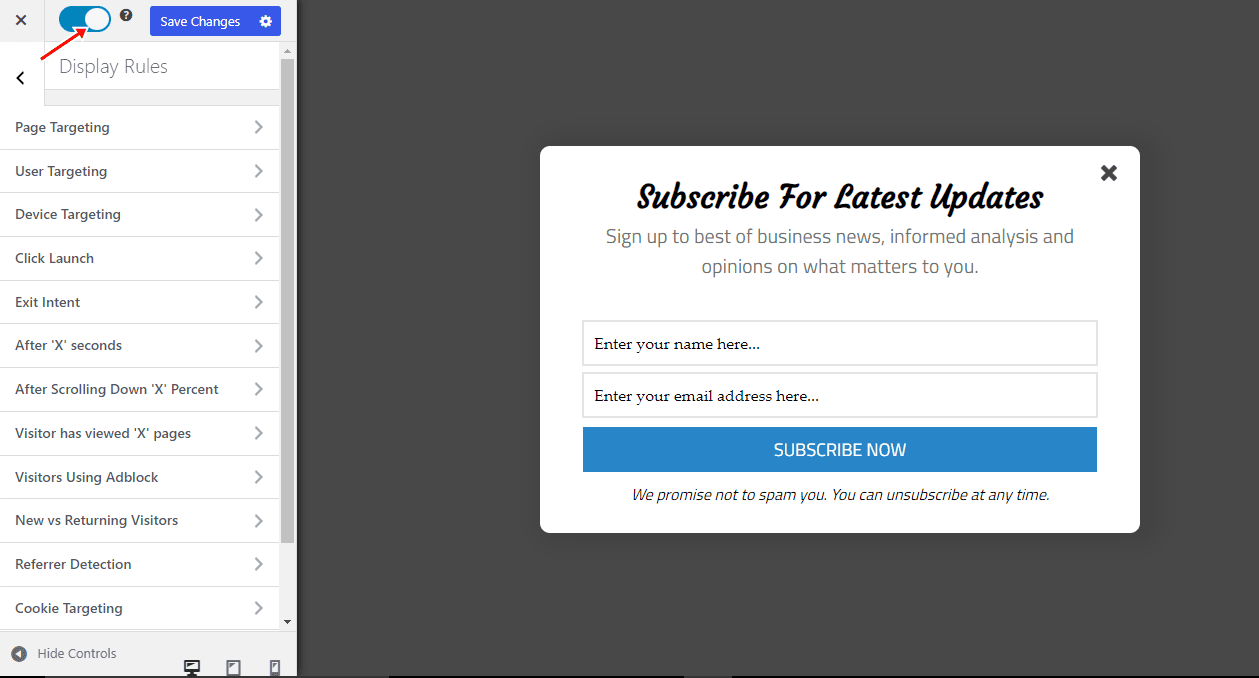
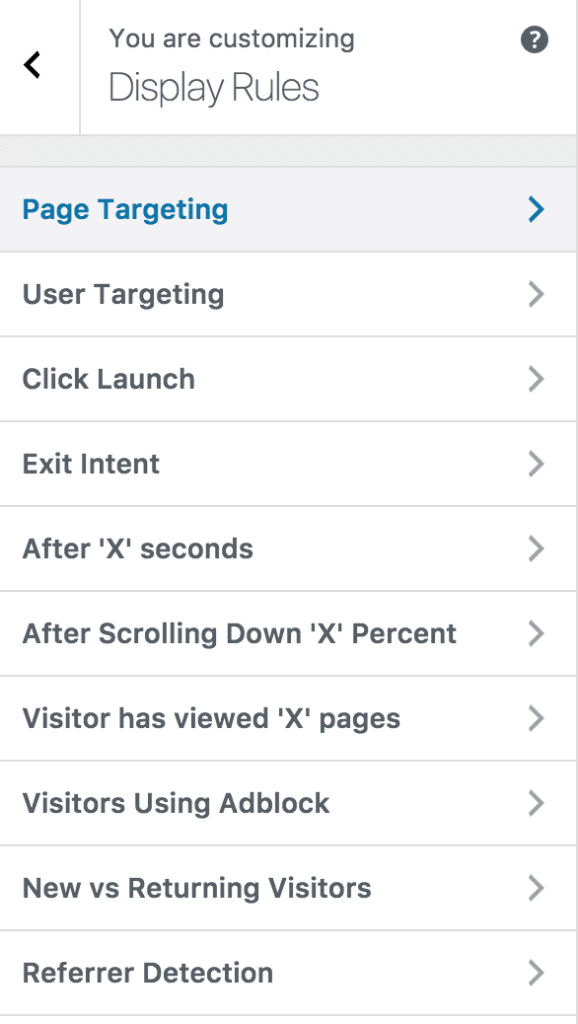
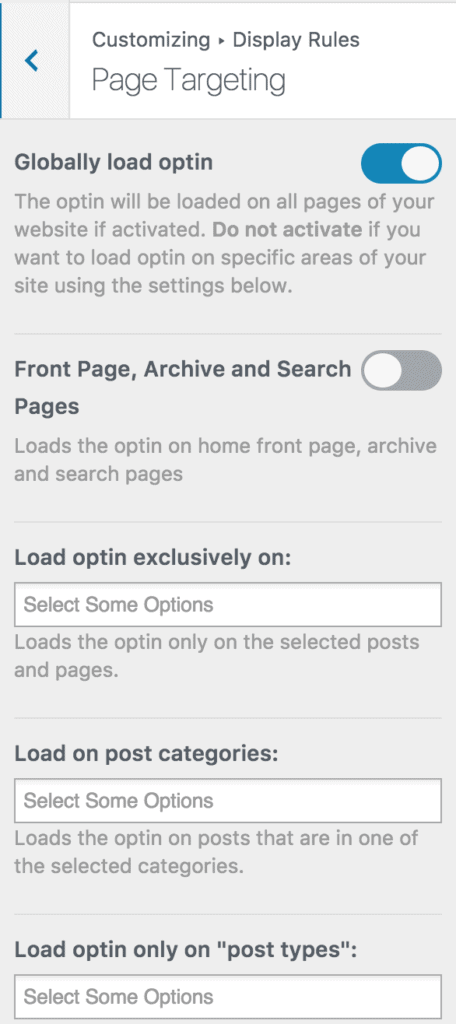
Navigate to the “Display Rules” panel.
If you want the opt-in form to be displayed everywhere (all pages) of your WordPress site, also check “Globally load optin” Otherwise use the page level targeting and triggers to determine how and where in your site the opt-in will be shown.
Finally, save the changes. Preview your website and you should see the optin displayed. If it doesn’t show up, be sure to clear your website and browser cache.
Optimizing Your Opt-in Forms for Maximum Conversions
Creating an opt-in form is just the beginning. To maximize lead capture, consider the following optimization tips:
A/B Testing: Regularly conduct A/B tests on different form elements (e.g., headlines, call-to-action buttons, colors) to determine what resonates best with your audience.
Clear Value Proposition: Clearly communicate the benefits of subscribing. Whether it’s exclusive content, discounts, or updates, make sure your visitors know what they are signing up for.
Minimal Fields: Keep the number of fields in your form to a minimum. Asking for just the essential information reduces friction and increases the likelihood of form completion.
Ready to capture leads using MailPoet optin forms?
Integrating MailPoet with MailOptin offers a powerful solution for capturing leads and enhancing email marketing efforts on your WordPress website.
By following the steps outlined in this guide and optimizing your opt-in forms, you can effectively grow your email list and engage your audience. Remember to continuously conduct A/B testing, clearly communicate the value proposition, and keep your forms mobile-friendly to maximize conversions.
With the proper setup and design, MailPoet opt-in forms created with MailOptin can become valuable assets for your online marketing strategy.
Follow the guide below to learn how to create other popular types of email opt-in forms, and don’t forget to select MailPoet in the Integration panel: