
Would you like to connect your WordPress site to SendPulse to grow your email list and boost your marketing efforts?
If you have a website, your goal is to engage visitors, convert them into leads, and stay in touch through email. SendPulse makes it easy to do all that.
SendPulse is an email marketing platform that helps businesses create, send, and automate campaigns using a drag-and-drop builder and ready-made templates. It offers features such as segmentation, personalization, and automated workflows to deliver targeted messages based on user behavior.
By connecting WordPress to SendPulse, you can subscribe users, leads, and email subscribers to your SendPulse contact list and email your posts immediately after publication (or at a daily, weekly, or monthly basis) and send newsletters from your WordPress admin dashboard to your contact list.
In this guide, we’ll show you how to integrate your WordPress website with SendPulse using MailOptin.
Getting your SendPulse API Credentials
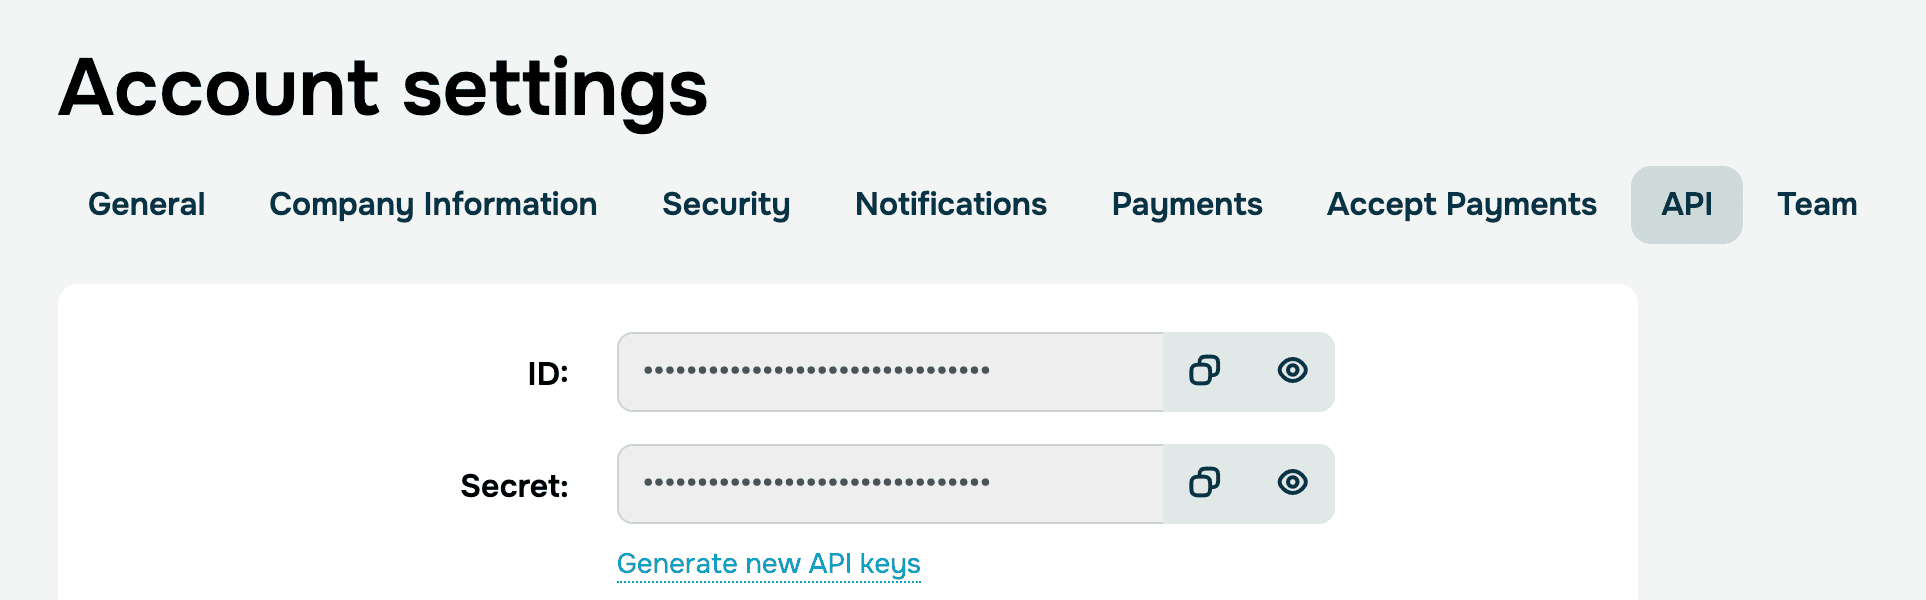
To get your Client ID and Client Secret, log in to your SendPulse account and go to Account Settings > API to find them.
Enter MailOptin as the API name and submit.
Integrating the SendPulse API Credentials with MailOptin
Now that you have your SendPulse API Client ID and Client Secret, the next step is to implement it in your WordPress site using the MailOptin plugin.
If you haven’t done so already, install and activate the MailOptin plugin on your WordPress website. Once the plugin is active, go to your WordPress dashboard and navigate to MailOptin > Integrations.

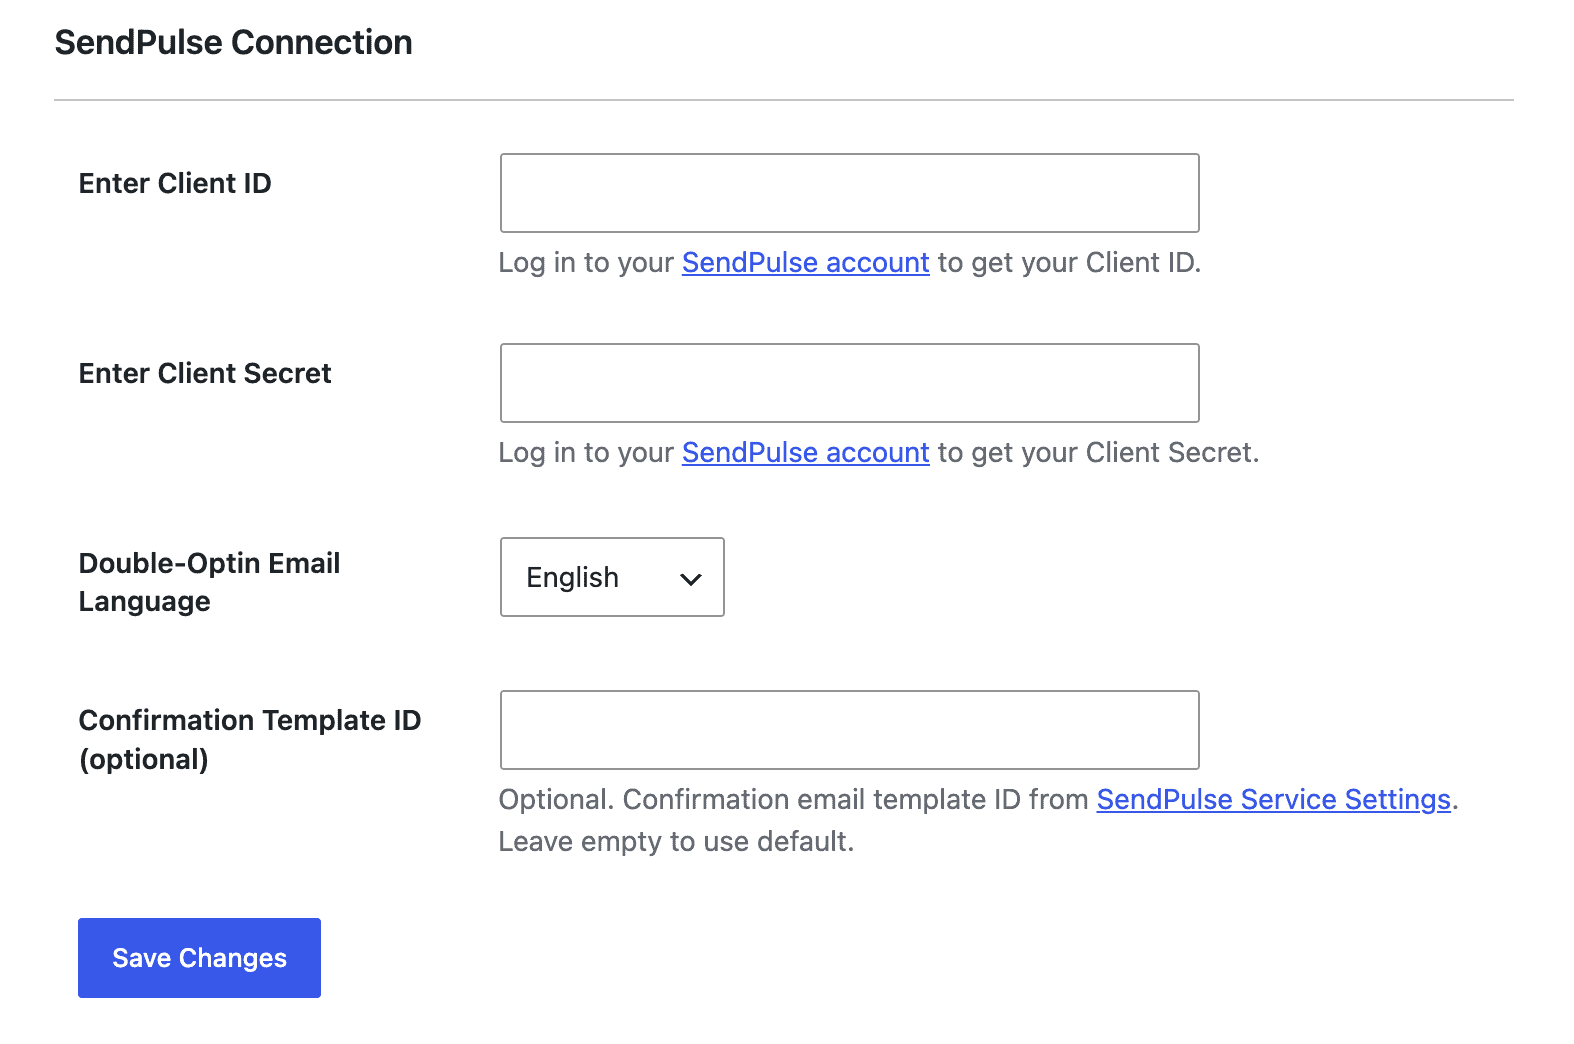
Open the SendPulse Connection section and enter your API Client ID and Client Secret. If you intend to enable double optin for your SendPulse WordPress forms created with MailOptin, select a language for the double optin email and optionally specify a template ID to use as the confirmation email content.
Important Note
It is important that you ensure the email address specified as MailOptin From Email in Settings is verified as a sender address in SendPulse if you intend to enable double-optin for your optin campaigns and email your mailing list subscribers in SendPulse whenever you publish a new post, send email digests of articles, or broadcasts from your WordPress admin dashboard.
Finally, hit the “Save Changes” button.
What’s Next?
Now that the connection is active, you can start creating email opt-in forms, pop-ups, slide-ins, and notification bars connected to SendPulse and sending new post notifications and email digests to your contacts in SendPulse.
We hope this article has helped you learn how to connect WordPress to SendPulse.