How to Set up WordPress Content Lockers
Looking for an easy way to grow your email list? Set up a content locker on your WordPress site.
Content lockers are a great way to restrict content on your site until site visitors perform specific actions. These actions can include anything from buying premium products to giving out their email information before they can access the restricted content on your site.
In this article, we’ll take a closer look at what precisely a content locker is and how it can be helpful for your business. We’ll also show you how to quickly set up one on your WordPress site using a robust plugin.
Why use a content locker on your WordPress site?
A WordPress content locker is an online tool that restricts visitors from accessing specific content on your website until they perform certain actions.
For instance, you can restrict blog posts or downloadable content until site visitors give you their email addresses. Similarly, you can also “lock” high-quality articles or premium members-only content and only let specific user roles on your site access the restricted content.
Let’s take a look at some of the benefits of setting up a content locker on your WordPress site:
- Helps grow your email list. One of the significant benefits of using a content locker is that it allows you quickly grow your email list. This is because you can ask site visitors to give out their email addresses before they can access premium content on your WordPress site. As a result, you can grow your email list and enhance your email marketing campaigns.
- Increase engagement. Content lockers are also great for increasing engagement on your social media posts or simply diverting traffic to another page on your website. For instance, you can ask site visitors to follow your social media accounts before they can access specific content on your website. As a result, you increase engagement on your social media accounts and help more users stay connected with your brand.
- Offer premium content. Using a content locker on your WordPress site is a great way to offer premium content by hiding it behind a paywall. This also helps provide a visual “preview” of the premium content that the customer can fully access once they subscribe to your membership or purchase the online course.
- Offer content upgrades. A WordPress content locker is also valuable for up-selling content upgrades to site visitors. For instance, you can display an “upgrade your plan” opt-in CTA box to customers who have already subscribed to you. This makes the pop-up offer more relevant to the user while also encouraging them to upgrade their subscription plan to access even more premium content.
Two ways to use a content locker in WordPress
Now with a better understanding of what content lockers are and why they are helpful, let’s take a look at some of the ways you can use one on your WordPress site:
#1: Offer downloadable content behind a lead magnet
One of the most effective ways to encourage users to subscribe to your newsletter is by offering premium content for users’ emails. For instance, you can let users download an ebook from your website by entering their email addresses. Once they do that, you can send the download link to their email address. This way, users will access premium content without paying a penny while you keep adding new entries to your email lists.
#2: Create opt-in CTA pop-ups
Another great way to use a content locker on your WordPress site is by creating opt-in CTA pop-ups. For instance, you can display a CTA pop-up on your site’s “Members-only” page for regular site visitors only. This way, users interested in your premium content can quickly subscribe to your membership program to access the restricted or “Content-locked” page on your WordPress site.
How to set up a content locker on your WordPress site
We’ll show you how to set up a content locker on your WordPress site using the intuitive MailOptin plugin.
While a content locker is a great thing to have on your site, WordPress out of the box doesn’t have options that let you set one up. We recommend using MailOptin to quickly set up a content locker on your site, even if you’re not particularly tech-savvy.
MailOptin is an all-in-one solution for converting site visitors into subscribers that lets you create, customize, and showcase professional opt-in boxes on your WordPress site.
It features an easy-to-use form builder that lets you create attractive-looking pop-up lightboxes and display them based on certain conditions. This also means you can content lock specific parts or pieces of your content and ask site visitors to perform particular actions before accessing the restricted content.
For this tutorial, you will need a WordPress site and some content published on it. In addition to this, you will also need the MailOptin plugin to create a professional-looking opt-in form and display it along with the content locker on your site.
Step #1: Install and activate the MailOptin plugin
Get the MailOptin plugin and install it on your WordPress site.
Navigate to Plugins → Add New from the WordPress admin panel and click on the Add New button. Upload the zip file and install and activate the plugin on your WordPress site.
Step #2: Create and customize your opt-in form
With the MailOptin plugin installed on your site, navigate to MailOptin → Optin Campaigns and click on the Add New button.
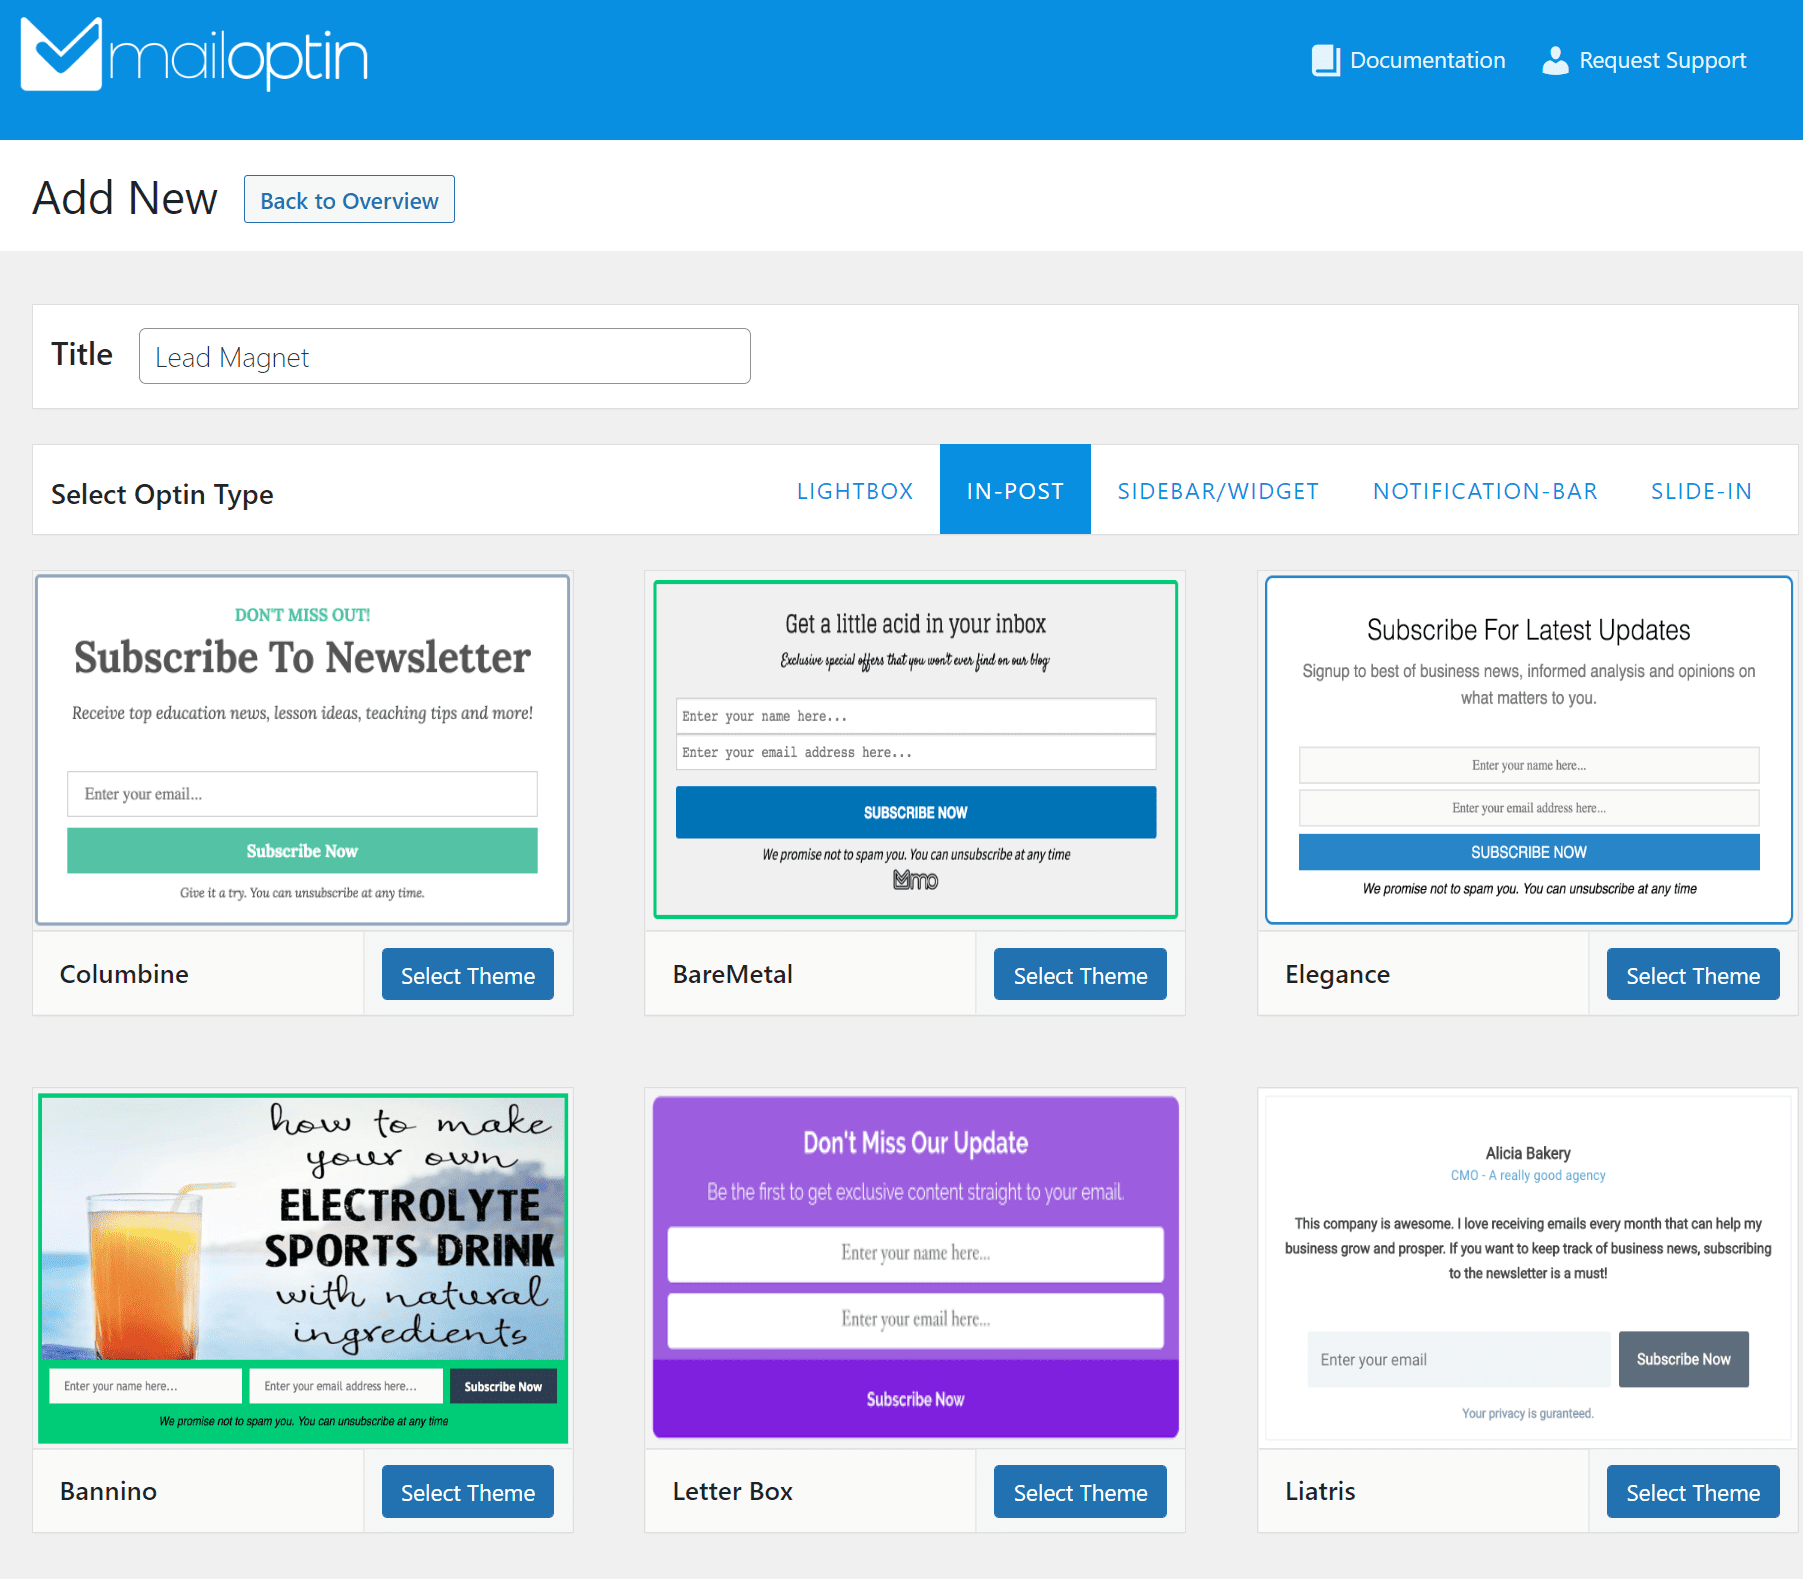
Give your opt-in form a name and select In-Post from the Select Optin Type section. Next, select the template you want to start customizing. We’ve decided to go with the Letter Box theme for this example. Once you click on the Select Theme button, you will automatically be redirected to the customization page.
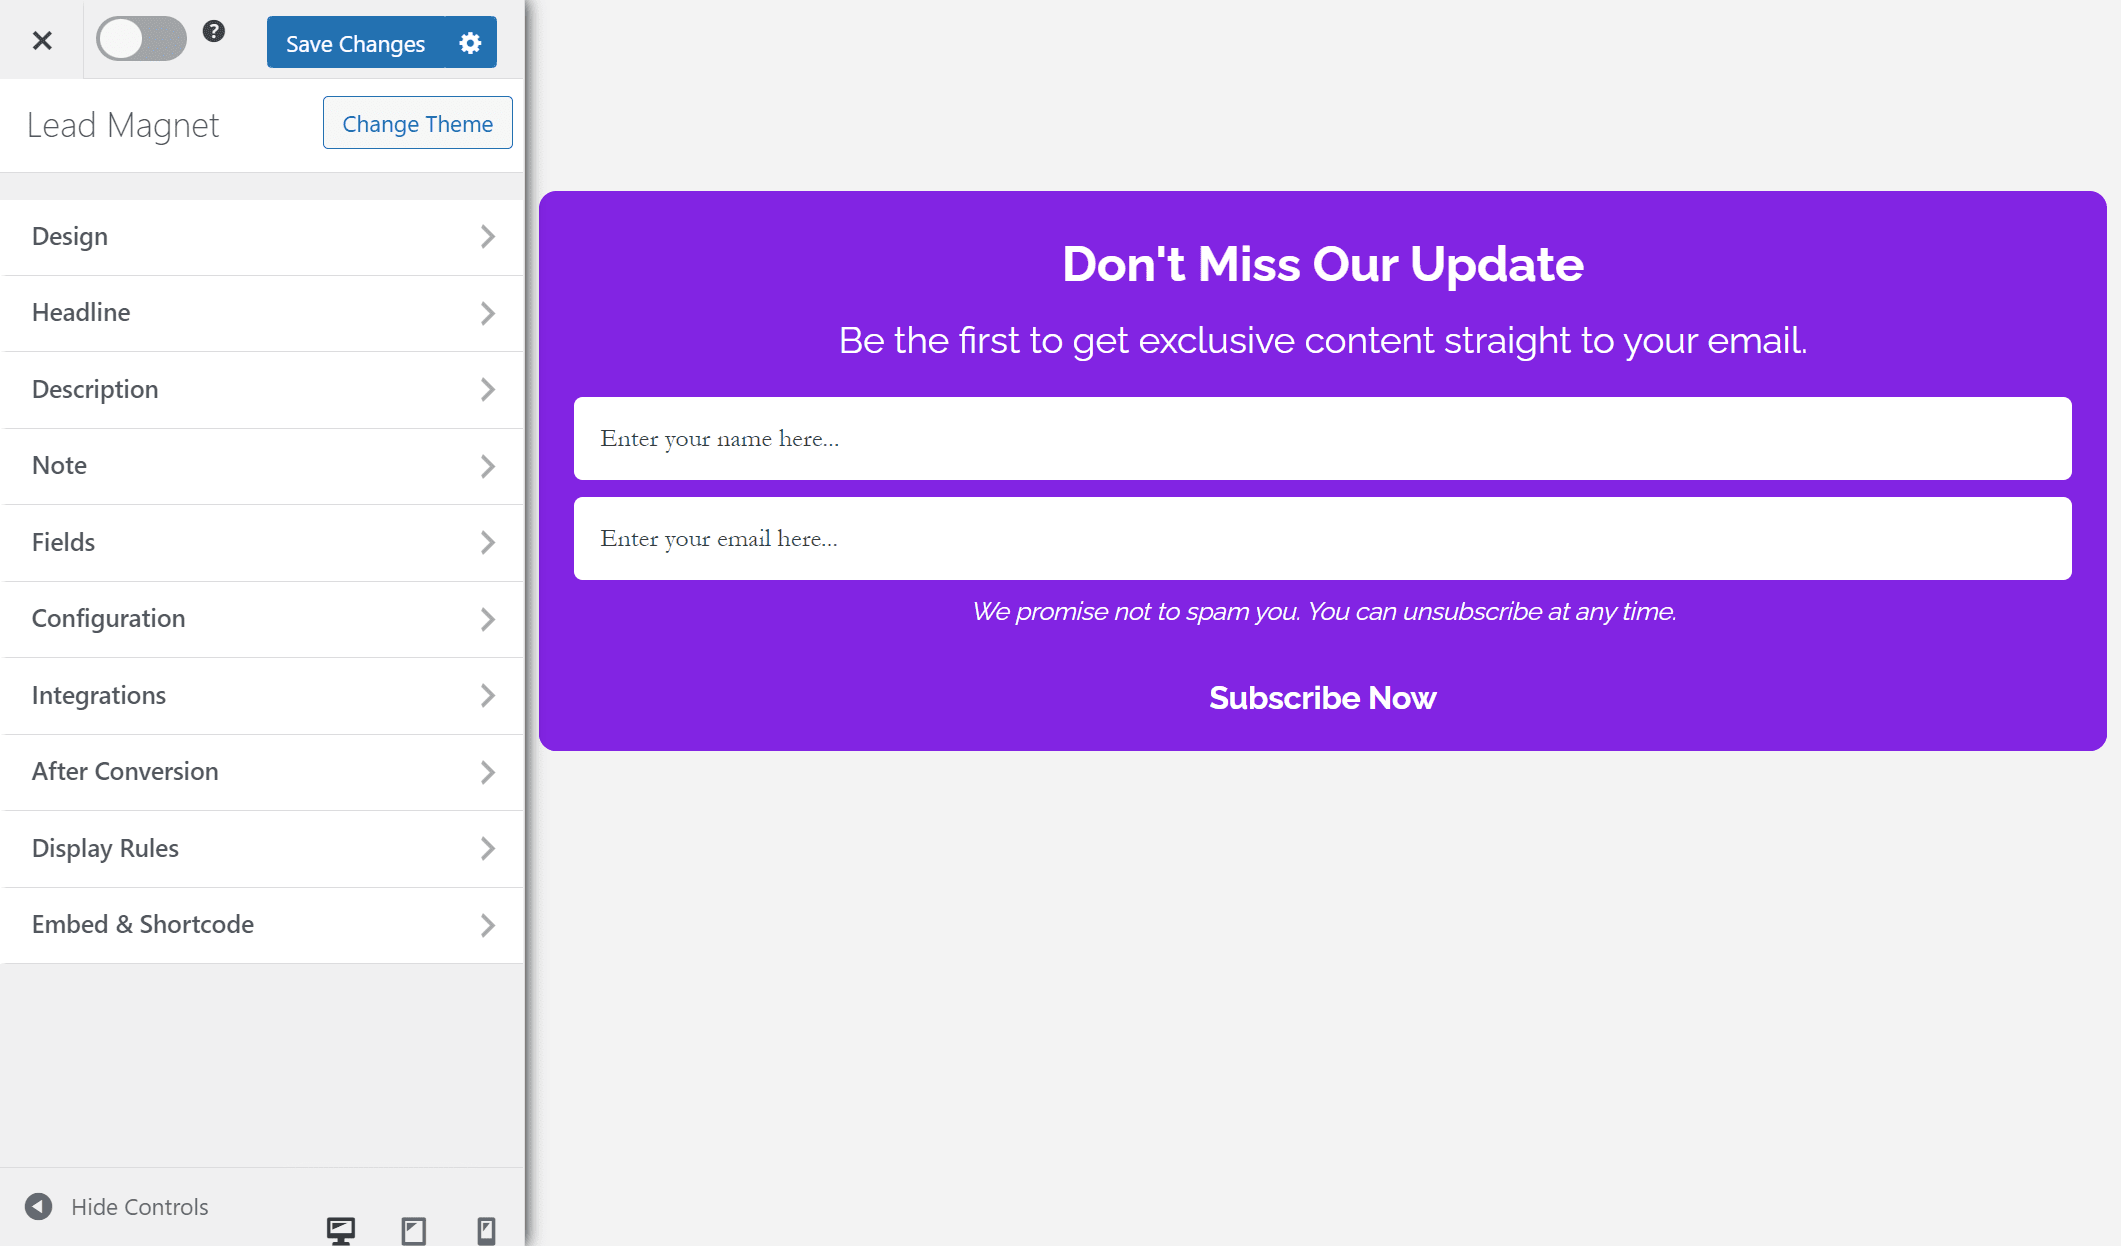
You can customize how the opt-in form will look and feel on the front-end of your WordPress site using the options here. Click on the Design tab to customize the background color of your opt-in form. You can also customize the typography using the Headline and Description menus and set text colors.
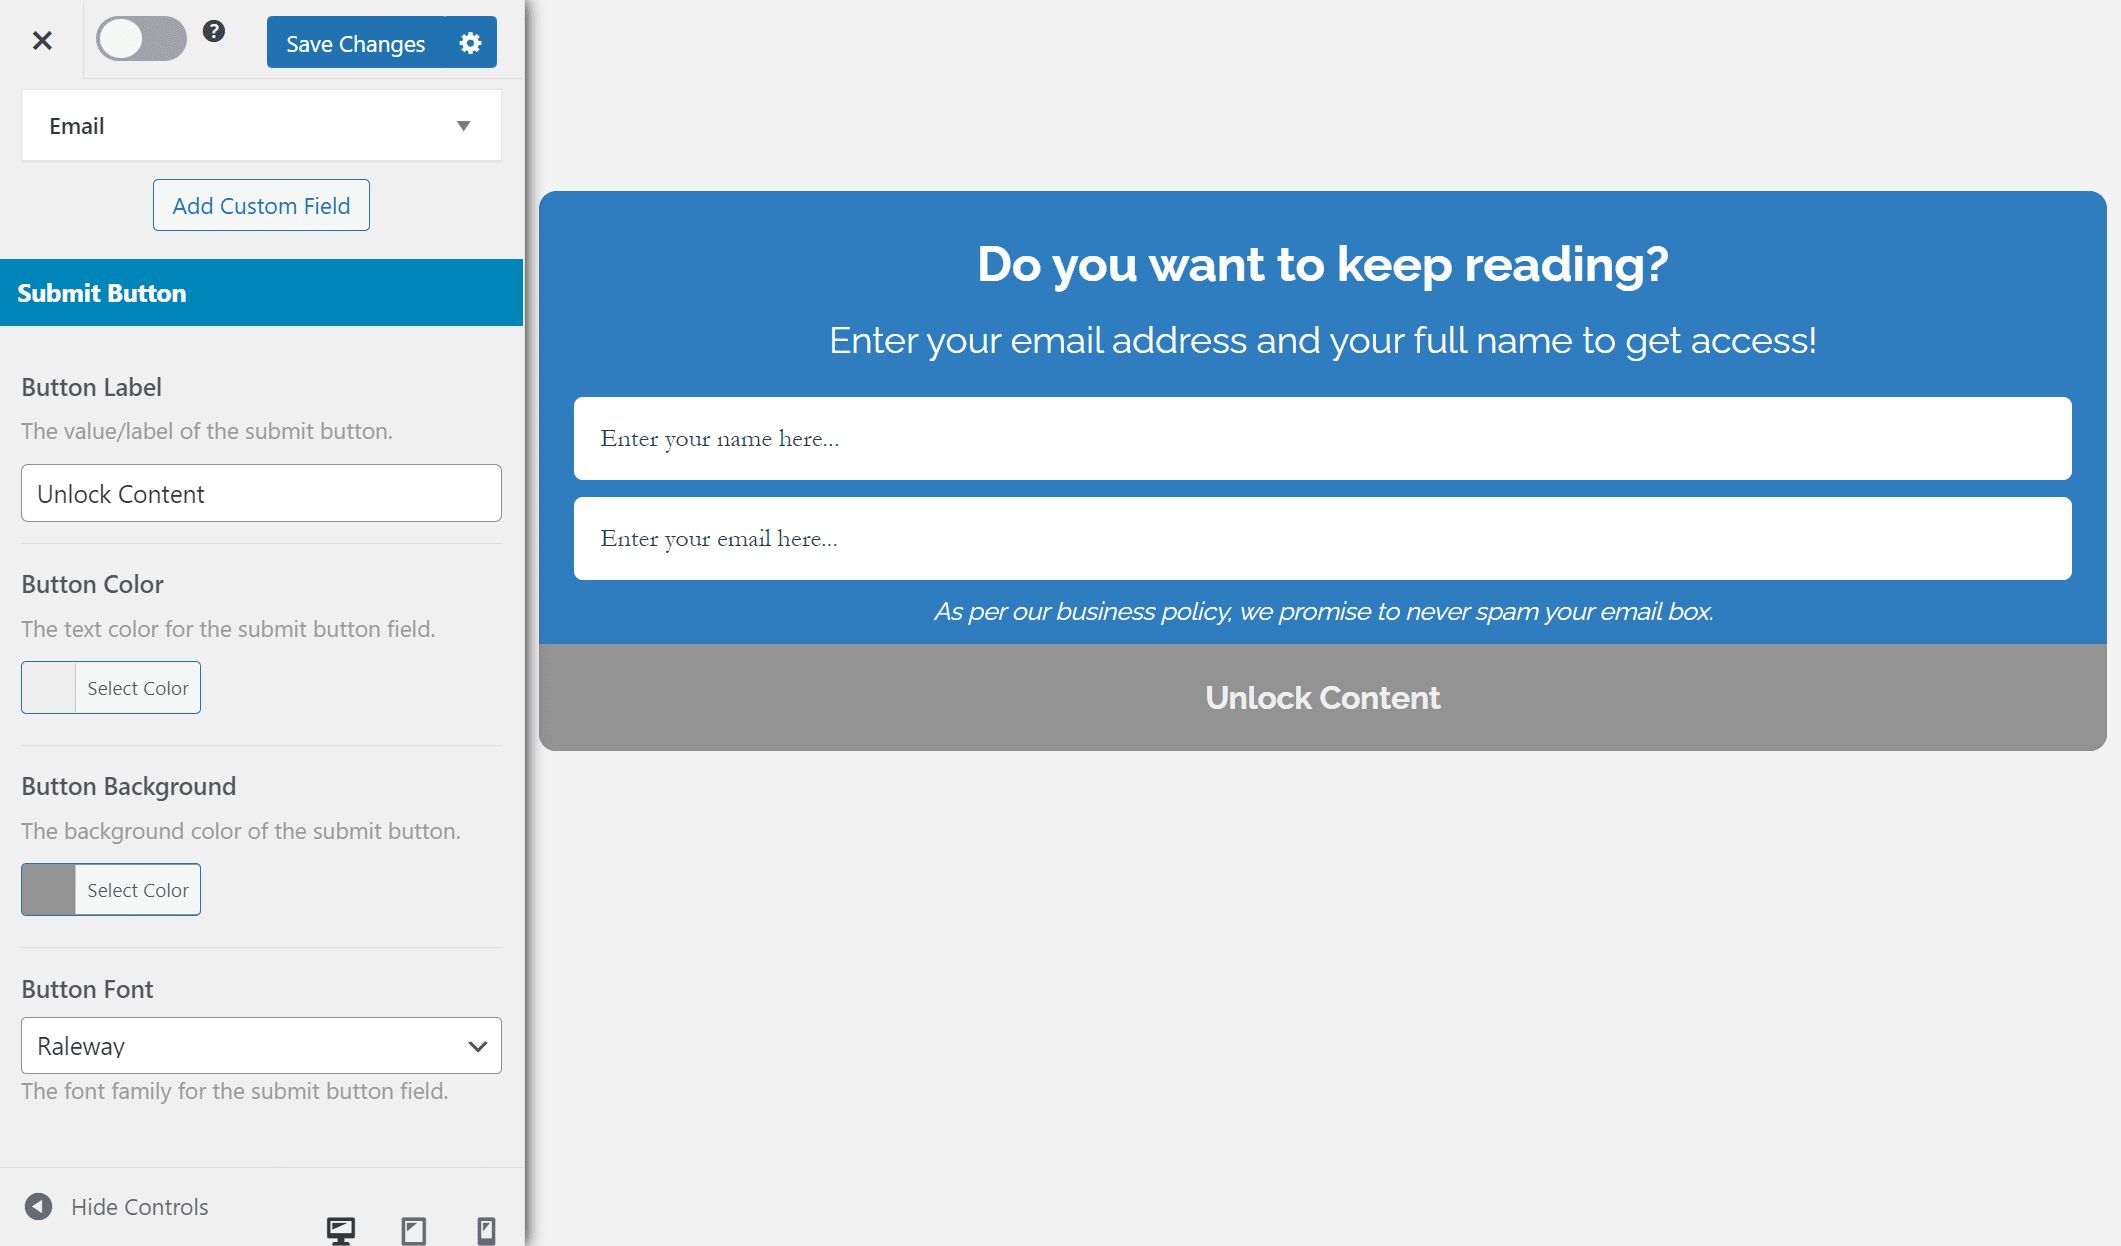
It’s also essential to display custom button text for the content locker to look professional and relevant to your audience. Go to the Fields section and scroll down to the Submit Button section. Enter the custom text using the Button Label text field and set the button color.
Step #3: Create a WordPress content locker
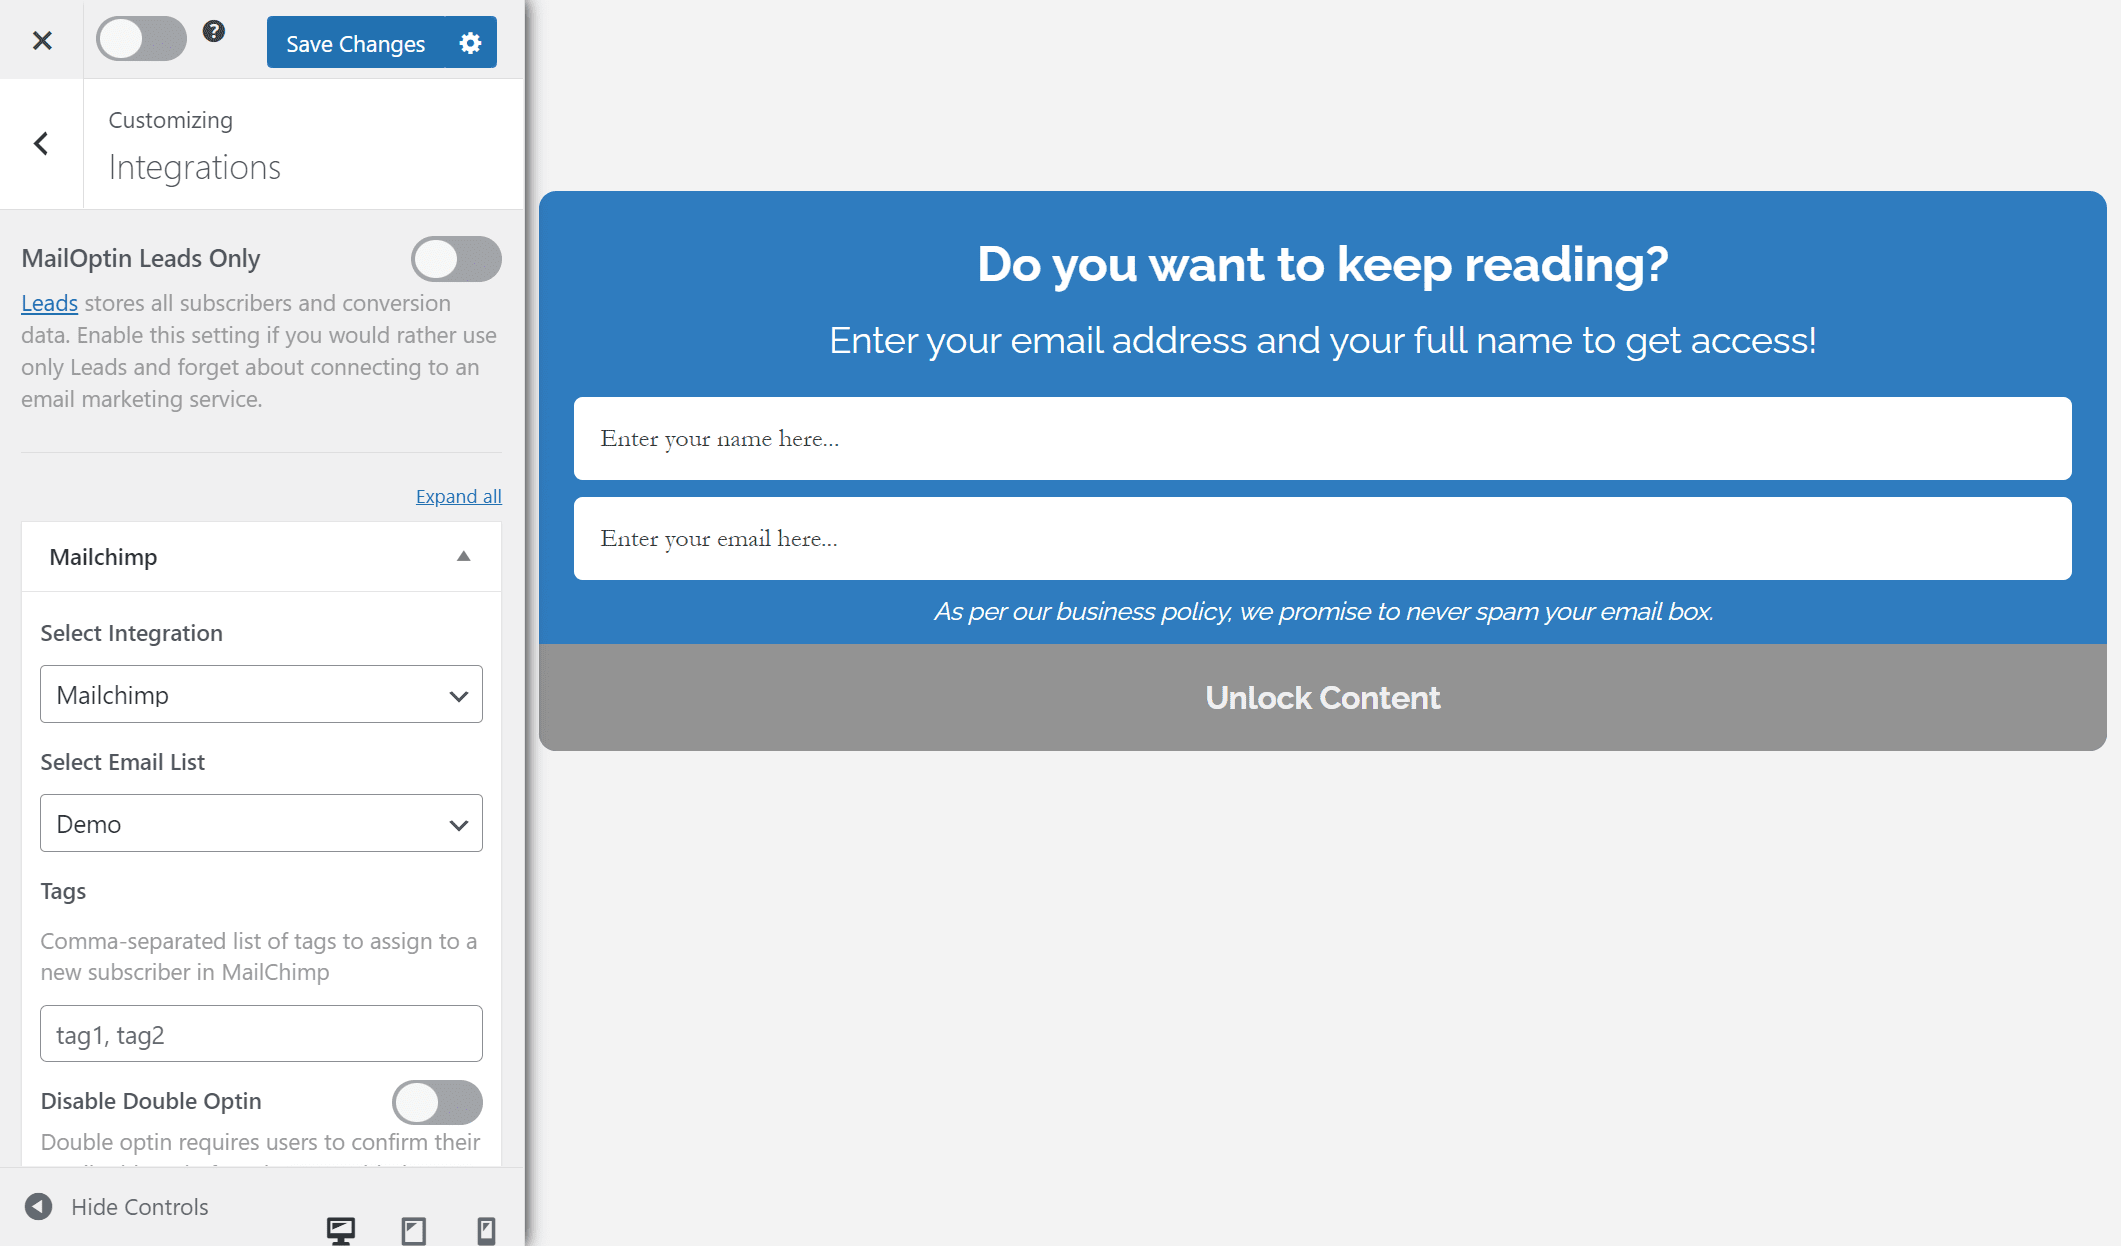
With your opt-in form looking exactly how you want it to, click on the Integrations button and select your email service provider using the Select Integration dropdown menu. To demonstrate, we’re using Mailchimp.
Now, click on the Configuration button and select the Lock Content Below Optin checkbox.
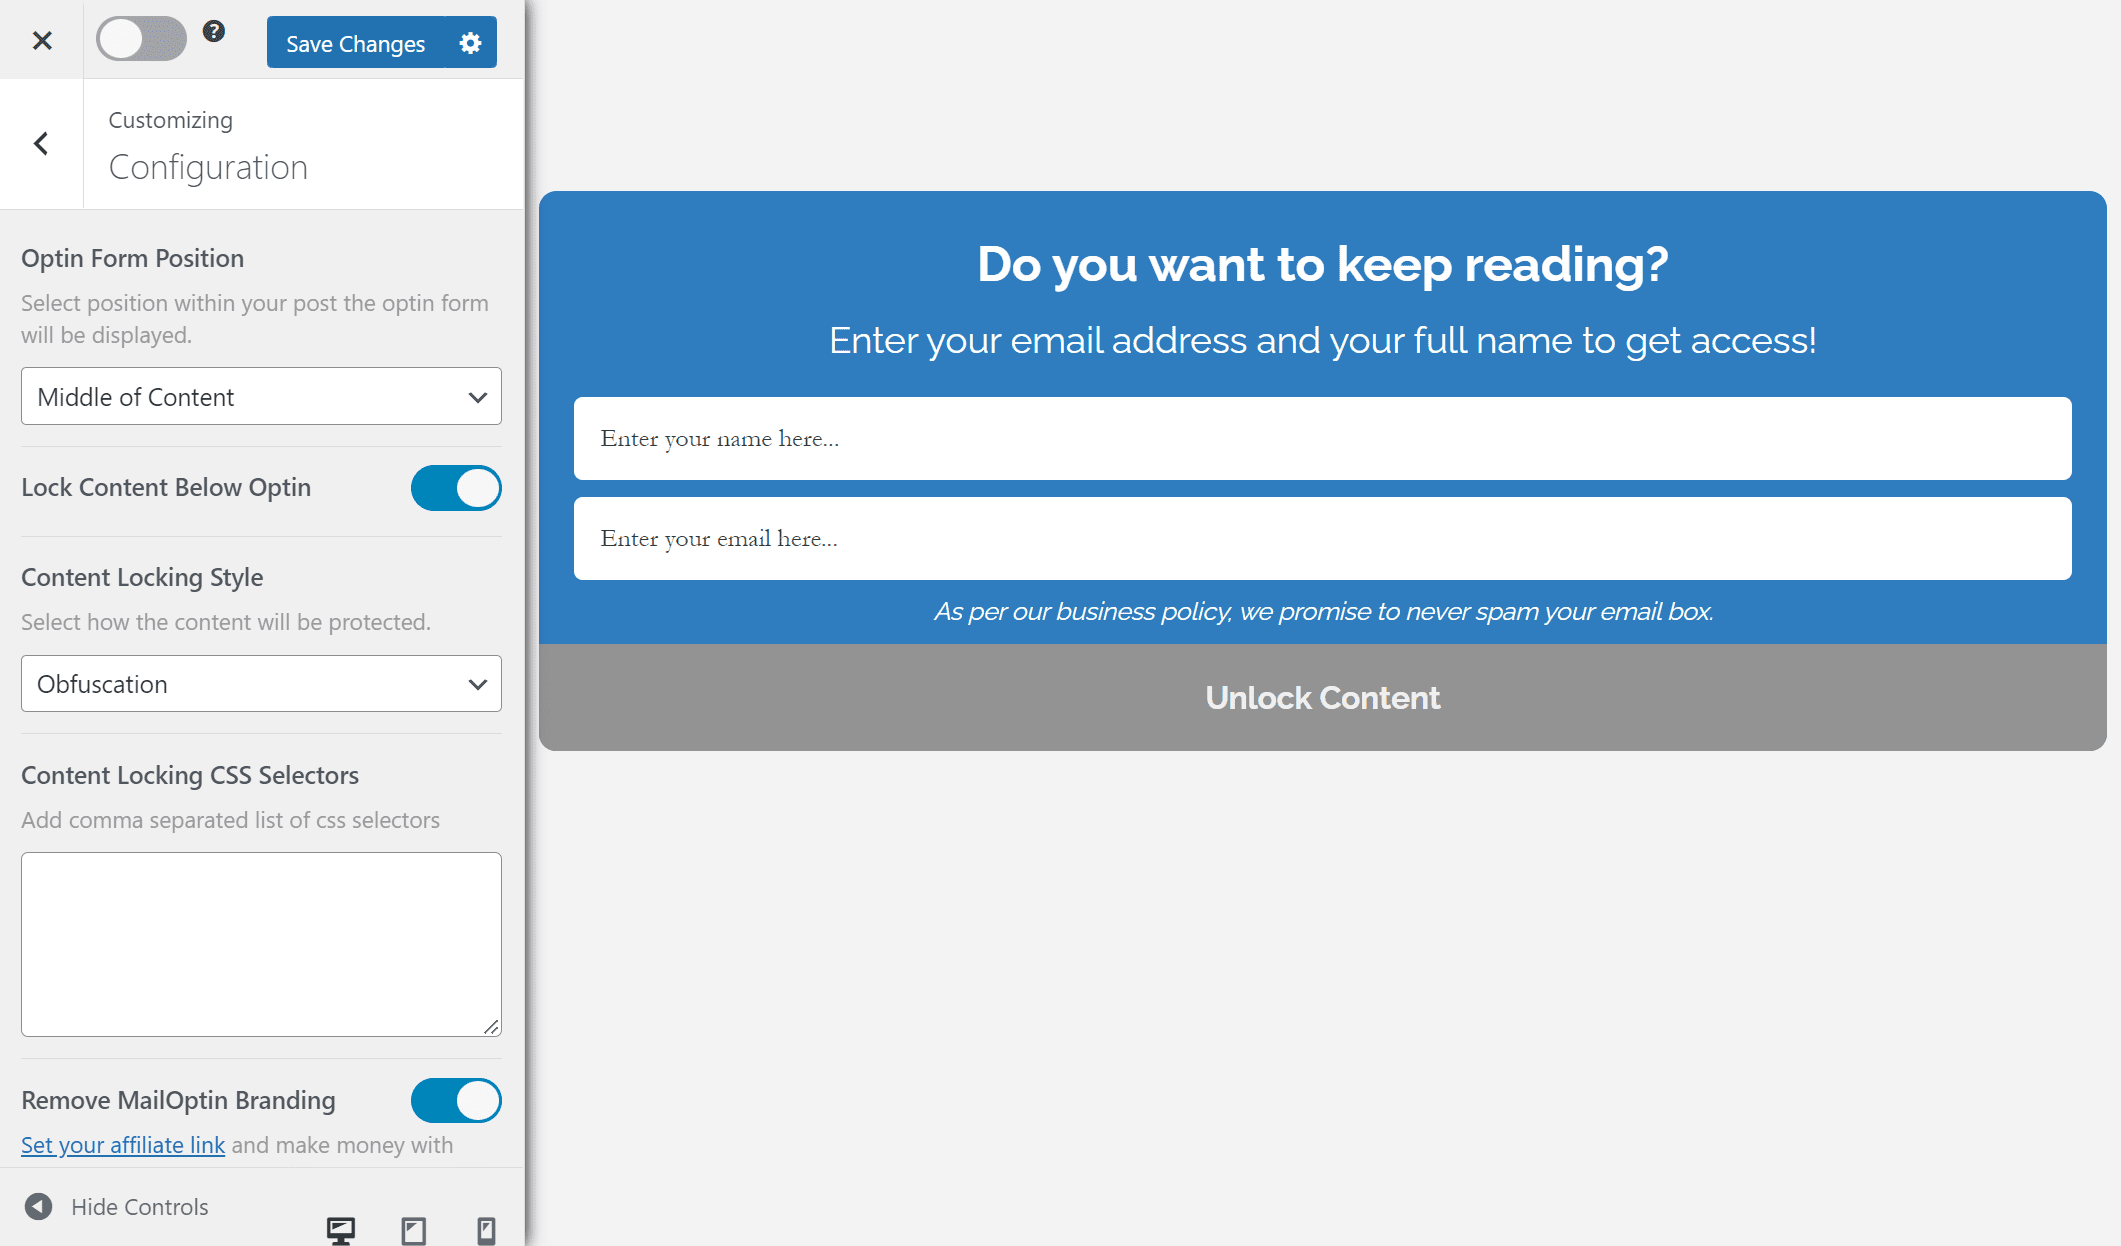
You will see new options appear. For example, you can select how the content locking style will display the restricted content and even add your custom CSS selectors. Once you’re done, click on the Save changes button and remember to activate the opt-in form using the checkbox next to the Save changes button.
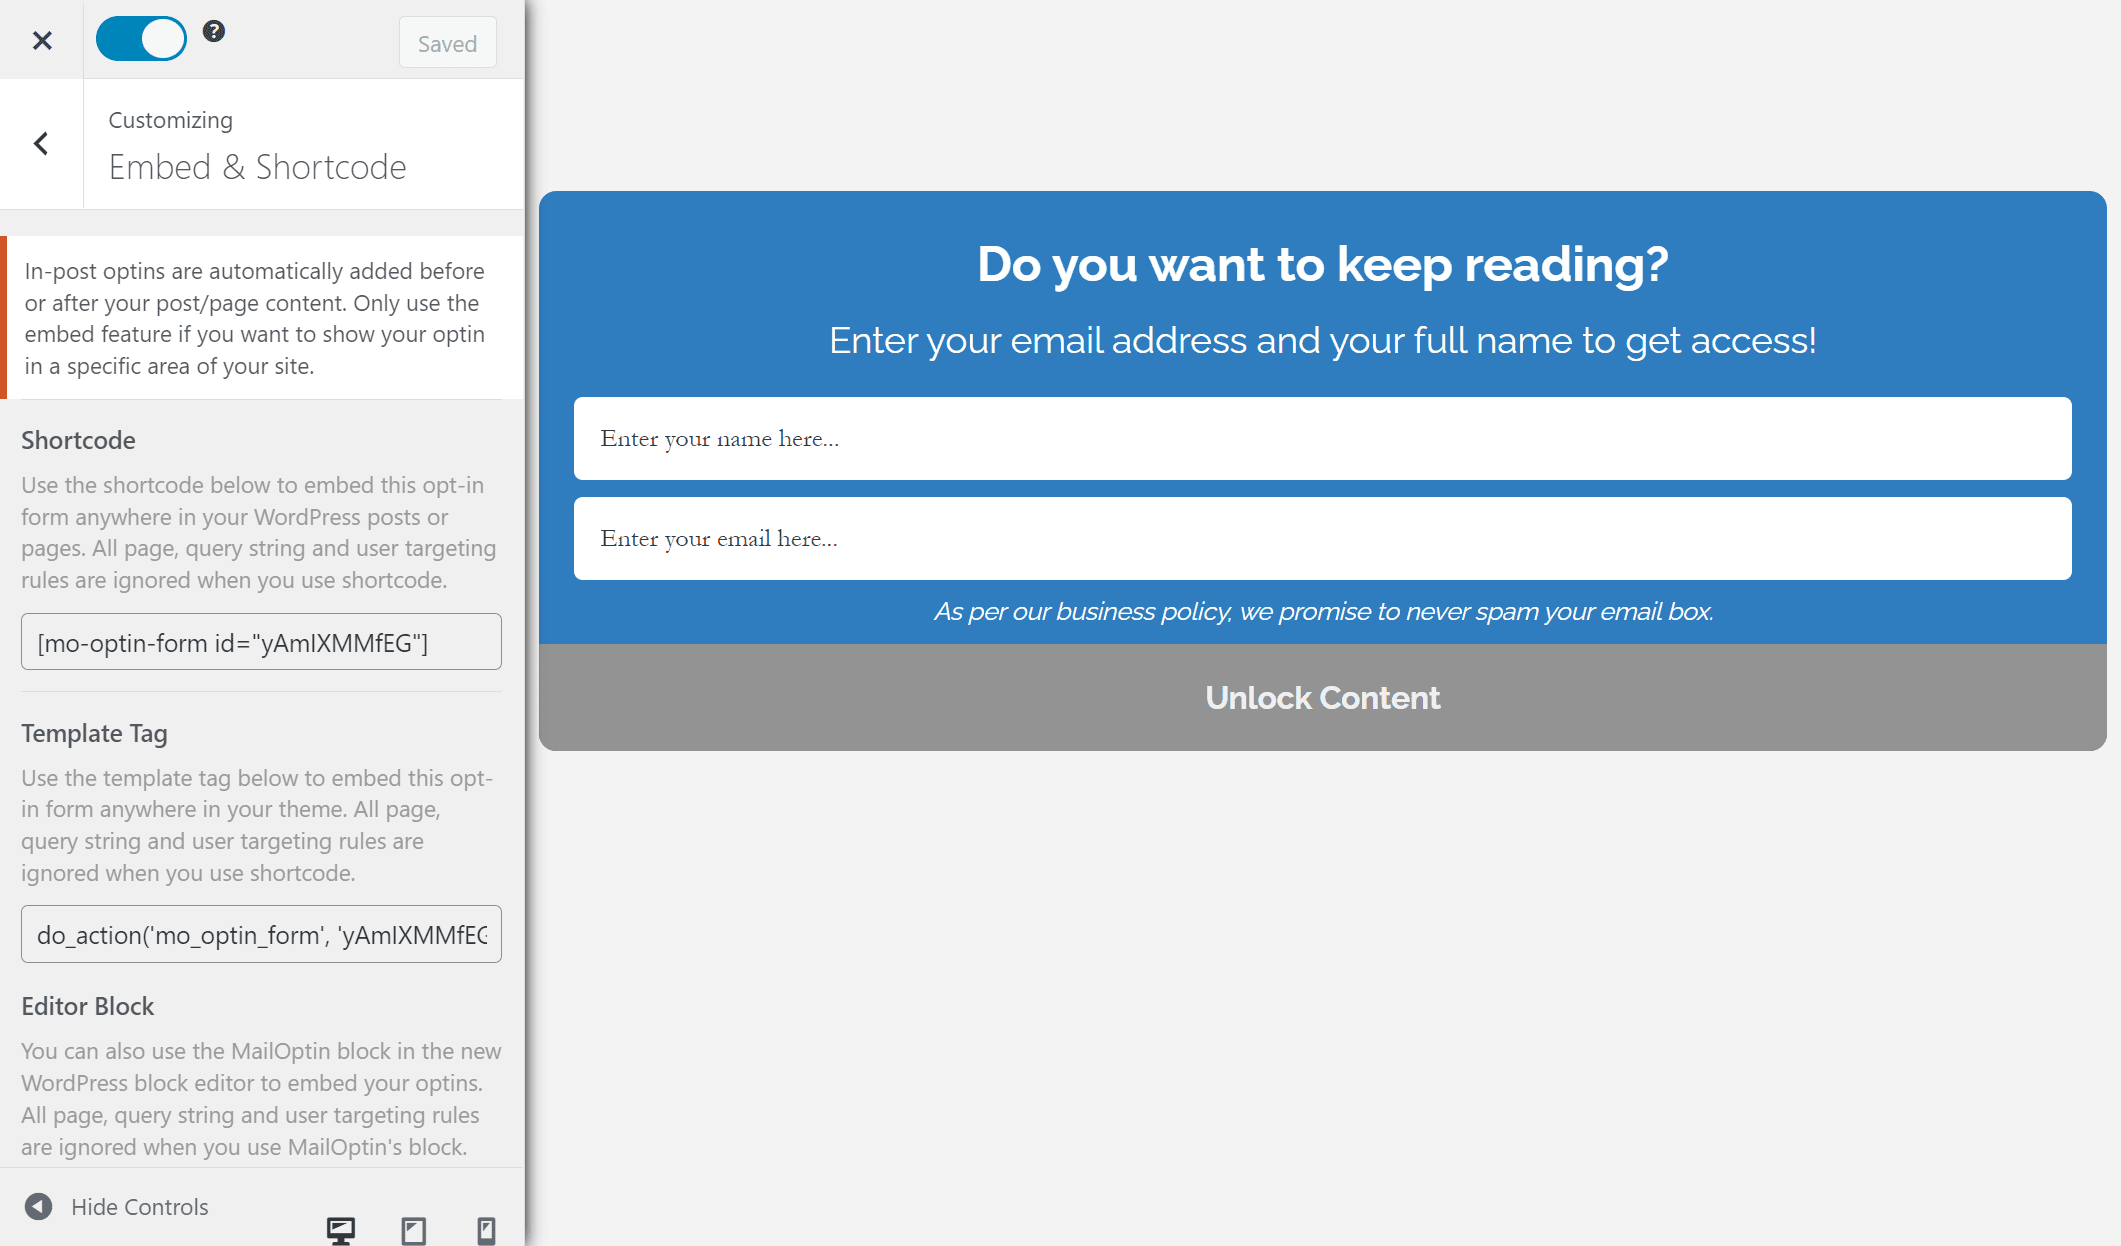
Before leaving the form customization page, click on the Embed & Shortcode menu and copy the shortcode for the opt-in form. Also, disable the Show Optin Globally checkbox using the Display Rules → Page Targeting menu.
Now, navigate to the page or post you want to add a content locker to and paste the shortcode exactly where you want the content locker to appear.
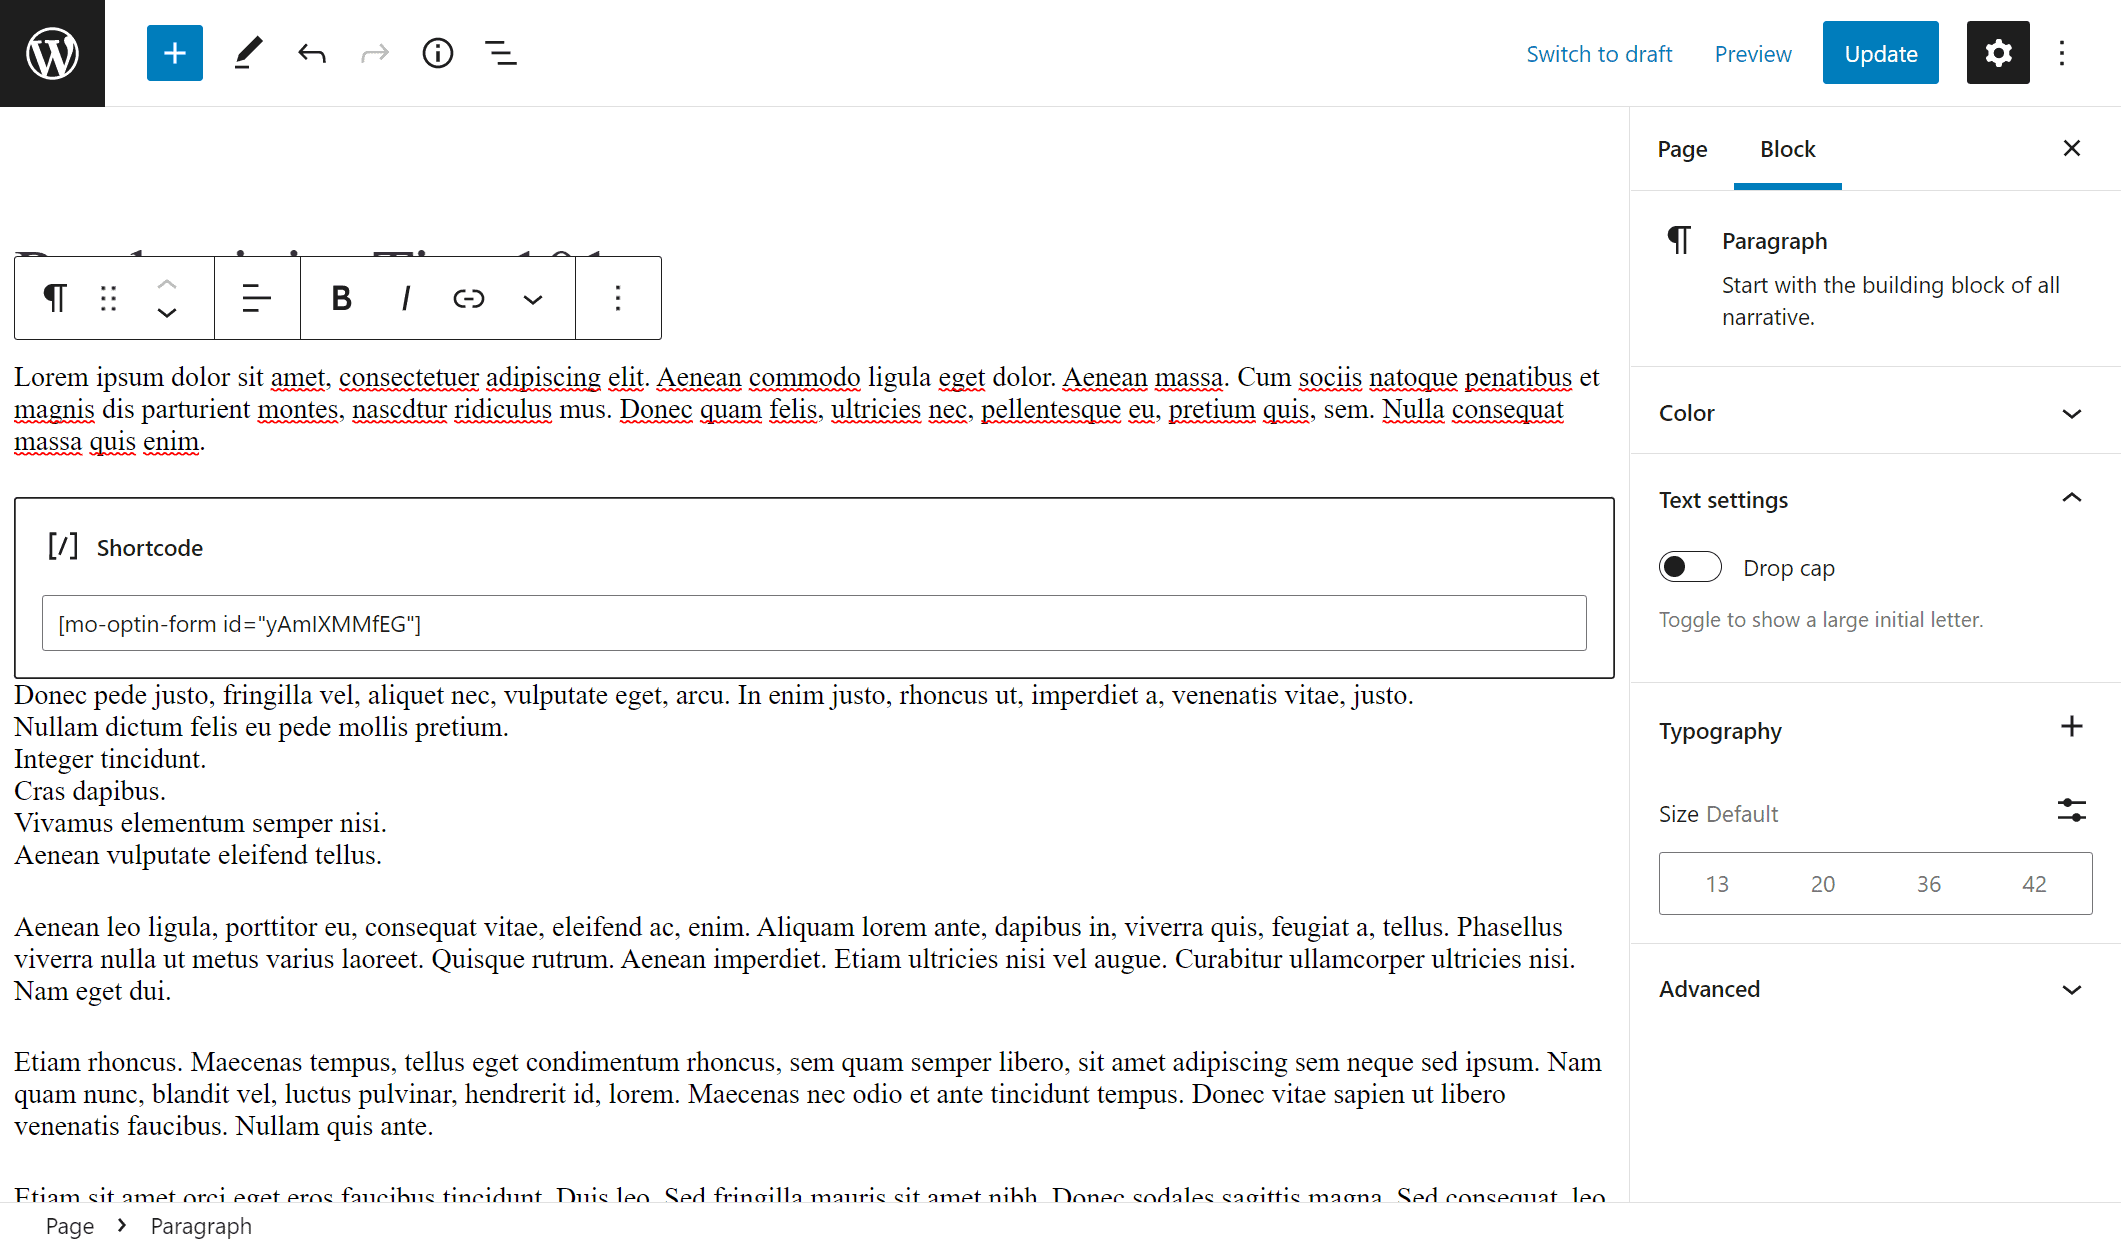
Make sure to click on the Update button to continue.
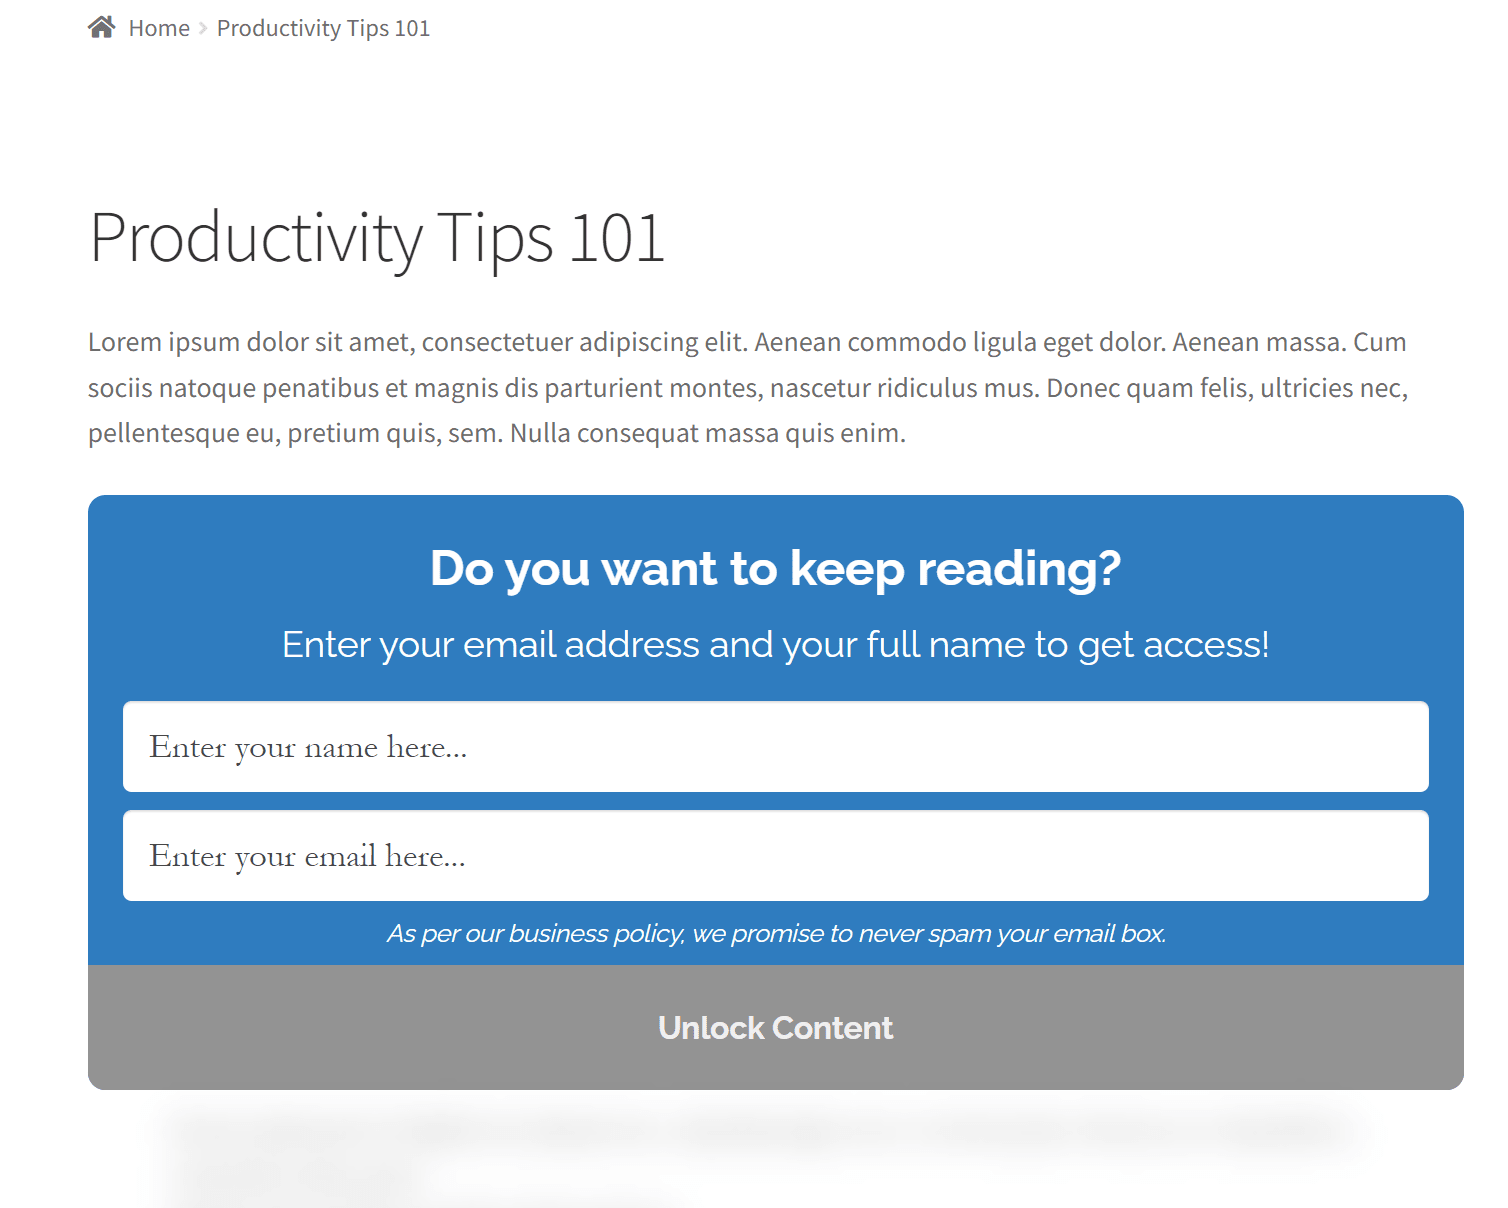
Site visitors will have to enter their email address and name before they can fully access the premium content on your WordPress site.
Conclusion
Since WordPress out of the box doesn’t feature a content locker for gating content, using an all-in-one solution such as MailOptin is your best option. You can create an attractive-looking opt-in form and display it anywhere on your WordPress site using a shortcode.
Setting up a content locker can grow your email list and enhances your email marketing campaigns. This way, you can let users access premium content in exchange for their email. In addition to this, content lockers give you more control over who has access to specific pages and help you offer a unique browsing experience on your WordPress site.
Ready to quickly set up a WordPress content locker? Get MailOptin today!
