How to Email Selected WordPress Posts to Users & Subscribers

Do you want to email selected WordPress posts to users and subscribers of your WordPress site?
Imagine the power of curating specific content and delivering it directly to your audience’s inbox. With MailOptin, you can effortlessly select your desired posts, craft engaging email campaigns, and send them to your target audience.
In this tutorial, you will learn how to send a list of selected published posts or posts of a custom post type (such as WooCommerce, The Event Calendar, Easy Digital Downloads, etc.) as an email newsletter to either registered users of your WordPress site or your email subscribers on Mailchimp, Campaign Monitor, Sendy, Constant Contact, AWeber, Kit (ConvertKit), MailerLite, GetResponse, Klaviyo, ActiveCampaign, Brevo (Sendinblue), SendGrid, Mailjet, Keap Max Classic (Infusionsoft), Zoho Campaigns, Moosend, Vertical Response, NewsMAN, CleverReach, iContact, Mailgun, E-goi, Elastic Email, WooCommerce, MemberPress, Easy Digital Downloads, Paid Memberships Pro, LearnDash, GiveWP, Restrict Content Pro, Tutor LMS , etc.
Whether you’re a content creator looking to spotlight your best work, a marketer aiming to boost engagement with evergreen content, or a business owner wanting to share industry insights selectively, this tutorial will equip you with the tools and knowledge to master the art of curated content emails.
Getting Started
To begin, you need to install and activate MailOptin on your WordPress site.
Next, if you are sending emails to your list of subscribers hosted on any of our supported email marketing services, please make sure you connect MailOptin with your account.
You can skip this step if you are sending emails to registered users of your WordPress website.
Setting Up The Broadcast Feature
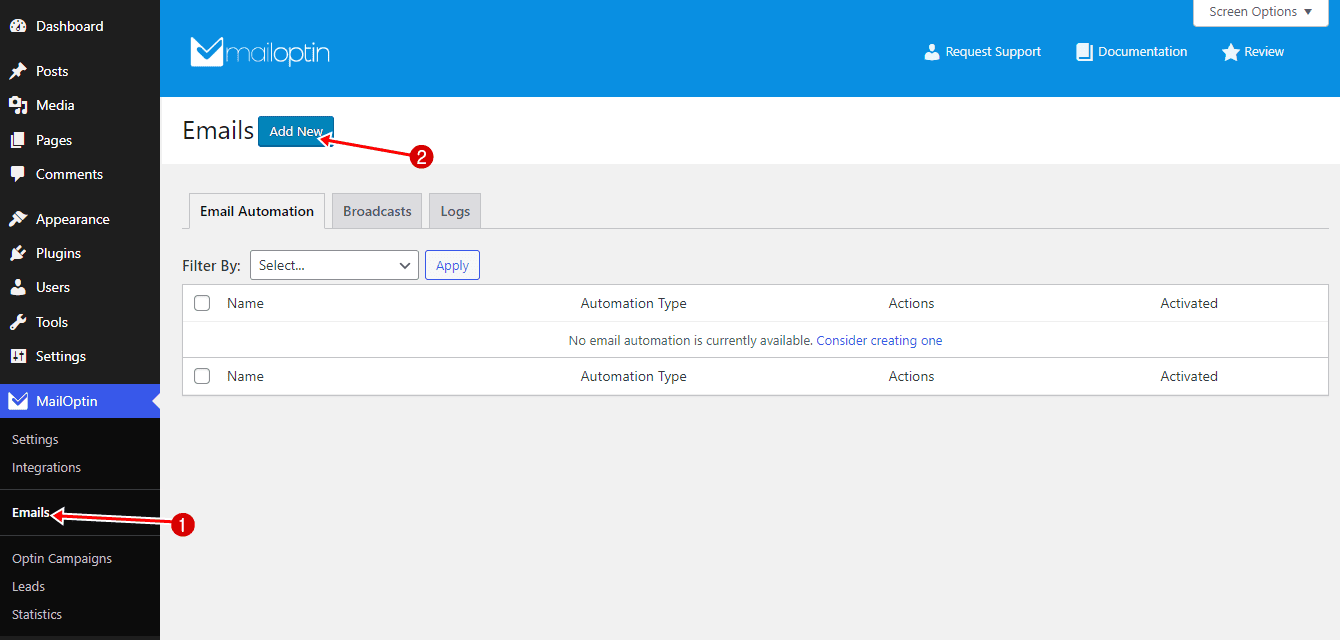
To do this, go to MailOptin >> Email >> Add New
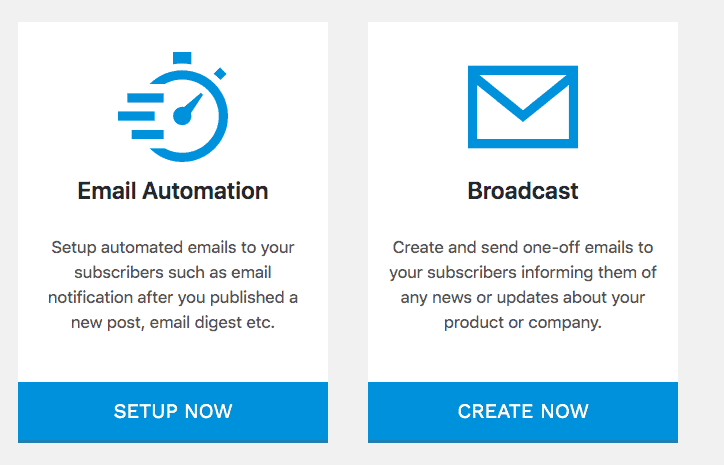
Click on “Create Now” under Broadcast.
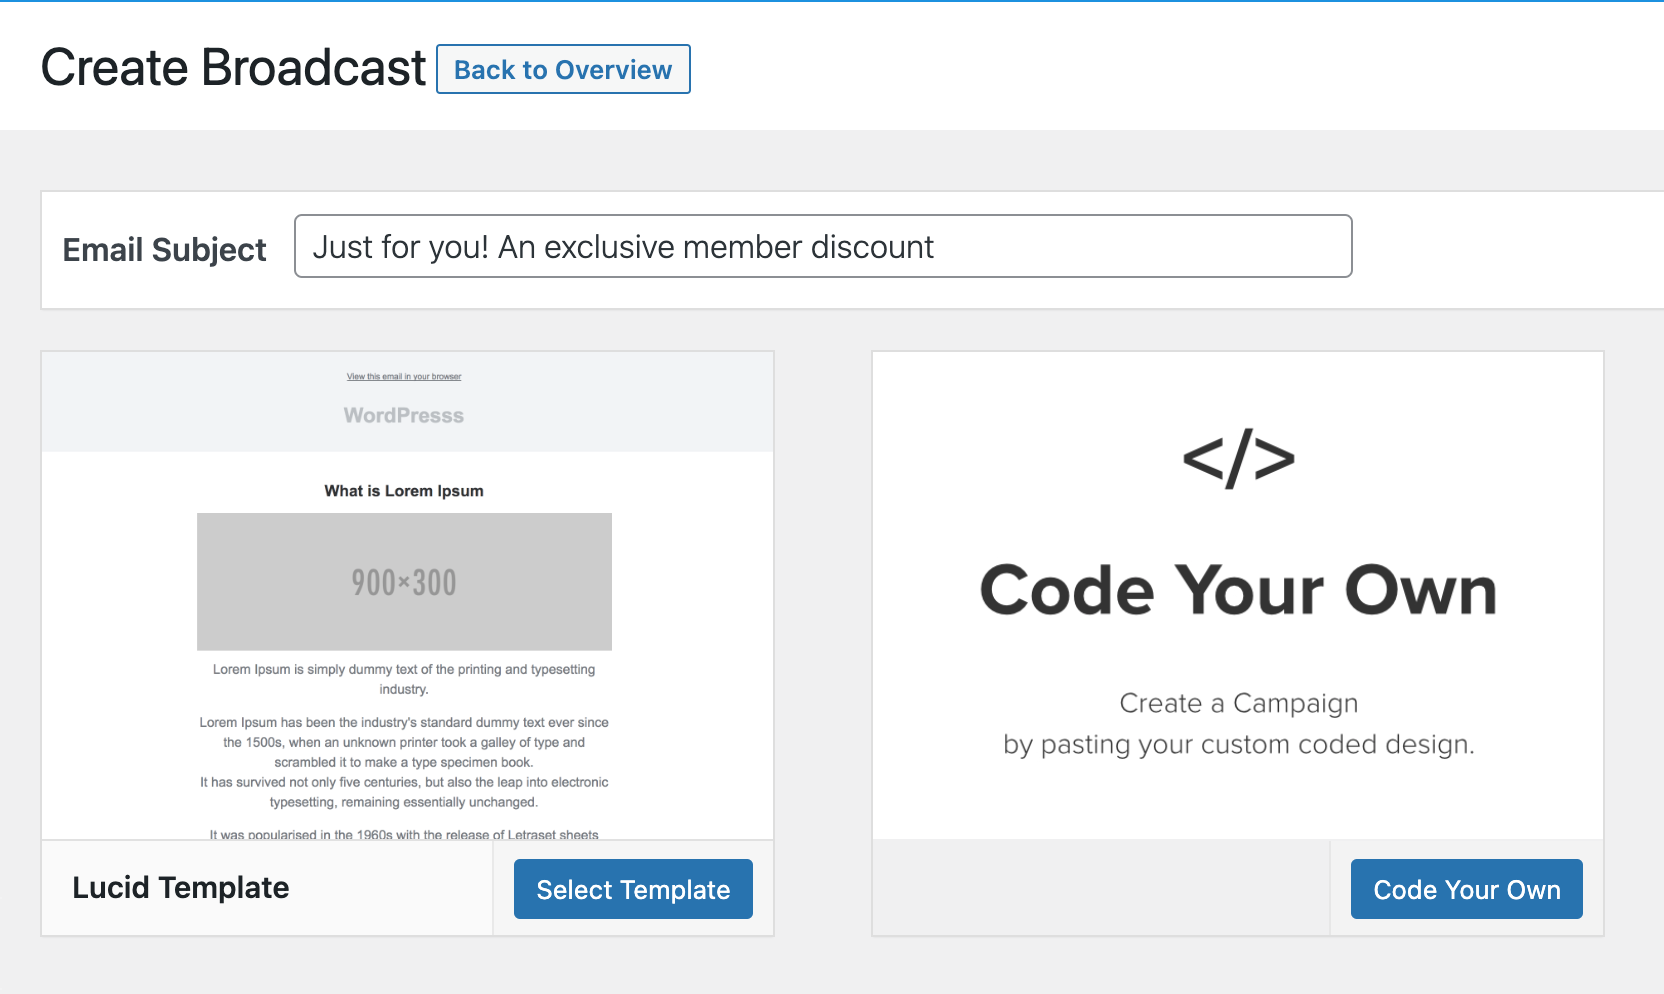
Enter the subject of the email and select your preferred template. You will then be redirected to the email builder to create and design the email content.
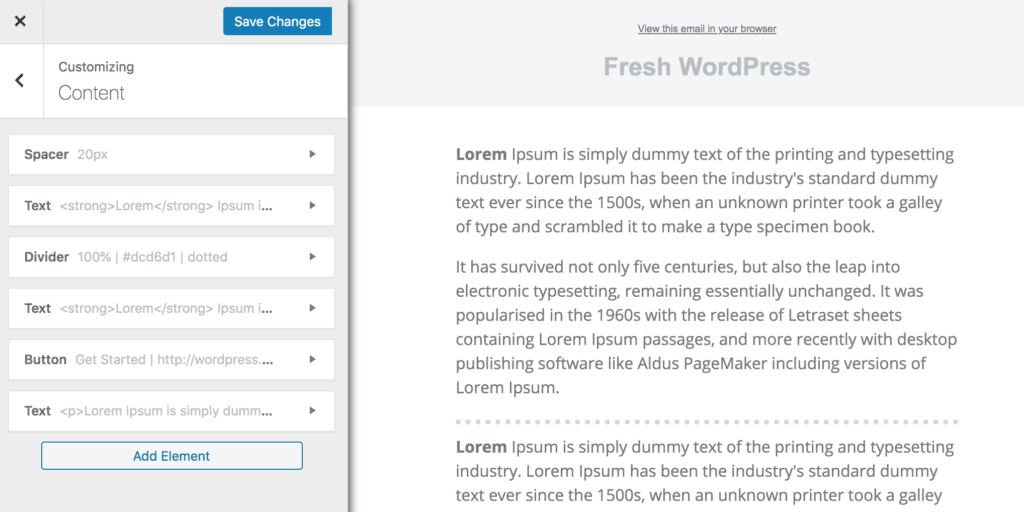
Here’s how the email builder looks and works. First, you write on the content panel and see a live preview on your right screen.
Sending a List of WordPress Posts
To select the list of posts to send as an email newsletter, click the “Add Element” button and select the “Posts” element.
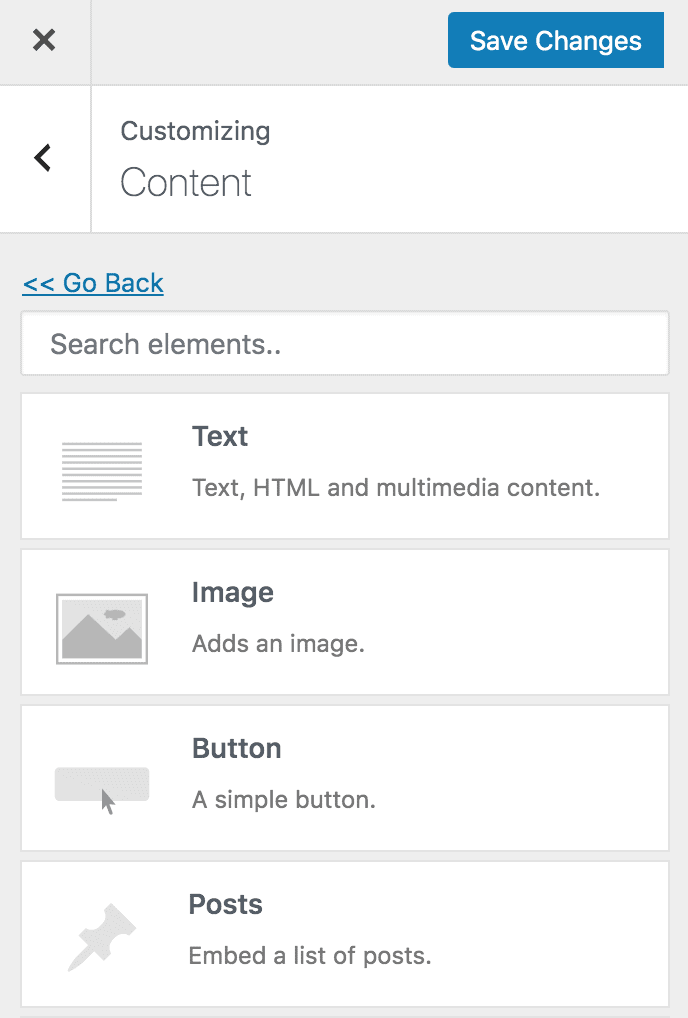
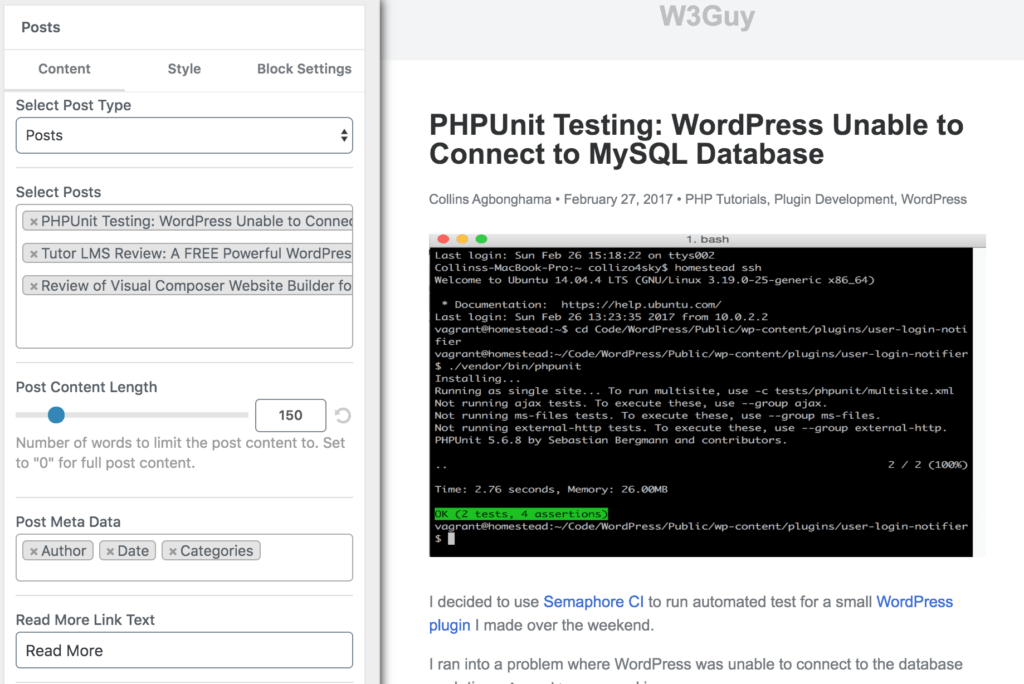
Open the Posts element, choose the custom post type (defaults to posts), and search and select the posts you want to send. You also have the option to style the post display, hide feature images, select the post meta, and much more.
When you are done crafting the email content, open the ‘Settings’ panel, set the email subject, and select the email newsletter recipients. This can be your website’s registered users (you can send to a specific number of users, users belonging to particular roles, or all users) or subscribers of your email list in your marketing software, such as Mailchimp.
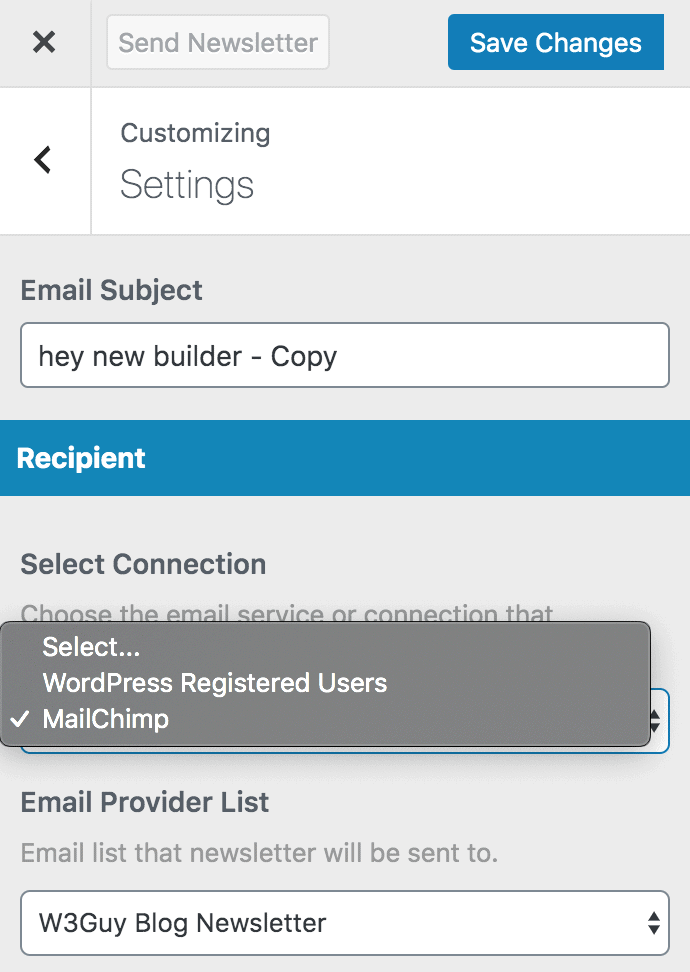
Next. click on the “Save Changes” button to save your work. The “Send Newsletter” button should now be clickable. Click on it when you finally decide it’s time to send the email.
Since you are sending emails to WordPress users, you can use the following placeholders in your email message.
- {{username}} – User’s username
- {{useremail}} – User’s email address
- {{firstname}} – User’s first name
- {{lastname}} – User’s last name
- {{displayname}} – User’s display name
- {{websiteurl}} – User’s website URL.
Start emailing selected WordPress posts to users and subscribers today!
Using MailOptin to send selected WordPress posts to your users and subscribers is a powerful strategy for maximizing engagement and fostering a strong connection with your audience.
By curating and delivering valuable content directly to their inboxes, you can ensure that your best work reaches the right people at the right time. Follow the steps outlined in this tutorial and begin sending carefully curated content to your audience today.
If you have any questions or comments, feel free to reach out to us.