How to Create Sendlane Optin Forms in WordPress
Do you want to create a Sendlane optin form in WordPress to capture leads?
Creating effective opt-in forms is crucial for capturing leads and building your email list. Sendlane is a popular email marketing provider among bloggers and internet marketers.
In this tutorial, we will learn how to integrate MailOptin with Sendlane so you can start capturing and saving leads with an email sign-up form to your account.
Benefits of Using Sendlane and MailOptin Together
Combining Sendlane and MailOptin leverages the strengths of both platforms. While Sendlane handles the backend of email marketing with analytics and automation, MailOptin focuses on the front end, providing email signup forms to capture leads.
This integration ensures that leads captured through your WordPress site are immediately funneled into your Sendlane campaigns, allowing seamless communication and engagement.
Creating a Sendlane Optin Forms in WordPress
To build a Sendlane WordPress form for your WordPress website, first, purchase a MailOptin license.
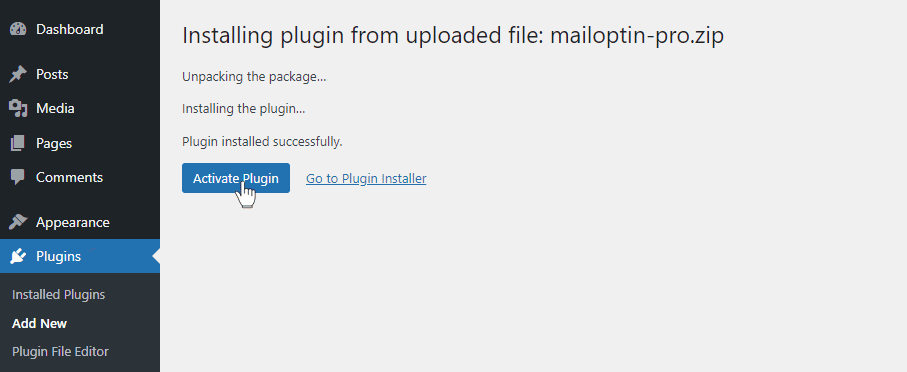
When you’re done with the purchase, you can log in to your WordPress admin dashboard, next go to the Plugins page, click the Add New button and Upload Plugin.
Then, click Choose File to select the downloaded plugin zip file. Click Install Now.

After installing the plugin, activate it by clicking ‘Activate Plugin’.
Connecting Sendlane to WordPress via MailOptin
The next step is to connect MailOptin with Sendlane. When you are done, return to this page.
Create Sendlane Optin Form in WordPress
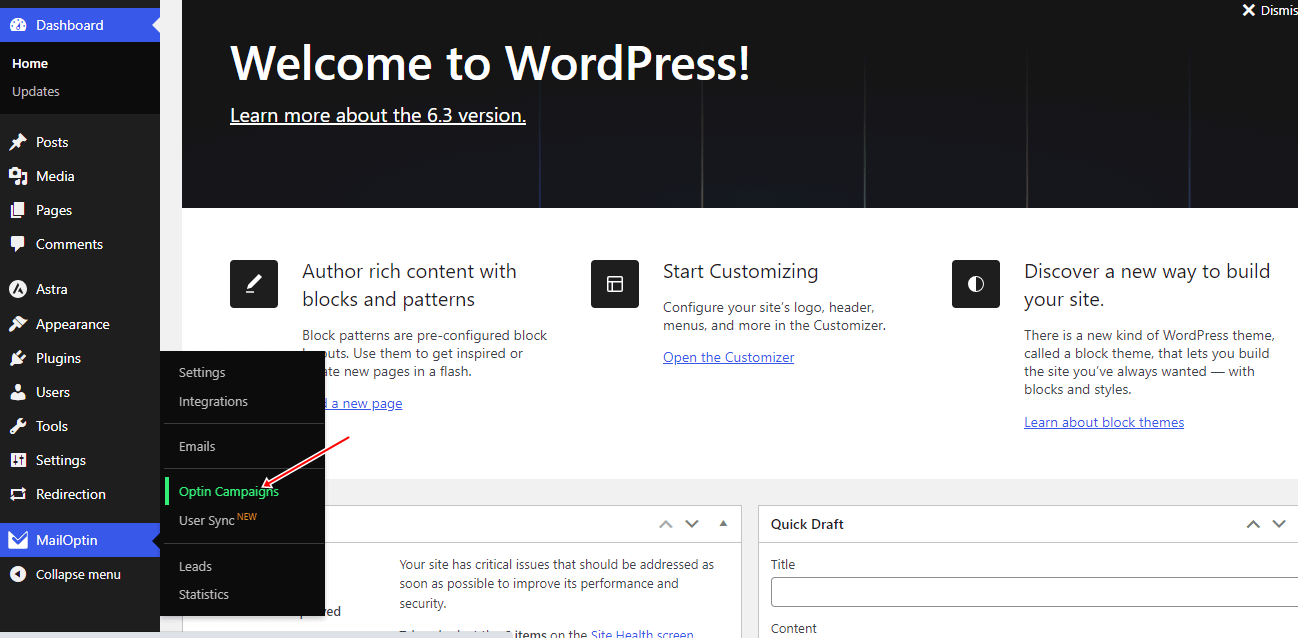
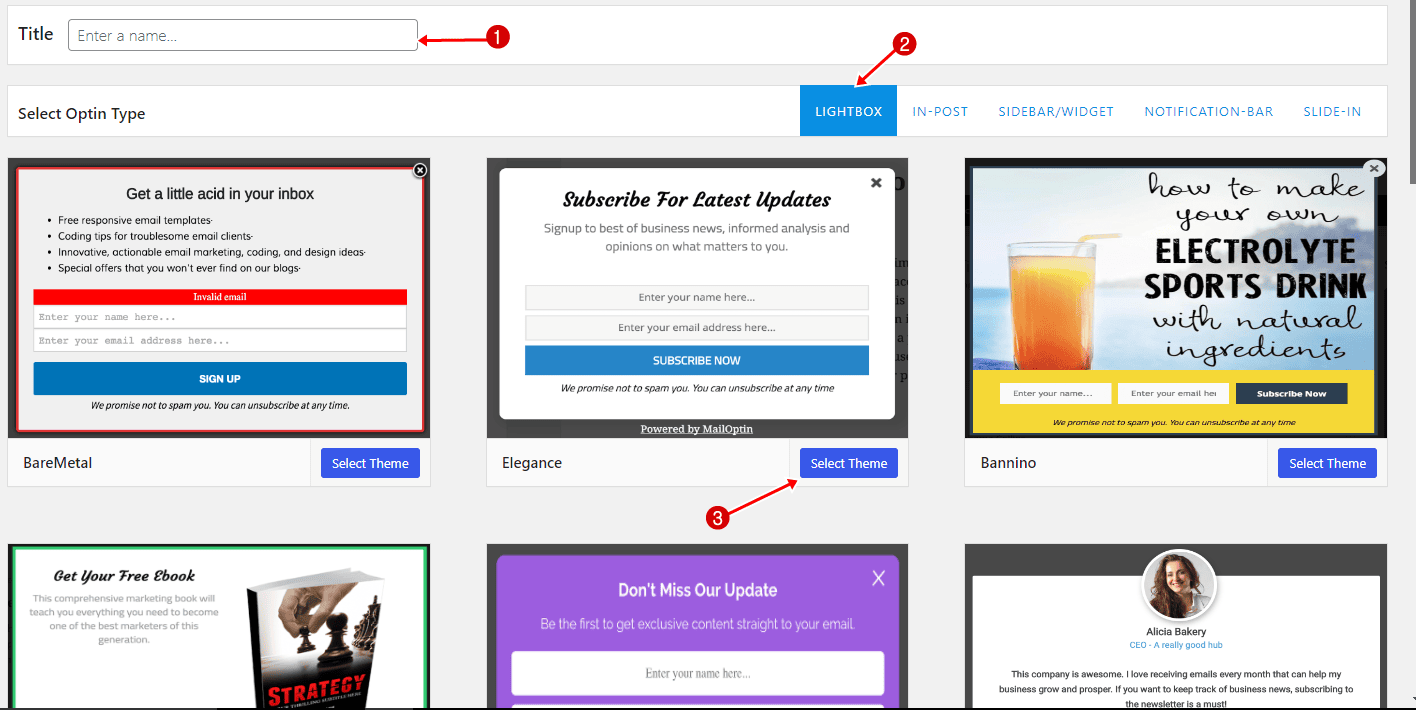
Next, create the Sendlane email signup form for your WordPress website using MailOptin. In the MailOptin menu, click on “Optin Campaigns.”
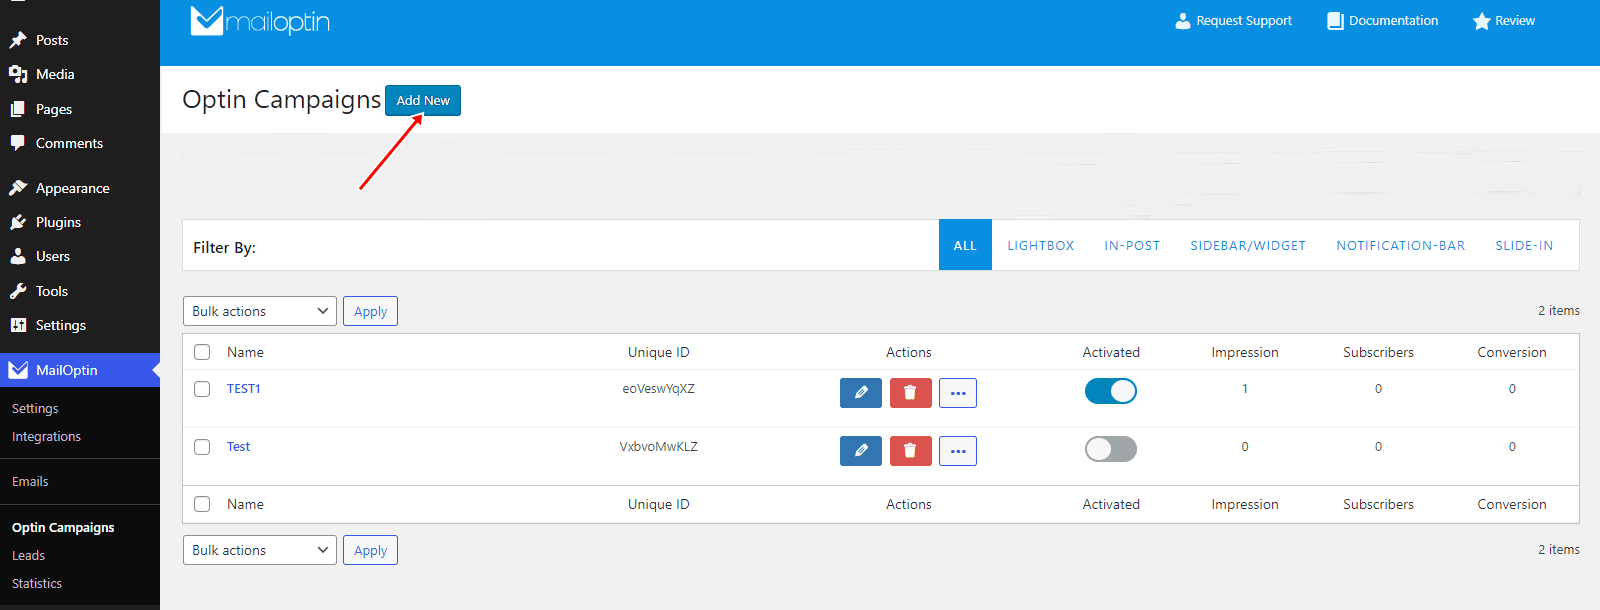
Click “Add New” to create a new WordPress optin form.
Enter an optin campaign title, select the optin type (for this tutorial, we’ll choose Lightbox), and click the optin form design you want.
You will then be redirected to the WordPress form builder, which has options and the flexibility to customize the optin form to your heart’s content.
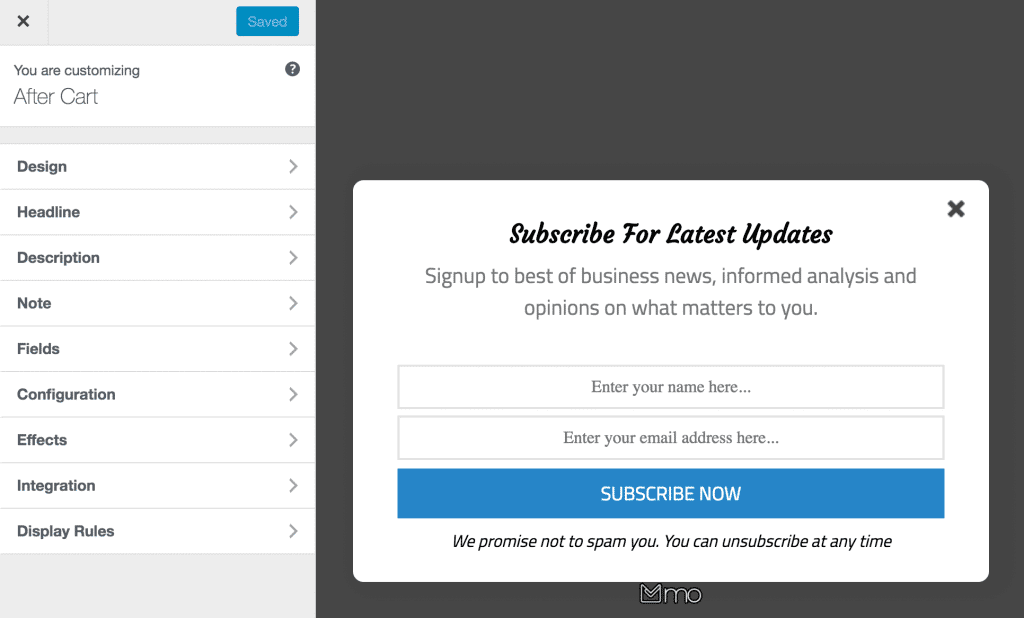
See: Adding Extra Fields to Your Optin Form
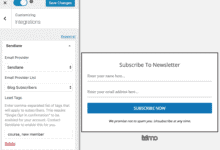
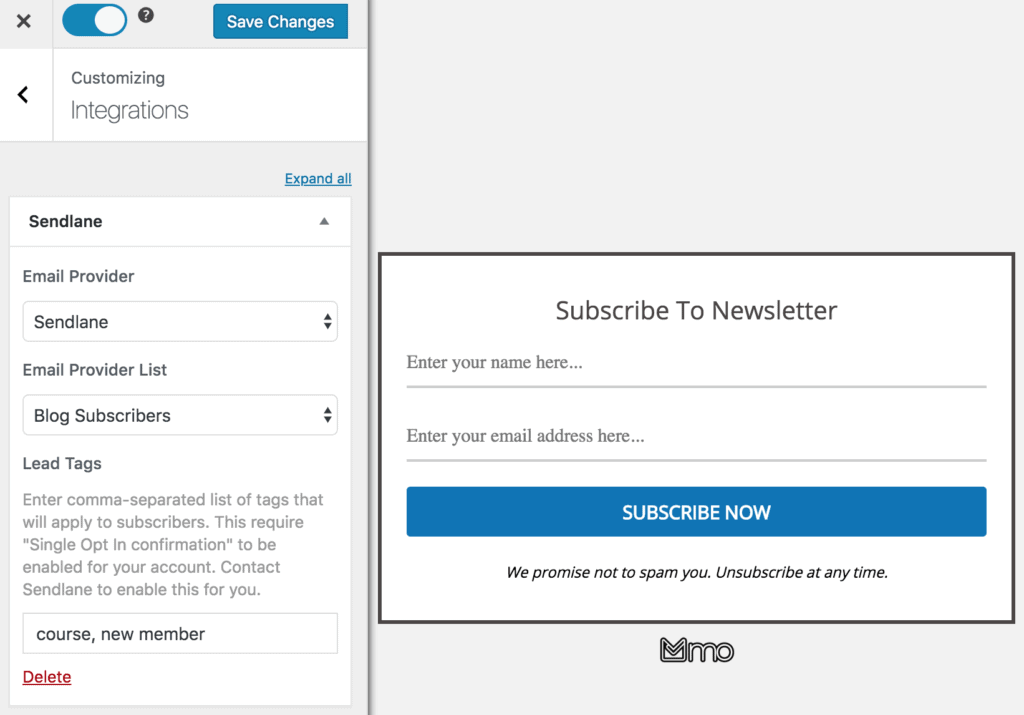
After customizing the form, open the Integration panel, Select Sendlane in the Email Provider dropdown, and the List to subscribe users to.
You can also add a comma-separated list of tags to apply to leads/subscribers. Note that this requires your account to be set to “Single Opt In confirmation”. Contact Sendlane to change your account from Double Opt-In.
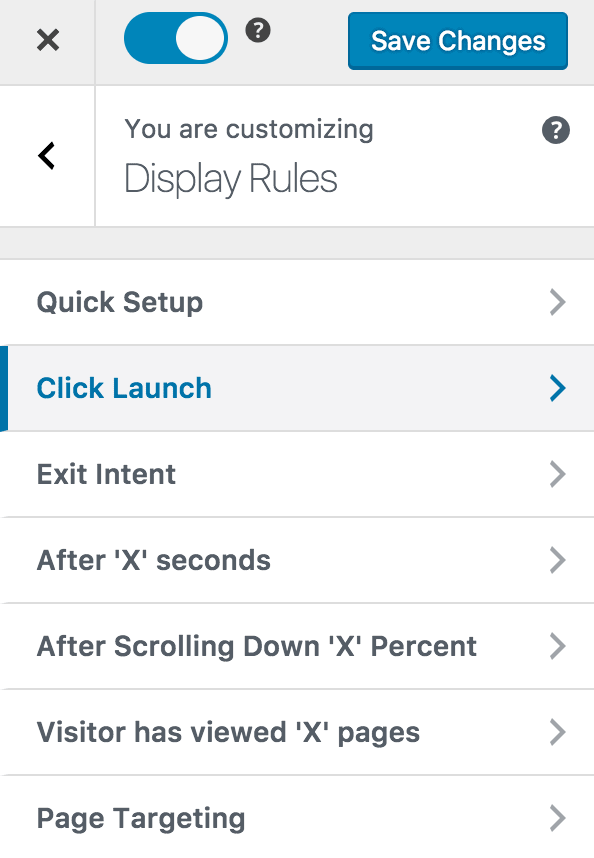
To get the Sendlable optin form to display on your WordPress site, toggle the activate switch ON at the top (close to the “Save Changes” button).
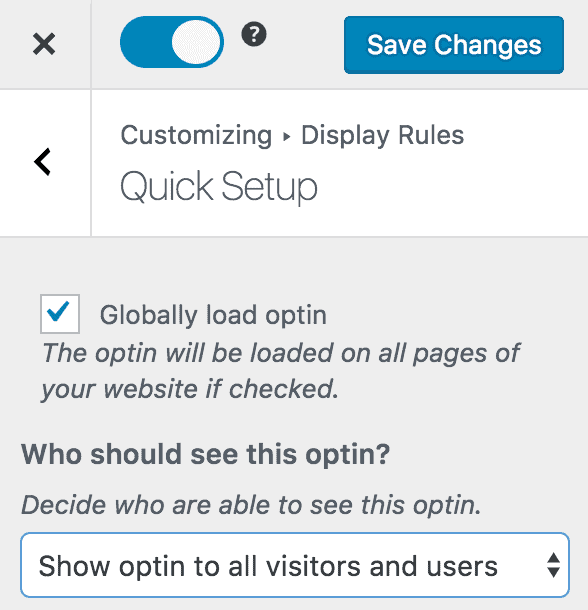
Navigate to the “Display Rules” panel and go to the “Quick Setup” section.
If you want the opt-in form to be displayed everywhere (all pages) on your WordPress site, also check “Globally load optin” Otherwise, use the page level targeting and triggers to determine how and where in your site the opt-in will be shown.
Finally, save the changes. Preview your WordPress website and see the Sendlane WordPress optin displayed. If it doesn’t show up, clear your website and browser cache.
Add Sendlane optin forms to your WordPress site today
Creating Sendlane opt-in forms in WordPress using MailOptin is a powerful strategy for capturing and managing leads effectively.
This tutorial explains the steps required to set up, customize, and optimize your opt-in forms, ensuring seamless integration between Sendlane and your WordPress website.
Follow the guide below to learn how to create other popular email opt-in forms. And don’t forget to select Sendlane in the Integration panel:
- How to Create a Notification Bar (Bottom/Top Bar) Optin
- How to Create a Slide-in Optin Campaign
- How to Create Before and After Post Optin Forms
- How to Create Sidebar Widget Optin Forms
We hope this article helped you learn how to create a Sendlane optin form for your WordPress website.