How to Connect WordPress With Sendlane

MailOptin offers a seamless integration with Sendlane email marketing service. Follow the step by step guide below to learn on how to connect MailOptin with your Sendlane account.
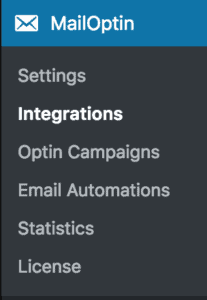
- Go to the Integrations settings page by either clicking the sidebar menu link or top menu tabs.
- At the Sendlane Connection section, click the Sendlane account link to login to your account.

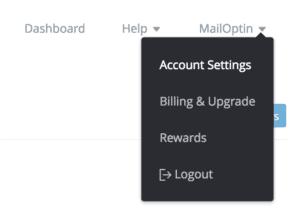
- After logging in, click on your username at the right menu and select Account Settings.
- On the account settings page, you will find your API key, Hash key and Domain.
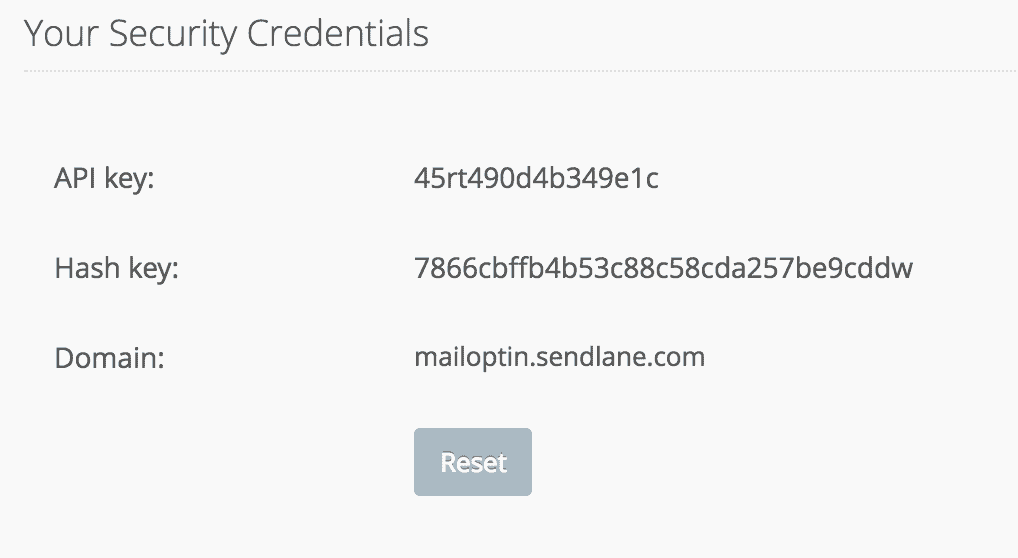
- Copy and paste them to Sendlane connection settings in MailOptin.
- Finally, save the changes.
Having completed the above set up, you can now start capturing leads.