How to Create Emma Subscribe Forms in WordPress

Are you looking to enhance your lead generation and email marketing efforts with Emma?
Emma is an email marketing platform that helps businesses create, send, and analyze email campaigns. It offers a range of features, including email design tools with templates and a drag-and-drop editor, list management for organizing subscribers, automation capabilities, A/B testing, detailed analytics, integration with other business tools, personalization options, and mobile optimization.
In this tutorial, you’ll discover how to seamlessly integrate MailOptin with Emma to capture and store leads through email sign-up forms on your WordPress website.
Creating Emma Subscribe Forms in WordPress
Follow these steps to create a WordPress Emma email subscription form.
Step 1: Install and Activate MailOptin Plugin
MailOptin is a powerful lead generation and email automation plugin. It helps you create optin forms that sync your email subscribers to your Emma account.
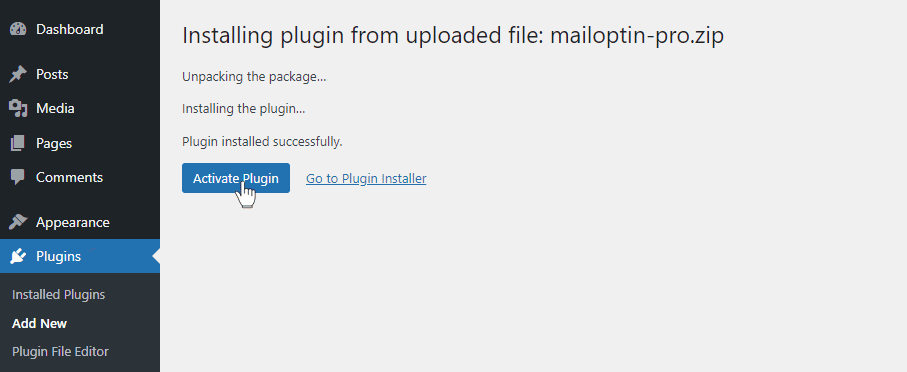
To get started, purchase a MailOptin plan and download the plugin. Then, upload and install the plugin into your WordPress website.

Once installed, click “Activate” to activate the plugin.
Step 2: Connecting MailOptin to Emma
Now, MailOptin is ready to use on your WordPress site. The next step is to connect MailOptin with your Emma account.
Step 3: Create an Emma WordPress Form
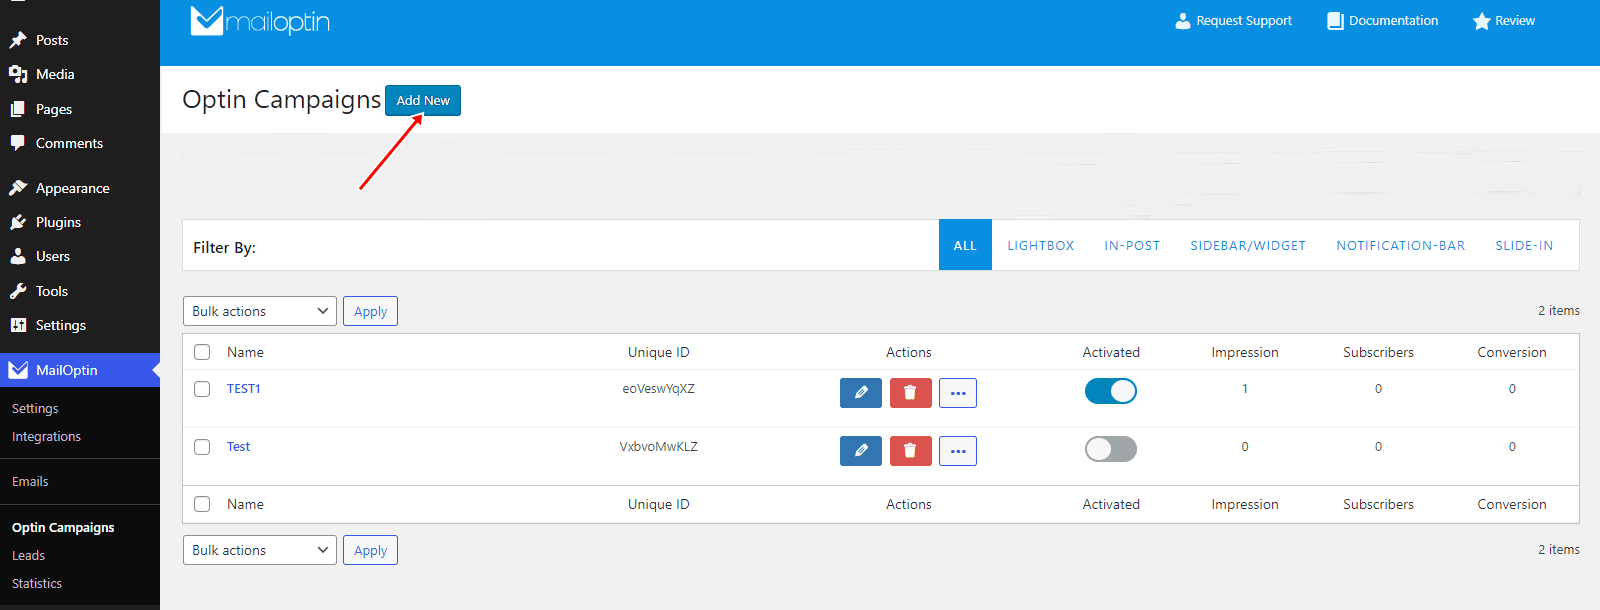
To create an Emma subscribe form that will be displayed on your WordPress website, navigate to MailOptin > Optin Campaigns > Add New.
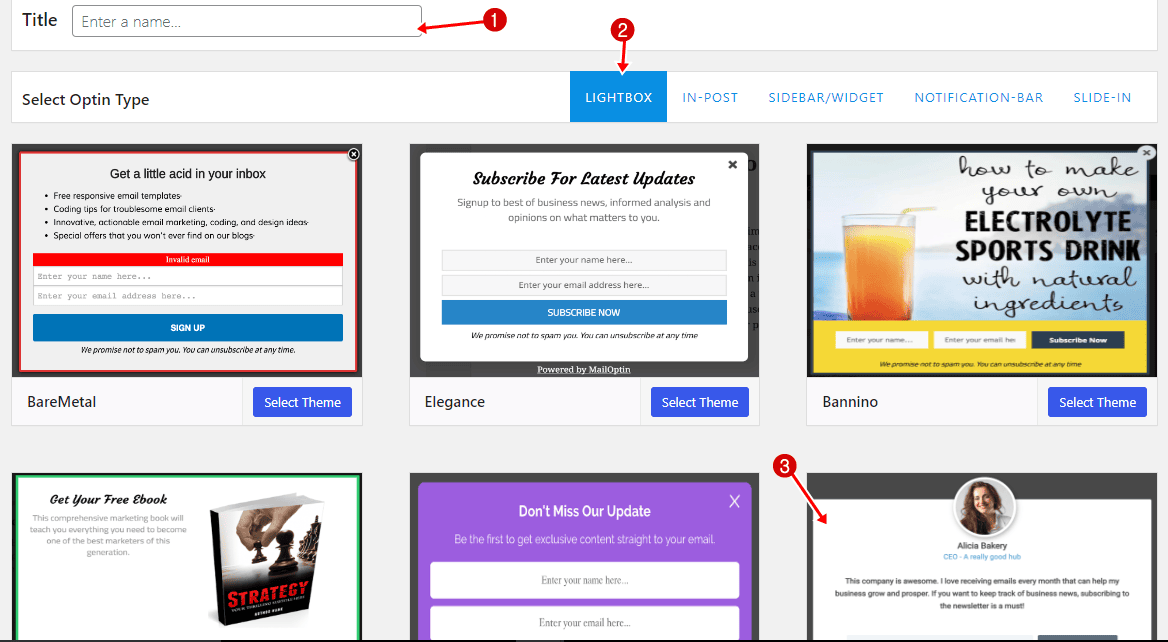
Enter a title for the Emma optin campaign, select the optin type (for this tutorial, we’ll select Lightbox), and click the optin form design you want.
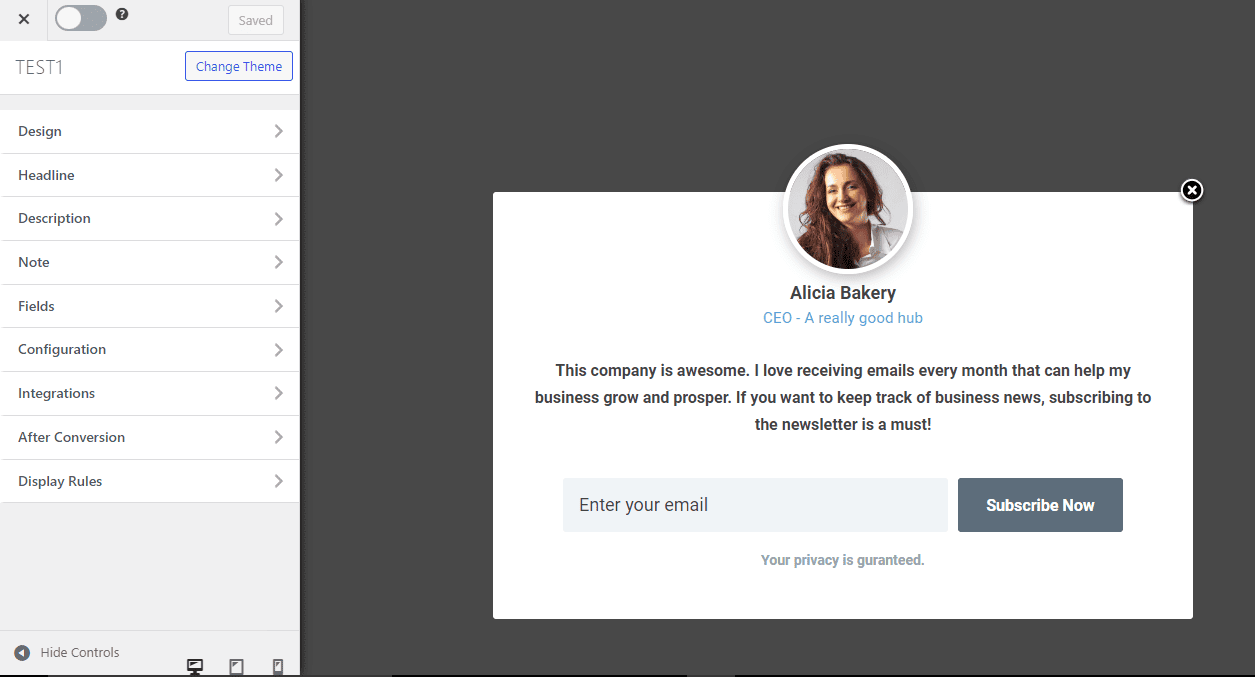
You will then be redirected to the MailOptin form builder, where you can customize the optin form to your heart’s content.
See: Adding Extra Fields to Your Optin Form
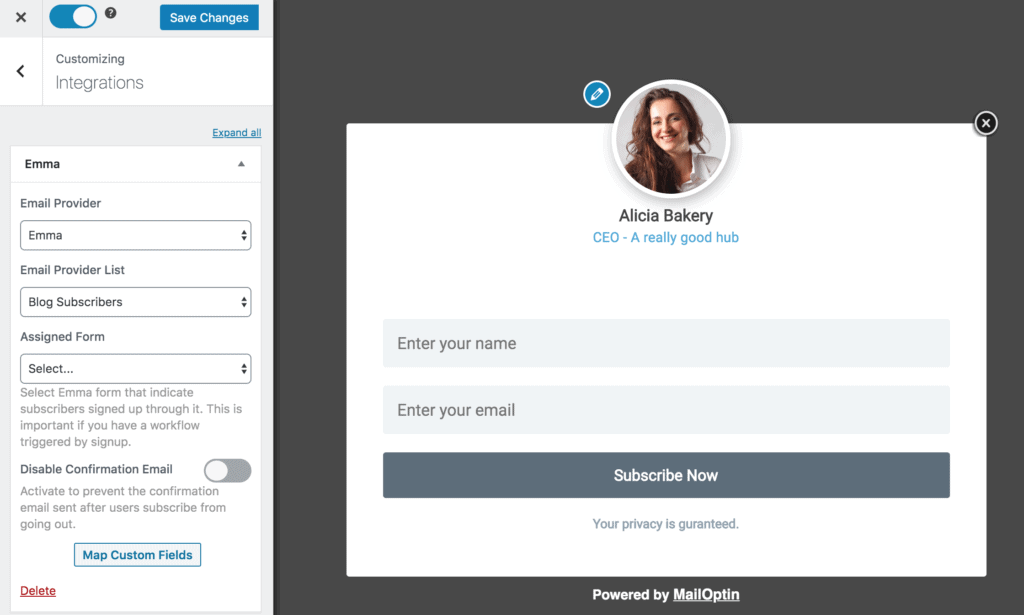
Having finished customizing the form, open the Integration panel, select Emma in Email Provider, select dropdown, and select the Group or email list to subscribe users to. You can also choose the Emma form to assign subscribers to and disable confirmation emails.
To get the Emma optin to display on your WordPress website, toggle the activate switch ON at the top (close to the “Save Changes” button).
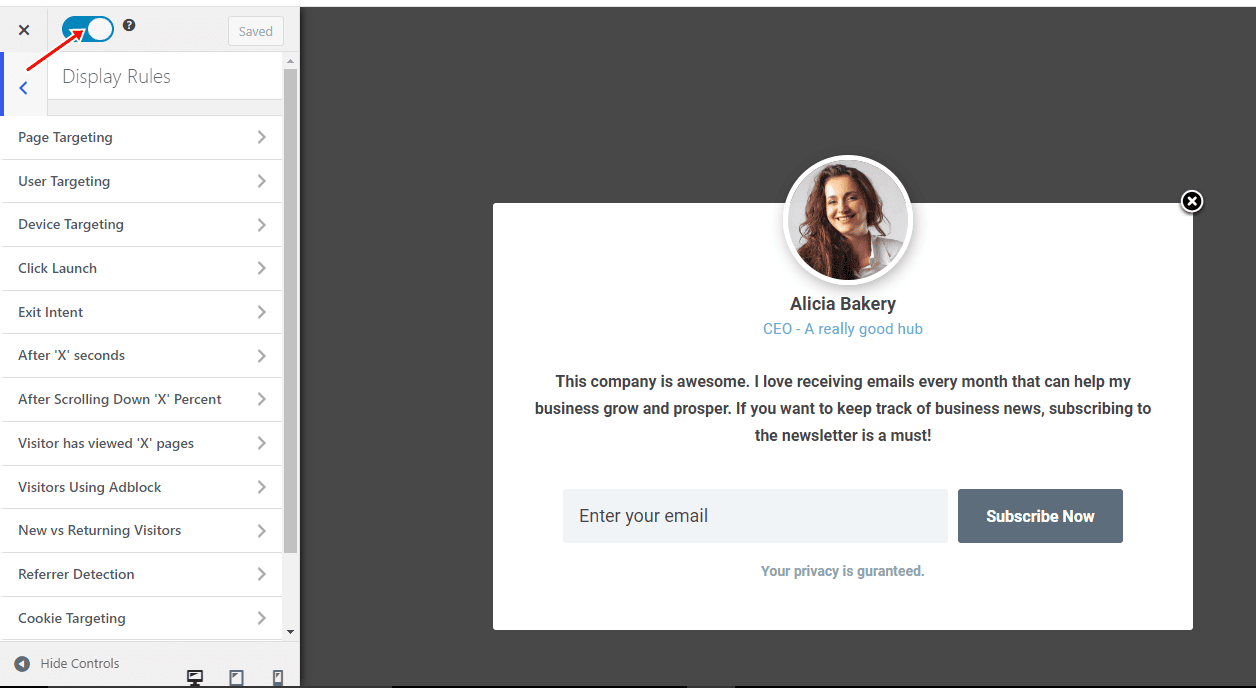
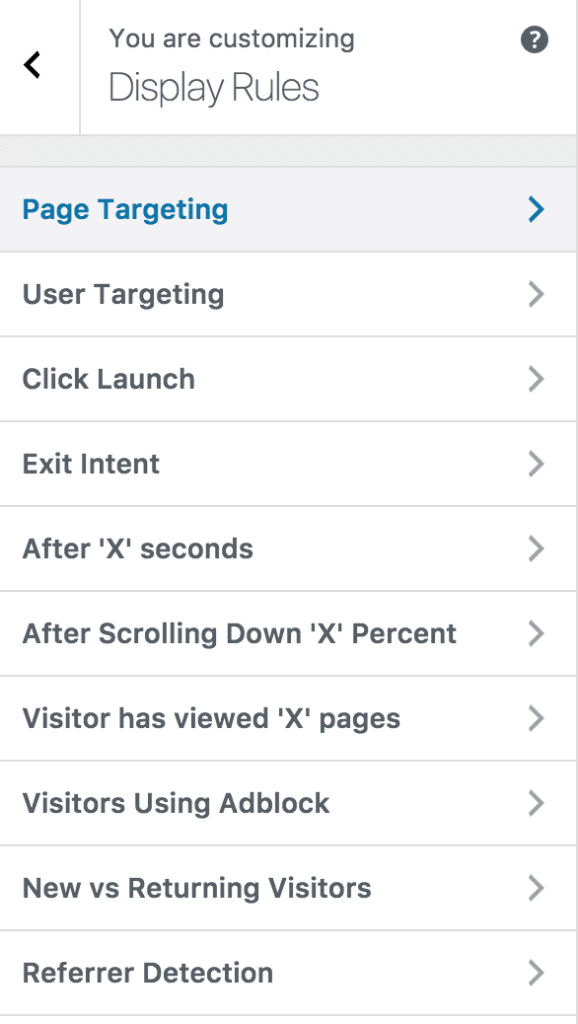
Navigate to the “Display Rules” panel.
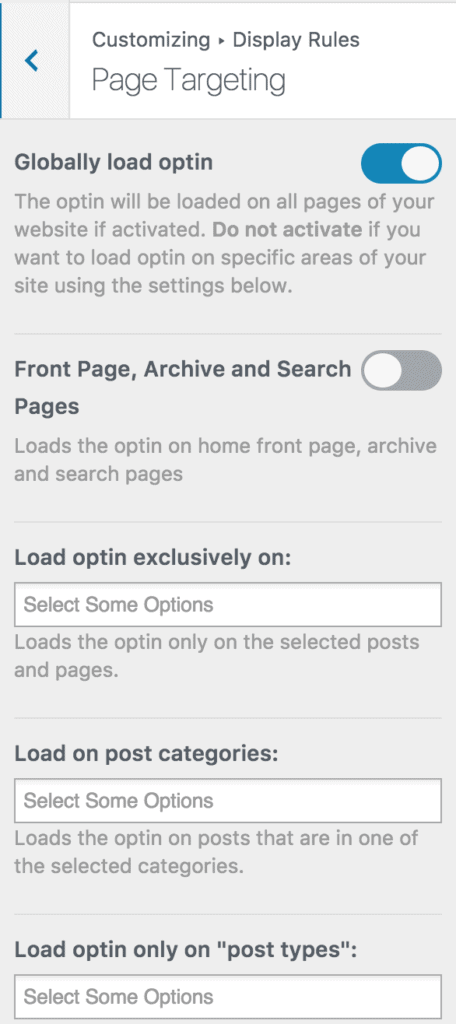
If you want the opt-in form to be displayed everywhere (all pages) of your WordPress site, also check “Globally load optin” Otherwise, use the page level targeting and triggers to determine how and where in your site the opt-in will be shown.
Finally, save the changes. Preview your website, and you should see the Emma optin form displayed on your WordPress site. If it doesn’t show up, clear your website and browser cache.
Create an Emma Subscribe Form for WordPress Today!
Integrating MailOptin with Emma to create subscribe forms in WordPress can significantly enhance your lead generation and email marketing efforts.
By capturing and storing leads with well-designed email sign-up forms, you can maximize your email marketing potential and help your business thrive.
Explore other popular optin types, and remember to select Emma in the Integration panel to make the most out of this powerful integration.