How to Create Drip Opt-in Forms in WordPress to Capture Leads

Are you looking to create a Drip opt-in form for your WordPress website?
Drip is an email marketing provider popular among professional bloggers, internet marketers, and small business owners.
In this tutorial, we will show you how to integrate MailOptin with Drip so you can start capturing and saving leads to Drip with email sign-up forms on your WordPress website
Why Use MailOptin to Create Drip Opt-in Forms?
MailOptin is a powerful WordPress lead generation plugin that allows you to create and customize high-converting lead capture forms that integrate with Drip for your WordPress website.
Here are some key benefits of using MailOptin:
Easy Integration with Drip: MailOptin integrates effortlessly with Drip, ensuring that your leads are automatically synced to your Drip account without any manual intervention.
User-Friendly Interface: One of MailOptin’s biggest advantages is its user-friendly interface. Its intuitive drag-and-drop builder allows you to easily design beautiful forms.
Advanced Targeting and Trigger Options: Effective lead capture is all about displaying the right form to the right audience at the right time. MailOptin provides advanced targeting and trigger options that allow you to do just that. Such as after X seconds, scroll depth, Exit Intent, and more.
Analytics and Reporting: MailOptin provides detailed analytics and reporting features that allow you to track the performance of your opt-in forms. These insights are invaluable for making data-driven decisions and optimizing your lead capture strategy.
Creating a WordPress Drip Optin Forms
Follow these steps to create a Drip opt-in form that is displayed on a WordPress website.
Step 1: Install and Activate MailOptin Plugin
The first step is to install and activate the MailOptin plugin on your WordPress website. You get a copy from the pricing page.
Next, connect MailOptin to Drip. When you are done, return to this page.
Step 2: Create an Optin Campaign
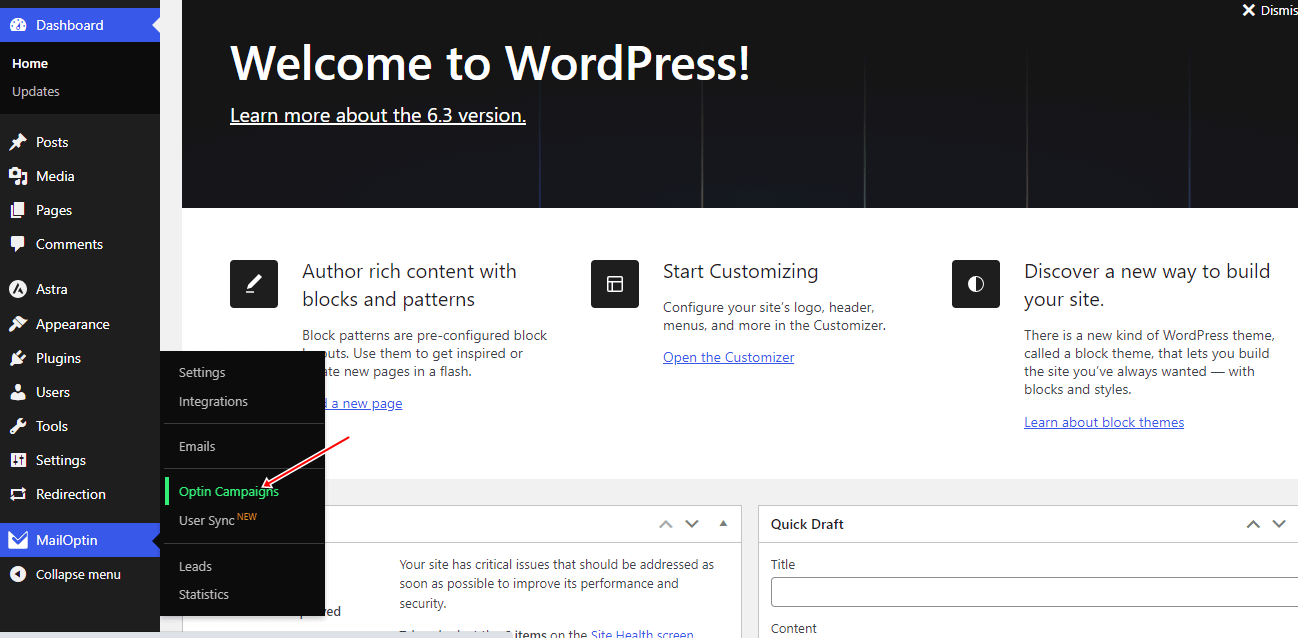
In the MailOptin menu, click on “Optin Campaigns.”
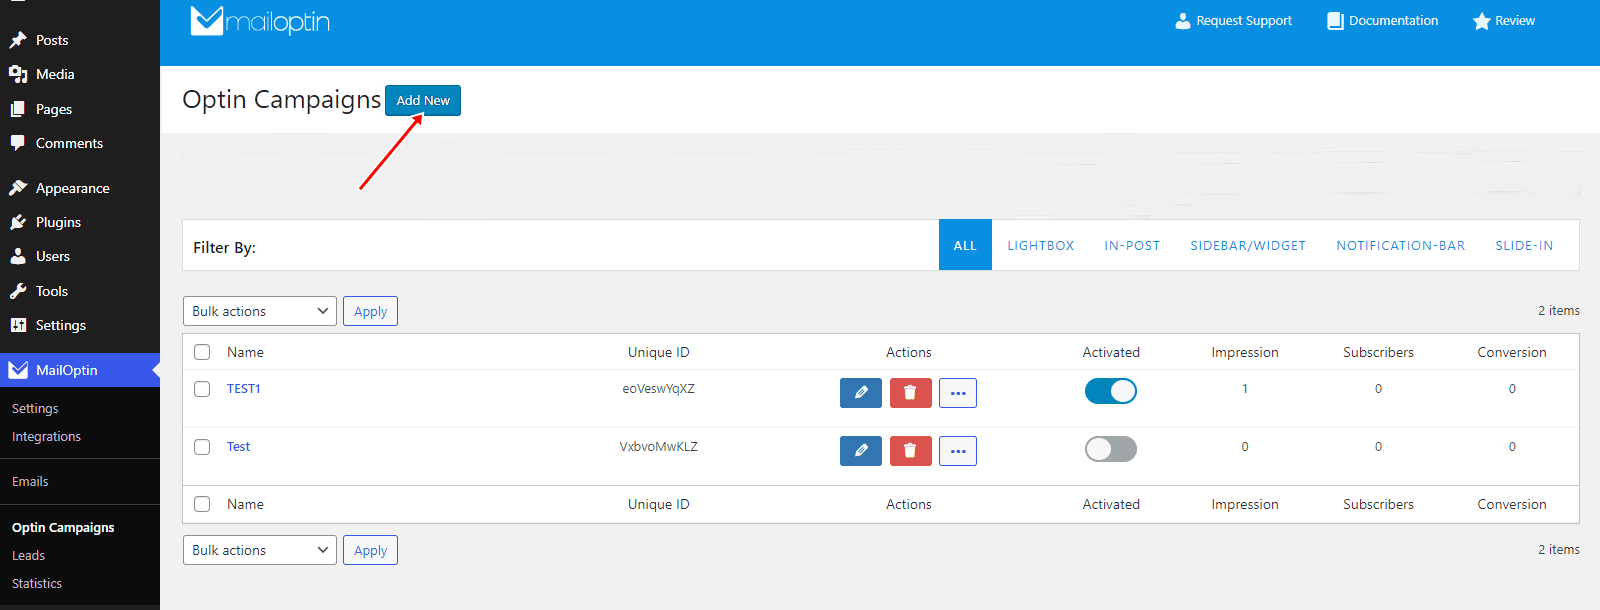
Then click the Add New button at the top to create an optin form.
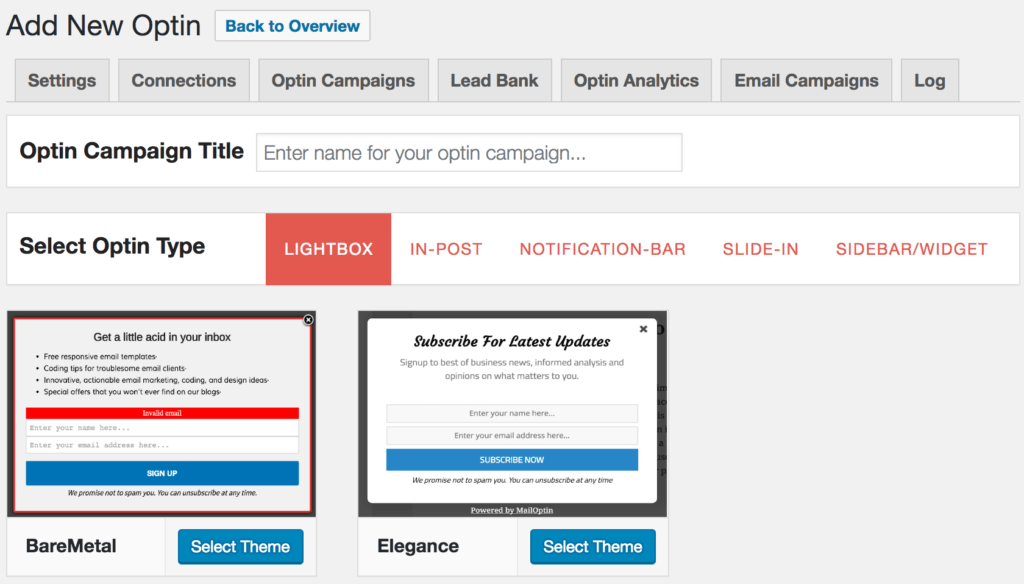
Enter a title for the campaign, select the optin type (for this tutorial, we’ll select lightbox), and click the optin form design you want.
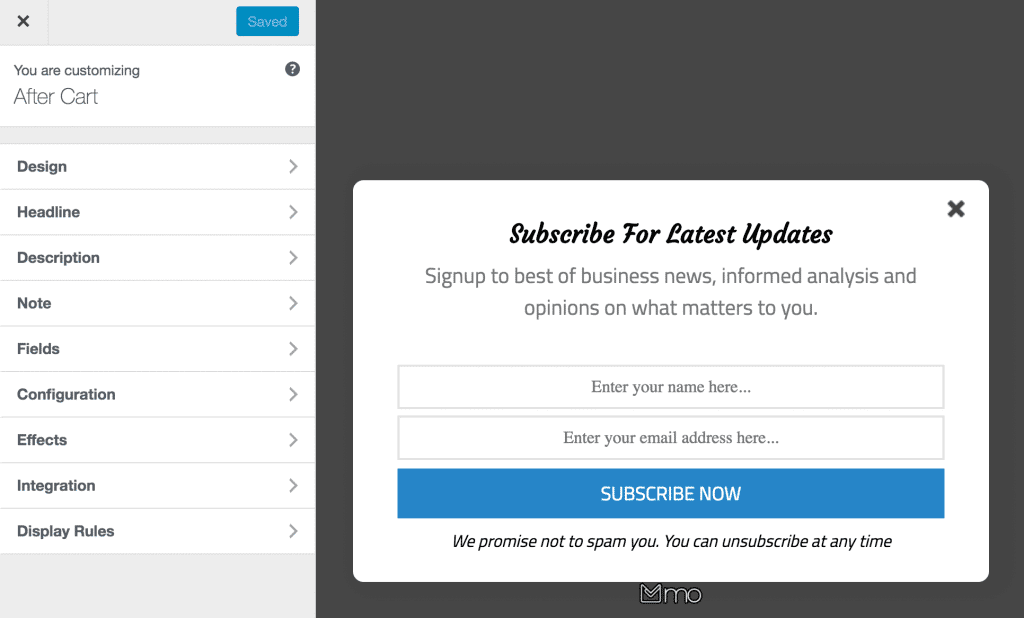
You will then be redirected to the form builder where you have options and the flexibility to customize the Drip optin form to your heart’s content.
See: Adding Extra Fields to Your Optin Form
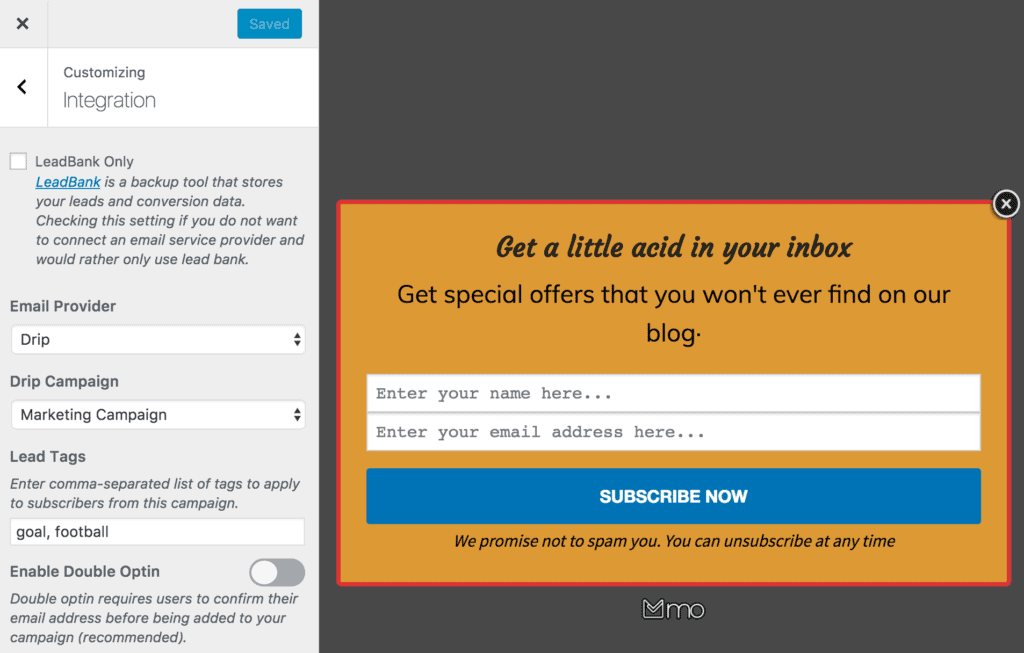
Having finished customizing the form, open the Integration panel, select Drip in the Email Provider dropdown, and choose the Drip Campaign to subscribe users to. You can also add a comma-separated list of tags to apply to leads/subscribers as well as toggle double opt-in.
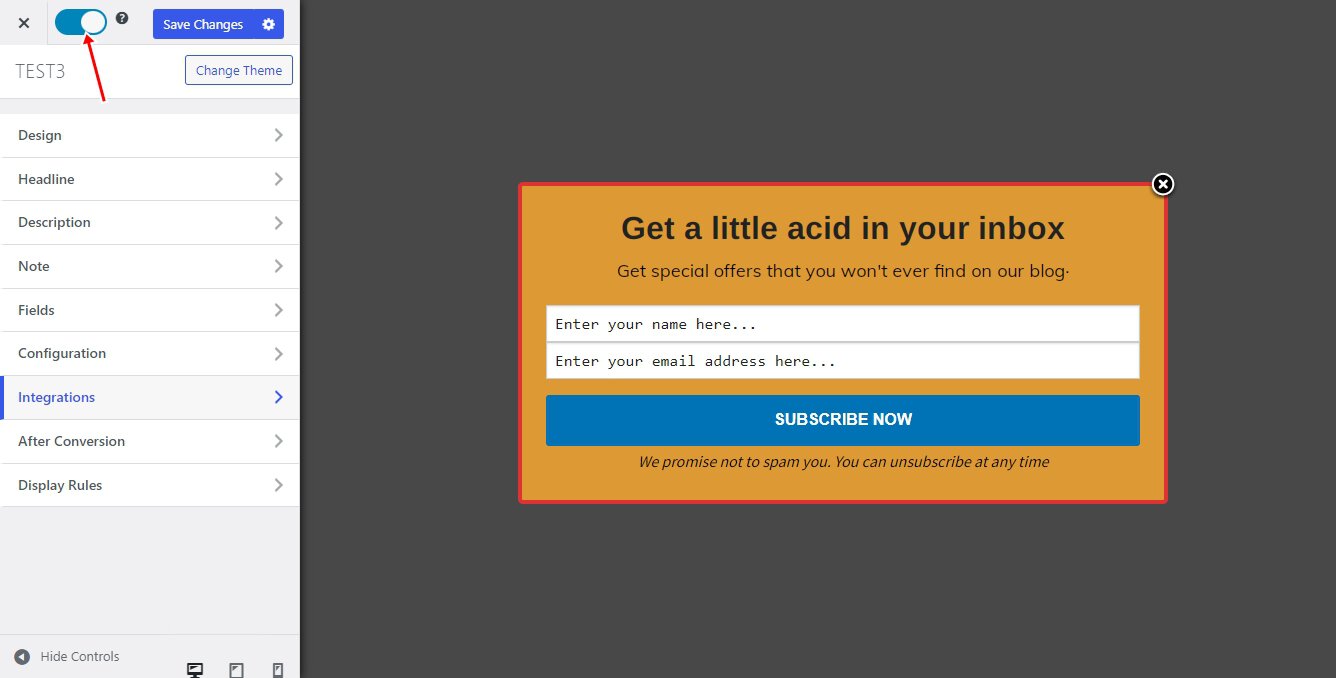
To actually get the Drip opt-in to display on your WordPress site, toggle the activate switch ON at the top (close to the “Save Changes” button).
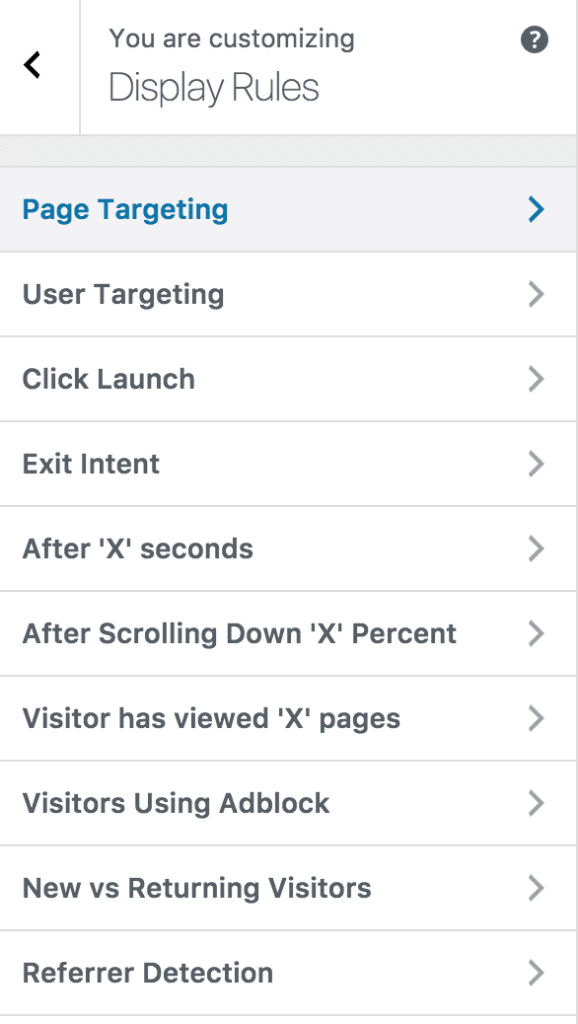
Navigate to the “Display Rules” panel.
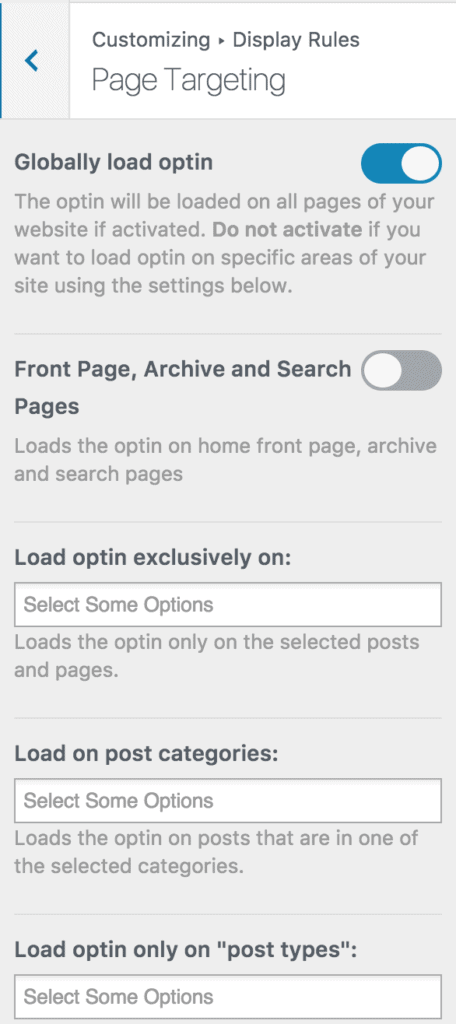
If you want the opt-in form to be displayed everywhere (all pages) of your WordPress site, also check “Globally load optin”, Otherwise use the page level targeting and triggers to determine how and where in your site the opt-in will be shown.
Finally, save the changes. Preview your website, and you should see the optin displayed. If it doesn’t, be sure to clear your website and browser cache.
Create Drip Opt-in Forms in WordPress Today!
Creating Drip opt-in forms in WordPress using MailOptin is an effective way to enhance your lead-generation efforts. By integrating MailOptin with Drip, you can seamlessly capture and manage leads, ensuring they are added to your Drip campaigns for ongoing engagement and nurturing.
In this tutorial, we’ve walked you through the steps necessary to install and configure MailOptin, connect with your Drip account, and design your opt-in forms.
Follow the guide below to learn how to create other popular types of email opt-in forms. And don’t forget to select Drip in the Integration panel.
