How To Accept Stripe Subscription Payments in WordPress
Are you interested in learning how to accept Stripe subscription payments on your WordPress website?
Subscription business models have become increasingly popular, offering businesses a steady stream of recurring revenue. Whether running a membership site, an online course platform, or a content subscription service, implementing an excellent payment system is crucial for your success.
Stripe, a leading payment gateway, has emerged as a top choice for handling online transactions, processing billions of dollars annually for businesses of all sizes. Its powerful API and user-friendly interface make it an excellent option for WordPress site owners looking to integrate subscription payments seamlessly.
In this article, we’ll walk you through the process of accepting Stripe subscription payments in WordPress, the benefits of using Stripe, and setting up Stripe membership payments using ProfilePress, from installing the necessary plugins to configuring payment settings and creating subscription plans.
By the end of this article, you’ll have a fully functional subscription system ready to start generating consistent revenue for your business.
Benefits of Using Stripe for Subscription Payments
Using Stripe for subscription payments offers numerous benefits, making it a popular choice for businesses and website owners that use WordPress and offer subscription-based services.
Global Reach: Stripe operates in over 40 countries and supports multiple currencies, making it ideal for businesses with an international audience.
Excellent Security: Security is paramount when handling online payments. Stripe is PCI-DSS compliant, meaning it adheres to the highest security standards. It uses advanced encryption and fraud detection technologies, protecting your business and members’ payment information.
Seamless Integration: Stripe integrates seamlessly with WordPress through various plugins, including ProfilePress. This makes setting up and managing Stripe subscription payments directly from your WordPress site easy.
Flexible Payment Options: Stripe supports various payment methods, including credit cards, debit cards, and digital wallets like Apple Pay and Google Pay. This flexibility ensures that your members can pay using their preferred method, increasing the likelihood of successful transactions.
Accepting Stripe Subscription Payments on Your WordPress Site
Setting up Stripe subscription payments on your WordPress site involves four key steps:
- Install and activate the ProfilePress WordPress membership plugin.
- Connect WordPress to Stripe via ProfilePress.
- Create a subscription-based membership plan.
- Set up the checkout page.
Install and Activate the ProfilePress Plugin
ProfilePress is a powerful WordPress membership plugin for paid communities, creating and managing user profiles, memberships, and subscriptions. It seamlessly integrates with Stripe, allowing you to accept and manage subscription payments directly from your WordPress site.
To install the ProfilePress plugin, visit the ProfilePress website and purchase a license plan that best suits your needs.
After your purchase, you’ll receive a confirmation email with a download link for the plugin’s zip file and your license key. You can also download the plugin directly from your account page on the ProfilePress website.
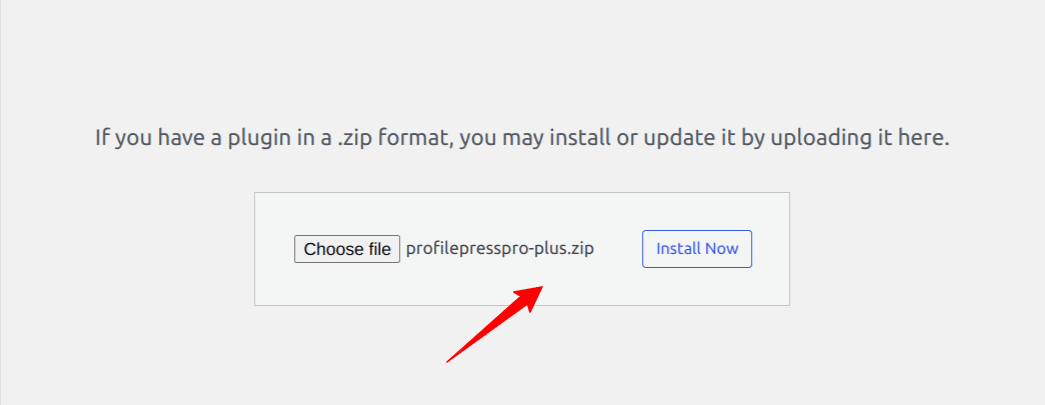
To install the plugin, login to your WordPress admin dashboard, go to the Plugins page, click “Add New,” select “Upload Plugin,” choose the zip file, and click “Install Now.”
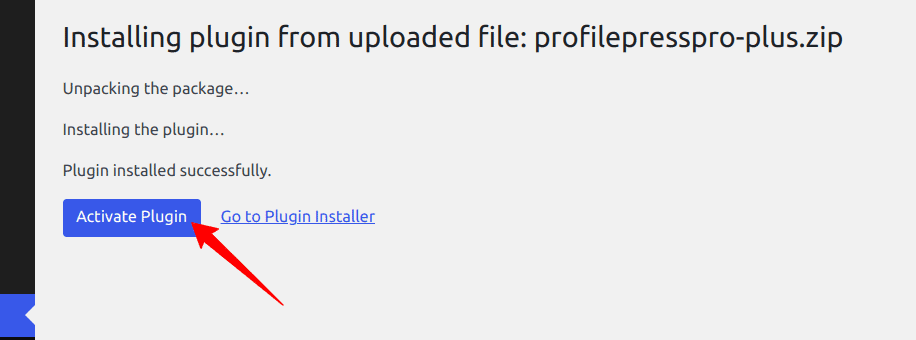
After installation is complete, click the Activate Plugin button.
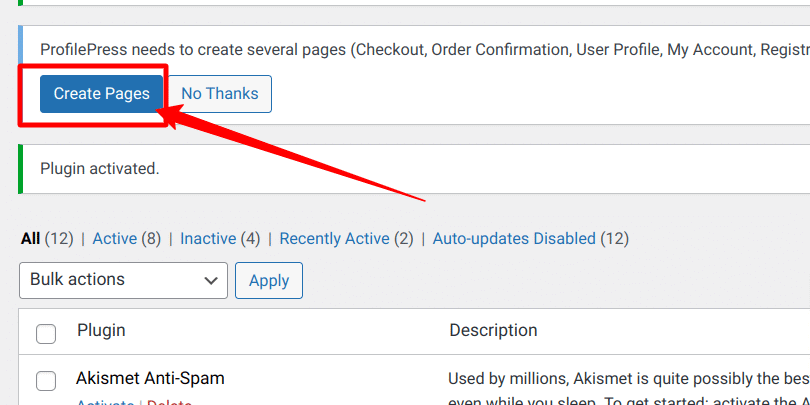
You’ll notice a notification at the top of the page stating, ‘ProfilePress needs to create several pages.’ Click the ‘Create Pages’ button to complete the plugin setup.
Connecting WordPress to Stripe
Next, you’ll need to connect your WordPress site to your Stripe account via ProfilePress to facilitate secure and efficient payment processing.
ProfilePress lets you connect your Stripe.com account with your WordPress-based membership website to process one-time and recurring payments using Stripe’s various methods.
In addition to collecting payments via debit and credit cards, ProfilePress Stripe integration also supports payments via Link, ACH Direct Debit, Apple Pay, Google Pay, Alipay, Bancontact, bank transfers, BLIK, EPS, FPX, Giropay, iDEAL, Sofort, P24, Affirm, Afterpay, Clearpay, Klarna, Cash App Pay, GrabPay, WeChat Pay, and SEPA debit, as well as Bacs Direct Debit.
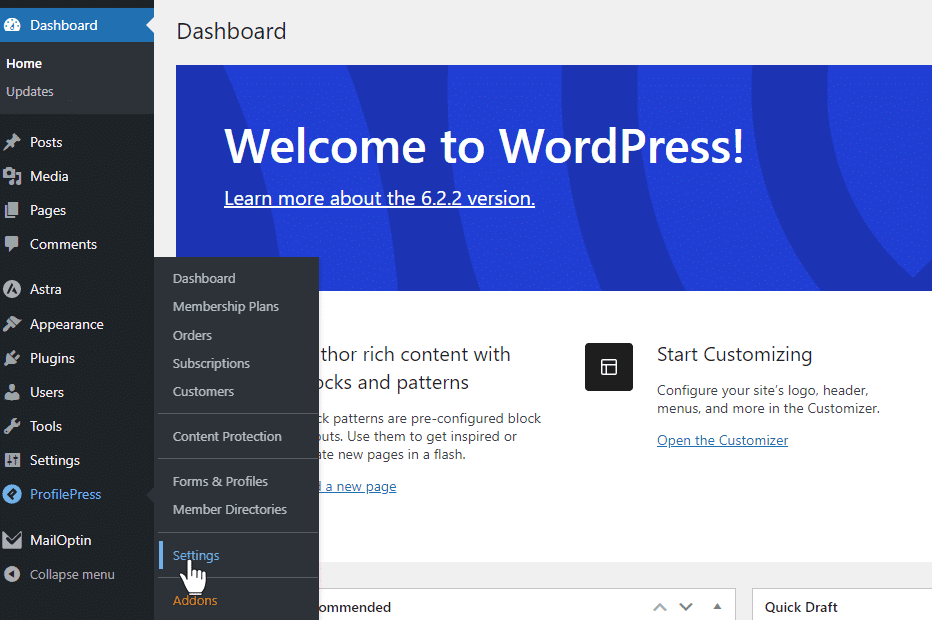
To connect with Stripe, navigate to the ProfilePress settings in your WordPress admin sidebar.
Next, click the Payments tab > Payment Methods sub-tab and choose Stripe
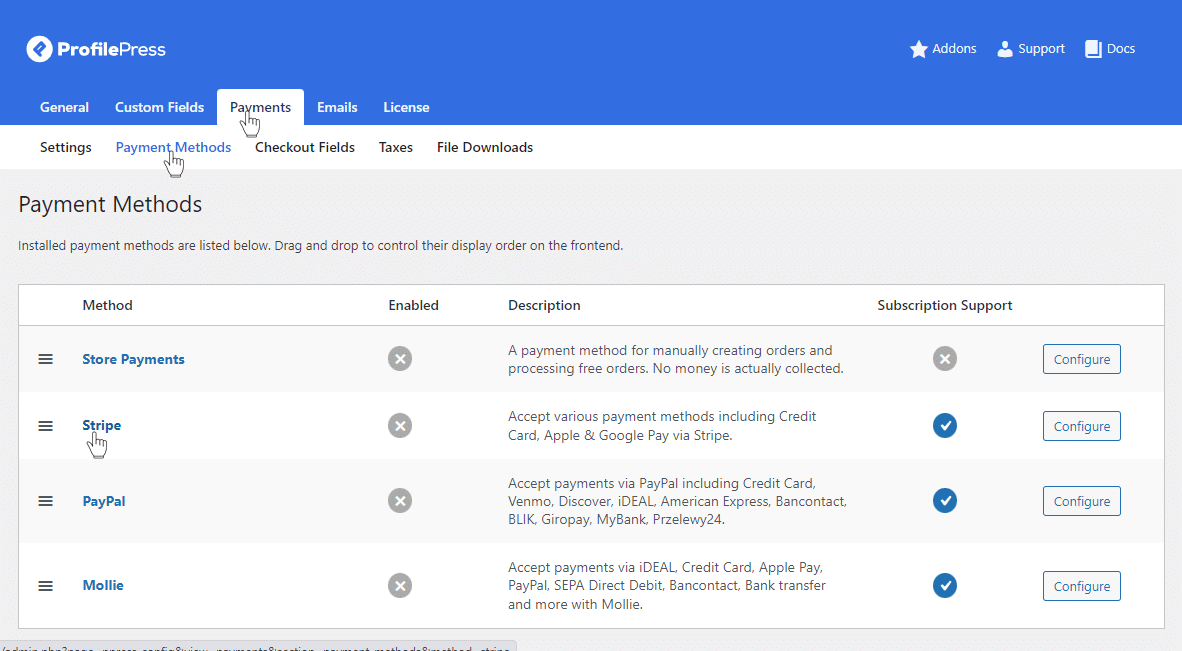
Then, click on the “Connect with Stripe” button.
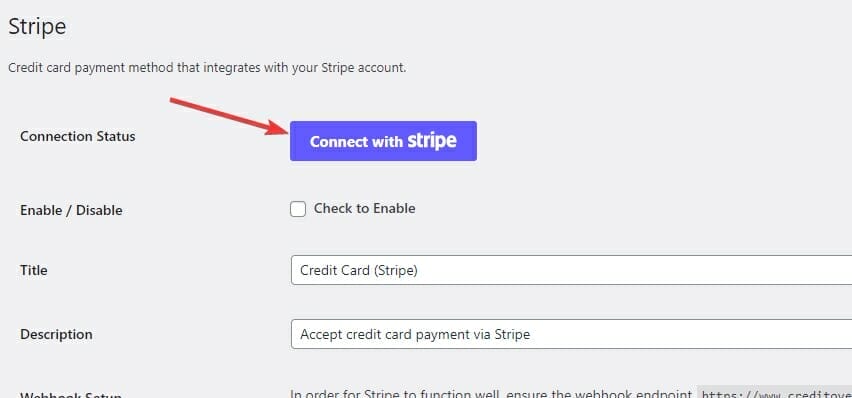
You’ll be taken to Stripe.com, where you’ll be prompted to create a new Stripe account or log in to your existing one.

Once you are logged in, you’ll be asked to select the account you’d like to use:
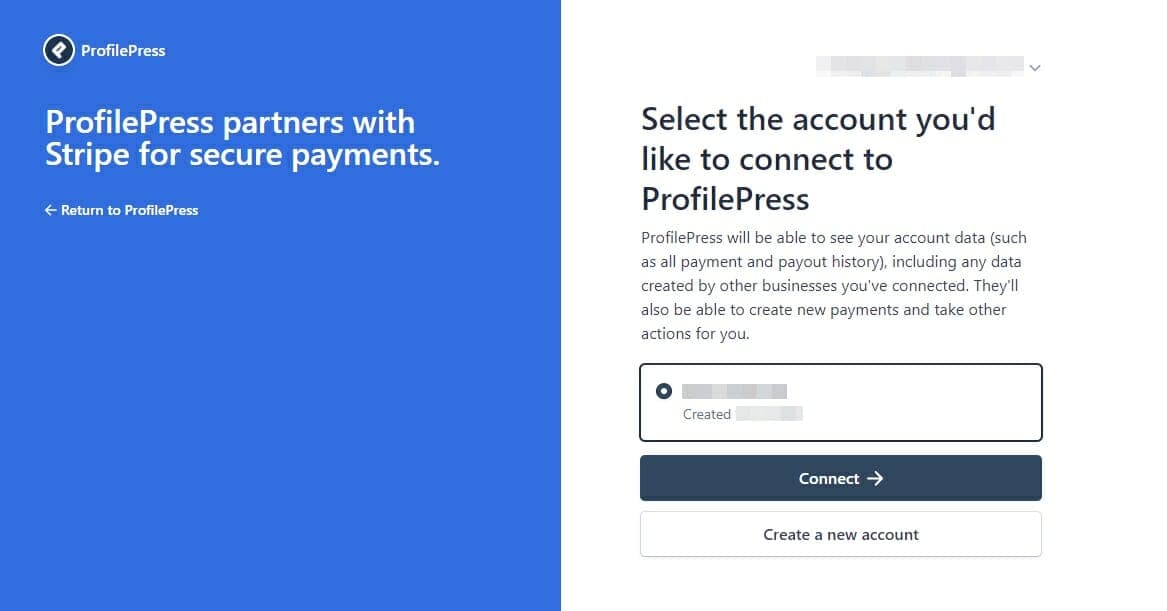
Select the account you want to use and click the connect button. This will bring you back to the configuration page.
Now that your stripe account is connected check the Enable checkbox and enter a statement descriptor.
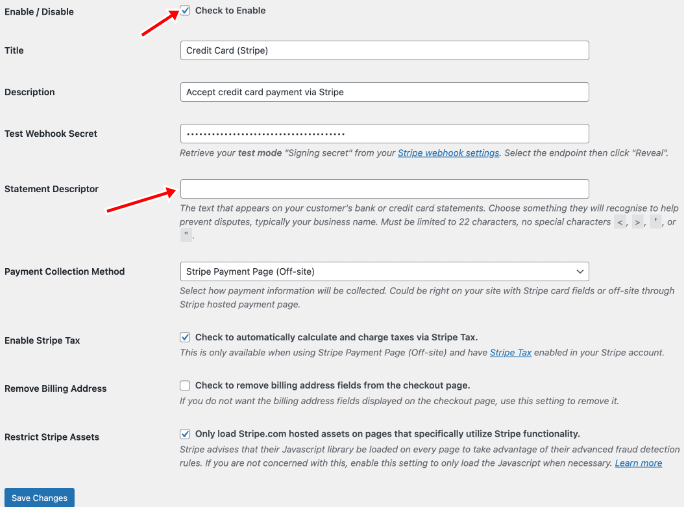
ProfilePress automatically attempts to create the necessary webhook endpoints for Stripe. You can also configure other options, such as enabling Stripe Tax, removing the billing address, and restricting Stripe assets. Remember to save your changes once you’ve customized these settings to your liking.
And that’s it! Your website is now ready to accept Stripe subscription payments.
Create a Stripe Subscription Membership Plan
With your WordPress site connected to Stripe, the next step is to create a recurring membership plan in WordPress that charges subscription payments.
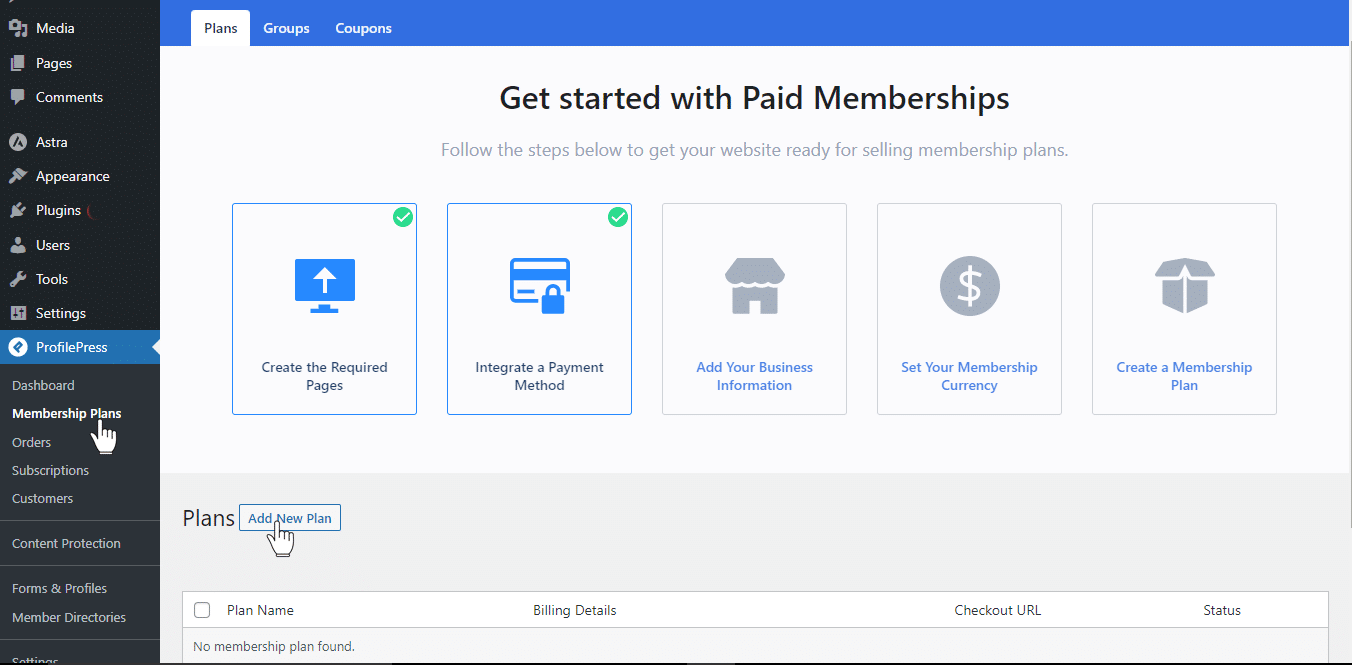
Navigate to ProfilePress >> Membership Plans and click on Add New.
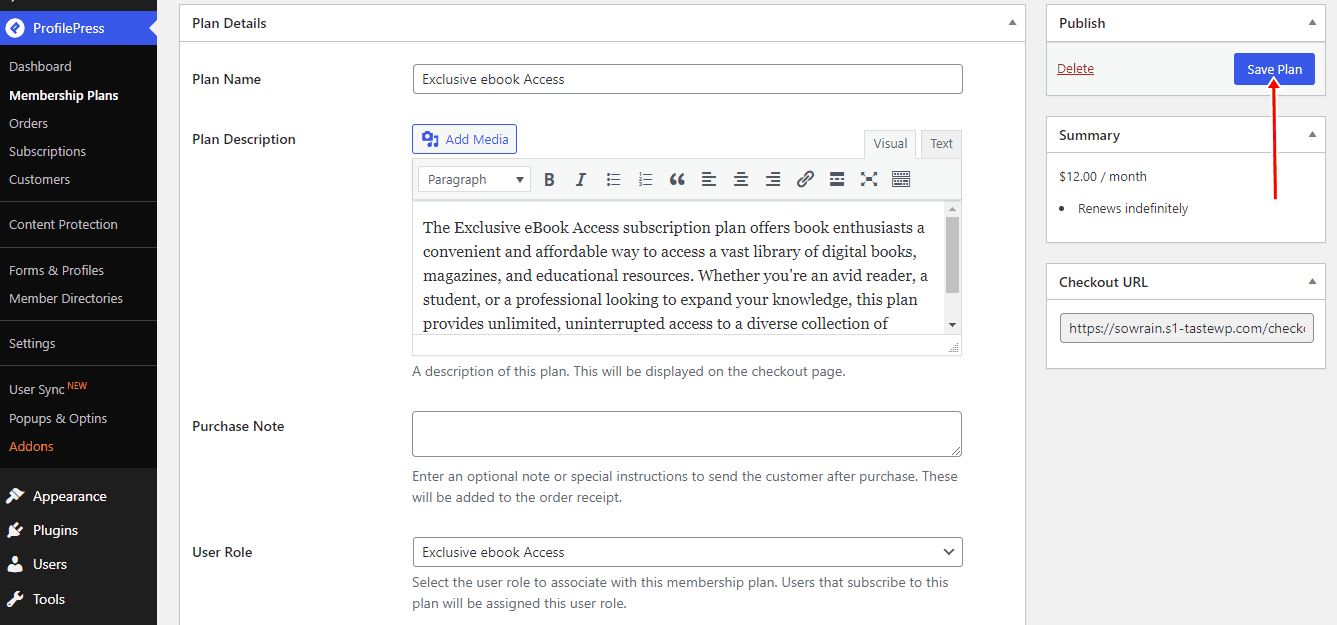
When setting up a new plan in ProfilePress, you must fill out several necessary fields under the Plan Details section.

Here’s a breakdown of what each field entails:
Plan Name: This is the title of your subscription plan. It should be clear and descriptive, reflecting the membership or service offered.
Description: In this field, provide a detailed explanation of what the plan includes. This is where you can outline the features, benefits, and any special conditions associated with the plan. A well-crafted description helps potential subscribers understand what they’re getting and why they should choose this particular plan.
Purchase Note: The purchase note is sent to users after they make a purchase. Helpful in thanking customers for their subscription, providing any next steps, or including essential information such as accessing their new membership benefits.
User Role: This option allows you to select the user role to associate with this membership plan. Users who subscribe to this plan will be assigned this user role.
Price: Finally, set the price for the subscription plan.

Once you’ve entered the plan’s name, purchase note, user role, and price, scroll down to the subscription settings section.
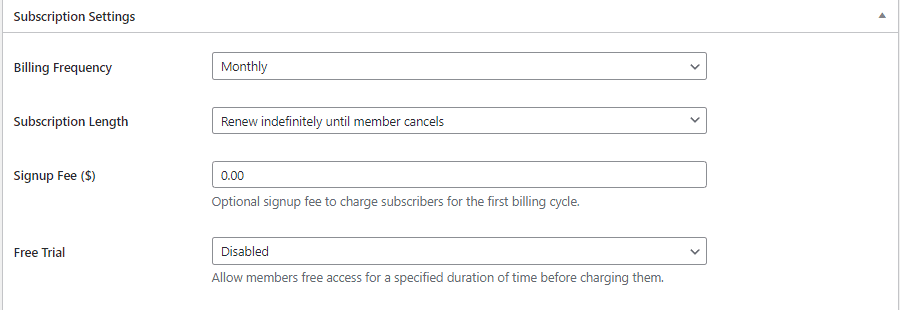
In this section, you can configure the following settings:
Billing Frequency: This option allows you to choose how frequently to bill for payments—options include monthly, weekly, daily, quarterly, biannually, or a one-time payment. For this example, we’ll select ‘Monthly,’ making it a recurring payment that subscribers will pay every month.
Subscription Length: With this option, you decide whether the subscription will renew indefinitely until the member cancels or set it for a specific number of payments.
Signup Fee: This setting allows you to charge a one-time fee for new subscribers during the first billing cycle.
Free Trial: This setting allows you to offer a free trial period by giving members complimentary access for a designated time before charging them. You can choose durations like three days, five days, one week, two weeks, three weeks, or one month.
Remember to click the Save Plan button.
Setting Up the WordPress Subscription Checkout Page
You’ll need to link to the plan checkout URL to allow users to purchase the plan’s subscriptions via Stripe. You can easily find the checkout link for each plan in the “Membership Plans” section within the ProfilePress settings.
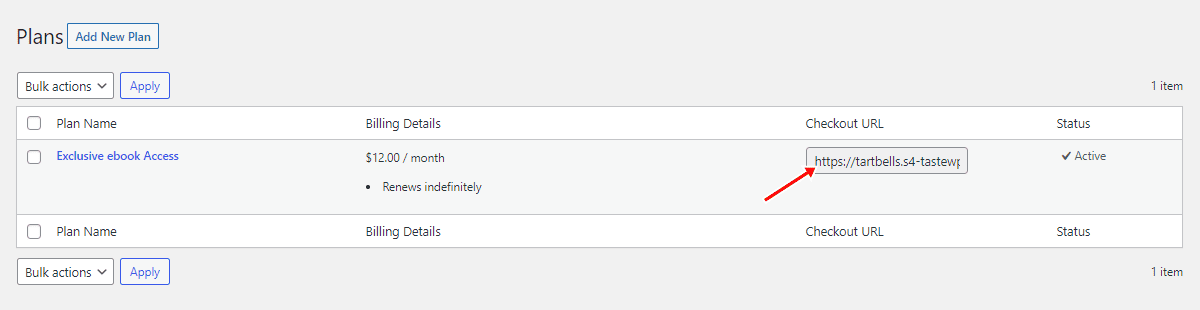
Add these links to the appropriate areas of your site, such as buttons, menus, or landing pages, to provide users with a seamless purchasing experience.
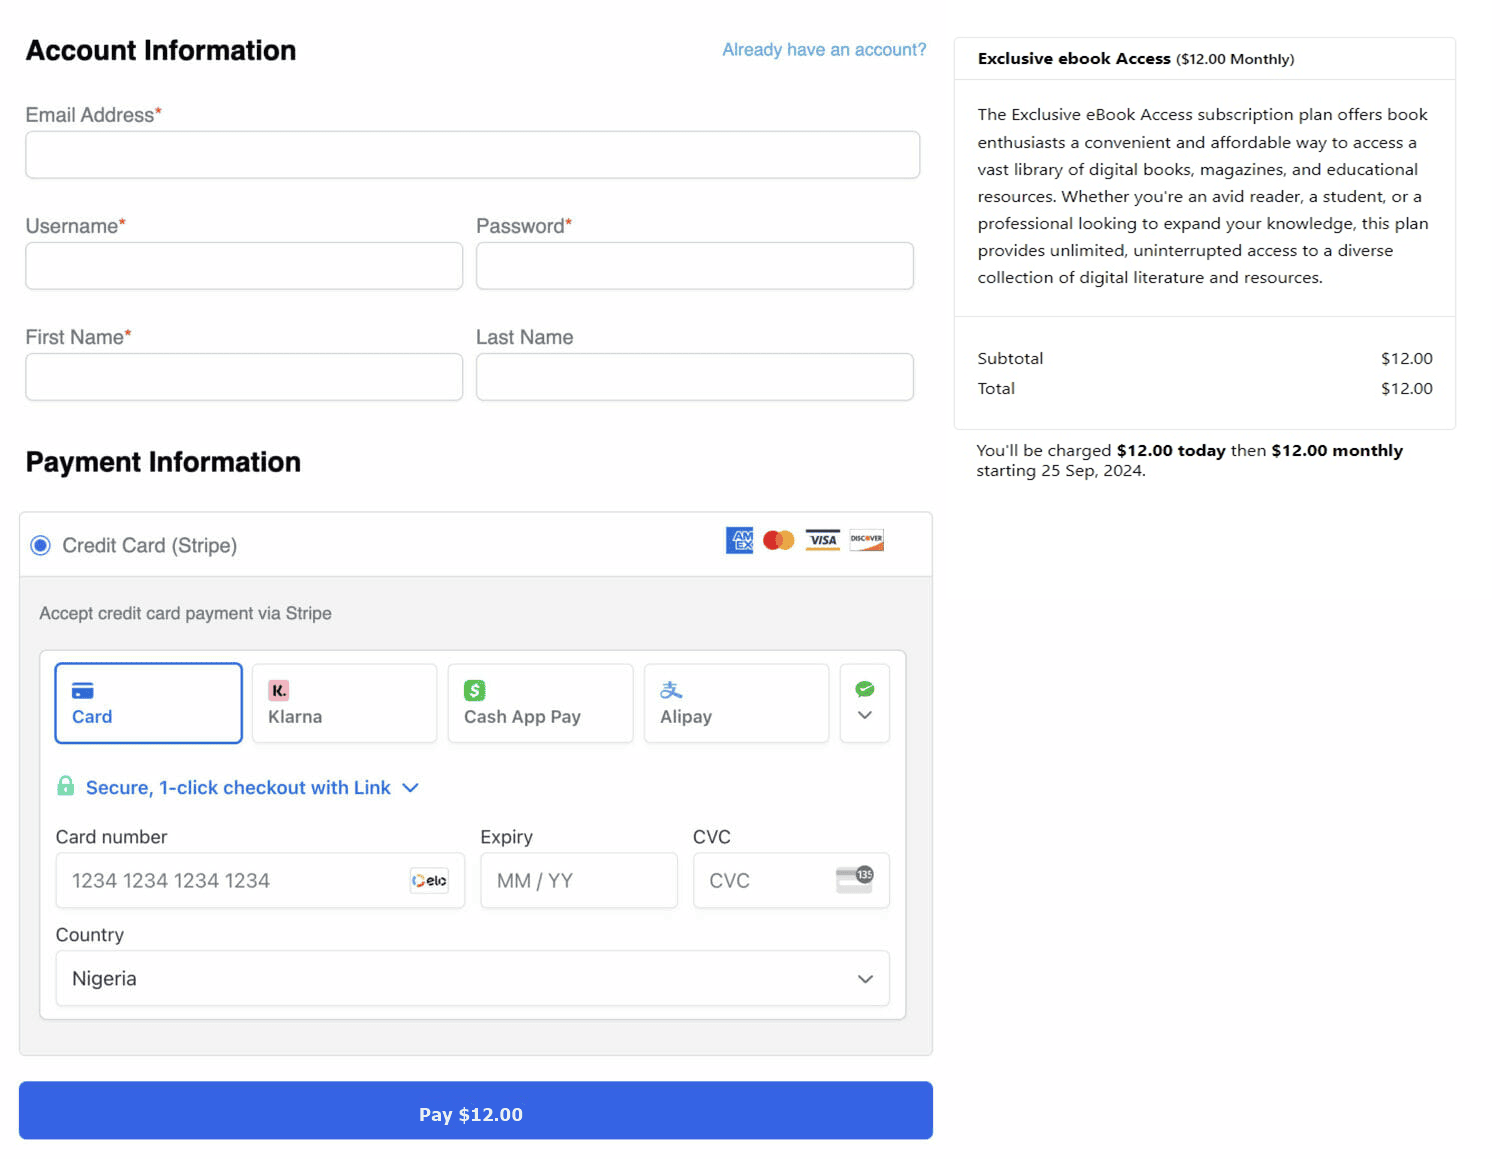
Below is a screenshot of the Stripe subscription checkout page from our demo website.
Implement Stripe Subscription Payments on Your WordPress Site Today!
Setting up Stripe subscription payments on your WordPress site is a decisive step toward building a reliable, recurring revenue stream for your business. With the guidance in this article, you now have the tools and knowledge to create a seamless and secure subscription experience that will benefit you and your customers.
To recap, start by installing the ProfilePress plugin and connecting it to your Stripe account. Once connected, you can easily create subscription plans for your business model. Before launching, run a test payment to ensure everything is functioning smoothly.
By implementing Stripe subscription payments on your WordPress website, you’re not just setting up a payment system but investing in your business’s future growth and stability.