How to Create Sendy Optin Forms to Capture Leads
Are you looking for an efficient way to capture quality leads and grow your Sendy email list without spending a fortune?
Imagine having a seamless and cost-effective solution to engage your audience and expand your subscriber base. Introducing Sendy – a self-hosted email newsletter application that allows you to send trackable emails via Amazon Simple Email Service (SES) at an incredibly low cost, without compromising on deliverability.
In this article, we will guide you through integrating MailOptin with Sendy, enabling you to effortlessly capture and save leads with an email sign-up form in WordPress directly to your Sendy account.
Creating a Sendy Optin Forms in WordPress
Follow these steps to set up a Sendy opt-in form on your WordPress website using MailOptin:
Step 1: Install and Activate the MailOptin Plugin
Start by installing the MailOptin plugin on your WordPress site. If you haven’t already, purchase a plan.
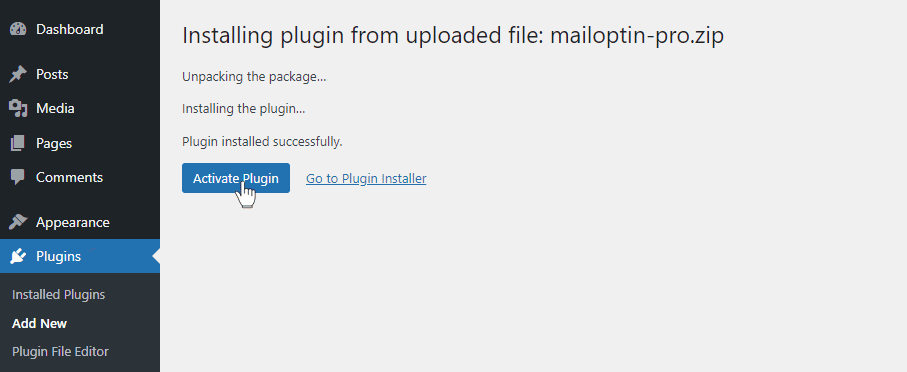
Next, log in to your WordPress admin dashboard and navigate to the Plugins page. Click on the “Add New” button, then select “Upload Plugin.”
Click “Choose File” to locate the downloaded plugin zip file on your computer. Once selected, click “Install Now” to begin the installation.

After installing the plugin, activate it by clicking ‘Activate Plugin’.
Step 2: Connecting Sendy to MailOptin
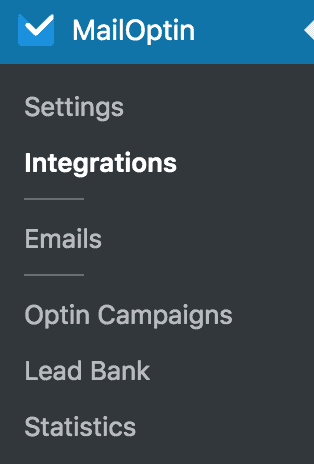
The next step is to connect your Sendy account to MailOptin. To do this, go to the Integrations settings page by either clicking the sidebar menu link or the top menu tabs.
In the Sendy Connection section, enter your installation URL (where Sendy is hosted), your API key (which you can get from http://your-installation-domain-name.com/settings), and the name and ID of your email list.
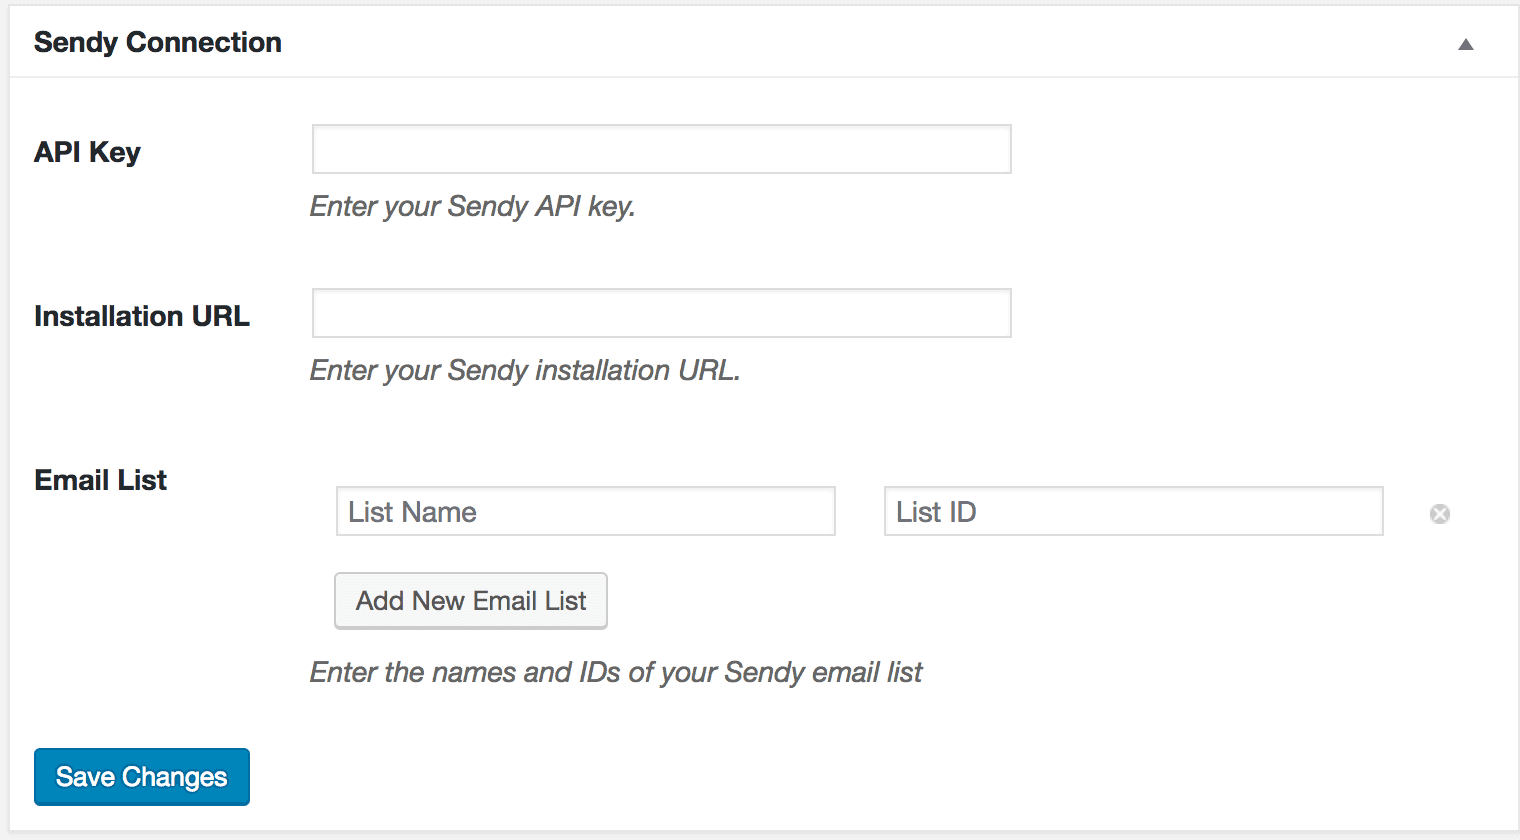
To add more email lists, click the “Add New Email List” button and enter the name and ID of the list.
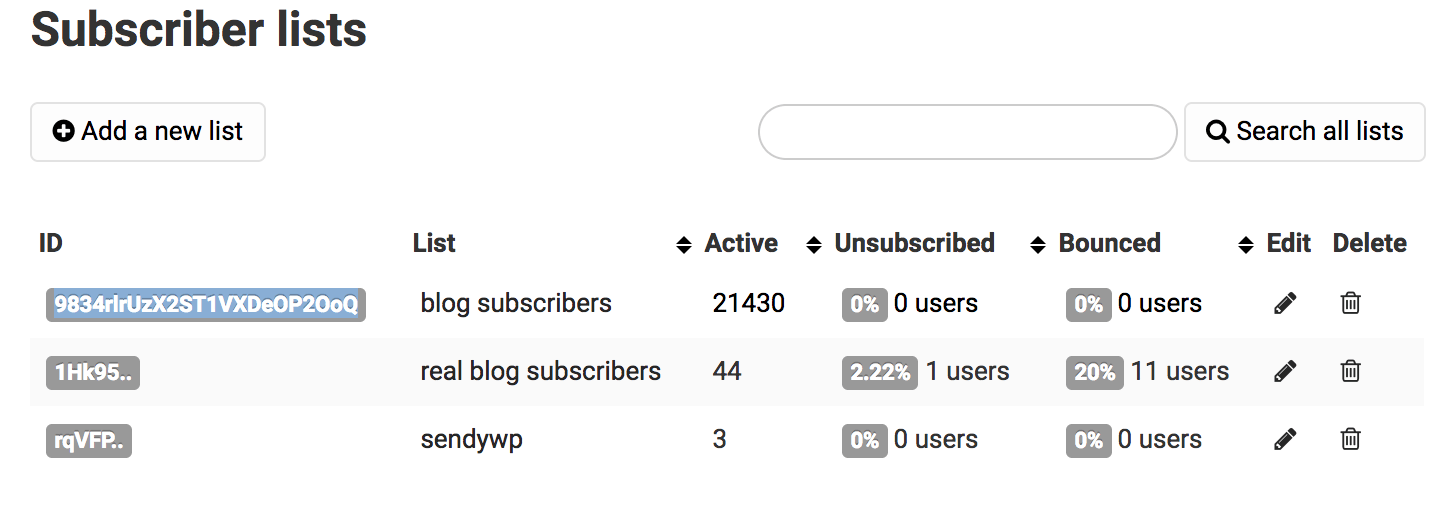
Not sure where to find your List ID? Log into your Sendy URL, and you can find it here:
Finally, click the “Save Changes” button to apply your settings.
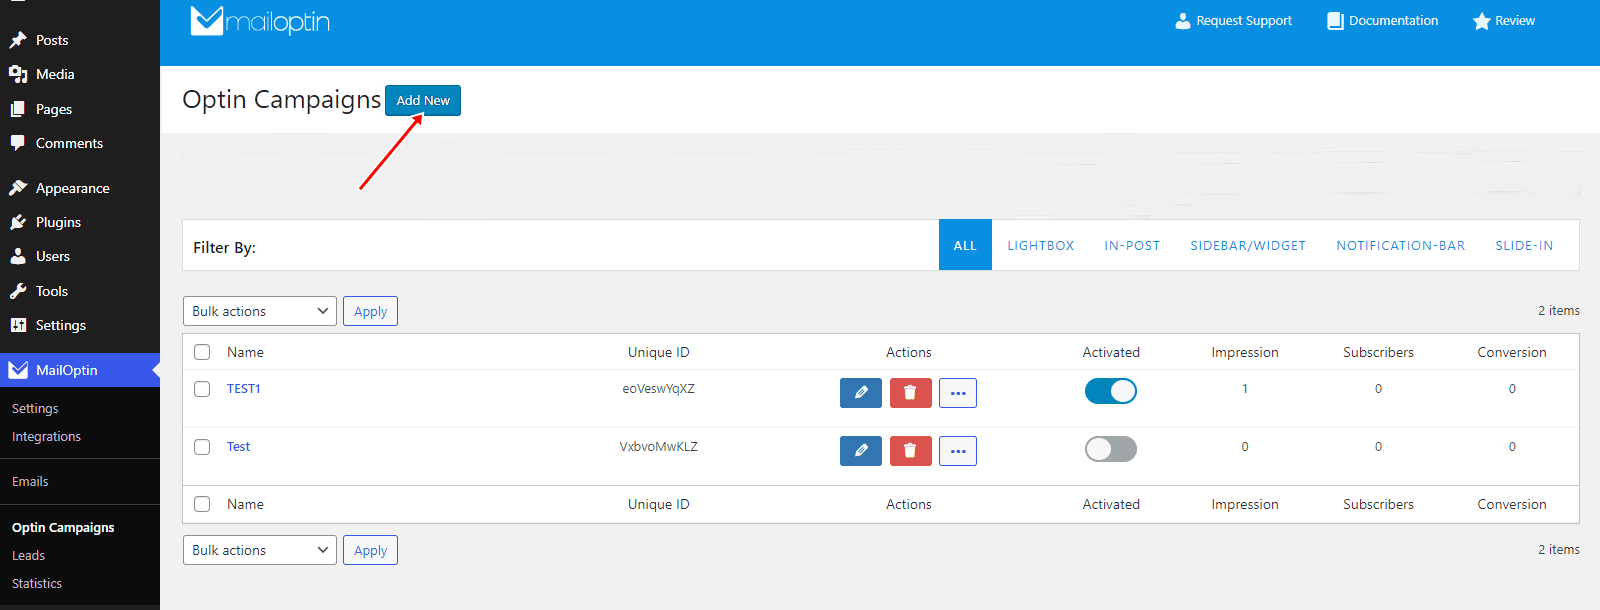
Step 3: Create a New Optin Campaign
To create a WordPress email signup form that is integrated with Sendy, go to the Optin Campaign page and click the Add New button at the top to create an optin form.
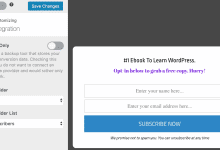
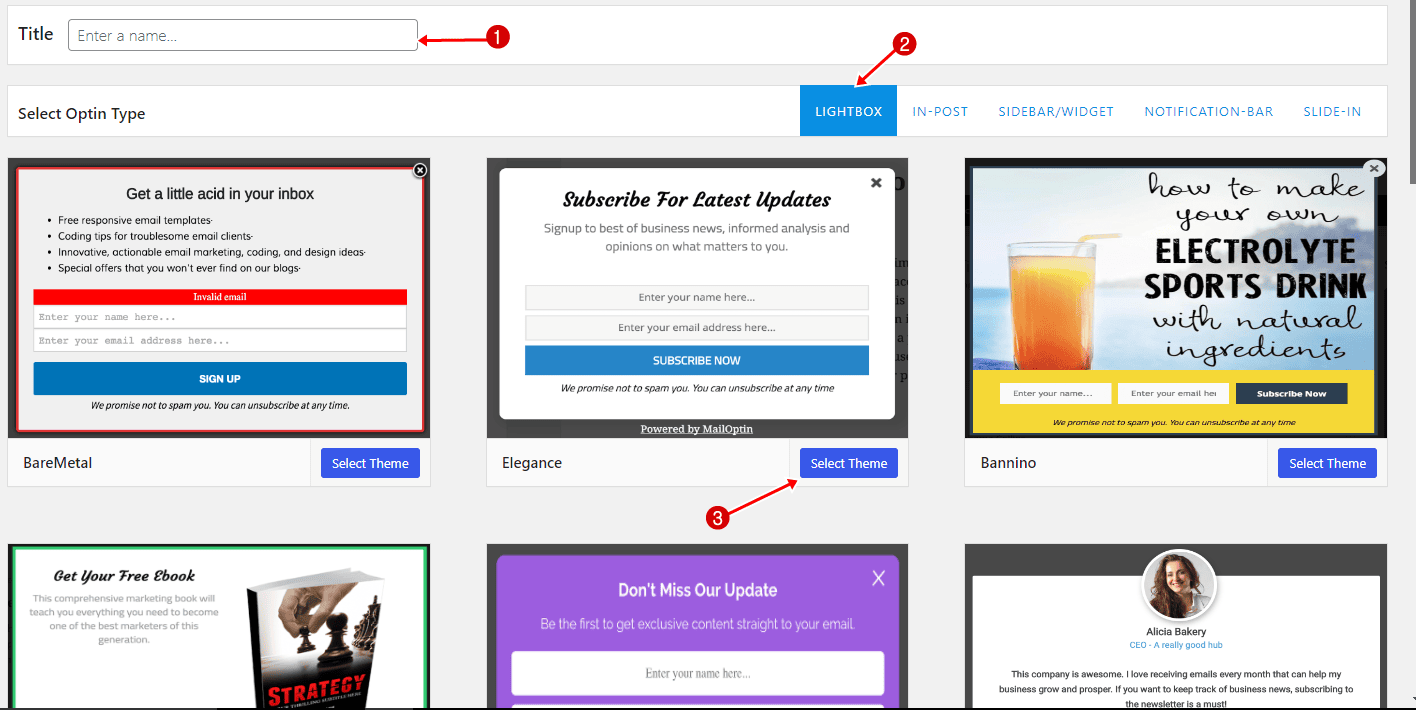
Enter a title for the campaign, select the optin type (for this tutorial, we’ll select Lightbox), and click the optin form design you want.
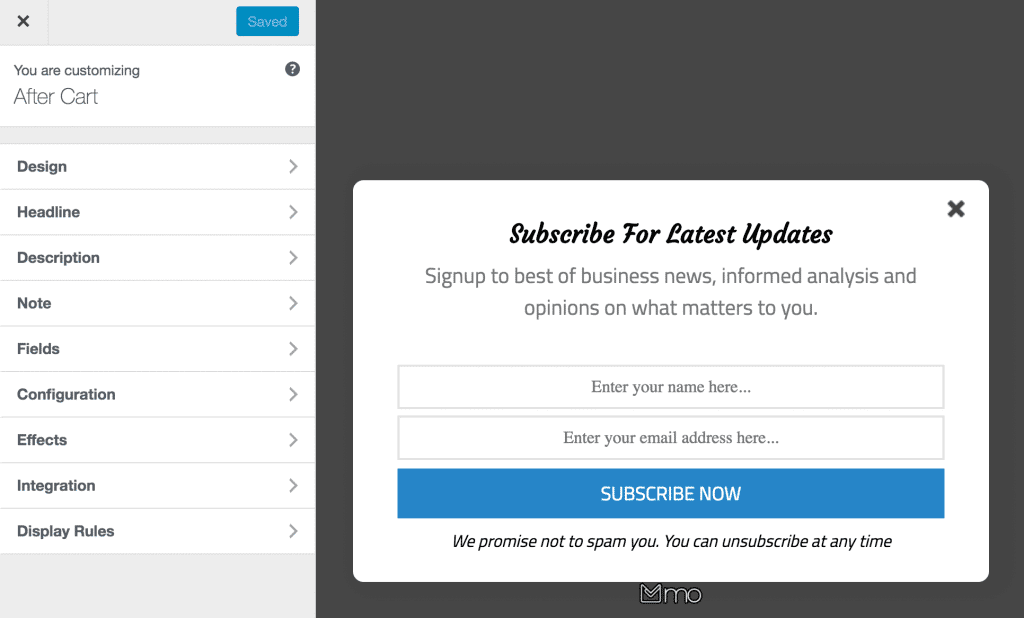
You will then be redirected to the WordPress form builder, where you have options and the flexibility to customize the optin form to your heart’s content.
See: Adding Extra Fields to Your Optin Form
Having finished customizing the Sendy optin form, open the Integration panel, Select Sendy in the Email Provider dropdown, and the Sendy Campaign to subscribe users to. You can also toggle double optin as well as a welcome email.
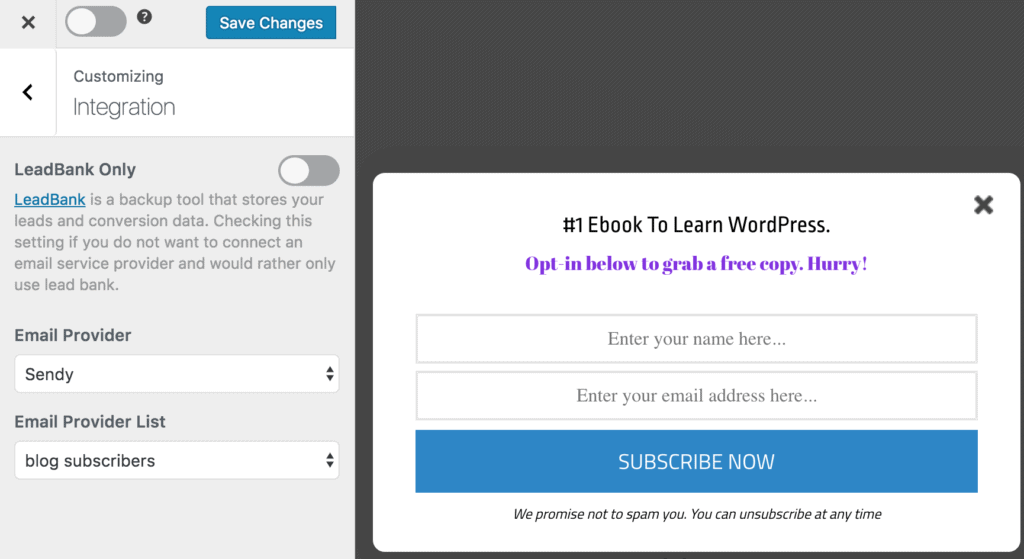
To actually get the opt-in to display on your site, toggle the activate switch ON at the top (close to the “Save Changes” button).
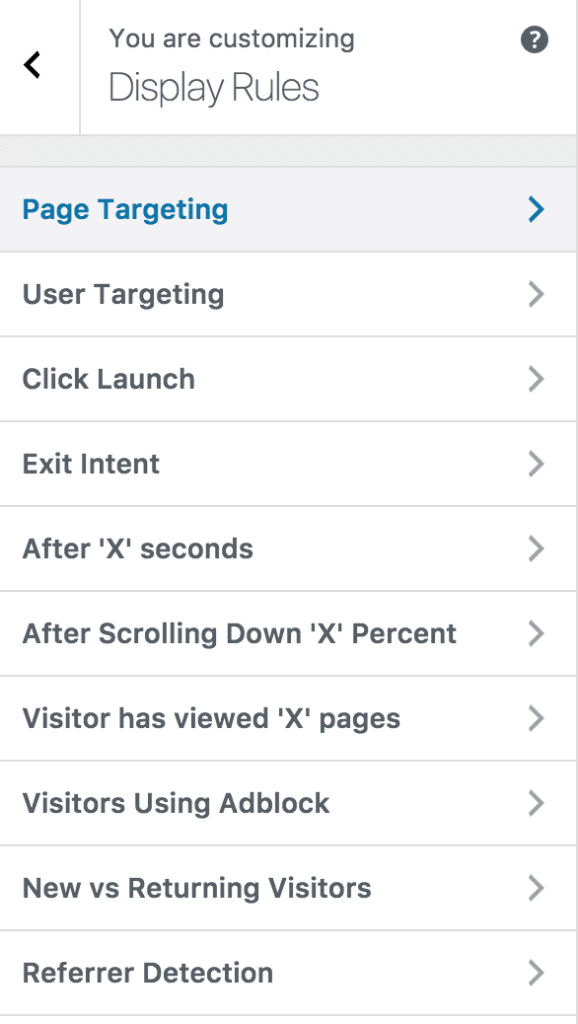
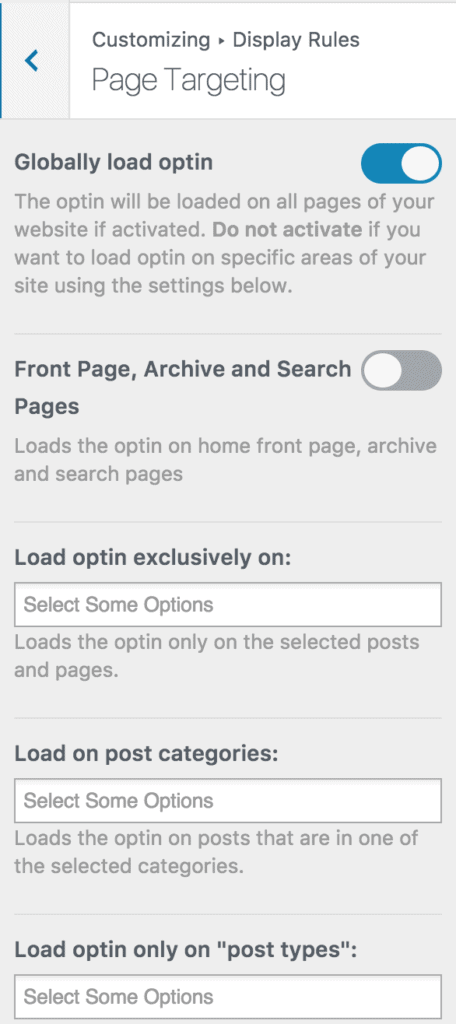
Navigate to the “Display Rules” panel.
If you want the opt-in form to be displayed everywhere (all pages) of your WordPress site, also check “Globally load optin” Otherwise use the page level targeting and triggers to determine how and where in your site the opt-in will be shown.
Finally, save the changes. Preview your website and you should see the optin displayed. If it doesn’t show up, be sure to clear your website and browser cache.
That’s how to create a Sendy optin form for WordPress
Capturing quality leads and growing your email list doesn’t have to be a daunting task. With the powerful combination of Sendy and MailOptin, you can create effective, visually appealing WordPress optin forms that seamlessly integrate with your Sendy account. This integration not only ensures that you engage your audience efficiently but also allows you to do so in a cost-effective manner.
In this tutorial, we’ve walked you through the entire process of creating a Sendy opt-in form using the MailOptin plugin. From installing and configuring the plugin to integrating it with your Sendy account, and customizing your opt-in forms, each step is designed to help you capture leads seamlessly.
Follow the guide below to learn how to create other popular types of email opt-in forms. And don’t forget to select Sendy in the Integration panel.