How to Create WordPress GoDaddy Email Marketing Optin Forms
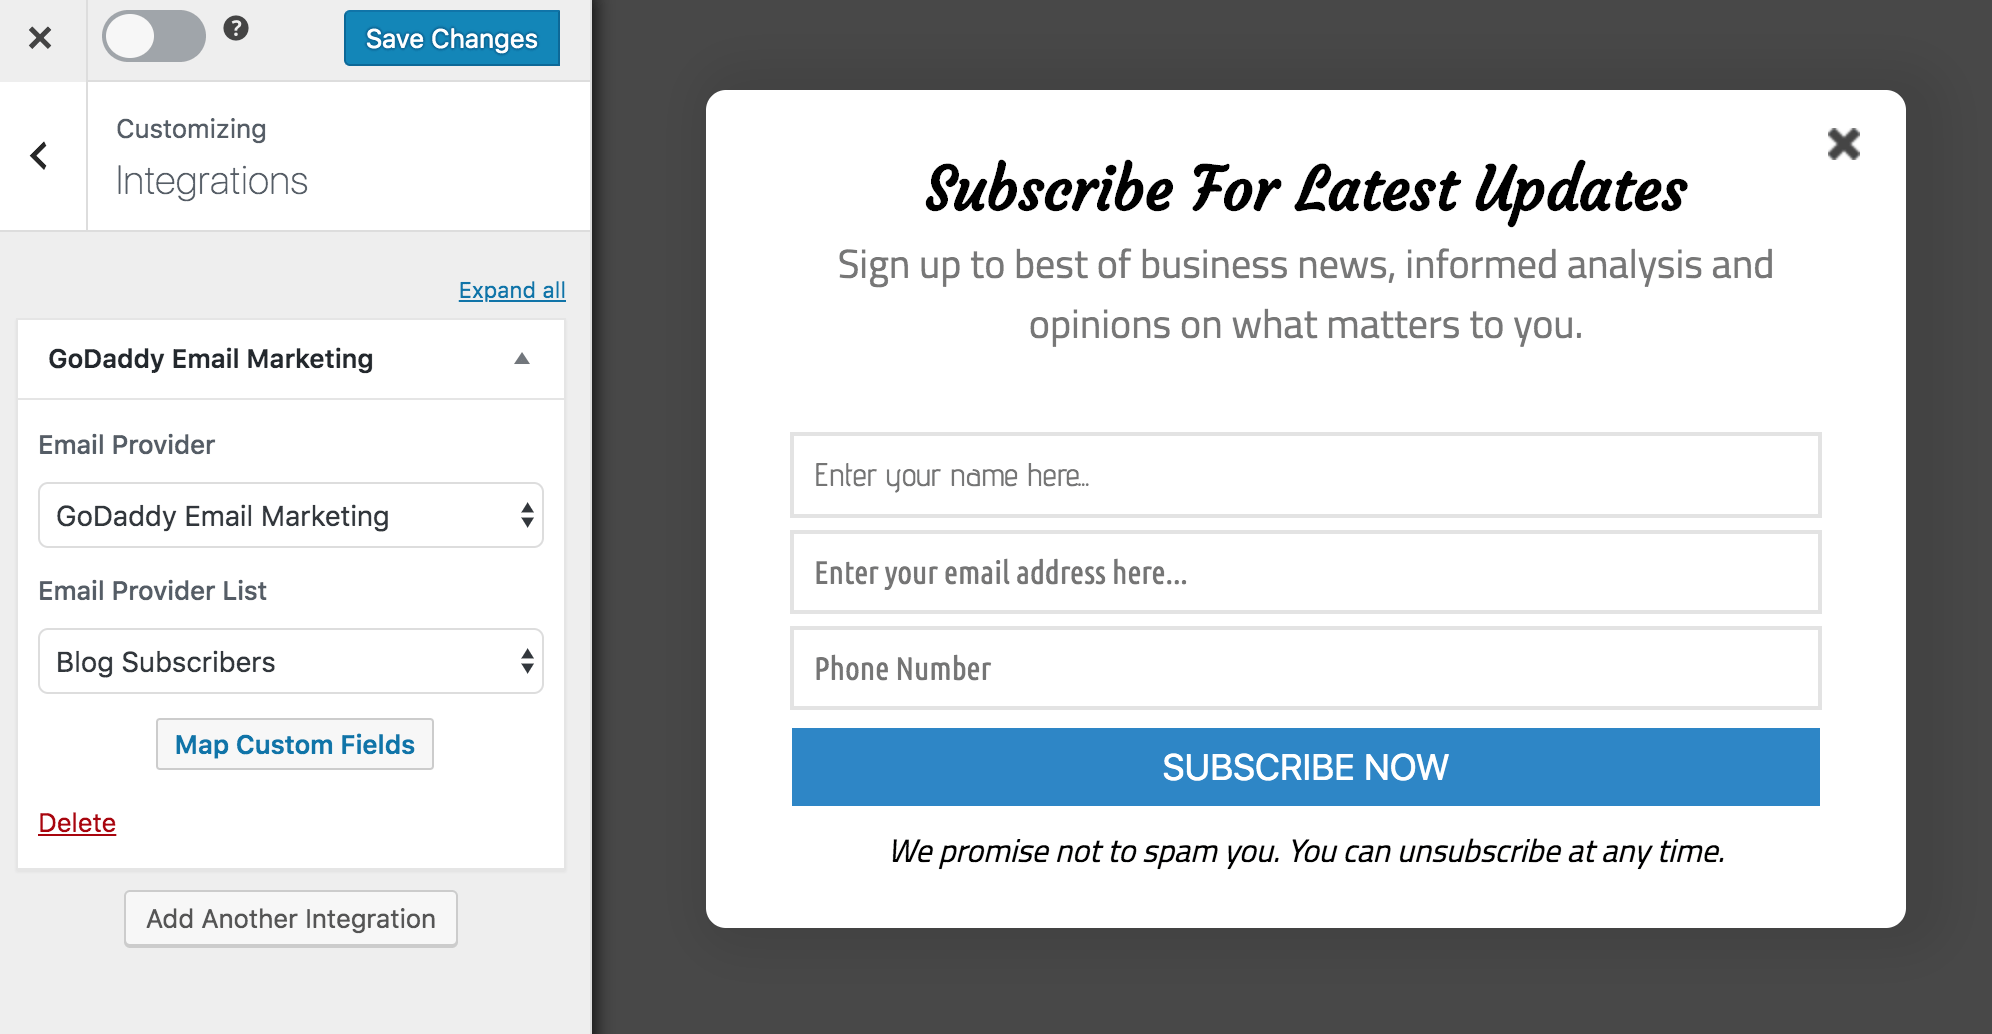
Are you looking to enhance your online presence and effectively engage your audience? Creating WordPress GoDaddy email marketing forms is crucial in capturing leads on your WordPress website and connecting with your target audience.
Email marketing continues to be one of the most powerful methods for driving conversions and nurturing customer loyalty. Optin forms play a pivotal role in this process, enabling you to gather valuable information from your website visitors.
In this tutorial, we will walk you through creating WordPress GoDaddy email marketing optin forms using the MailOptin plugin.
Creating a GoDaddy Email Marketing Optin Form
To build a GoDaddy email marketing optin form for your WordPress website, first, purchase a MailOptin license.
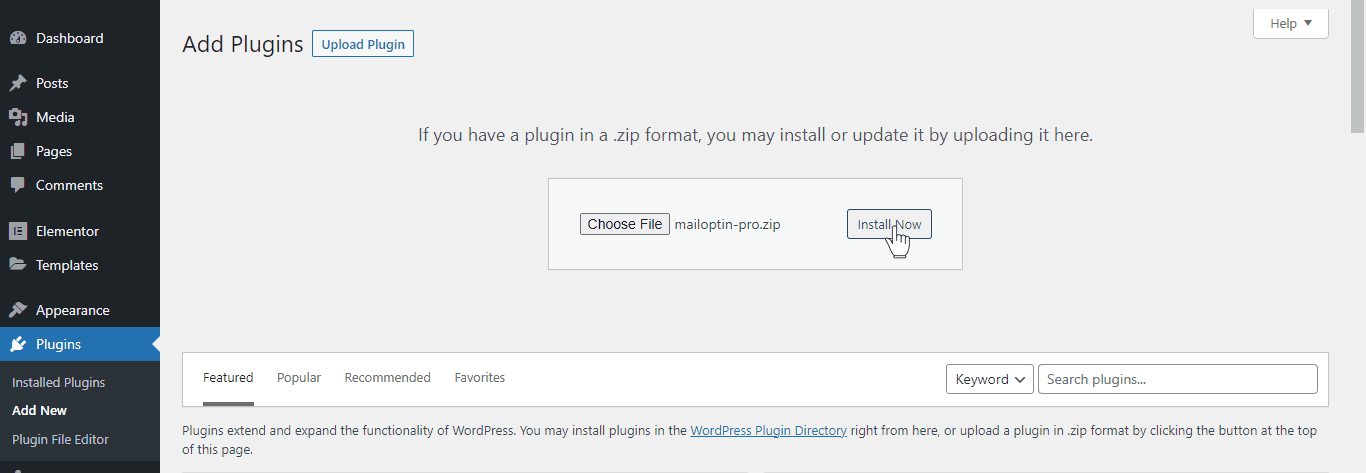
When you’re done with the purchase, you can log in to your WordPress admin dashboard, next go to the Plugins page, click the Add New button and Upload Plugin.
Then, click Choose File to select the downloaded plugin zip file. Click Install Now.
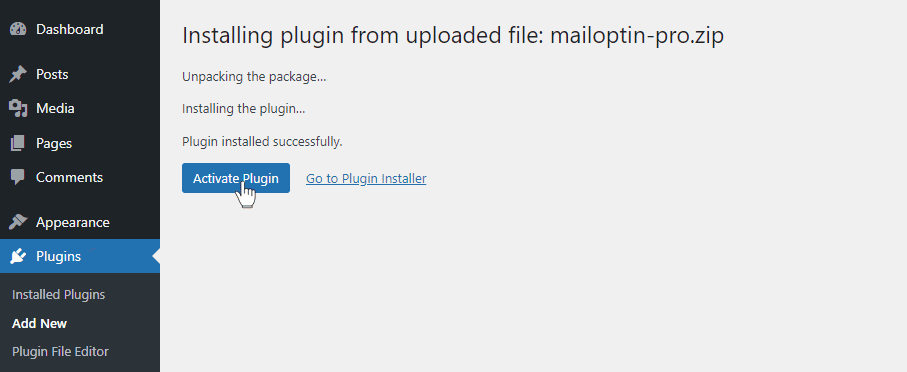
After installing the plugin, activate it by clicking ‘Activate Plugin’.
Connecting GoDaddy Email Marketing to WordPress via MailOptin
The next step is to connect MailOptin with the GoDaddy Email Marketing platform.
To do this, go to the Integrations settings page by either clicking the sidebar menu link or the top menu tabs.
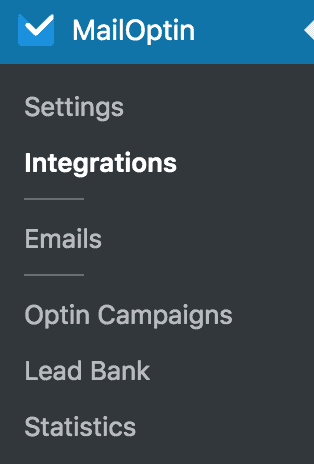
In the GoDaddy Email Marketing Connection section, you will find text fields where you can input your account email address and API key.
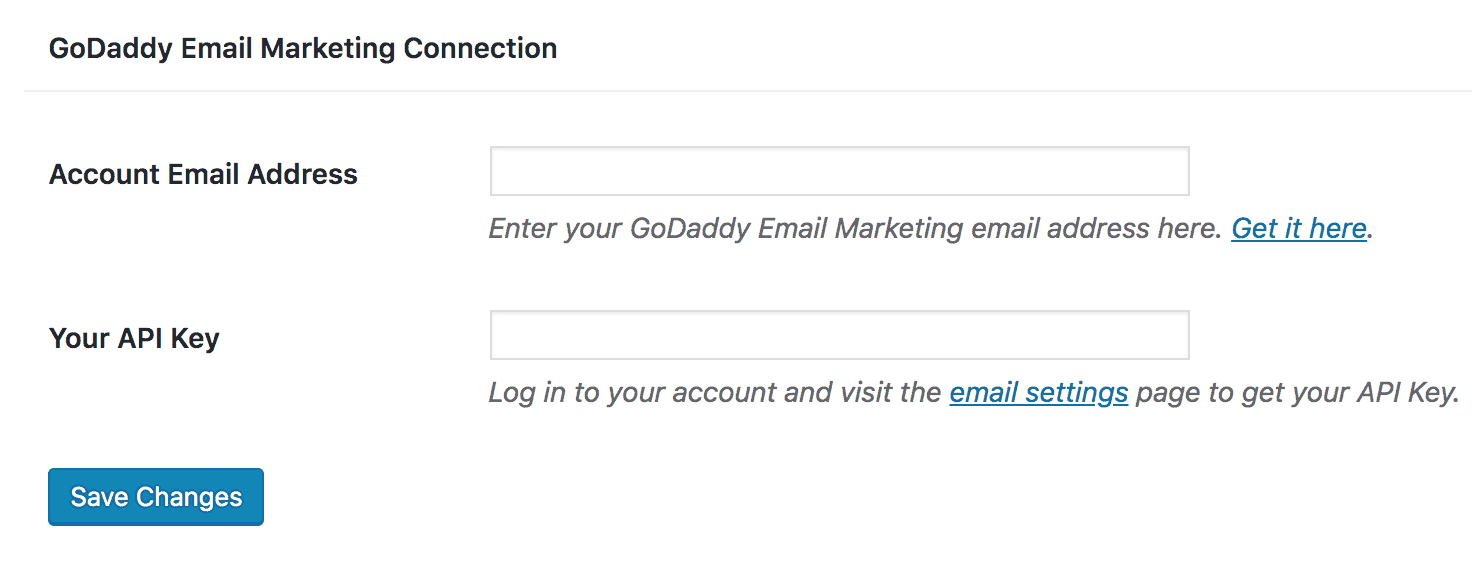
Finally, click the “Save Changes” button. Once you have completed this setup, proceed to the next step.
Create a WordPress GoDaddy Email Marketing Optin Form
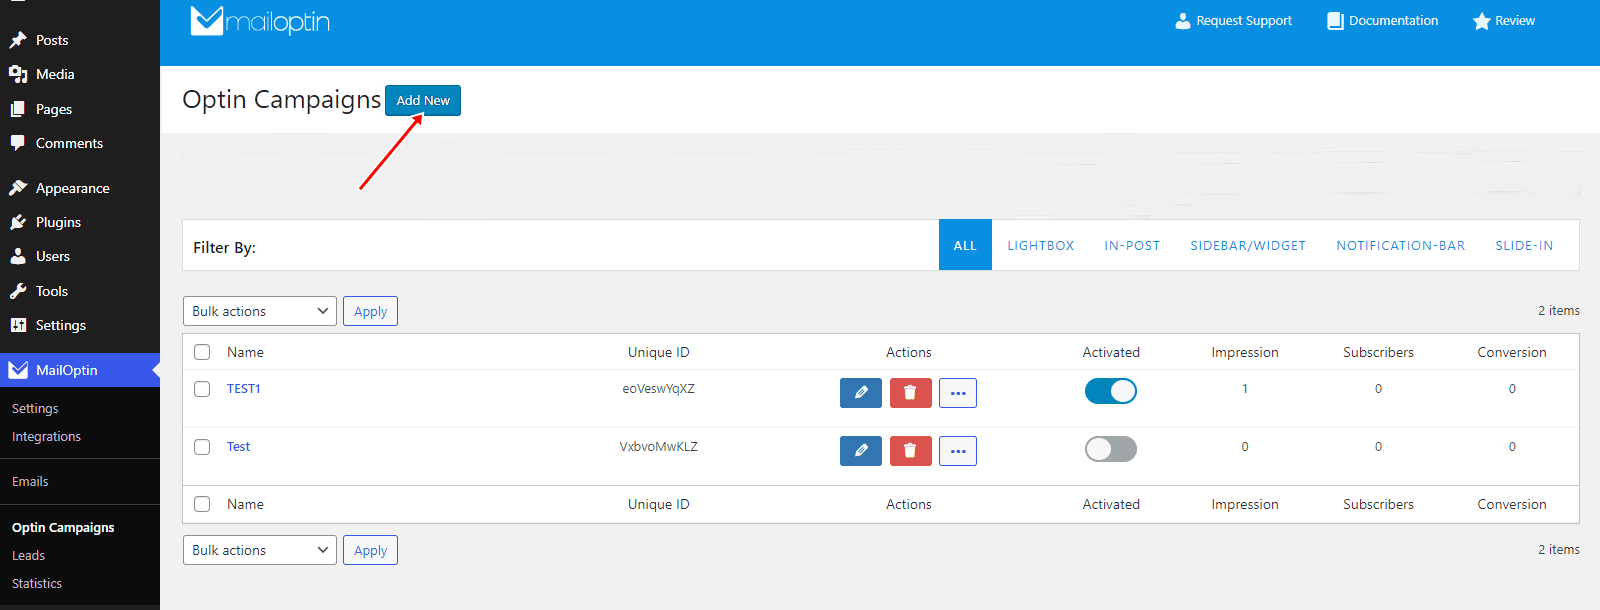
To do this, go to the Optin Campaign page and click the Add New button at the top to create an optin form.
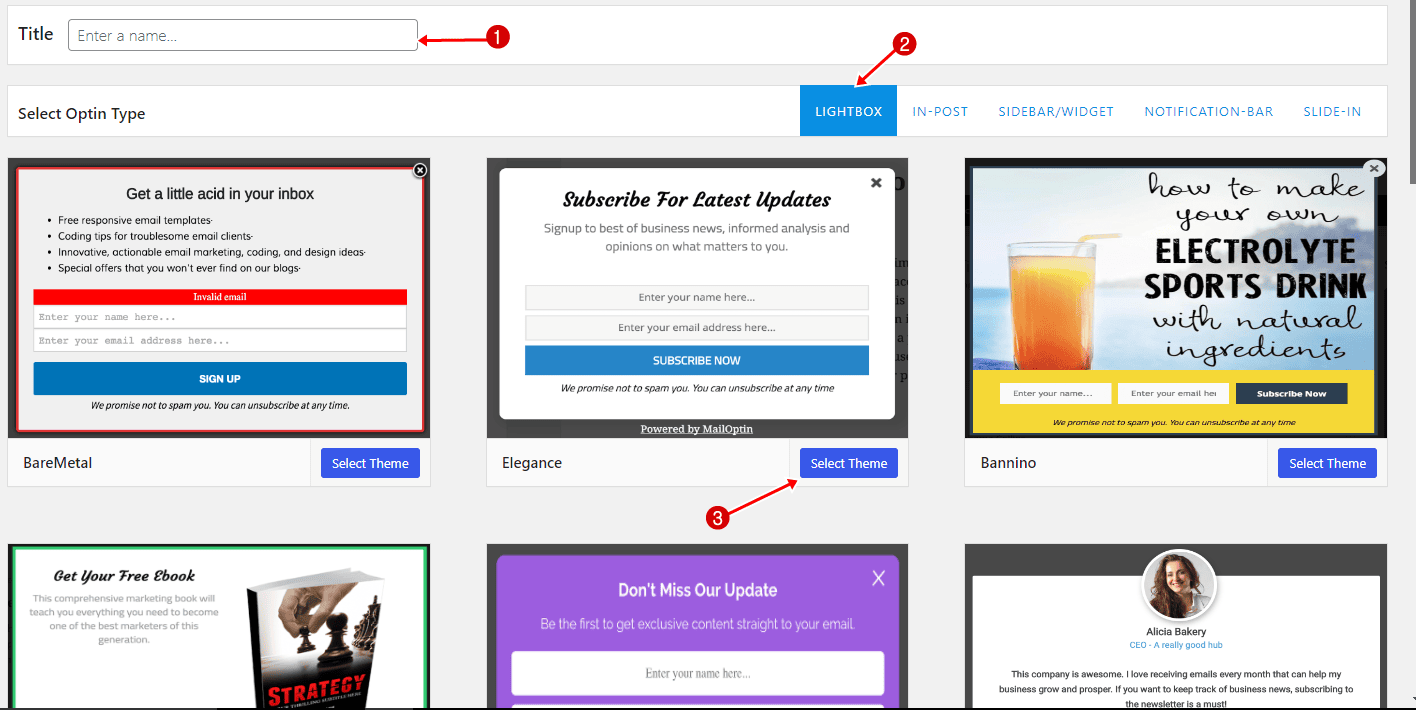
Enter a title for the WordPress optin campaign, select the optin type (for this tutorial, we’ll select Lightbox), and click the optin form design you want.
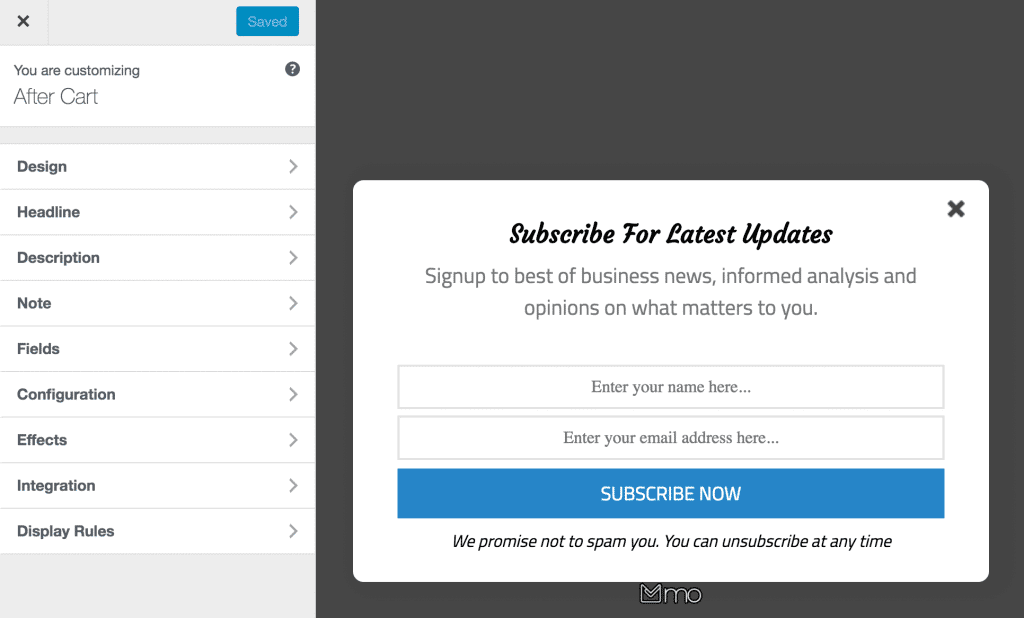
You will then be redirected to the form builder, where you have options and the flexibility to customize the optin form to your heart’s content.
See: Adding Extra Fields to Your Optin Form
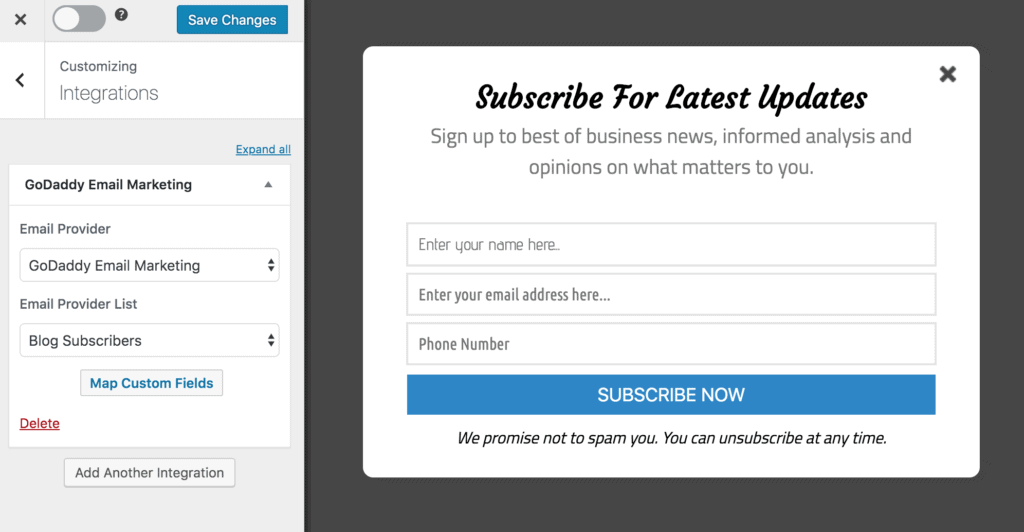
After customizing the form, open the Integration panel, Select GoDaddy Email Marketing in the Email Provider dropdown, and the list to subscribe users to.
To get the optin to display on your site, toggle the activate switch ON at the top (close to the “Save Changes” button).
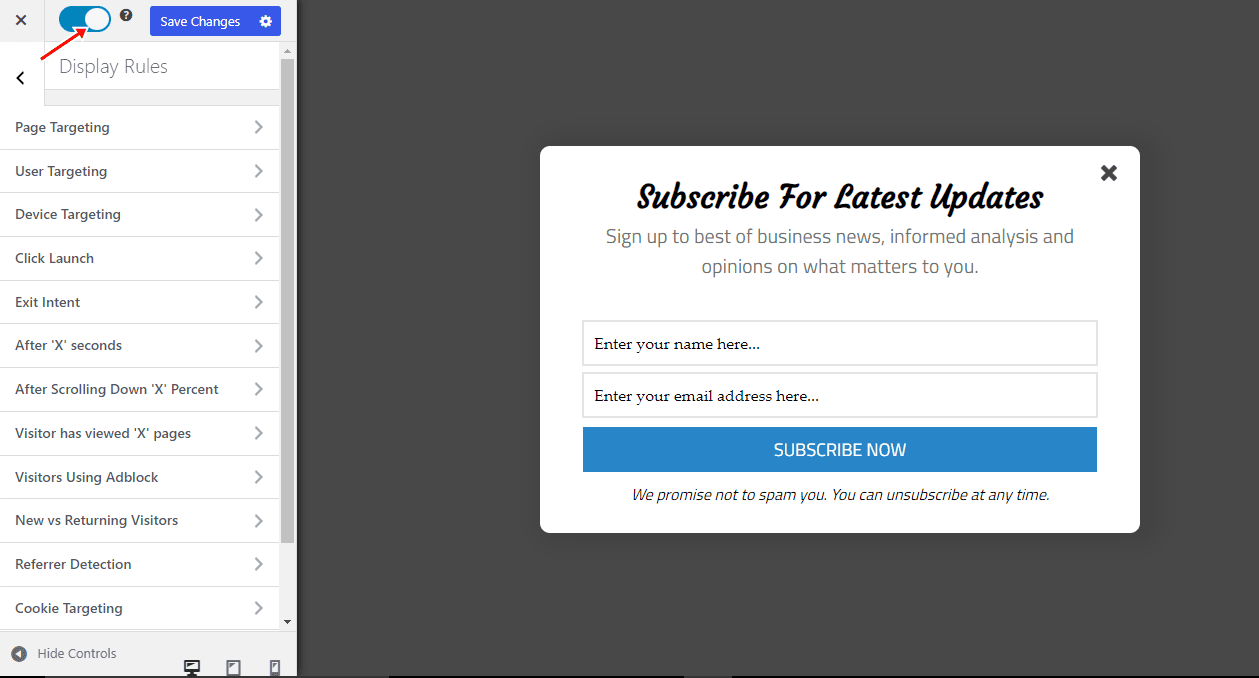
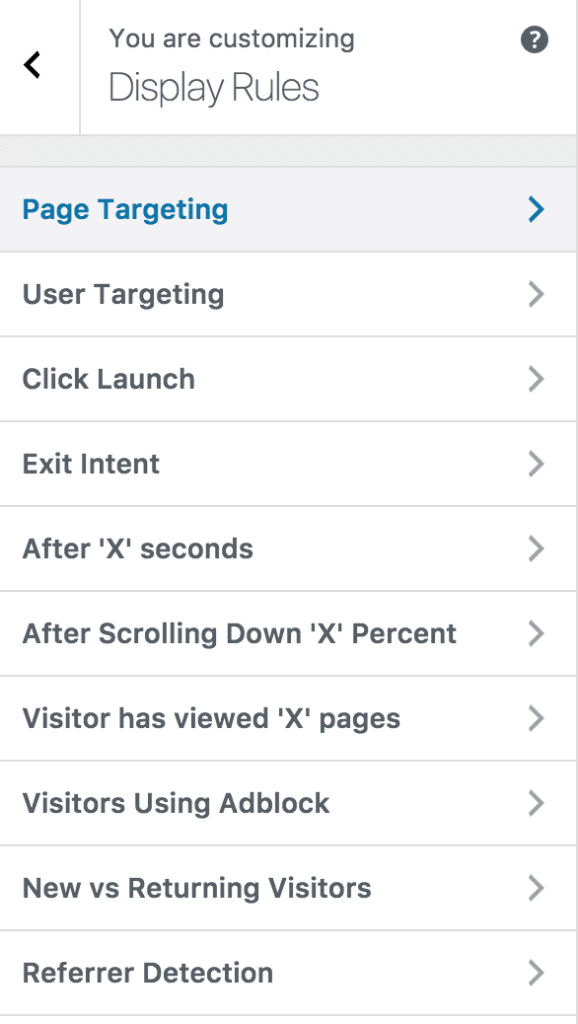
Navigate to the “Display Rules” panel.
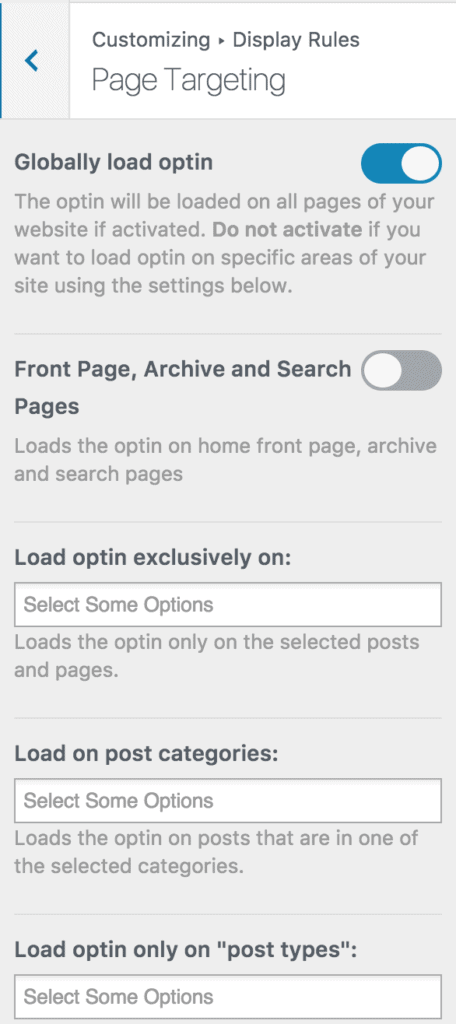
If you want the opt-in form to display on all pages of your WordPress site, check “Globally load optin.” Otherwise, use the page-level targeting and triggers to determine how and where the opt-in will appear on your site.
Finally, save the changes. Preview your website, and you should see the optin displayed on your WordPress website. If it doesn’t show up, clear your website and browser cache.
Following the steps outlined in this tutorial, you have learned how to integrate MailOptin with GoDaddy Email Marketing, allowing you to capture and save leads directly to your account.
You’ve seen how to install and activate MailOptin, design attractive opt-in forms, and optimize them for maximum conversion rates. Additionally, you’ve gained insights into advanced features like page-level targeting and triggers.
We hope this article has helped you learn how to create WordPress GoDaddy email marketing opt-in forms.
Follow the guides below to learn how to create other popular email opt-in forms. And don’t forget to select “GoDaddy Email Marketing” as the integration.
