How to Create FluentCRM Optin Forms in WordPress to Capture Leads
We all know that building an engaged audience is crucial for any business. However, capturing leads can be a real headache. FluentCRM is an awesome CRM plugin for WordPress that makes managing your email marketing a breeze. When you pair it with MailOptin, magic happens.
In this tutorial, we will guide you through integrating MailOptin with FluentCRM so you can start capturing and saving leads with email sign-up forms.
Guide to Creating FluentCRM Optin Forms
FluentCRM is a self-hosted email marketing automation plugin for WordPress. It allows you to manage your email marketing campaigns, track user activities, and automate marketing tasks directly from your WordPress dashboard. FluentCRM is designed to help you build strong customer relationships by providing comprehensive insights and tools to manage your email marketing efforts.
To create a FluentCRM optin form for your WordPress website, first, purchase a MailOptin license.
When you’re done with the purchase, you can log in to your WordPress admin dashboard, next go to the Plugins page, click the Add New button and Upload Plugin.
Then, click Choose File to select the downloaded plugin zip file. Click Install Now.

After installing the plugin, activate it by clicking ‘Activate Plugin’.
Creating a FluentCRM Optin Form
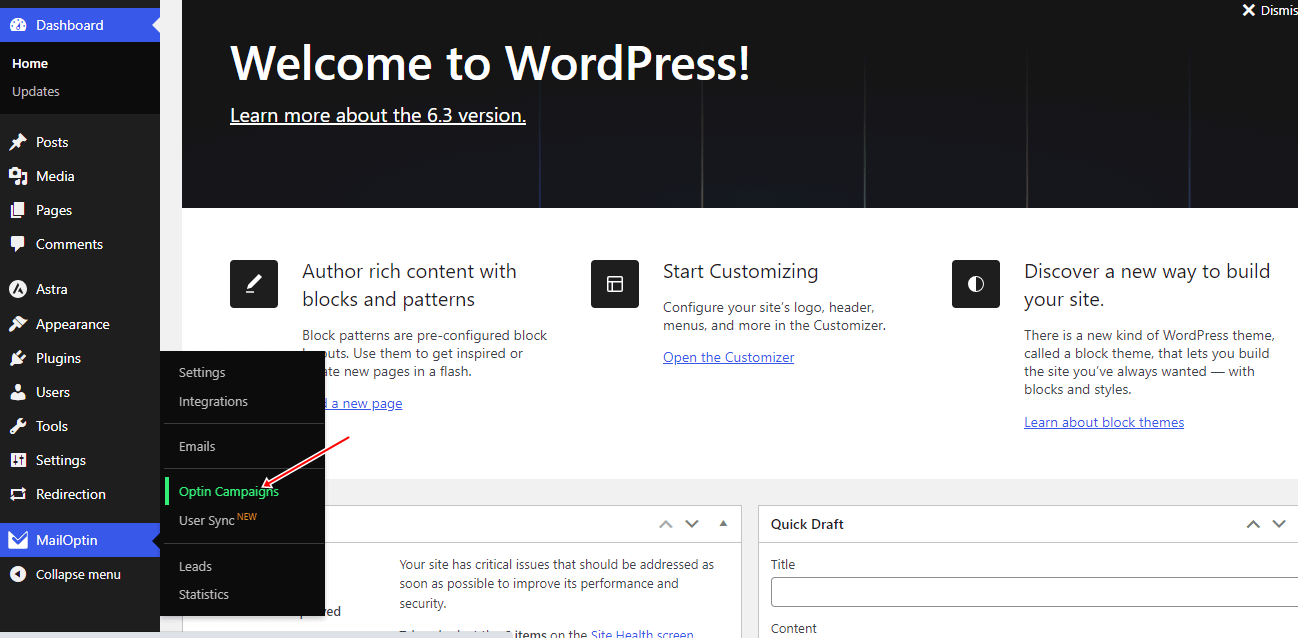
To create a FluentCRM optin form for your WordPress, click on “Optin Campaigns.” in the MailOptin menu.
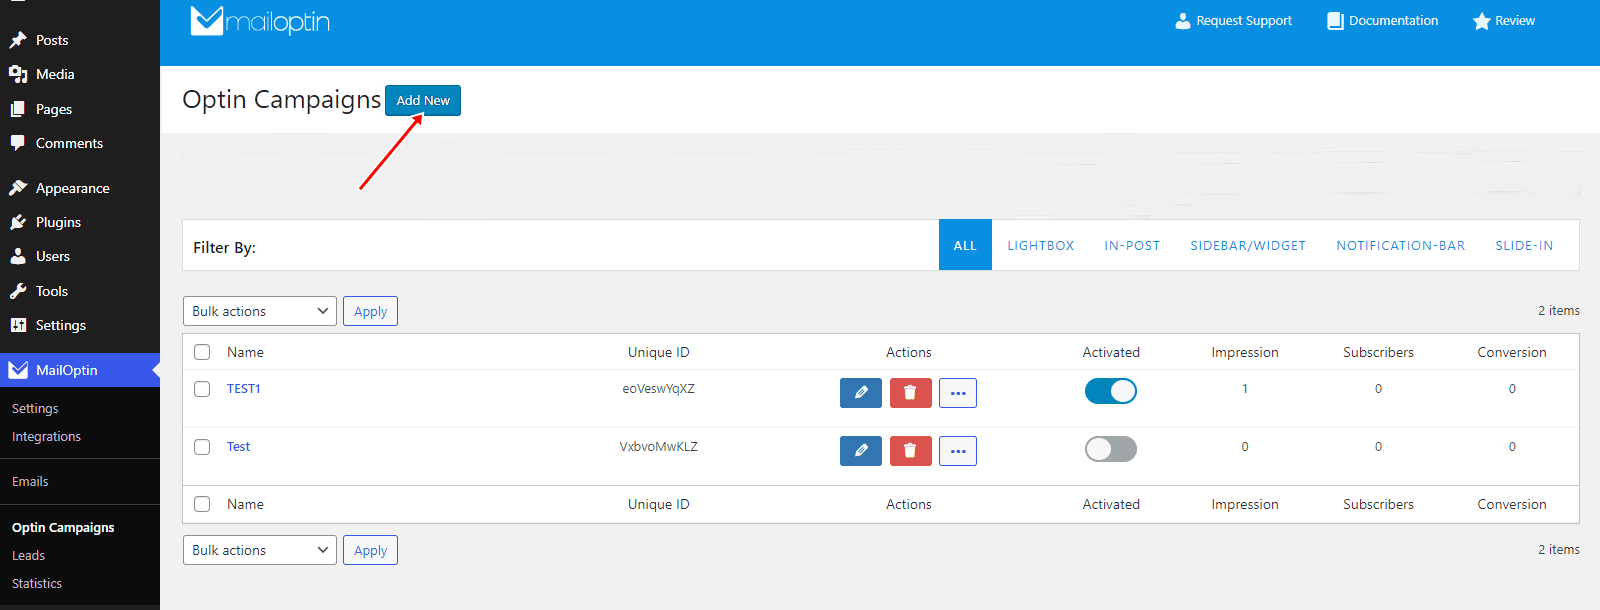
Click “Add New” to create a new opt-in form.
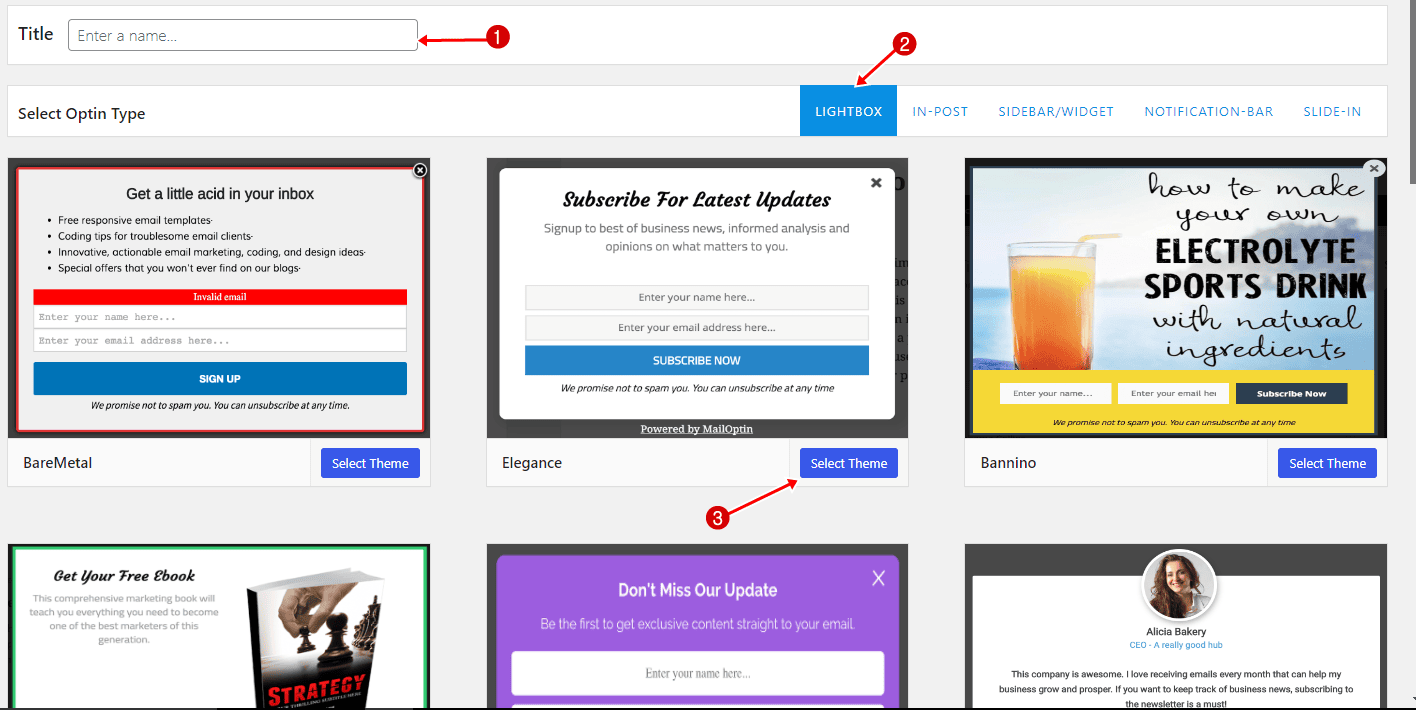
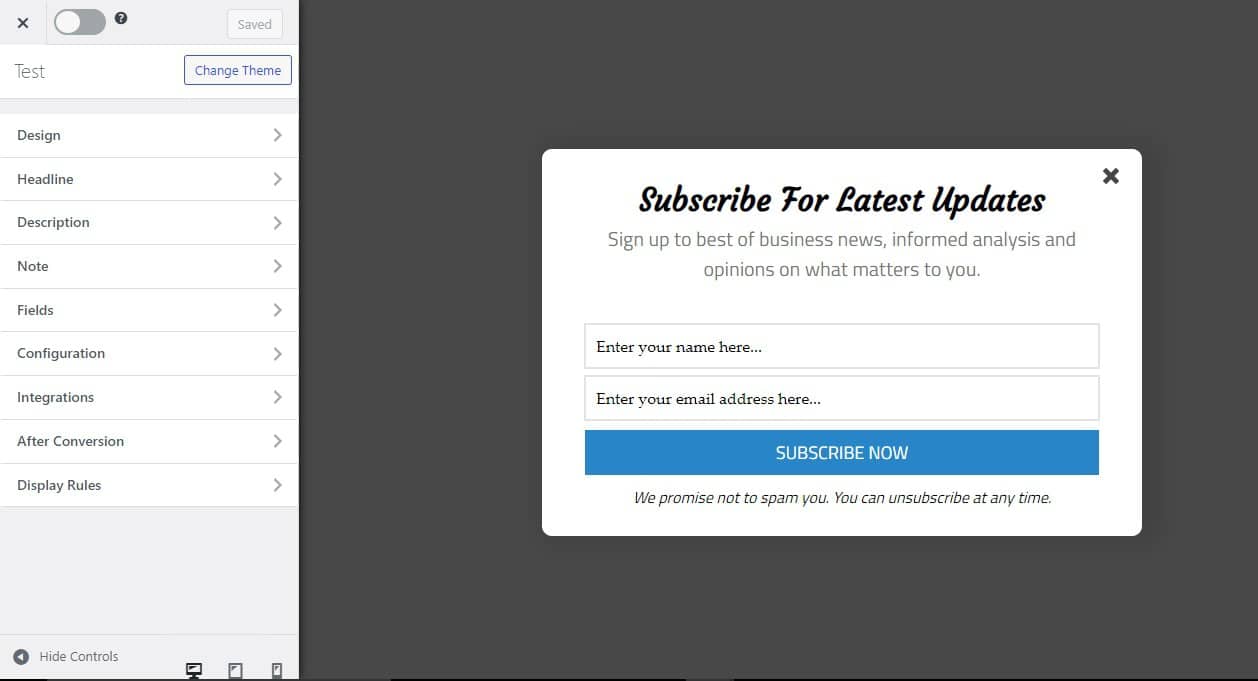
Enter a campaign title, choose the opt-in type (for this tutorial, we’ll select Lightbox), and click on the opt-in form design you prefer.
You will then be redirected to the form builder, where you have options and the flexibility to customize the optin form to your heart’s content.
You can change the Headline, Description, Note, Fields, and others according to your needs.
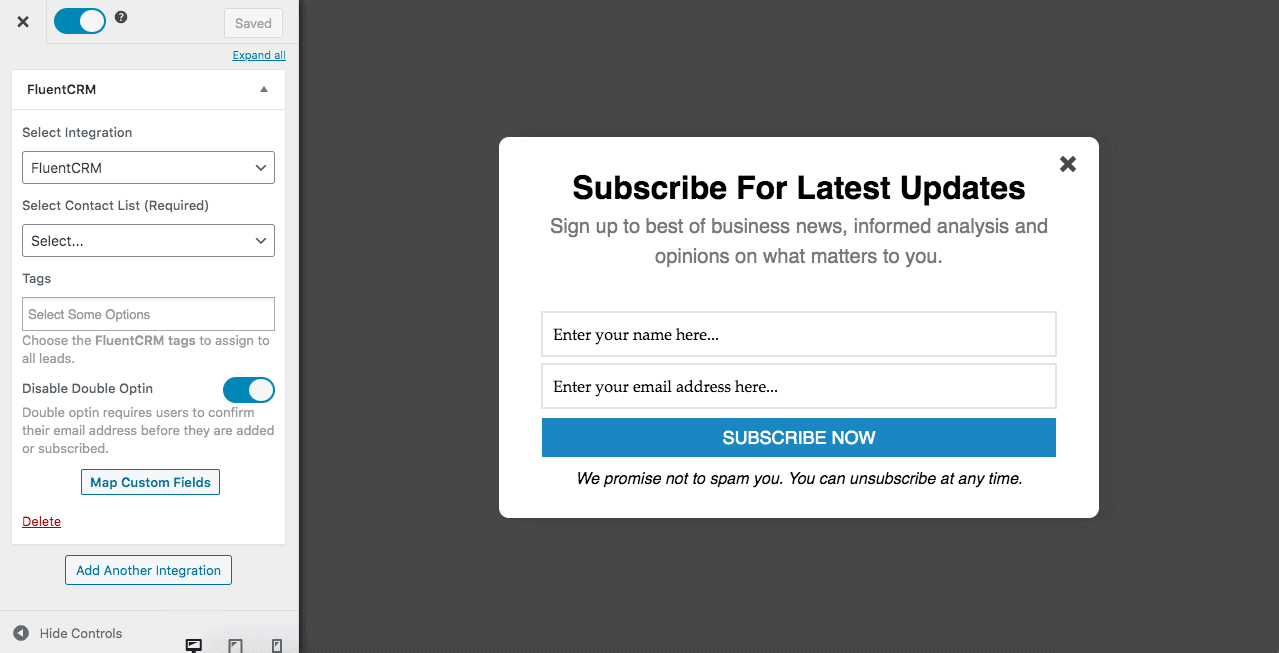
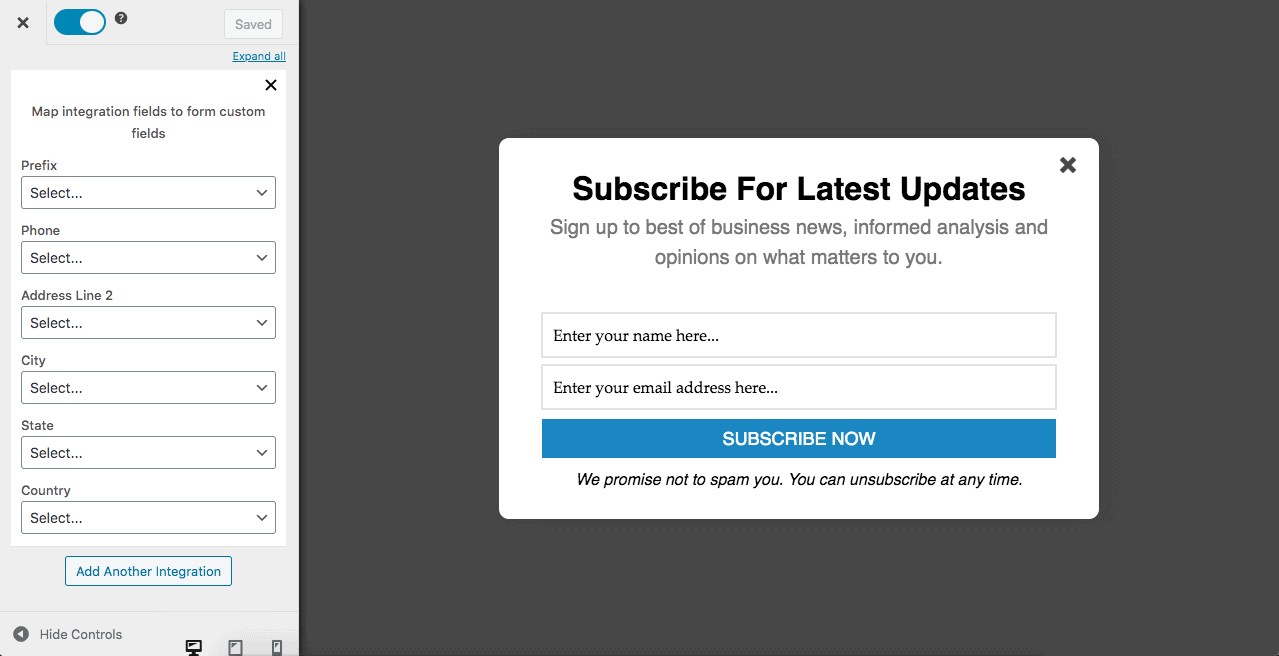
After finishing the customization of the form, open the Integration panel. Select FluentCRM as the integration and choose the contact list and tags from the available options.
You can also toggle ‘Disable Double Opt-in’ if you want users to confirm their email addresses before they are subscribed to the lists.
Click the “Map Custom Fields” button to map any extra fields you added to the form to their corresponding FluentCRM contact fields.
To get the FluentCRM optin form to display on your site, toggle the activate switch ON at the top (close to the “Save Changes” button).
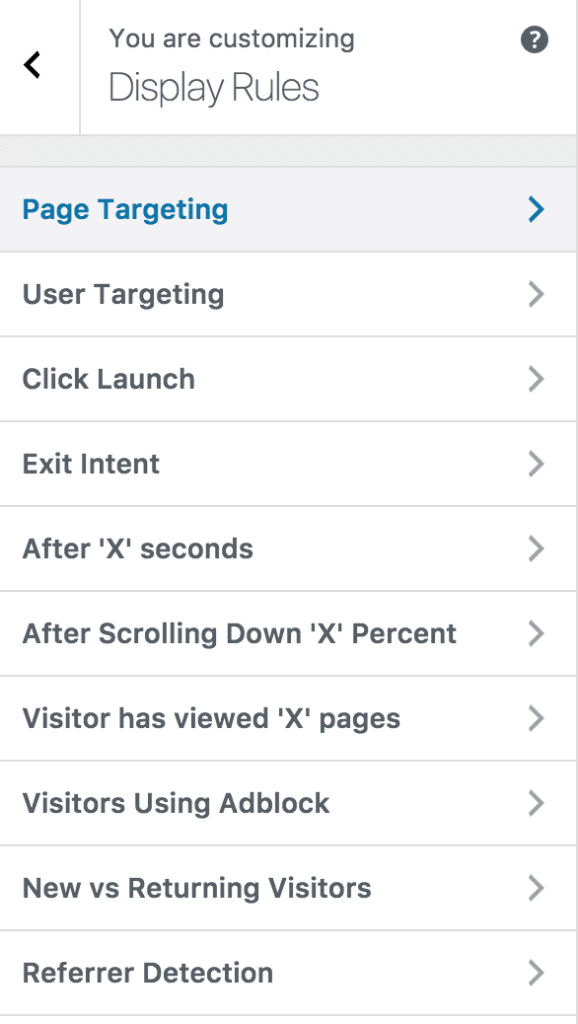
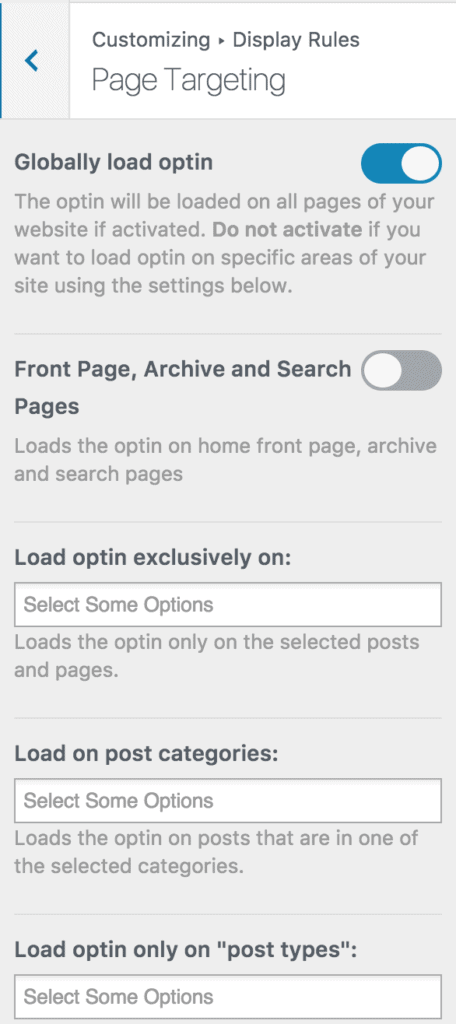
Navigate to the “Display Rules” panel.
If you want the FluentCRM optin form to be displayed everywhere (all pages) of your WordPress site, also check “Globally load optin” Otherwise, use the page-level targeting and triggers to deteermine how and where in your site the form will be shown.
Finally, save the changes. Preview your WordPress website, and you should see the optin form displayed. If it doesn’t show up, clear your website and browser cache.
We hope this article has helped you learn how to create an email signup form in WordPress that is integrated with FluentCRM.
Follow the guide below to learn how to create other popular email opt-in forms. Make sure to select “FluentCRM” as the integration.