Do you want to add social login to your WooCommerce store, allowing users to log in or sign up with their social account?
Social login has become increasingly popular over the last couple of years, and most people have adopted this feature as a standard way to create an account on any website.
With social login, we can use the same set of credentials across multiple websites without any security flaws; most people have an existing social media account, be it Facebook, Twitter, Google, or LinkedIn, and it is easier to log in to other sites using any of their existing social accounts.
Social login is also beneficial to website owners, as it helps them collect accurate information about their users. You can get their verified email address, name, location, and other relevant information available from their social network account.
In this article, we will guide you through setting up a WooCommerce social login feature on your website in simple steps.
Benefits of Adding Social Login to WooCommerce
There are numerous benefits to adding a WooCommerce social login feature. We will look at a few of them below.

Fast Checkout: Adding social login to WooCommerce unlocks a faster checkout process for your customers. Your customers do not need to fill out a registration form to complete their checkout. Instead, they can click a button and jump to the important parts of the checkout process.
Fewer Credentials: Social login removes the need to save and remember login credentials across multiple websites. With social login, your users only need to click on their social account button, and they will be automatically authenticated and logged into their WooCommerce account.
Accurate Data: Social login enables WooCommerce site owners to get more accurate data about their customers. The social network used for login will provide you with accurate and verified information about your user, which can be beneficial to your business.
Reduced Cart Abandonment: According to Baymard Institute Research, 37% of online shoppers said they abandoned their cart due to a lack of interest in creating an account, and another 28% said they abandoned their cart due to a lengthy checkout process; both of these scenarios can be improved with a WooCommerce social login.
How To Add Social Login To WooCommerce
Adding social login to a WooCommerce store is pretty easy when you use a plugin like ProfilePress. ProfilePress is a user profile and membership plugin for WordPress, offering features that include a social login for WooCommerce.
With ProfilePress, you can create custom forms that will replace the default WooCommerce login and registration forms on the “My Account” and checkout pages.
In the sections below, we will go through all the steps required to add a WooCommerce social login to your WordPress site.
Step 1: Install and Activate ProfilePress
The first step to adding social login to WooCommerce is to install and activate the ProfilePress plugin. Go to the ProfilePress website to get a suitable license plan.
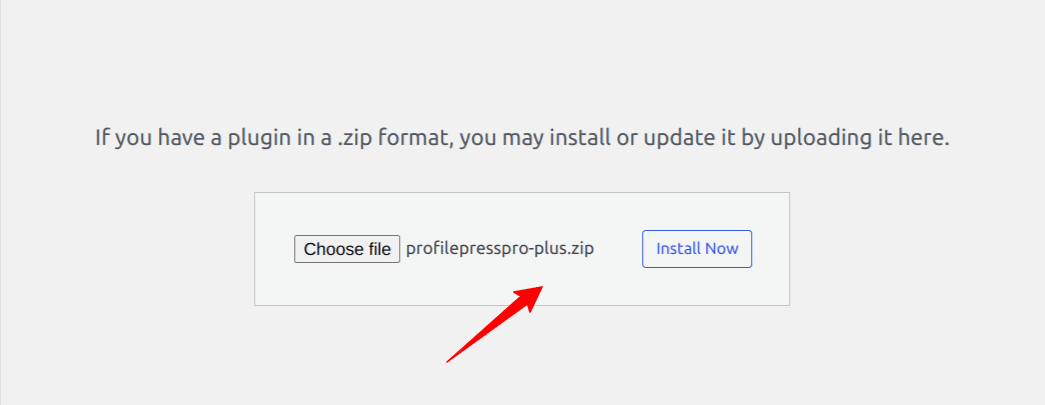
After getting a suitable license, you will receive an email with your license key and a link to download the ProfilePress plugin. Download the zip file to your computer, log in to your WordPress dashboard, and navigate to the Plugins page. Click the “Add New” button, then select “Upload Plugin”.
Click “Choose file” to select the previously downloaded plugin zip file. Click “Install Now”.
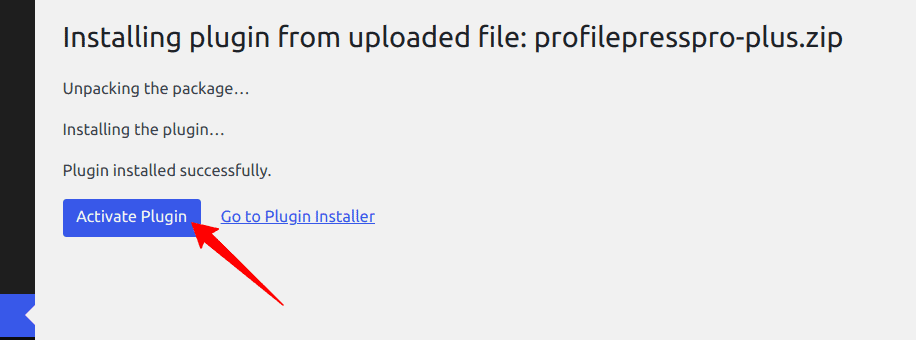
After the installation is complete, click the Activate Plugin button.
Step 2: Create a Custom WordPress Login Form
Now that you have installed and activated the ProfilePress plugin, you can proceed to create a custom WordPress login form that includes social login buttons and replaces the default WooCommerce login form.
The first thing is to activate the Social Login addon. Navigate to ProfilePress >> Addons, scroll to the social login addon, and activate it.
Next, go to ProfilePress >> Forms & Profiles and click on the Add New button, and select the Drag & Drop Builder.

For the form type, choose “Login” and a form title at the top, and select a template from the various designs available.

For this article, we will select the “Bash” template. You will notice it is predesigned with some social login buttons.

Once you click on the Select Template button, you will be redirected to the form editing page, where you can modify the form fields and add social media login buttons.
Step 3: Add Social Login Buttons to Your Custom Form
ProfilePress allows you to add multiple social login buttons to your WordPress login and registration forms. You can use as many social media logins as you want, but we will recommend a maximum of three to ensure a clean design and good user interface.
Use the drag-and-drop feature to add or remove extra fields on your login form from the editing page.

On the editing page, you will see the Form Settings section, which allows you to customize the look of your login form. You can change the field styling, labels, text, and the submit button.

In the Appearance tab, you can add various social media accounts using the Social Login Buttons text field. You can also customize the button text for submit buttons and text field placeholders for your custom login form.

Once you’re done, click on the Save Changes button to save your form. A shortcode will be generated for this form; take note of it, as we will use it in the next step.
Step 4: Create a Social Login Page
Now that we have created our custom WordPress login form with all the necessary social login buttons, the next step is to embed this form on a page to make it accessible on our WooCommerce website.
Navigate to Pages >> Add New on your WordPress dashboard to create a new social login page. Select a shortcode block and paste the form shortcode you copied in the step above.

Click the publish button, and the login form should be visible on this page.

Step 5: Replace the Default WooCommerce Login Form
In this final step, we will configure the social login add-on settings and replace the default WooCommerce login form with our custom WordPress login form page that we created in the previous step.
To use the social login page we created as the default WordPress login page globally on our site, navigate to ProfilePress >> Settings and select the newly created login page from the Login Page dropdown list under the Global Settings tab.

Next, go to ProfilePress >> Settings, and click on the Social Login tab to configure the various social media login settings. Depending on the social media platforms you choose, you will need to provide your app keys, secrets, and other relevant information.

After entering the API keys for the social media platforms, click on the Save Changes button.
You can also change the text of the social login buttons by clicking on the buttons tab.

Don’t forget to save your changes when you are done.
The last step is to select WooCommerce from the side navigation and choose your newly created social login page using the My Account Login Form, Checkout Login Form, and My Account Registration Form dropdown fields.

Click on the Save Changes button to save your settings.
Below is a preview of how the forms might look on your WooCommerce My Account page.

When your customers click on the social login buttons, they will be redirected to the login authentication page of their preferred social account. This will enable them to check out faster without having to fill out any boring forms.
Conclusion
Integrating social login into your WooCommerce store is a strategic move that not only enhances the user experience but also improves the registration and checkout process.
By allowing customers to log in using their existing social media accounts, you reduce barriers to entry, minimize cart abandonment, and gather reliable user data essential for your business.
The ProfilePress plugin makes adding social login to WooCommerce, tailored to your brand, easy.
Get started today, and watch your conversion and engagement metrics soar.