How To Create WordPress Registration & Login Forms with Social Login
Would you like to create a custom WordPress user registration and login forms with WordPress social login?
Adding a social login to WordPress registration and login forms is a great way to improve user experience. It allows your website visitors to log in and sign up without filling out a form, speeding up the process.
This guide will show you how to add WordPress Social Login buttons to your front-end registration and login forms.
Why Add a WordPress Social Login to Your Site?
The easier you can make your website’s sign-up process, the more people will sign up. Adding Social Login to WordPress login and registration forms is a surefire way to reduce the friction in signing up and logging in.
Think about the average sign-up flow: You have to enter your email address, your first name, your last name, and a password. Some websites also ask you to confirm your password. And don’t forget about validations. Your password might be too short or too weak. The average sign-up experience is really slow.
On the other hand, signing up using a social media account that you already have is much faster. You click the sign up with the Facebook button, click confirm, and that’s it. You now have an account! You don’t need to worry about password validation, filling out your name, or uploading a profile picture. It’s all automatically taken care of!
People love social logins because it helps them avoid filling out registration forms. In a survey, Gigya found that 86% of users are bothered by creating new accounts. This might be because it means they will have to remember a new password. Whatever the reason, people love being able to sign up instantly with a social network account they already have.
Why Add a WordPress Social Login to Your Site
You only need the ProfilePress plugin to add social login and registration to your WordPress website. Unlike other plugins that allow you to do the same, ProfilePress is the best WordPress social login plugin with no steep learning curve.
The best part about using ProfilePress is that it has dozens of other features you’ll enjoy. It’s an all-in-one plugin for selling paid memberships and digital products. So whether you want to create a paywall-based news site, a premium subscription for your podcast, or sell an eBook, ProfilePress has you covered.
It offers one of the easiest ways to start selling on your WordPress website. It supports payment gateways, including PayPal, Mollie, and Stripe. You can use it to sell both recurring memberships and one-time purchases.
The biggest reason why I recommend ProfilePress over other plugins is that it’s built for beginners. It offers a user-friendly interface and makes creating and managing your online business easy.
If you don’t already have ProfilePress, download it today!
In the next section of this article, I’ll show you step-by-step how easy it is to set up a WordPress social login with ProfilePress.
How To Add a Social Login to WordPress
Step 1: Enable User Registration & Create The Essential Pages
To allow your visitors to register on your website, you need to enable the ‘Anyone can register’ option from the settings of your WordPress dashboard.
Navigate to the Settings page from the sidebar, and enable the ‘Anyone can register’ option.
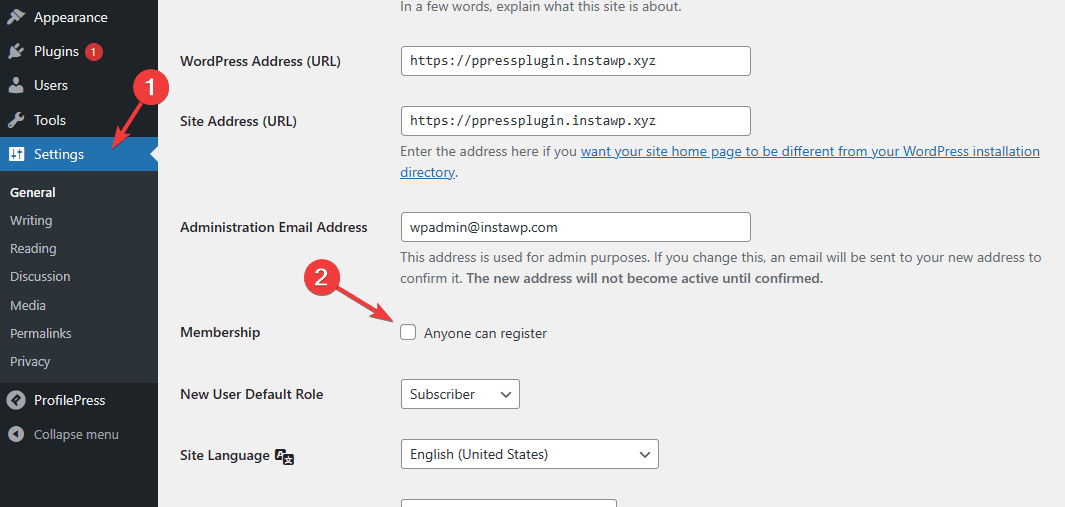
If you don’t enable this option, your visitors won’t be able to register on your website.
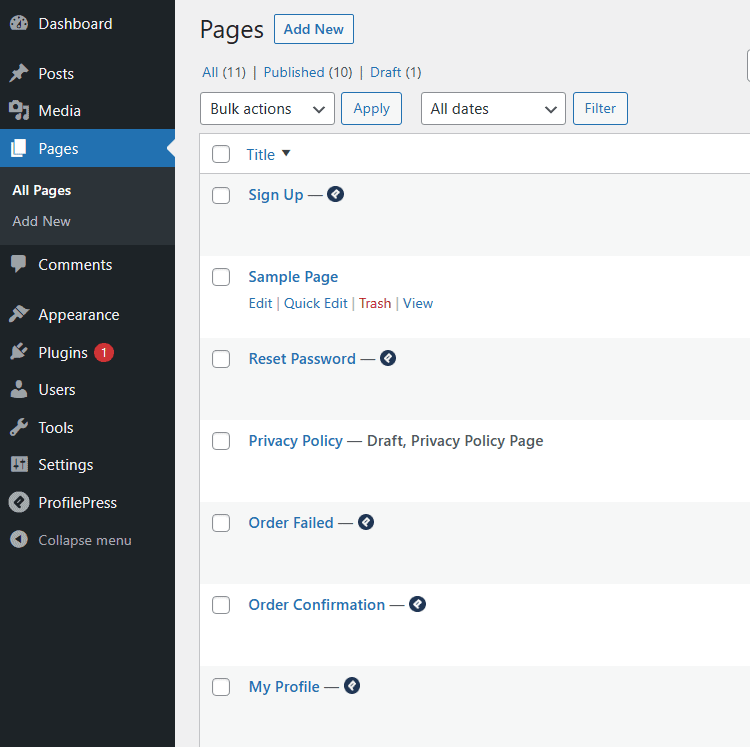
You’ll now need to create some essential pages for ProfilePress, such as the registration and login pages. Thankfully, ProfilePress can do it for you automatically. After installing the ProfilePress plugin, you’ll see this notification on all pages of your dashboard:

Next, click the Create Pages button. This will create all the required pages.
You’ll see the newly created pages if you visit the Pages section of your WordPress dashboard:
You can visit the ‘Sign Up’ and ‘Log In’ pages in incognito mode to see what they look like. If you visit either of them, you’ll see they don’t have a social login option yet. That’s what we’ll add in the following steps.
Step 2: Enable the Social Login Addon
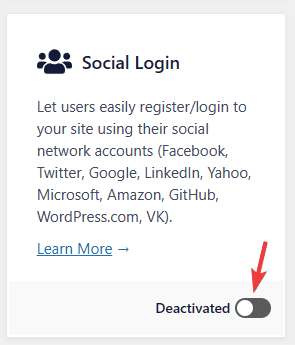
ProfilePress comes with lots of addons that enable additional features. First, you’ll need to enable the Social Login addon.
Go to ProfilePress -> Addons:
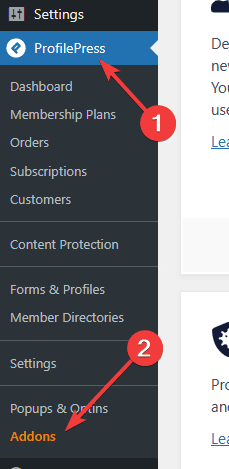
Now enable the Social Login Addon:
Step 3: Set Up Social Login Integrations
To enable social login, you’ll need to create an app on the developer platforms of each social network you want to use.
For this article, I’ll show you how to do it for Facebook and LinkedIn. Visit the ProfilePress documentation to learn how to set up other social login applications.
Setup Facebook Login
First, visit the Facebook Developer platform website, and log into your account.
Now, click the Create App button:

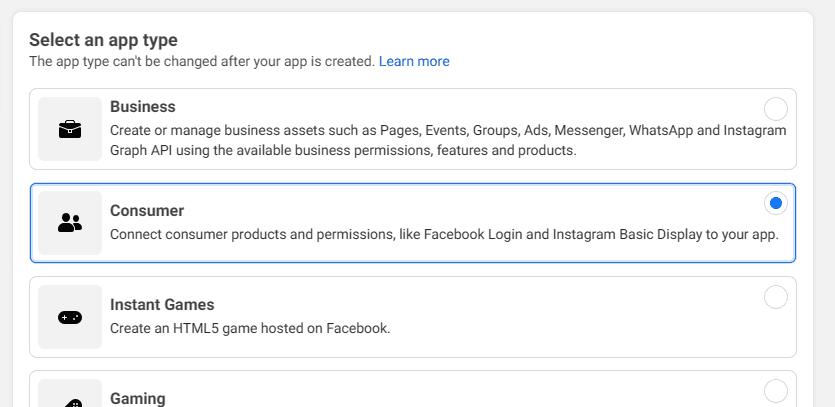
Select Consumer as the app type, and click the Next button at the bottom of the page:
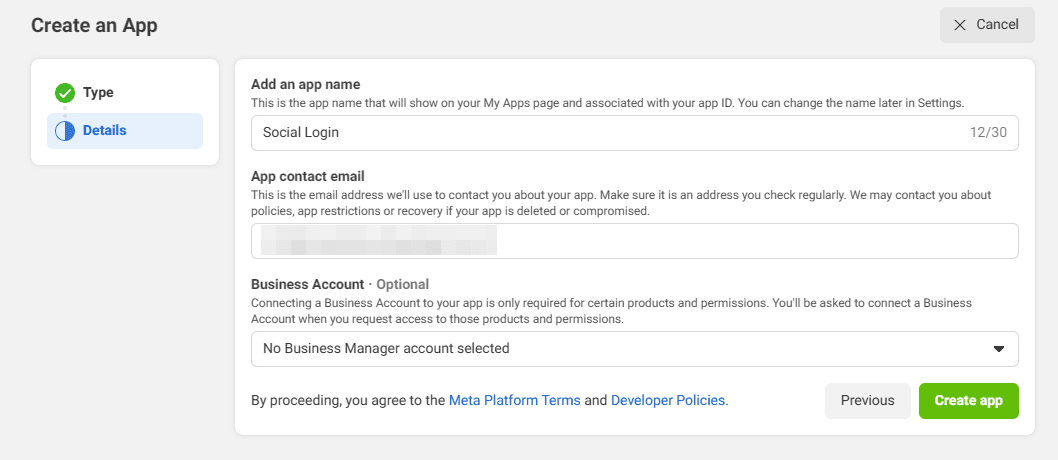
Enter a name for your App, and click the Create App button:
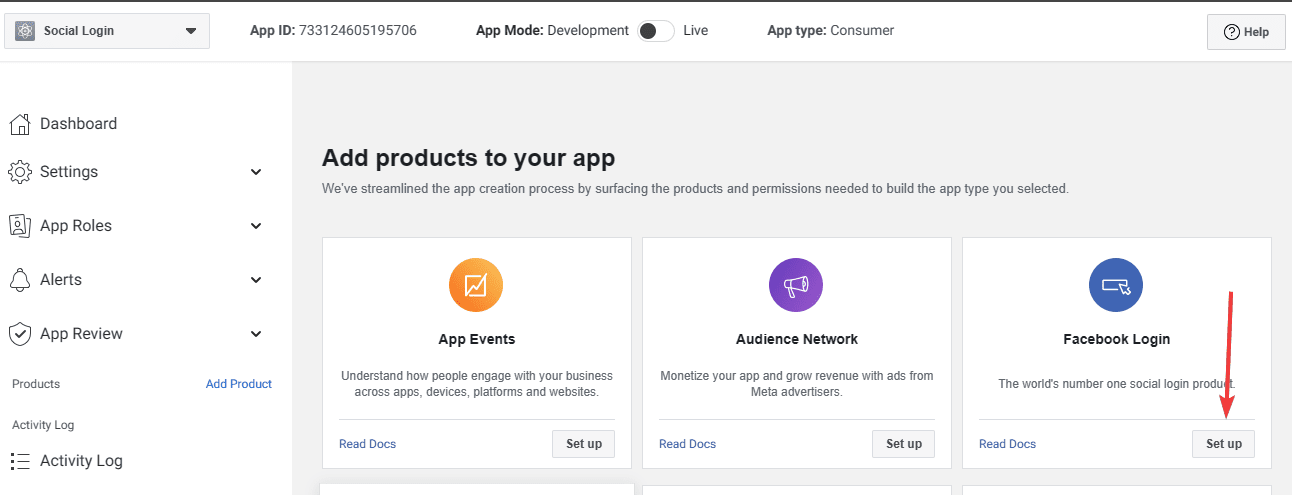
You’ll now see a list of products you can add to your app. Next, click the Set Up button under Facebook Login:
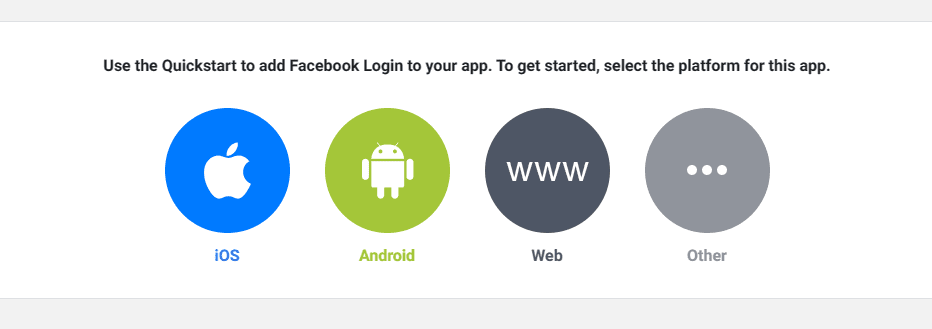
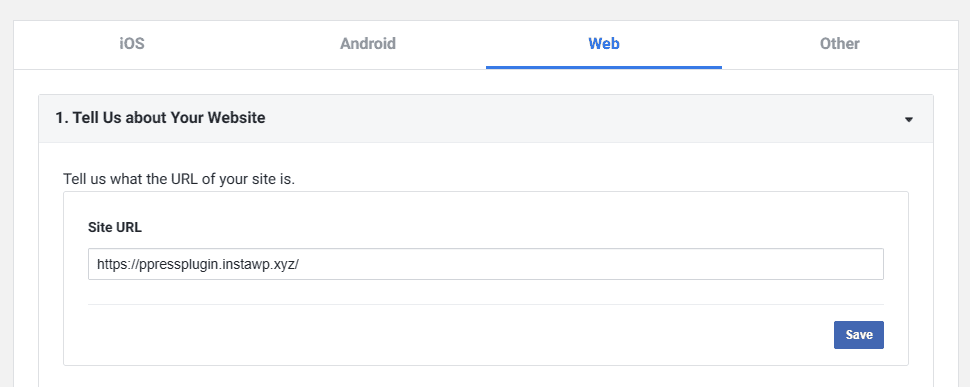
Select Web as the platform:
Enter the URL of your website, and click Save:
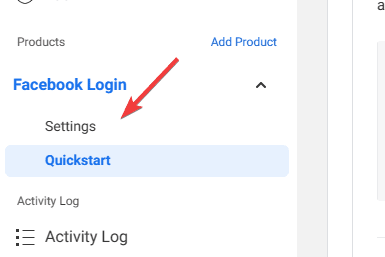
Now, click the Settings submenu under Facebook Login in the sidebar:
Then, in the ‘Valid OAuth Redirect URLs’ field, enter “https://your-website.com/ppauth/facebook”:
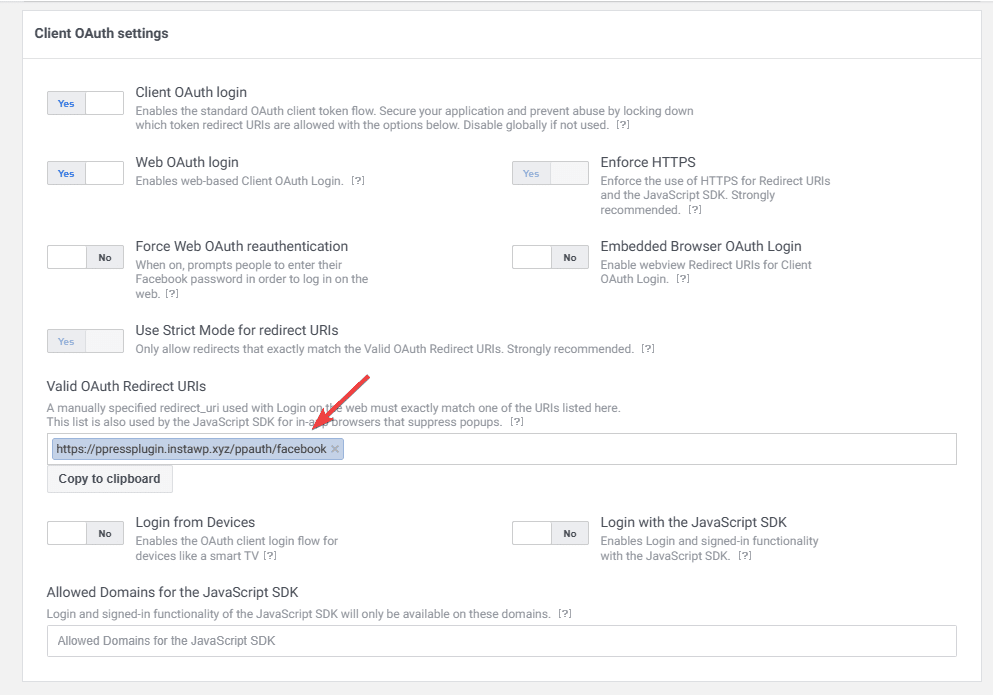
Finally, click the Save changes button at the bottom of the page to save.
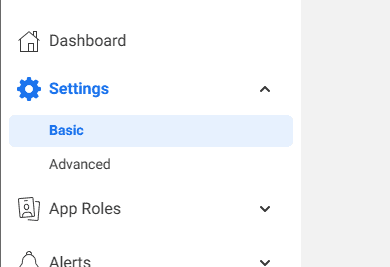
Now, navigate to the Basic submenu under Settings from the sidebar:
Enter your website’s domain name in the App Domains field:
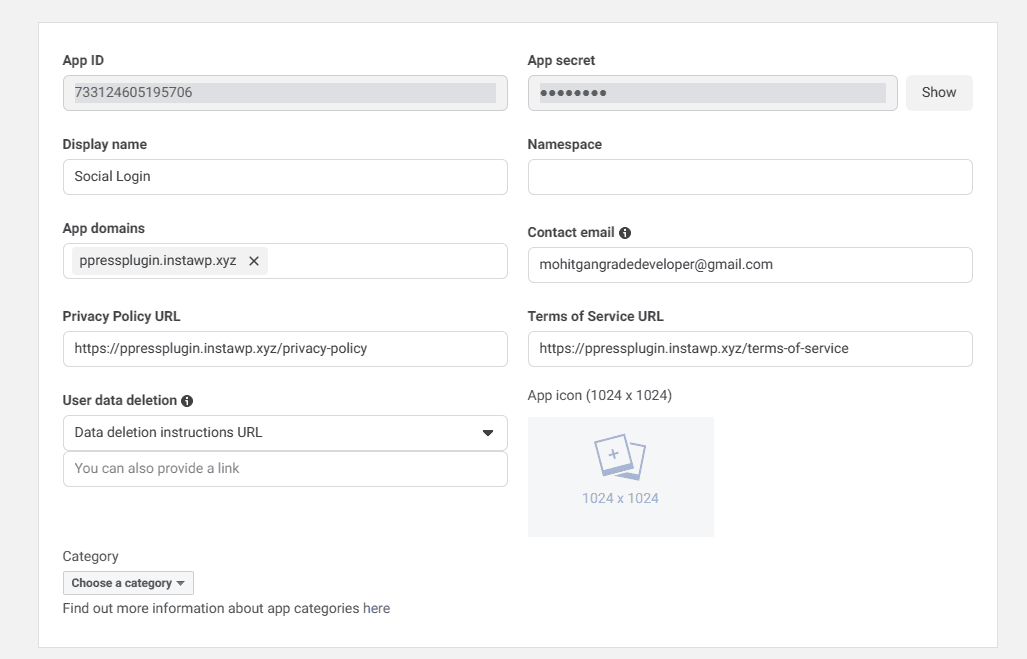
Also, enter the URLs for your website’s privacy policy and terms of service in the respective fields. Click Save changes.
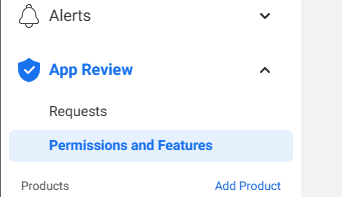
Now, navigate to Permissions and Requests under App Review:
Next, click the Get Advanced Access button next to the email and public_profile fields:
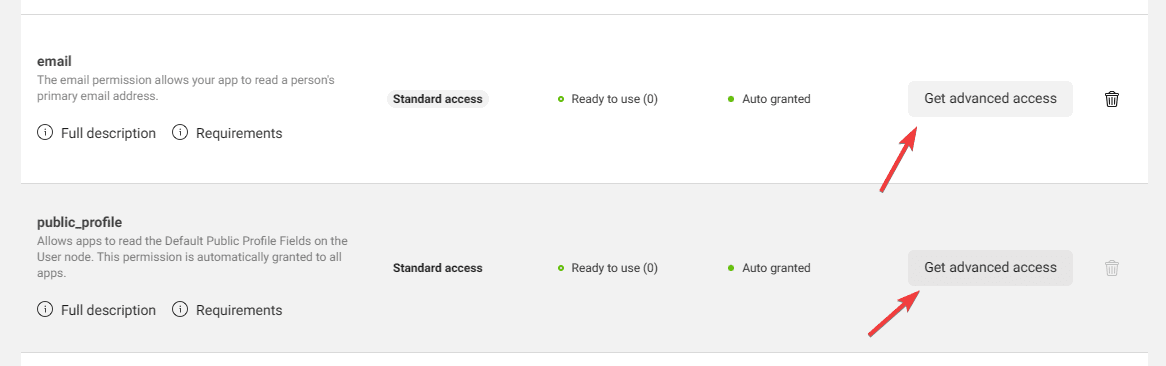
Note: You should scroll down a bit to find the two fields.
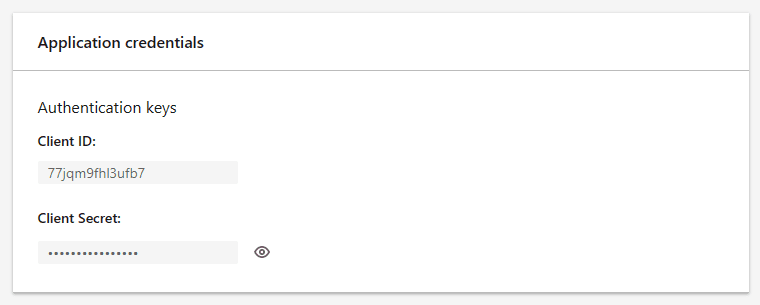
Copy the App ID and Secret from the Settings → Basic menu from the sidebar:

You’ll need these two in a second…
Visit ProfilePress → Settings from your WordPress admin section sidebar. Select the Social Login tab at the bottom, and enter your App ID and Secret in the Facebook fields:
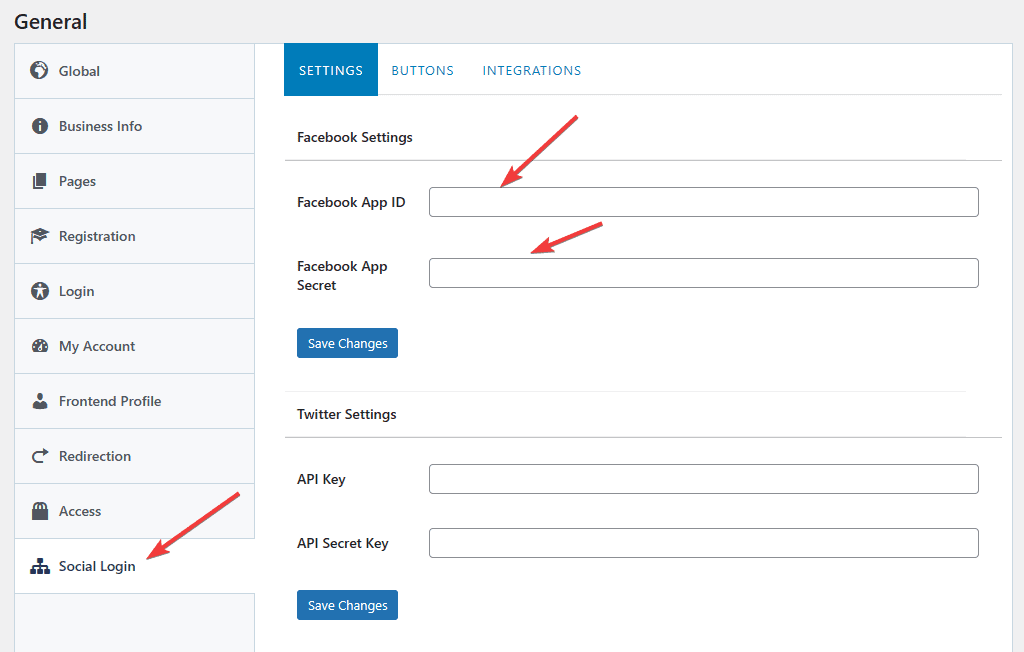
Click the Save Changes button.
Setup LinkedIn Login
Visit the LinkedIn Developer platform website and log into your account.
Now, click the Create App button to get started:
Now, enter a name for your app:
![]()
Then, enter the URL of your business’ LinkedIn page. If you don’t have one, you can create a new one by following the create a link under the LinkedIn Page field. Finally, upload your business logo as the App Logo.
Click the Create App button at the bottom.
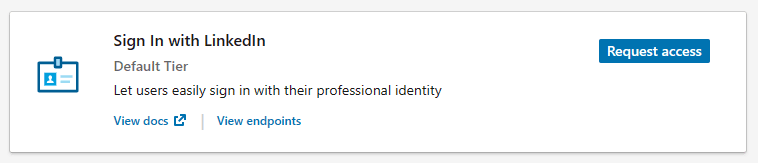
Now, click the Request Access button on Sign In With LinkedIn product:
Now, navigate to the Settings tab from the top:

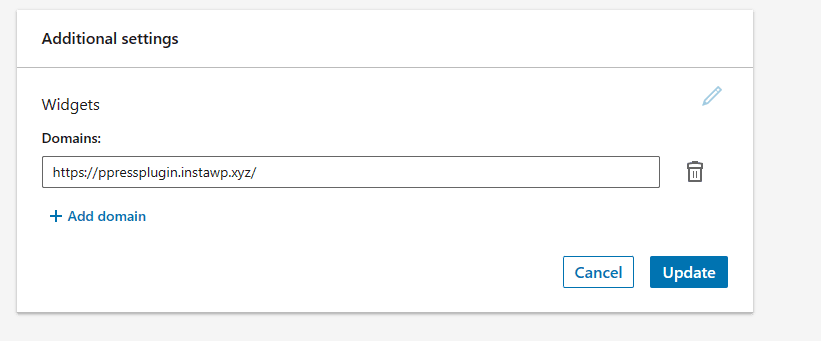
Scroll down to the Additional Settings section and click the Edit icon. Then, enter your website’s domain name:
Now, navigate to the Auth tab.
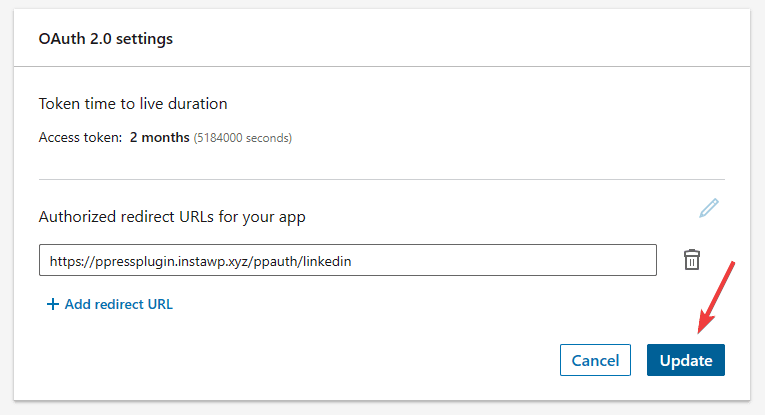
Click the Edit icon in the OAuth 2.0 section next to “Authorized redirect URLs for your app”:
![]()
Enter “https://yourwebsite.com/ppauth/linkedin” as the Redirect URL, and click Update:
Finally, copy the Client ID and Client Secret from the top of the page:
Now, navigate ProfilePress → Settings in your WordPress dashboard, select the Social Login tab, and enter your client ID and secret in the LinkedIn fields:
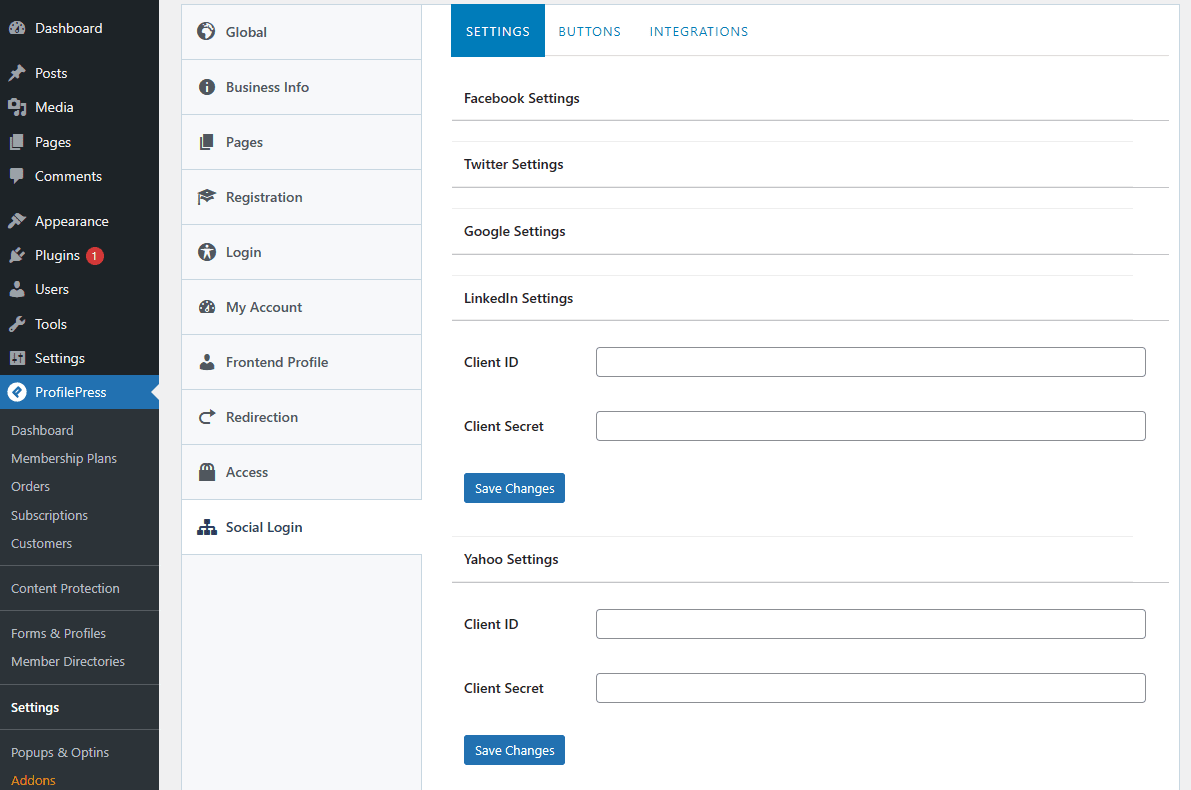
Click Save Changes.
Step 4: Edit The Default Registration Form
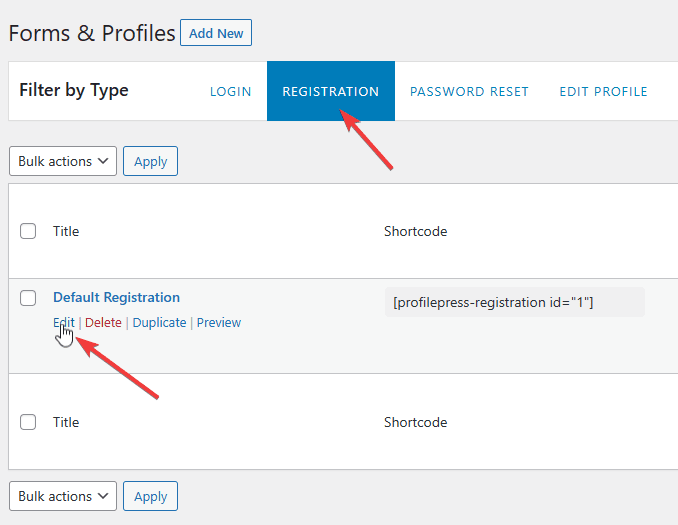
To add the social login buttons to your website’s registration form, visit ProfilePress -> Forms & Profiles:

Now, select the Registration tab, take your mouse over the form named “Default Registration,” and click Edit:
This will take you to ProfilePress’ form editor interface:
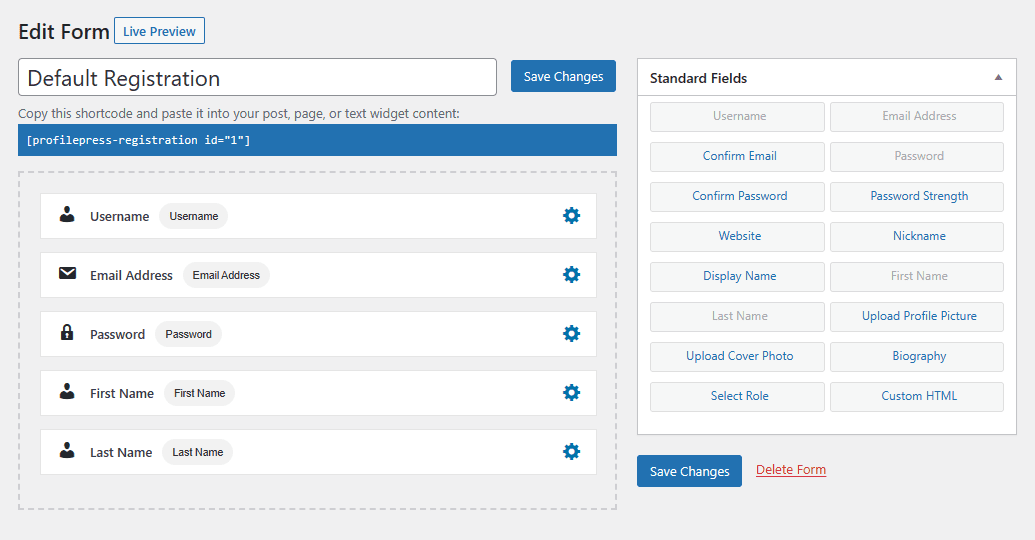
Here, you can remove fields or add new ones to your form. You can also rearrange their order by dragging and dropping them on the canvas.
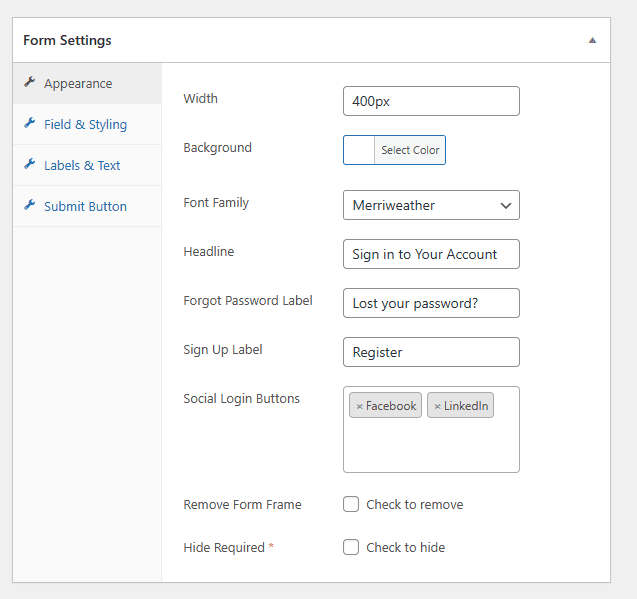
For now, scroll down to see the Form Settings section. This is where you can add social login button to your registration form:

You can add or remove any social networks in the Social Login Buttons section. Just click the field to see all available options.
Click the Save Changes button to publish the form.
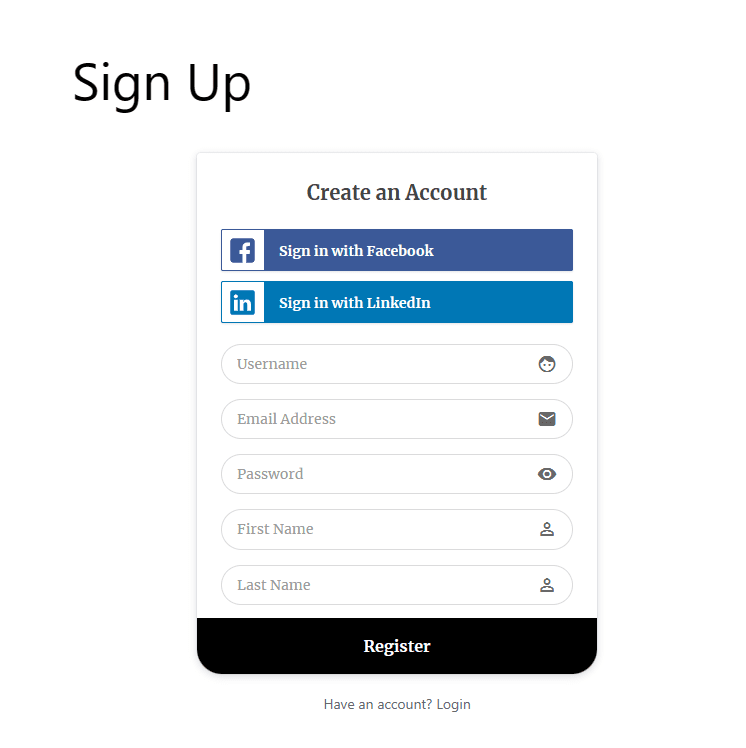
If you visit your website’s Registration page, you’ll now see the social login buttons that you chose:
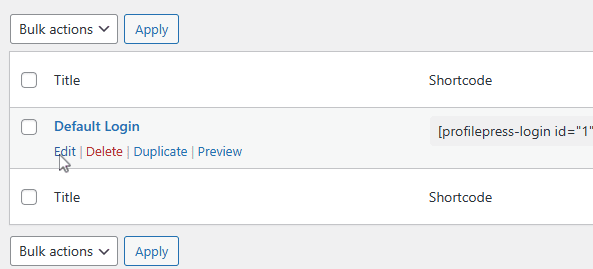
Step 5: Edit the Default Login Form
Navigate to ProfilePress → Forms & Profiles:
Now, take your mouse over the form named “Default Login,” and click the Edit button:
Scroll down to the bottom of the page and select the same social networks that you set for the Registration form:
Click the Save Changes button to publish the changes.
You’ll now see social login buttons on the Log In page:

Have a WooCommerce site? ProfilePress can add a WooCommerce social login to your site.
Conclusion
Allowing your website visitors to sign up with their social media accounts makes the sign-up process faster and easier. In addition, it improves user experience, improving conversion rate.
To add Social Logins to your WordPress website, you’ll need ProfilePress, the best WordPress social login plugin. You don’t need to know how to code to use it; it supports almost all major social networks.
Just follow the steps in this article, and you’ll be able to create a login and registration form with social login in no time.