How to Create a WooCommerce Popup to Increase Sales
Are you looking for an effective way to increase sales? Create a sales popup for your e-commerce store.
A WooCommerce sales popup helps you deliver the right messages to shoppers at the right time. For example, you can quickly inform customers about popular products, ongoing deals, or sales and encourage them to make purchases. In addition to this, it lets you create a better shopping experience that’s tailored for customers.
In this tutorial, we’ll show you how to create a WooCommerce popup and display it anywhere on your online store to encourage more purchases.
Creating a popup in WooCommerce
WooCommerce doesn’t let you showcase popups or notifications anywhere on your online store. The only way to do this is by editing your child theme and making changes in the back-end. However, this can be risky, and you may end up accidentally breaking your site if something goes wrong.
A better way to create a popup for your store is by using a dedicated WooCommerce sales popup plugin.
With a dedicated popup plugin, you get more control over how popups are displayed on your WooCommerce site. It also lets you create different popups and show them on specific pages of your online store.
With a dedicated sales popup plugin, you can create a more optimized shopping experience by showing customers popups or notifications based on their interactions with your online store.
A better way to create WooCommerce popups
The MailOptin plugin lets you display popups, notification bars, and slide-ins anywhere on your WooCommerce site. You can control how shoppers see sales popups when they visit your online store.
You can use the Added-to-cart display trigger to show customers popups based on the products they added to their shopping cart. For example, if a user adds a hoodie to their shopping cart, you can display a popup promoting similar or related products. This makes it the perfect plugin to show upsell and cross-sell offers.
MailOptin also lets you set up unique WooCommerce targeting rules for the popups or notifications you create. This way, you can create a highly personalized shopping experience and only shows customers the offers and messages that are relevant to them. For example, you can create WooCommerce cart popup, display a popup on WooCommerce checkout
MailOptin automatically tracks user browsing data and lets you display different notifications or popups to returning site visitors and new site visitors. This encourages more sales and is a great way to get the right offer in front of the right customer.
Using MailOptin, you can also display popups based on the time a user spends on your WooCommerce site. For example, you can trigger a WooCommerce discount popup if a user spends a long time on the cart page. You also have the option to showcase popups when a user scrolls down a page.
The best part is that MailOptin comes pre-built with exit-intent technology that saves “lost” sales and reduces cart abandonment on your WooCommerce site. You can use this to show users a message if they’re about to leave. This lowers your bounce rate and helps you boost conversions on your WooCommerce site.
MailOptin’s A/B split testing features let you create conversion-optimized WooCommerce popups. You can create multiple popups and see which performs best with site visitors. This helps you better understand what your customers want and what works best for increasing conversions.
MailOptin offers an excellent user experience for store owners and is highly optimized for delivering a better shopping experience to site visitors. Customers can view the popups on any device – including mobile devices – with sound and display effects.
How to Create a WooCommerce popup using MailOptin
Here, we’ll discuss how you can create a WooCommerce popup to increase sales.
For this tutorial, you will need a WordPress site with the WooCommerce plugin installed, and some products added. You will also need the MailOptin plugin to create and display popups on your online store.
Step #1: Install and activate the MailOptin plugin
Get the MailOptin plugin and install it on your WooCommerce site. Navigate to Plugins → Add New and upload the plugins .zip file. Click on the Activate this plugin button to continue.
Next, navigate to MailOptin → Settings from the WordPress admin panel and click on the License tab.
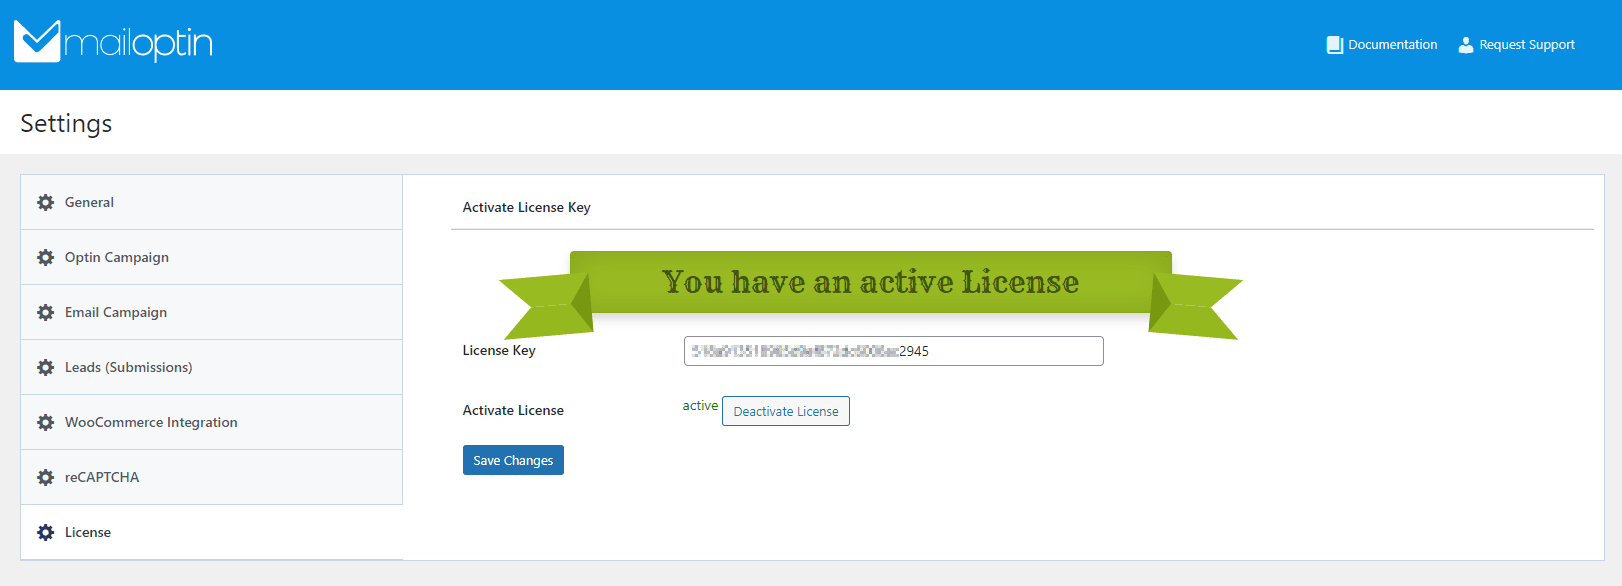
Paste the license key given to you at the time of purchase and click on the Activate License button to continue.
Step #2: Create a WooCommerce popup
To create a new popup, navigate to MailOptin → Optin Campaigns and click on the Add New button.
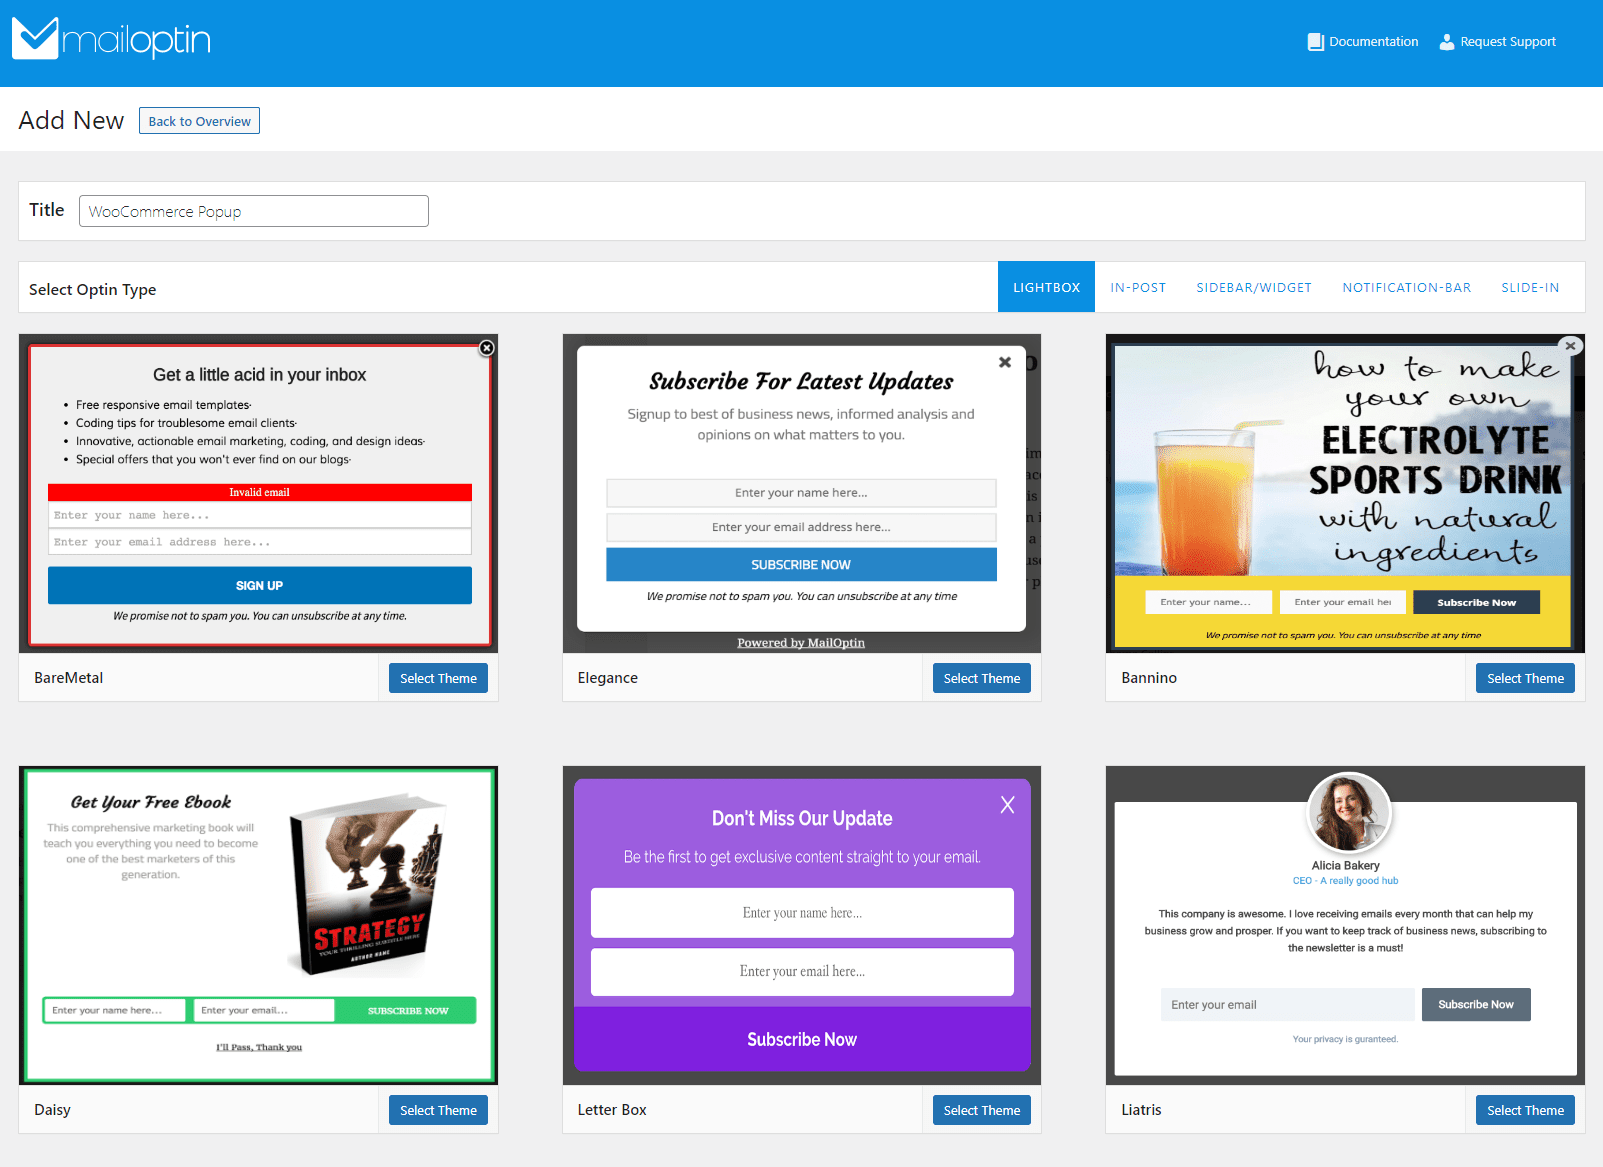
After giving your popup a new title, select the popup type using the Select Optin Type section. MailOptin lets you create a WooCommerce popup, a slide-in notification message, or a notification bar.
Choose the Lightbox option if you want to create a popup, and choose a pre-designed template to begin editing. Click on the Select Theme button to continue.
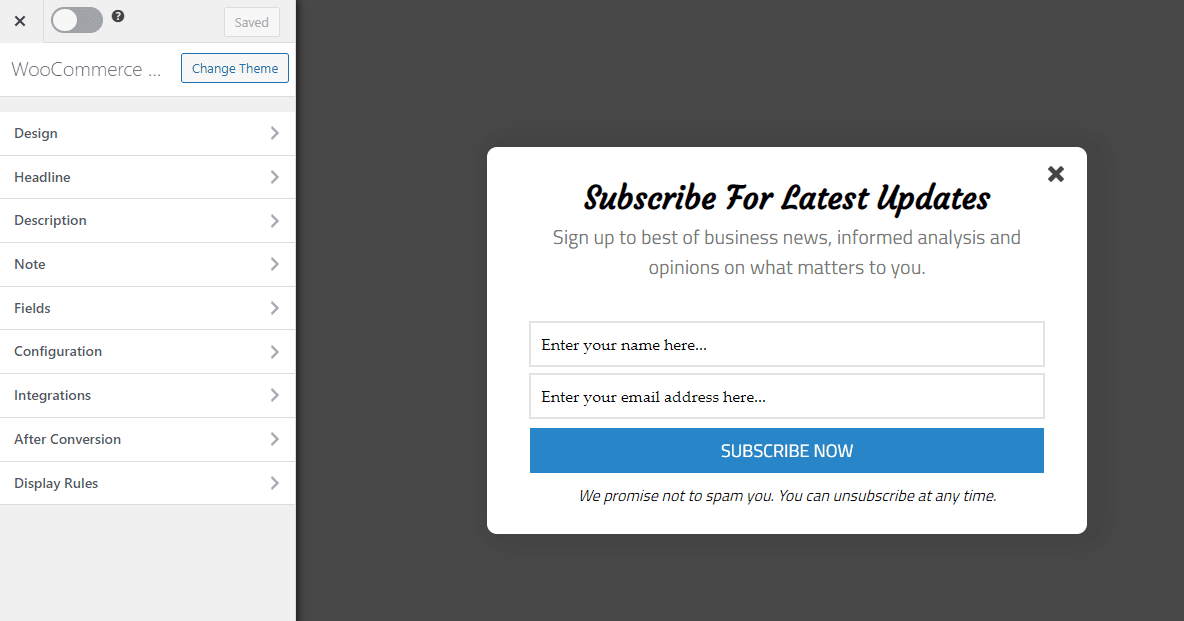
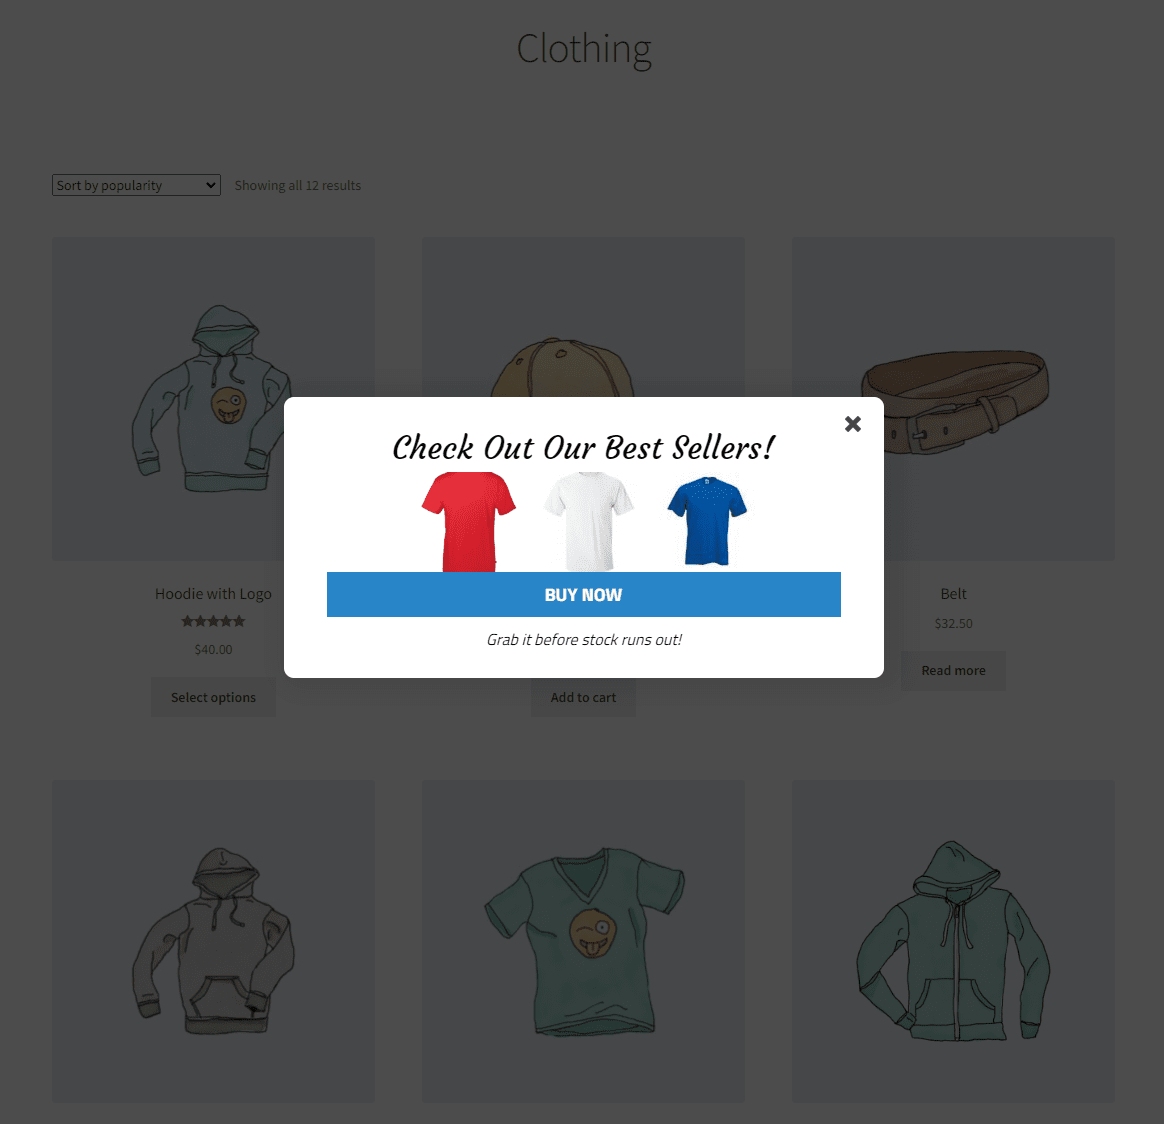
This will automatically redirect you to the popup editing page, where you can decide what to showcase in your WooCommerce popup. In addition, you can edit the title of your popup according to your use case. For example, if you want to display your best-selling products or frequently bought together products and encourage users to purchase them, you can change the headline title to something like “Take a look at our best-selling products”.
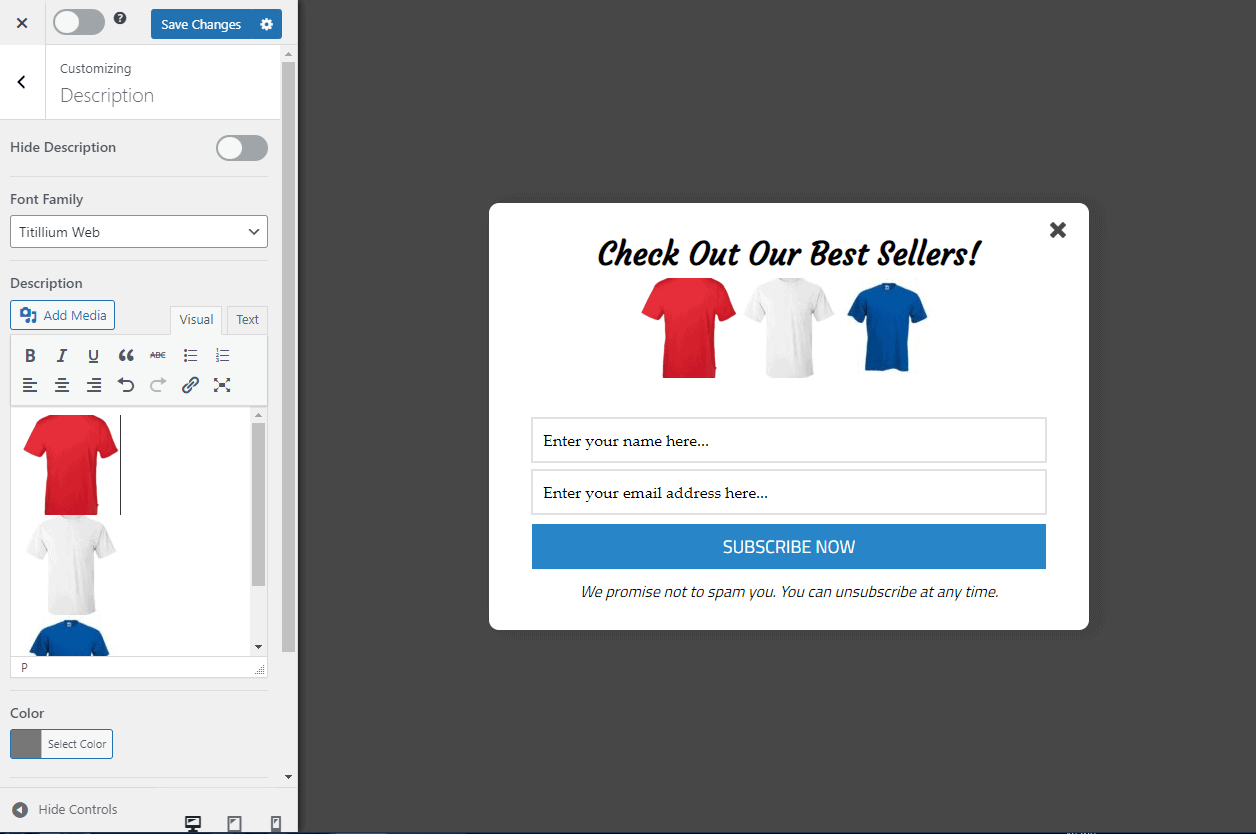
You can also add product images instead of displaying plain text using the Description section of your WooCommerce popup.
Next, we want to display a CTA button for customers to navigate to the product page directly. Under the Fields section, check the Display Only CTA Button checkbox to display a “Buy now” button instead of the regular fields.
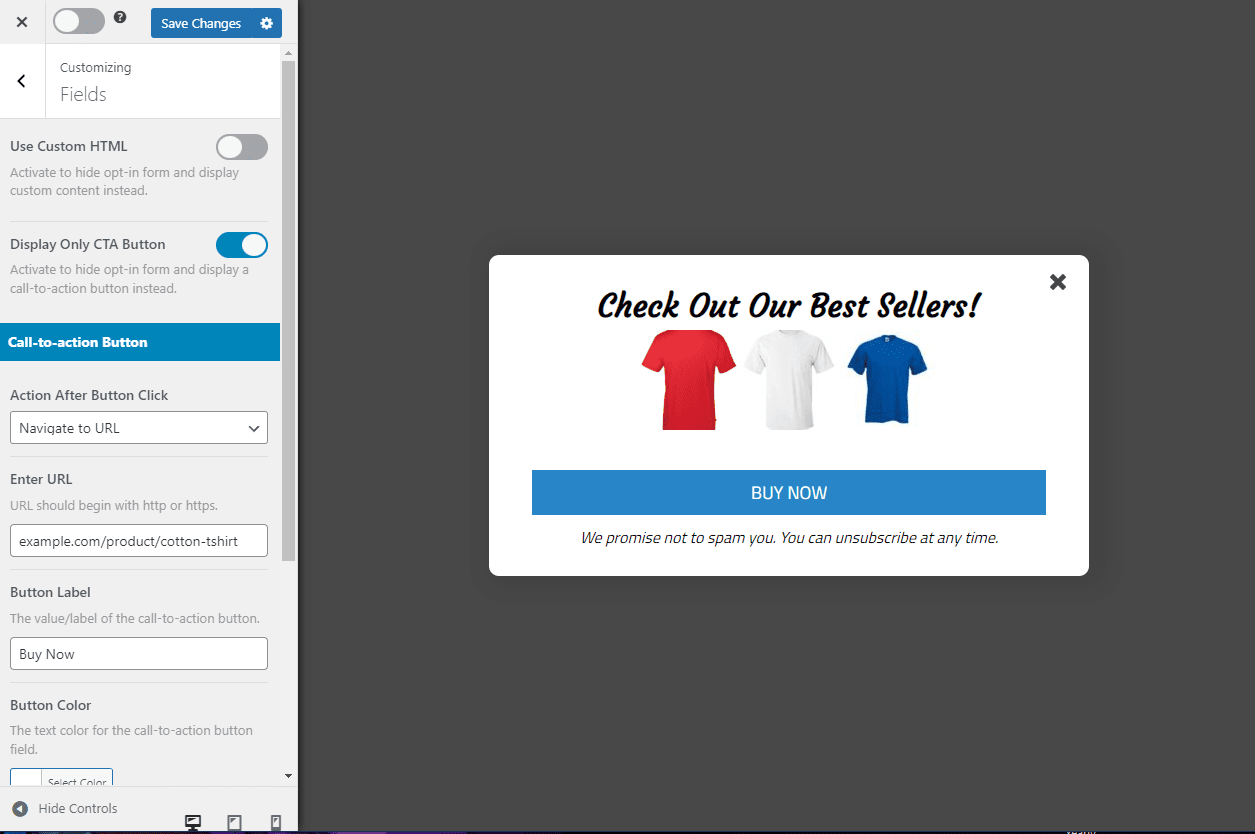
Specify the product page or URL using the Enter URL field and change the CTA button label using the Button Label field below. This will allow customers to navigate your product page from the WooCommerce popup quickly.
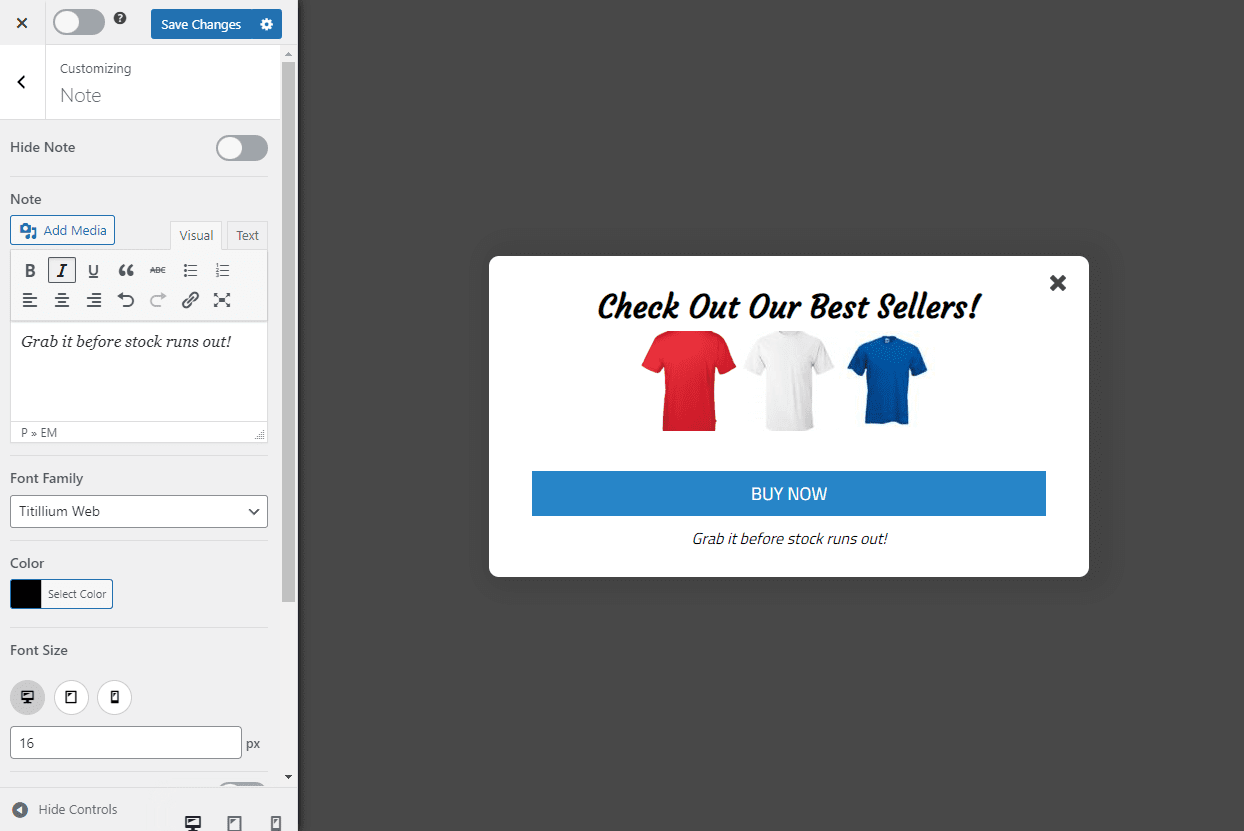
In addition, you can also edit the Note section to display additional details or provide additional information to site visitors. This is a simple way to encourage customers to learn more about the product and make a purchase.
Step #3: Set conditions
Now that we’ve created a WooCommerce popup, we can start setting conditions or display rules, so only relevant users on your online store can view the popup notification. Navigate to Display Rules → WooCommerce Added to Cart and tick the Activate Rule checkbox.

You can specify certain products that customers need to add to their cart to display the popup.
MailOptin gives you complete control over how popups are displayed to shoppers on your WooCommerce site. Navigate to Display Rules → WooCommerce Conditions to set this up.
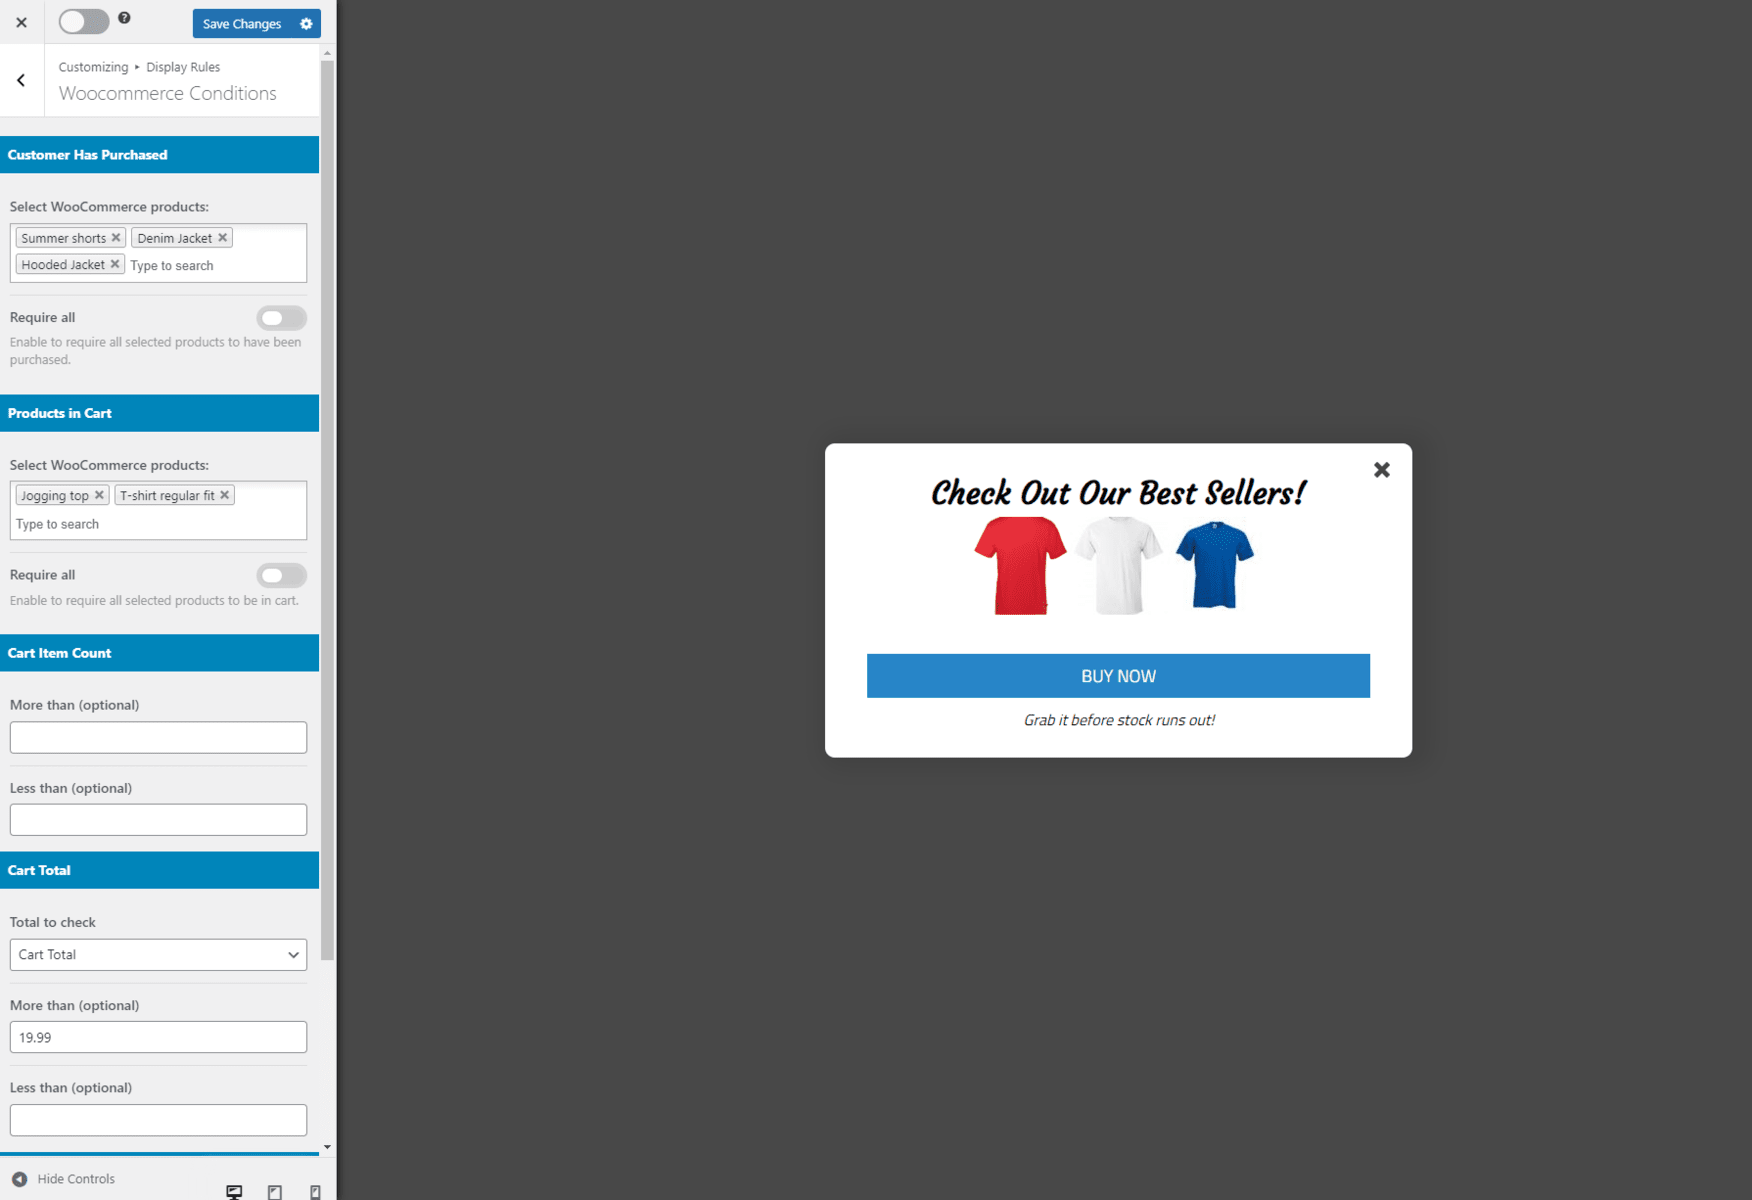
The Customer Has Purchased section lets you showcase popups only to customers who have purchased certain products. This can help you encourage customers to buy from your store again.
Using the Products in Cart section, you can display your WooCommerce popup only to shoppers who add specific products to their shopping cart. For instance, if a customer adds a pair of jeans to their cart, you can show them a popup to purchase a t-shirt on sale.
Similarly, the Cart Item Count section can be used to pre-define the number of items your customers need to have in their carts before they see the popup. For example, let’s say you run an online store but also sell to wholesalers. You can create a special discount or newsletter popup that will only be displayed to customers who purchase at least ten units of an item.
In addition, MailOptin also lets you set advanced conditions such as cart total, and customer total spend amount to display popups to users on your WooCommerce site. For example, the Cart Total section lets you display a popup to users with cart items valued over a certain amount.
Similarly, the Customer Spent section can be used to specify the total amount customers need to have spent on your WooCommerce site to see the popup. This lets you offer an exclusive discount to loyal customers.
Step #4: Preview
Depending on the WooCommerce conditions you set, customers can view a WooCommerce popup when browsing your WooCommerce site.
Conclusion
Creating a WooCommerce popup is a great way to increase sales on your online store. You can use it to display important messages or notifications to promote products or ongoing sales on your online store.
The best way to do this is using a WooCommerce popup plugin such as MailOptin. It comes pre-built with all the features you need to create multiple popups, including lightboxes, notification bars, and slide-in popups. This makes it the perfect solution for creating a WooCommerce popup with targeting display rules so you can only show the popup to relevant users.
Ready to create a WooCommerce popup and increase sales on your WooCommerce site? Get MailOptin today!