How to Create WooCommerce Added-to-cart Popups
WooCommerce Popups are essential for eCommerce stores. They come in different types, such as Added-to-Cart popups, welcome popups, exit-intent popups, and others, and contribute to a store’s success in various ways. The most effective popup in WooCommerce is the Add-to-cart popup because it can help you capture customers’ email addresses, convert them into subscribers, and quickly add any item to their cart.
One exciting feature of the WooCommerce Add-to-Cart popup is that it is less intrusive than other popups that suddenly appear on the screen.
MailOptin’s WooCommerce Added to Cart trigger lets you display a notification bar, slide-in, and popup offers and promotions immediately after a product is added to the cart. This is particularly useful in creating down-sells, cross-sells, and upsells.
To create an “add to cart” optin, follow the guide below.
Creating a WooCommerce Added to Cart Popup
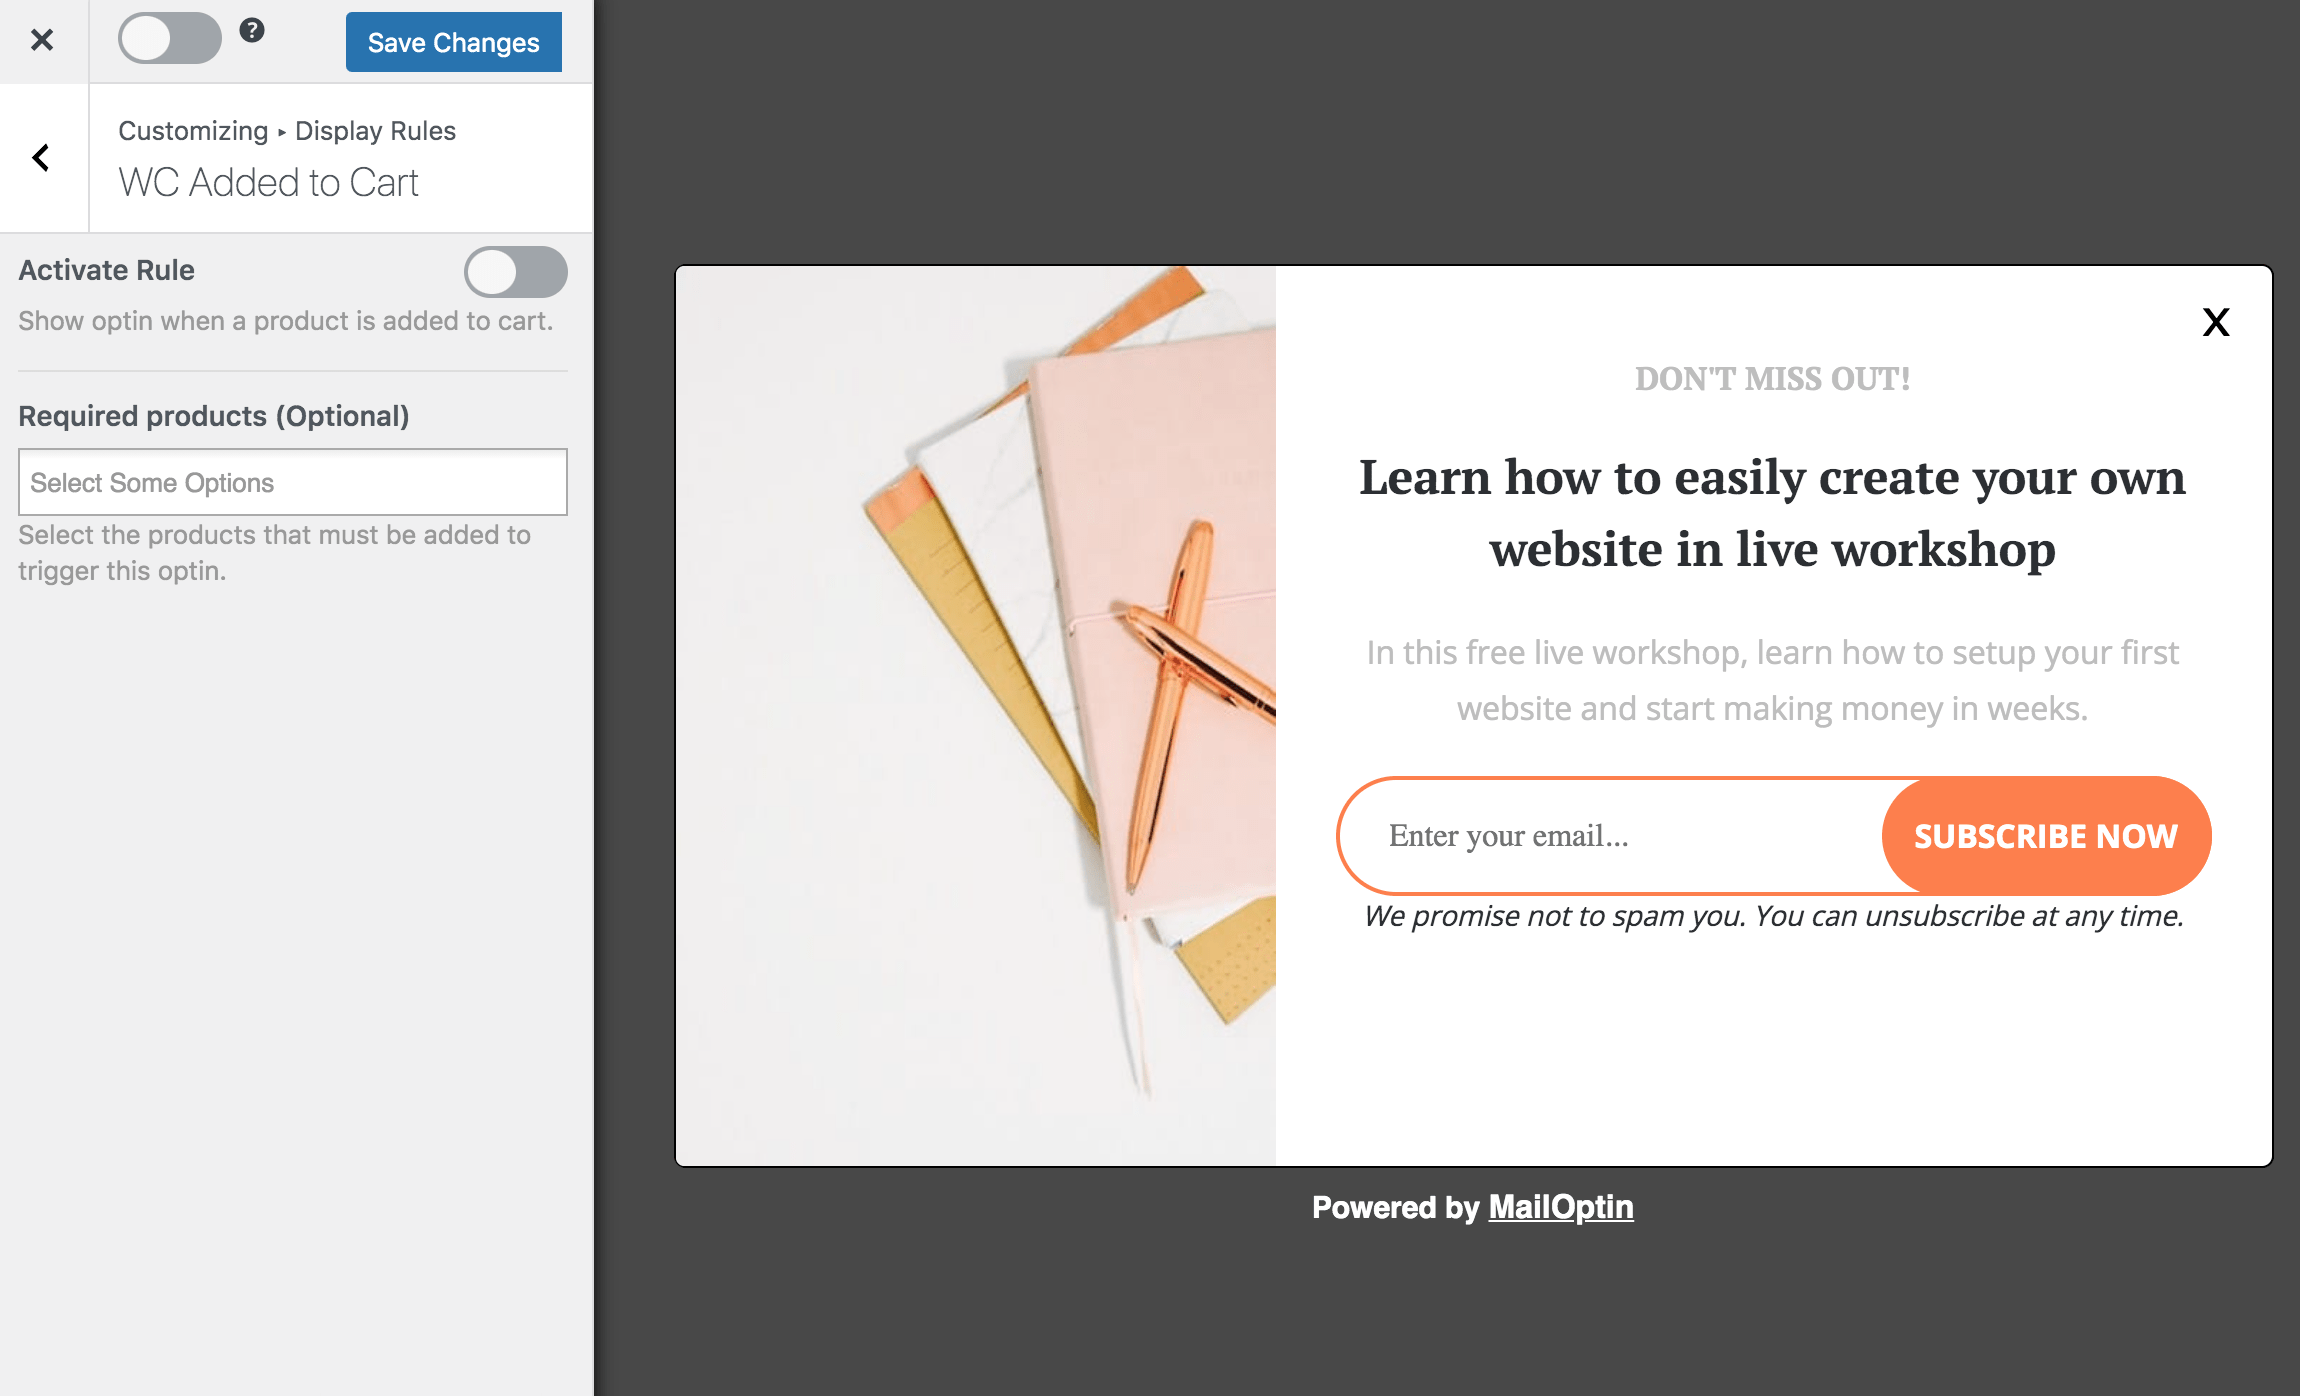
Click the campaign title or the Customize button to open the edit screen.
Open Display rule panel >> WooCommerce Added to Cart to set up the display rule.
To display the campaign only when specific products are added to the cart, select them in the “Required Products” dropdown field.
Don’t forget to activate the optin from the top left-hand corner.
See also: Using WooCommerce Conditions to Create Optin Campaigns
We hope this article helped you learn how to implement a WooCommerce Added-to-cart popup to your e-commerce website or store.
Remember, the Add-to-Cart popup is an effective popup that can be used in any WooCommerce store, which helps capture visitors’ email addresses, prevent cart abandonment via an abandoned cart popup, recover lost WooCommerce sales, and ultimately increase revenue.
Let us know if you have any questions or comments.