How to Create Exit-Intent Popups in WordPress
Do you want to create an exit-intent popup in WordPress?
Exit-Intent popups are the perfect tool for growing your email list. Unlike other forms of popups, they don’t bother your visitors as they are using your website. Your users only see them when they try to leave your website.
You can use an Exit-Intent popup to grow your email list by offering a free lead magnet or simply asking your visitors to sign up for your email list. You can also use it to offer discount coupons to your visitors to nudge them into buying immediately. The possibilities are endless if you get a little creative.
In this guide, I’ll show you the easiest way to create an Exit-Intent popup in WordPress.
What Is an Exit-Intent Popup?
Popups are a great way to grab your website visitor’s attention. They take over the entire screen and leave zero room for distractions. Not only that, but popups can result in absurdly high conversion rates when done right.
However, displaying a popup that takes over the whole screen as soon as someone visits your website is not a great idea. If your visitors have to close a popup before they can read the contents of your web page, that’s a recipe for user experience disaster!
Fortunately, there’s a better, more effective way to use pop-ups. You guessed it: Exit-Intent Popups.
An Exit-Intent popup is displayed when the user tries to close the page.
This might not seem like a big deal, but it is. When a visitor is about to leave your website, you’ve already lost them. An Exit-Intent popup is your chance to grab their attention before they leave.
You can use this popup to drive your visitors toward any conversion goal. Want to grow your email list? Ask your visitors to subscribe to your newsletter before they leave your blog. Want to get more sales? Offer a discount coupon to entice them into making a purchase.
Thousands of super-successful businesses use Exit-Intent popups.
eCommerce businesses use it to entice you with a discount when you try to leave their website.
Software-as-a-Service (SaaS) businesses such as Zendesk use Exit-Intent popups to invite you to watch a demo video of their software in action:

This is one of the best examples of how to use an Exit-Intent popup without bothering your customers. When someone visits Zendesk’s website, they are probably already interested in helpdesk software (which is what Zendesk offers).
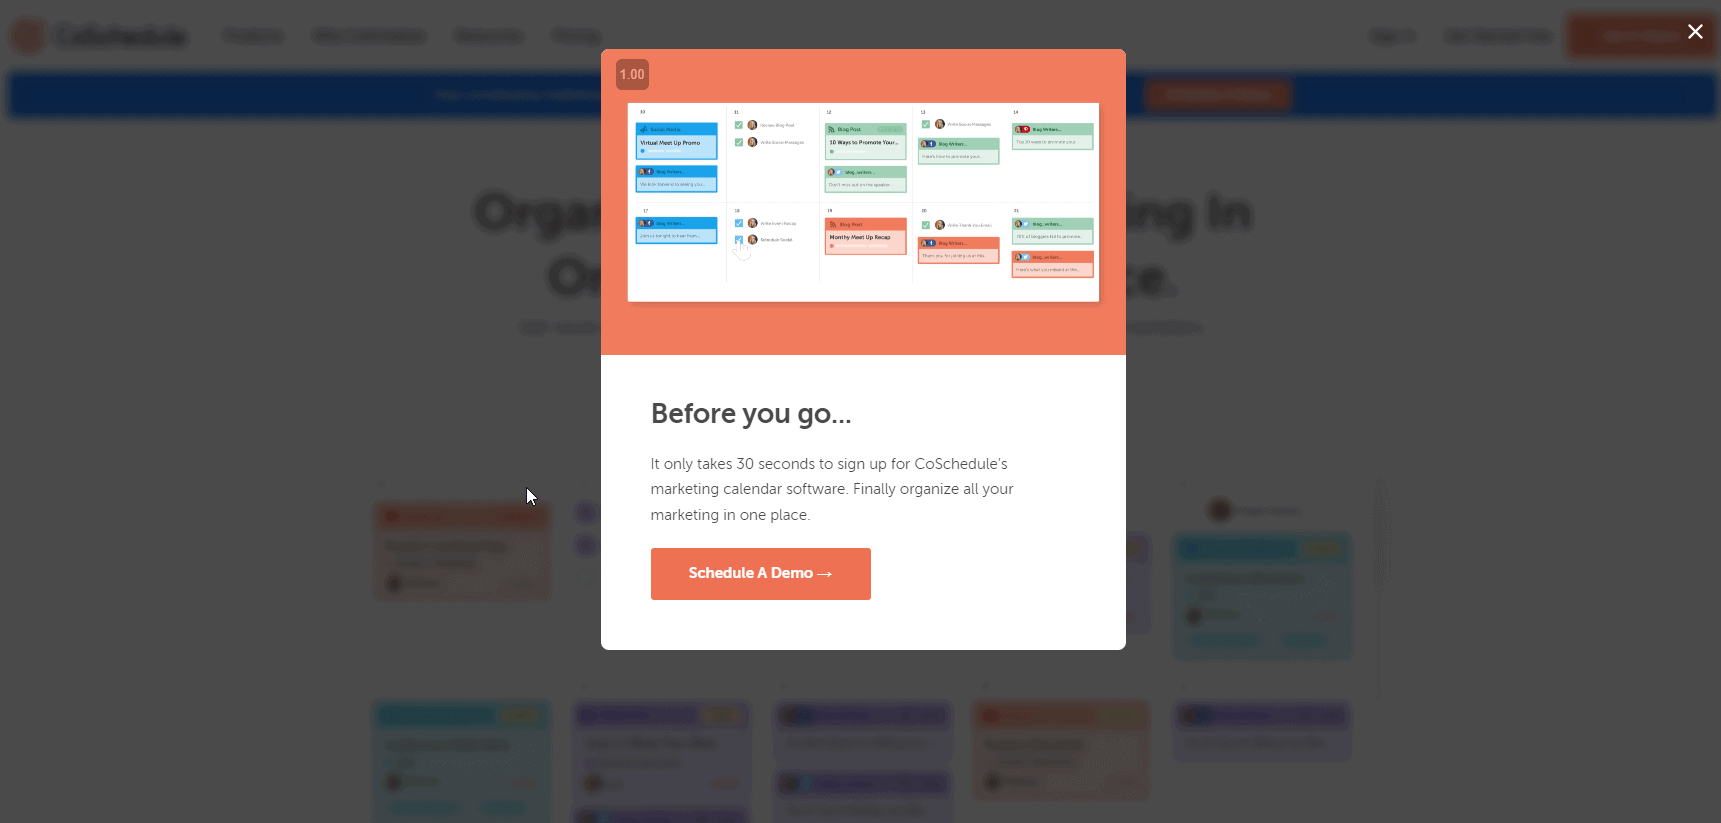
Zendesk isn’t the only SaaS business that uses popups.
CoSchedule displays a popup when you try to leave their website. But unlike Zendesk, CoSchedule wants you to schedule a demo:
The conversion goal that you use for an Exit-Intent popup will depend on the industry you’re in.
For example, General Assembly, a software engineering Bootcamp, shows this popup:
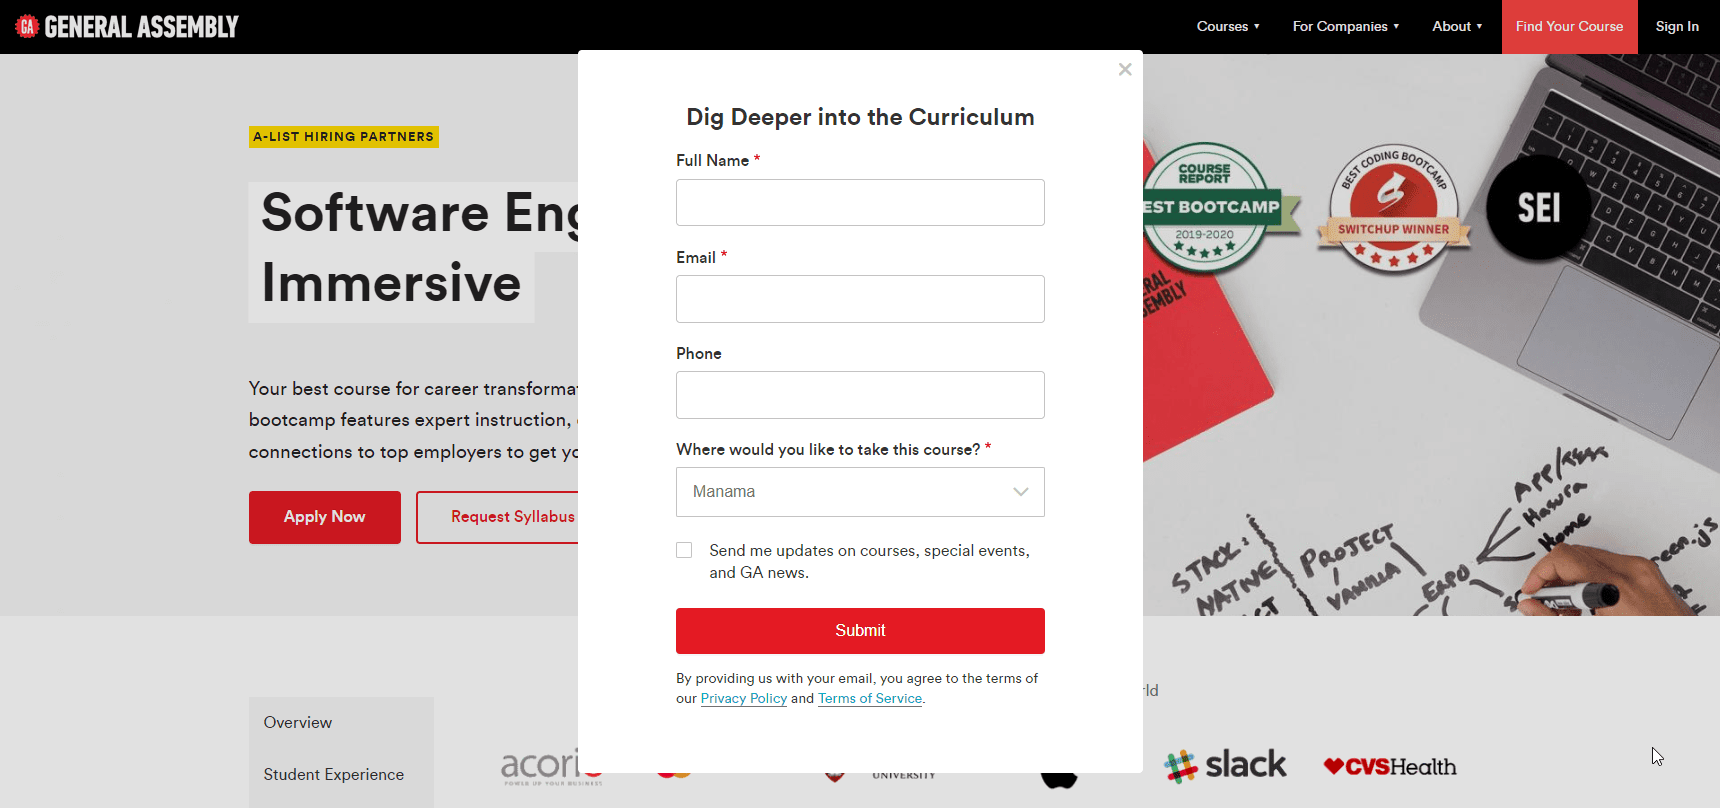
Unlike the above two examples, General Assembly gives you a chance to find out more about the curriculum of the course you’ll be taking. Popups like this are great for alleviating any doubts your visitors might have about buying from you.
All three examples above are for specific cases (i.e., SaaS and Bootcamps). If you can’t think of something similar, the easiest way to get started with Exit-Intent popups is to ask your visitors to subscribe to your email list.
This is what Ryan Robinson does on his blog. He offers you a free 7-day course on starting a blog in exchange for signing up for his email list:
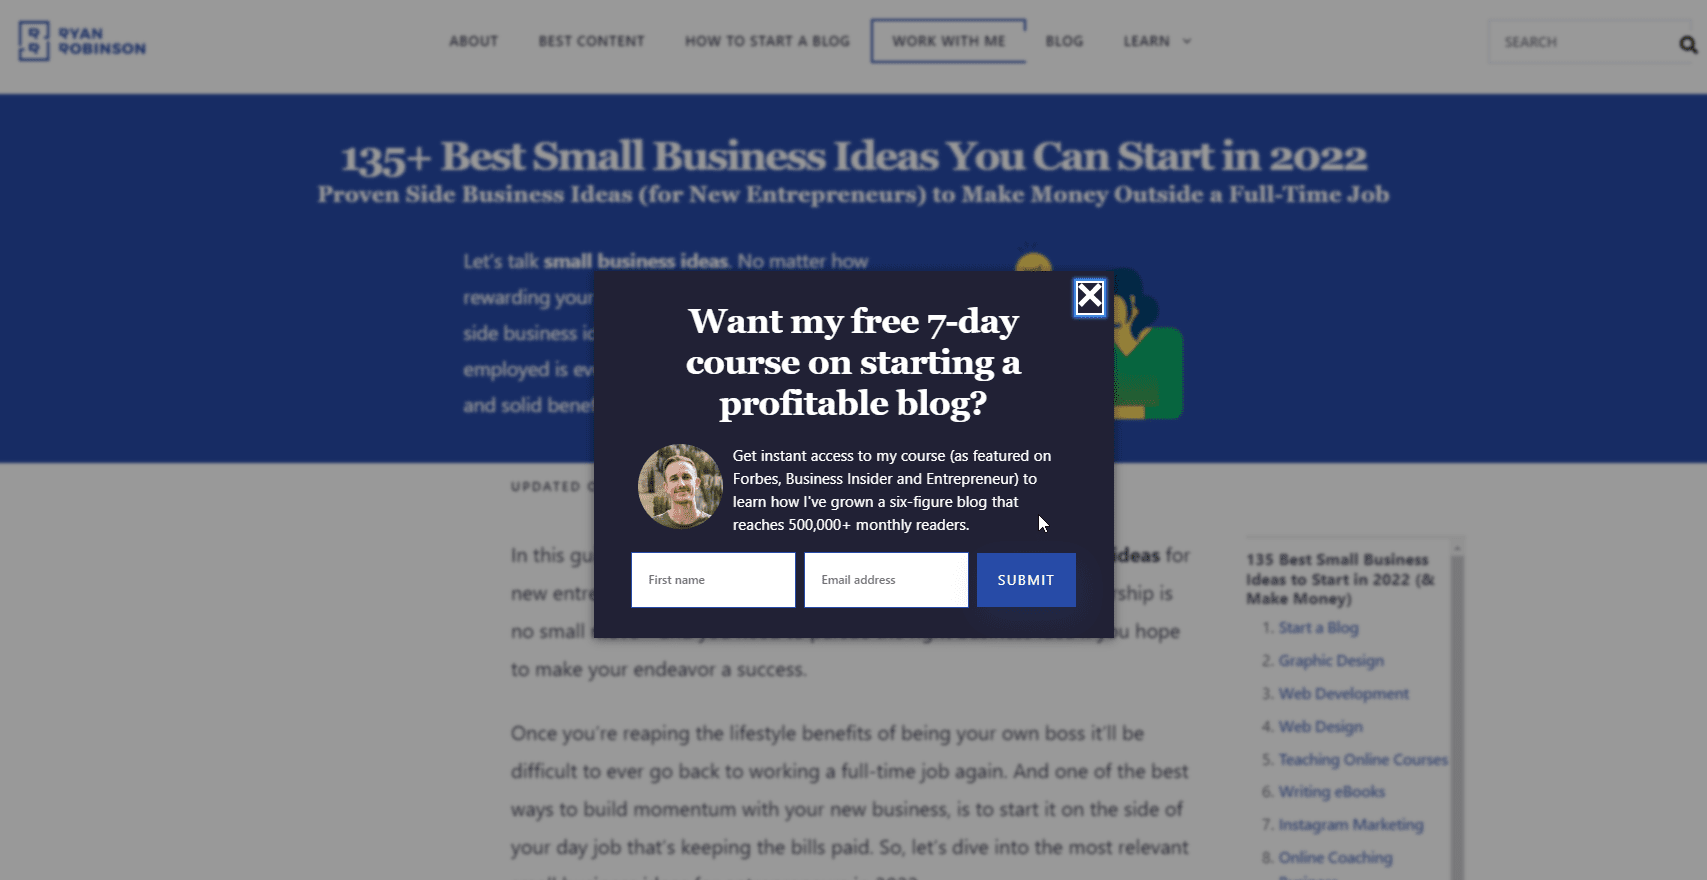
Ryan isn’t alone in doing this. Thousands of successful blogs and many successful SaaS companies do the same.
Asking visitors to subscribe to your email list is one of the best use cases for popups. It isn’t a big ask and doesn’t require any time commitment from your website visitors. And when someone signs up for your email list, you get to stay in touch with them for as long as you desire.
Why You Need an Exit-Intent Popup on Your Website (or how to stop leaving money on the table)
You lose money when someone visits your website and doesn’t subscribe to your email list. This person will never revisit your website! If they had subscribed, you’d have been able to reach out to them later and promote your products. But now you can’t!
This is where an Exit-Intent popup can help you make the most out of your website traffic. It grabs your visitors’ attention when they are about to leave your website. You can use this opportunity to ask them to subscribe to your email list.
Every new subscriber you get from your Exit-Intent popup increases your revenue. If you get 1000 new subscribers every month from the popup and you make $1 per subscriber on average, then you stand to make an extra $1000 every month. If you don’t have an Exit-Intent popup on your website, you are leaving money on the table every month.
If you spend a lot of your marketing budget on content marketing and SEO, you leave a lot of money on the table. But, without a good strategy for converting those visitors into subscribers, you might as well flush your money down the toilet.
How To Create an Exit-Intent Popup In WordPress
Step 1: Download MailOptin
To create an Exit-Intent popup in WordPress, you’ll need MailOptin. It’s an all-in-one WordPress plugin for Lead Generation. It’s the only tool you need to grow your email list. It allows you to create many types of lead-gen forms, including Popups, In-Post forms, Slide-In, etc.
If you don’t have MailOptin installed on your website, you need to download and install it right now. It’s the best lead generation plugin for WordPress.
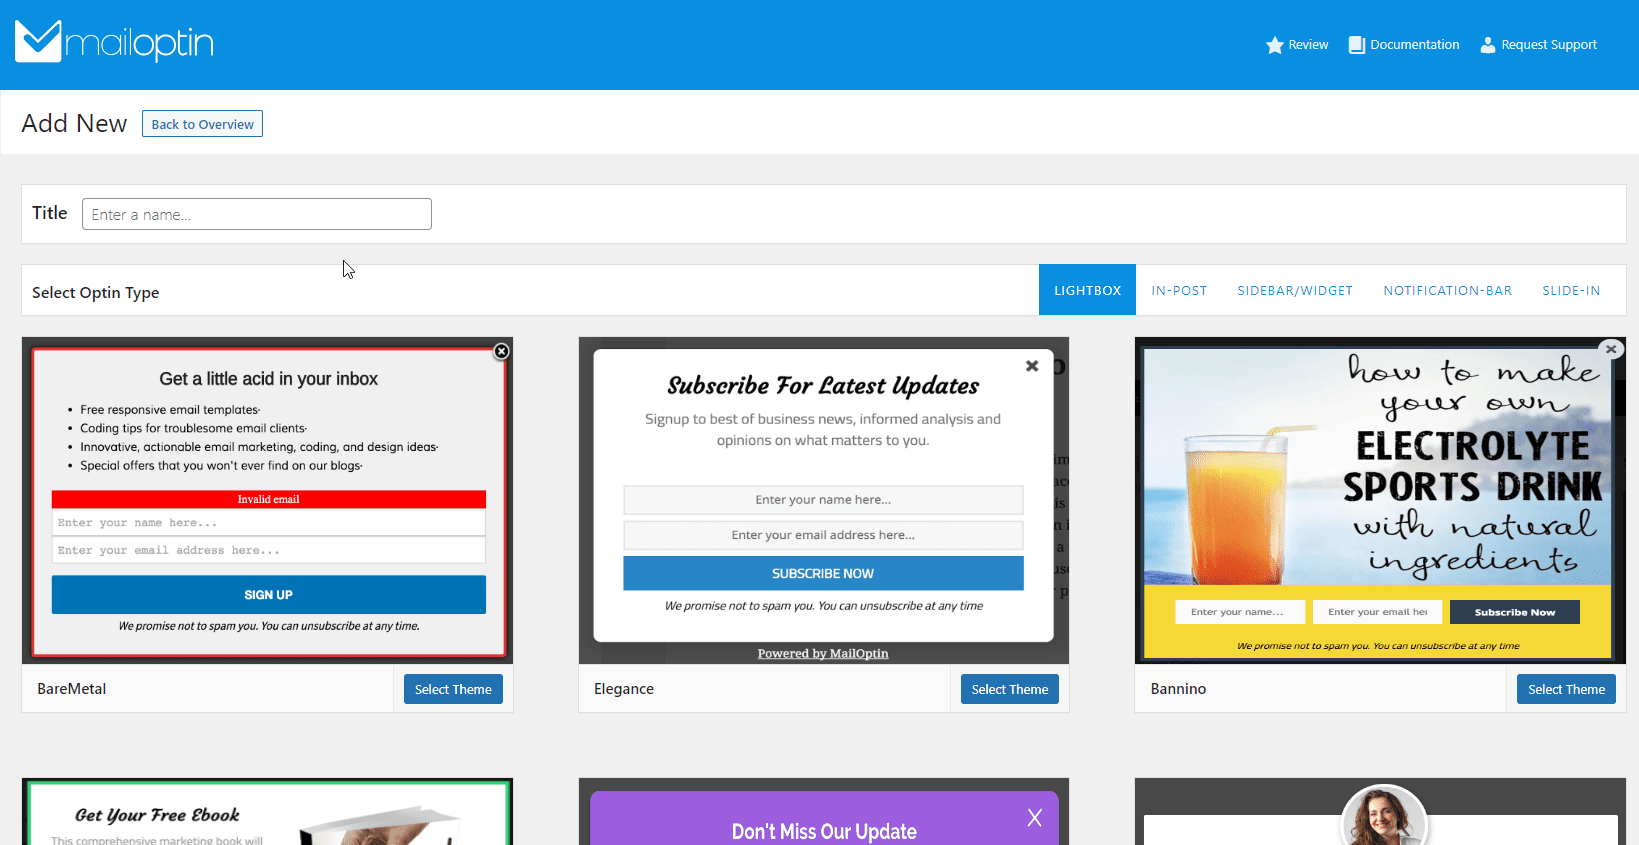
Step 2: Create a New Campaign
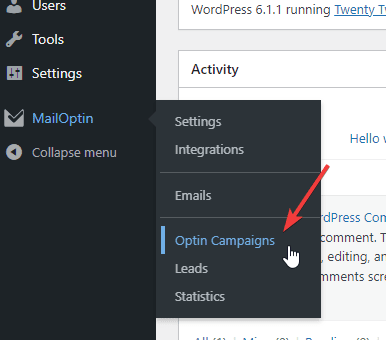
First, go to MailOptin > Optin Campaigns:
Click the Add New button to create a new popup:

Now, enter a name for your new popup and select a design:
This will take you to the option campaign builder page:
This page lets you customize all aspects of the design of your popup. You’ll learn all about how it works in the coming sections.
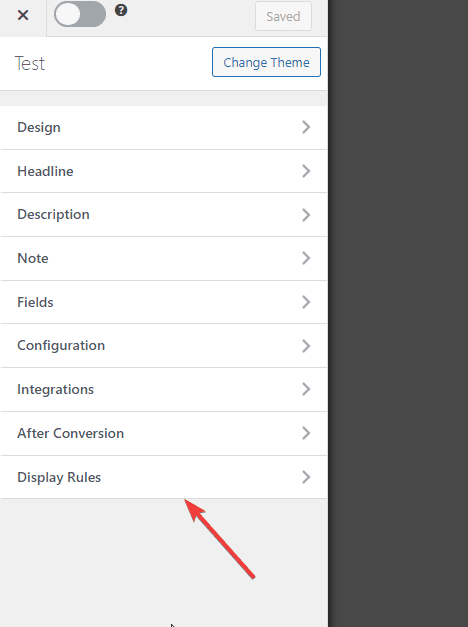
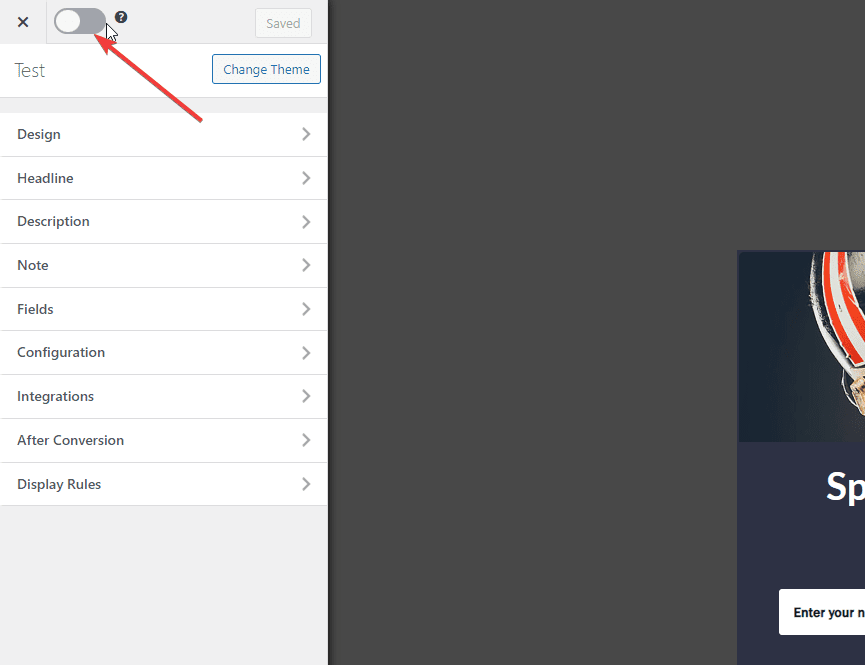
Step 3: Enable The Exit-Intent Trigger
I’ll show you how you can customize your popup in the next step, but first, we need to make it an Exit-Intent popup.
To do this, select the Display Rules option at the bottom:
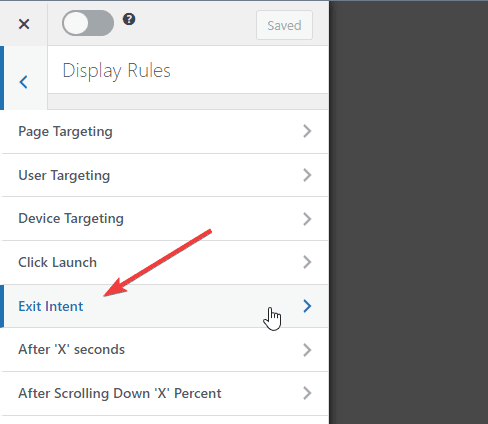
Now, select the Exit-Intent option:
Finally, click the Toggle button to enable the Exit-Intent trigger:
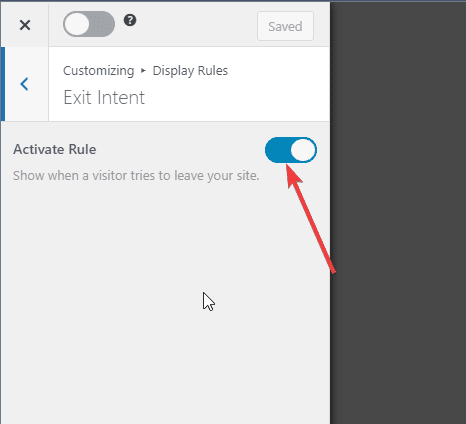
Your popup will only be displayed when the visitor tries to leave your website.
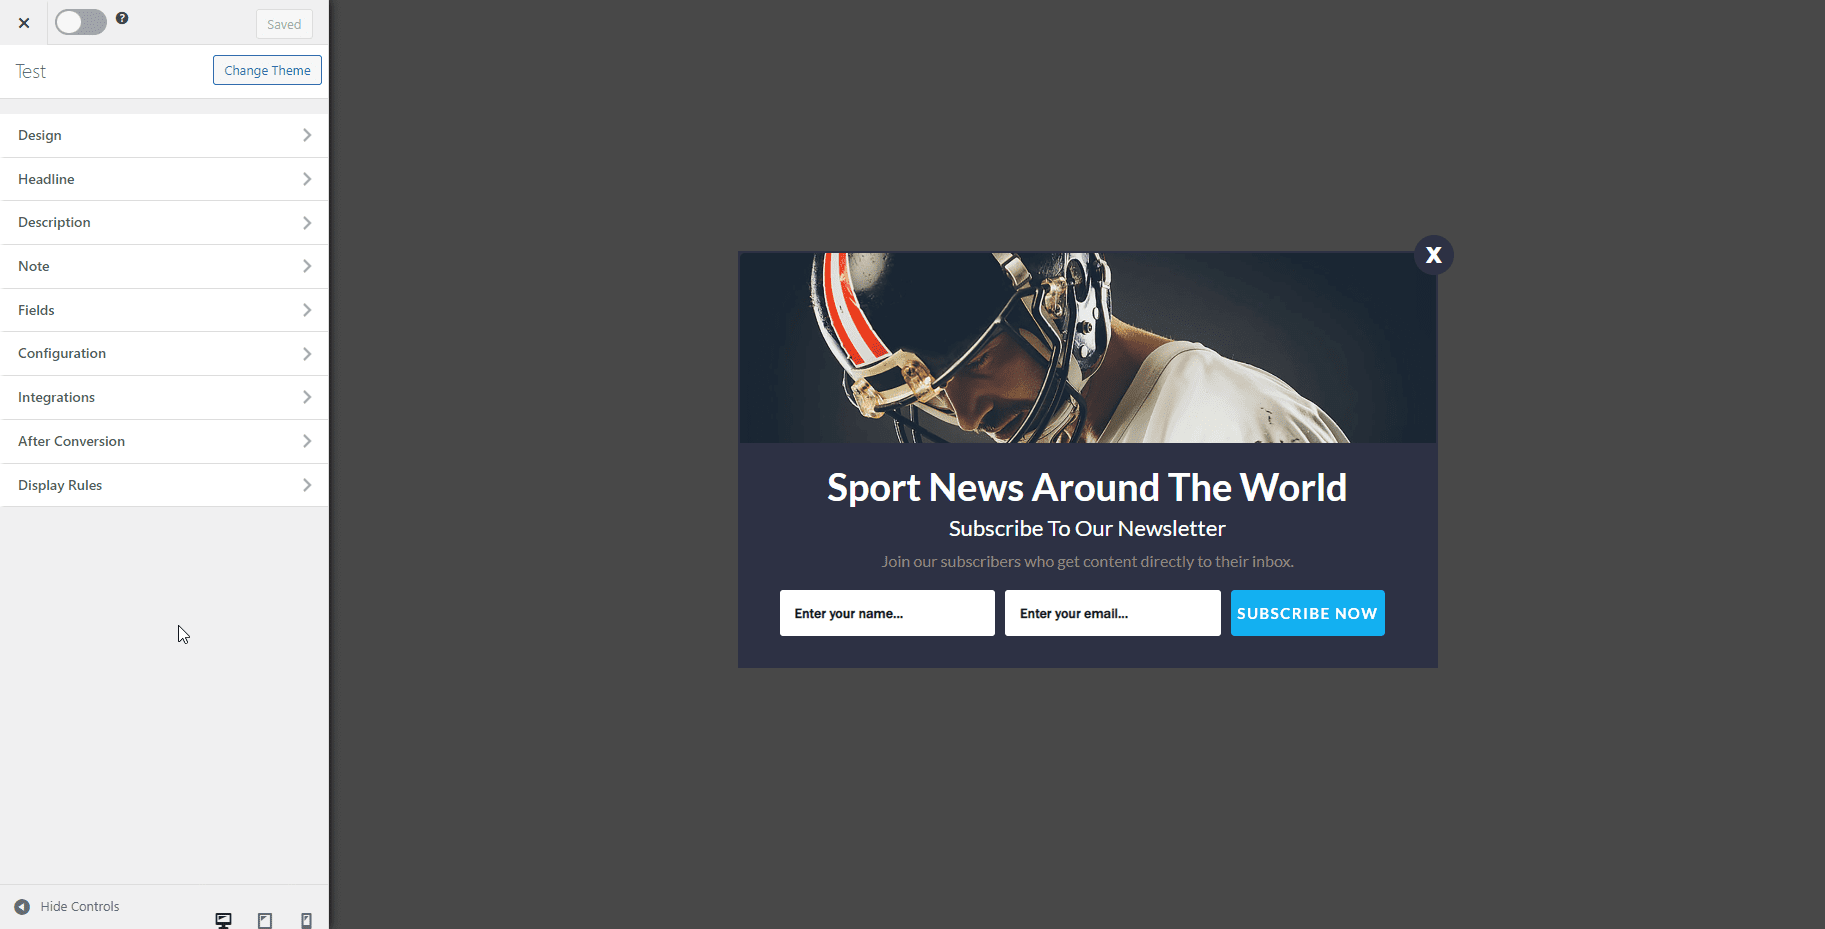
Step 4: Customize Your Popup
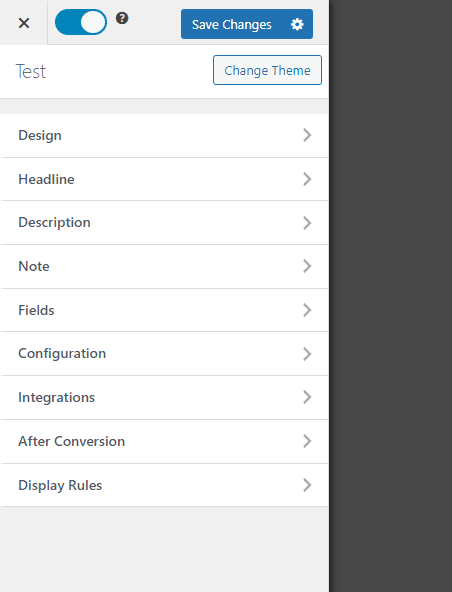
Let me guide you step-by-step through all the customization options available in MailOptin.
Pro Tip: You don’t need to edit any of these options. If you don’t understand any one of them, skip it. To change the text, customize the Headline, Description, and Note.
Design

The design section allows you to customize the design of your popup.
Here’s what all the options do:
- Optin Width: Choose how wide your popup is.
- Display Effect: You can add a basic animation to your popup. The animation only plays once when the popup is displayed.
- Hide Image: If the popup you chose has the option to add an image, you can choose to hide it.
- Image: Add an image to your popup. If you are using a lead magnet to get your visitors to subscribe, you can add a screenshot of the lead magnet here.
- Custom CSS: You can add your own custom CSS here if you want. This allows you to customize all aspects of your popup.
Headline
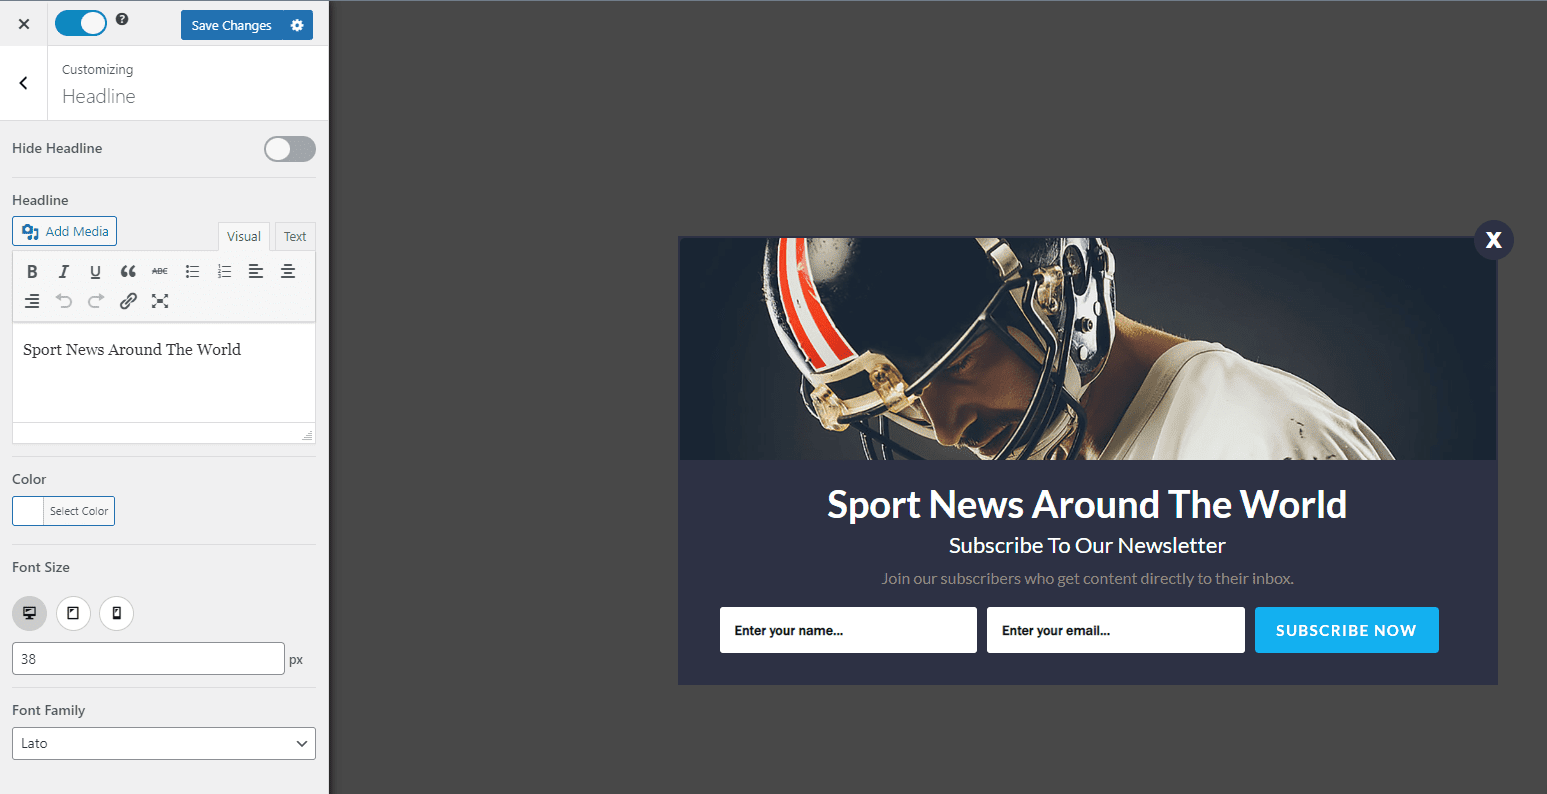
This section allows you to customize the Headline of your popup.
- Hide Headline: Don’t want to display a headline in your popup? Check this option.
- Headline: You can use WordPress’ WYSIWYG editor to customize the look of the headline.
- Color: The color of your headline text.
- Font Size: You can select different font sizes for different screen sizes.
- Font Family: You can change the font family of your heading to any Google Font you want.
Description
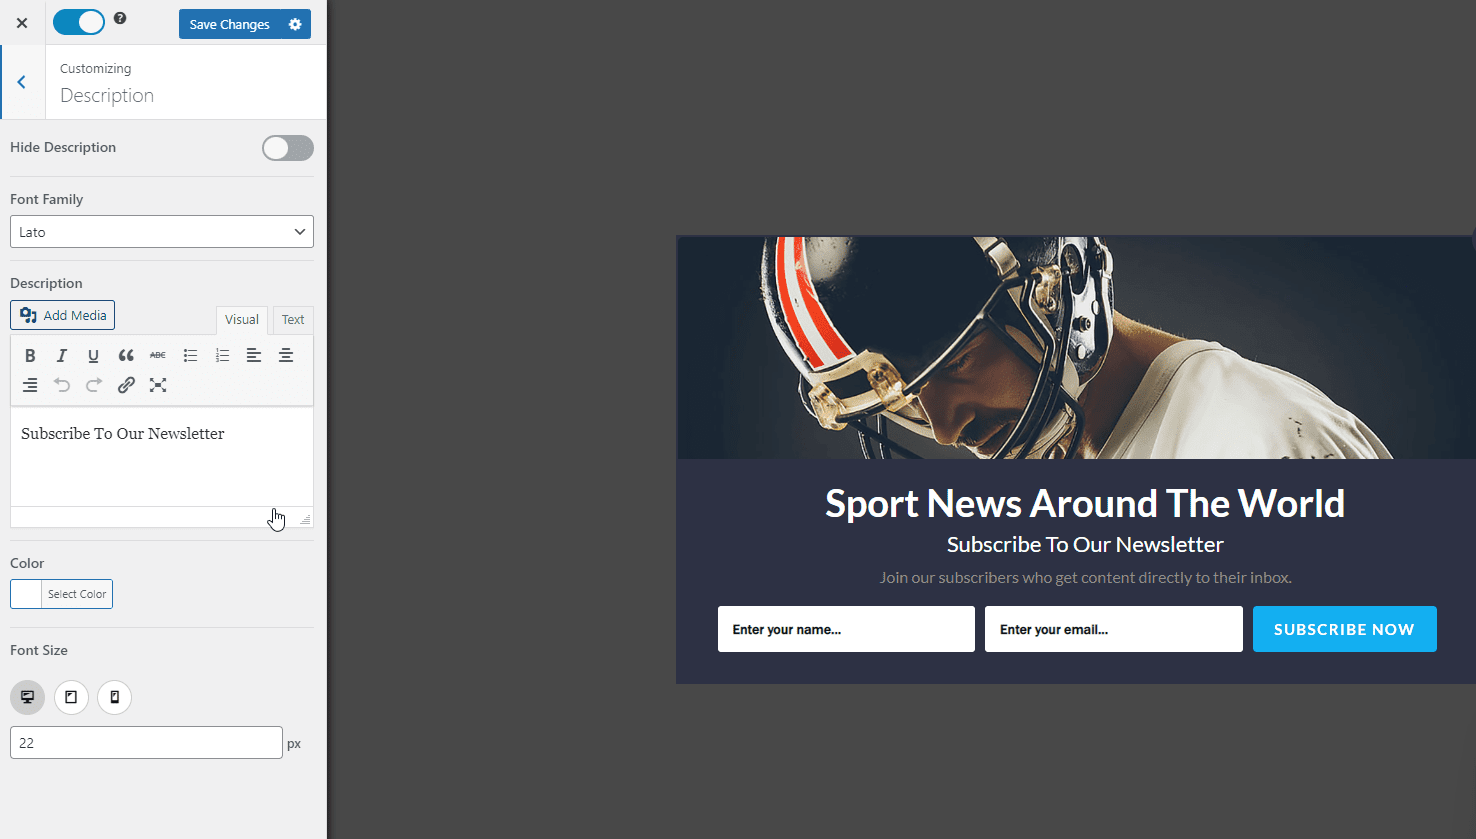
This section allows you to customize the subtitle or description you see under the headline of your popup.
- Font Family: Change the font family of your popup’s description text. Use this to change the font family to match your website’s font family.
- Description: The text that is displayed.
- Color: The text color of the text.
- Font Sizes: Use this option to select different font sizes for different screen sizes.
Note
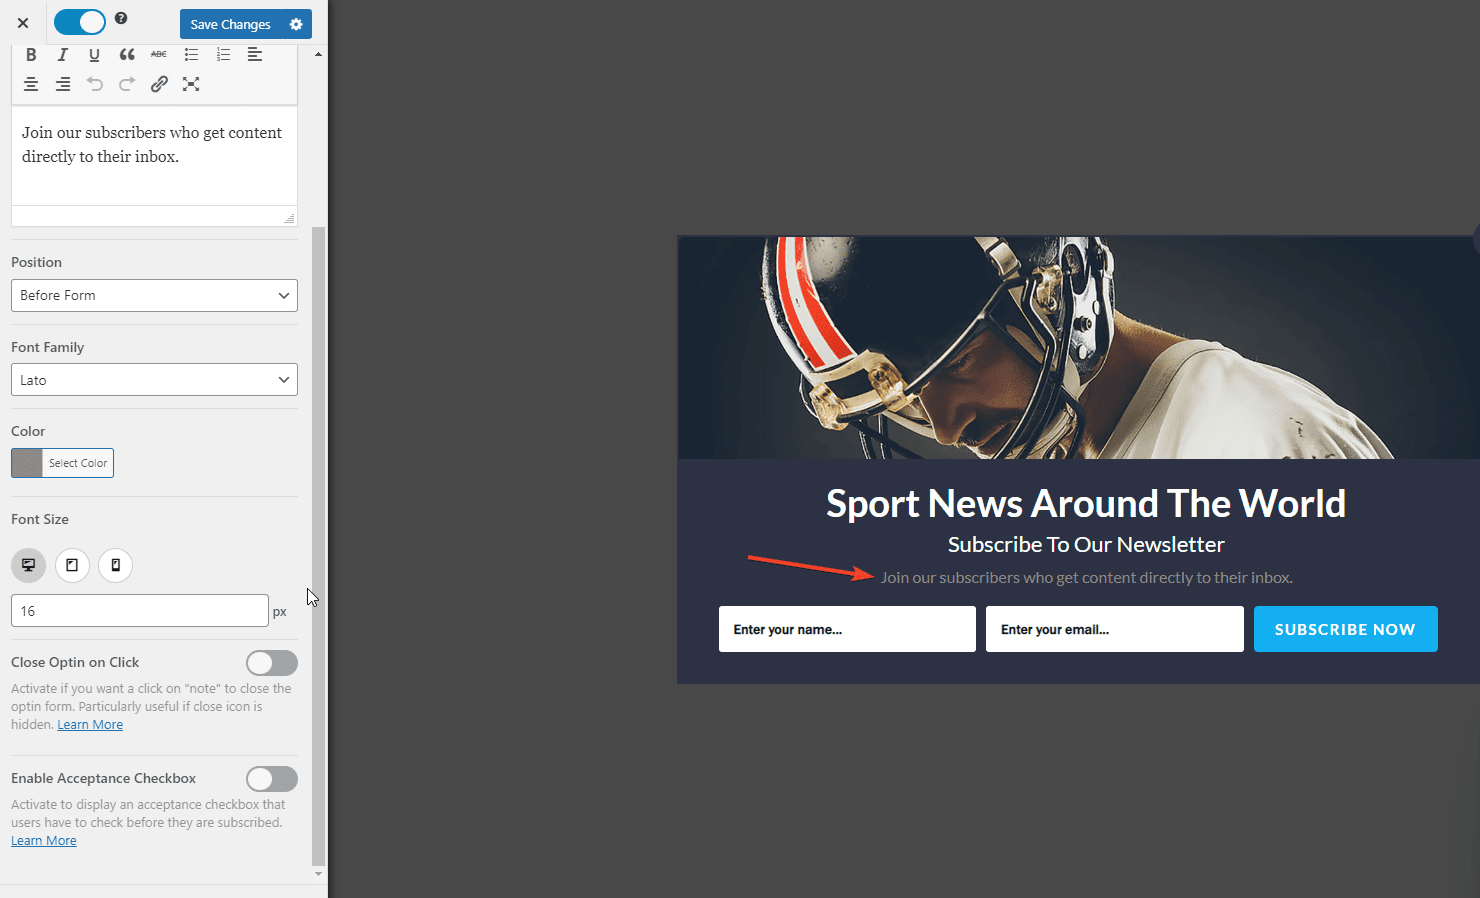
You can choose to add a note to your popup. This note is displayed
- Note: The note text that is displayed.
- Position: Whether to display the note before or after the form.
- Font Family: The font family of this note text.
- Color: The color of this text.
- Font Size: Use this option to select different font sizes for different screen sizes.
- Close Optin on Click: Use this option with the Position option to create a link-based close button.
- Enable Acceptance Checkbox: Convert this note text into a checkbox. Your visitors will need to check this checkbox before they are allowed to sign up.
Fields
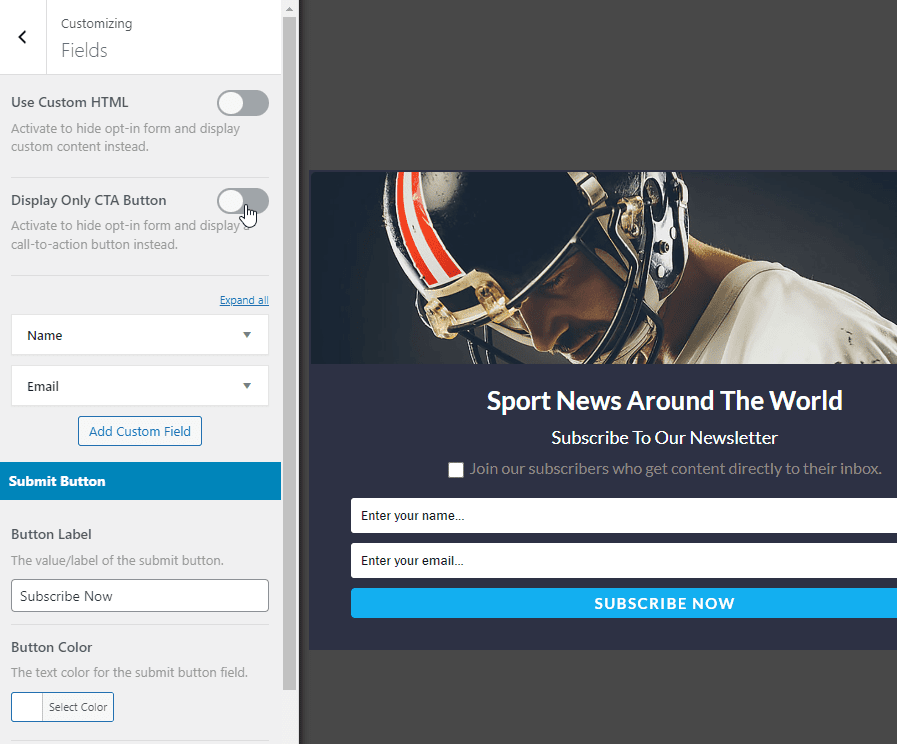
This section allows you to add or remove fields to your form. For most use cases, you’ll want to leave this setting alone. It also allows you to customize the Submit button’s look and feel.
Enable the Display Only CTA Button checkbox to create a popup that shows a CTA button. You can choose what the CTA button does. You can either display a form afterward or redirect the user to another page.
Configuration
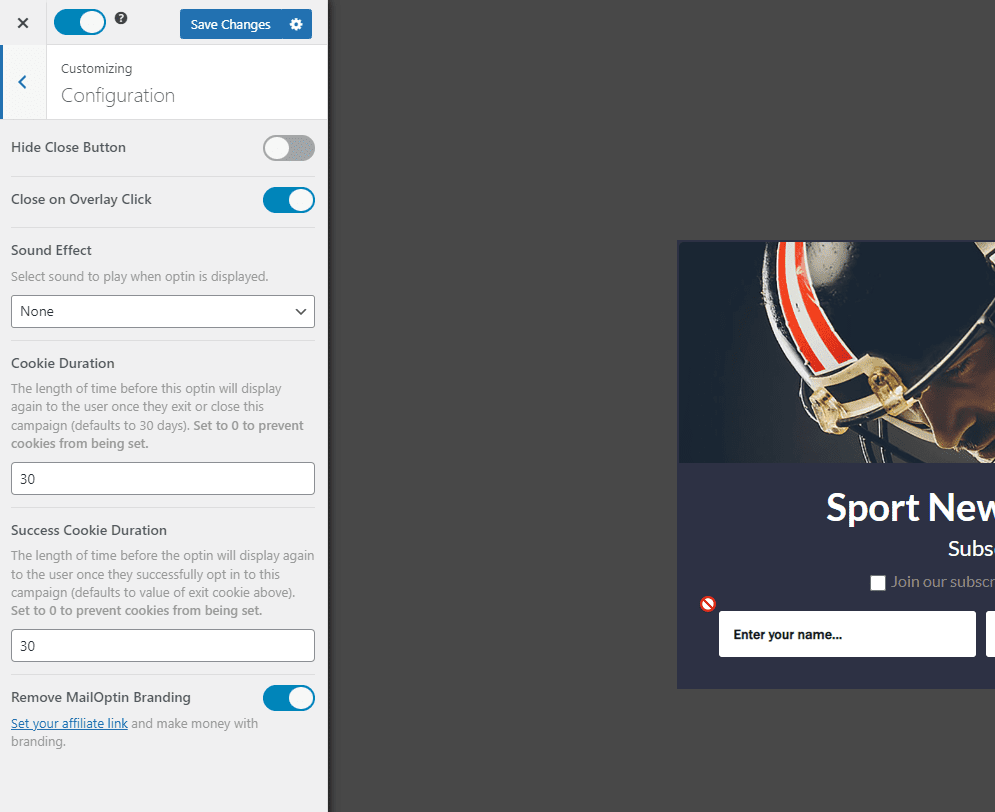
- Close On Overlay Click: Close the popup if the user clicks the dark overlay section.
- Sound Effect: You can choose to play a sound when the popup is displayed.
- Cookie Duration: Once the user closes the popup, the popup won’t be displayed again until this cookie expires. Set it to 0 to display the popup even after the user closes it and revisits your website.
- Success Cookie Duration: The popup won’t be displayed again until this cookie expires once they successfully sign up.
Integration
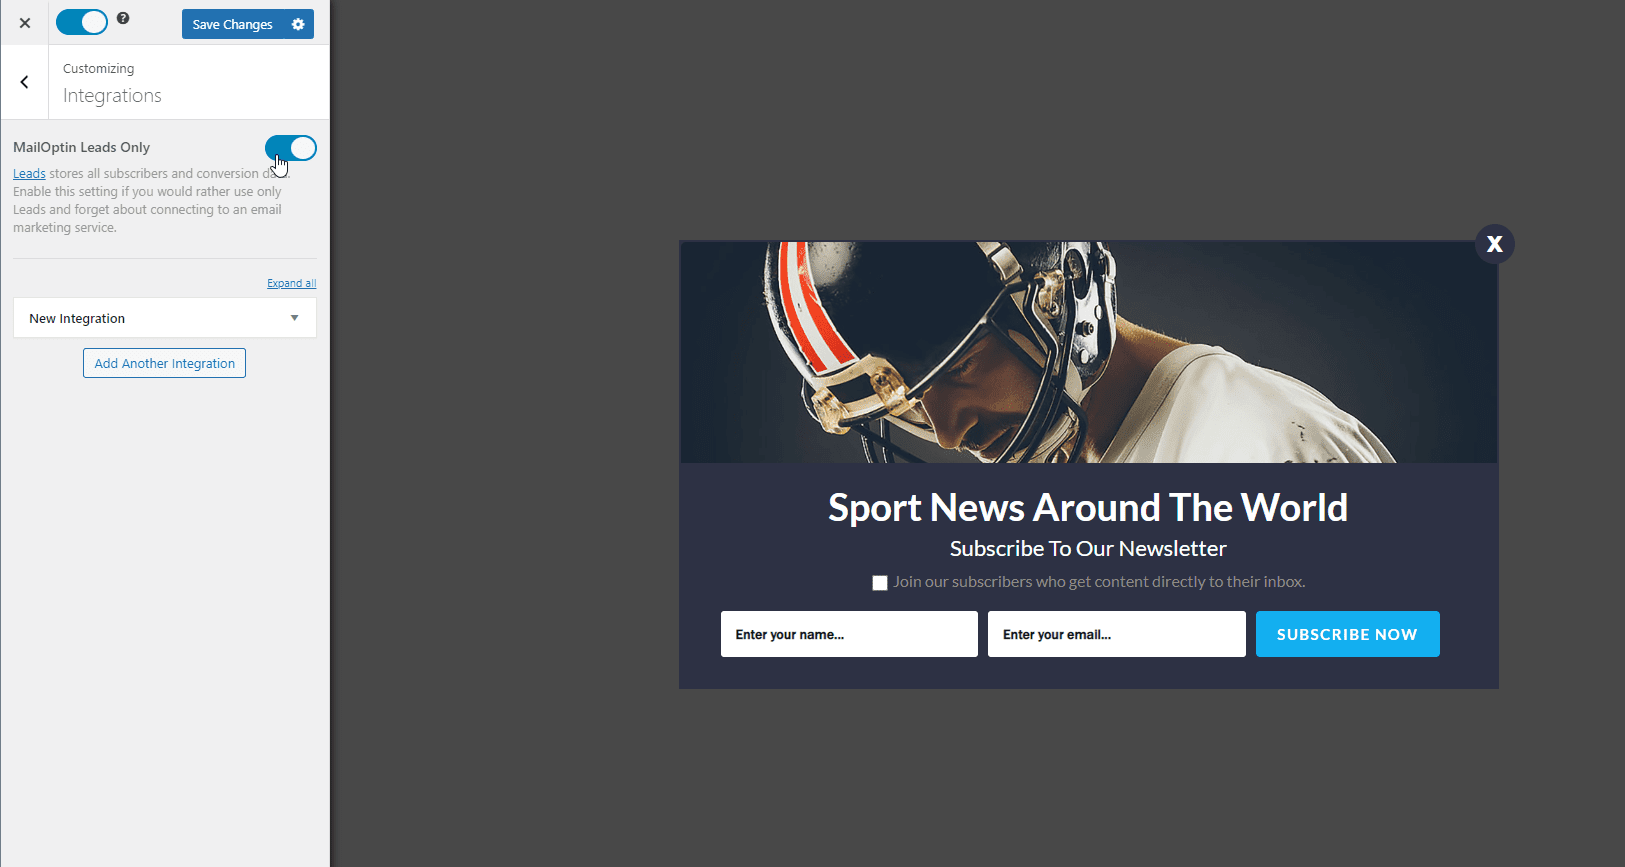
This section allows you to connect your popup to email marketing platforms, including MailChimp, Salesforce, Microsoft Dynamics 365, Drip, AWeber, ConvertKit, MailerLite, Constant Contact, GetResponse, Sendy, Campaign Monitor, ActiveCampaign, Brevo (Sendinblue), Gist, Klaviyo, Sendlane, Mailster, Vertical Response, Mailjet, HubSpot, Ontraport, Moosend, MailPoet, Zoho CRM, Zoho Campaigns, Keap Max Classic (Infusionsoft), HighLevel, Omnisend, Flodesk, Beehiiv, Benchmark Email, SendFox, iContact, Mailgun, E-goi, SendGrid Email Marketing, Elastic Email, GoDaddy Email Marketing, weMail, FluentCRM, CleverReach, NewsMAN, Facebook custom audience.
Once connected, all your new leads will be automatically added to your email marketing platform of choice. If you don’t want to integrate a platform right now, enable the MailOptin Leads Only option. This option saves all your leads in your website’s database. You can then export them and import them into your email marketing platform of choice.
After Conversion
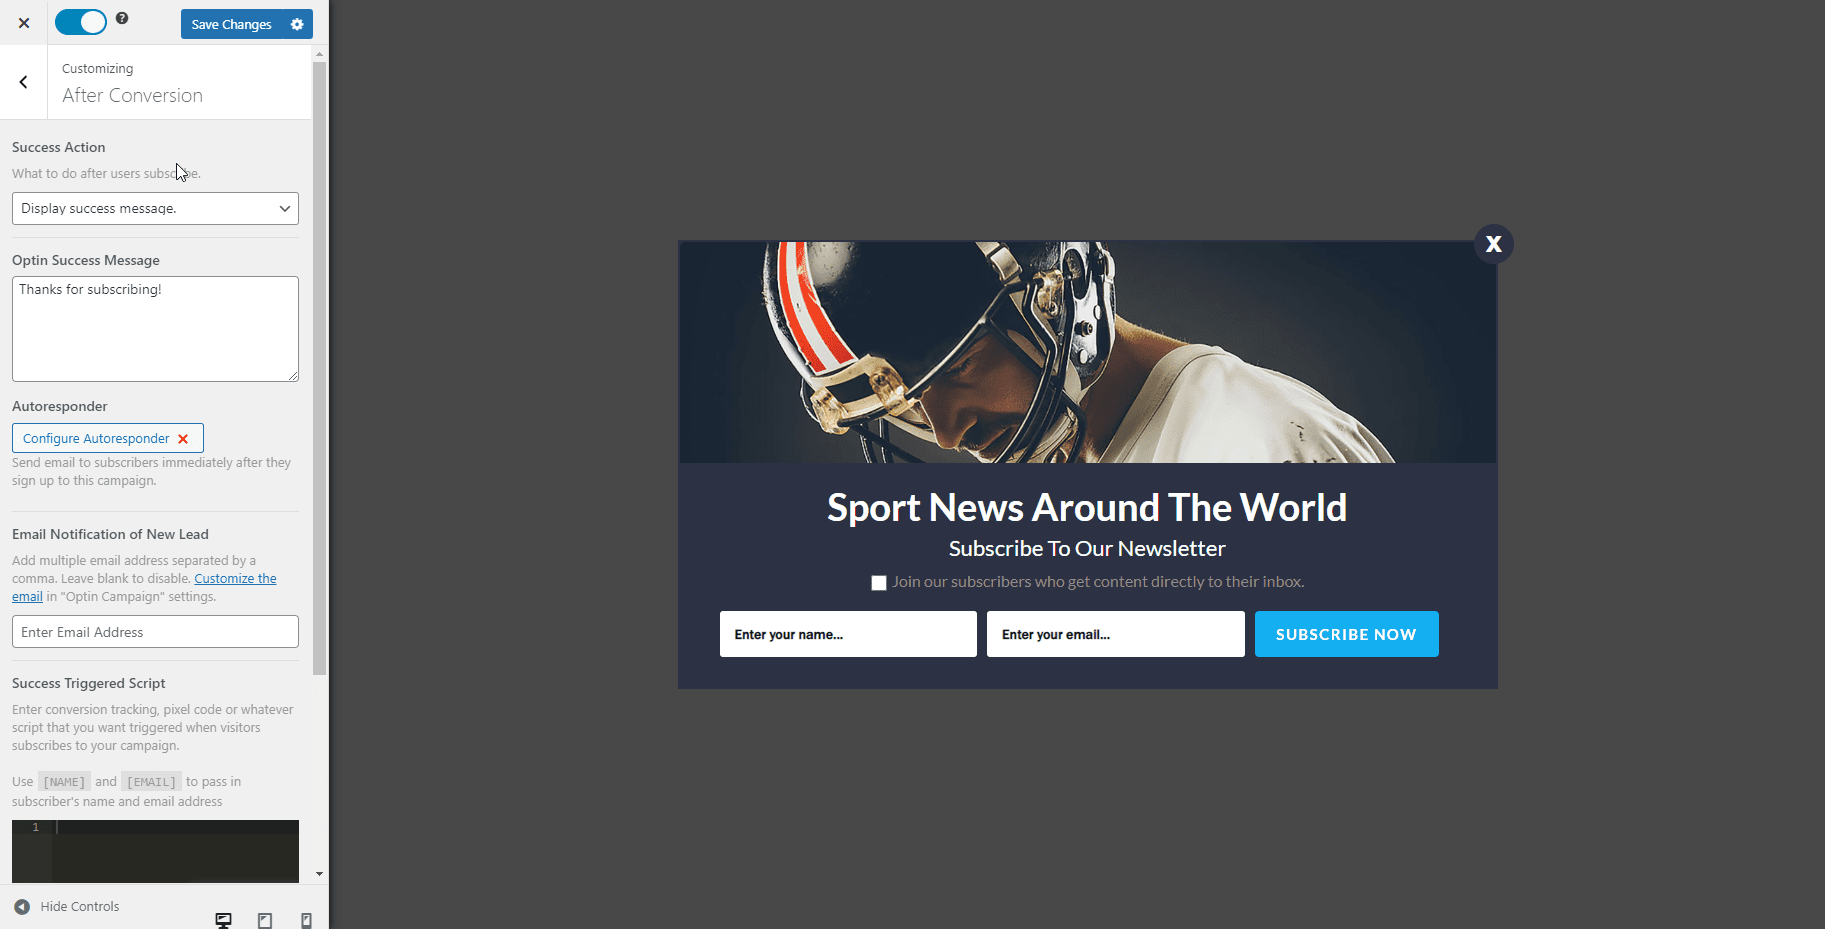
This section controls what happens after the user successfully signs up.
- Success Action: What to do after the user signs up? By default, MailOptin displays a success message that you can customize. You can also close the popup after conversion or redirect to another page (e.g. a thank you page).
- Autoresponder: MailOptin allows you to create email autoresponders. This is an email that is sent after a conversion goal. If you have created an autoresponder already, you can select it here. Anyone who signs up from this popup will receive your selected autoresponder email.
- Email Notification of New Lead: If you enter your email here, you’ll receive a notification whenever someone signs up.
- Success Triggered Script: Use this to run JavaScript code after the conversion event. You can use this to fire a Google Analytics conversion event.
Display Rules
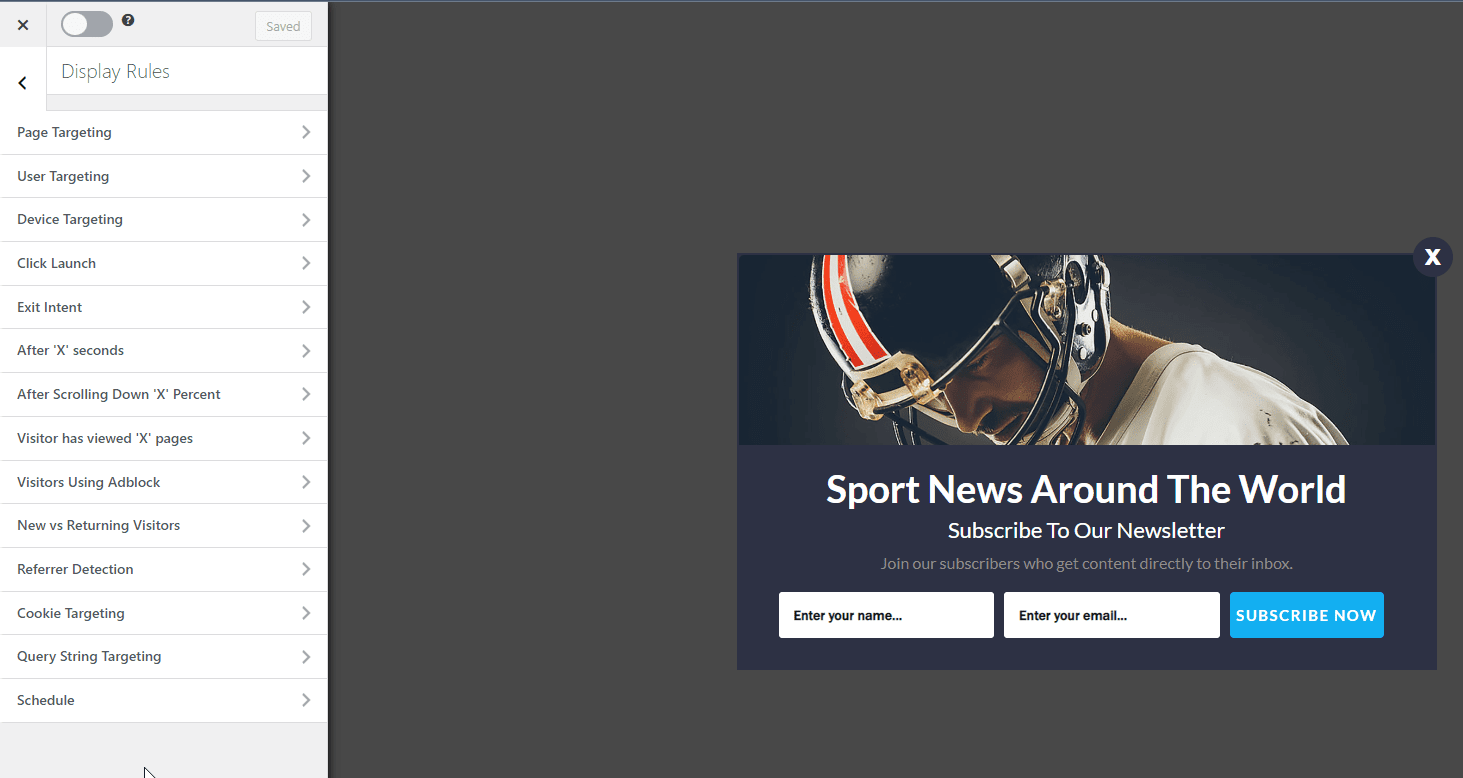
MailOptin allows you to trigger your popup based on many available display rules.
Here’s what the many different rules do:
- Page Targeting: This allows you to select what pages the popup is displayed on or hidden from.
- User Targeting: Control what type of users can see the popup: Logged In Users, Logged Out Users, or Specific User Roles.
- Device Targeting: What type of devices display this popup? Desktop, Mobile, or Tablet You can select more than one. By default, MailOptin targets all devices.
- Click Launch: This allows you to display a popup only when a link is clicked. This option gives you a simple shortcode you can paste into your content that will create a trigger link. It also gives you the HTML code for the trigger link.
- Exit-Intent: Trigger the popup when the user is about to leave the page.
- After X Seconds: Display the popup once X number of seconds have passed.
- After Scrolling Down X Percent: Display the popup when the user has scrolled down past the X percentage of the page.
- Visitor Has Viewed X Pages: Display the popup after the user has already visited X number of pages.
- Visitors Using Adblock: Display the popup to users who are using Adblock. You can use this setting to create a popup asking your visitors to turn off their Adblock for your website.
- New Vs Returning Visitors: You can use this setting to display this popup to returning visitors.
- Referrer Detection: Display this popup to or hide from visitors coming from a specific domain name. For example, display popups to visitors coming from https://facebook.com.
- Cookie Targeting: Hide or Display the popup based on whether or not a cookie is found. You can define the cookie’s name and value.
- Query String Targeting: The query string is the part in the URL after the question mark. For example, in the URL example.com/page?key=value, key=value is the query string. You can display or hide the popup if a query string is present.
- Schedule: This is useful in case this popup’s content is only valid for a limited period of time. For example, Black Friday sales. You can select a start and end date between which you want to display this coupon.
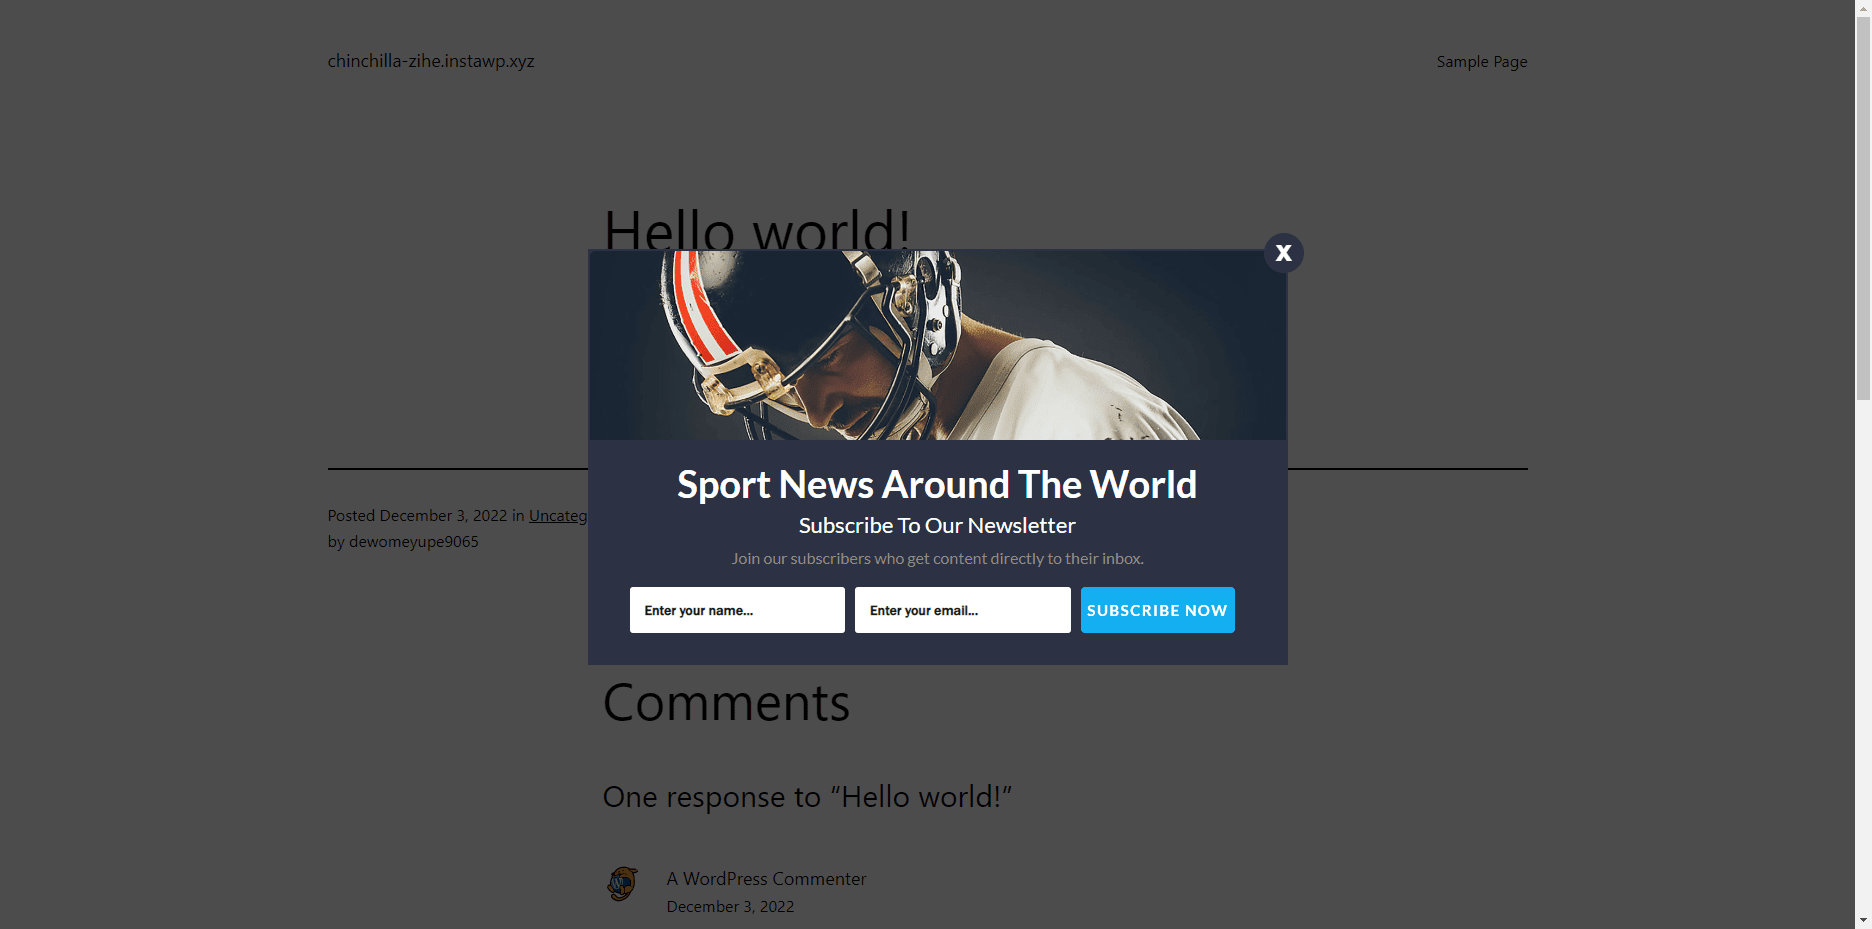
Step 5: Publish Your New Popup
To publish your popup, you’ll need to enable the big toggle button on the top left of your screen:
Try visiting your website now in incognito mode. You’ll see your popup as soon as you try to close your website:
Conclusion
An Exit-Intent Popup is your chance to convert visitors who are about to leave your website. It fires when a visitor is about to close your website.
When someone is about to leave your website, they have already decided not to buy. Maybe they will buy after some time, or maybe never; who knows?
You can use an Exit-Intent popup to ask them to subscribe to your newsletter to receive your latest offers. This will give you another opportunity to persuade them to purchase from you.
If you aren’t already using Exit-Intent popups, download MailOptin today and get started! They can help you grow your revenue and your email list. And it doesn’t take any time to set them up.