How to Create WooCommerce Exit-Intent Popup With Coupons
Do you want to learn how to create a WooCommerce exit intent popup with discount coupons?
Capturing the attention of a potential customer at the right moment can make all the difference. One powerful way to do this is by using exit intent popups — on-screen messages that appear just as a visitor is about to leave your site. These popups are designed to grab attention by offering a compelling reason to stay, such as a discount coupon.
Exit-Intent popups work by tracking the movement of a visitor’s mouse or touch gestures, triggering the popup at the precise moment they are likely to navigate away.
Why is this so effective? Because everyone loves a good deal! Research shows that 94% of consumers use coupons, and 38% buy more than they intended because of a coupon. Additionally, 83% of frequent coupon shoppers say coupons influence purchasing decisions. By presenting a well-timed discount offer through an exit intent popup, you can reduce cart abandonment and increase sales by converting hesitant visitors into paying customers.
In this guide, we’ll show you the benefits of setting up a WooCommerce exit-intent popup with coupon codes for discounts, how to create those coupons, and how to design an attention-grabbing exit-intent popup using the MailOptin plugin to display your WooCommerce coupons.
Benefits WooCommerce Exit-Intent Popup with Discount Coupons
Implementing a WooCommerce exit-intent popup with discount coupons offers several significant advantages for your online store, which include:
Reduce Cart Abandonment: By offering a discount just before users leave your WooCommerce-powered online store, you can persuade them to complete their purchase, reducing cart abandonment rates.
Increase Conversion Rates: A discount through an exit-intent popup can motivate hesitant visitors to finalize their purchase. This tactic turns potential losses into sales, improving your overall conversion rates.
Boost Sales Revenue: Discount coupons encourage more purchases, often increasing average order values. Customers are more likely to buy additional items or upgrade their purchases when they feel they are getting a good deal.
Gather Valuable Insights: By experimenting with different offers, designs, and triggers for your exit-intent popups, you can gain insights into what appeals most to your audience. This data helps refine your marketing strategies and improve future campaigns.
Setting up a WooCommerce exit-intent popup with discount coupons is a powerful strategy to enhance your store’s performance, drive conversions, and improve customer satisfaction.
Creating WooCommerce Exit-Intent Popup With Discount Coupons
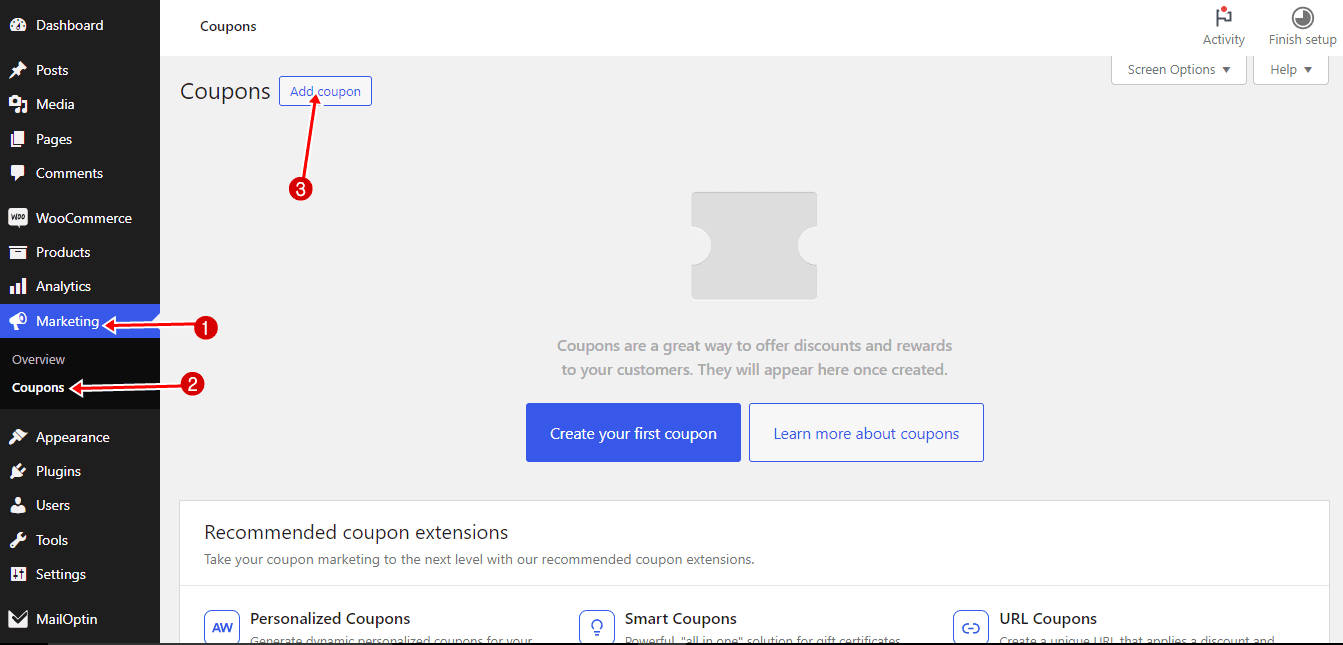
The first step in creating an exit-intent popup that offers discounts in WooCommerce is creating the coupon to offer to your website visitors and users. To do this, log in to the admin dashboard of your WooCommerce online e-commerce store.
Navigate to your WordPress dashboard, go to Marketing > Coupons, and click Add Coupon to create a new coupon code.
A new window opens that gives you the option to enter your desired coupon code manually or click on “Generate Coupon Code” to let the plugin create a random code for you automatically.
Next, you’ll find the Description field, which is optional. This field is intended for internal use, allowing you to add notes or details about the coupon that are only visible to merchants, not customers.
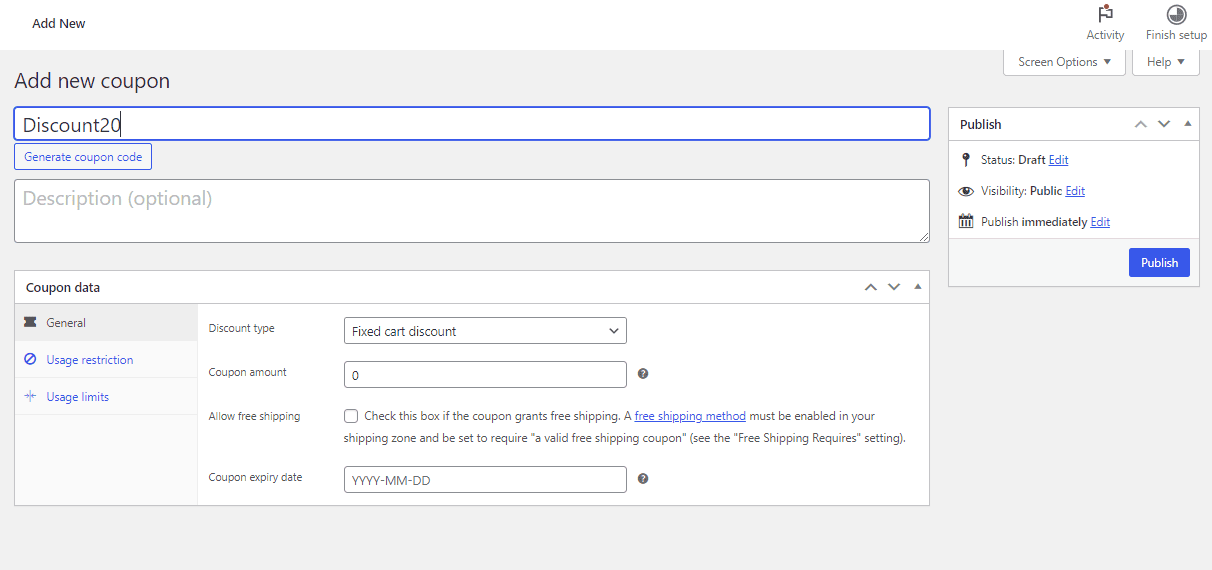
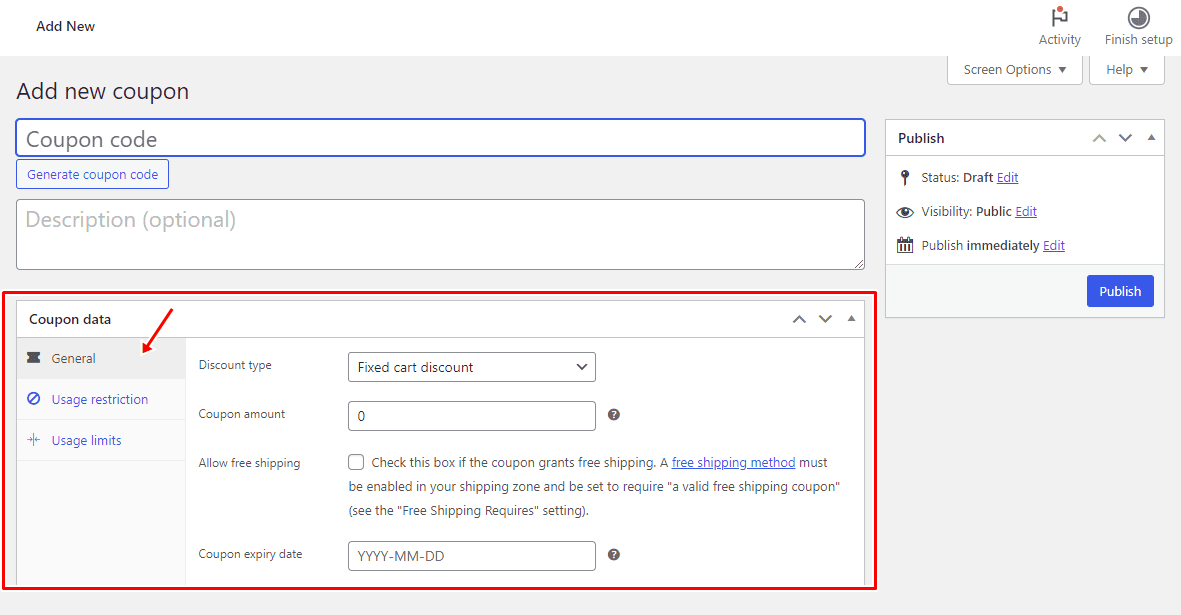
Below the description field, you’ll find the Coupon Data block, divided into three sections: General, Usage Restriction, and Usage Limits.
Let’s explore each section in detail to understand how they work;
General Section
This section includes the discount type, coupon amount, an ‘allow free shipping’ checkbox, and the coupon expiry date.
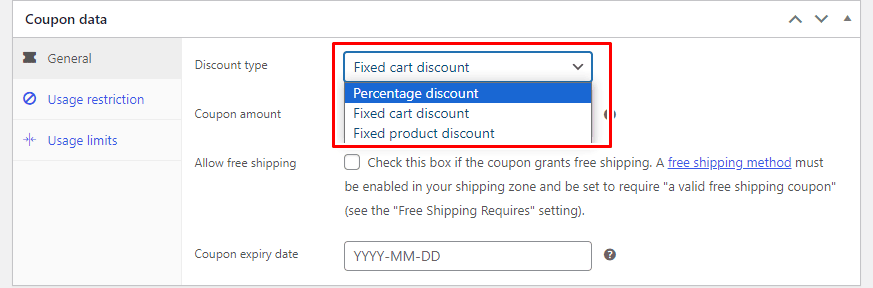
Discount Type: By default, WooCommerce offers three types of discounts;
- Percentage discounts apply a percentage discount to the entire cart.
- Fixed cart discounts apply a fixed discount to the entire cart.
- Fixed product discounts apply a fixed discount to selected products only. The discount is calculated per item, not for the whole cart.
Coupon Amount: This field allows you to set the value of the discount.
Allow Free Shipping Checkbox: This option enables you to offer free shipping to customers who use the coupon.
Coupon Expiry Date: This field allows you to set an expiration date for your coupon.
Usage Restriction Section
Without applying any restrictions, anyone can use the coupon at any time, which may not align with your promotional goals. To better control how your coupon is used, this section allows you to implement several restrictions, which include:
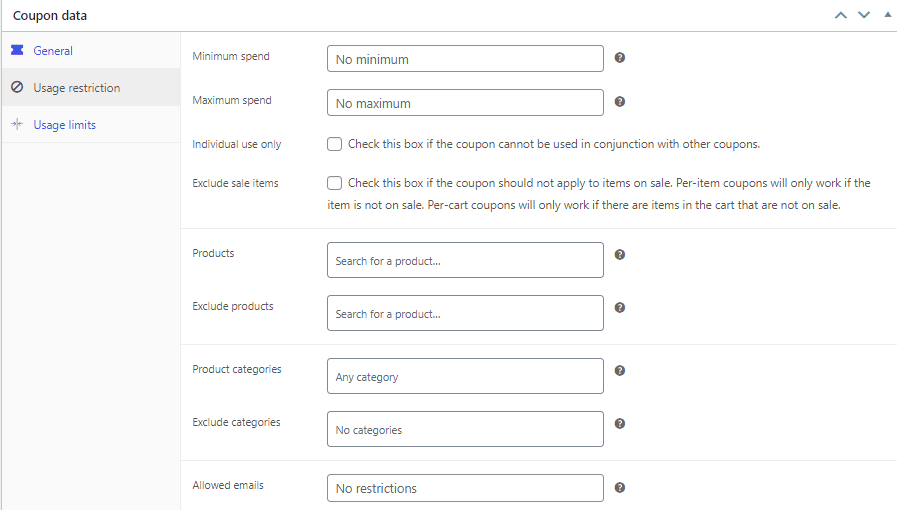
Set Minimum or Maximum Order Subtotal: Define a minimum or maximum order value (including the cart subtotal plus tax) required to apply the coupon.
Include or Exclude Specific Products or Categories: Restrict the coupon to particular products or product categories or exclude specific ones.
Limit by Allowed Email Addresses: You can restrict coupon usage to specific email addresses verified against the customer’s billing email. WooCommerce 3.4+ also allows you to include a wildcard character (*) to match multiple email addresses, for example, `*@gmail.com` to include any Gmail address.
Usage Limits Section
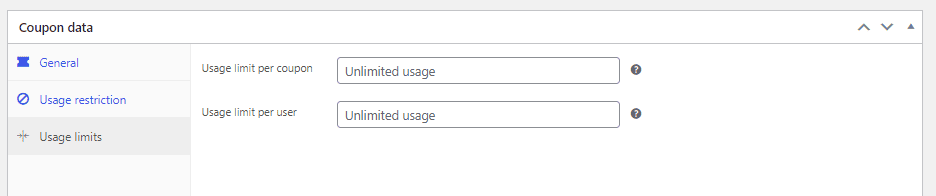
In this section, you can determine how many times the coupon can be used, both overall and per customer. Additionally, you can set the number of products the coupon can be applied to in a single transaction.
Once you’ve configured your coupon settings, the next step is to create an exit intent popup using MailOptin to showcase the coupon you just created.
Creating The WooCommerce Exit-Intent Popup
MailOptin is an excellent WordPress plugin for lead generation, email automation, and newsletters. It excels at converting website visitors into subscribers and registered WordPress users, and it allows you to send targeted one-off newsletters, automated email campaigns, and more.
With MailOptin, you can easily create and manage exit-intent popups that capture your WooCommerce users’ attention just before they leave, offering them a compelling incentive to stay and complete their purchase.
Installing and Activating MailOptin Plugin
Purchase a license from the pricing page to install and activate the MailOptin plugin. After purchasing, you’ll receive a confirmation email with a download link for the plugin’s zip file and your unique license key.
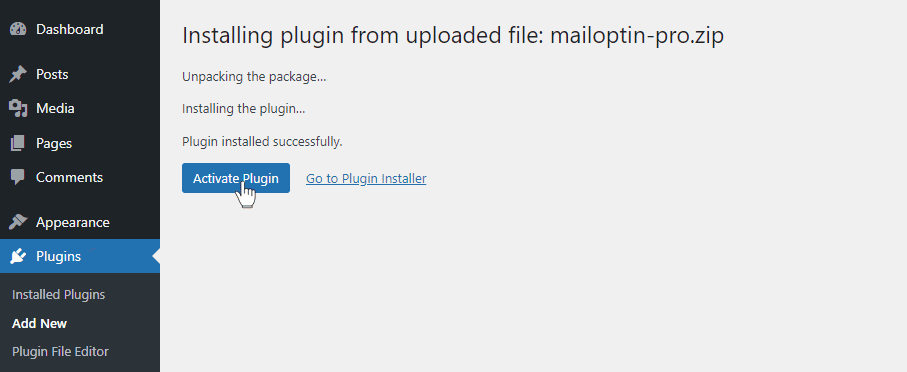
To install the plugin, log in to your WordPress admin dashboard, go to the Plugins page, click “Add New,” select “Upload Plugin,” choose the downloaded zip file, and click “Install Now.”

After installing the plugin, you can activate it by clicking Activate Plugin.
Creating a Popup Campaign
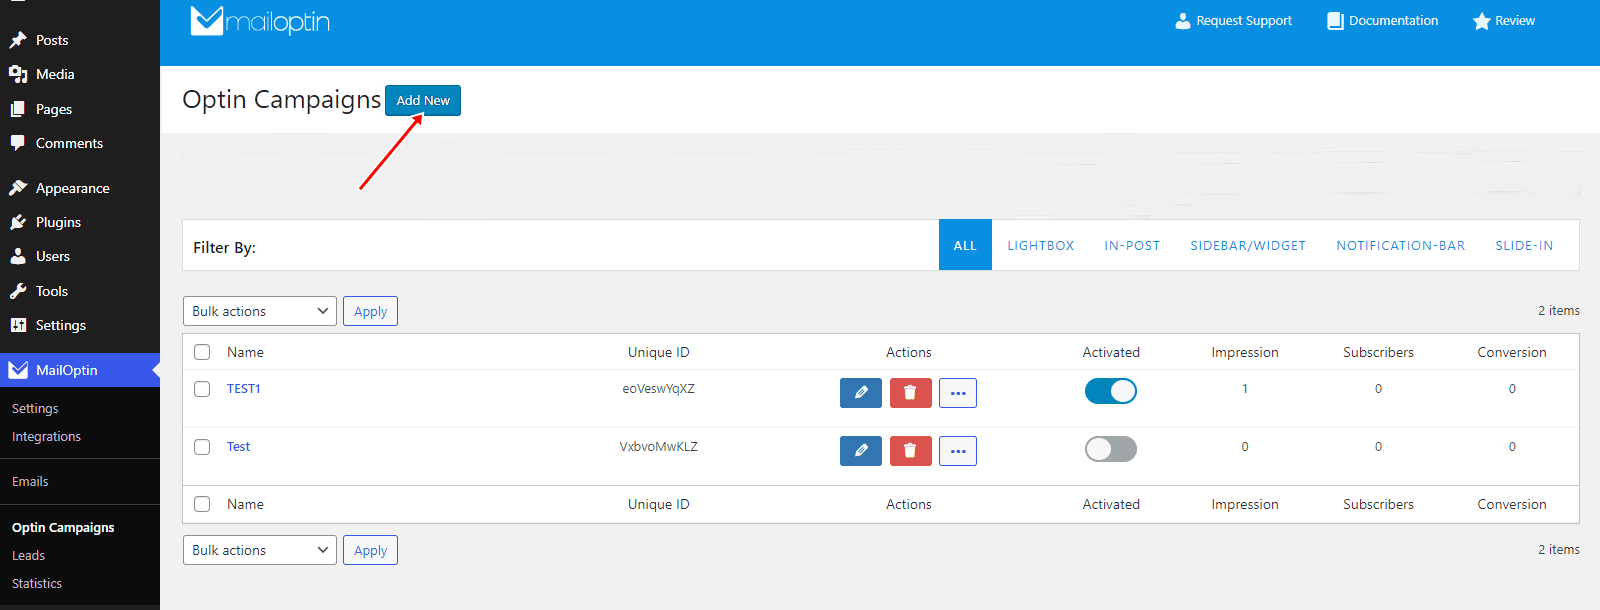
After activating MailOptin, the next step is to create a WordPress optin specifically for your exit-intent popup. Go to MailOptin in your WordPress dashboard and navigate to the ‘Optin Campaigns’ section.
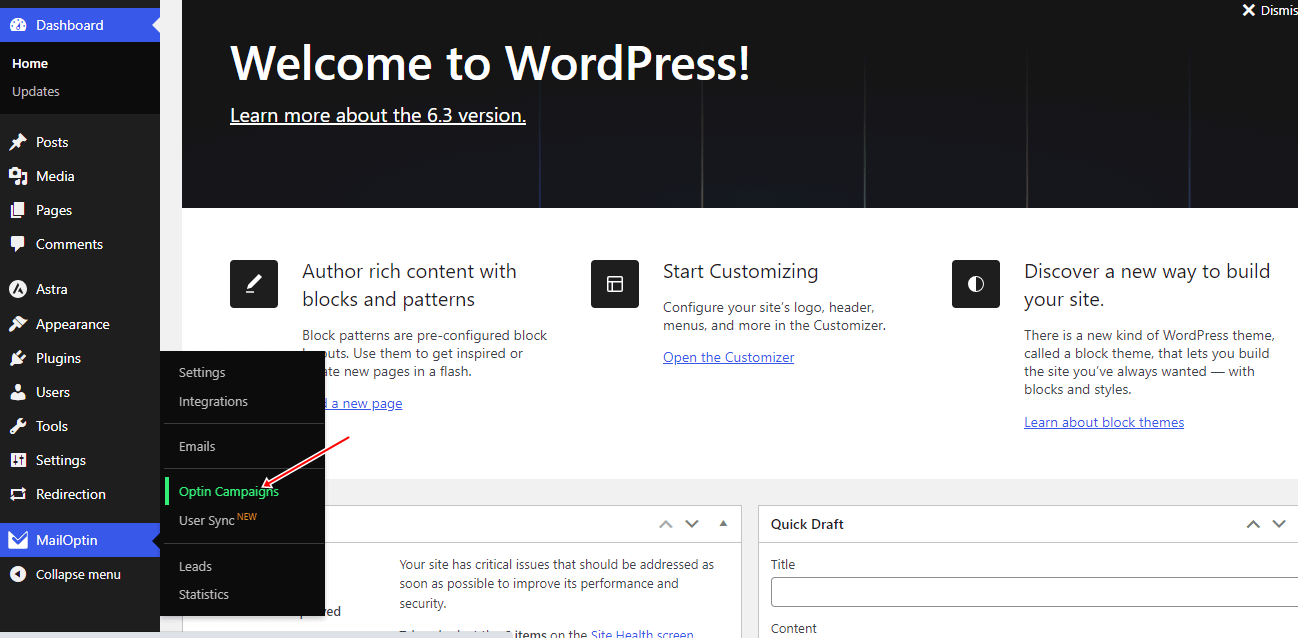
Next, on the Optin Campaigns admin page, click the “Add New” button at the top.
Enter a campaign title and select LightBox as the opt-in type for your campaign.
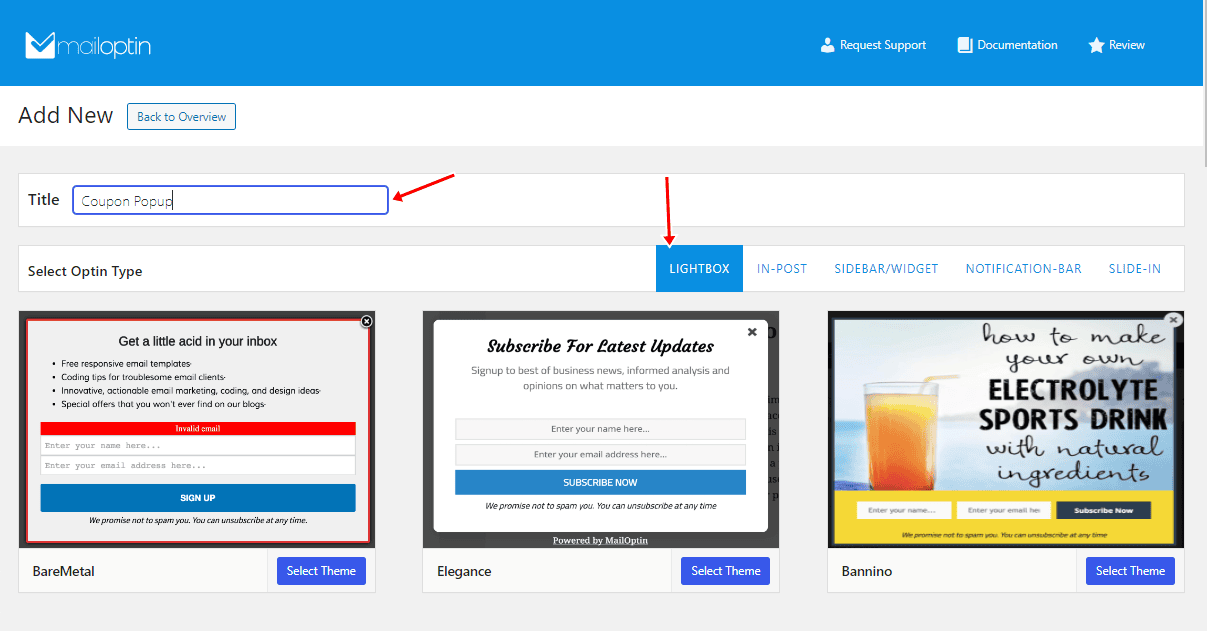
Next, you’ll need to choose a template. We recommend scrolling down until you find the “Promo” template, which is ideal for creating a coupon popup. However, select any other template that suits your needs, as all templates are fully customizable.
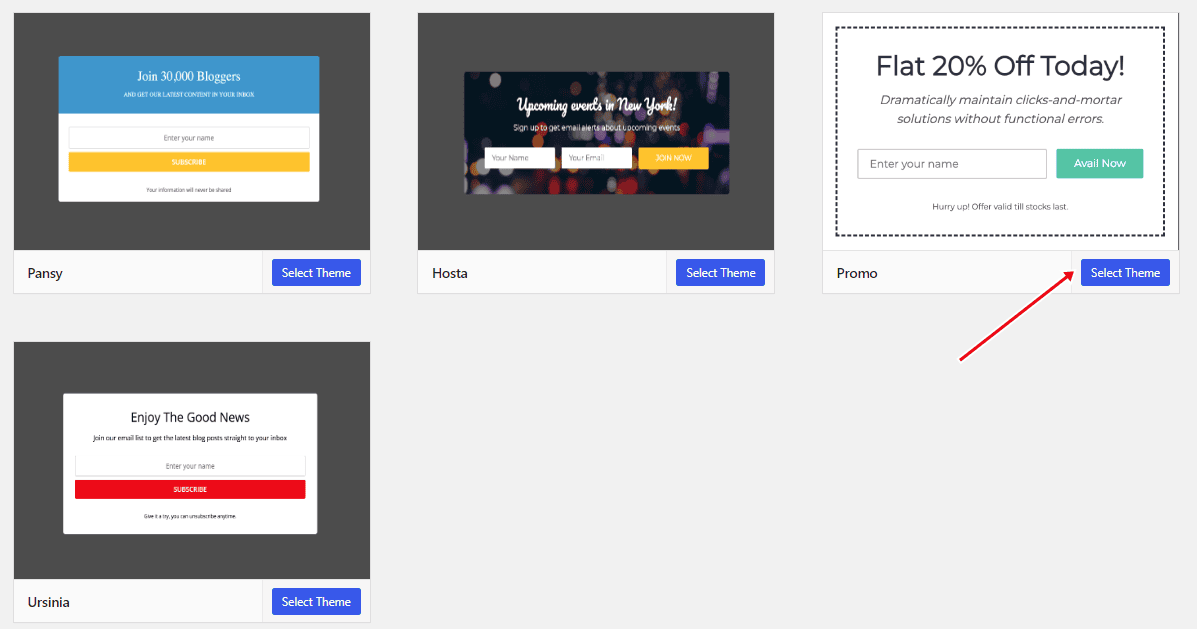
After selecting your preferred template, MailOptin will redirect you to the form builder page, where you can customize and design your lightbox popup to match your branding and promotional goals.
Customizing The WooCommerce Exit-Intent Popup
Designing your Exit-intent coupon popup is very easy when using MailOptin. The popup form builder allows you to customize each element from the side panel effortlessly.
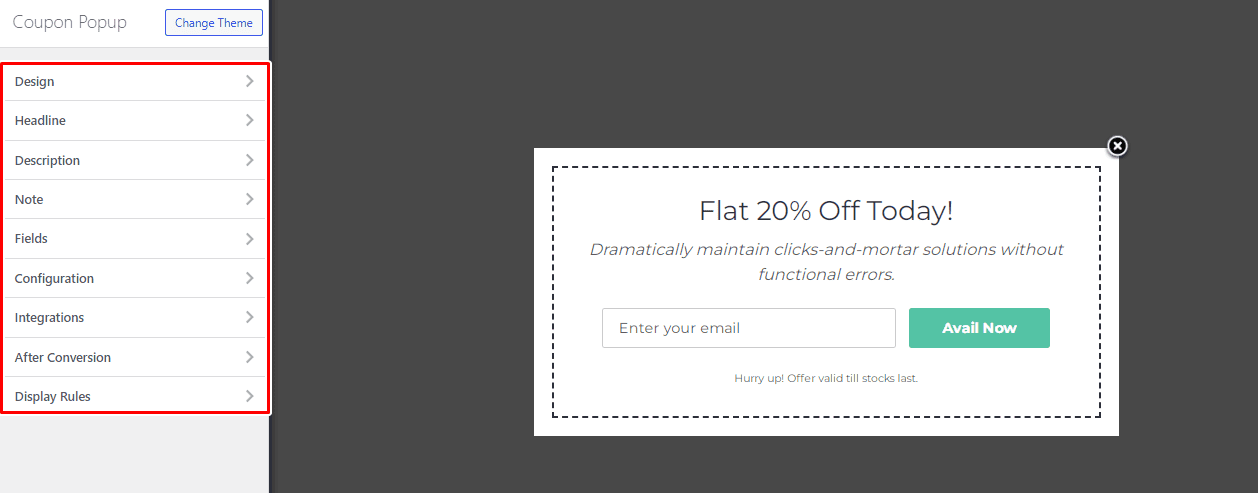
We’ll guide you through the options in the sidebar.
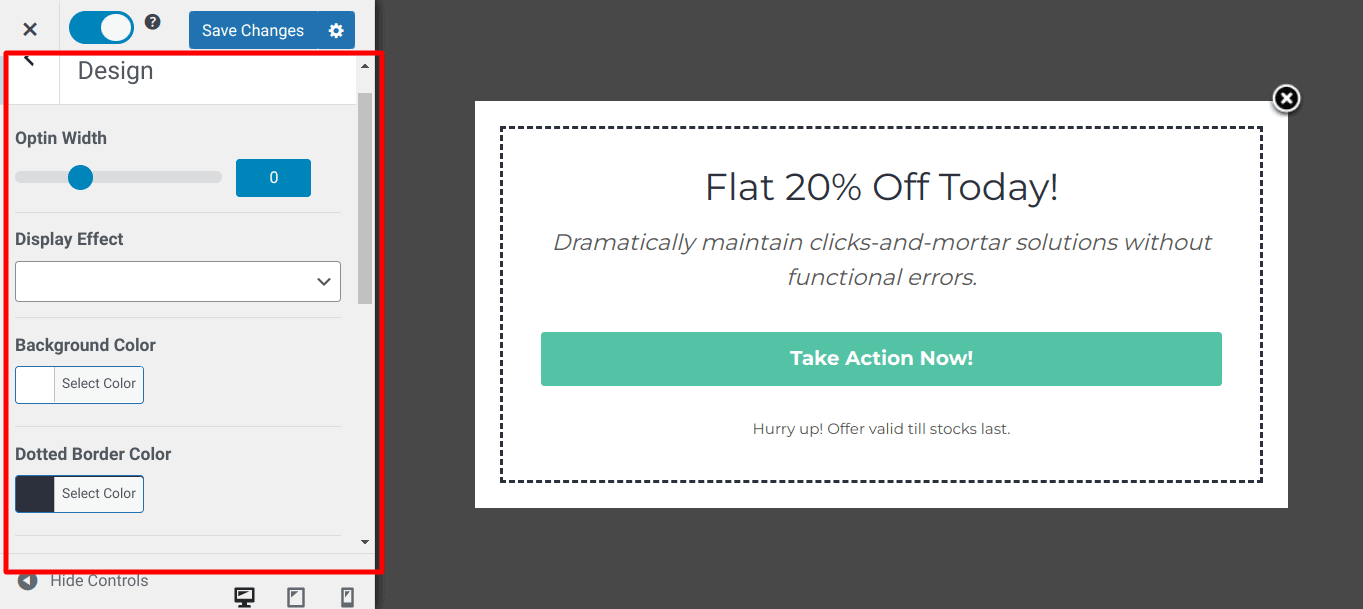
Design Panel: This allows you to customize the optin background and border color, add custom CSS, and more.
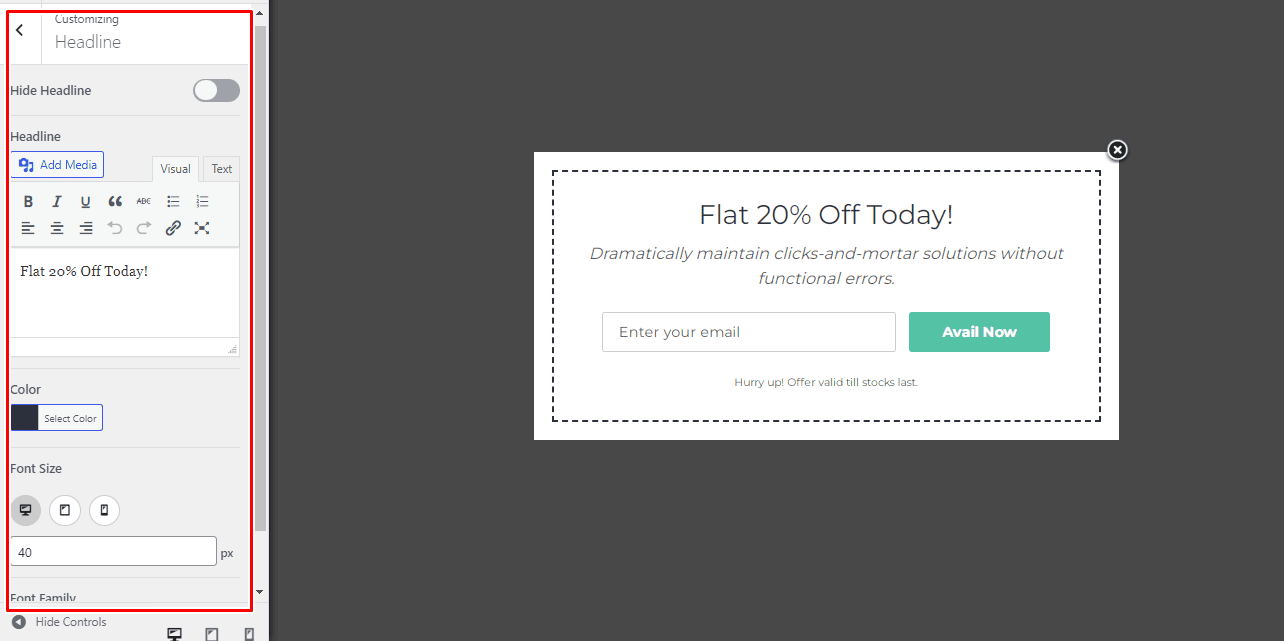
Headline Panel: Allows you to set a custom headline, adjust the font and color, and more.
The Description panel works like the Headline panel but for the text under the headline.

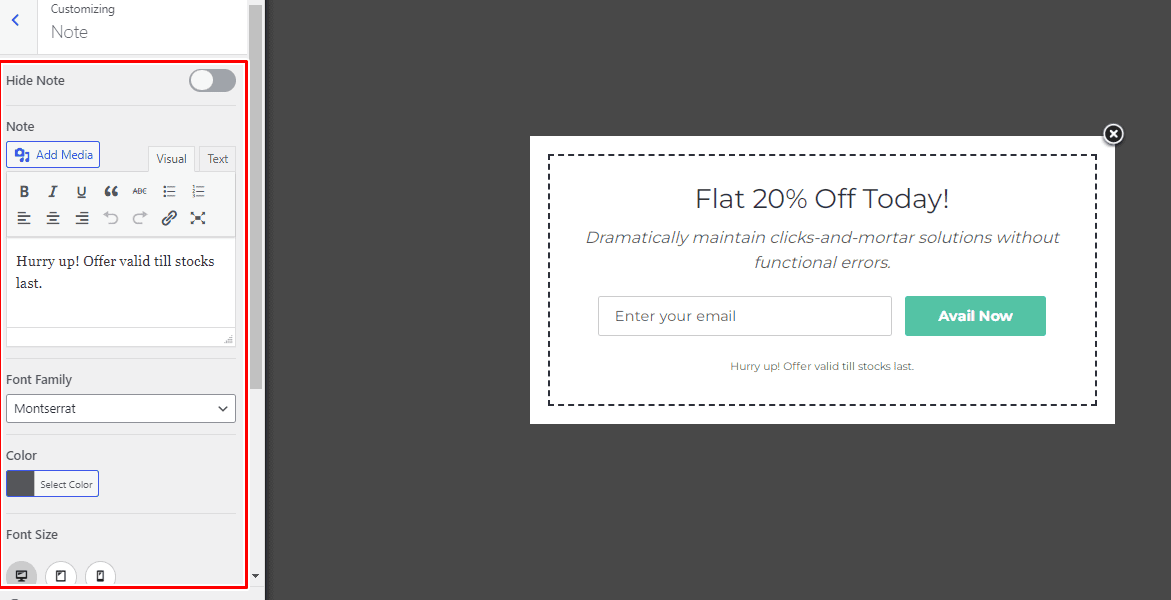
Similarly, the Note panel customizes the text beneath the optin form.
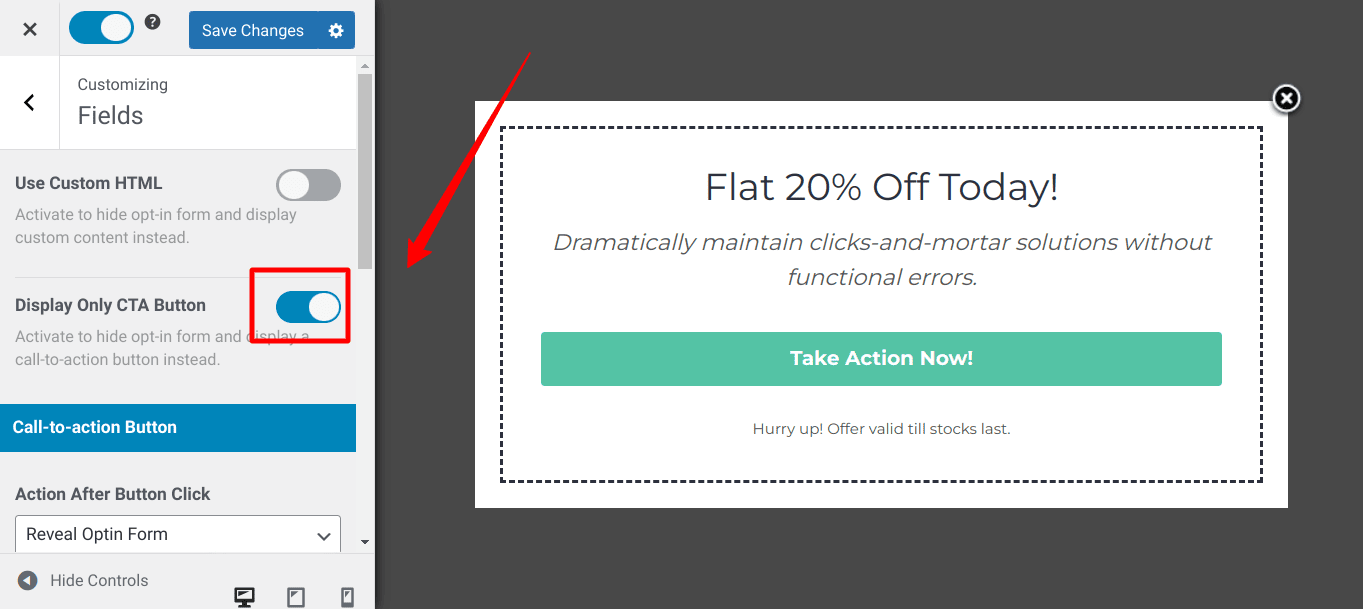
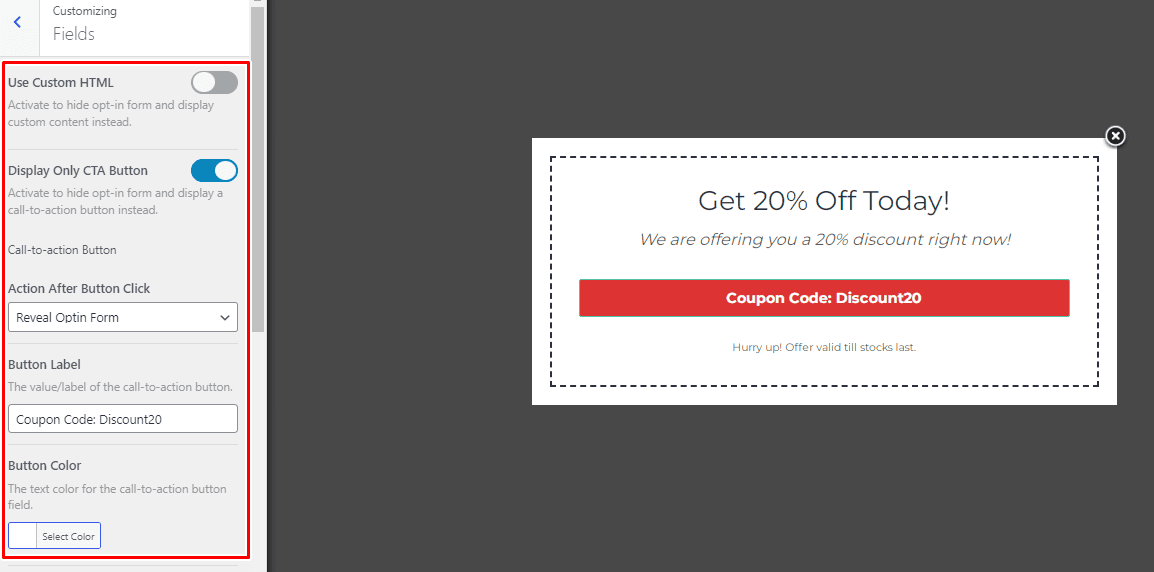
Fields Panel: By default, the form template includes fields for name and email. You can add or remove fields by clicking on the form or selecting the ‘Fields’ option on the left sidebar.
When you click the Fields option, you can customize everything about the Exit-intent popup field area. You can turn off fields, change the background color of your call-to-action, or even use your custom HTML.
For instance, to display just a CTA button, you can toggle the ‘Display only CTA button’ option, as shown below:
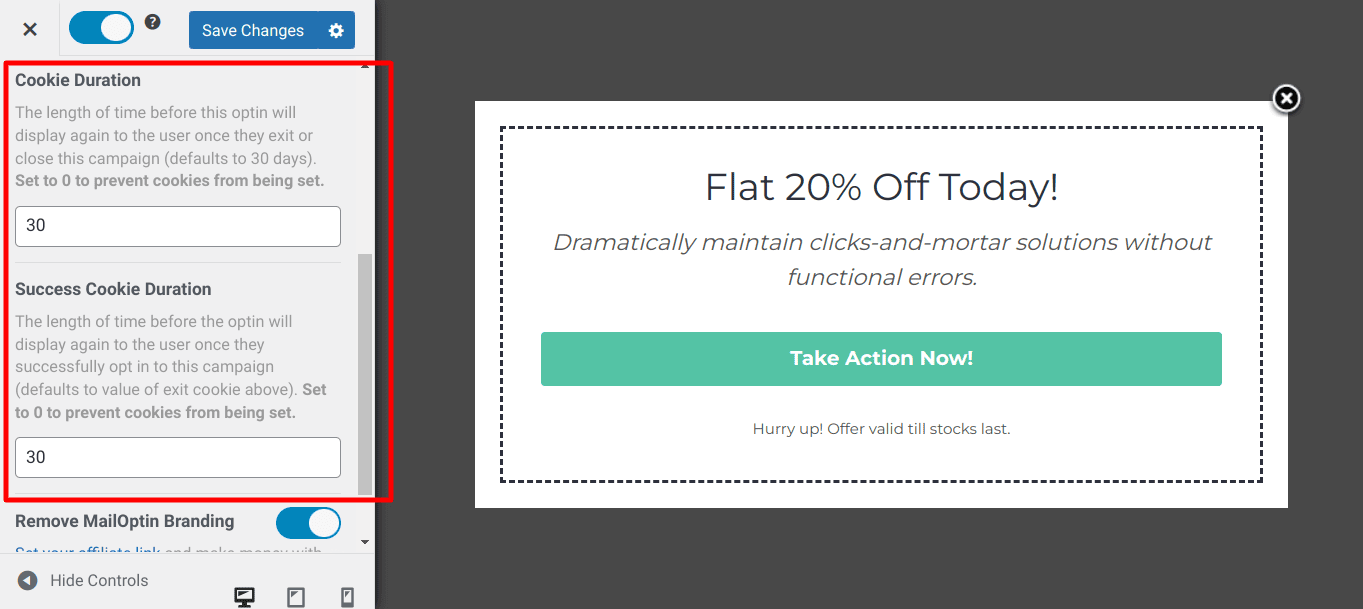
Configuration Panel: Allows you to define various standard configurations. For instance, you can set a specific sound that will play when the popup is displayed if you’d like.

You can decide when the WooCommerce popup should reappear after a user leaves the page or subscribes to the newsletter. Additionally, you can set what happens when users click on the overlay. These options give you more control and flexibility over how the popup behaves.
You can edit any part of the design by clicking on it. The customization options will appear in the side panel when you click an element.
If you check out the design below, you’ll notice it looks different from the earlier ones in this article. That’s because we have customized it and added the discount code “Discount20”. You can do the same by clicking on each element in the popup design.
Displaying The WooCommerce Exit-Intent Popup
Once you’ve finished designing your WooCommerce exit-intent popup with a coupon, the next step is to decide when and how to display it to your customers.
The Display Rules panel gives you fine-grain control over how your optin campaign will be displayed, such as on specific posts, pages, or custom post types, and the activities or events that will trigger the optin, e.g., scroll, exit intent, time on site, page views, etc.
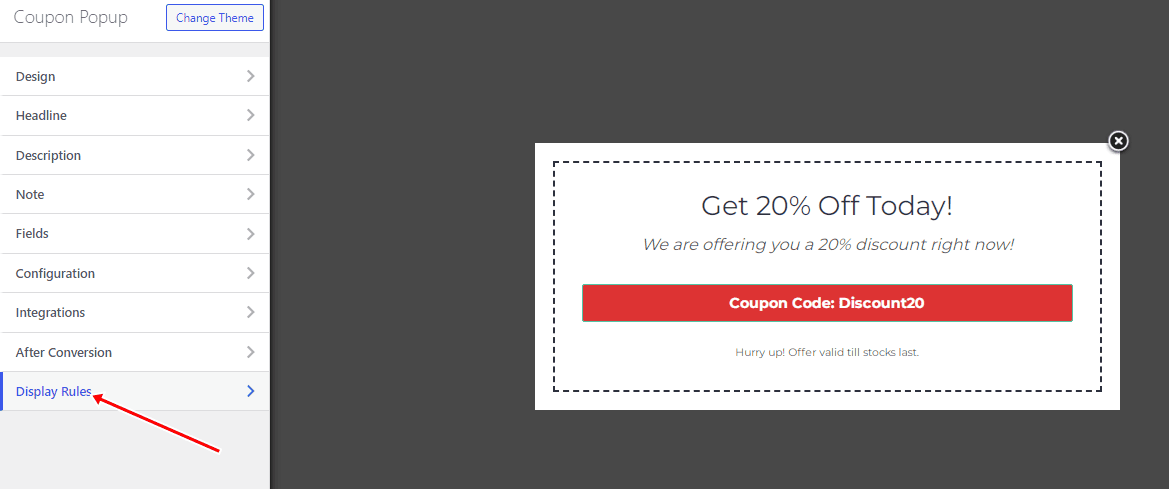
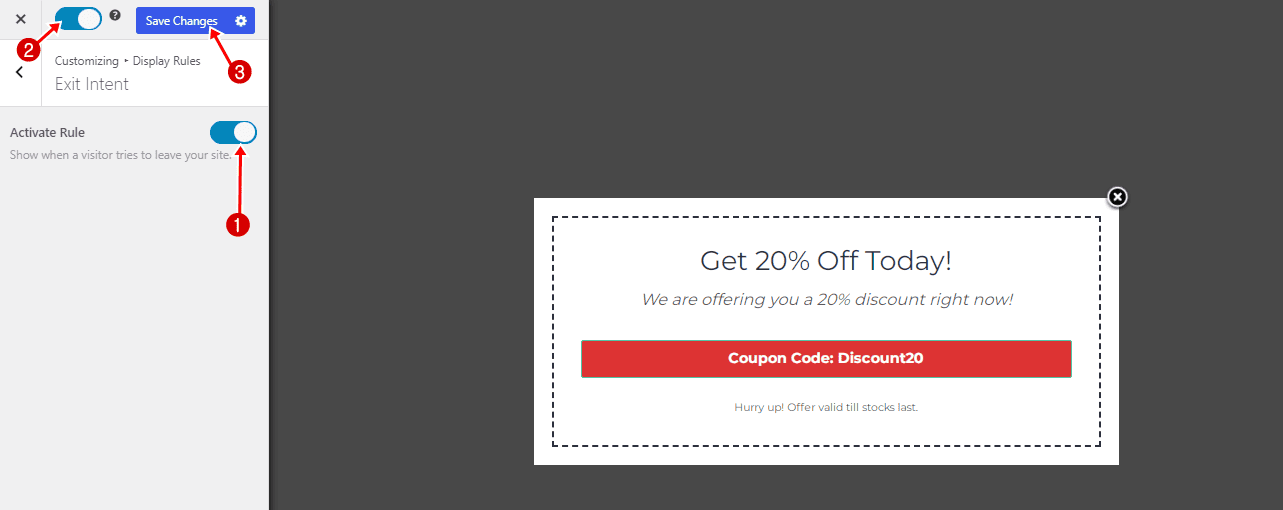
If you click on the Display Rules tab, you’ll see something like this:
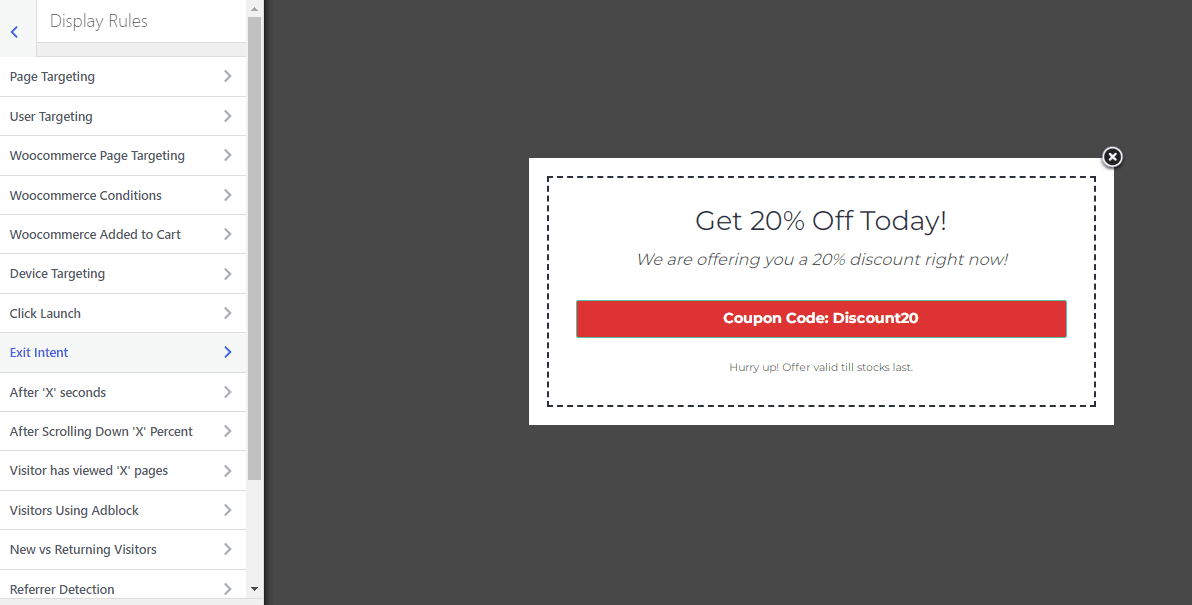
Click the ‘Exit Intent‘ option in the side panel and toggle the ‘Activate Rule’ button. Then, click the ‘Save Changes’ button, and your popup will appear whenever a visitor tries to exit your WooCommerce store.
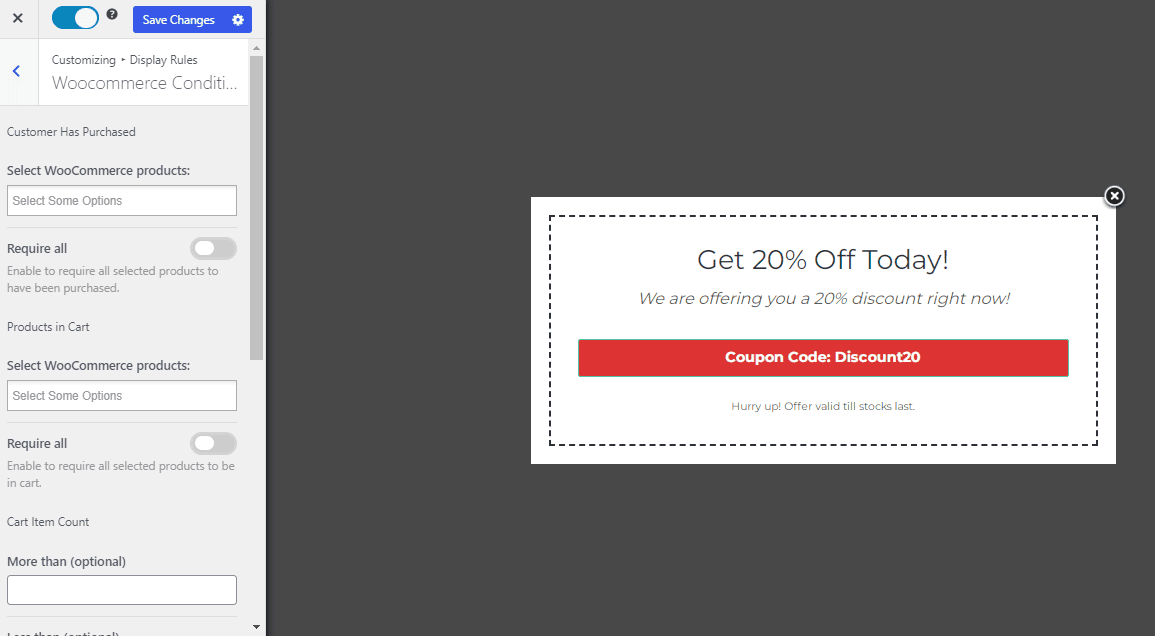
You can also target specific WooCommerce pages for your exit-intent popup, such as the Shop page or specific product pages, as well as when certain conditions are met, such as to users who previously bought certain products, based on the item in the cart, number of items in the cart, cart total, how much the customer has previously spent, etc.
Open the Display rule panel and click “WooCommerce Conditions” to configure precisely where you want the Exit-intent coupon popup displayed.
With this done, you’ve created a WooCommerce exit-intent popup for your e-commerce website. Don’t forget to save your changes.
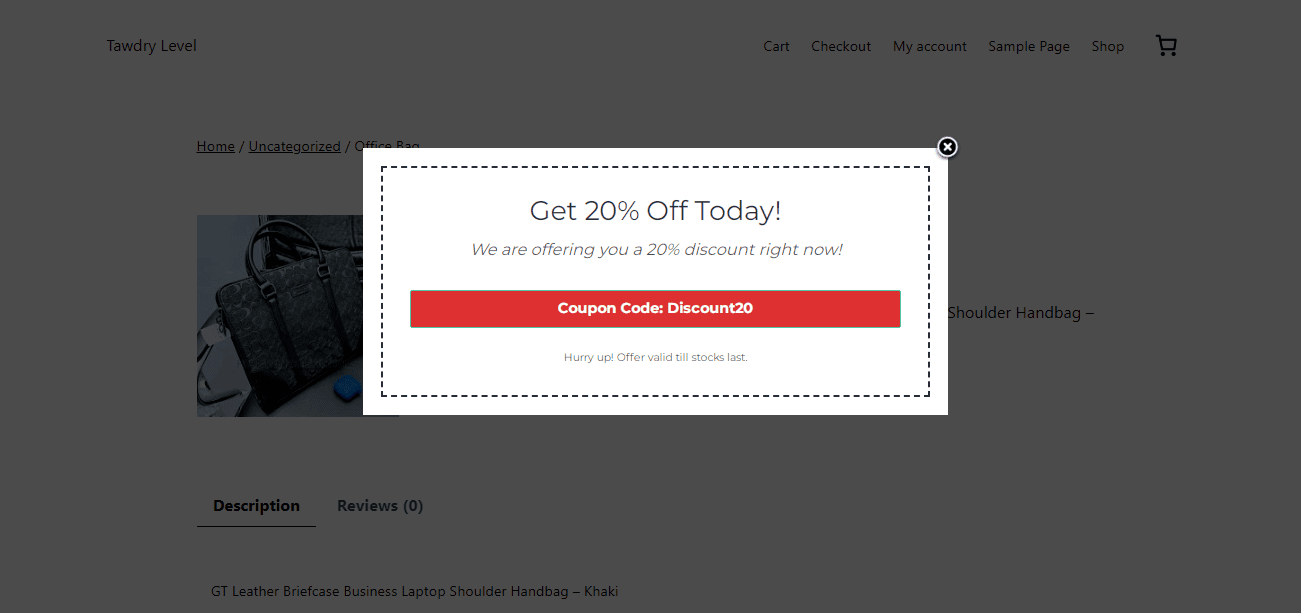
When visitors attempt to exit your WooCommerce website, the exit intent popup will be displayed, offering them a discount coupon to encourage them to complete their purchase.
Below is an example of how the popup looks on our demo website.
Create a WooCommerce Exit-Intent popup offering coupons today
Setting up a WooCommerce exit intent popup with discount coupons is more than just a strategy—it’s a game-changer for your online store.
Following the steps outlined in this guide, you can create a compelling exit intent popup using MailOptin, giving visitors a last-minute incentive to complete their purchase. The flexibility of this approach allows you to experiment with various designs, coupon offers, and targeting strategies as you become more comfortable with the process.
Take the time to design your exit intent popup thoughtfully. Test different offers, messages, and designs to find what resonates best with your audience. The effort you put in now will pay off through increased sales, lower abandonment rates, and a stronger connection with your customers.