Adding WooCommerce Customers to Email Marketing Lists
WooCommerce is a popular, customizable, open-source eCommerce platform built on WordPress.
If you run a WooCommerce shop, then building an email list of your customers is something you should do.
When someone buys a product in your shop, WooCommerce captures their information for future purposes. As a shop owner, you can add your customers to a specific email list in your email marketing or newsletter software such as MailChimp, Salesforce, Microsoft Dynamics 365, Drip, AWeber, ConvertKit, MailerLite, Constant Contact, GetResponse, Sendy, Campaign Monitor, ActiveCampaign, Brevo (Sendinblue), Gist, Klaviyo, Sendlane, Mailster, Vertical Response, Mailjet, HubSpot, Ontraport, Moosend, MailPoet, Zoho CRM, Zoho Campaigns, Keap Max Classic (Infusionsoft), HighLevel, Omnisend, Flodesk, Beehiiv, Benchmark Email, SendFox, iContact, Mailgun, E-goi, SendGrid Email Marketing, Elastic Email, GoDaddy Email Marketing, weMail, FluentCRM, CleverReach, NewsMAN, Facebook custom audience..
You can generate more sales using an email list by sending them discounts, new offers, products, etc. This is a proven strategy to encourage customers to return to your store.
MailOptin integrates with WooCommerce, so you can automatically add your shop customers to your email list after their order has been processed or completed and give them the option to subscribe during checkout via a newsletter subscription checkbox.
You can add WooCommerce customers (buyers or guests) to a specific contact list based on the products they purchase, assign tags, and map customer data to custom fields. Want to segment your customers based on their order from a specific product category or tag? We’ve got you covered.
Below are different ways you can use MailOptin with WooCommerce. But first, ensure your store is running WooCommerce and has the MailOptin plugin activated.
Any Purchased WooCommerce Products
See the steps below to add all WooCommerce customers to a particular email list regardless of the product they bought or the category or tag the products belong to.
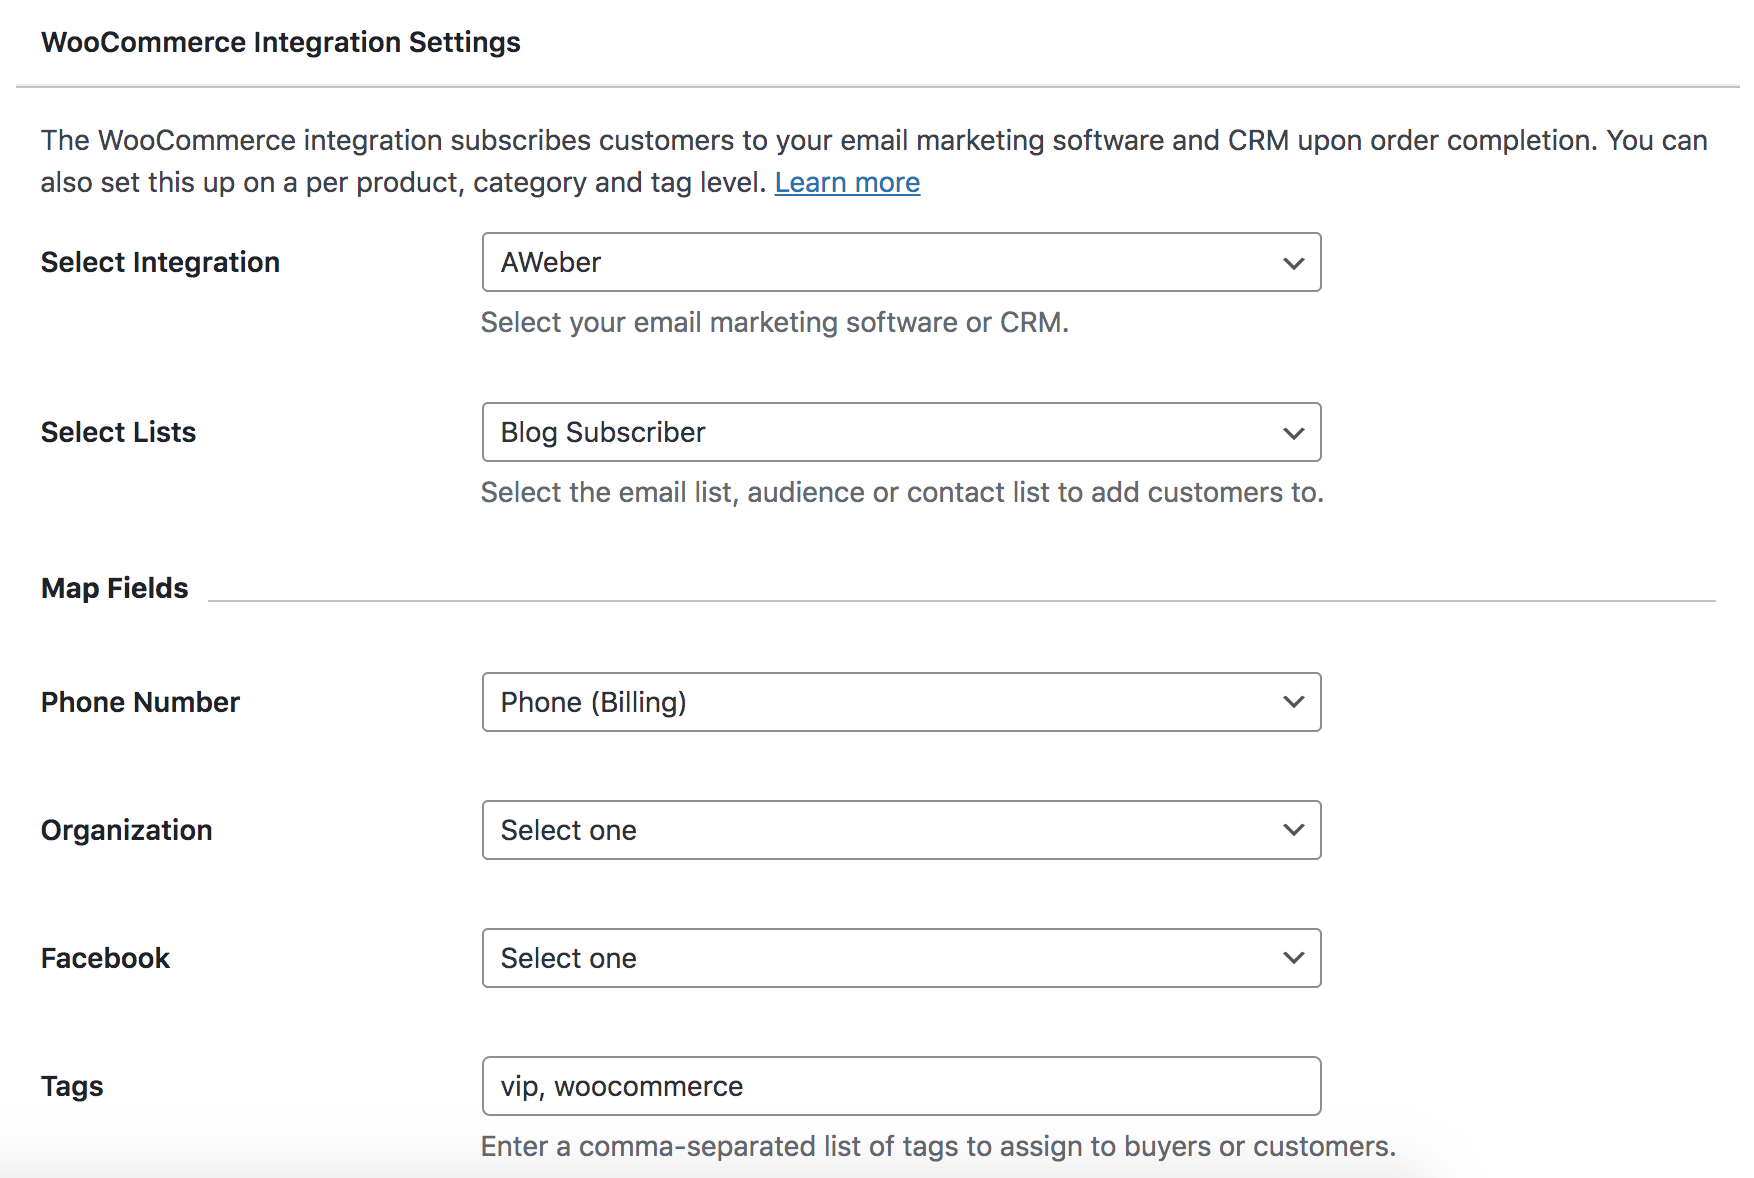
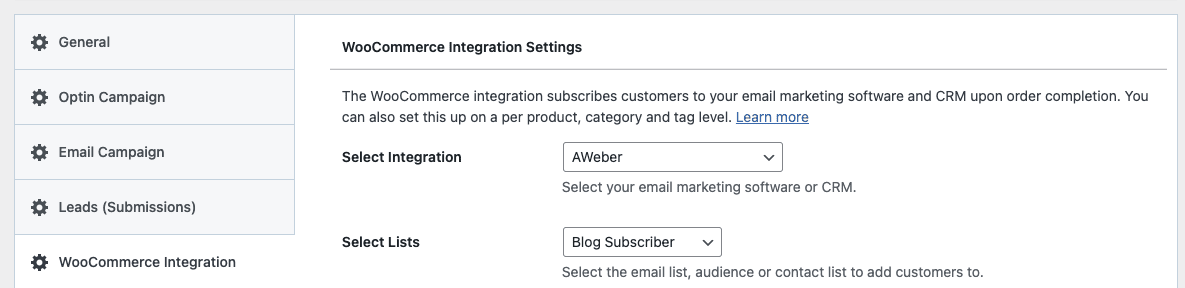
Go to MailOptin >> Settings >> WooCommerce Integration
Select your email marketing software (e.g., Mailchimp, AWeber, MailerLite, etc.) and the email list to add customers to.
If you don’t use an email marketing service, you can save your customers in WordPress by selecting “MailOptin Leads” as your integration. Learn more about MailOptin Leads.
You can also pass additional or extra customer data about your customer besides their names and email addresses by mapping their billing and shipping data to the corresponding custom fields in your email marketing software.
Tags too can be assigned to them.
Finally, save your changes.
Purchase of Specific WooCommerce Products
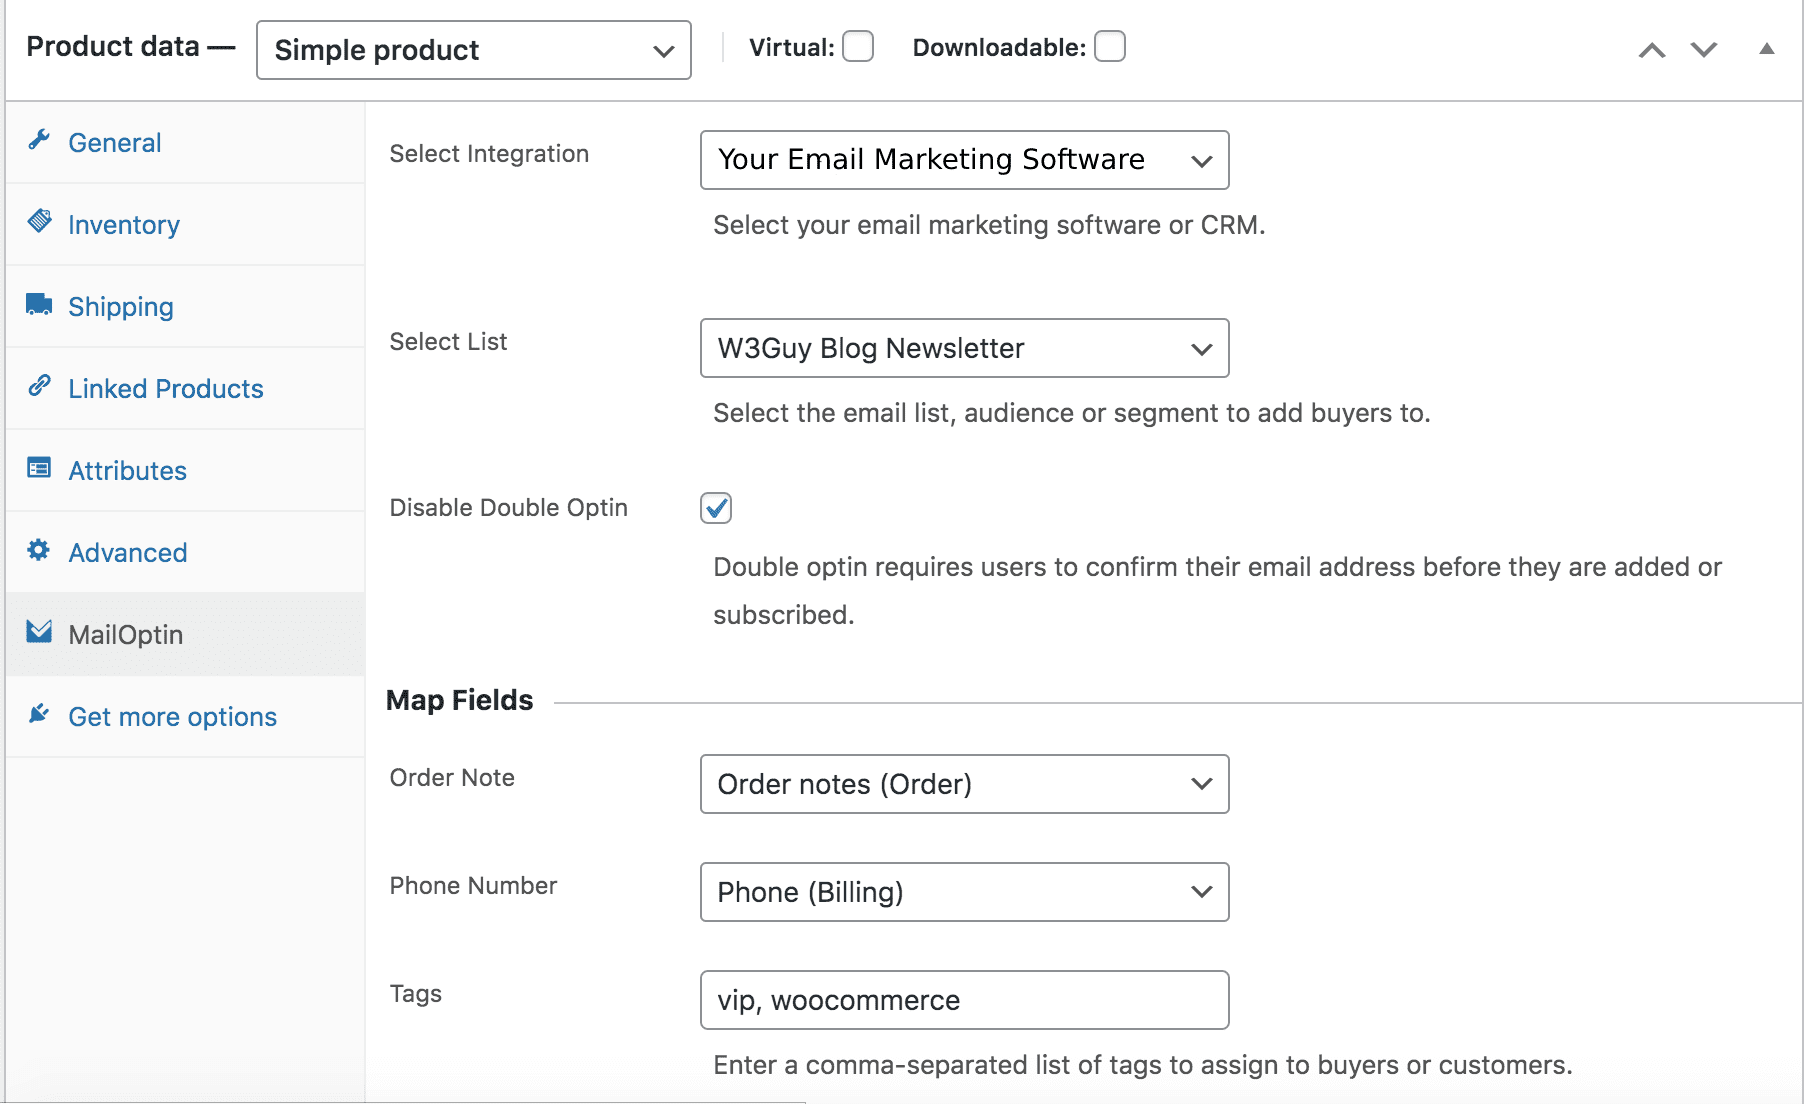
To add customers who purchase specific products to specific lists or assign particular tags to them, open the product edit page in WooCommerce.
Scroll to Product data metabox and open the MailOption section to select your email marketing software, the list to add them to, map custom fields, and the tags to assign to them.
See also: Add WooCommerce Customers to email lists based on purchased products.
Purchase from Specific Product Categories
You can add buyers or customers who purchase products belonging to a category to a specific list or assign specific tags. Here’s how.
Go to WooCommerce >> Products >> Categories. Open the product category edit page you want to connect MailOptin.
There you will find the option to Connect MailOptin as shown below.

Click on the connect button to reveal the setup modal where you can set up the integration.
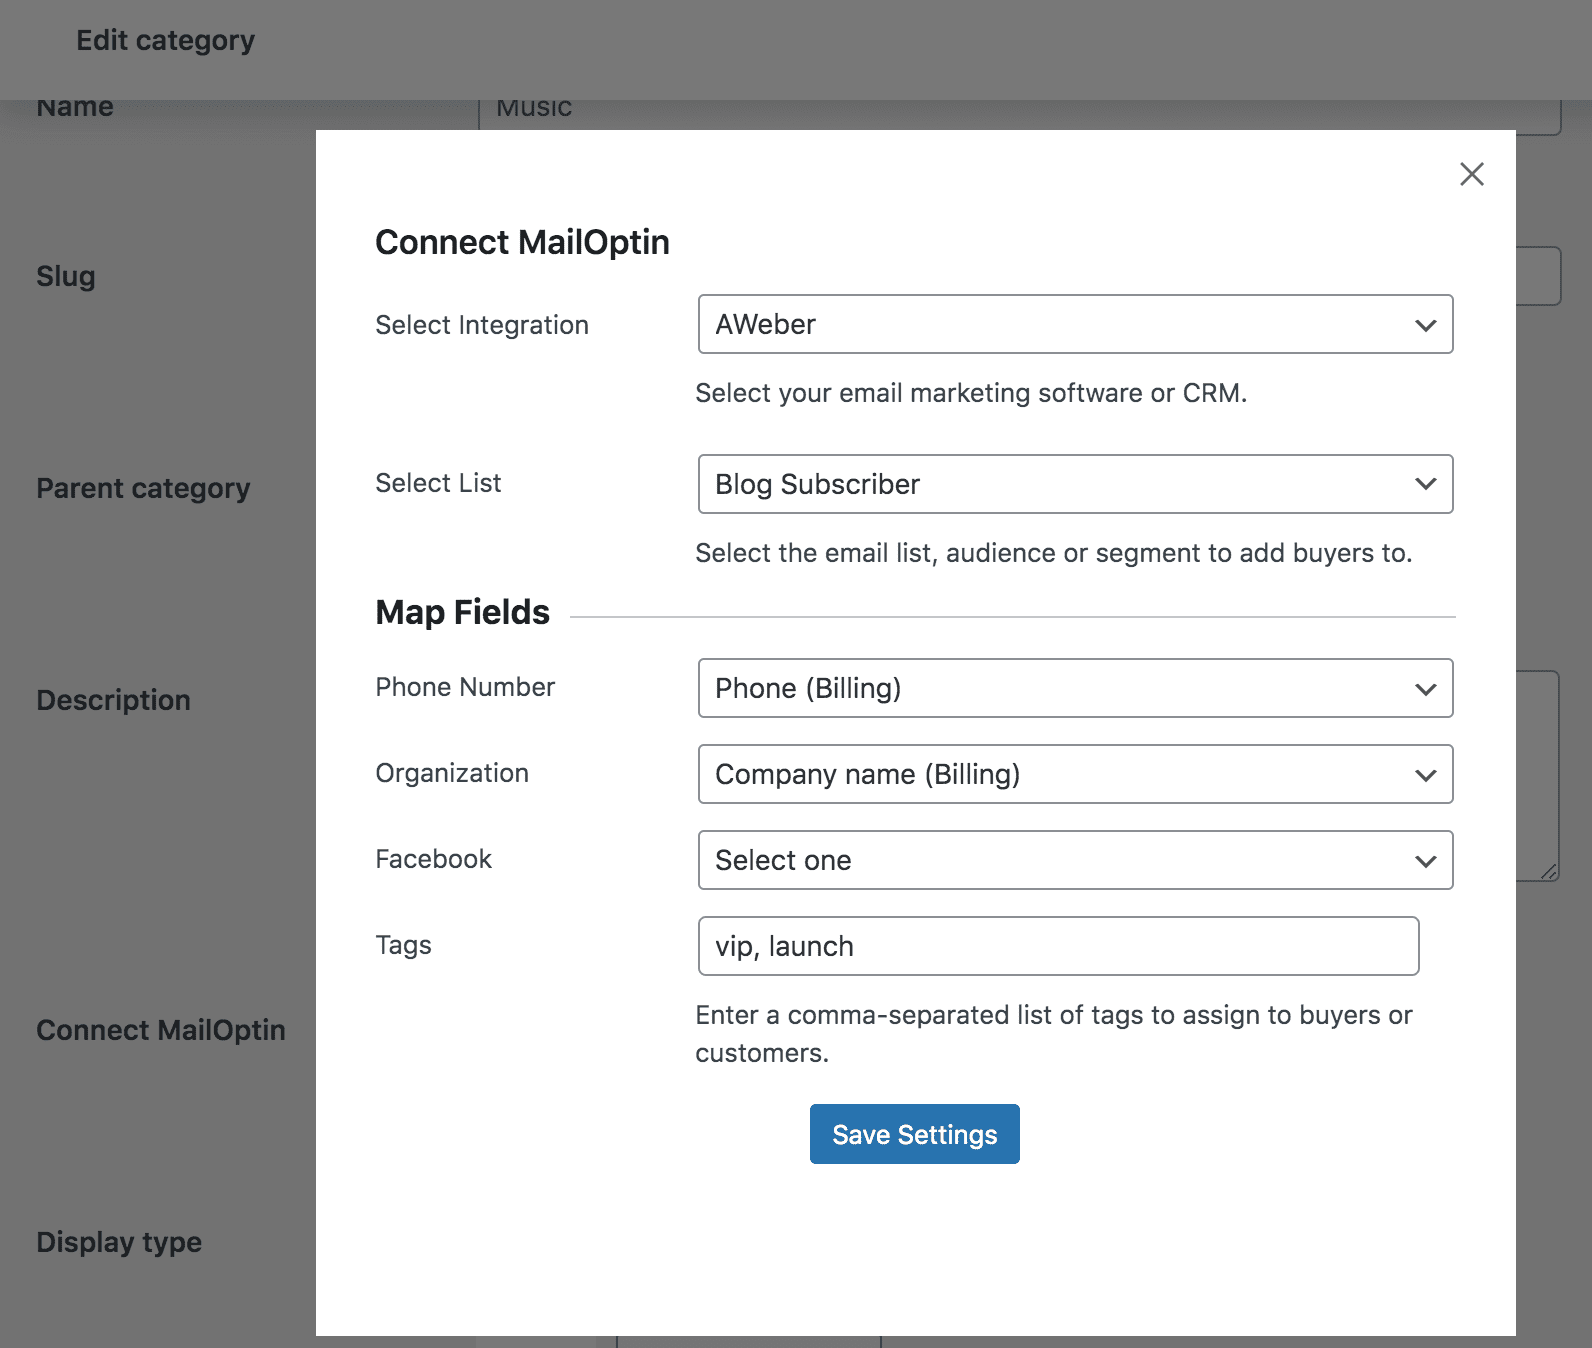
Click on the Save Settings button when you are done.
And don’t forget to click on the Update button to save your changes after the modal.
After saving the changes, the MailOptin connect button text will change to Connected.

Purchase from Specific Product Tags
Similar to Product categories, you can add buyers or customers that purchase products from a product tag to a specific email list.
Go to WooCommerce >> Products >> Tags. Open the edit page of the product tag you want to connect MailOptin.
There you will find the option to Connect MailOptin as shown below.

Click on the connect button to reveal the setup modal where you can set up the integration.
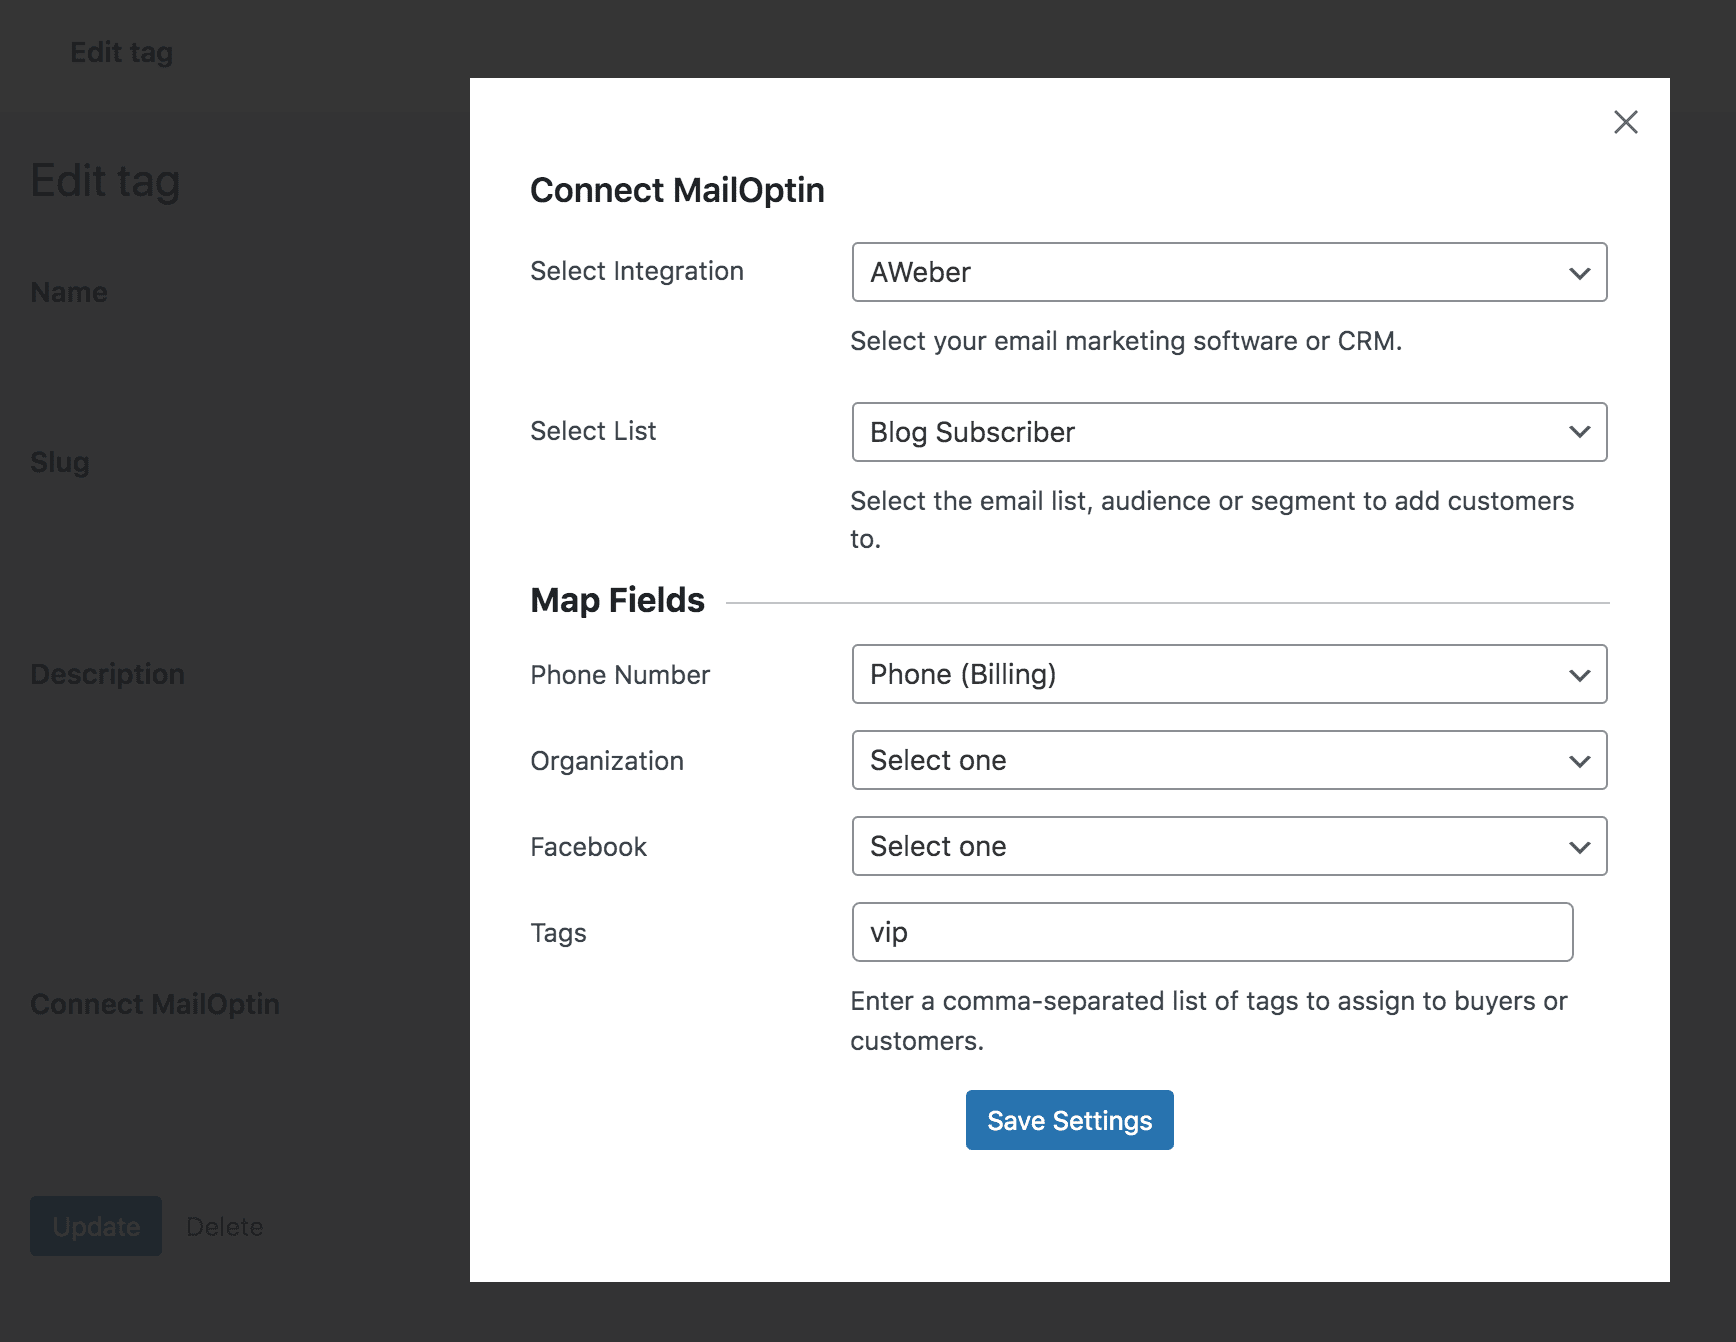
Click on the Save Settings button when you are done.
After saving the changes, the MailOptin connect button text will change to Connected.

Setting Up WooCommerce Newsletter Subscription Checkbox
By default, MailOptin automatically subscribes customers to your email list after every successful order. Follow the guide below to add an optin checkbox to WooCommerce checkout to seek their permission before adding them to your email marketing list.
On WooCommerce Integration Settings in MailOptin, change the Subscribe Customers setting to “Ask for permission,” configure the optin checkbox label, and set the checkbox default, state, and the location of the opt-in on the WooCommerce checkout page.

Don’t forget to save your changes.