
Do you want to learn how to add WooCommerce customers to your email list based on the product they purchased?
WooCommerce is a customizable, open-source eCommerce platform built on WordPress. MailOptin has built-in integration with WooCommerce, allowing you to add your customers to your email marketing list.
By following this article, you can ensure that every customer is added to the right email list based on the products they purchase.
Supported email marketing software and CRMs include Mailchimp, Salesforce, Microsoft Dynamics 365, Drip, AWeber, Google Sheets, Kit (ConvertKit), MailerLite, Constant Contact, GetResponse, Sendy, Campaign Monitor, ActiveCampaign, Brevo (Sendinblue), Gist, Klaviyo, Sendlane, Mailster, Vertical Response, Mailjet, HubSpot, Ontraport, Moosend, MailPoet, Zoho CRM, Zoho Campaigns, Keap Max Classic (Infusionsoft), HighLevel, Omnisend, Flodesk, Beehiiv, Benchmark Email (Classic), SendFox, iContact, Mailgun, Ortto, E-goi, SendGrid Email Marketing, Elastic Email, Encharge, Sender.net, SendPulse, Bento, weMail, FluentCRM, Groundhogg, CleverReach, Mailercloud, Copper CRM, NewsMAN, Facebook custom audience..
Subscribing WooCommerce Customers by Purchased Product
Step 1: Accessing the MailOptin Integration in WooCommerce
When you create a new product or edit an existing one in WooCommerce, you’ll notice a dedicated MailOptin tab within the Product Data section.
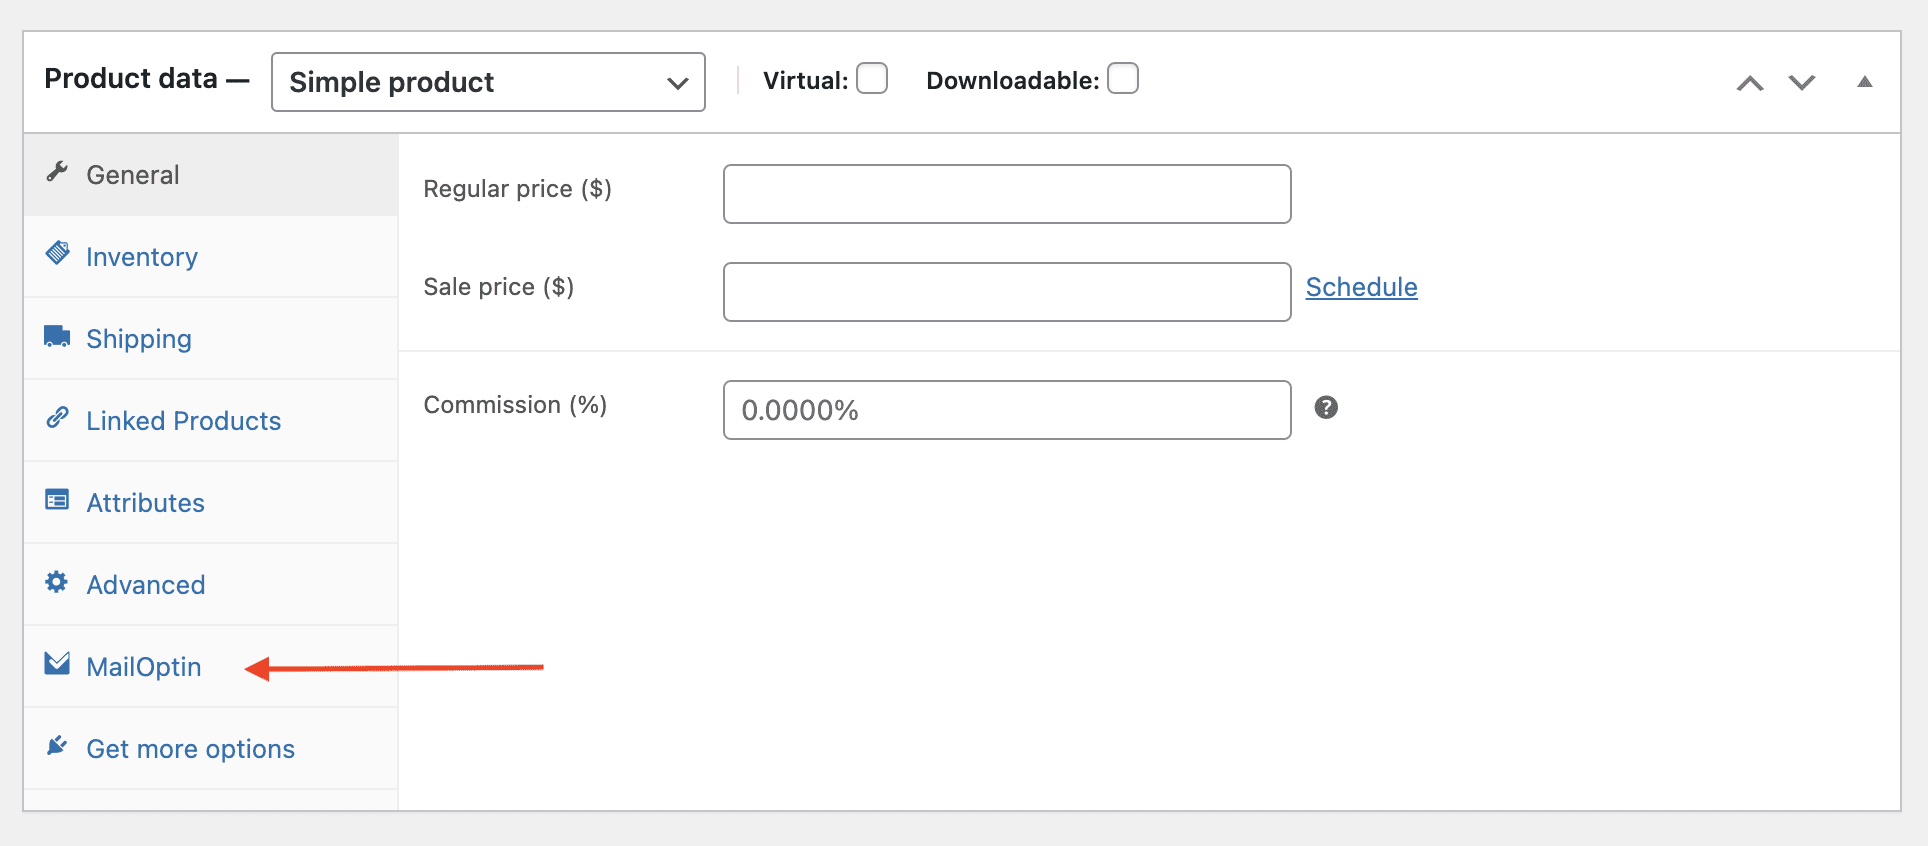
Click on MailOptin, and you will see where to select the integration you want to connect with, as shown below.
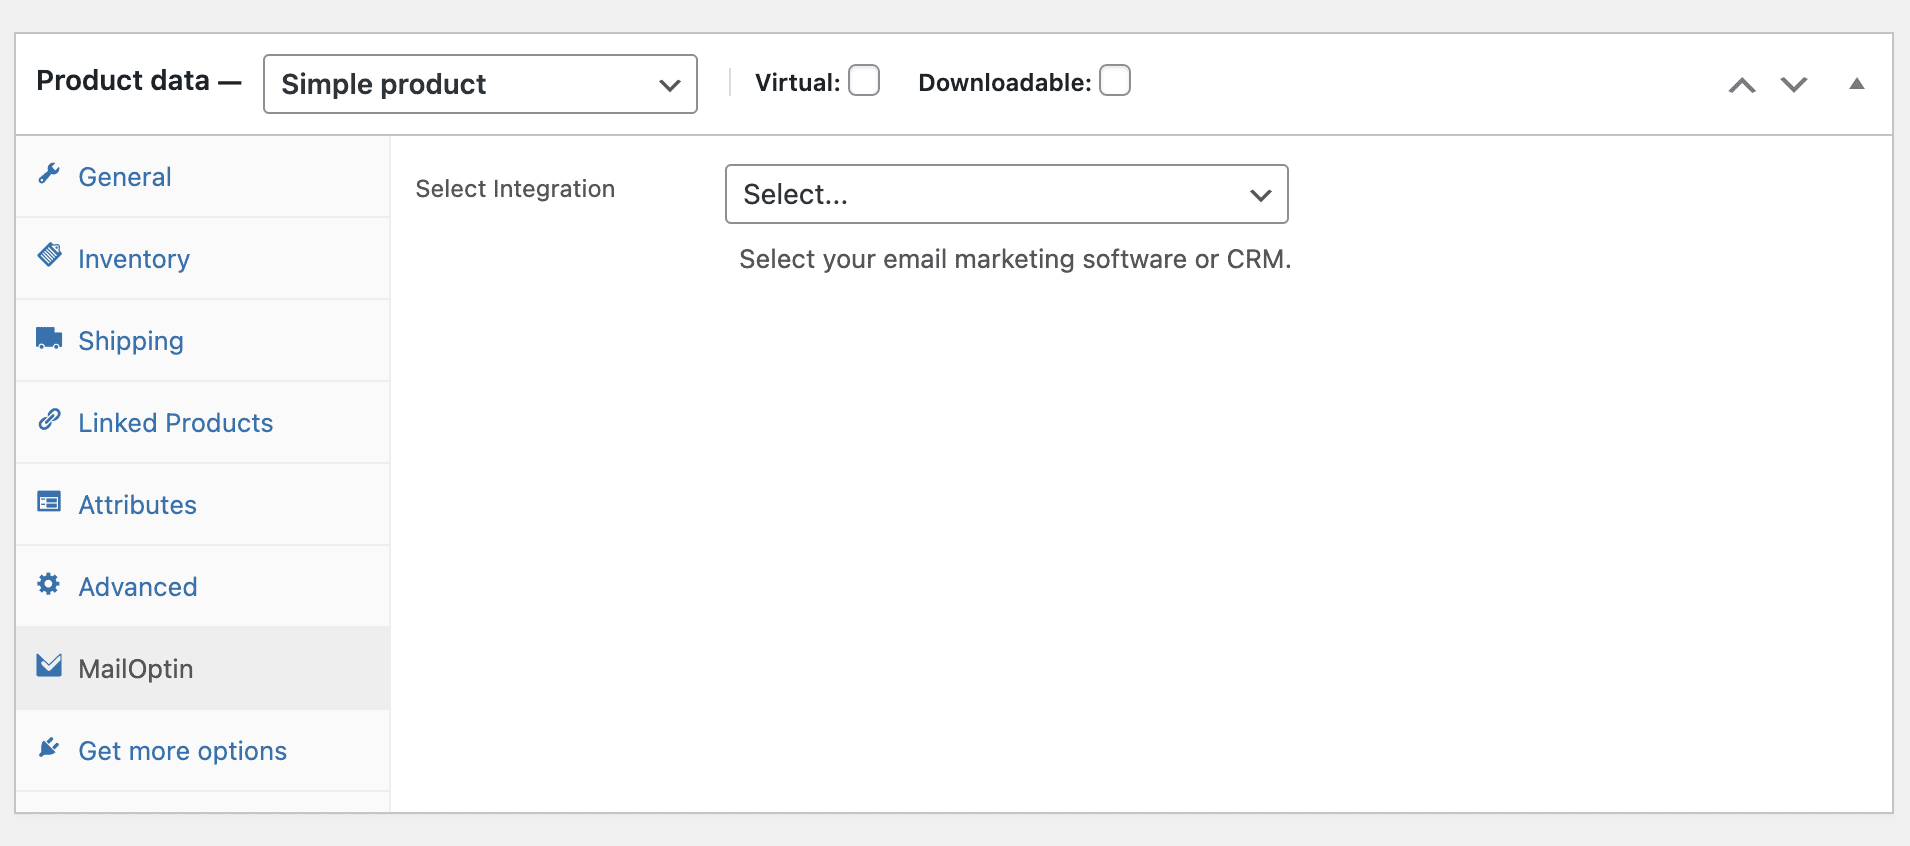
Step 2: Selecting Your Email Marketing Service and List
Select the email marketing service or CRM you use (such as Mailchimp, AWeber, MailerLite, etc.) and choose the specific email list to which customers who purchase the product should be added.
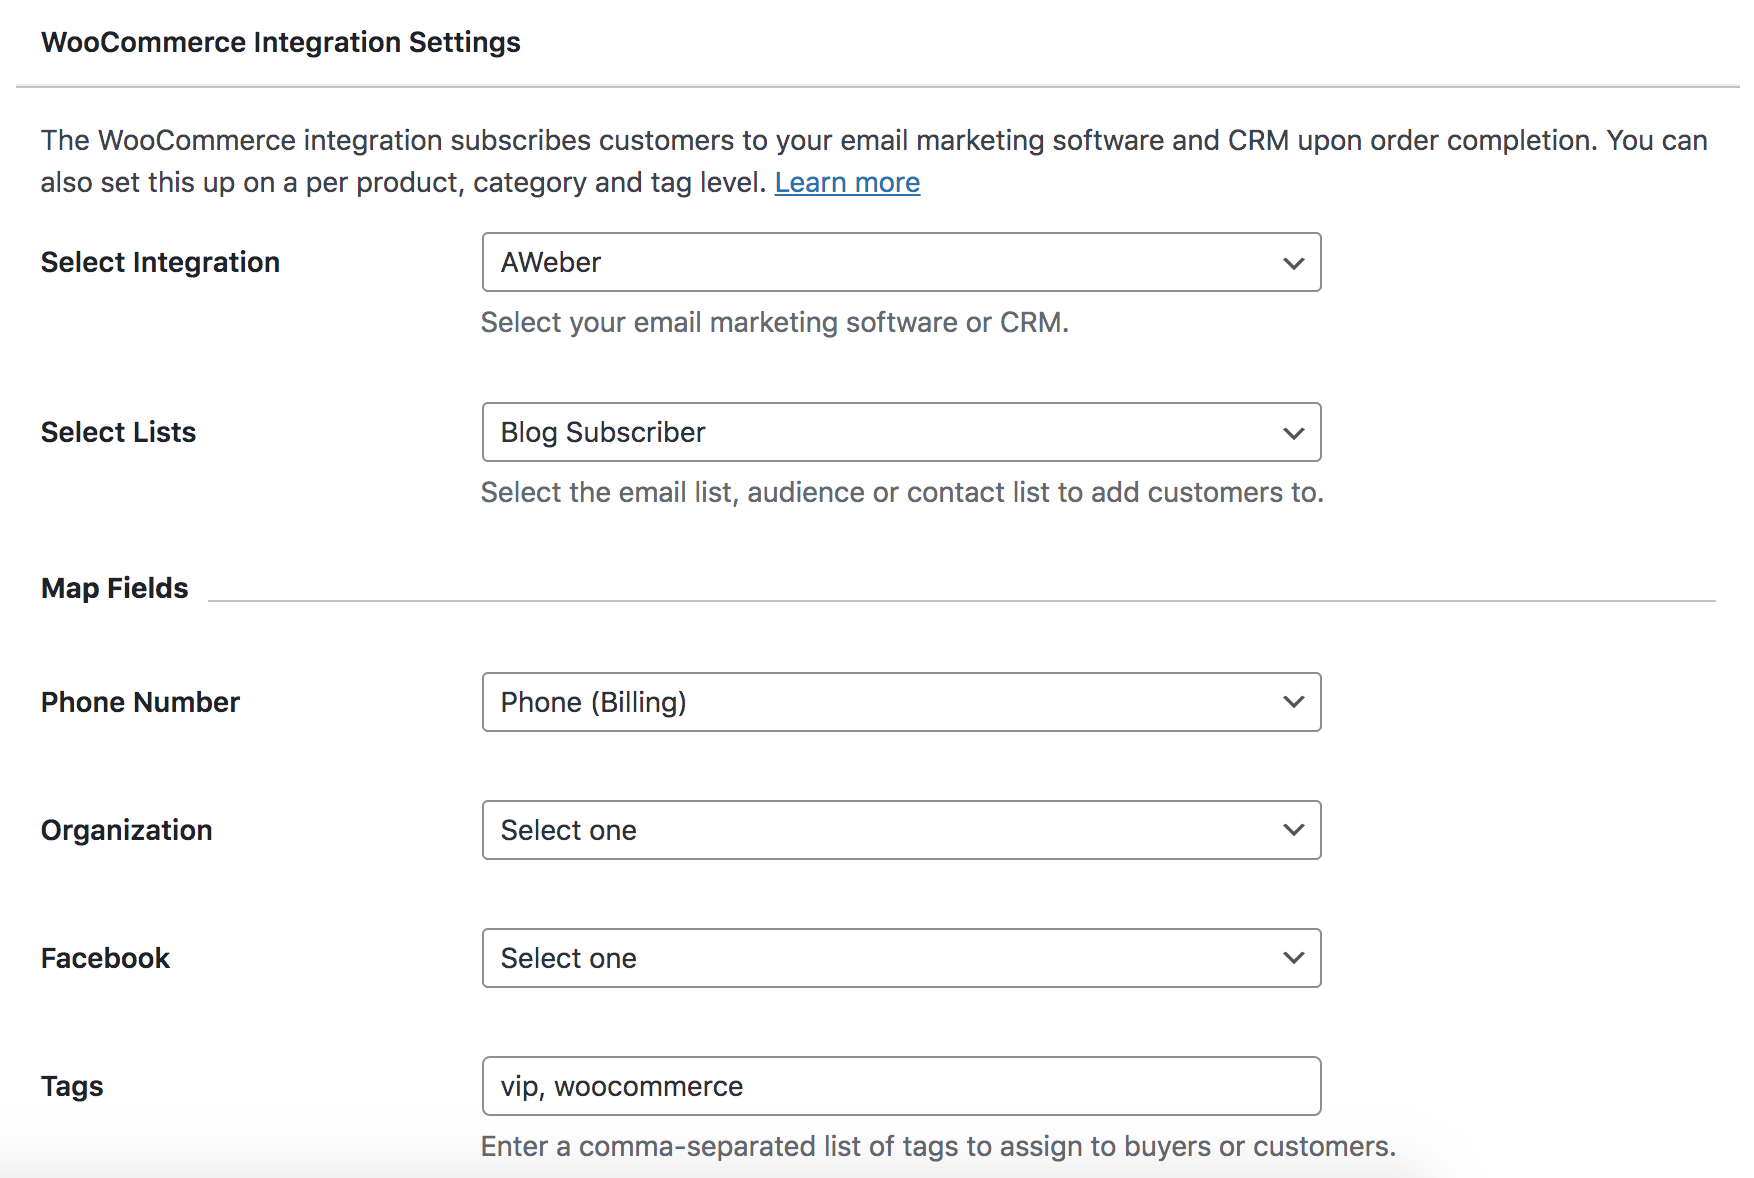
Step 3: Mapping Customer Data
You can also map other WooCommerce billing and shipping fields to custom fields provided by your email marketing service, ensuring that you capture all the important data needed for personalized campaigns.
You have the option to collect additional or extra data about your lead or customer besides the name (which is by default the Billing first name and Billing last name) and email address (which is by default the Billing email address) by mapping other WooCommerce billing and shipping fields with the custom fields provided by your email marketing service.
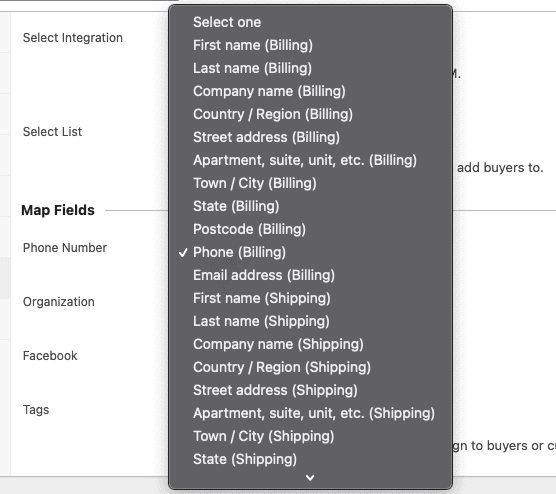
Note: The name to be mapped is set to the Billing first name and the Billing last name by default. If the Billing first and last names are empty, MailOptin automatically detects the currently logged-in user and retrieves the user’s first name and last name as the name.
Similarly, the email address to be mapped is the Billing email address by default. If the Billing email address is empty, MailOptin automatically detects the currently logged-in user and gets the user’s email address to be mapped with the email address.
Step 4: Finalizing Your Settings
Once you’ve selected your email marketing service, chosen the email list, and mapped any additional fields, don’t forget to save and update your changes.
This step is crucial to ensure that every new purchase is correctly tracked and that the corresponding customer details are added to your designated email list if the customer makes a purchase.
Additional Options for Segmentation
If you would like to add WooCommerce customers based on other criteria, such as by specific product categories or tags, you can refer to our guide on adding WooCommerce Customers to Email Marketing Lists.
Conclusion
Integrating MailOptin with WooCommerce to add customers to your email list based on the products they purchase is a smart way to boost your email marketing strategy.
With this setup, you can capture and segment customer data, create targeted communications and messages for specific groups, and ultimately increase sales.
Start optimizing your email marketing today by ensuring that every product purchase translates into a valuable addition to your email list.