How to Create a WordPress Member Directory
Looking for a way to make user information readily available on your WordPress site? You might consider creating a WordPress member directory or user directory.
For those unfamiliar, a WordPress member directory is a page that displays all registered user information. This way, users on your WordPress site can see all other users and public account information about each other. This lets you showcase the profile pages of all members on your website and allows other users to browse through the directory to find registered users.
However, since WordPress by default doesn’t have built-in functionality that lets you do this, you will need to use a WordPress member directory plugin. Our top recommendation is the robust, all-in-one user profile management plugin, ProfilePress. It lets you create browsable and filterable member directories on your WordPress site, even if you’re not tech-savvy.
This article will discuss why it’s essential to create a WordPress member directory and how you can do so using the ProfilePress plugin for WordPress.
Why creating a WordPress member directory is useful?
Creating a WordPress member directory helps your site look more professional and encourages other people to join the “list”.
Here are some of the main benefits of creating a member directory on your site:
- Promote the most active members or VIP members. A great way to offer more value to your VIP or most active members is by including their names and photos in the member directory list. This helps make them feel even more “exclusive” and encourages regular members to upgrade their subscription to the “VIP” membership.
- Showcase registered users and professionals working with you. If you work with big names in your industry, displaying their names, credentials, and achievements on your site can help attract more members. For instance, you can include their name and a testimonial about your product or service in an attractive, easily browseable member directory. This so doing, other high-profile clients will be encouraged to try out your product or service.
- Let users or members contact each other. Creating a members directory on your WordPress site is also a great way to let registered users or members contact each other on your website. This is a great way to let users collaborate and discuss topics with like-minded people.
- Keep track of all registered members on your site. One of the most obvious use cases of a member directory is to keep track of all registered users on your WordPress site. It’s by far the easiest way to showcase the number of people who trust your brand and help business owners keep track of everyone that subscribes.
Who needs a WordPress member directory?
Before we jump into creating a member directory for your WordPress site, let’s first take a look at some use case scenarios of websites that might need to use one:
- Membership websites. Since membership websites are built around a sense of community, letting users access useful information about other users in a member directory might be helpful. It’s a great way to offer an enhanced user experience while making your membership site stand out.
- Event websites. You can list all VIP guests attending your event or keynote speakers in a members directory when hosting an event. This way, you encourage more people to register for your event.
- Institution websites. Creating a member directory for institutions is easy to list all the faculty or teachers in an easy-to-read list. Students can quickly find information about the expert they want to learn from. It can also be an excellent way for institutions to list thousands of registered students and track them directly through the website.
- Online learning websites. Students or users on an online learning website may find it useful to read other users’ testimonials that have found success with your content and membership program. For instance, when users register, you can ask them to write a few lines about their experience and display the information on a member directory on the front-end.
- Online clubs and societies. Since online clubs and societies are also centered around building communities, showcasing all community members in a front-end member directory is a great way to increase registrations.
Creating a WordPress member directory using ProfilePress
Here, we’ll show you how to create a WordPress member directory using ProfilePress.
You’ll need a WordPress site and some registered users for this. You’ll also need the ProfilePress plugin to create a WordPress member directory without having to code a single line.
The ProfilePress plugin offers a “one-off” solution for managing user roles and customizing content restriction options on your WordPress site. This includes an easy-to-use, drag-and-drop form builder for creating custom login, password reset, and user registration forms for your WordPress. ProfilePress also features pre-built themes or templates that let you quickly create attractive forms without building one from scratch.
The best part about the plugin is that it also lets you create easy-to-navigate member directories in WordPress, even if you’re not very tech-savvy.
Here’s how you can do this on your WordPress site:
Step #1: Install and activate ProfilePress
Start by getting the ProfilePress plugin and installing it on your WordPress site. Next, navigate to Plugins → Add New from the WordPress admin panel and click on the Add New button. Next, upload the zip file and install the plugin on your WordPress site.
Step #2: Create a new member directory
With the ProfilePress plugin installed and ready to go, you can start creating a new member directory.
To do this, navigate to ProfilePress → Member Directories from the WordPress admin panel and click on the Add New button.
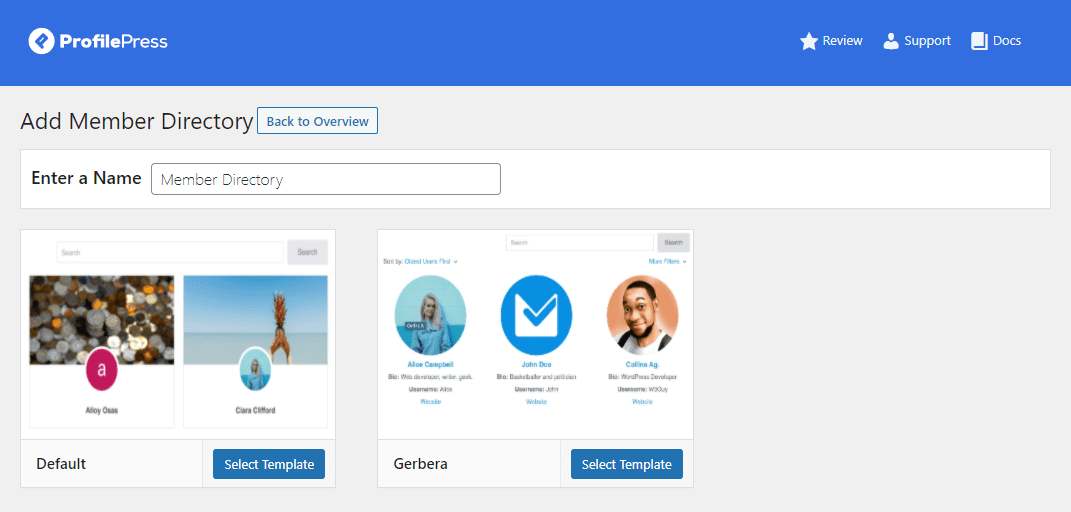
Enter a new title for your member directory and select a template to begin customizing it. We’ve chosen the Gerbera template for this tutorial. Click on the Select template button to continue to the customization page.
Step #3: Customize your WordPress member directory
Using the Edit Form page, you can customize how your WordPress member directory will look on the front-end.
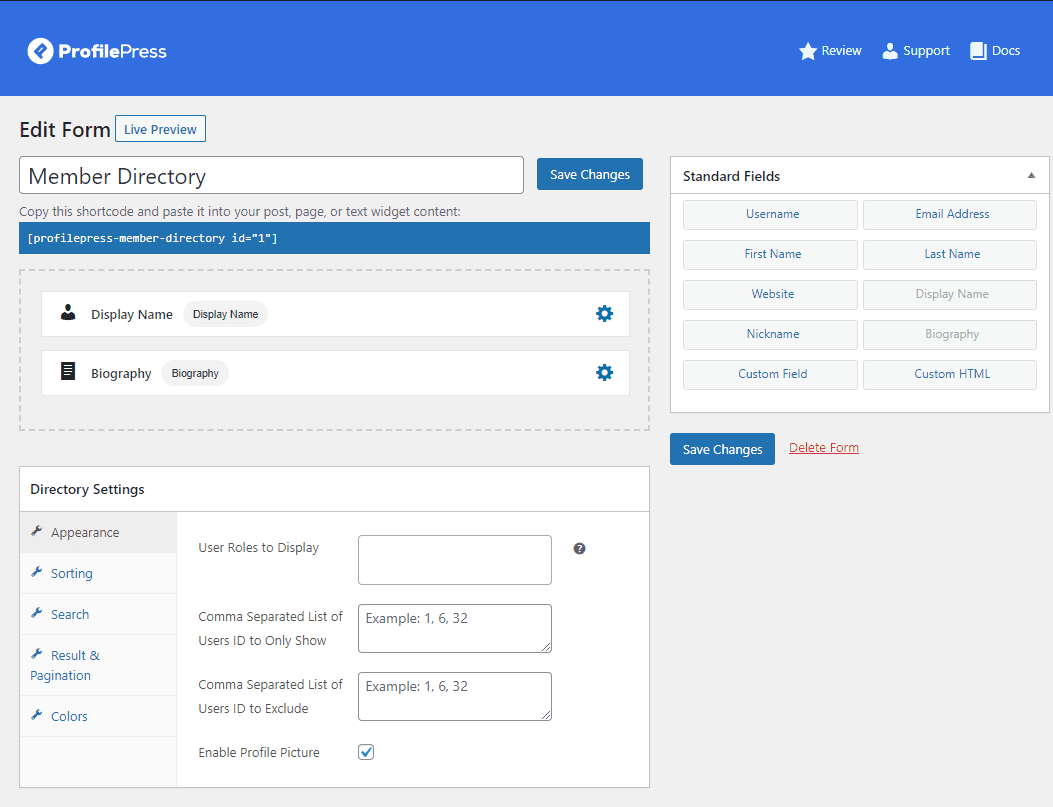
You can drag and drop the fields and add them to your member’s directory. For instance, you can add a Country of Residence custom field to your member directory using the Custom Field.
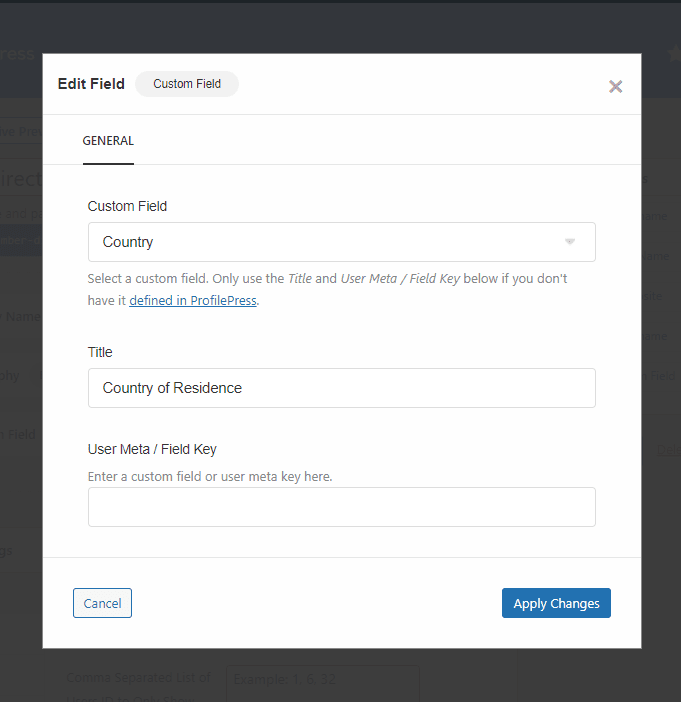
You can click on the settings icon on each field to edit its details and set custom field names. Make sure to click on the Apply changes button to save field details.
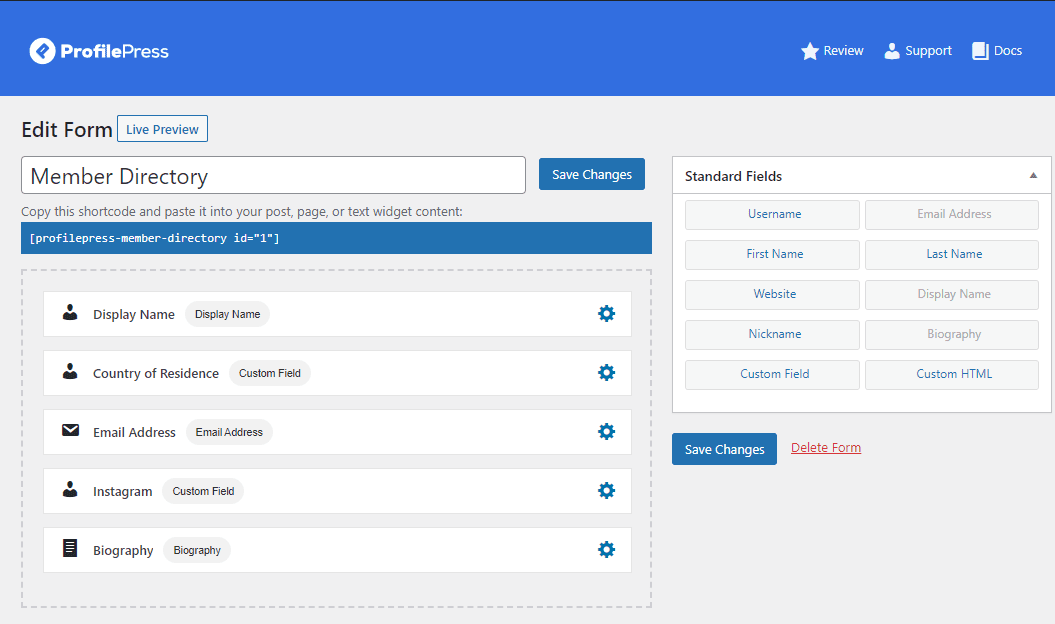
ProfilePress lets you add multiple fields to your member directory profile pages and sort fields according to your requirements.
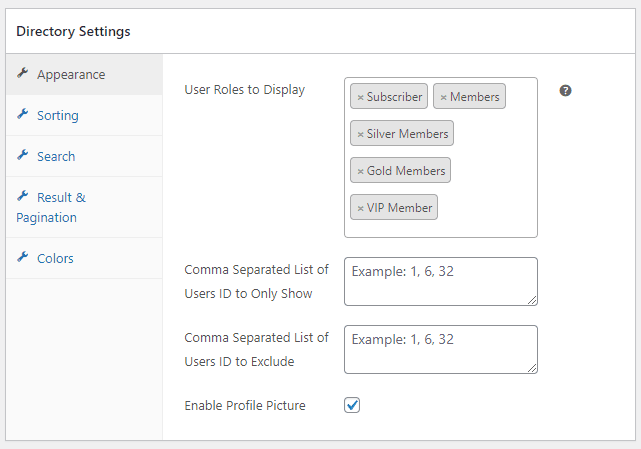
With all the fields added, you can start customizing the Directory Settings. For example, you can select which user roles to display on the member directory using the Appearance tab under the Directory Settings meta box. This can be useful for membership websites or event websites that only want to display specific user roles on the front-end, such as VIP Members.
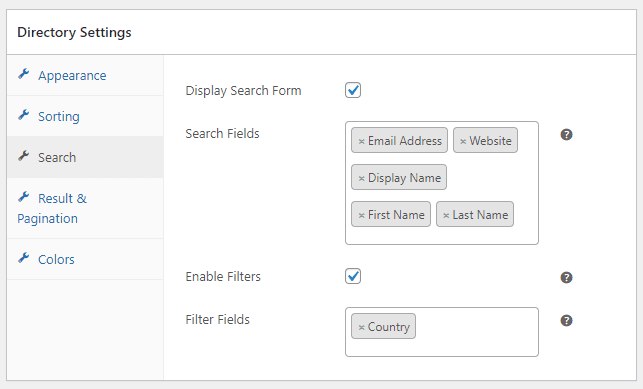
In addition to this, you can also let site visitors search the member’s directory using custom filters. Select the Enable Filters checkbox under the Search tab and include the custom field you want users to filter by.
Once you’re done customizing the member directory, click on the Save Changes button to continue.
Step #4: Preview the front-end
Copy the shortcode of your newly created member directory and paste it into the Shortcode block on a new page.
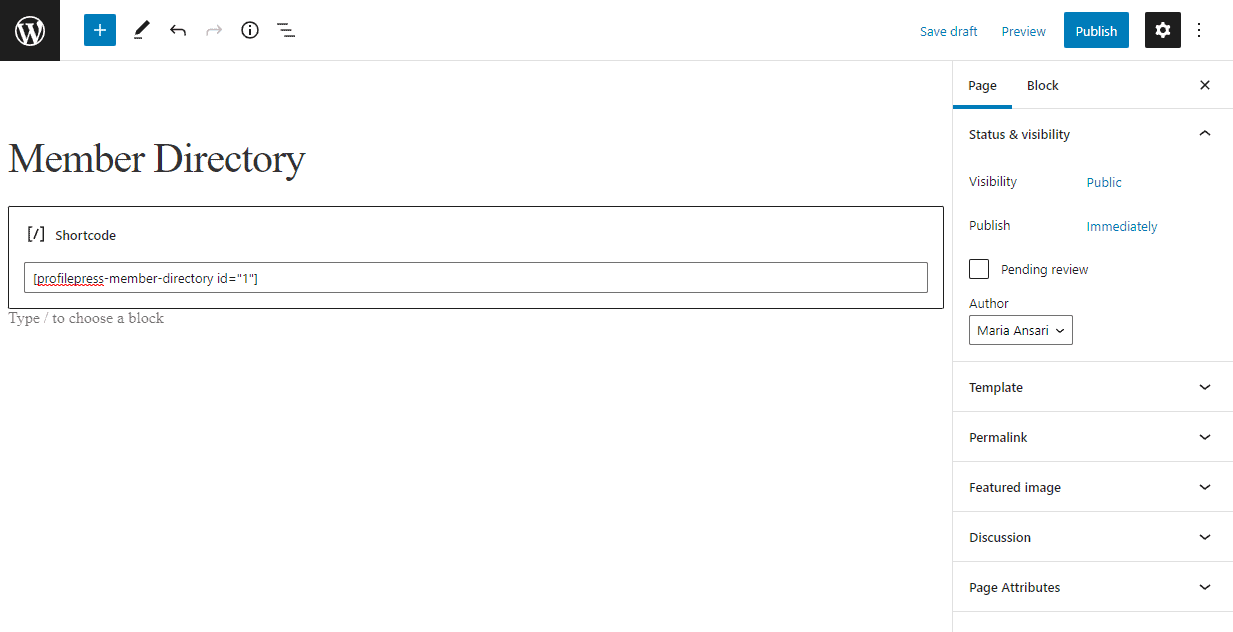
Click on the Publish button to continue. Here’s what the member directory will look like on the front-end of your WordPress site:
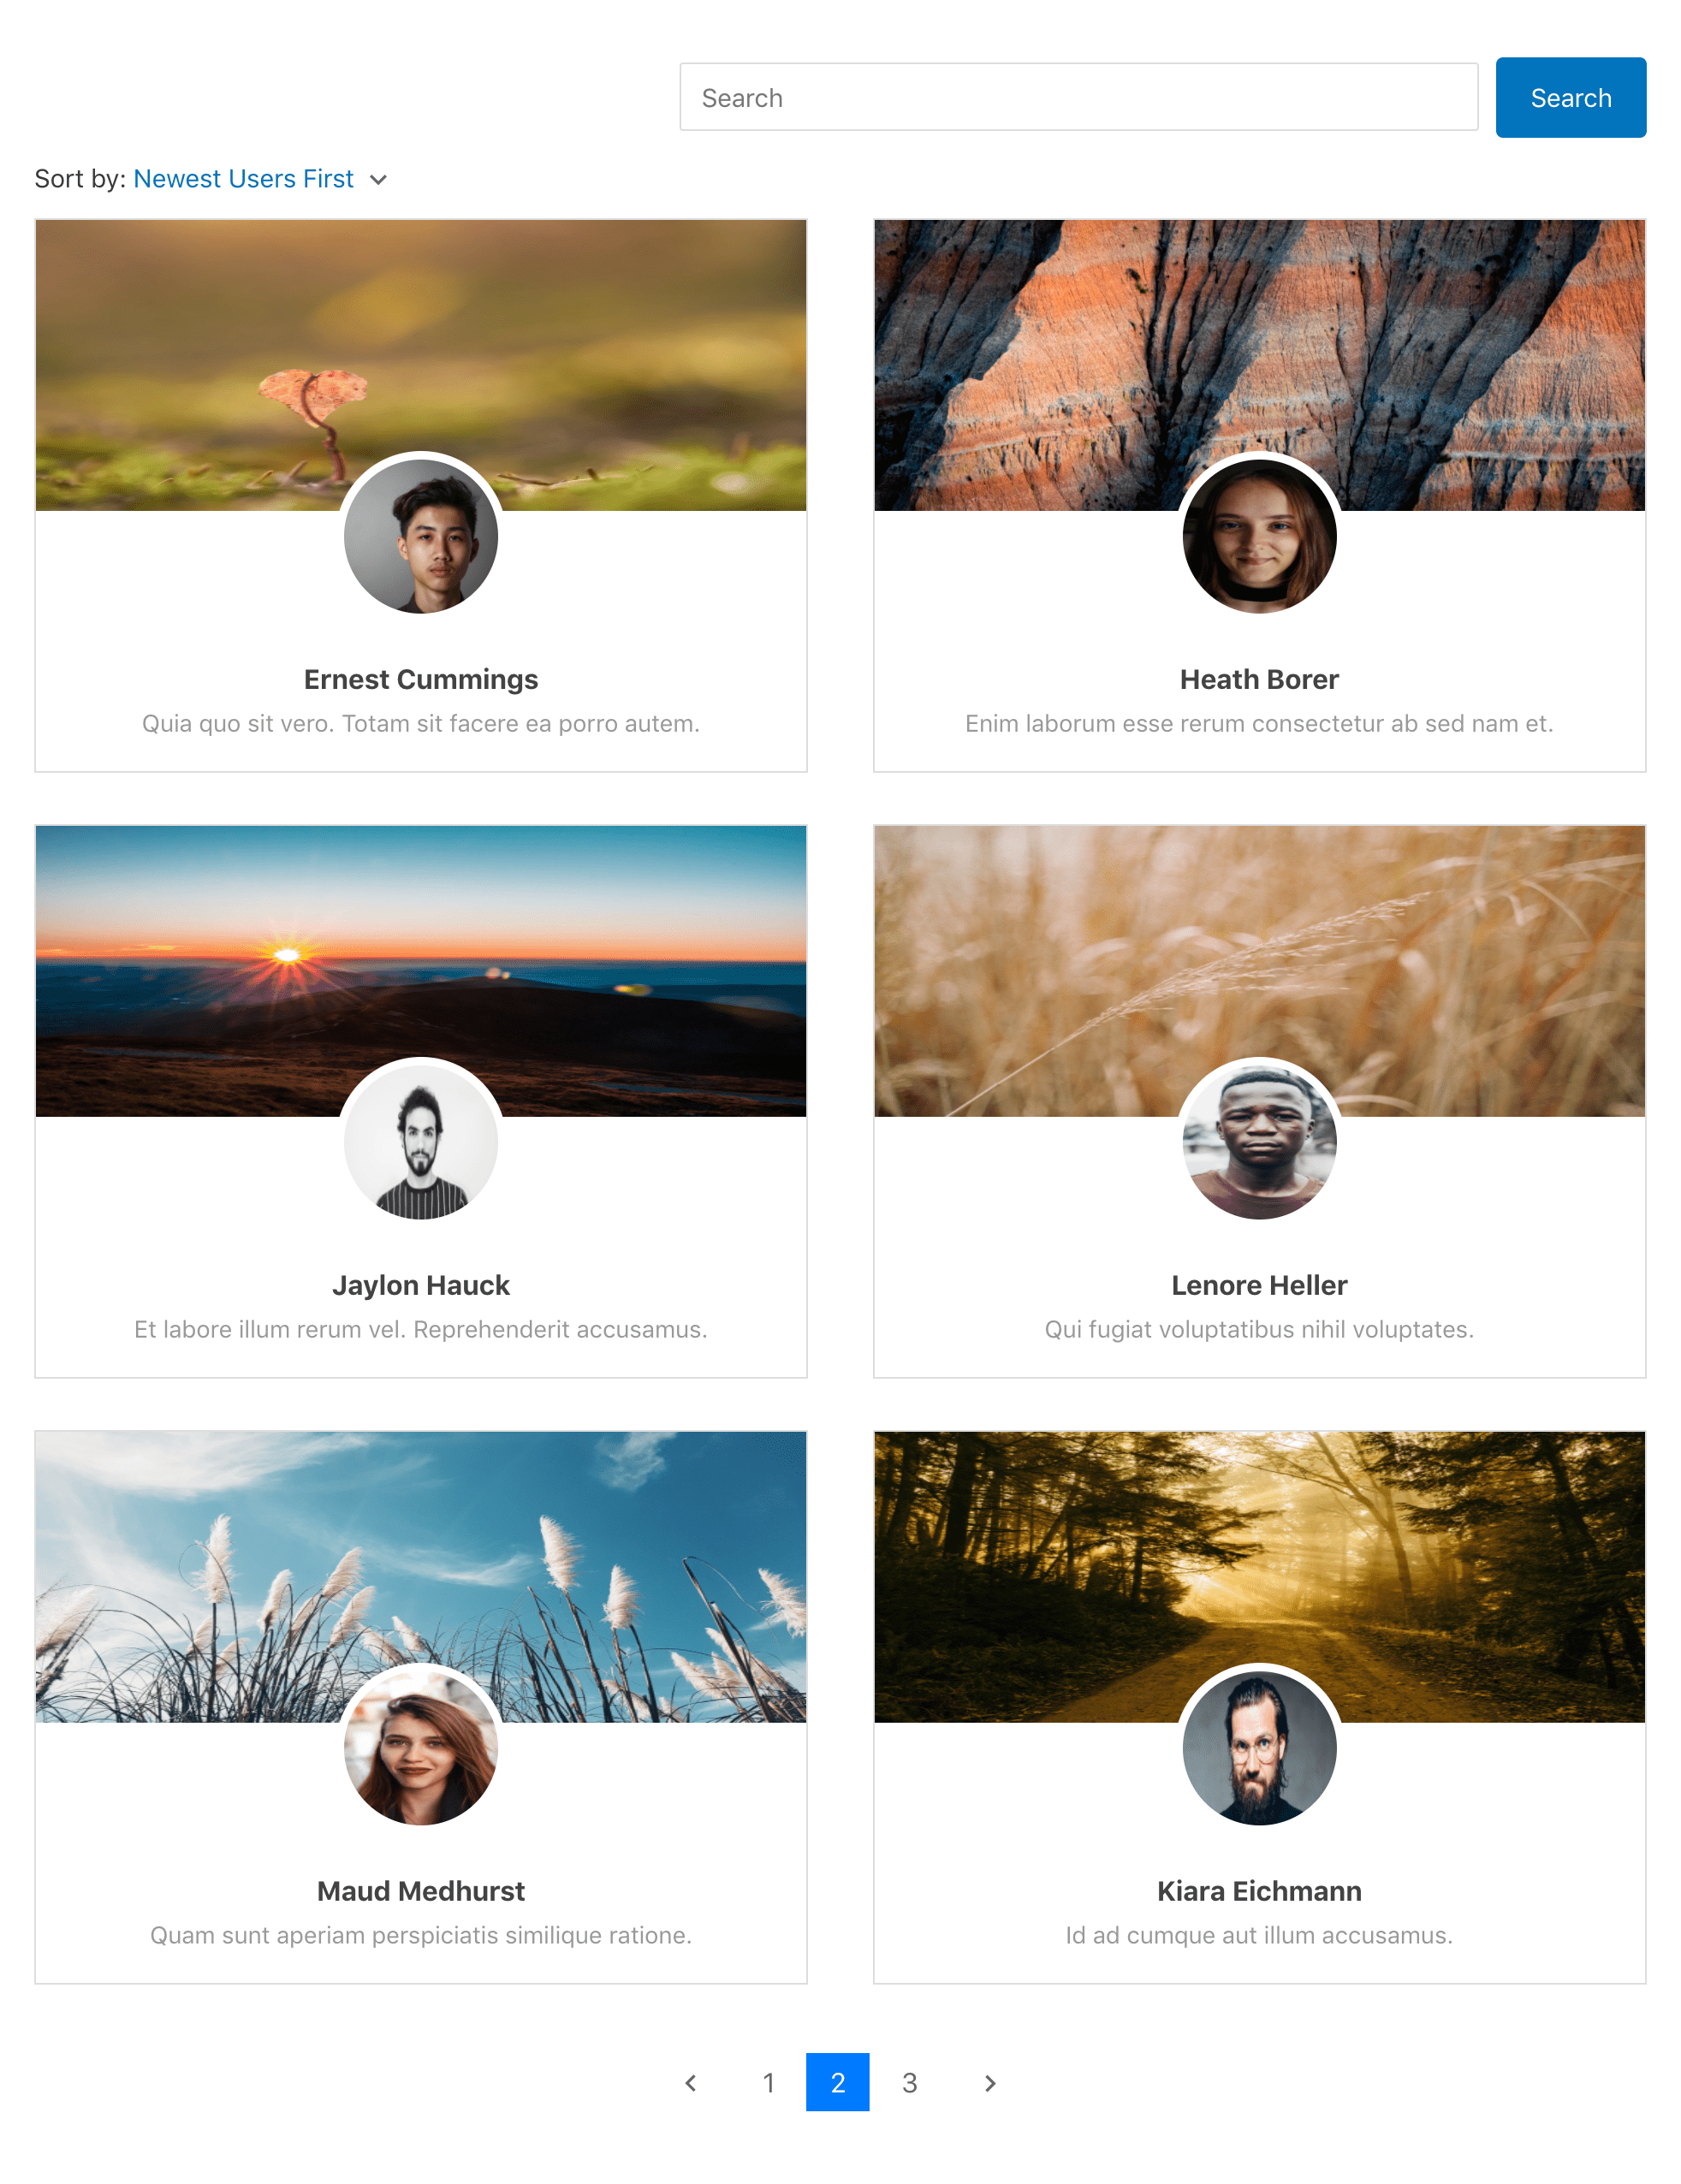
Users can search the member directory and use filters to sort out specific members from your WordPress site.
Conclusion
Creating a member directory on your WordPress site is a great way to showcase all registered users. In addition, it can be useful for increasing member registrations and showcasing some of the professionals you work with.
Since WordPress, by default, doesn’t let you do this, using an intuitive plugin such as ProfilePress is your best option.
ProfilePress lets you easily create a member directory and customize it the way you want without touching a single line of code. This is great for business owners looking for an all-in-one solution for showcasing an attractive and professional-looking WordPress member directory on their site.
Ready to start creating your WordPress member directory? Get ProfilePress today!