How to Segment Your Email List for Better Conversions
Email marketing is a multifaceted marketing strategy that baffles many bloggers and small business owners. Some build an email list of tens of thousands of subscribers but never do anything with it. Some only send broadcast emails to the entirety of their lists whenever they publish new blog posts. Others don’t have lists at all.
That’s why segmentation is still one of those things that tends to baffle marketers even though it’s been a prominent feature of email marketing for quite some time now.
In this post, we’re going to explain what email segmentation is and why you should segment your email list. We’ll then go over the steps you can take to segment your list so you can increase conversions and grow your revenue.
Why You Need to Segment Your Email List
Your audience is a lot more diverse than you probably realize. Every member is at a different stage in your niche, and if you sell products or services, you’ll wind up with a set of subscribers who have purchased something from you and another set who hasn’t.
All of this matters when it comes to the emails you send to your list, and it should be taken into consideration when you develop new marketing strategies.
For example, if you have an idea for a product, let’s say Product B, that’s highly similar to Product A, you’ll have a much easier job finding beta customers if you have a segment of subscribers you know have purchased Product A.
You already know they’re interested in the topic or type of product Product A relates to, so they’re much more likely to be interested in Product B than cold leads you market to on your blog or advertisements would. Overall, your marketing campaign for this product will acquire more conversions.
Those are the biggest benefits of email segmentation, and ultimately why you should consider segmenting your email list. It helps you develop a better relationship with your audience by allowing you to target the right customers with the right messages.
How Email Marketing Plays Into Your Sales Funnel
Let’s say the beta period for Product B is over, and you’re ready to launch the full product. You’ll need to develop a plan to market the product effectively. This type of plan is commonly known as a “sales funnel,” a type of marketing strategy that helps you turn traffic into conversions and eventually revenue.
The typical sales funnel that includes email marketing works like this. You create a free lead magnet that relates to Product B and offer it on a landing page by attaching it to an opt-in form.
When you use a tool like MailOptin, you can promote this lead magnet on related pages across your entire site with multiple form types, including various pop-ups you can design to be nonintrusive, notification bars that stick to the top or bottom of your pages, flexible inline forms, and more.
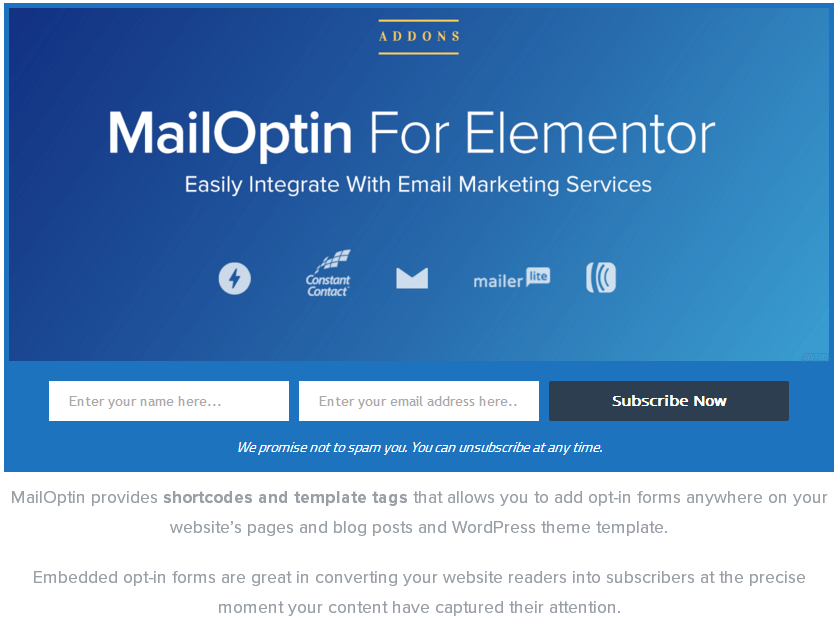
These forms even integrate with popular email marketing platforms, including MailChimp, ConvertKit, Aweber, MailerLite, GetResponse, Campaign Monitor and more.
You then integrate these landing pages, known as “squeeze pages,” in your marketing strategy, which typically means placing them on related blog posts and landing pages you promote in advertisements. Facebook Ads are especially effective.
Once you capture subscribers, or “leads,” you send them a series of emails related to Product B. These emails should expand on the freebie you offered. At least one of your emails should tease your product before you send the final email focused solely on promoting it. This is where the revenue part of the sales funnel begins.
Using the automation rules most email marketing services offer these days, you can segment your leads throughout the sales funnel process based on the actions they take.
For example, if they click the link leading to your product’s landing page, you can tag them as being interested in Product B. If they purchase the product, you can remove that tag and tag them with “Purchased: Product B” instead.
The funnel usually ends once a lead purchases your product, but you can continue using marketing tactics on leads you tagged as being interested in your product.
For instance, some marketers only allow you to purchase during set timeframes. If the leads you tagged as being interested don’t purchase your product after a certain number of days, you can use this marketing tactic to encourage them to take action by placing “only X days left!” in your subject line and email content.
Plus, thanks to your “Purchased: Product B” tag, you now have a tag full of customers you can promote additional products to, including customers who haven’t purchased Product A.
Let’s get into the meat of this post and talk about additional ways you can segment your email list.
How to Segment Your Email List for Better Conversions
There are multiple ways you can go about segmenting your email list, especially with a goal of increasing your conversions. We’re going to break it down into three simple steps:
- Define your primary segments.
- Define your secondary segments.
- Implement segments into your email marketing software.
Let’s start at the top.
Defining Your Primary Segments
For the purposes of this article, we’re going to call segments and groups “primary segments” and tags “secondary segments.”
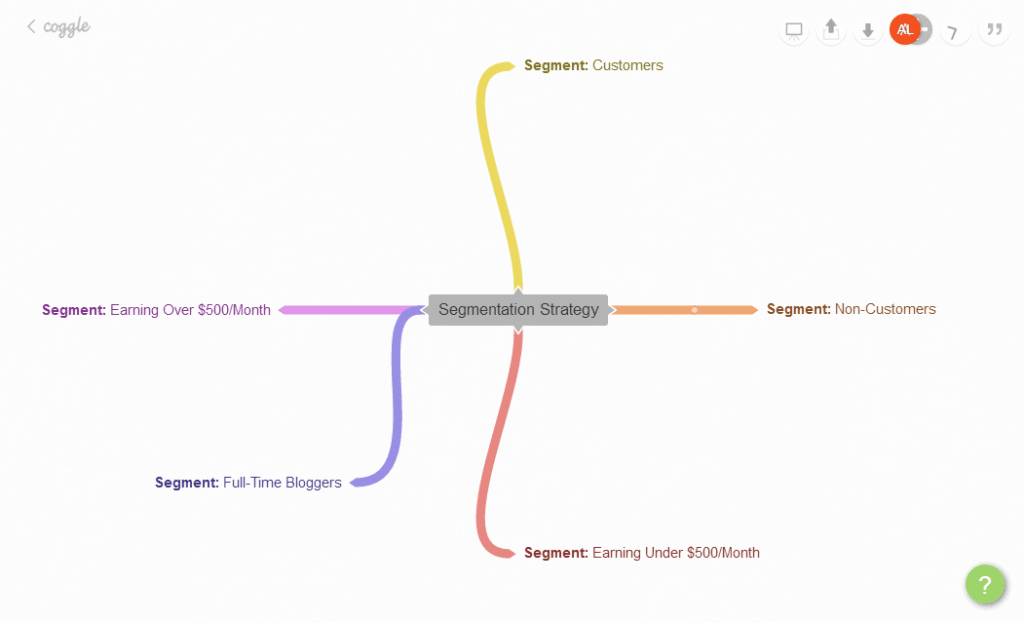
If you sell products or services of any kind, you should start with the following two primary segments:
- Customers
- Non-Customers
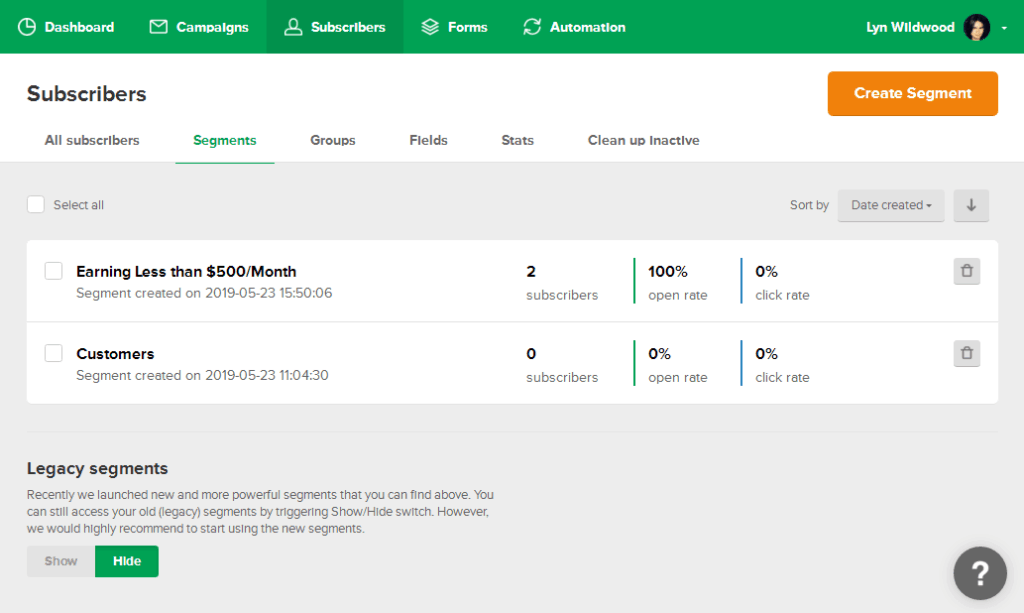
Most email marketing services integrate with popular ecommerce platforms. This allows you to add anyone who makes a purchase to your “Customers” segment.
You should only create three to five additional primary segments after that. These segments should be specific enough for subscribers to only fit into one segment.
A common way to organize subscribers is to create a different segment based on where they are in your niche. For example, if your business teaches people how to make money blogging, you could use segments based on how much revenue they earn every month:
- Segment 1: Under $500/Month
- Segment 2: Over $500/Month
- Segment 3: Full-Time Bloggers
Find a way to organize your subscribers based on where they are in learning about your niche, and break it down into three to five groups.
The goal is to ensure you’re delivering the right content to the right people. A reader earning enough from their blog to make a living isn’t going to be interested in a guide on how to start a blog nor is a reader struggling to earn their first dollar going to be interested in advanced monetization strategies.
Defining Your Secondary Segments
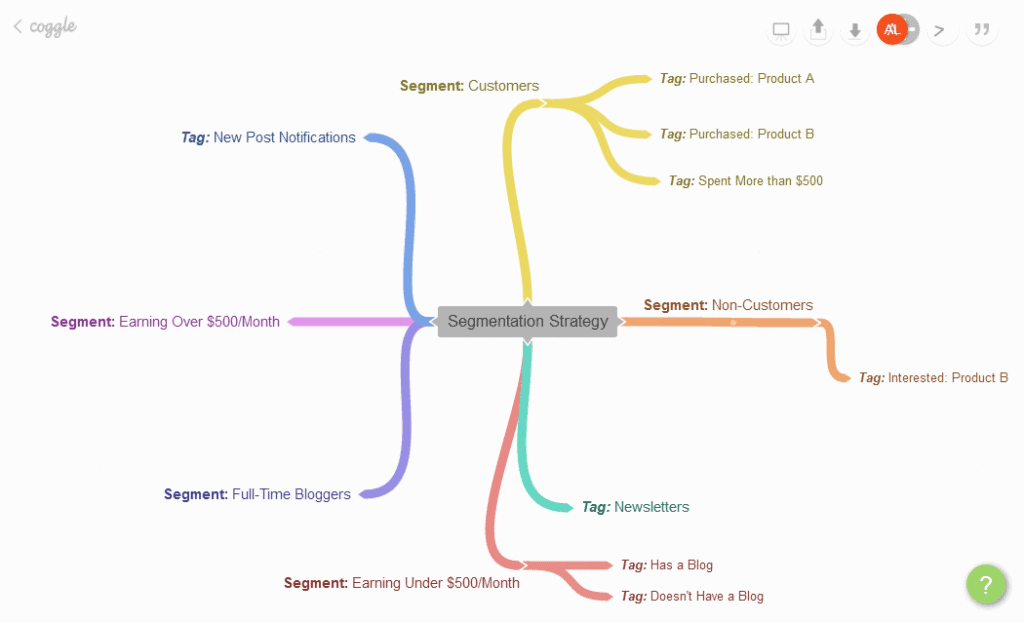
You can be as flexible as you need when it comes to tags. They’re simply ways for you to organize your subscribers based on what they’re interested in and the actions they take on your list.
For example, there are two methods bloggers use to inform subscribers about new content. They either send new post notifications whenever they publish new blog posts or send lists of their latest posts in weekly newsletters. You can assign subscribers to “New Post Notifications” and/or “Newsletters” tags based on how they state they’d like to stay informed.
You can also tag customers based on what they’re interested in when it comes to the topics you cover on your blog. Most importantly, you should tag subscribers at different points in the sales funnel, as we already covered.
You can also assign tags based on the lead magnets they download, the types of links they click, products they’re interested in and products they purchase.
Implementing Segments and Tags
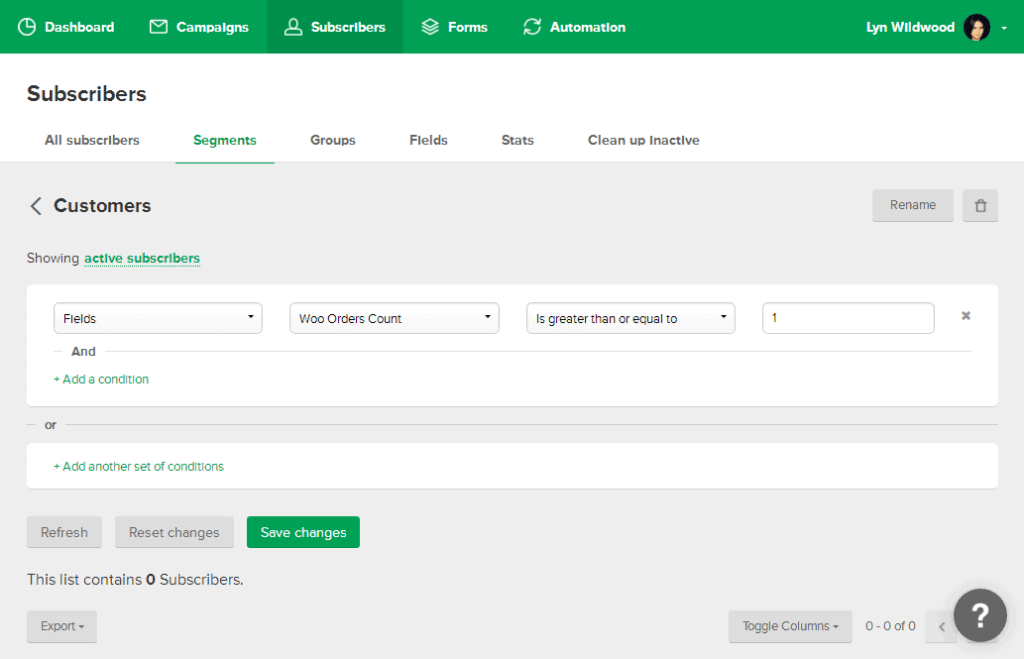
The way you add segments and tags to your email list depends on the email marketing service you use. Most require you to use filters and conditions to create segments while tags are typically created through automation.
For example, if you want to create your “Customers” and “Non-Customers” tags, you’re going to need to connect your store to your email marketing service account. You’ll then need to use that service’s ecommerce-based conditions, such as “Total # of Orders” or “Has/Has Not Purchased.”
You can also segment and tag subscribers based on automation. In our example blog, for instance, we can create a welcome email series that includes an email asking subscribers to click the link that best describes the point they’re at with their blogs:
- “I’m making under $500/month in revenue.”
- “I’m making over $500/month in revenue.”
- “I’m earning enough revenue to support myself full-time.”
The links will be assigned to a designated segment, and the subscriber will be added to the segment assigned to the link they click.
Decide which segments and tags you need to create, and go through your email marketing service’s settings and documentation to find ways to create and automate them.
Final Thoughts
Once again, the overall goal of email segmentation is to ensure you’re sending the right emails to the right people. An added benefit is the ability to get to know your audience a little better.
You’ll know what kind of content to create and the types of solutions you should be focusing on when it comes to creating products. You’ll even be able to look at the number of subscribers each segment has to determine how much content you need to create for each one.
If you’re a MailChimp user and need a little help learning how to use segmentation, check out our post on how to segment leads into specific MailChimp groups.
We also have a tutorial on how to allow users to select daily, weekly and monthly newsletters through MailChimp if that’s a form of segmentation you’d like to use.