Setup WordPress New Post Notification to Zoho Campaigns Contacts
Have you ever wished your latest WordPress blog posts could seamlessly reach your audience? Imagine the power of instantly notifying your dedicated readers the moment you hit ‘publish.’ This dream can become a reality by setting up WordPress new post notifications to your Zoho Campaigns contacts using MailOptin.
In this tutorial, we’ll walk you through setting up WordPress new post notifications to your Zoho Campaigns contacts using the versatile MailOptin plugin.
Whether you’re a seasoned blogger looking to automate your email marketing or a novice eager to expand your readership, this article will equip you with the knowledge and tools to streamline your content delivery and enhance engagement.
To get started:
Install and Activate MailOptin
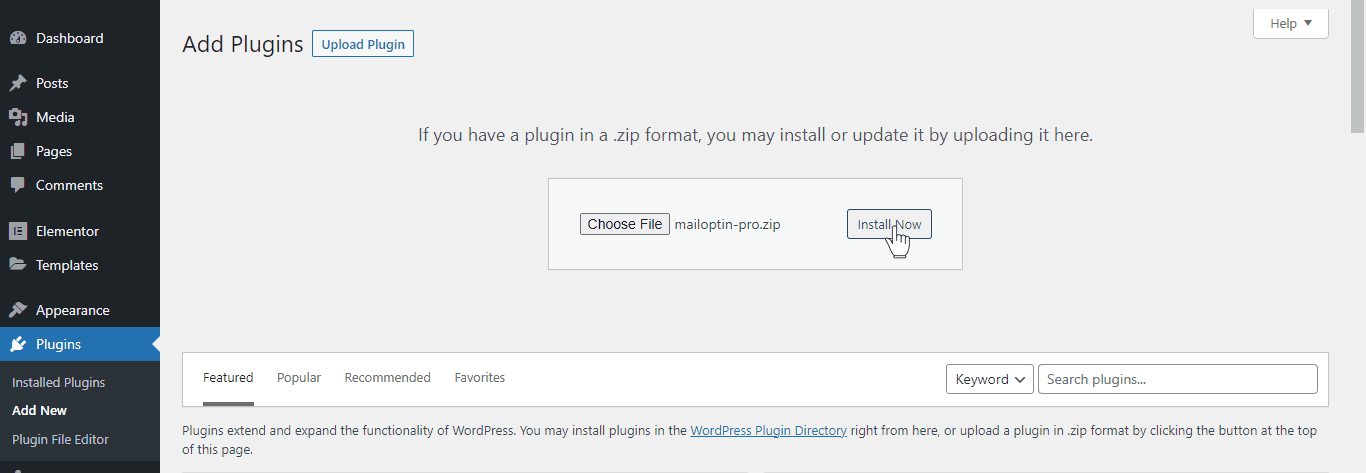
To set up new post notifications automation in WordPress, first purchase a MailOptin license. Next, log in to your WordPress admin dashboard, go to the Plugins page, click the Add New button and Upload Plugin.
Then, click Choose File to select the downloaded plugin zip file. Click Install Now. After installing the plugin, activate it by clicking ‘Activate Plugin’.
Connecting WordPress to Zoho Campaigns via MailOptin
After installing the MailOptin plugin, the next is to connect MailOptin to your Zoho Campaigns account. To do this, go to the Integrations settings page by clicking the sidebar menu link or the top menu tabs.
Next, click the “Authorize” button in the Zoho Campaigns Connection section.

You will then be redirected to log in to your account. Then, go to a screen to authorize MailOptin to access your account.
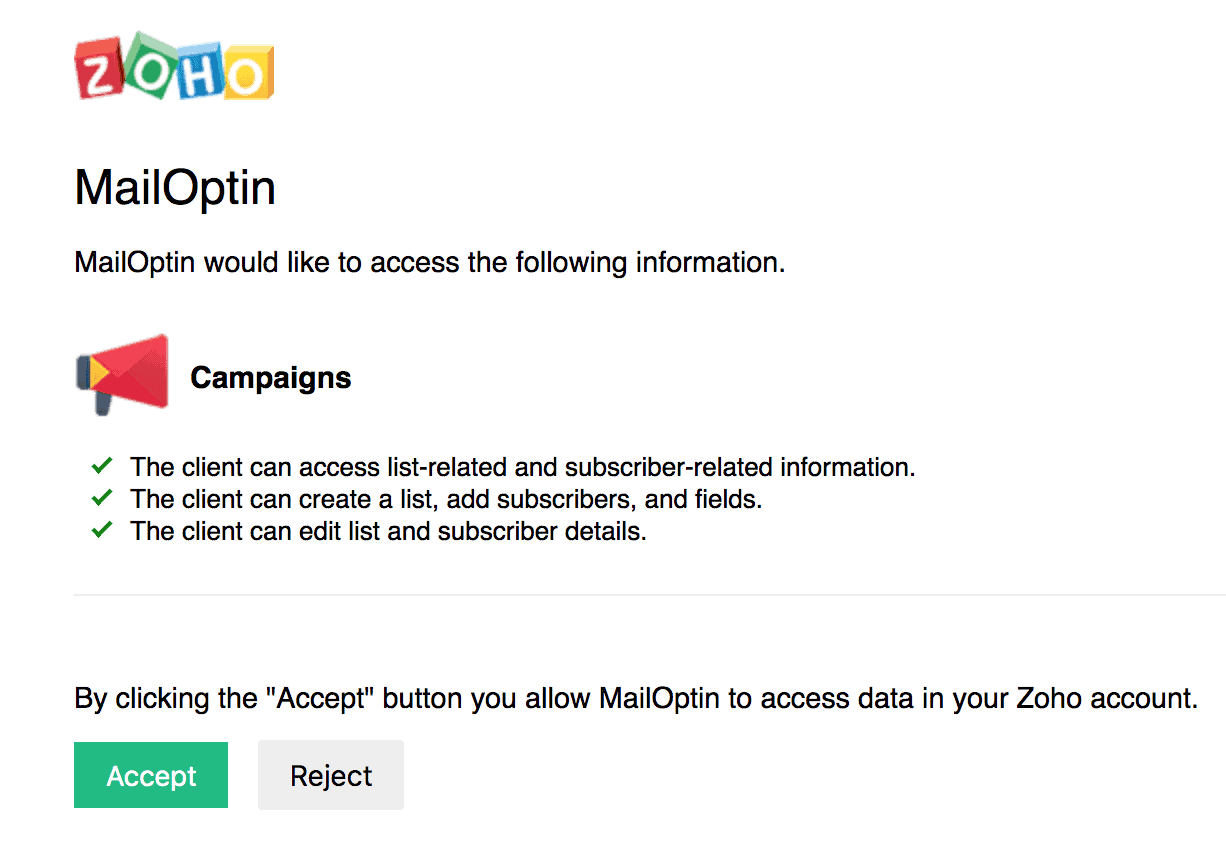
After clicking the “Accept” button, you will be redirected to the MailOptin connections page, where the button will now appear green, indicating a successful connection.
Creating the WordPress New Post Notification
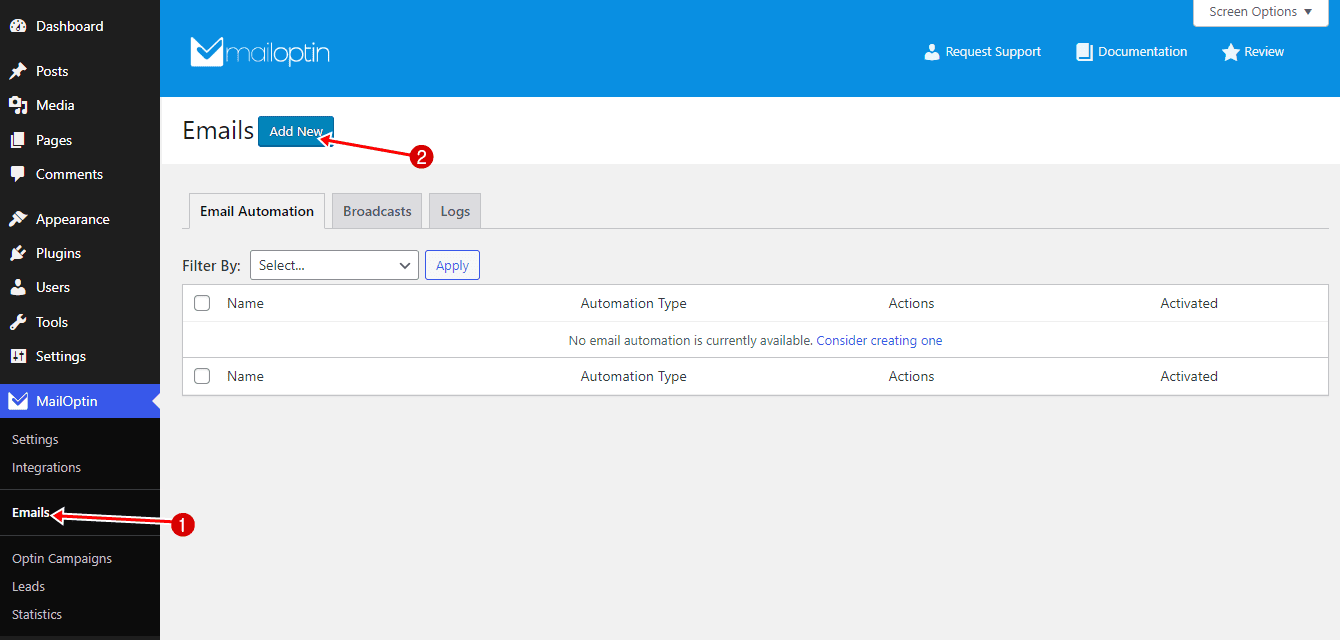
To set up the email automation that automatically emails your Zoho Campaigns contacts whenever a new post is published, go to MailOptin >Email > Add New.
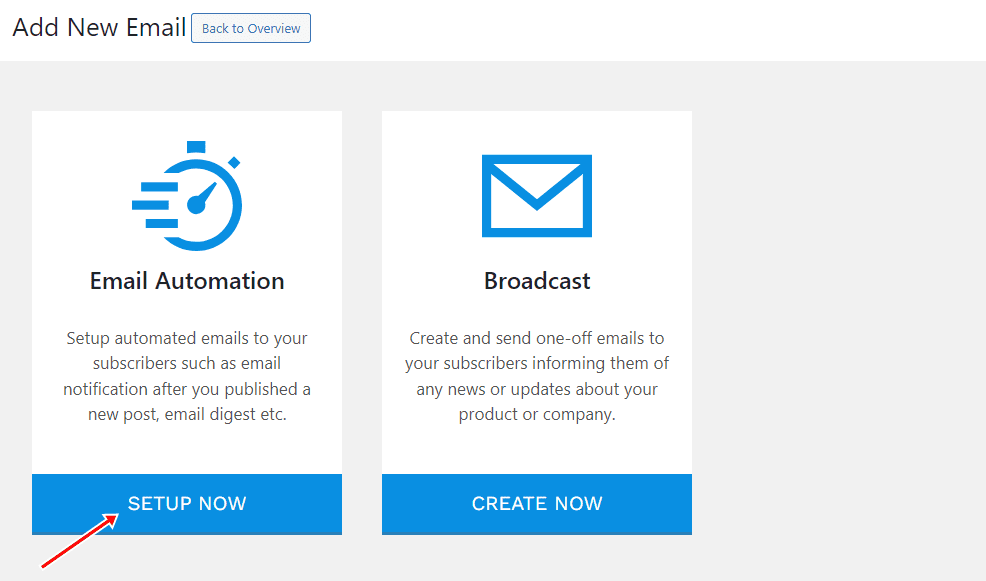
Then, click on ‘Setup Now’ under Email Automation.
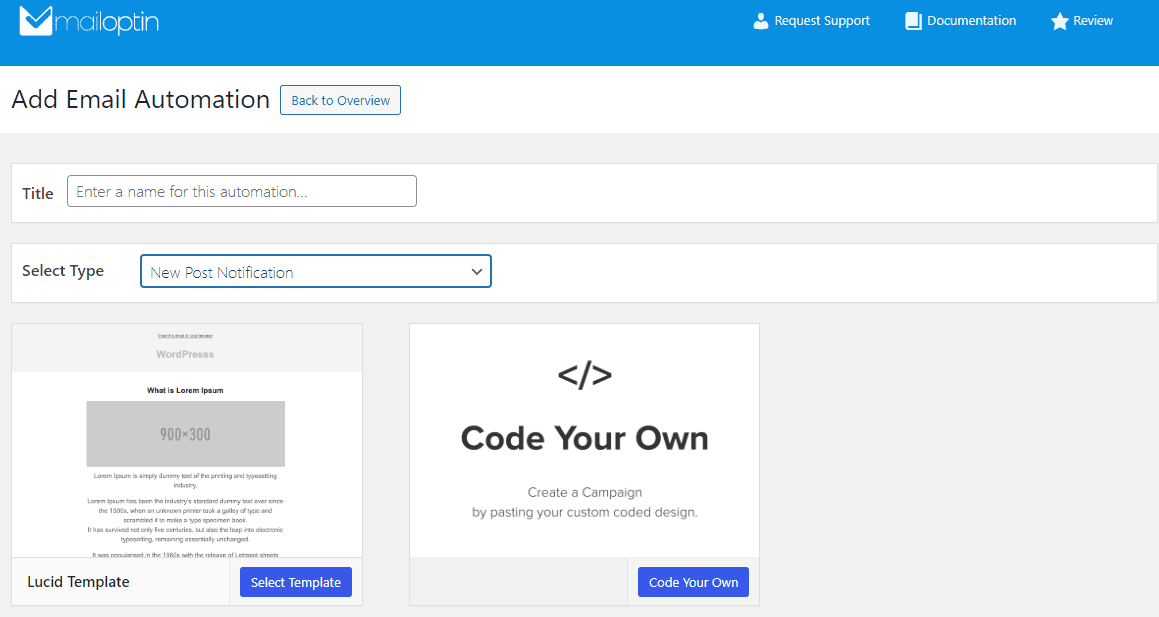
Next, enter a title for the automation, select Automation Type as “New Post Notification”, then choose a Template.
Here’s how to use your own custom email template.
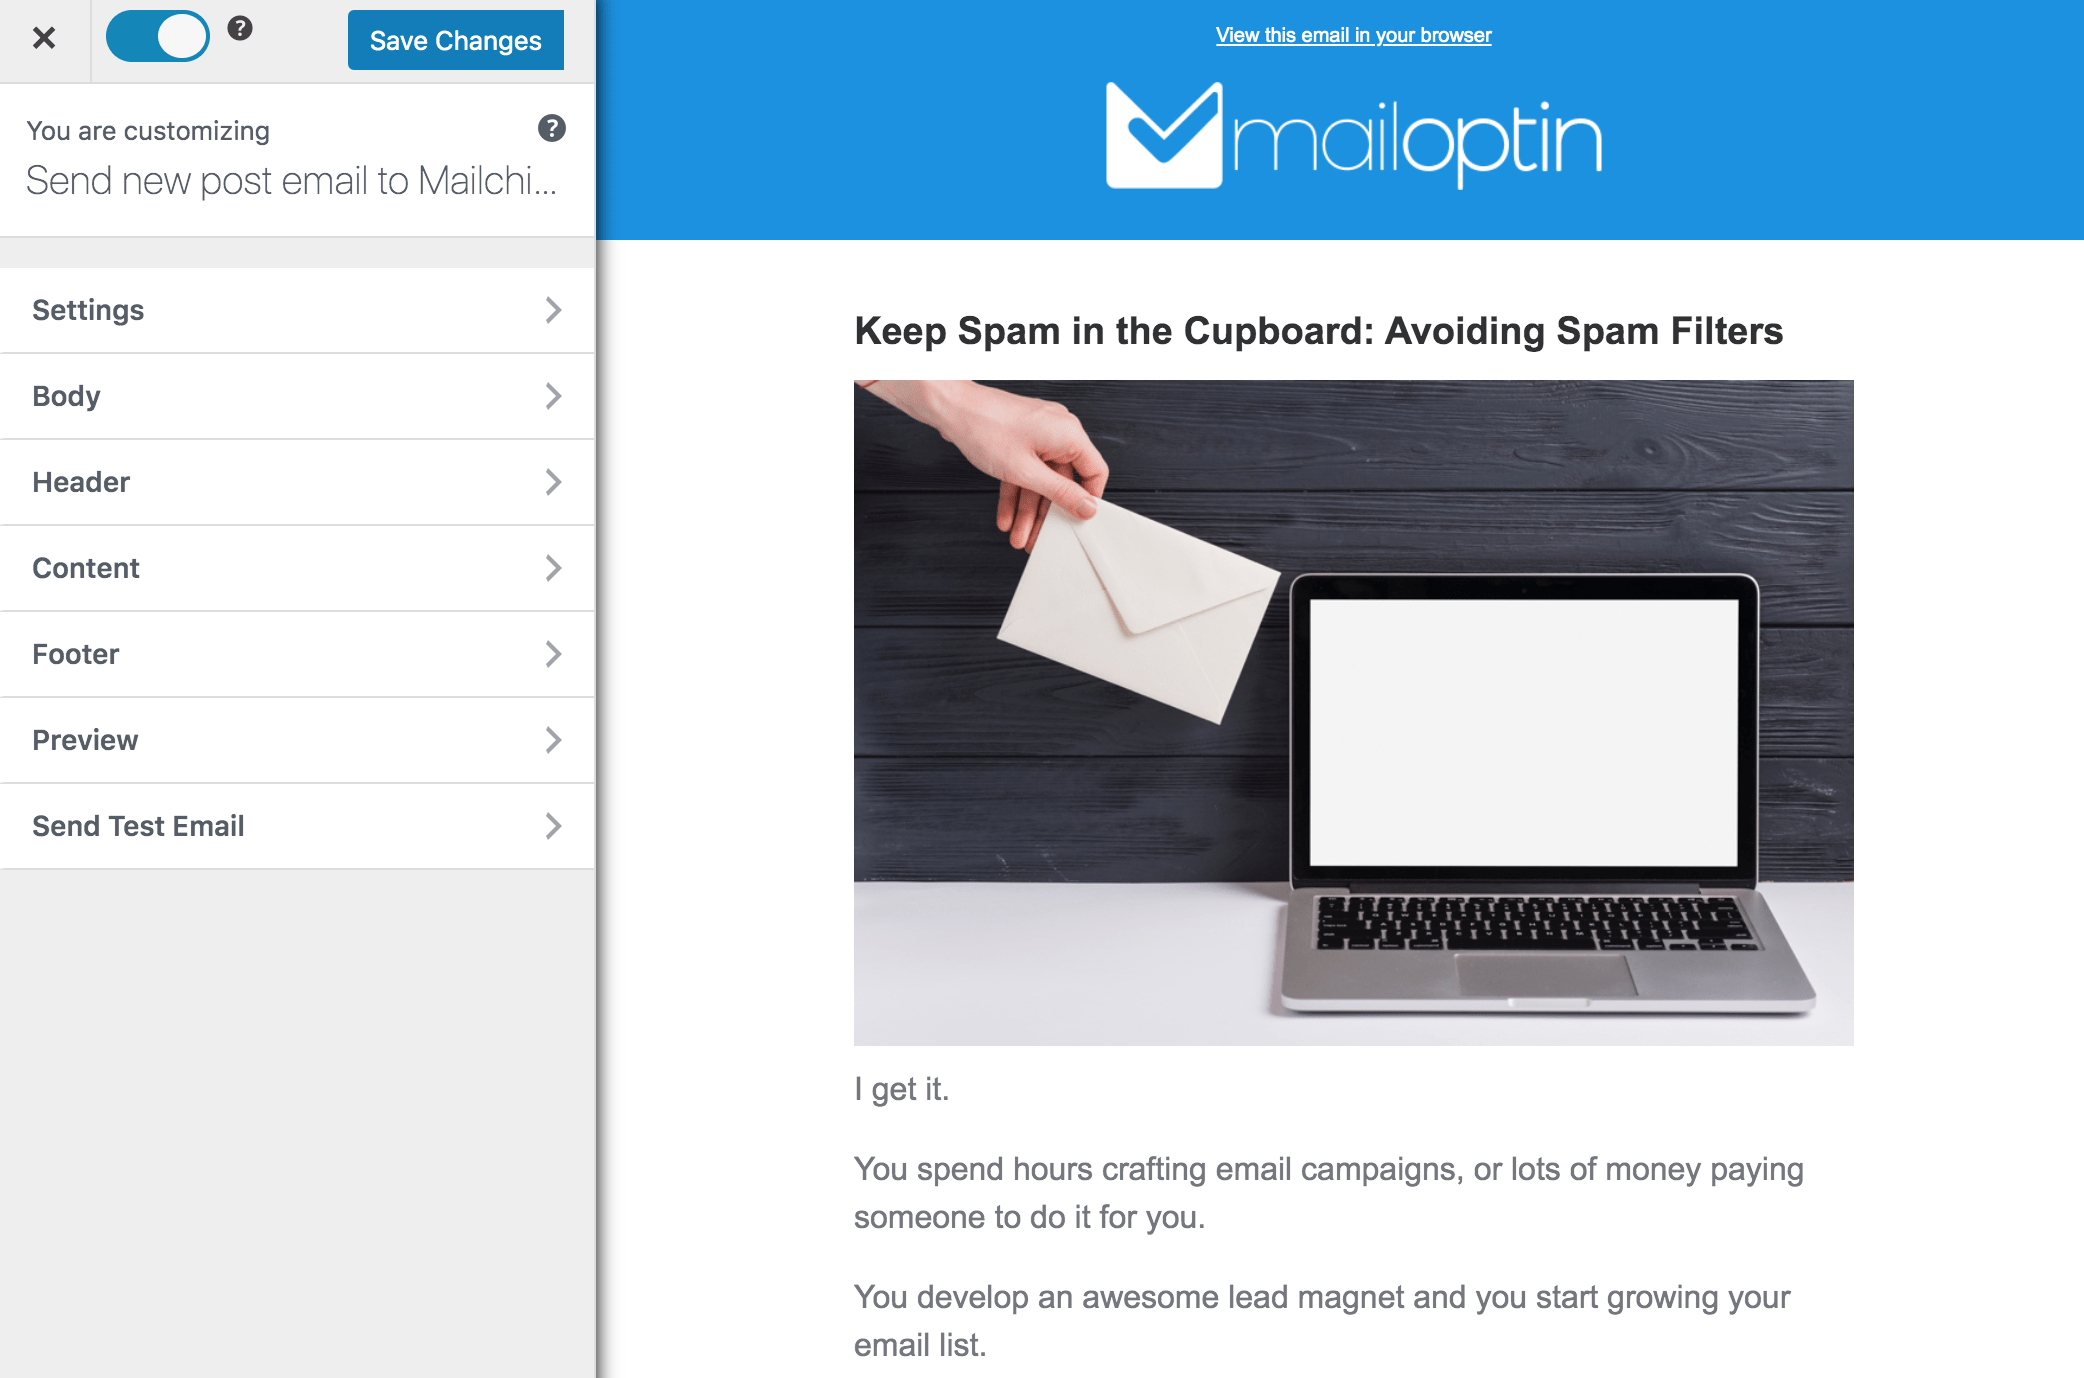
After selecting your template, you will be taken to the email customizer page, where you can configure the automation settings, template page, template header, template content, and even send a test email to your email address.
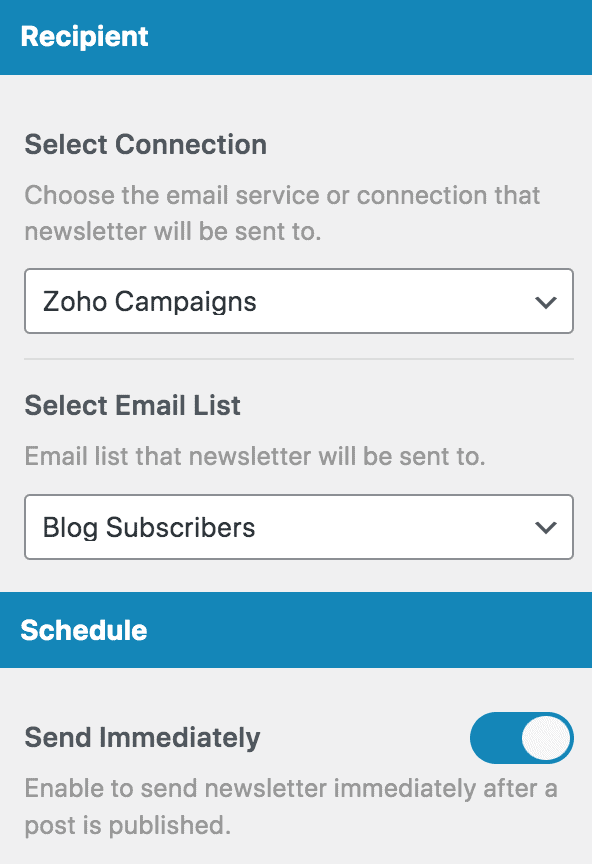
Open the “Settings” panel and select “Zoho Campaigns” as your connection.
Then, select a specific email list to which the new post newsletters will be sent. You can also decide to send the newsletters immediately after posting by checking “Send immediately” or scheduling it to be sent minutes, hours, or days after publication.
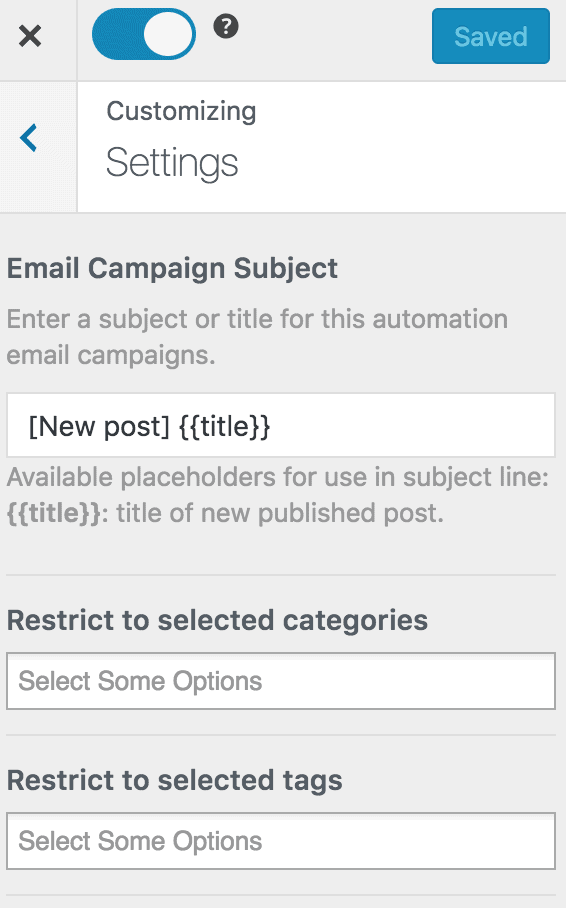
You can create as much automation as possible to be sent to a different email list based on the categories and tags the post belongs to.
The setup is now complete. Finally, save your changes and activate the automation.
Every time MailOptin sends a new post-email newsletter to your contact list, you will see the record in Zoho Campaigns.
Following this tutorial, you’ve taken a significant step towards streamlining your content distribution and maximizing your WordPress content impact.
Imagine the possibilities that await:
- Your latest post reached eager readers within moments of publication
- Increased traffic to your website as subscribers click through to read your entire posts
- Improved engagement rates as your audience consistently receives valuable content
- More time to focus on creating stellar content rather than manual email marketing tasks
This is just the beginning of your automated marketing journey. To take your strategy even further, consider these next steps:
- Experiment with email designs and subject lines to optimize open rates
- Use Zoho Campaigns’ analytics to understand which topics resonate most with your audience
- Segment your contacts based on interests to deliver even more targeted content
- Regularly review and refine your automation setup to ensure peak performance
The power is now in your hands to create a thriving, engaged community around your blog.
Let us know if you have any questions or comments.
