How to Add Email Newsletter Signup Forms to WordPress
Newsletters are crucial tools for online business owners. They help establish strong relationships with customers and keep them informed and engaged.
Recent statistics show that 77% of marketers have experienced an increase in email engagement over the past 12 months, which can lead to more business.
Adding an email newsletter signup form to your website is invaluable and can help grow your business. However, building a signup form from scratch can take some effort.
In this article, we will show you how to easily add email newsletter signup forms to your WordPress website using MailOptin.
MailOptin is a tool that allows you to build various forms without difficulty, such as popups, subscription forms, and user registration forms, and send automated emails or one-off email newsletters directly from your WordPress dashboard.
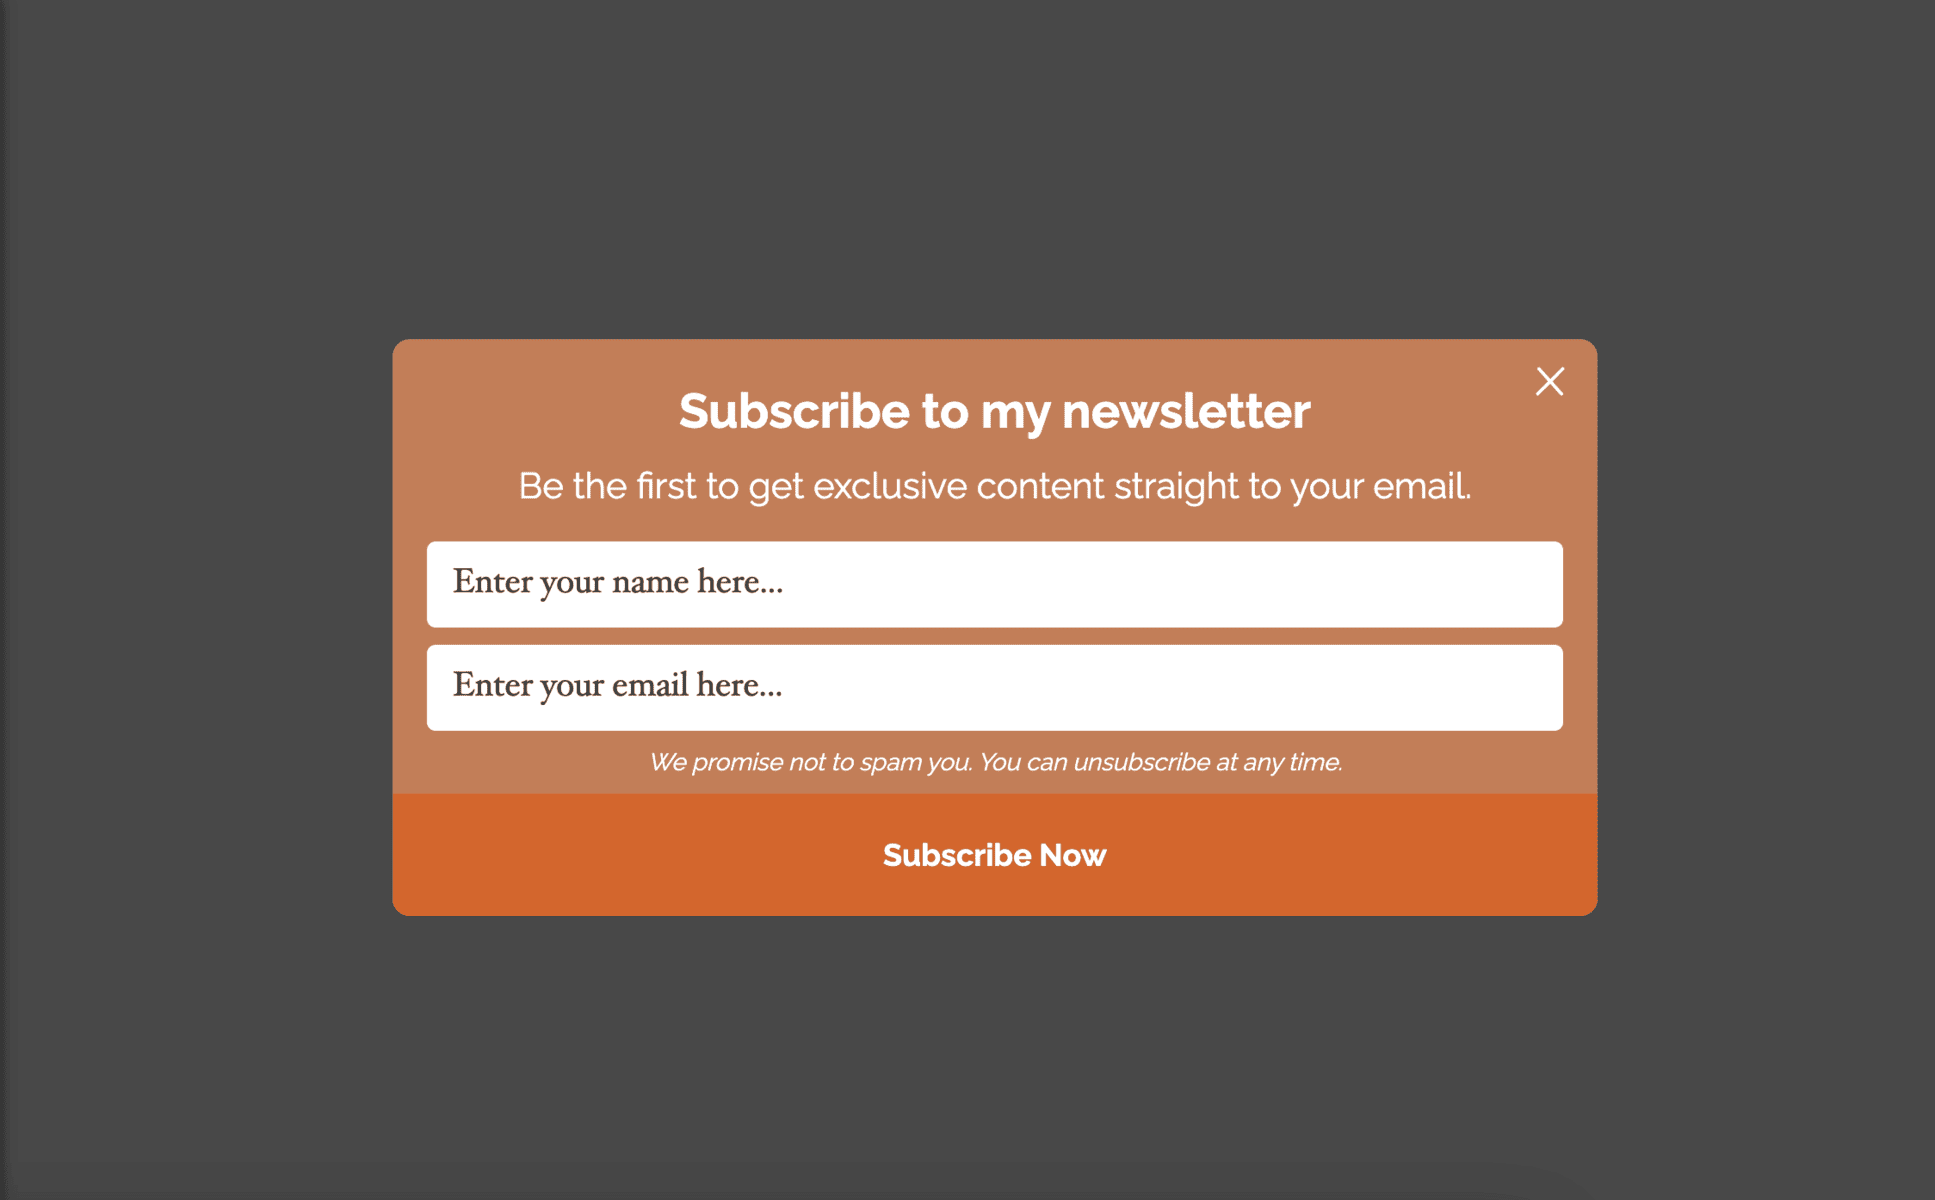
At the end of this guide, we’ll learn how to build a newsletter signup form with the MailOptin plugin and connect MailChimp or any supported ESP (Email service provider) to it. Our newsletter form should look like this:
Installing and Setting up MailOptin
Installing WordPress plugins is typically a simple process. There are two main methods for installing a plugin.
- Installation from the WordPress Plugins repository
- Uploading the WordPress plugin
You will need to log in to your WordPress dashboard and access the plugin repository section. You can do this by selecting the “Plugins” option from the sidebar and then clicking on “Add New,” as demonstrated in the example below:
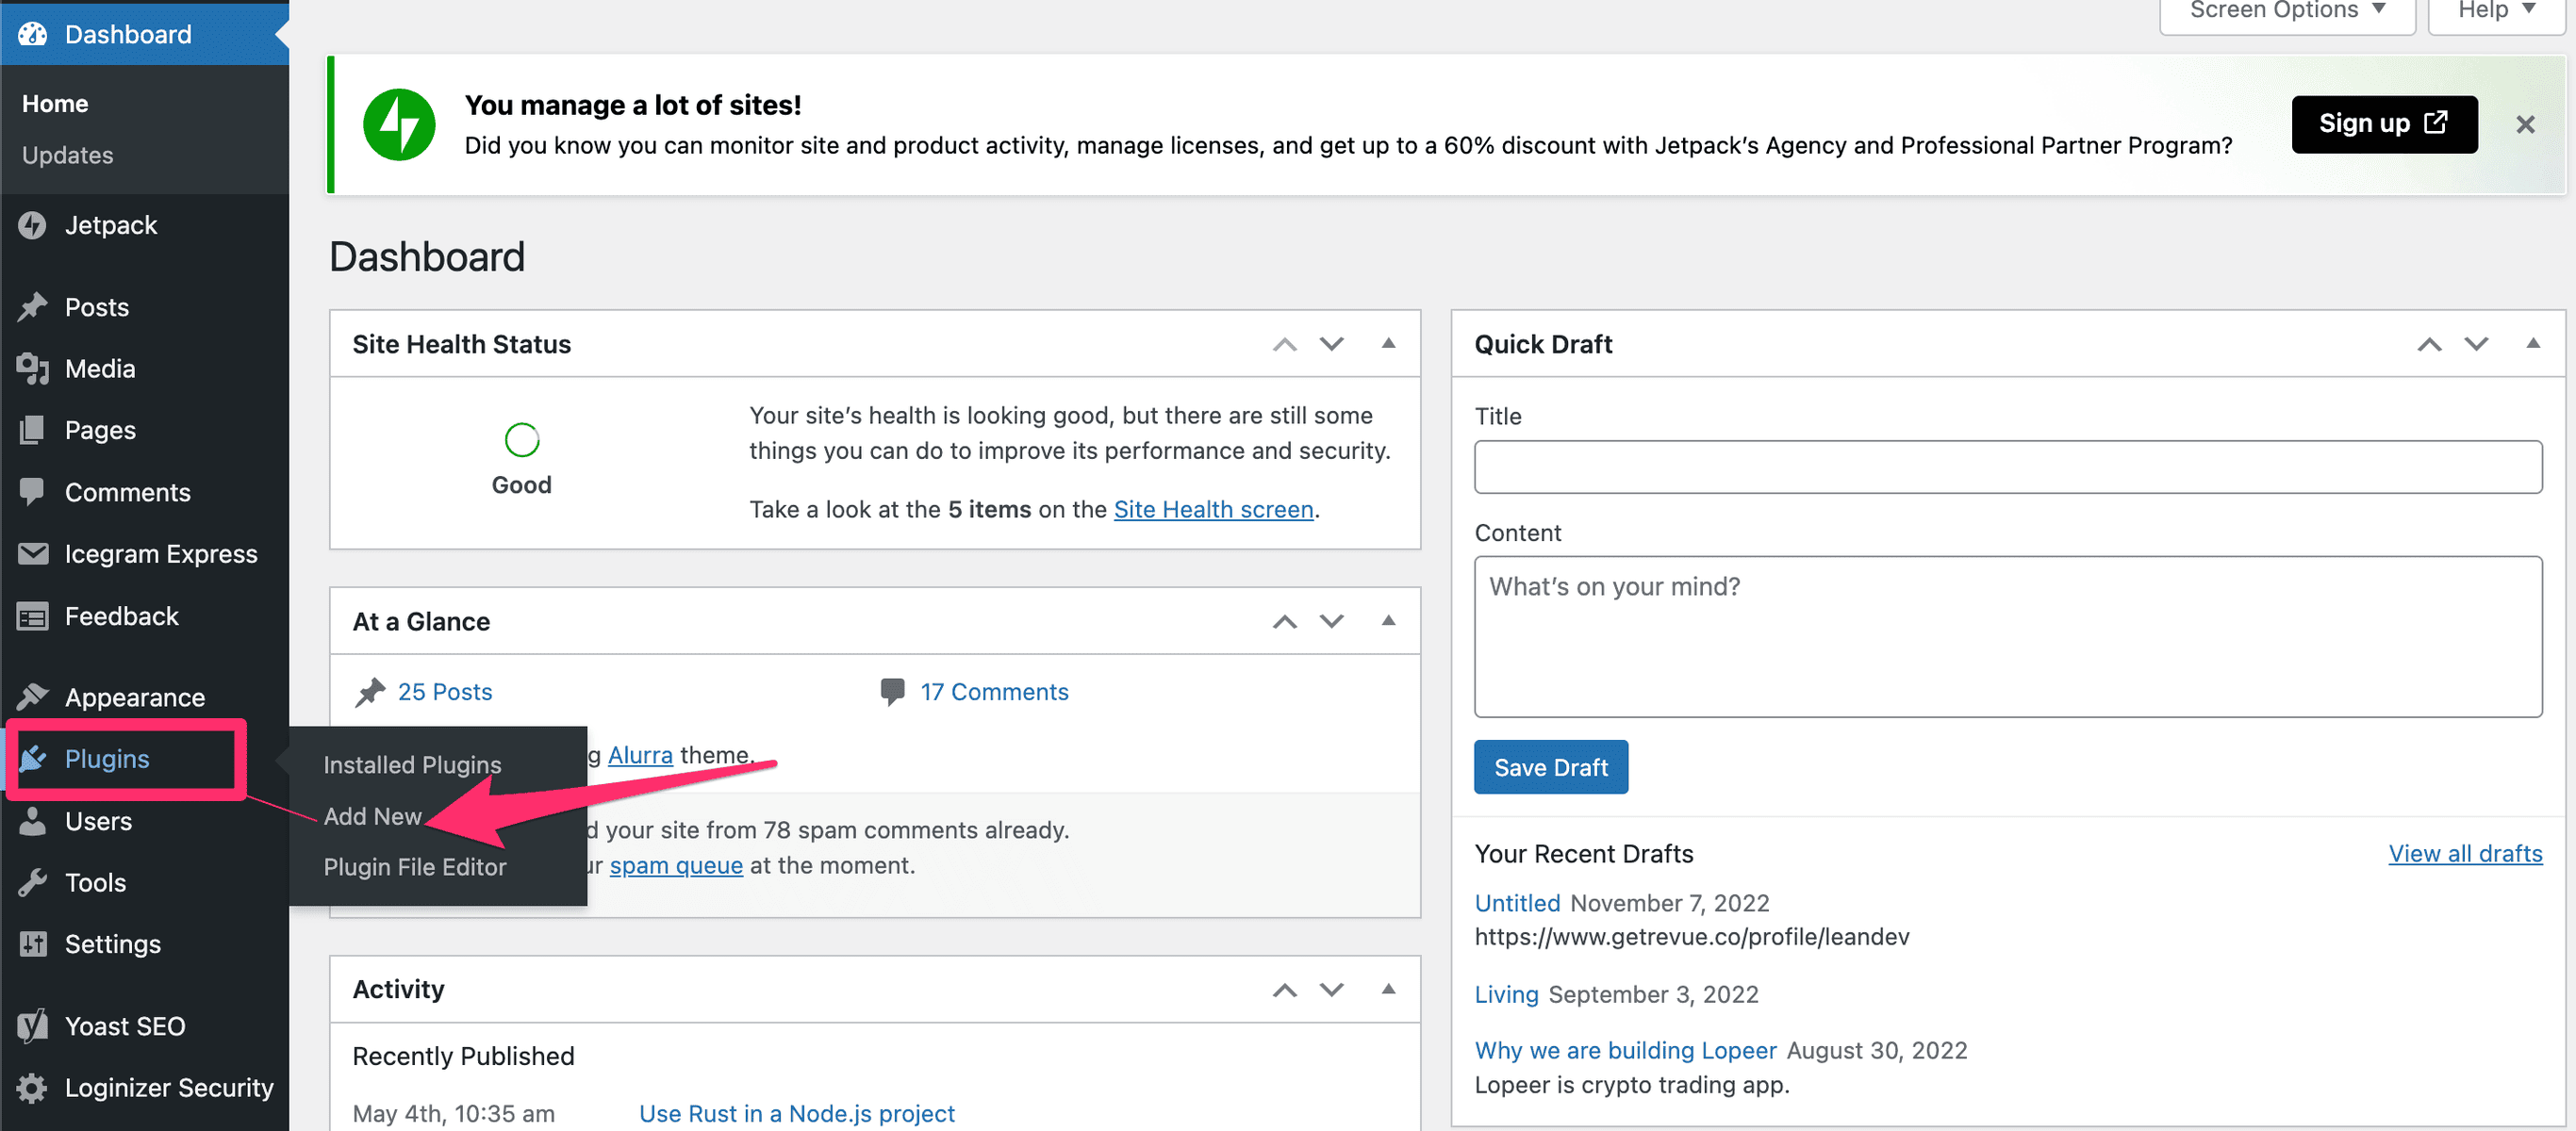
To add a new plugin, click the “Add New” link, which will take you to the WordPress Plugins repository.
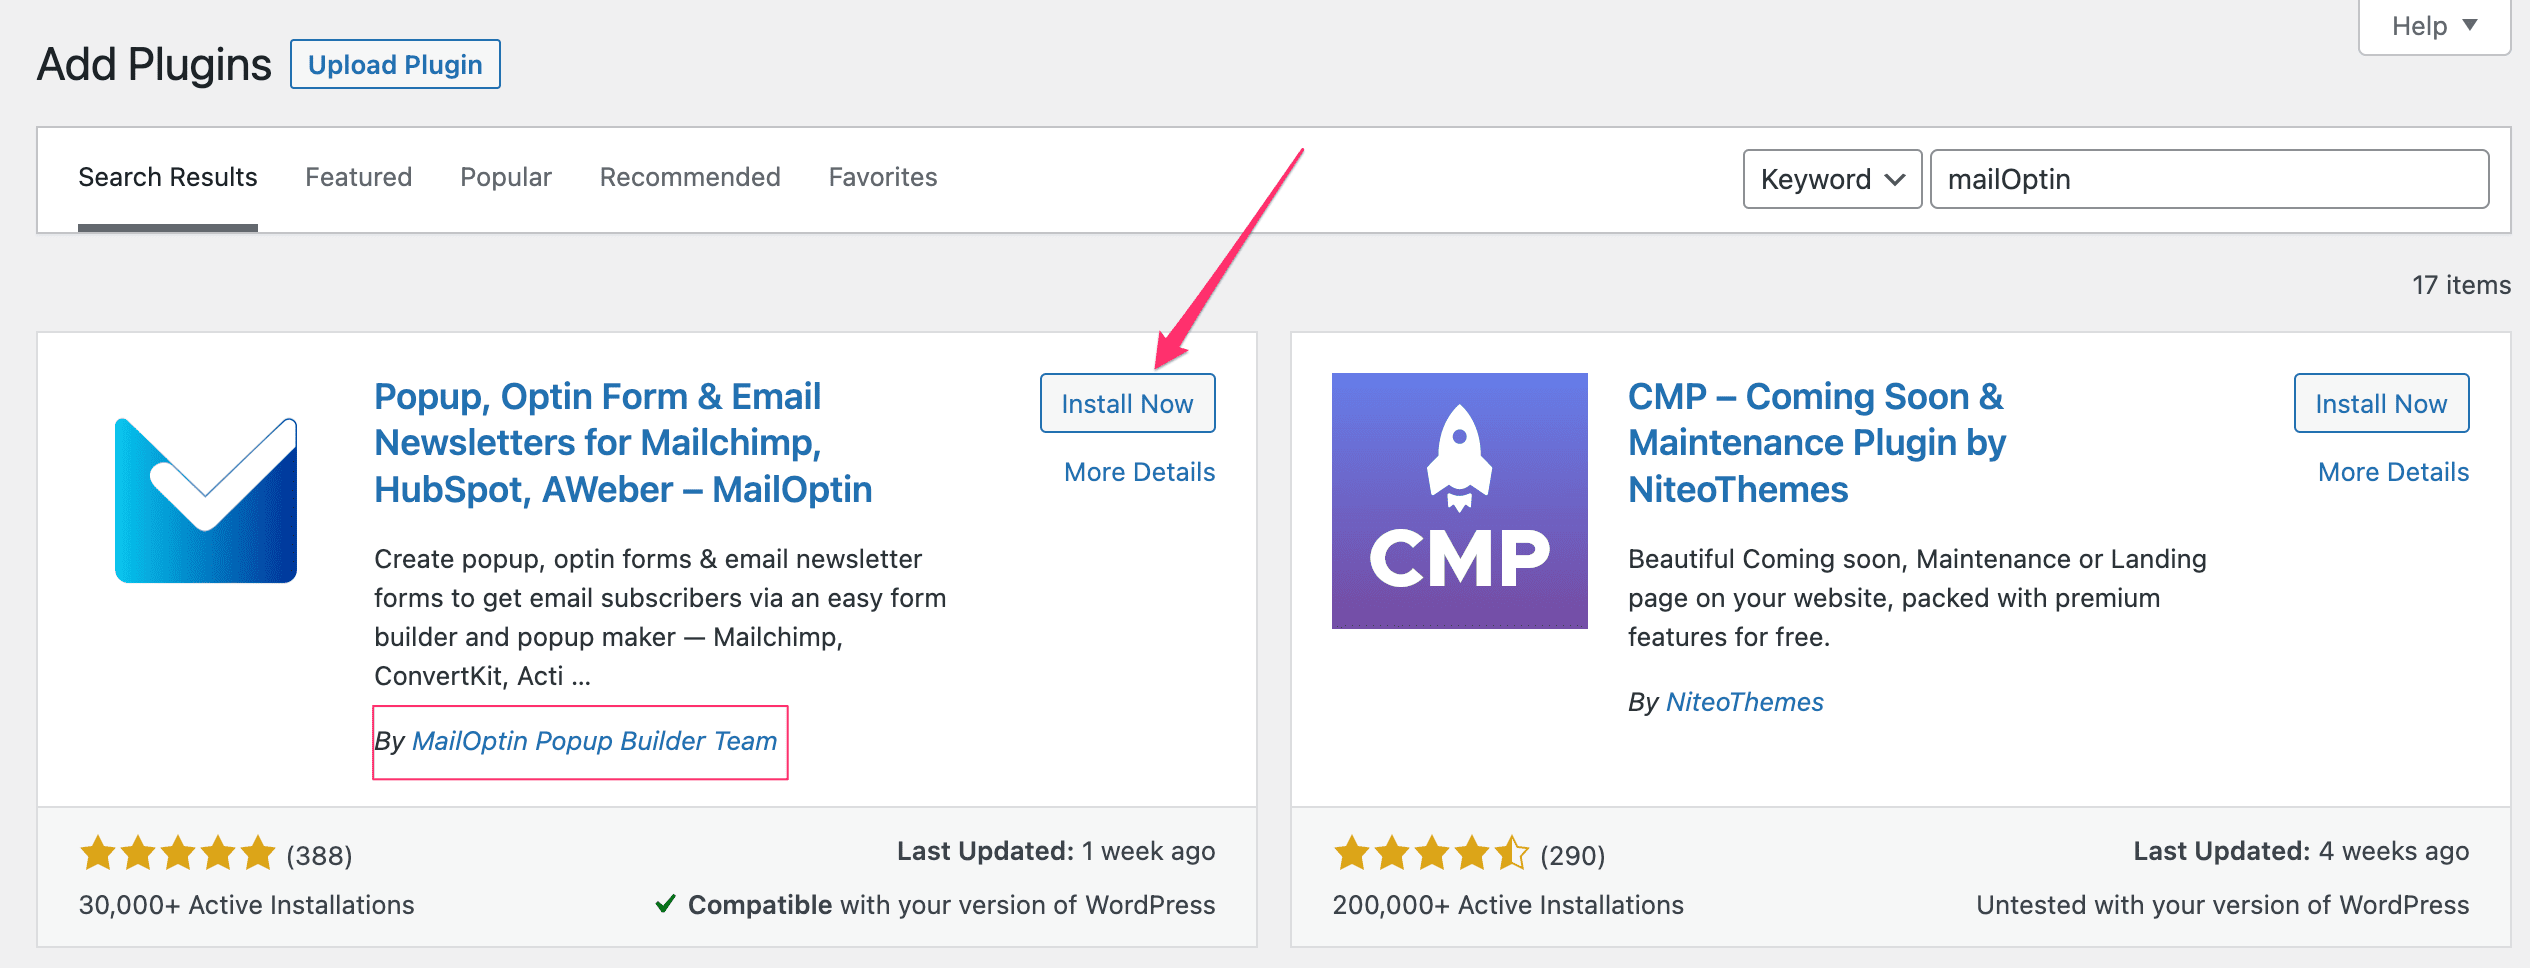
You can search for MailOptin and install and activate the option developed by the MailOptin Popup Builder Team. Please follow the example below for your guidance.
Congratulations! You have successfully installed the MailOptin plugin using the WordPress Plugin repository. Alternatively, you can purchase a premium plan, download it from your MailOptin dashboard, and upload it to your WordPress website. Both methods ensure a seamless installation process.

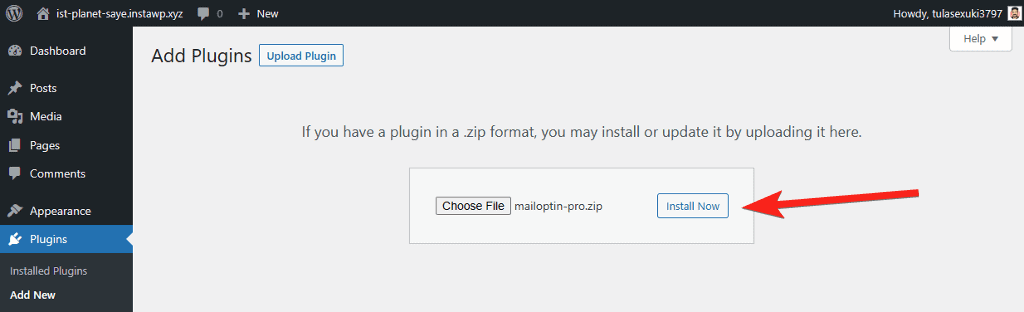
To install it on WordPress, please follow the same process we discussed earlier; you can just go to the plugins repository and click the Upload button.
Find the downloaded zip file on your computer and upload it. Once uploaded and installed, click on Activate.
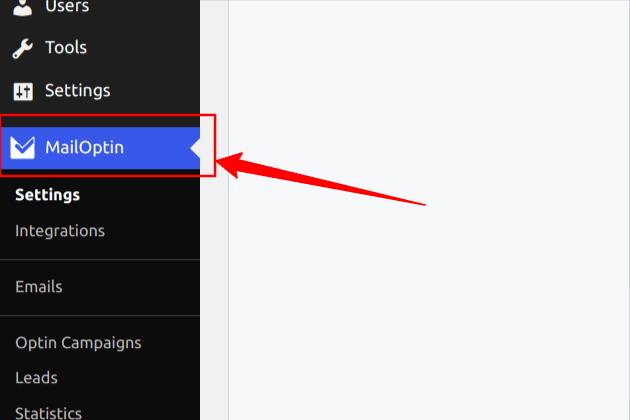
Once installed and activated, the plugin icon will now be available in the sidebar menu of your WordPress dashboard, as shown in the image below:
Next, click on the MailOptin icon. You’ll be prompted to enter your License key. If you don’t have a License key yet, visit the MailOptin website to purchase the appropriate package for your business. Once you’ve purchased, you’ll find the License key in your dashboard. Copy and paste the key into the designated box, as indicated below.
Finally, click the ‘Unlock Premium Features‘ button to activate the enhanced functionality.
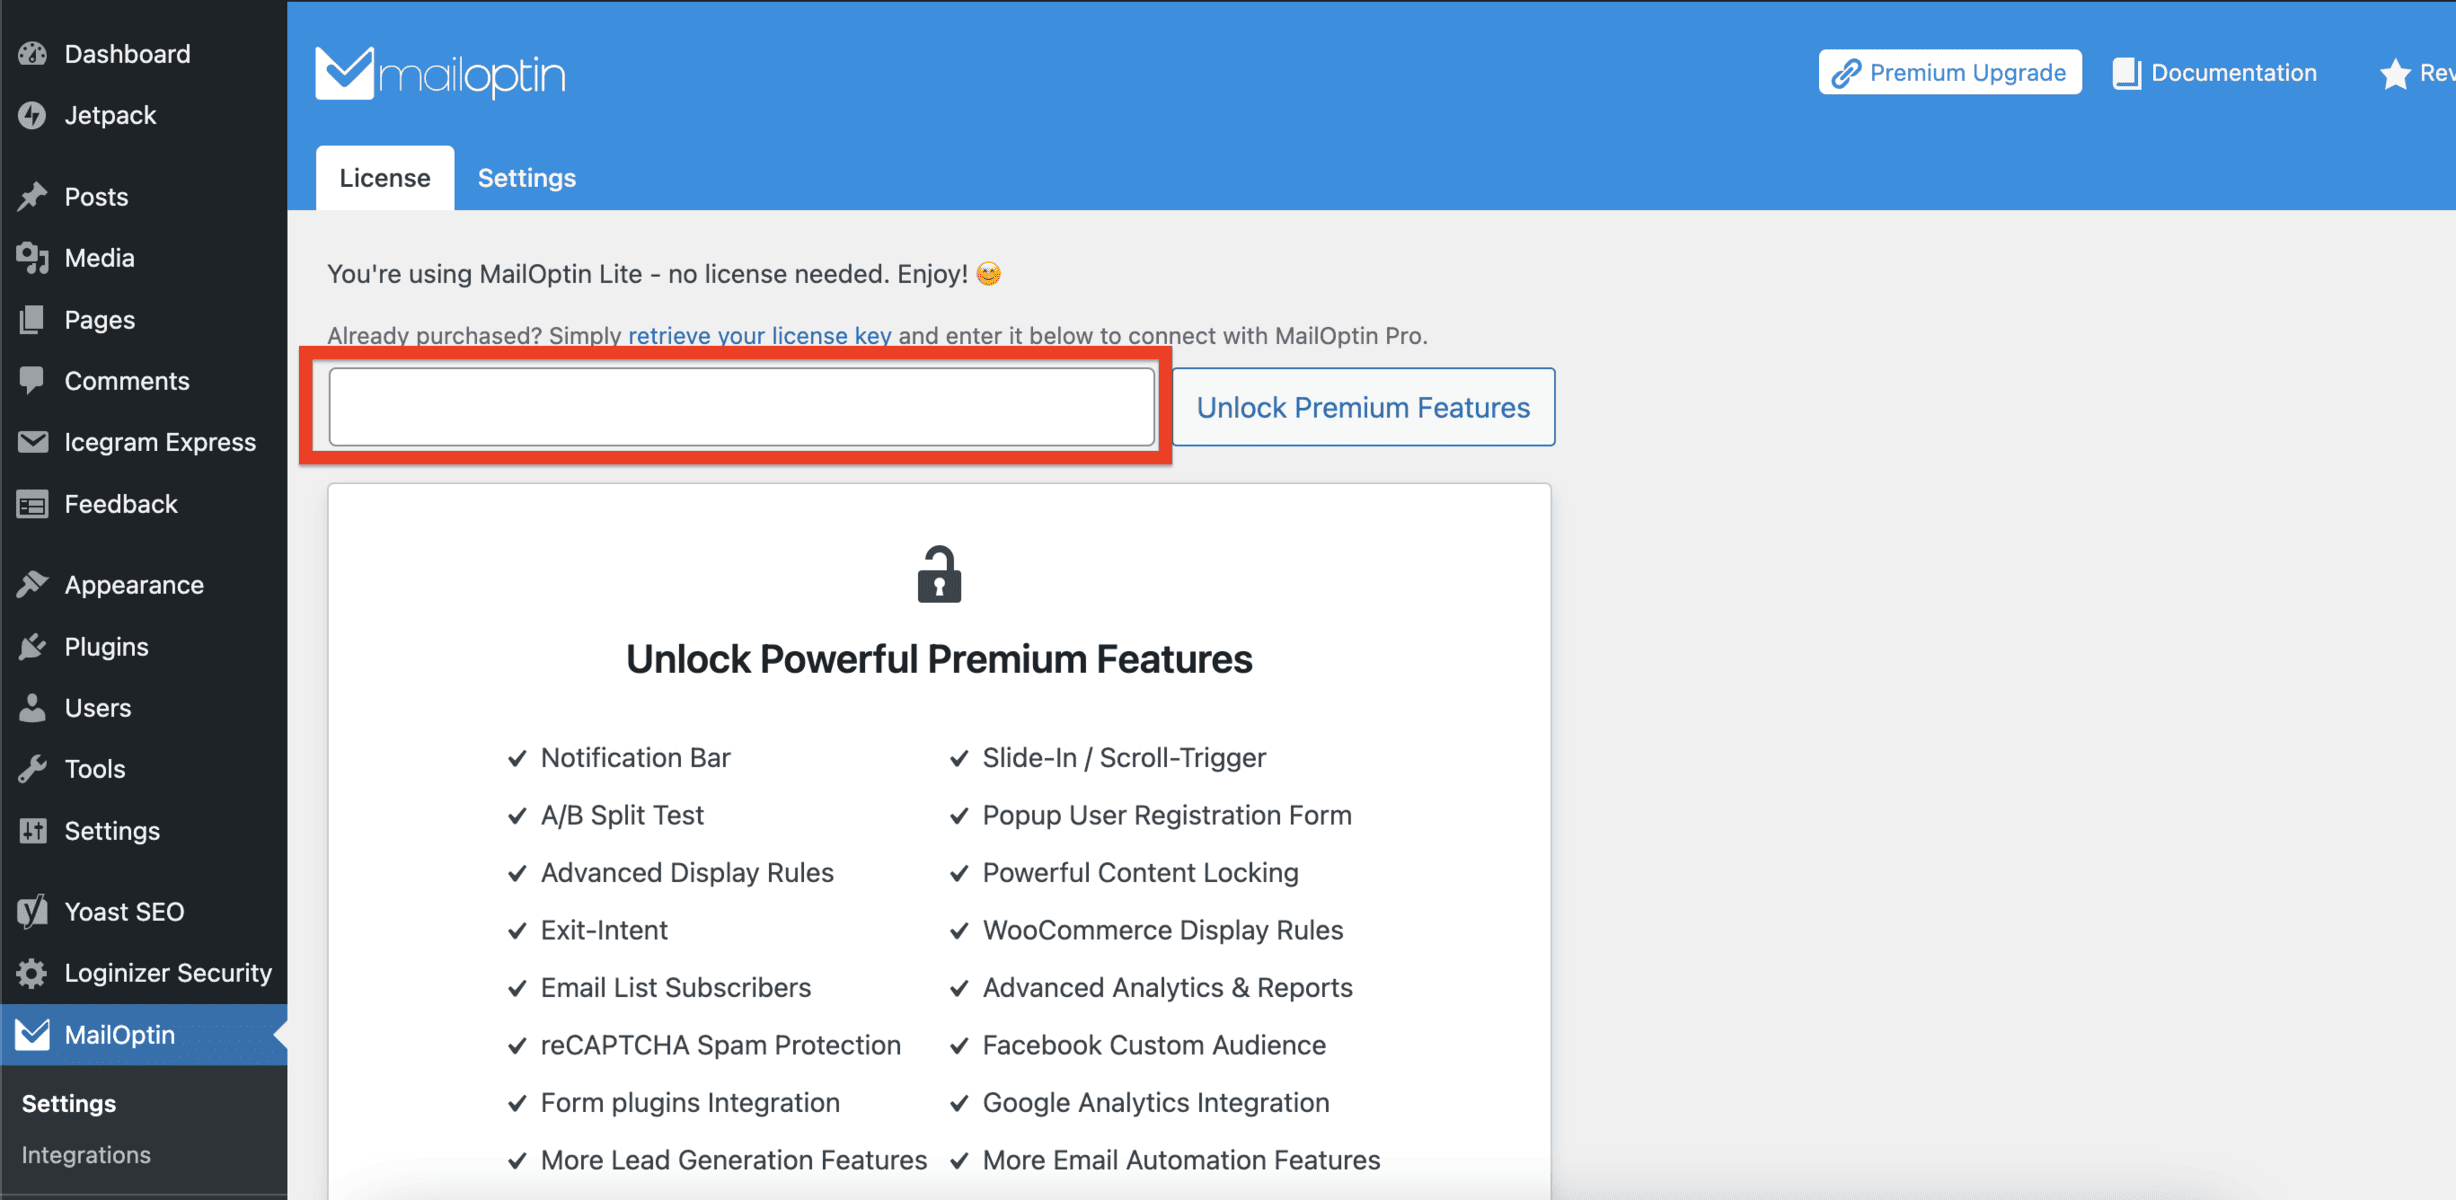
The upgrade process may require a few minutes to complete. However, you’ll be all set to go once the upgrade is successful. You’ll then be greeted by the following page, granting you access to all the features MailOptin offers.
Now that the MailOptin setup is ready, we can connect with an email service provider and build the signup form.
Connect To Email Service Provider
With MailOptin, you can easily connect to your preferred email marketing platform, such as MailChimp, Drip, AWeber, ConvertKit, MailerLite, Constant Contact, GetResponse, Sendy, Campaign Monitor, ActiveCampaign, Brevo (Sendinblue), and others.
This feature lets you store all your leads and email subscribers in your chosen email marketing platform. Furthermore, you can use MailOptin to send notifications for newly published posts, email digests, and broadcast/newsletters directly to your list subscribers from your WordPress account.
To connect MailOptin with a third-party email service provider, navigate to MailOptin > Integrations and choose your preferred email marketing provider. Then, you can just enter the API Key in the designated box and click Save Changes.
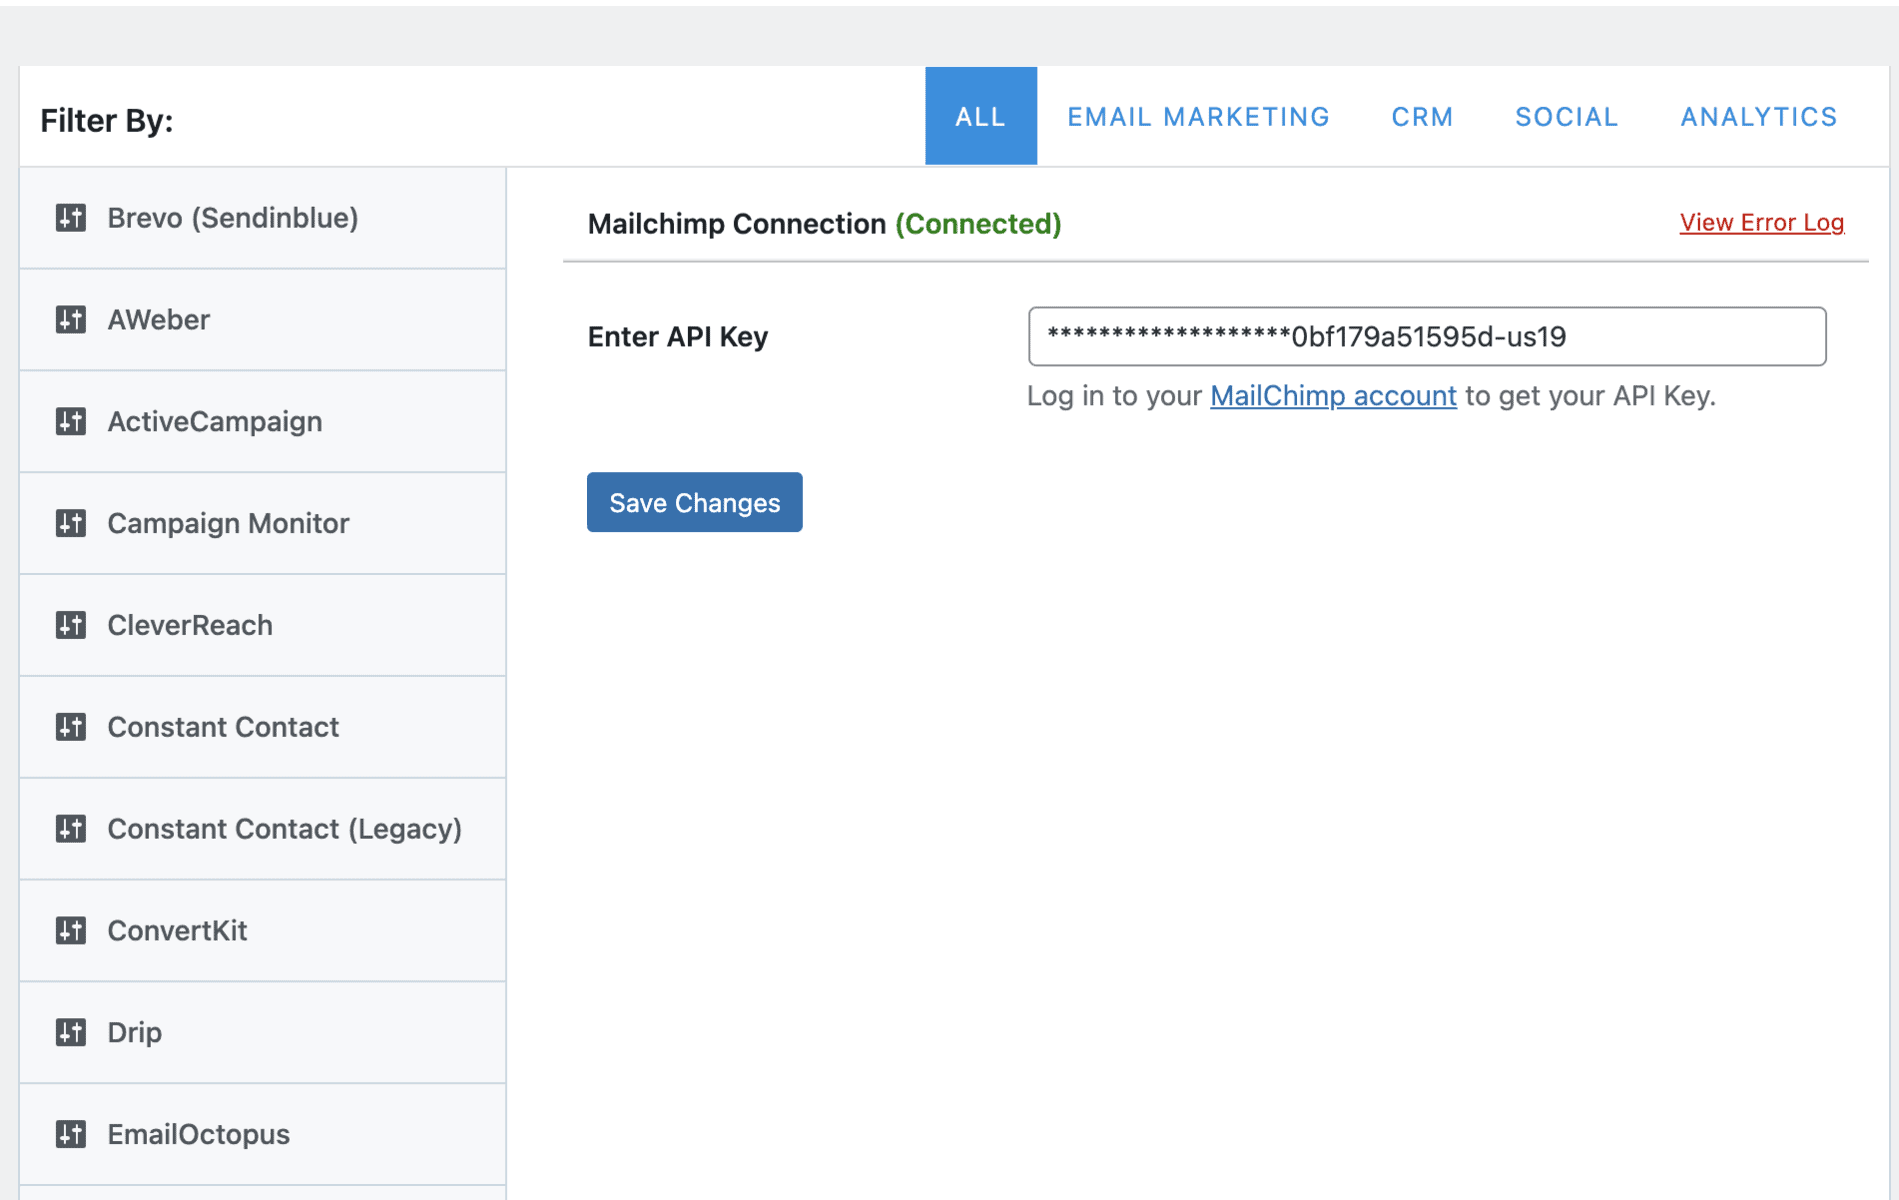
If you need the API key, click the link below the box to be redirected to the ESP website and generate a new API key.
Once you’ve set up the MailOptin plugin, let’s look at how to create optin forms using it.
Creating a New Campaign
To make a form with MailOptin, you can start by creating a campaign. This will be the main place you manage your newsletter signup form workflow.
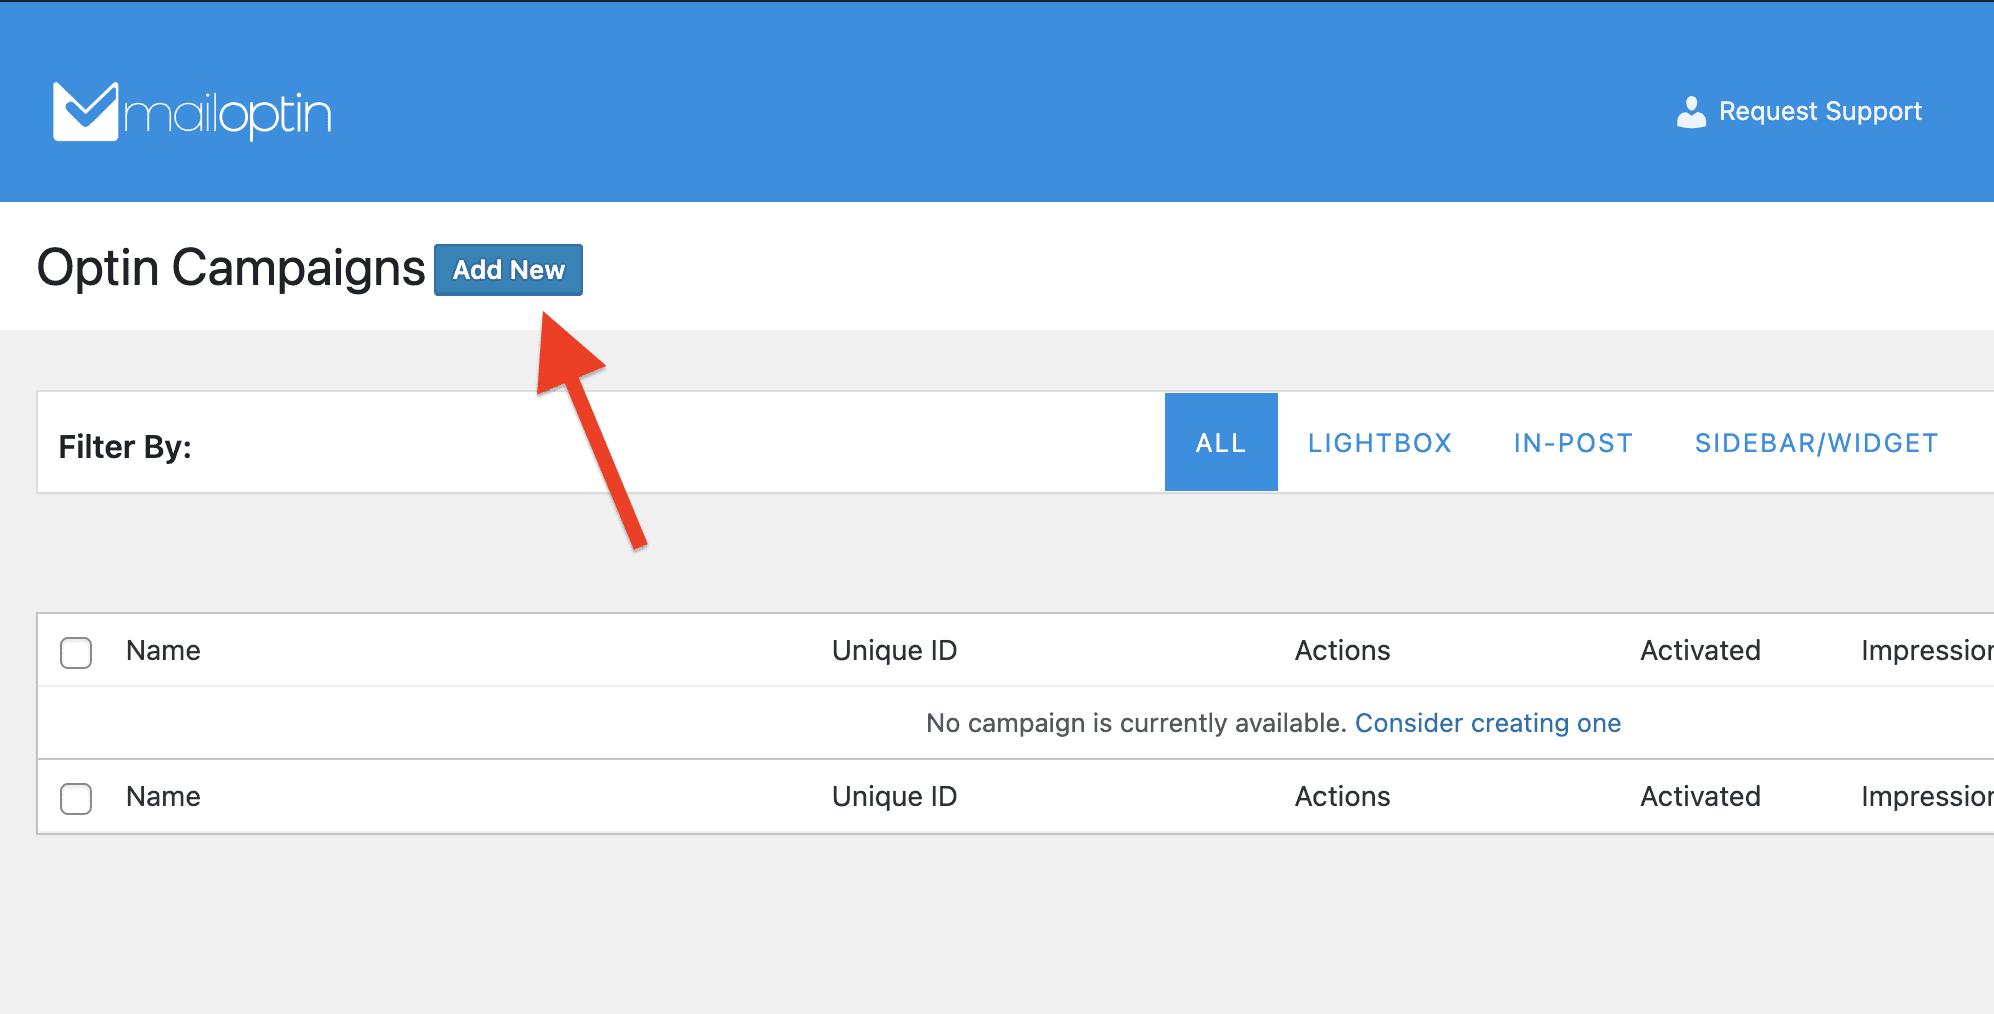
From the MailOptin plugin menu options, click on “Optin Campaigns” as shown below:

When the Optin Campaign page shows up, click “Add New” to create a new campaign.
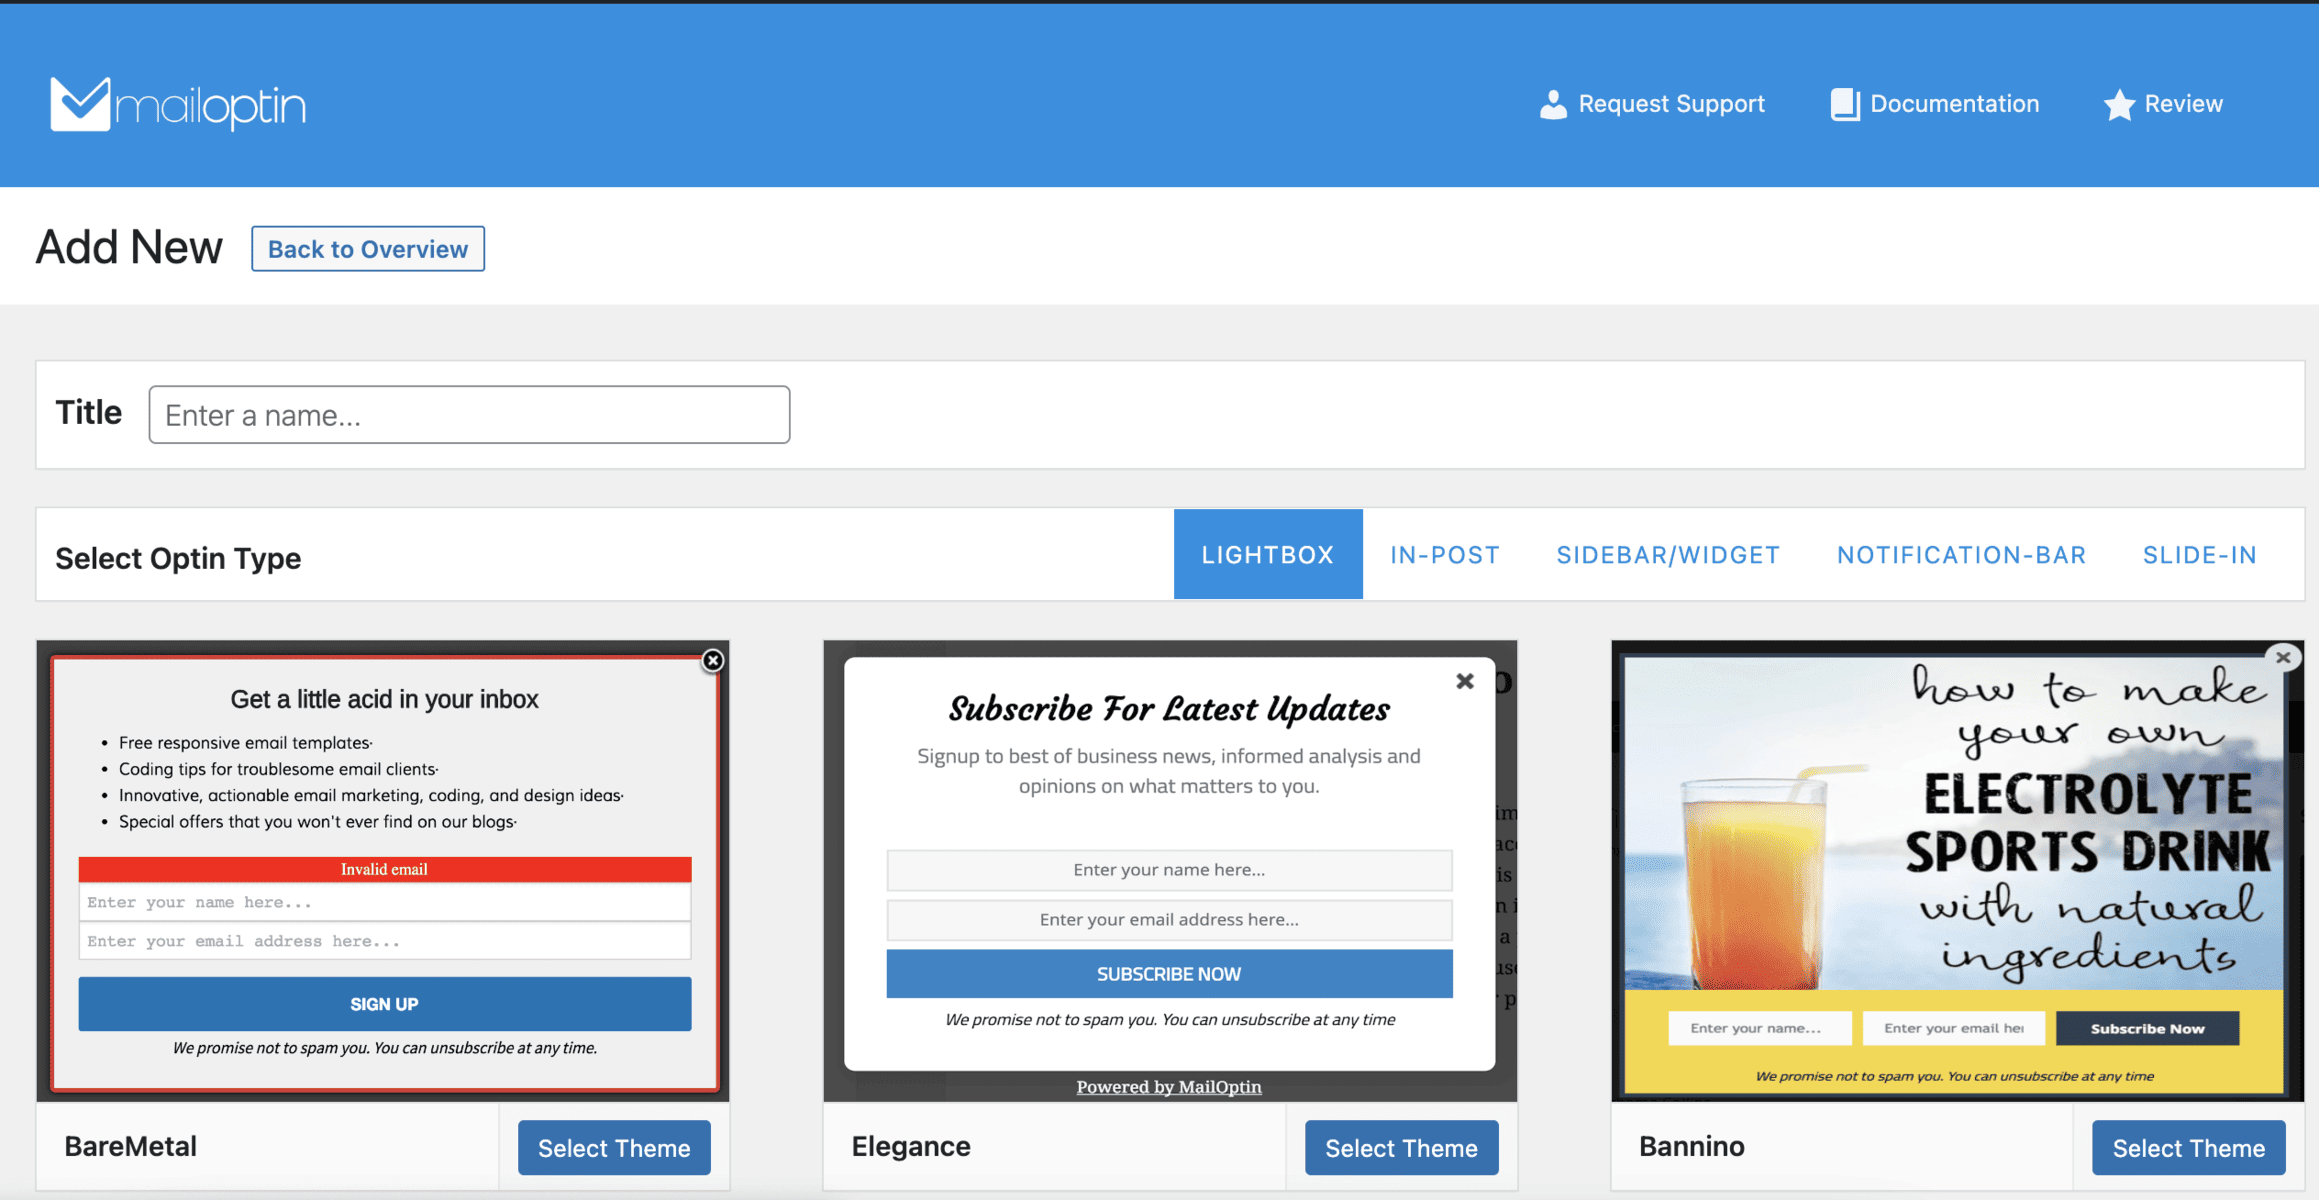
What follows is a page that allows you to enter the title and select a theme for your form:
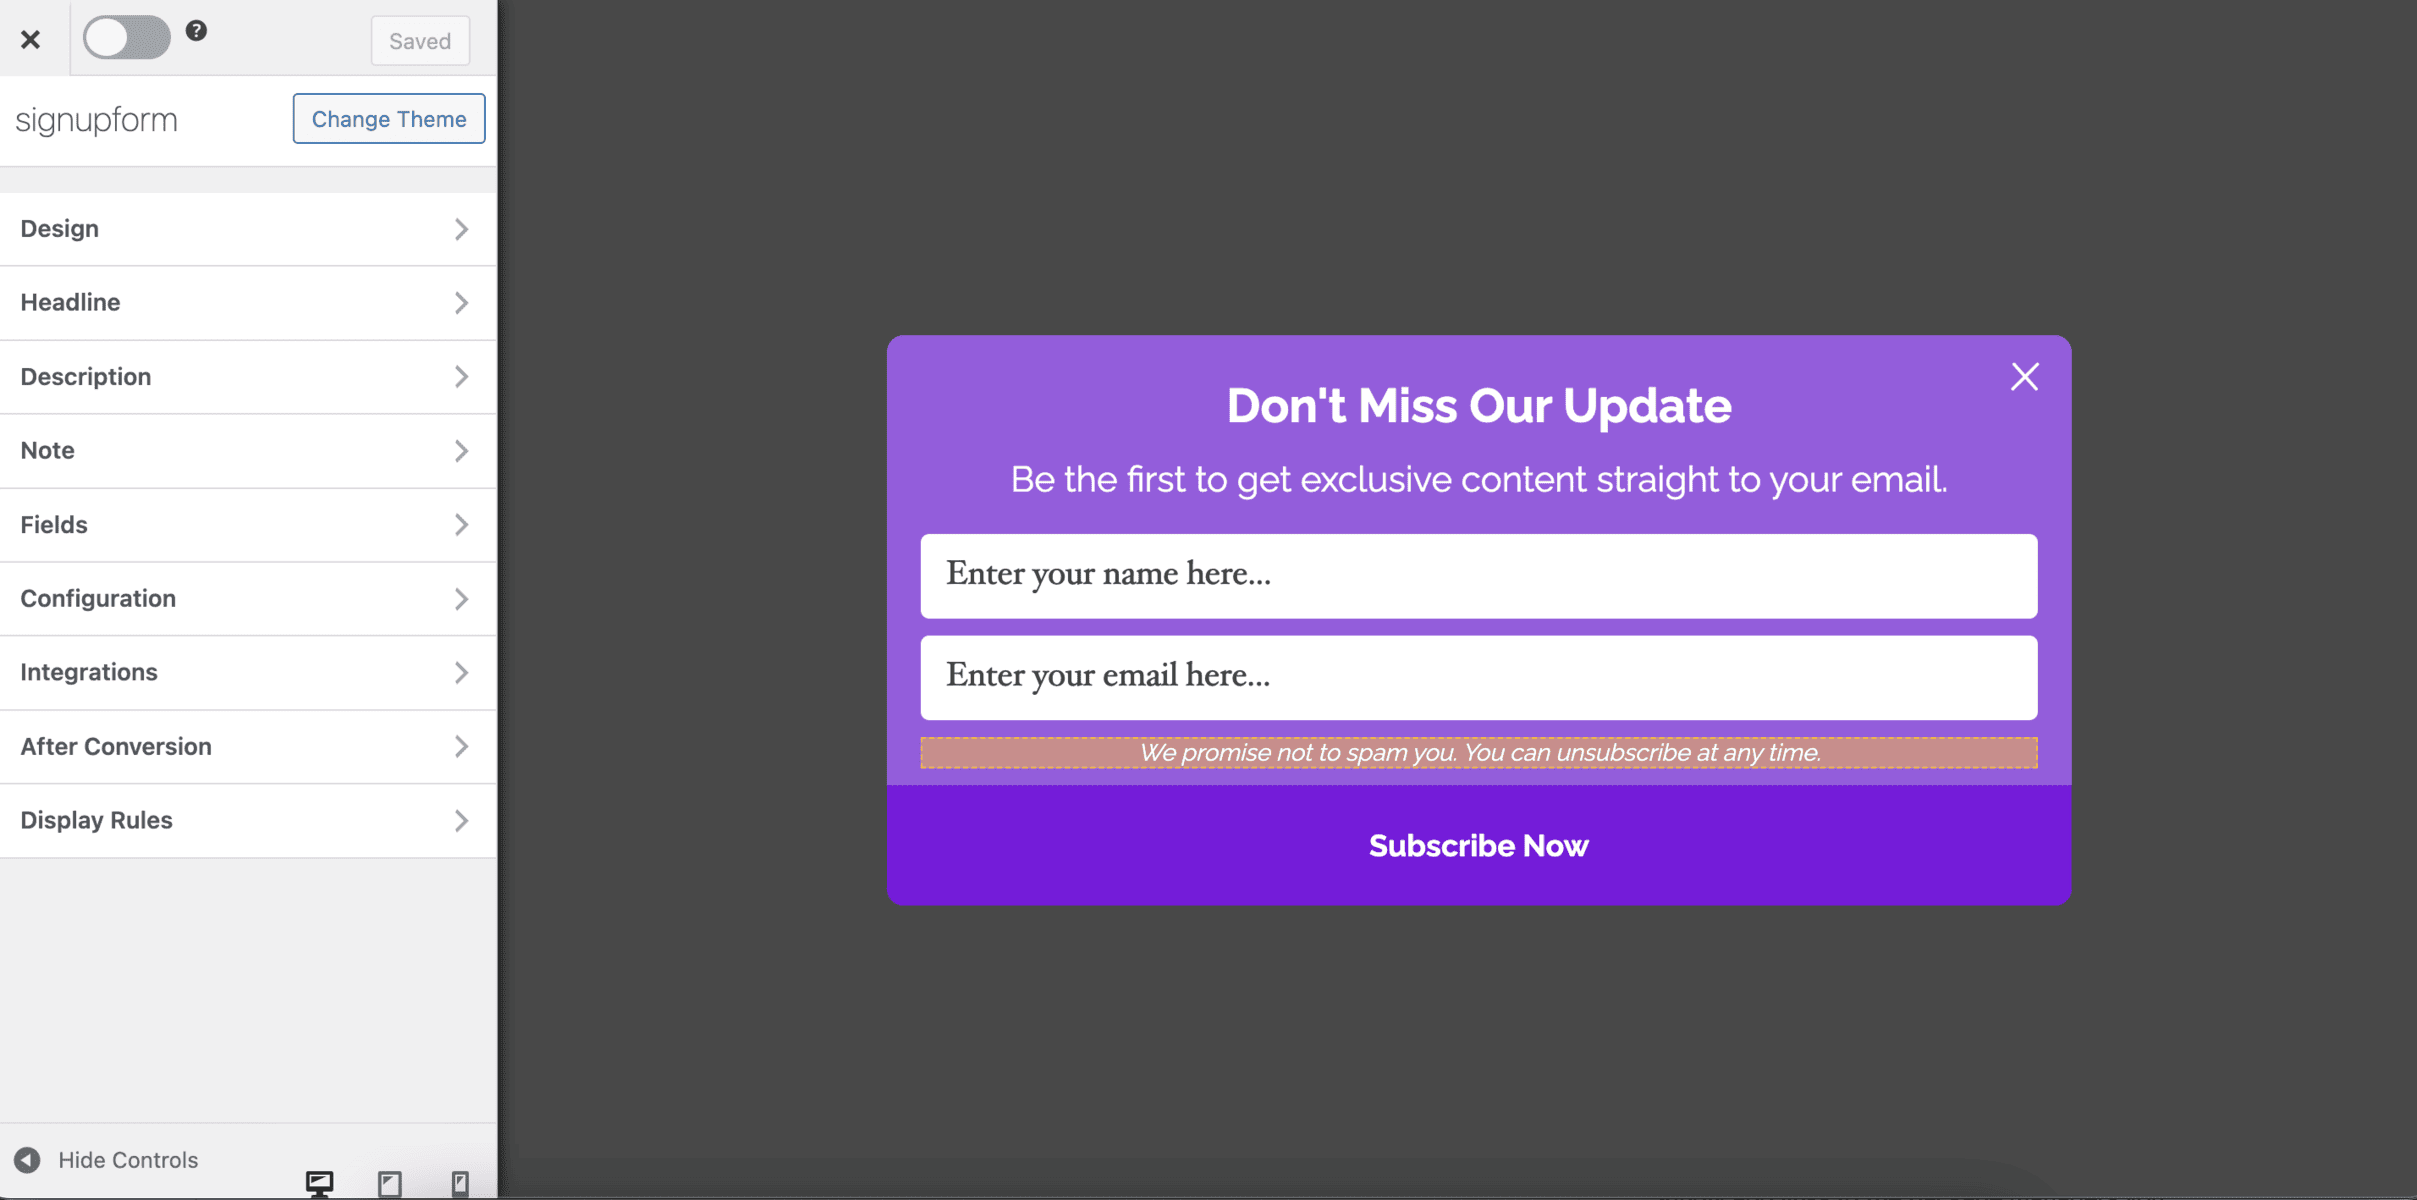
When you choose a theme, you’ll be taken to a screen that will enable you to design the form as you desire:
That brings us to the next section — designing the signup form
Customizing the Newsletter Signup Form
To start, we need to decide what information we want to obtain from our newsletter recipients.
It’s best to keep the form uncomplicated and mainly ask for their email address. But it’s also worth considering adding a field for their first name to enable personalized greetings in the newsletters.
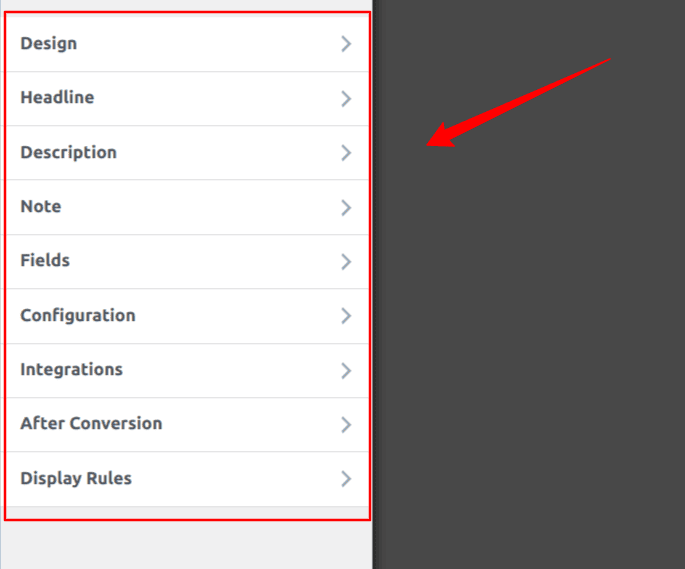
We’ll go through each option in the sidebar step by step.
Design
The design section allows you to change the background and the general look and feel of the form, and you can also animations and custom CSS as shown in the image below:
Headline
The headline section allows you to change and customize the headline as you see fit.
Description and Note
Like the headline section, the description and note sections allow you to customize them—change the text, color, font family, and font size of the Note and description. You can even hide them if you don’t want them to appear.
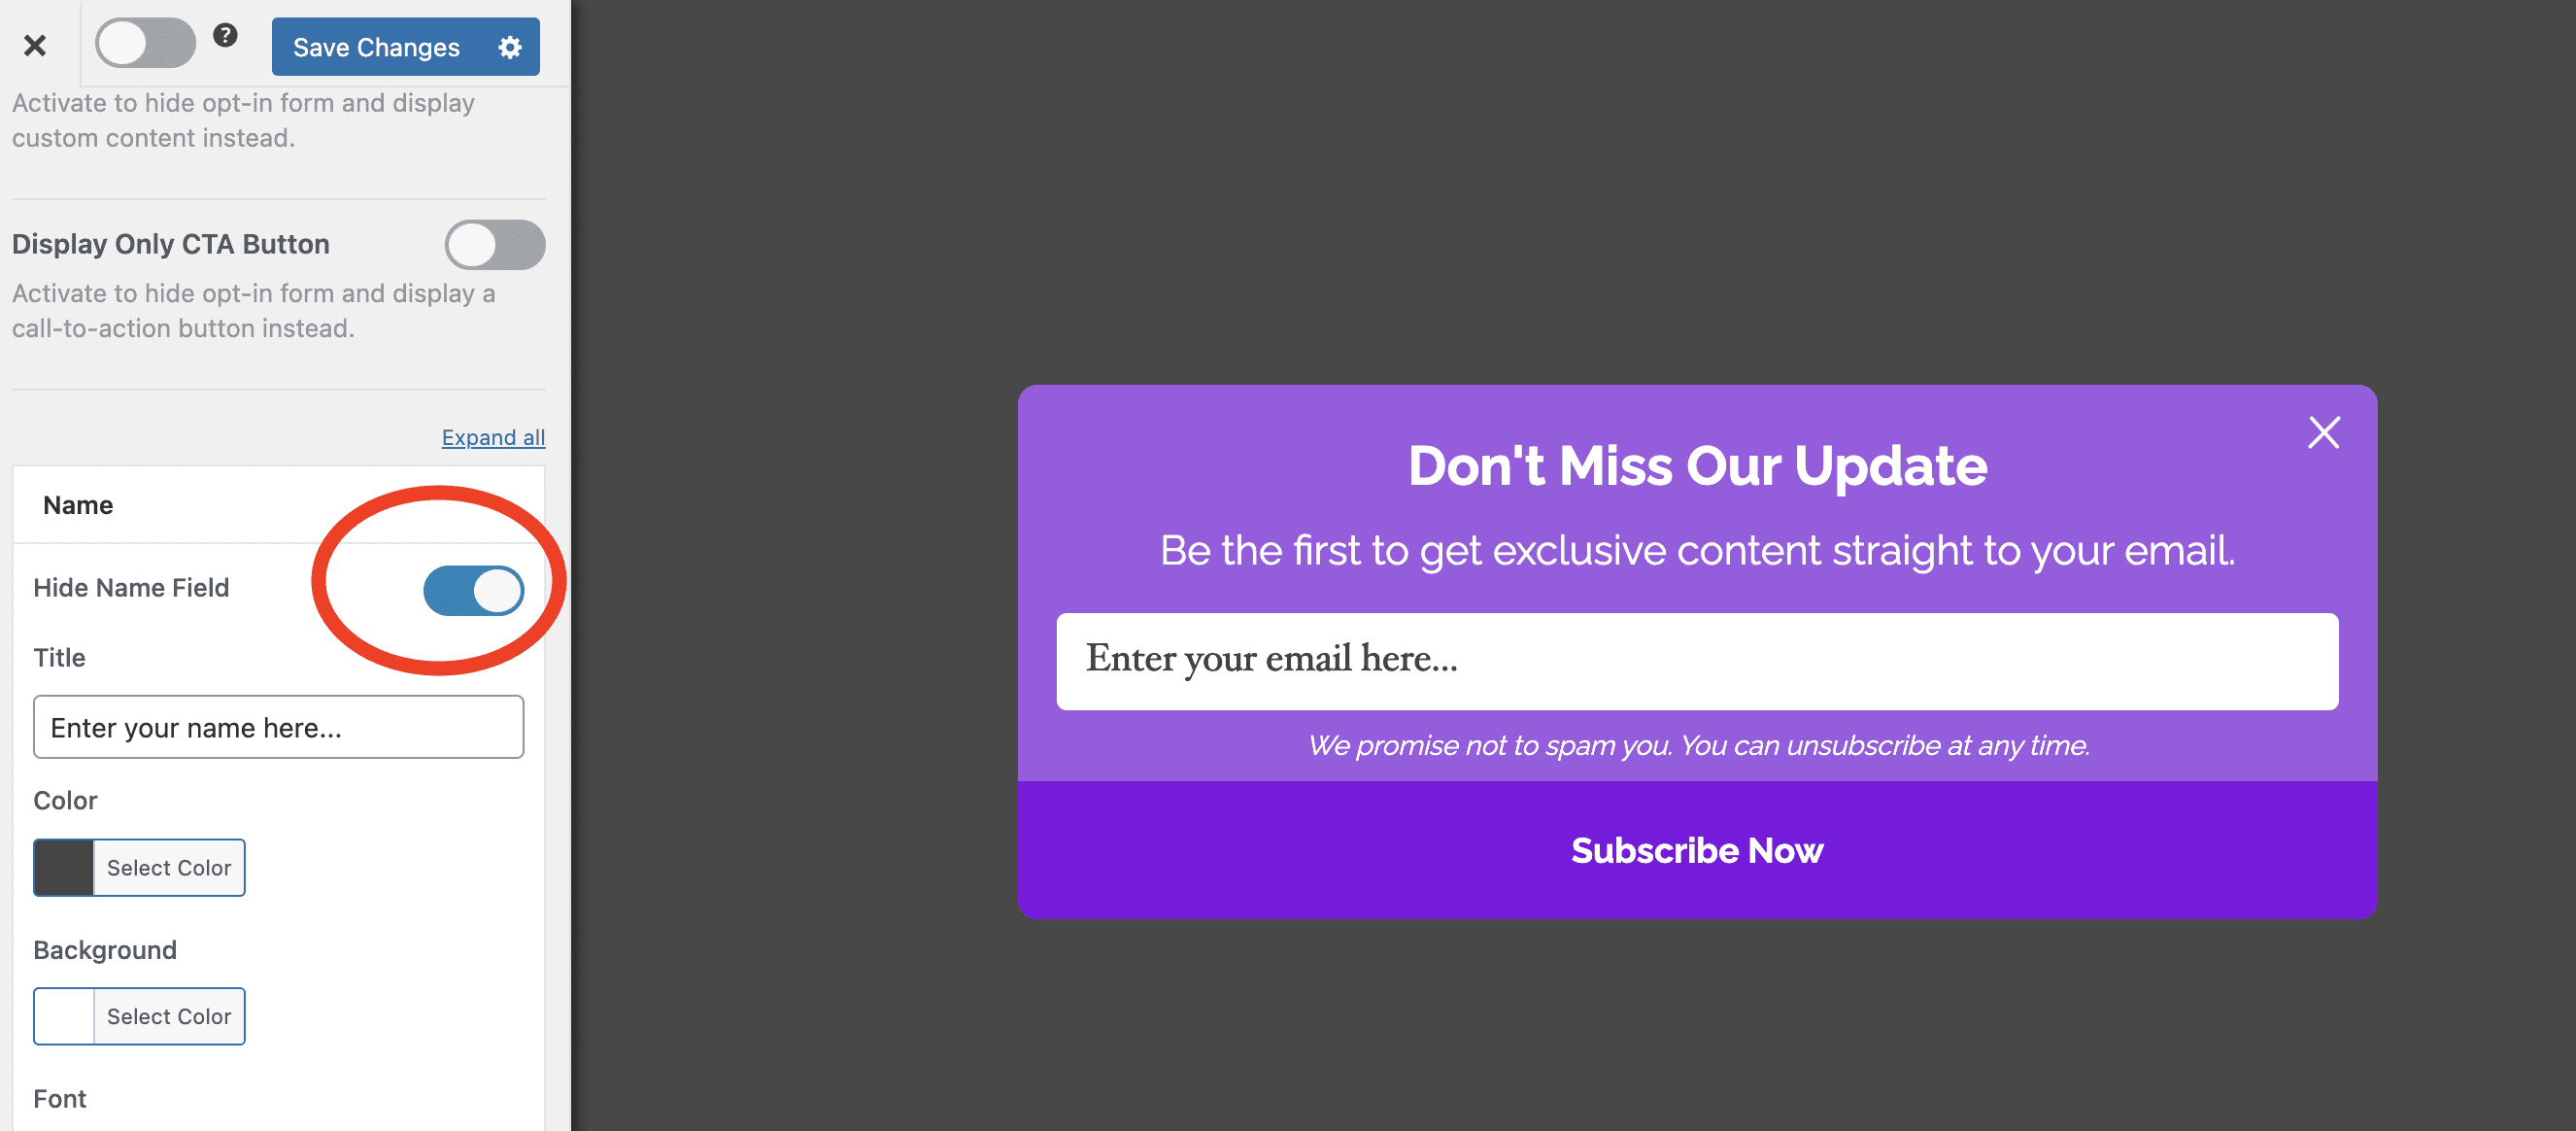
Fields
By default, the form template includes both the name and email address. You can remove or add more fields by clicking on the form or the “Fields” option in the left sidebar.

When you click on the Fields option, you can change everything about the form. From disabling any form fields, changing the background color of your call-to-action, or even using your own Custom HTML.
For example, to disable the name field, you can toggle the name field off, as shown below:
Configuration
In the configuration section, you can define various standard configurations. For instance, you can set a specific sound that will play when the form is displayed if you’d like.
You can specify when the form reappears after the user leaves the page or subscribes to the newsletter. Finally, you can set what happens when users click the overlay. These settings offer flexibility and control over the form’s behavior.
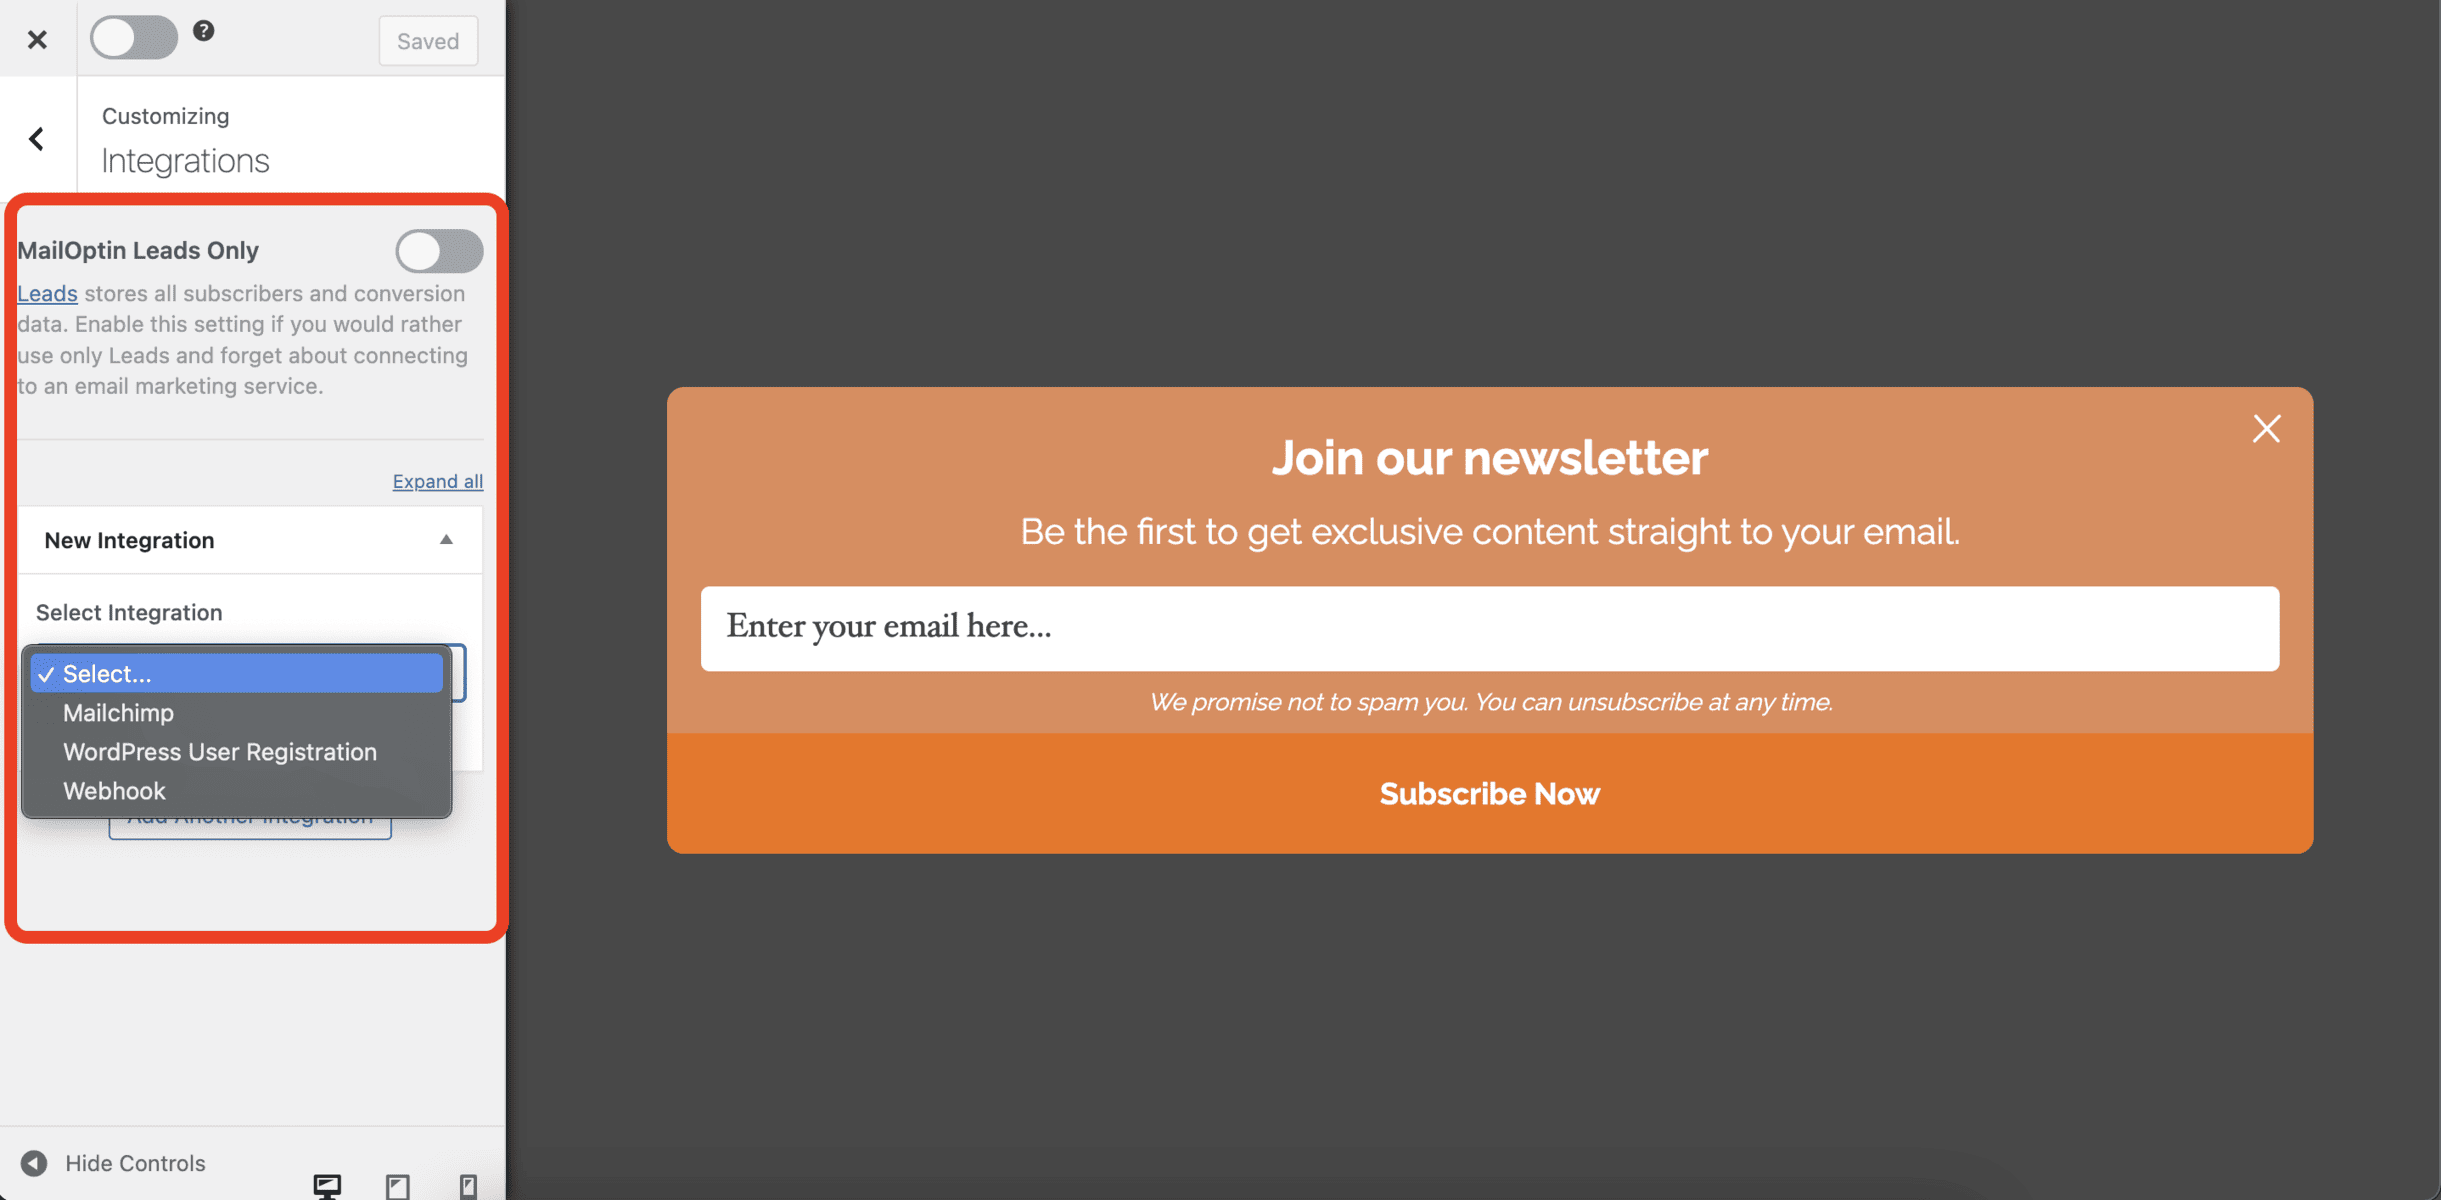
Integration
Email marketing is predominantly carried out through email marketing services (EMS) such as MailChimp, Constant Contact, Aweber, and others. So if you’re looking to integrate an EMS into your newsletter—which is ideal, this is the appropriate section to do so.
You need to click on the Integration tab and select your desired EMS —this is where you’ll likely be sending your newsletters. You also have the option to utilize the MailOptin email marketing service by simply toggling the MailOptin Leads Only switch.
This lets you choose the email marketing solution that best aligns with your preferences and requirements.
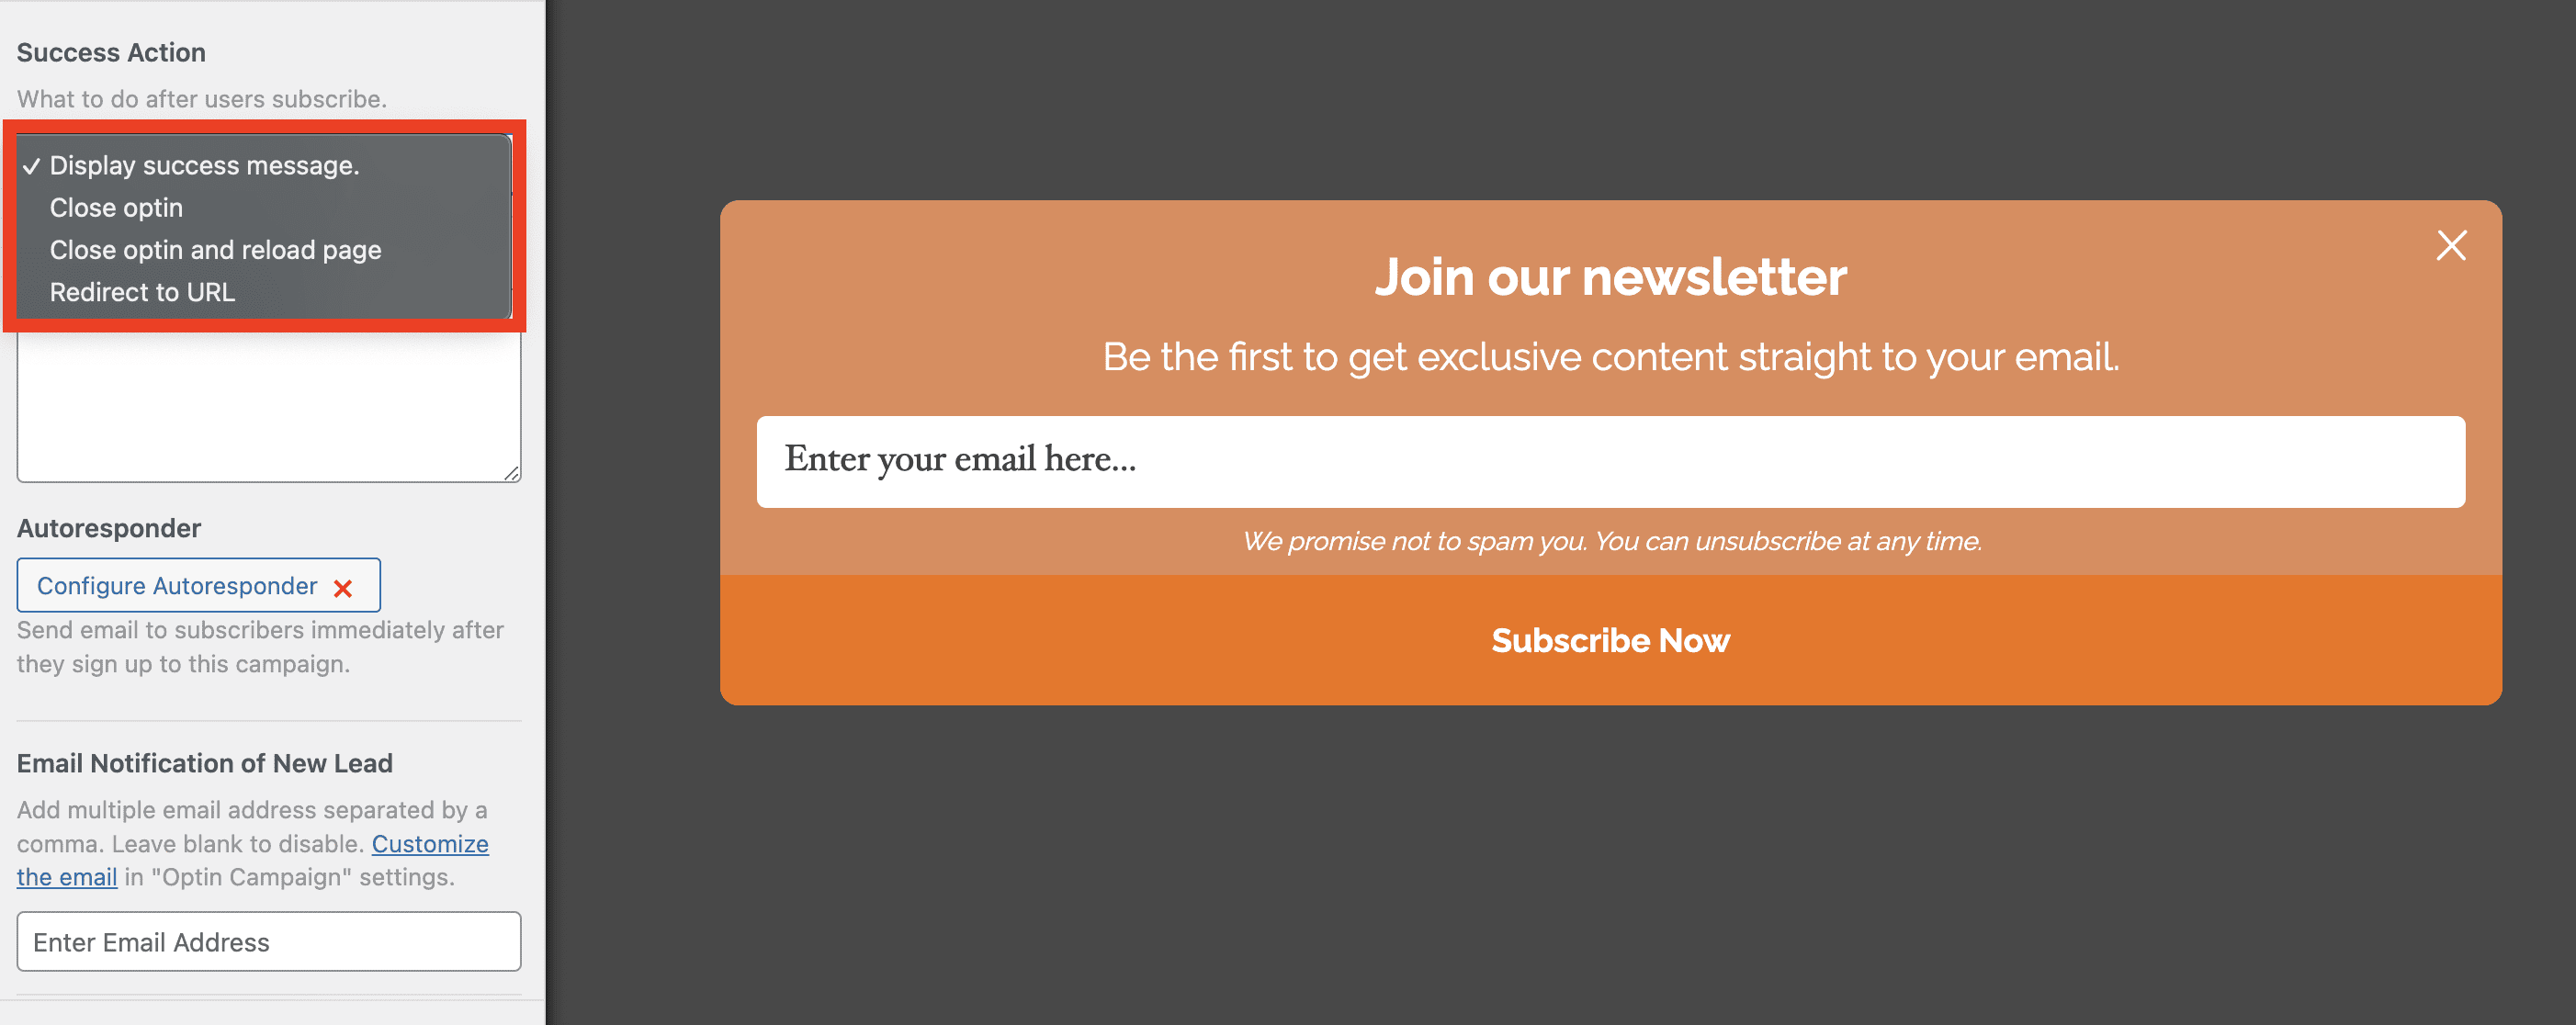
After Conversion
In this section, you can adjust the settings for what occurs after a user successfully subscribes to your newsletter.
You can activate and personalize various behaviors, including selecting the type of message displayed, closing the Optin form, reloading the page, or redirecting the user to a specific URL.
Customizing this section is crucial to avoid receiving the default behavior. Additionally, you can automate email responses for new subscribers and set up alerts to receive notifications every time a user signs up.
Display Rules
The display rules section has even more settings that allow you to control the form’s behavior. It’s focused on users’ actions, like what happens when the user is about to leave the page—exit intent, what happens if the user has Adblocker on or scrolls down to the bottom of the page, and so on.
If you click on the Display Rules tab, you’ll see something that looks like so:

Interestingly the titles are very descriptive. They do exactly what they say. Now that we have the newsletter campaign all set. Let’s take a look at how to activate the form
Activating the form
The final step is activating the form. When you activate it, everyone can see the awesome form you’ve built.
So, how do you activate it? Activating the form is easy. Navigate to the Optin Campaign screen and toggle the “Activated” option as shown below:
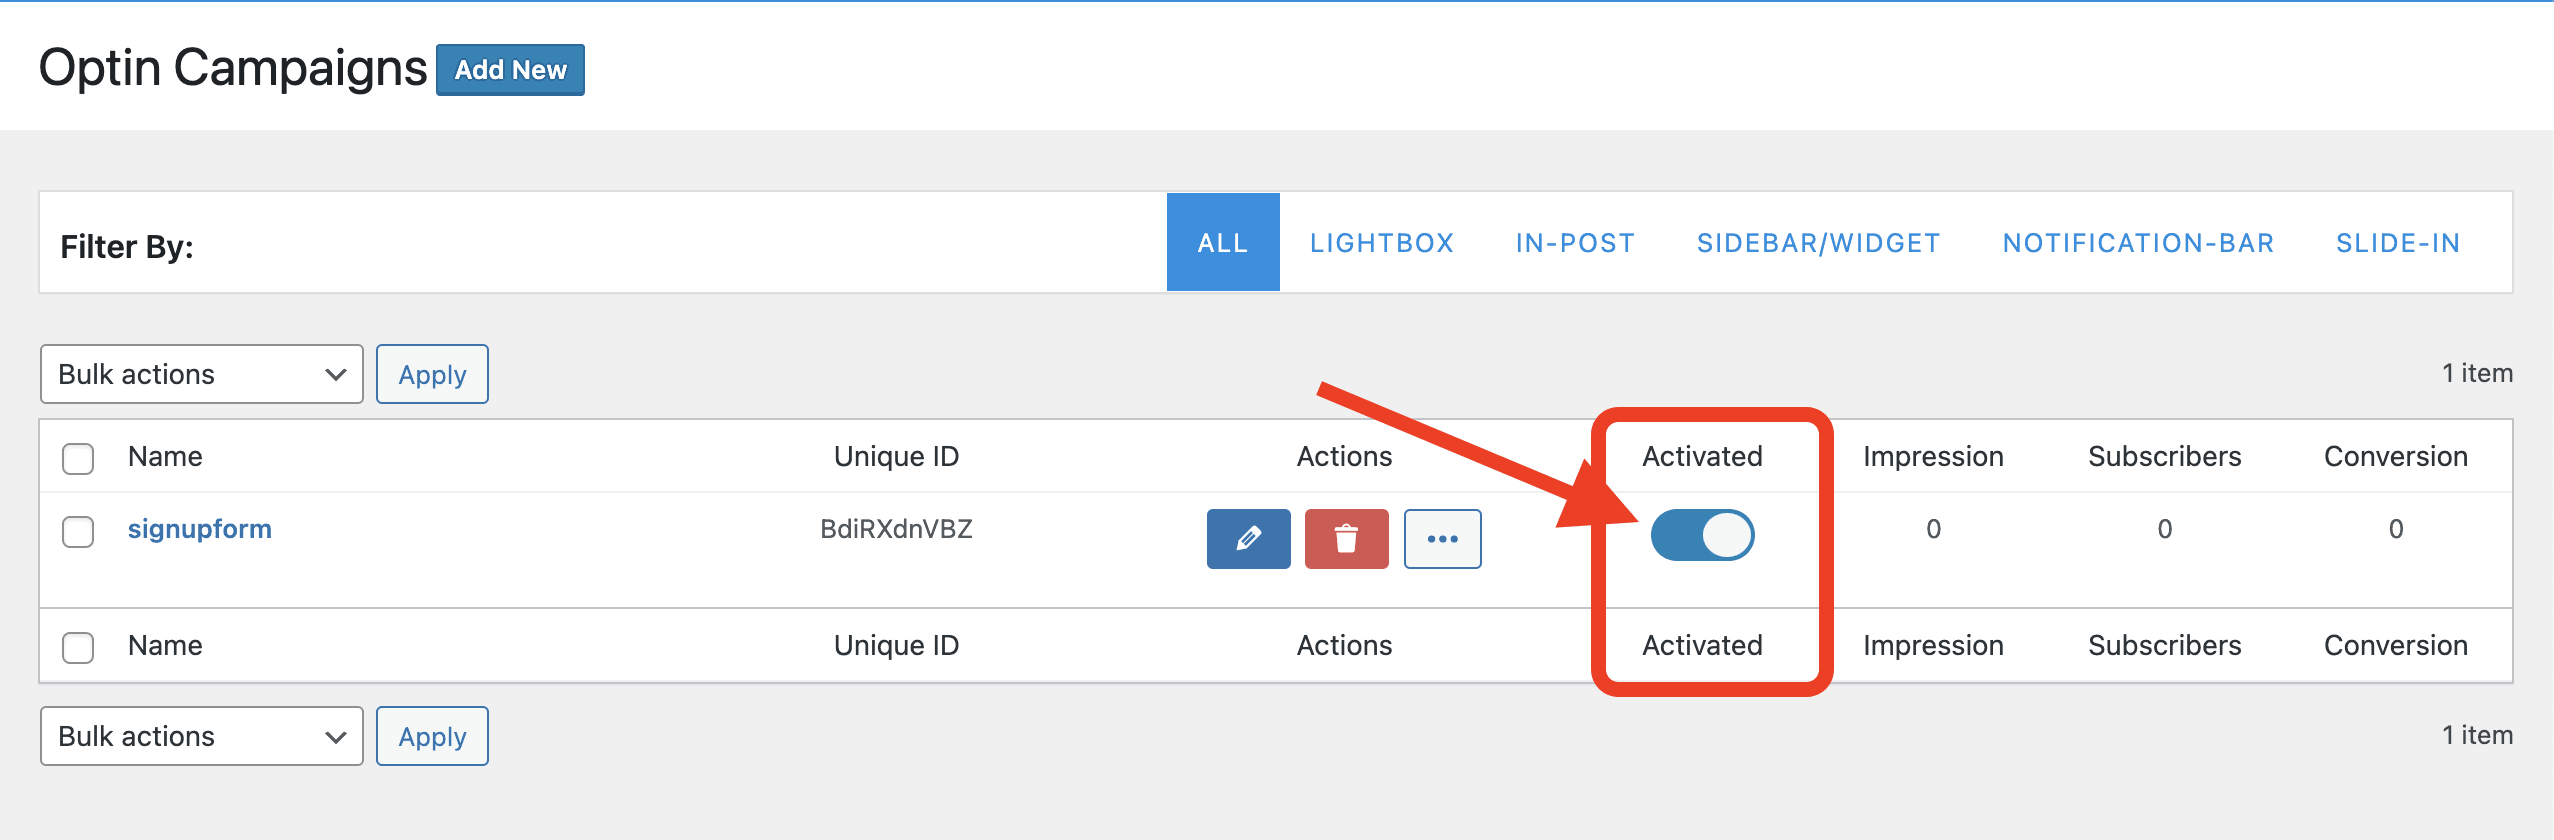
It’s activated when the toggle color is blue and not activated when it’s grey.
With this done, you now have a newsletter signup form on your WordPress site, and depending on how you configured your form, visitors will be added to your mailing list when they submit it.
Conclusion
Building and maintaining a solid connection with your customers or potential customers is crucial for the success of your business.
MailOptin is an invaluable tool for streamlining the process of collecting your customer’s contact information, such as their email addresses and names, for your newsletter.
With MailOptin, you gain a superpower that would typically require significant time and effort to develop from scratch.
If you want a seamless way to integrate an email newsletter signup form on your WordPress website, we highly recommend MailOptin.