How to Send Restrict Content Pro Coupons to Subscribers of Your Email List
MailOptin simplifies the process of sending coupon codes to subscribers who sign up for your email list, making it a valuable solution for those whose email marketing software cannot send welcome emails. MailOptin supports various email marketing services, including MailChimp, Salesforce, Microsoft Dynamics 365, Drip, AWeber, Kit (ConvertKit), MailerLite, Constant Contact, GetResponse, Sendy, Campaign Monitor, ActiveCampaign, Brevo (Sendinblue), Gist, Klaviyo, Sendlane, Mailster, Vertical Response, Mailjet, HubSpot, Ontraport, Moosend, MailPoet, Zoho CRM, Zoho Campaigns, Keap Max Classic (Infusionsoft), HighLevel, Omnisend, Flodesk, Beehiiv, Benchmark Email, SendFox, iContact, Mailgun, E-goi, SendGrid Email Marketing, Elastic Email, GoDaddy Email Marketing, weMail, FluentCRM, CleverReach, NewsMAN, Facebook custom audience.
Do you know you can also use MailOptin to send email campaigns right from your blog without leaving your website?
Restrict Content Pro is a WordPress membership plugin that allows you to monetize content access. As a content restriction plugin, Restrict Content Pro gives you complete control over who can and cannot view content on your WordPress site.
With MailOptin, you can send email campaigns directly from your blog without leaving your website. Coupons are a great way to reward existing customers and attract new ones, and with Restrict Content Pro, you can create custom coupon codes to share online, in newsletters, or personal emails to clients.
Let me walk you through sending a Restrict Content Pro coupon to email subscribers using MailOptin.
Firstly, ensure you have MailOptin installed and activated on your WordPress site.
How to Create Restrict Content Pro Coupons
If you already have your coupons, you can ignore this step. However, if you don’t know how to create coupons with Restrict Content Pro, follow the steps below.
You have two options for discounts:
- a flat percentage,
- a fixed amount for the membership total
Discount codes can be configured in Restrict > Discount Codes.
Discounts allow you to give special offers to new registrations, providing extra incentives for users to sign up for your website’s premium content section.
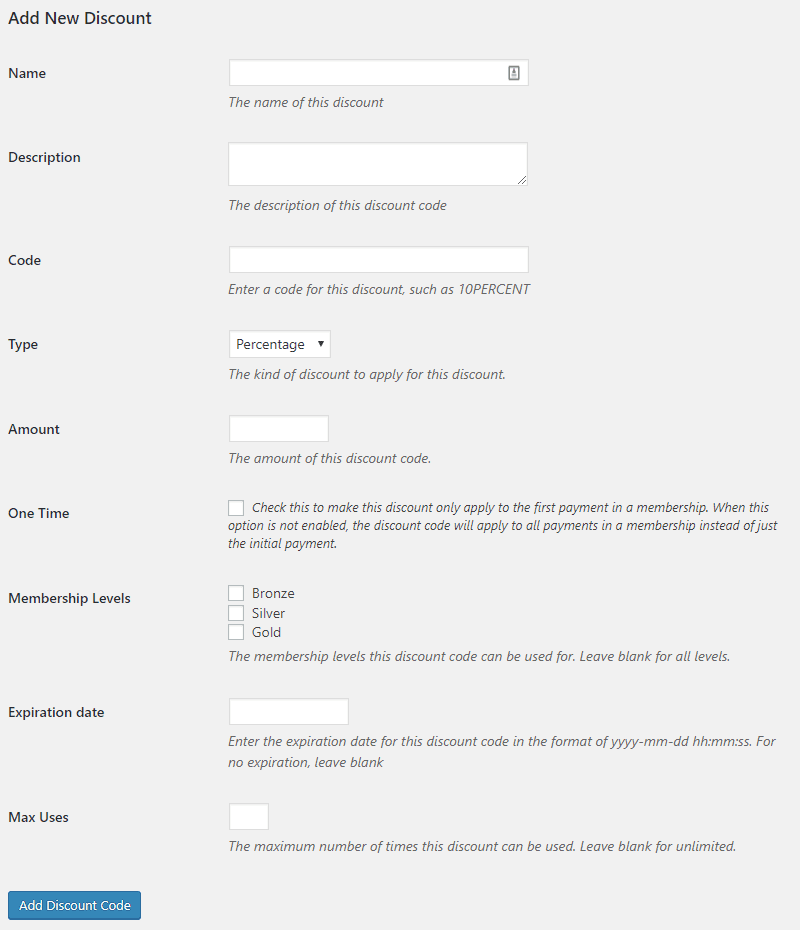
The following options are available when creating a new discount:
- Name – The name of the discount. This is for your reference in the admin area.
- Description – A description of the discount. Also, for your reference.
- Code – The actual code for users to enter on the registration form. Entering this code applies the discount.
- Type – There are two choices: “Percentage” and “Flat.” “Percentage” gives a percentage of the total price. So if your membership is $10 and your discount is 10%, the registration price will be $9. Flat gives a flat dollar amount discount. This takes the specified number of dollars (or other currency) off the base membership price.
- Amount – The amount the discount is for. So if you chose “Flat” previously, you’d enter the dollar amount to subtract from the registration price here. Or if you chose “Percentage,” then you’d enter the percent number.
- One Time – If checked, the discount will only be applied to the first payment in a membership. If unchecked, the discount will be applied to all payments in that membership.
- Membership Levels – You can allow the discount to be applied to “All Levels” or only to a specific membership level.
- Expiration Date – Optionally, you can schedule the discount to expire at a specific date. If someone tries to apply the discount after it’s expired, it will not be applied to their order.
- Max Uses – Optionally, you can set the discount only to be used a certain number of times. Leave blank for unlimited.
When someone signs up for a new membership on your site, they can enter a discount code if you have created at least one. The code is verified when the registration form is submitted. If it’s invalid, an error message will appear. If the code is valid, the membership fee will be reduced by the discount amount, and if auto-renewal is enabled and “one time” is not selected, the discount will also apply to future payments.
Sending Restrict Content Pro Coupons
MailOptin’s autoresponder automatically sends welcome emails to your subscribers immediately after they signup for your list. This can come in handy if your email service provider does not have this automation.
Even if your email marketing software has an automatic email after-signup feature; instead of sending a generic email to all users, you can use our autoresponder to send Restrict Content Pro Coupons to your subscribers based on the opt-in campaign they signup from.
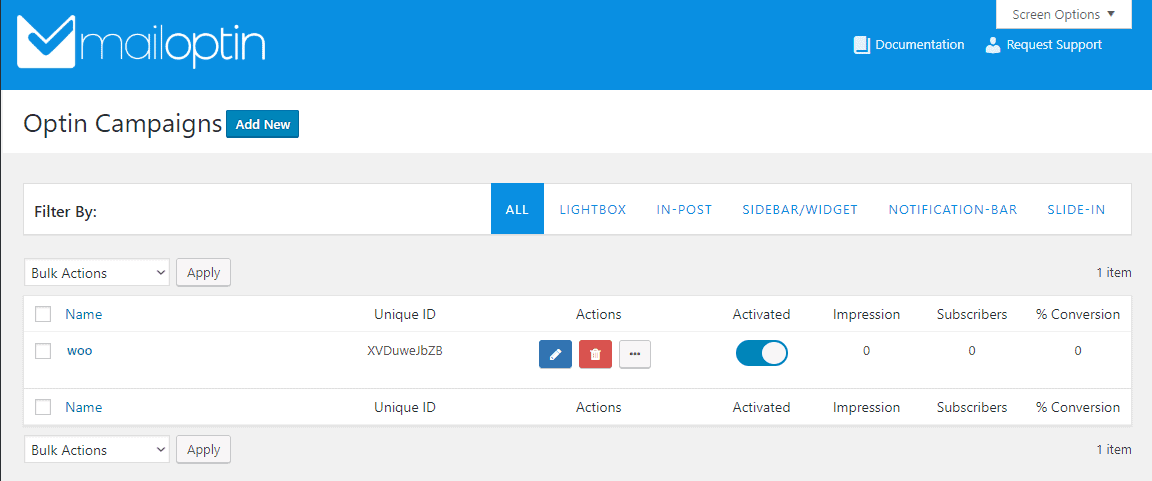
To set up an autoresponder, create an opt-in campaign if you don’t have one already or edit an existing one.
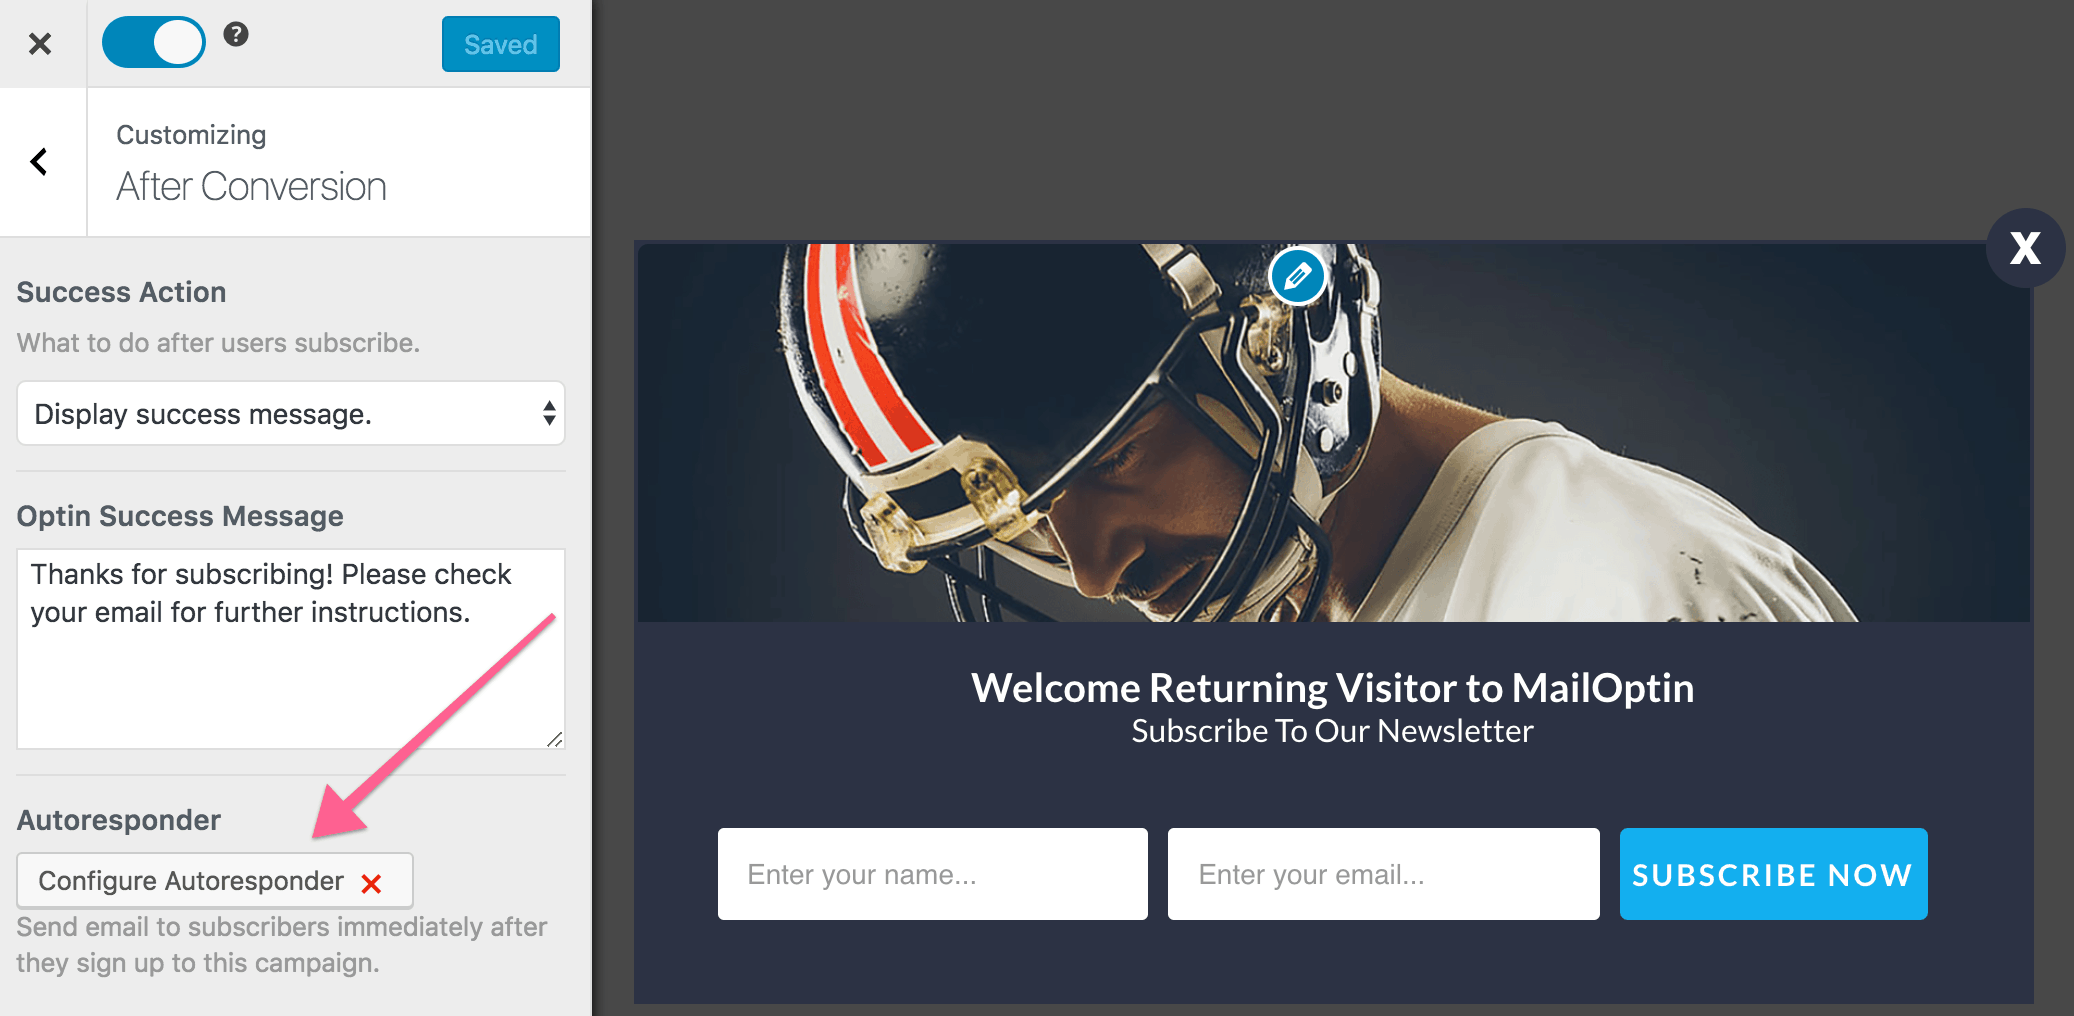
Open the After Conversion panel and click the “Configure Autoresponder” button.
Now, activate the autoresponder and, set up the content of the email, include your Restrict Content Pro Coupon Code in the mail. The user interface is intuitive and easy to set up.
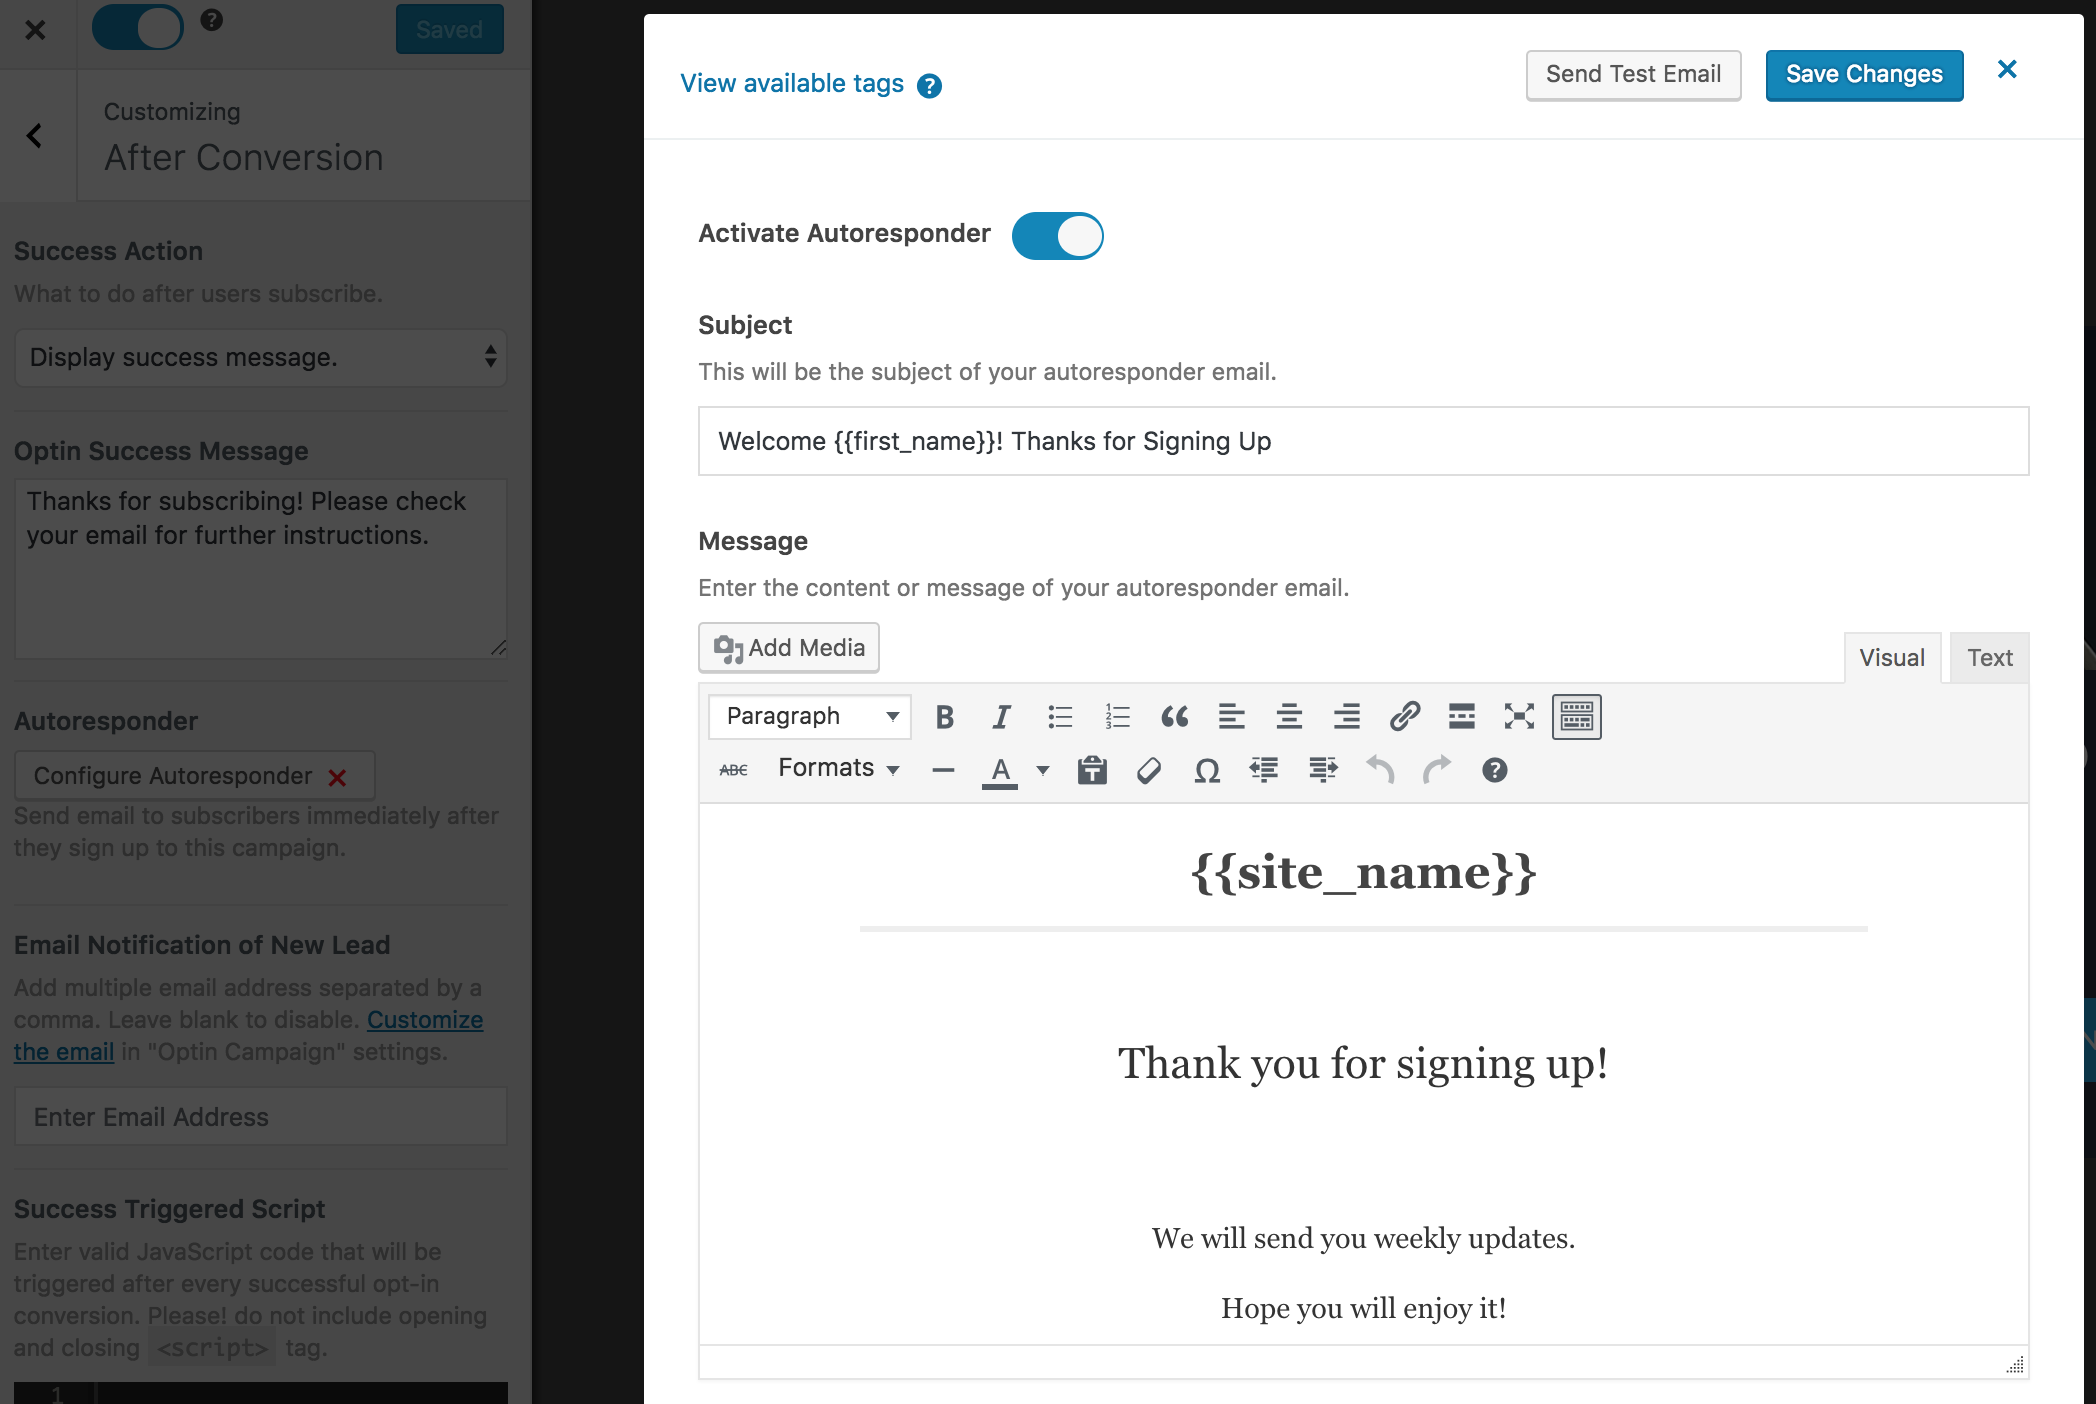
You can personalize the autoresponder email using the following tags.
{{first_name}}: First name of the subscriber.{{last_name}}: Last name of the subscriber.{{email}}: Email address of the subscriber.{{site_name}}: Site title or name.
Remember to save the changes when you are done.
Conclusion
MailOptin’s autoresponder feature can send personalized welcome emails to new subscribers, including a coupon code, based on the opt-in campaign they join. You can set it up by creating or editing an opt-in campaign, enabling the autoresponder, and customizing the email content with subscriber details like their name, email, and the discount code for your site.
Therefore, with MailOptin, you can tap into the tendency of online shoppers to seek discounts by sending them coupons from Restrict Content Pro.