How to Create an Constant Contact Popup Form in WordPress
Want to create a Constant Contact popup subscribe form on your WordPress website?
Constant Contact is one of the best email marketing tools out there, and you can use it to launch email campaigns and carry out functions like sending automated emails and storing subscribers, among other things.
There are many ways to collect subscribers, but a popup form is one of the most effective methods. Popups are excellent tools for drawing attention.
Combining a popup form with a proper call to action will encourage visitors to subscribe to your newsletters and mailing lists.
In the tutorial below, we will show you how to create a Constant Contact popup to collect subscribers and how to connect the popup to your Constant Contact account so that you can store your subscribers there.
Creating a Constant Contact Popup Subscription Form in WordPress
To create a popup subscription form that is integrated with Constant Contact, you will need to take the four following steps:
Step 1: Install and activate the MailOptin plugin
Step 2: Create a popup subscription form using MailOptin
Step 3: Integrate the MailOptin plugin with the Constant Contact account
Step 4: Connect the popup subscription form with Constant Contact
Step1: Install & Activate MailOptin
MailOptin is a powerful WordPress lead generation or email automation solution. It will help you create a popup form and also ensure that the subscribers you collect will be stored in your Constant Contact account.
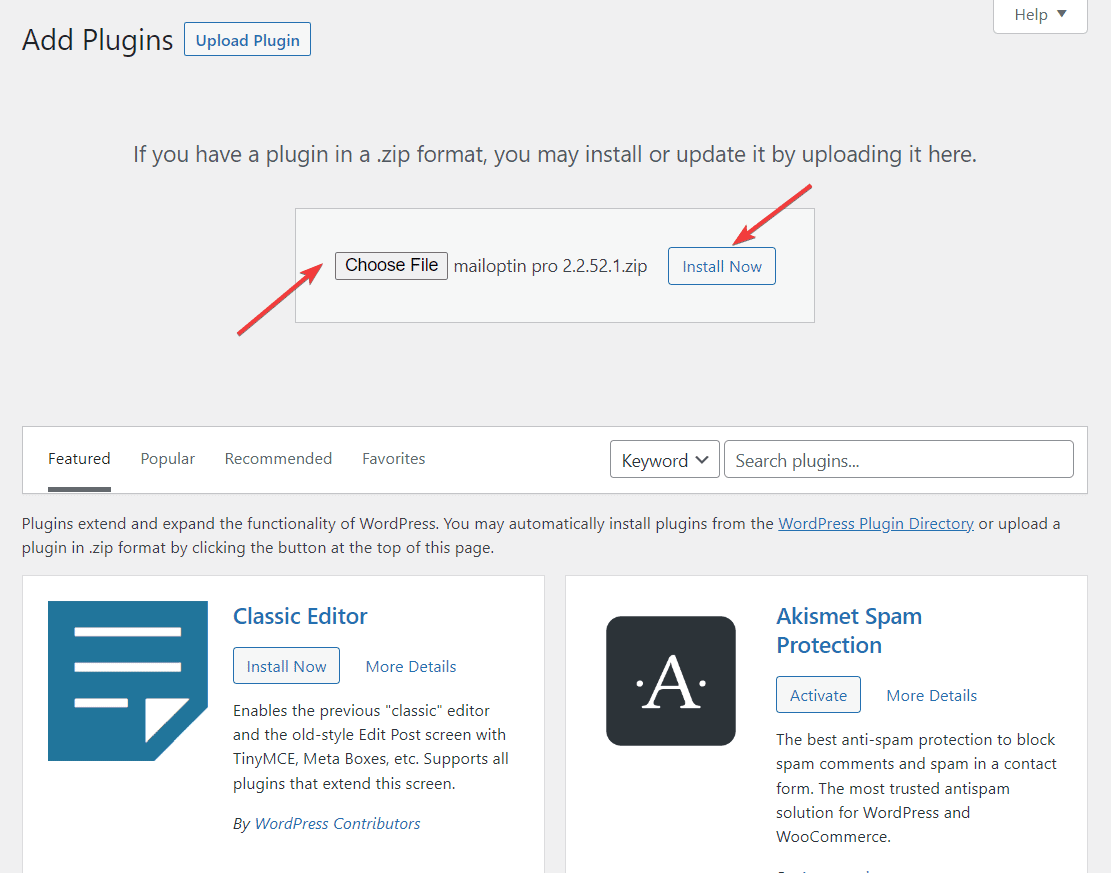
Purchase a MailOptin plan and download the plugin from the welcome email or your MailOptin account. Then, upload and install the plugin into your WordPress website.
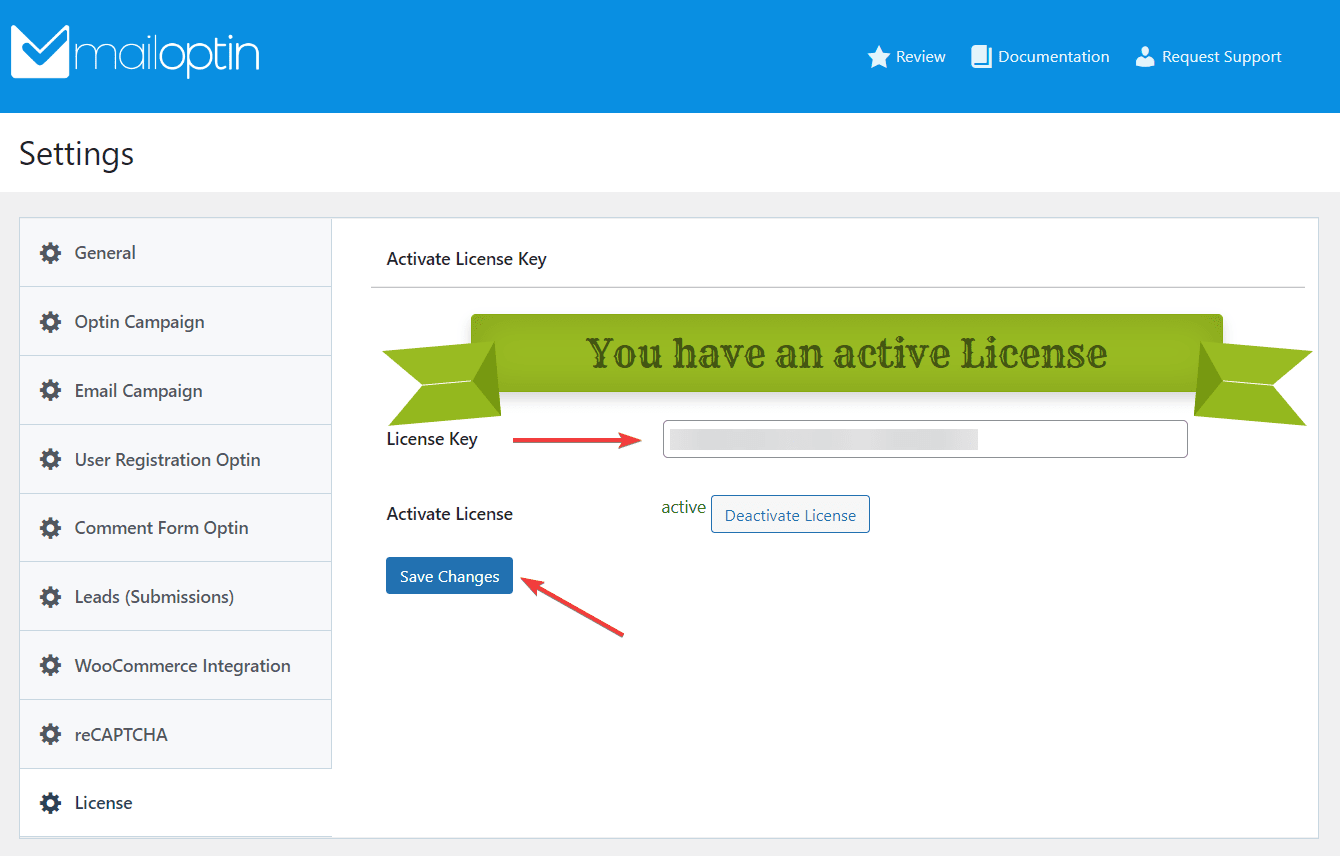
Next, you will need to activate the MailOptin license. Here’s how:
Open your WordPress dashboard and go to MailOptin > Settings > License. You need to copy the license key from your welcome email or your MailOptin account. Paste the license key in the white box beside the License Key field.
Hit the Save Changes button and the license will be activated.
Step 2: Create a Constant Contact Popup Form Using MailOptin
To create a Constant Contact popup form for WordPress, Go to MailOptin > Optin Campaigns > Add New.
A page asking you for a title and offering different readymade form templates will appear.
Enter a title, and then from the Select Optin Type option, choose LightBox.
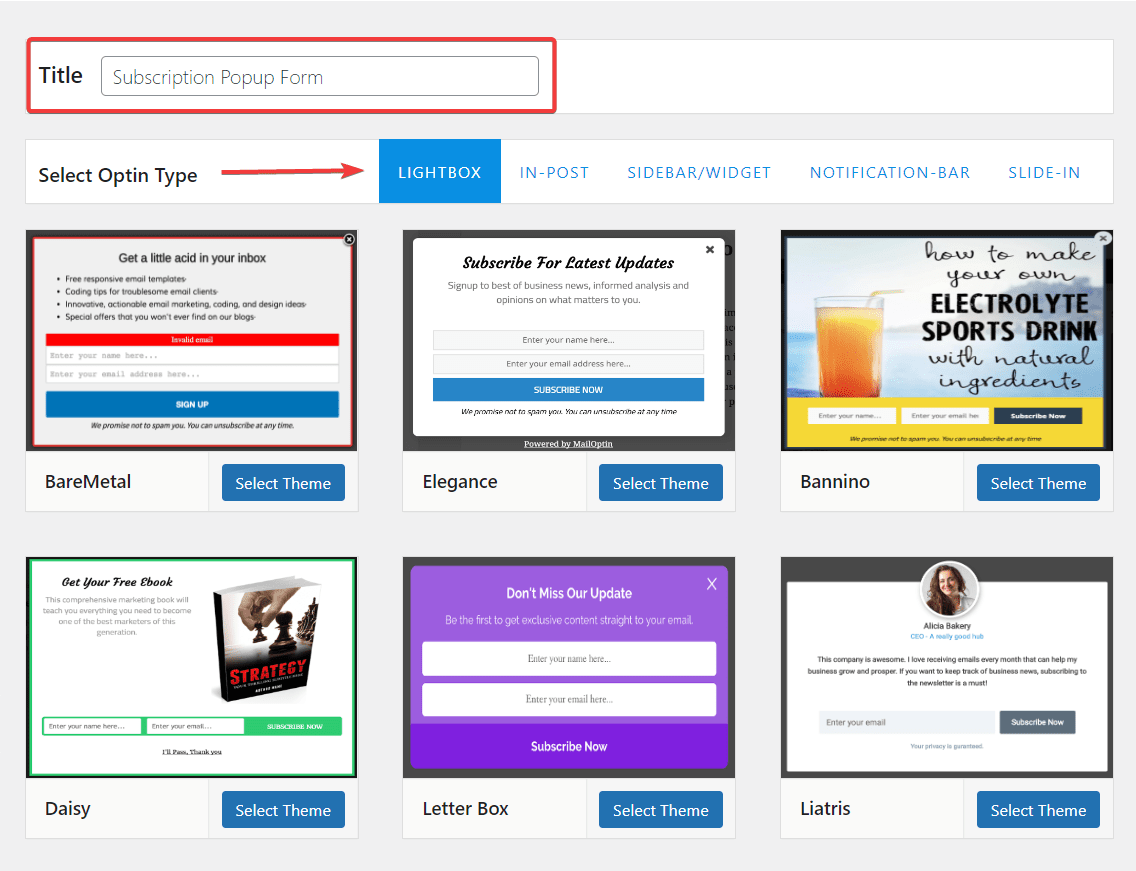
The form templates under LightBox are all popups. If you change your mind about popups in the future, try using other opt-in forms like sidebar, slide-ins, notification bars, and in-posts forms. For now, choose a template from under LightBox and proceed by hitting the Select Theme button on your preferred template.
As soon as you do, you will be taken to the page where you can edit the form.
The form is on the right side of the page, and the tools you need to modify it are on the left.
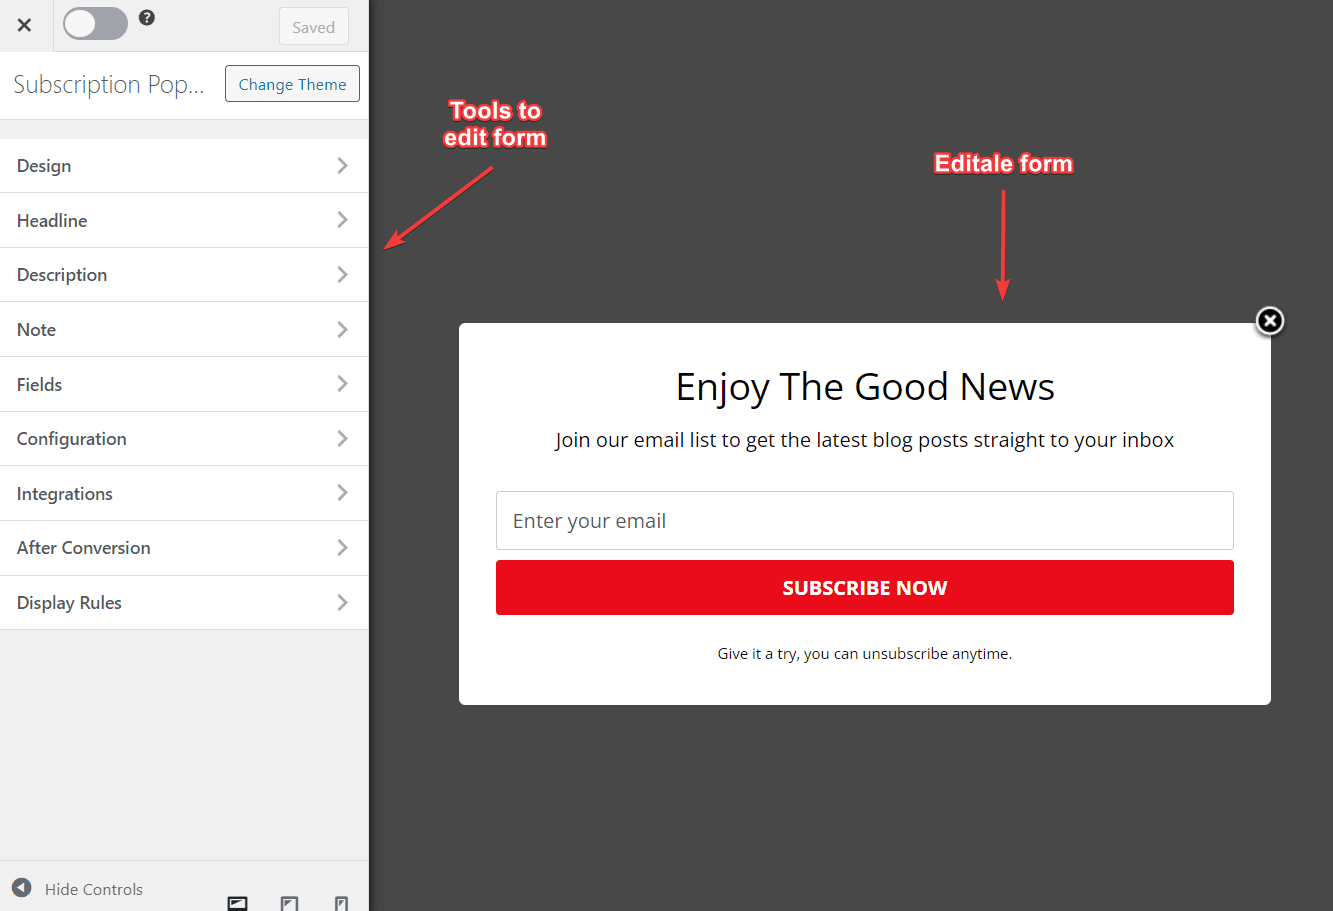
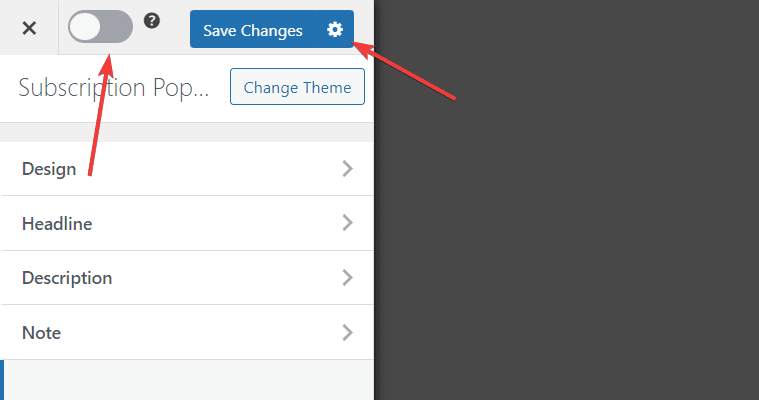
When your form is ready, save all your changes by choosing the Save Changes button at the top of the screen. Also, activate the form by toggling the Activate button beside Save Changes.
Step 3: Integrate MailOptin Plugin With Constant Contact Account
You have activated MailOptin on your WordPress website and created a popup subscription form. Next, ensure that visitors who sign up for the form are stored in your Constant Contact account.
The first step is to create a Constant Contact account. Open this page, select the free trial option, and sign up.
After signing up, you should return to your WordPress dashboard and connect your Constant Contact account to MailOptin.
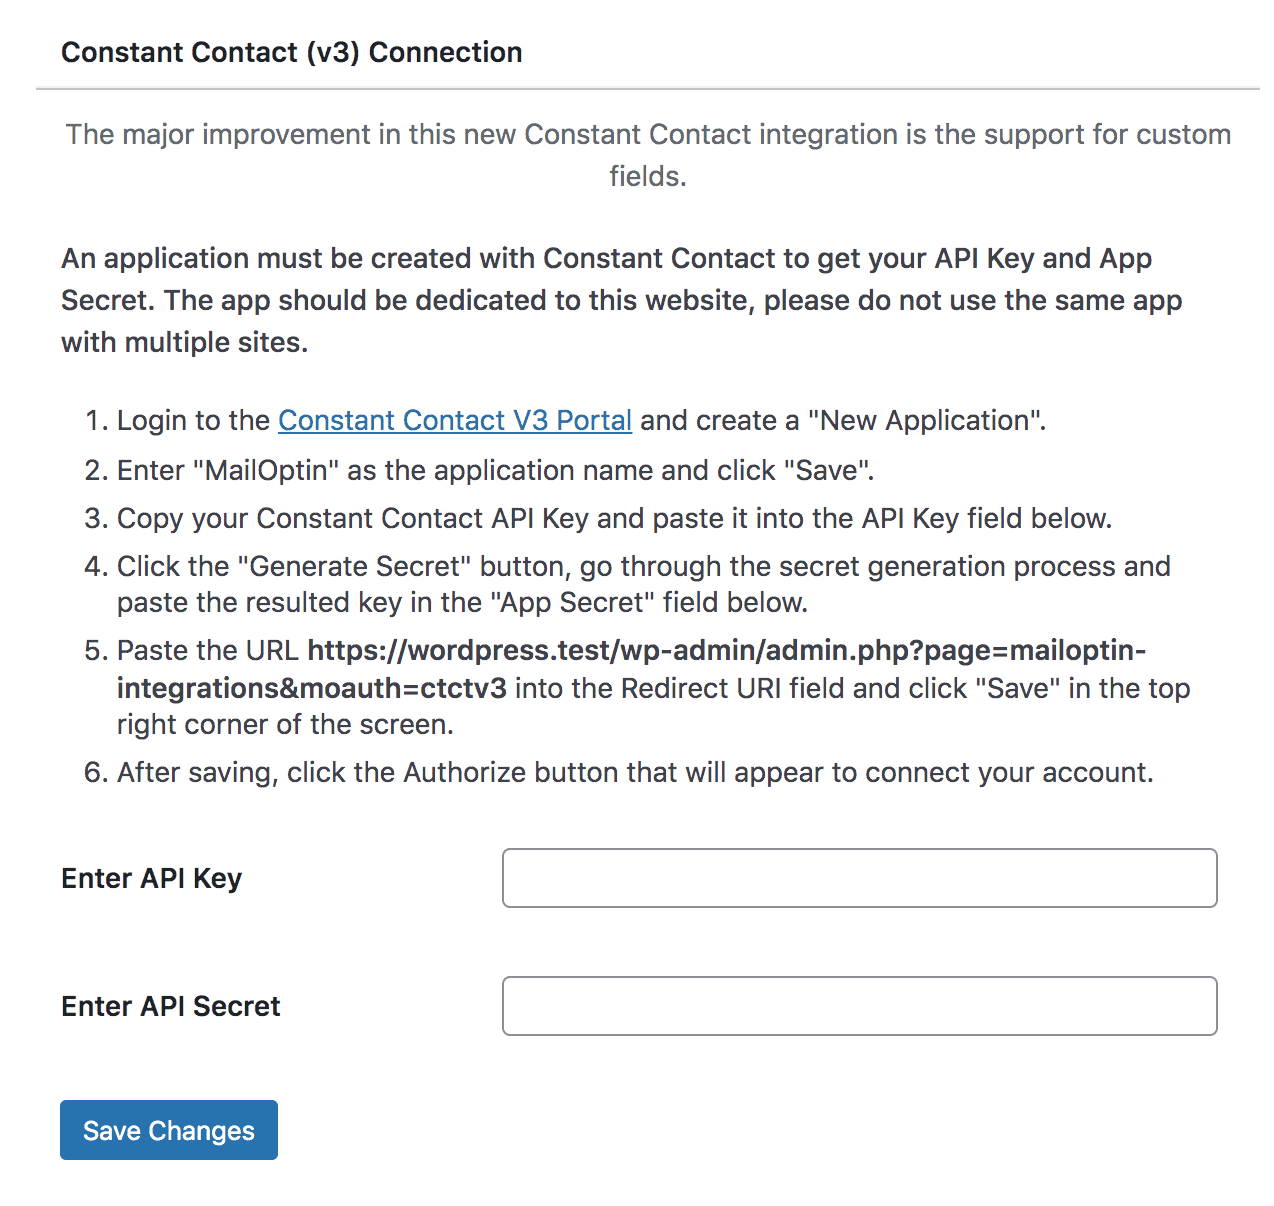
Login to the Constant Contact V3 portal and create a “New Application“.
Enter an application name like “MailOptin” and click “Save“.
Copy your Constant Contact API key and paste it into the API Key field on the Constant Contact (v3) tab of the MailOptin Integrations page.
Click the “Generate Secret” button, go through the secret generation process, and copy the secret. Then, paste it into the “App Secret” field on the integration settings page in MailOptin.
Copy and paste the URL displayed in step five of the setup instructions on the MailOptin> Integrations> Constant Contact (v3) tab in WordPress into the Redirect URI field in Constant Contact App Details, then click “Save” at the top right corner of the screen.
The application needs to be authorized to communicate with your Constant Contact account. To do this, enter your API keys into the Constant Contact settings in MailOptin.
First, log into your WordPress admin dashboard. Next, hover over “MailOptin” in the left-side navigation menu and click “Integrations.”
Once you’re on the Integrations page, select the “Constant Contact (v3)” tab.
Finally, enter the API Key and App Secret you obtained earlier, and click “Save.”
Click AUTHORIZE YOUR ACCOUNT. If you’ve entered your account information correctly, you will be redirected to a new page asking you to grant the Constant Contact API permissions.
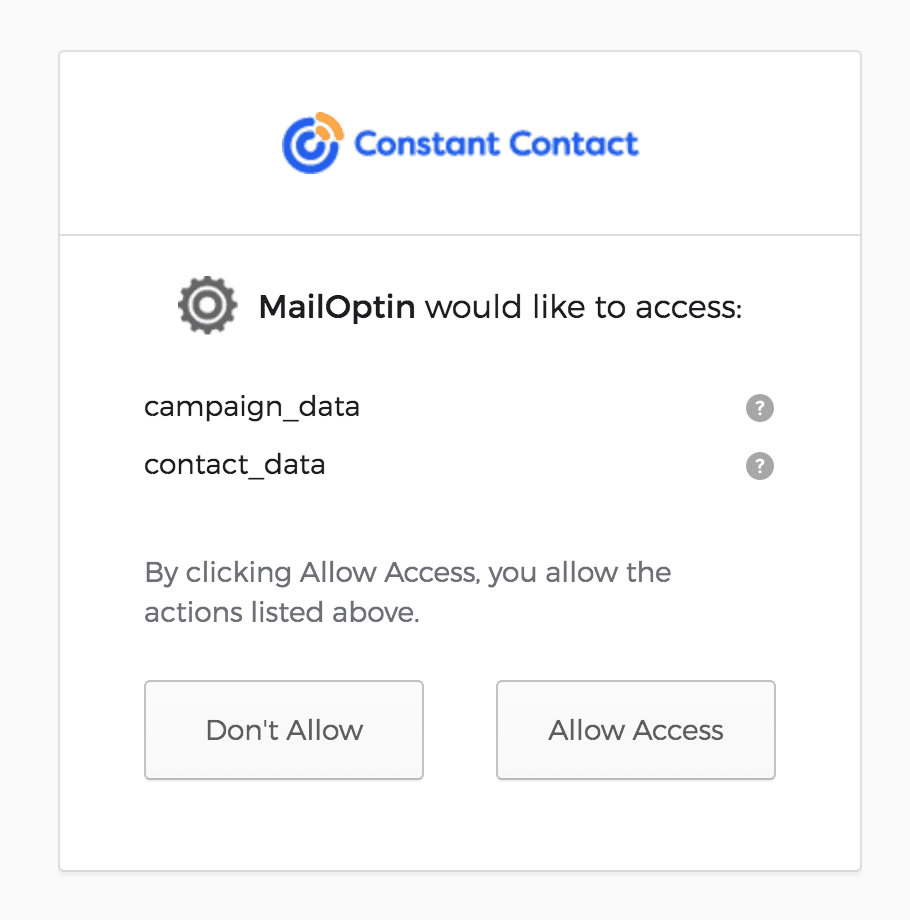
Once permissions are granted, you will be redirected to the WordPress dashboard’s Constant Contact Settings page. There, you will see a new button, Disconnect Integration.
Step 4: Connect Popup Subscription Form With Constant Contact
You’ll need to connect your popup form with Constant Contact to ensure that the data (name, email address, or both) is stored in your Constant Contact account whenever someone signs up for your newsletter. Here’s what you need to do:
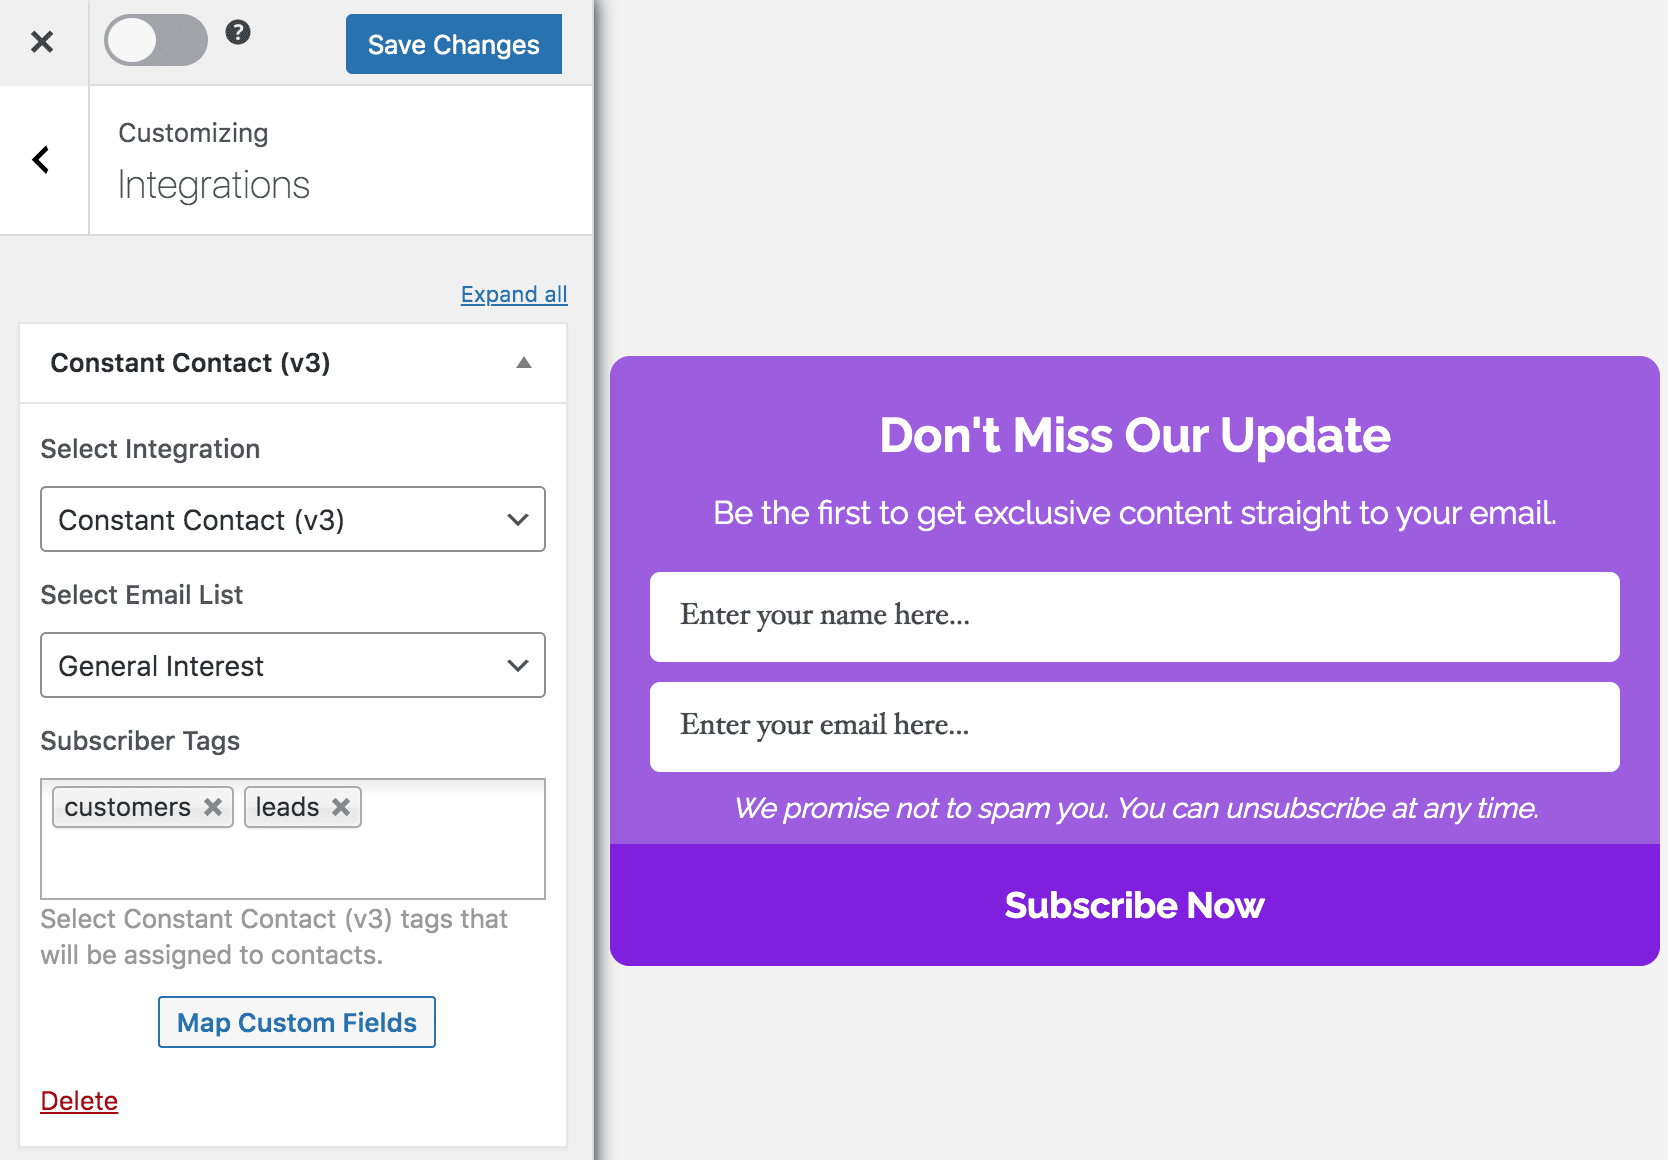
You can open the popup form you created in Step 2 by going to MailOptin > Optin Campaigns. Then, click on the form, which will open on the next page.
From the tools on the left side of the screen, go to Integrations and click on New Integrations. A drop-down menu will appear with the option Constant Contact. Select that. Be sure to save your changes before you exit the page.
That’s it, folk. You now have a Constant Contact popup subscribe form on your WordPress website.
Conclusion
Adding a Constant Contact popup form to your WordPress website is a great way to collect subscribers. Many popup form plugins are available, but you must select one that can connect with Constant Contact to store the subscribers.
MailOptin is an easy-to-use plugin that lets you quickly create a popup form and connect it to your Constant Contact account for powerful lead generation and email automation.