How to Create a Private Store with WooCommerce
Do you want to create a private store with WooCommerce?
WooCommerce comes with all the essential features for an online store, including product management, inventory, payment modules, cart & checkout, stock, and more.
However, building a private WooCommerce store isn’t a default feature in WooCommerce. You’ll need to use a plugin that provides the private store functionality.
In this guide, we’ll be using the ProfilePress plugin. It’s a powerful private WooCommerce store plugin that enables you to create membership sites, accept payments, and control access to your content. We’ll specifically utilize the ProfilePress access control feature to limit access to our WooCommerce store and keep it private.
How to Create a Private Store with WooCommerce
ProfilePress allows you to restrict access to your website in several ways; you can make the entire WooCommerce site private, make only the store products private, or restrict certain products by categories or tags.
This article will cover all these options so you can know multiple ways to make your WooCommerce store private and choose the best one for your business.
Install and Activate ProfilePress
The first thing to do is install and activate the ProfilePress plugin. You’ll need to purchase a ProfilePress Pro License and install the ProfilePress plugin. To do that, go to the ProfilePress website to purchase a suitable license plan.
After getting your copy of ProfilePress, you will receive a confirmation email with a link to download the plugin zip file and your license key. You can also download the plugin from your account page on the ProfilePress website.
Once you have downloaded the plugin, login to your WordPress admin dashboard, and navigate to the Plugins page; click on the “Add New” button and click “Upload Plugin“.
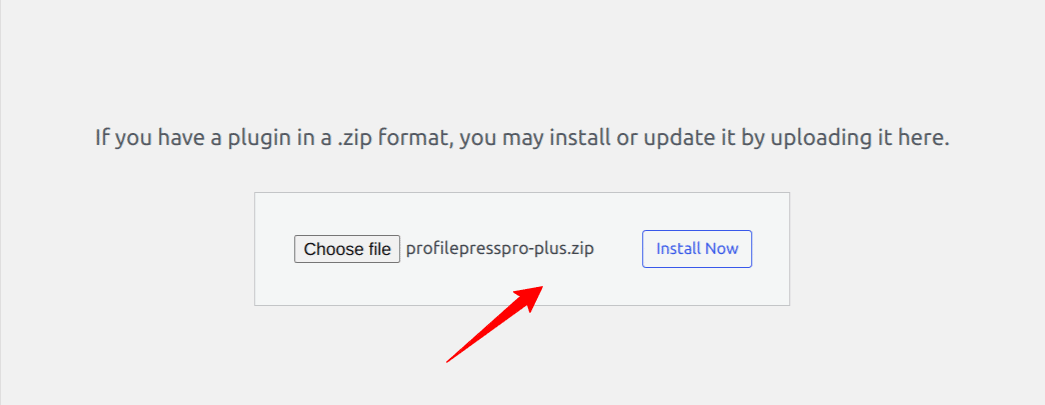
Next, click “Choose file” to select the previously downloaded plugin zip file. Click “Install Now.”
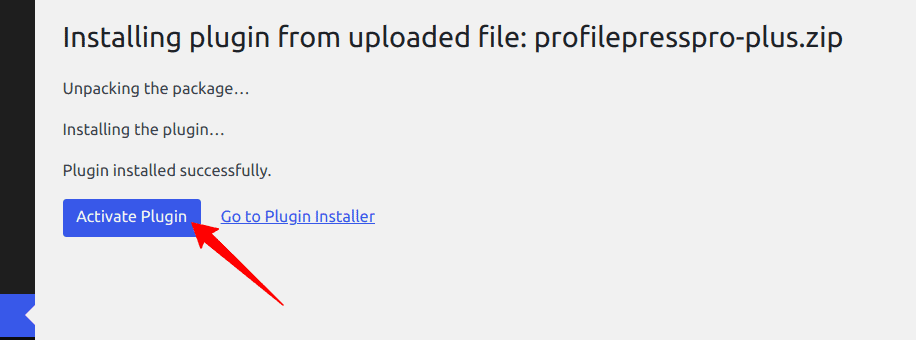
After installation is complete, click the Activate Plugin button.
How to make the Entire WooCommerce Store Private
This section will make our entire WooCommerce store private so only logged-in users can access the store. If a non-logged-in user tries to visit your website, they will be redirected to a login page or a custom page, or you can display a message to the visitor.
From your WordPress admin dashboard, go to ProfilePress >> Settings>> Access and select the Accessible to logged-in users option.
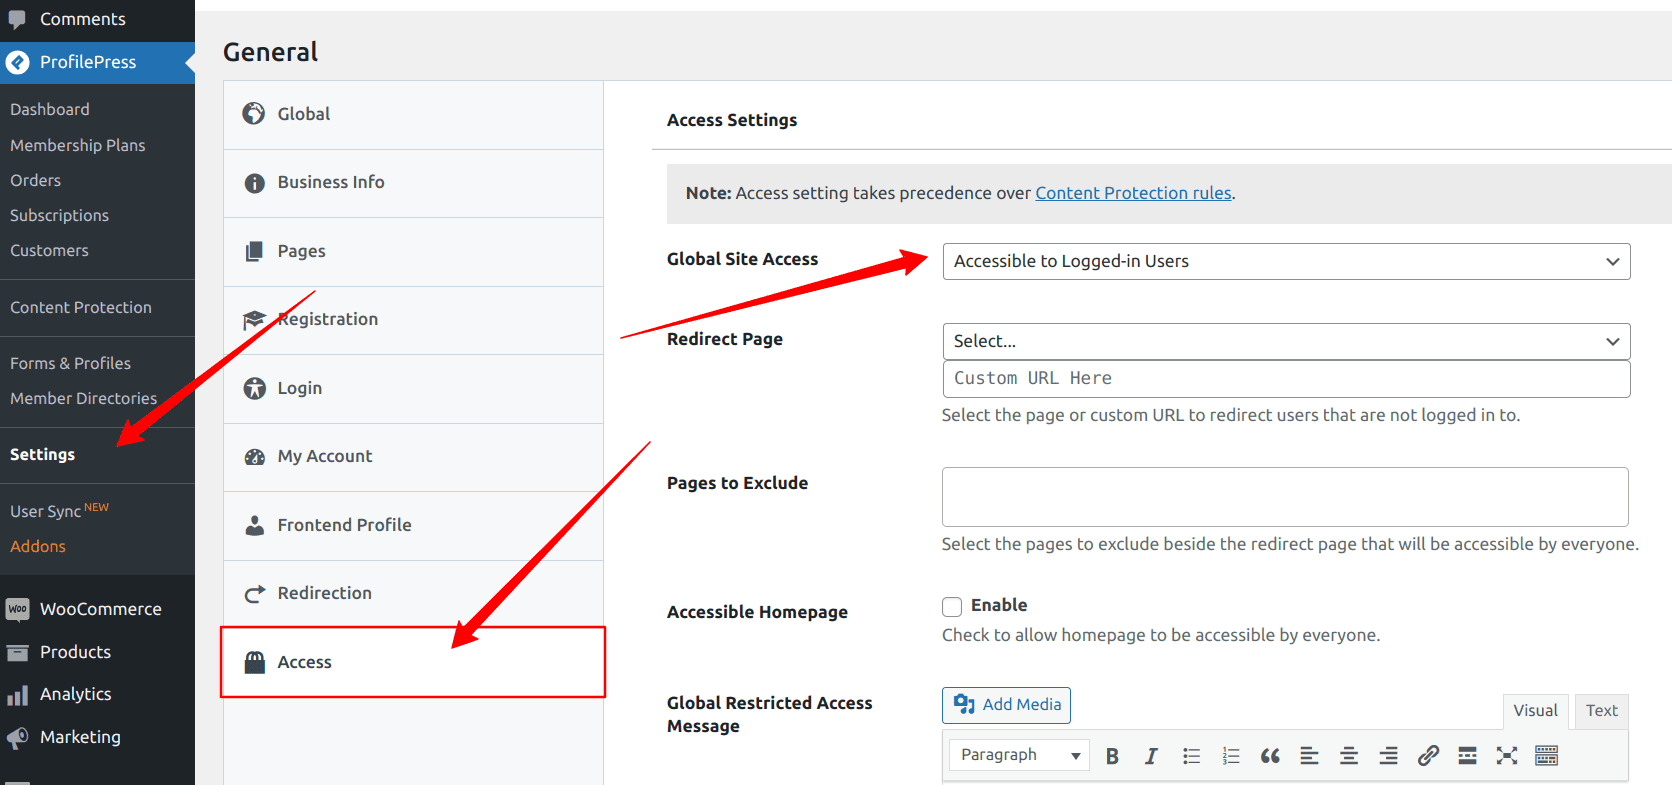
Next, you need to specify where to redirect visitors who try to access your website. You can send them to a login page or a custom page on your website, select a page from the drop-down, or provide a custom URL to redirect users who are not logged in.
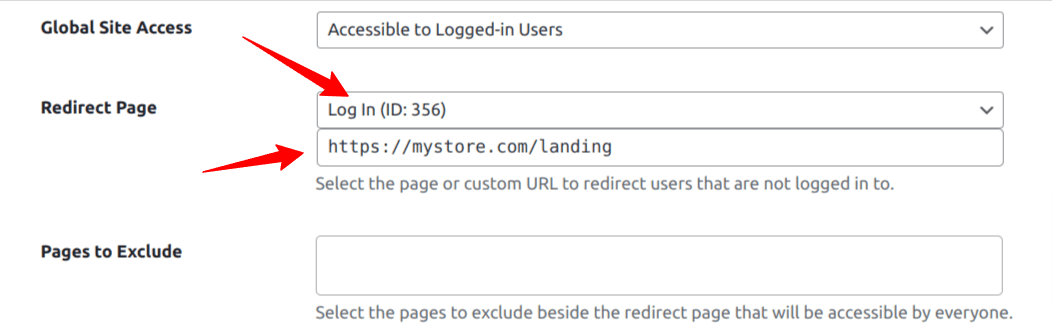
If you want to make the homepage of your private WooCommerce store visible to everyone or use it as a landing page, tick the checkbox below to activate it.

Now, log out or use another browser to access your WooCommerce store, and you will be redirected to the WooCommerce login page.

How to Make All WooCommerce Products Private
In the previous section, we restricted access to our entire WooCommerce site. Still, in this section, we will create a private store in WooCommerce by restricting access only to WooCommerce product pages.
To do this, go to ProfilePress >> Content Protection and add a new protection rule.
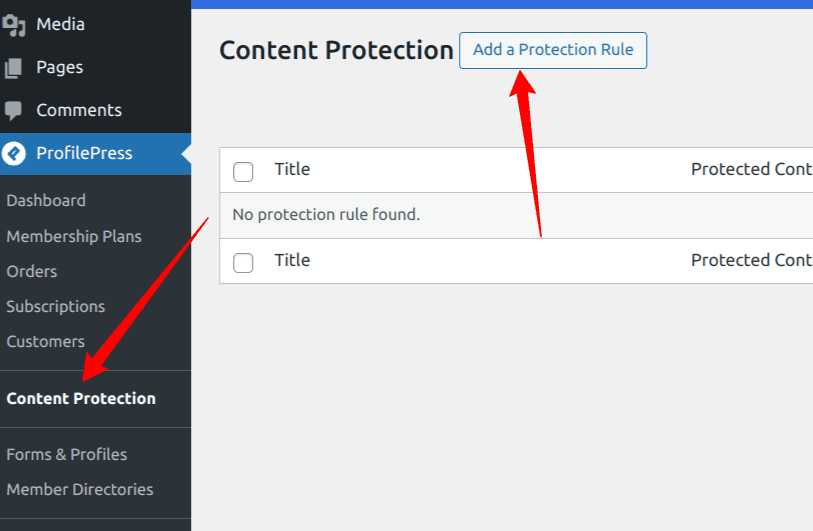
On the content protection rule page, you will add the protection rules for your WooCommerce private store.
Provide a name for this rule, and in the “Content to protect” section, click the dropdown menu and select All Products.
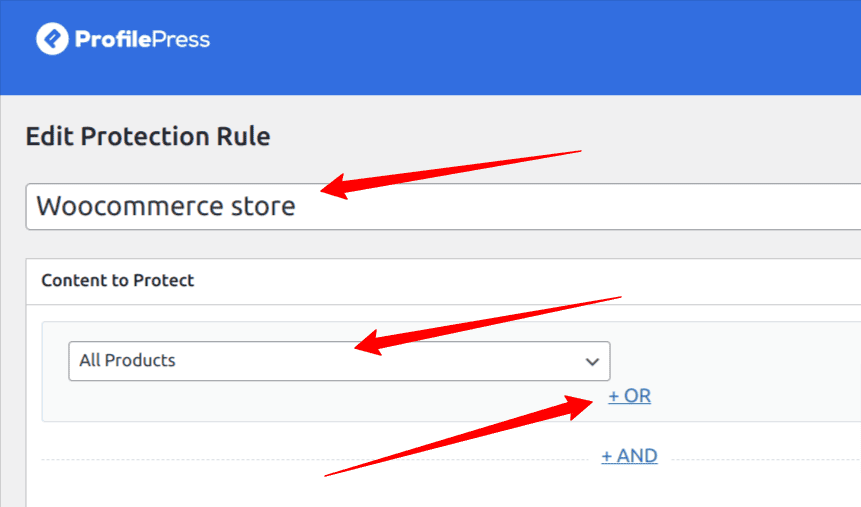
Click the “OR” option to include other WooCommerce product pages and hide them. A new dropdown will pop up. Click it and select all product archive pages.
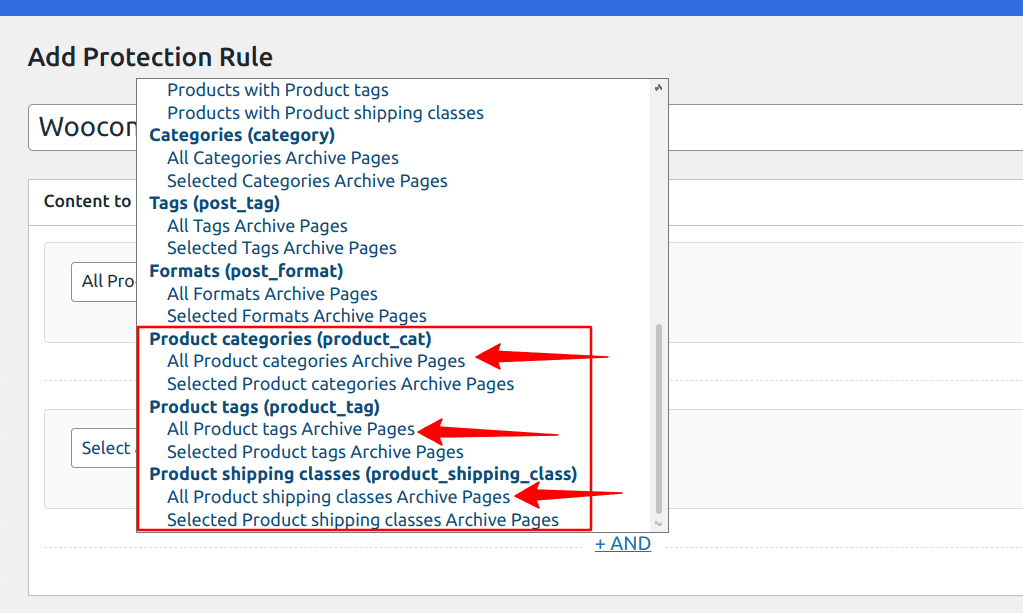
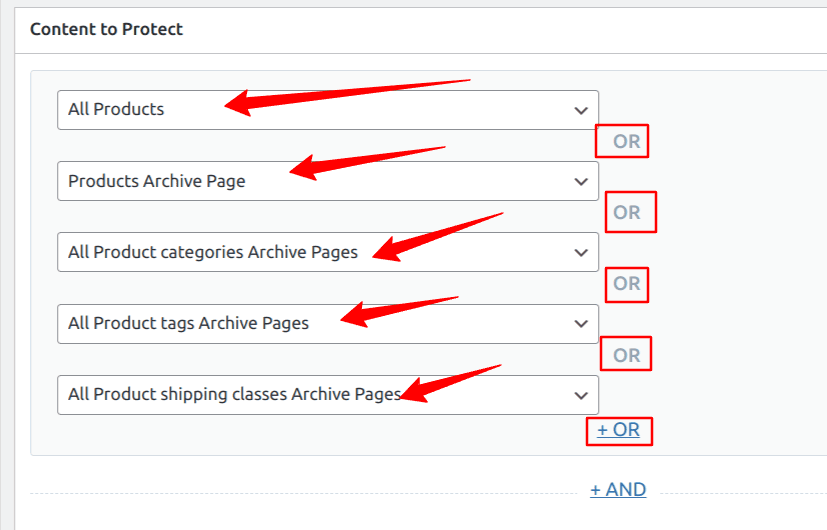
There are three options above, so you will click the “OR” option thrice and select each of these archive pages under each dropdown. So, you will eventually have something like the image below.
Next, scroll down to the “Access Condition” Section on this page. This section controls who can access our WooCommerce store and products.
From the dropdown, select “Logged in users”, and some new options will pop up. You will need to choose the roles or membership plans that will have access to your WooCommerce store.
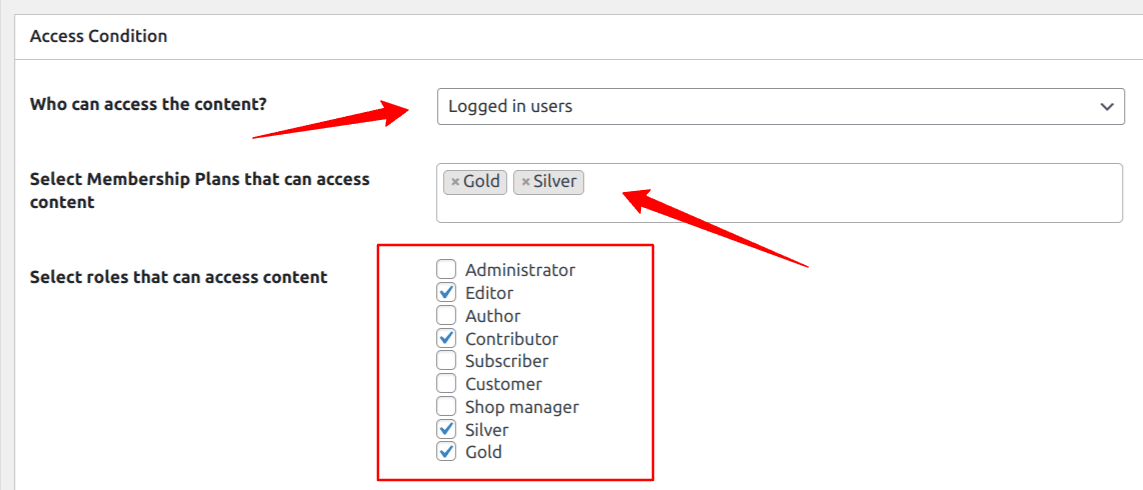
The Access condition section is quite simple to configure. Click on the various dropdown selects to choose the best options for you.
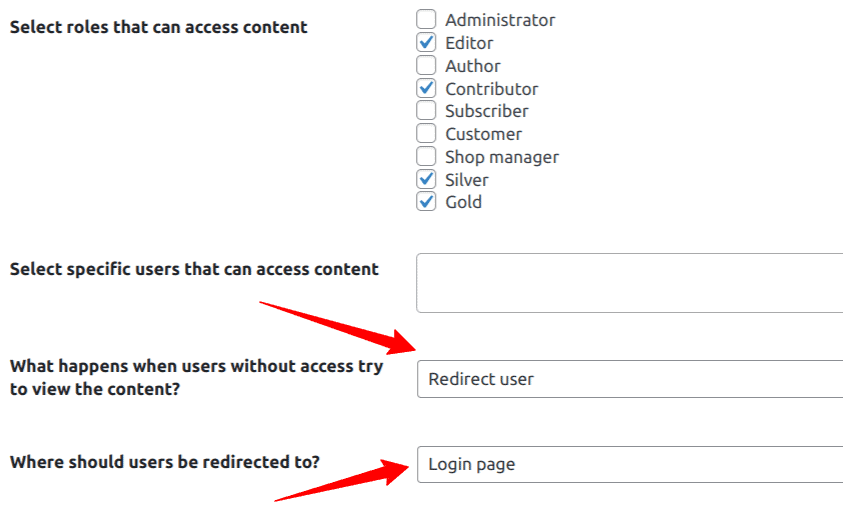
For this article, we will redirect users who do not have access to the login page when they try to access our WooCommerce product pages, as shown below.
Now, log out or use another browser to access your WooCommerce store, and you will be redirected to a login page.
Alternatively, you can select “Show access restricted message” as “What happens when users without access try to view the content?” instead of “Redirect user”.
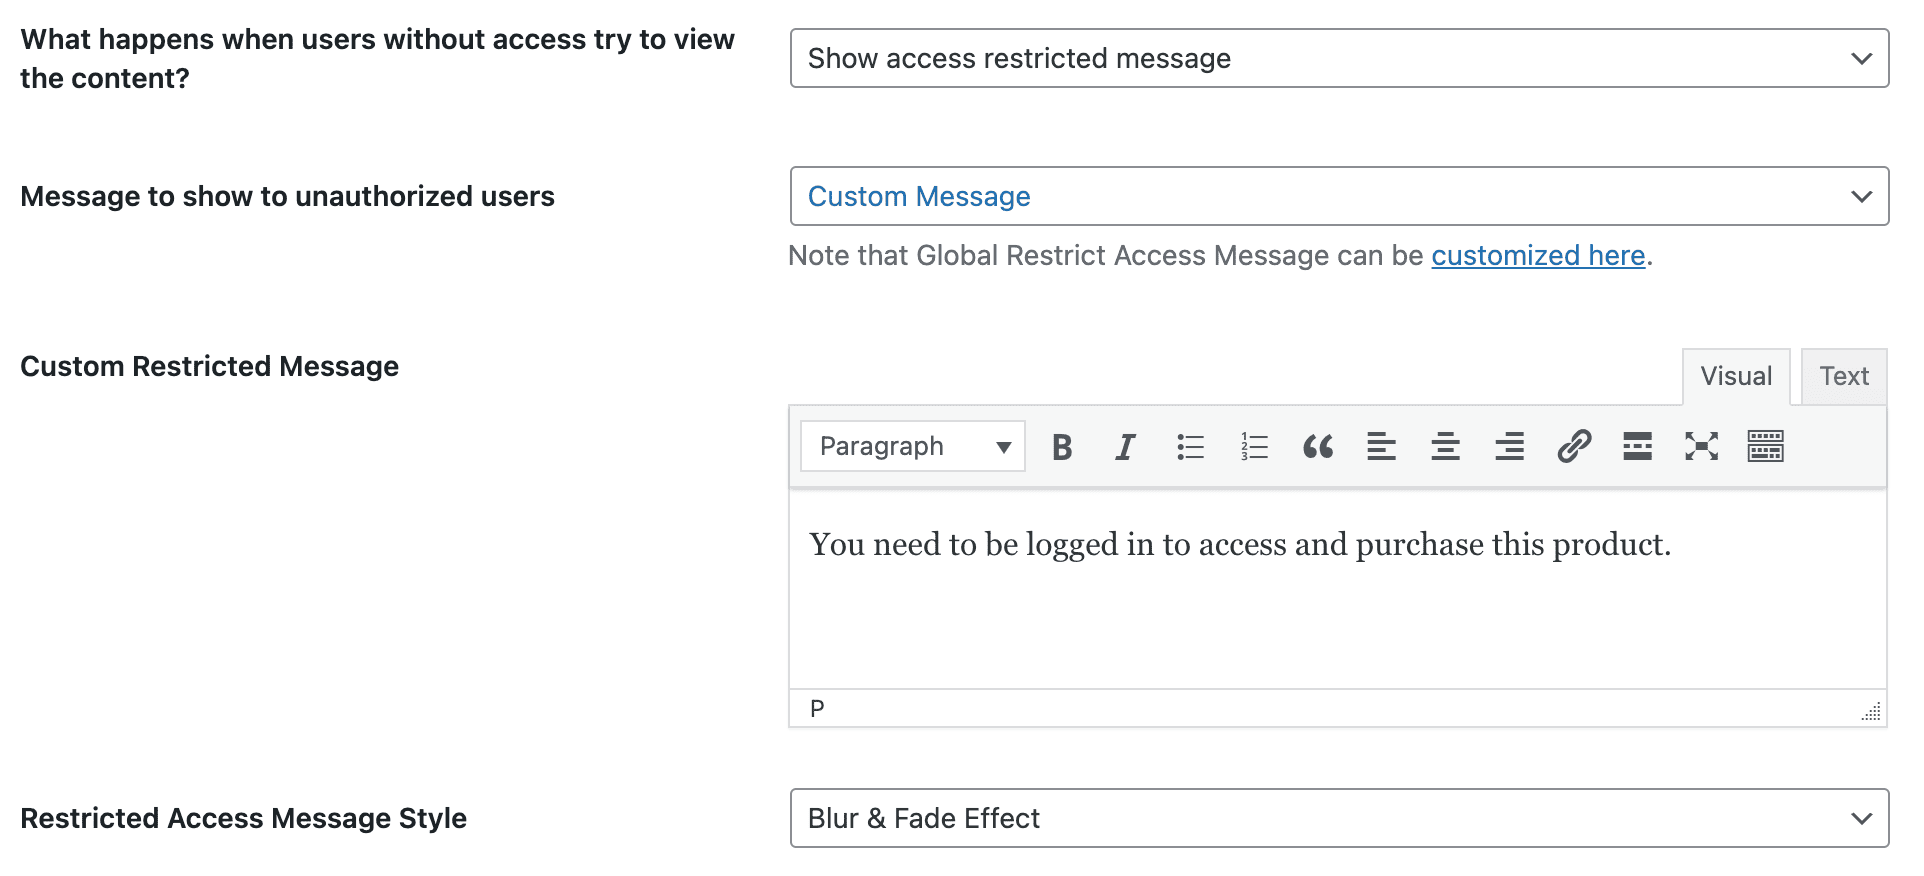
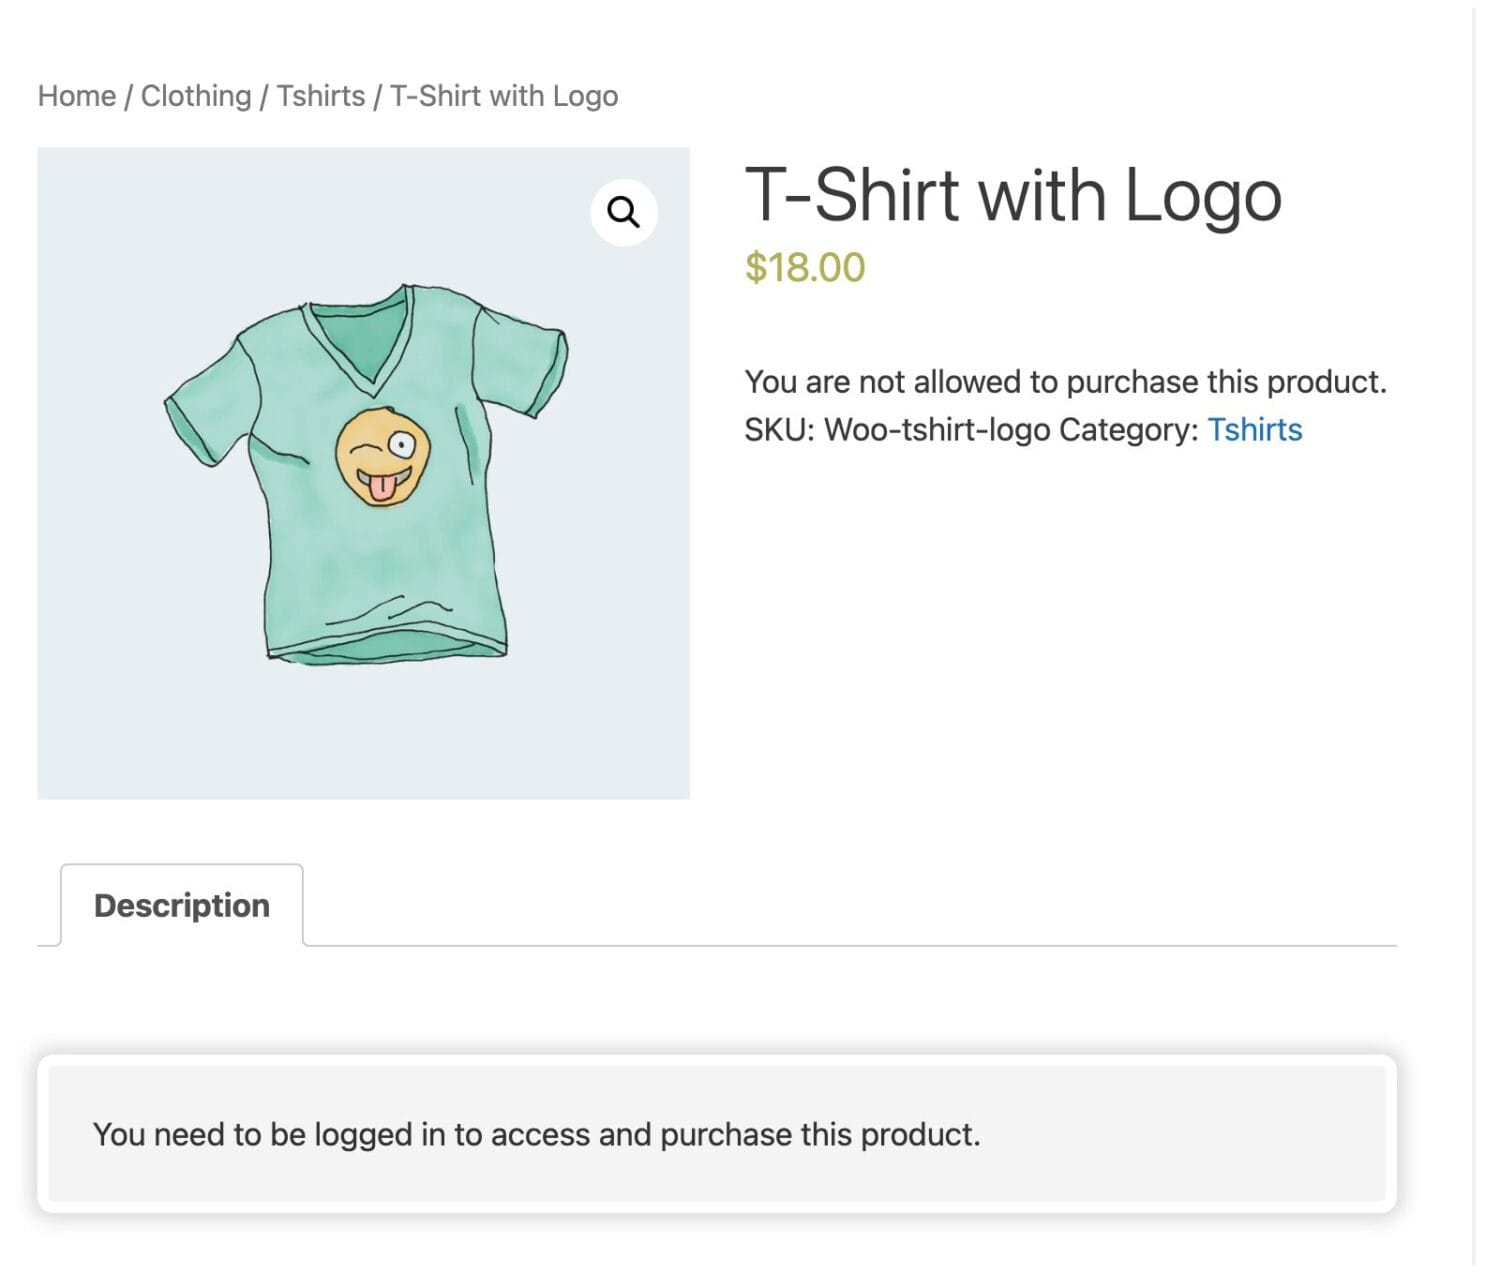
Users who visit a restricted or protected WooCommerce product page will see a message you have set up. Also, the “Add to Cart” button for the product is hidden or removed, with an error message informing them that they can’t purchase the product on your website to make a private store.
How to restrict WooCommerce Products by Categories and Tags
To make your WooCommerce products private by categories or tags, we will follow a similar process to the last section. We are still using the content protection feature of ProfilePress to achieve this.
To do this, go to ProfilePress >> Content Protection and add a new protection rule.
On the content protection rules page, enter a name for this rule, and in the “Content to protect” section, click the dropdown and select Products with Product categories.
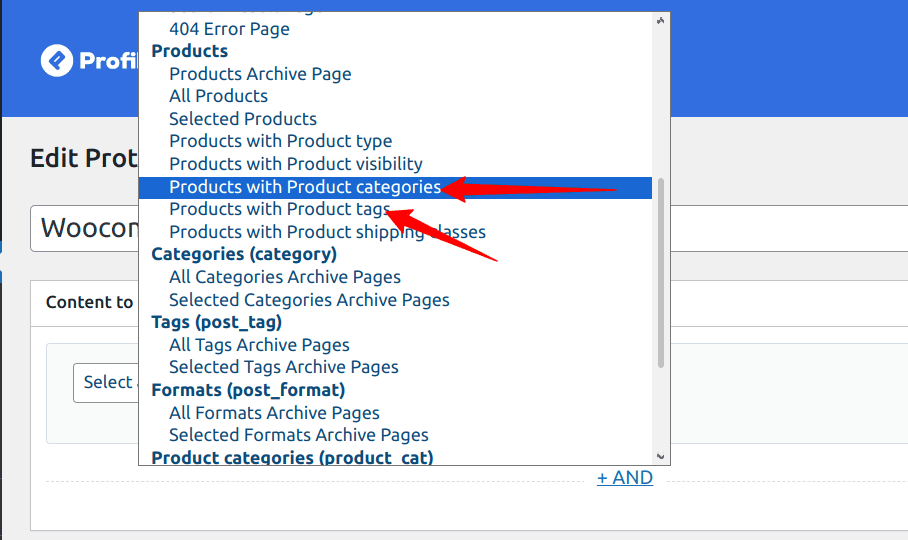
Click the “OR” option to include other WooCommerce product tags and hide them. A new dropdown will pop up; click it and select the Product with Product tags option.

As you can see in the image above, we have two protection rules that control the content we want to hide. The rules state that “all products in the T-shirt category or with the hat tag is protected”.
Next, scroll down to the “Access Condition” section, where we will choose who can access the products in this category or tag.
From the dropdown, select “Logged in users”, and some new options will pop up. You will need to choose the roles or membership plans that will have access to your WooCommerce store.
The Access condition section is relatively easy to configure. Just click on the various dropdown selects to choose the best options for you.
In this example, we will redirect users without access to the login page when they try to access any products that belong to the category or tag we selected above.
Now, if you log out or use another browser to access your WooCommerce store, then try to visit any product belonging to the T-shirt category or hat tag, and you will be redirected to a login page.
Setting up User Moderation on Your Private WooCommerce Store
User moderation enables you to review, approve, and manage user accounts before they can access your online store. If you have created a private store in WooCommerce, user moderation can help to ensure only the right users can access your private WooCommerce store.
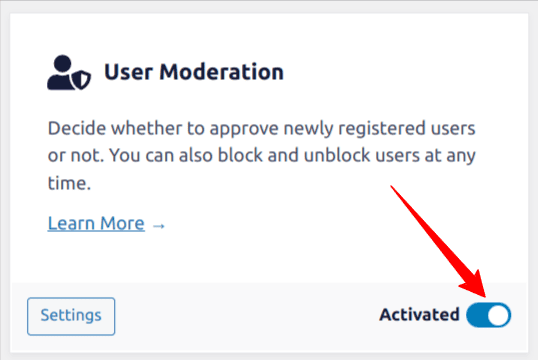
ProfilePress comes with a User Moderation addon that allows you to approve or disapprove newly registered users or block and unblock users at any time with the help of this powerful addon.
To get started, activate the User Moderation add-on. Go to ProfilePress >> Addons, Scroll to User Moderation, and switch it ON.
Once activated, you will receive a notification email each time a user registers on your website, and you can choose to either approve or reject the user. All new user accounts will be in a “pending mode” until you approve or block them.
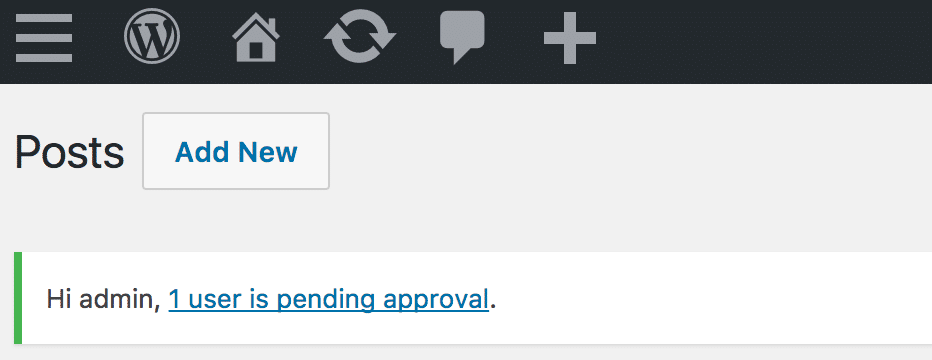
You will also see an admin notice on the dashboard widget if you have any users pending approval.
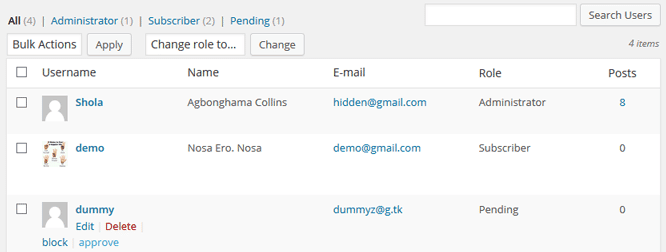
To approve new users or block/delete them from your WordPress dashboard, go to the Users >> All Users. Find the pending users and approve them.
ProfilePress sends users email notifications. When a user is approved or rejected, they will get an email letting them know.
Conclusion
Creating a private store with WooCommerce is made simple and effective using the ProfilePress plugin. This powerful tool offers multiple approaches to privacy, including restricting access to your entire site, all WooCommerce products, or specific product categories and tags.
The user moderation feature adds an extra layer of control, allowing you to review and approve new registrations. With customizable access conditions and redirect options, you can perfectly customize the private shopping experience to align with your business model and customer expectations.
We hope this article helped you learn how to create a private online store with WooCommerce.