How to Send Emails to Tutor LMS Users in WordPress
Are you looking to send emails to Tutor LMS users in WordPress?
Tutor LMS is a popular WordPress plugin for creating and selling online courses. Educators and trainers can create interactive learning experiences using its features, such as course progress tracking, quizzes, and certificates. It is also easy to use, versatile, and can be integrated with other WordPress plugins and tools.
Regularly sending emails to your Tutor LMS users is essential for several reasons: it helps keep students engaged and informed, fosters a sense of community, encourages course completion, and provides opportunities to promote additional courses or resources, ultimately driving higher retention and revenue.
In this tutorial, you’ll learn how to efficiently send bulk emails to your Tutor LMS users in WordPress using the MailOptin plugin.
Sending Emails to Your Tutor LMS Users
Follow the guide below to send a broadcast or bulk email to Tutor LMS users enrolled in specific courses in WordPress.
First, purchase a MailOptin license.
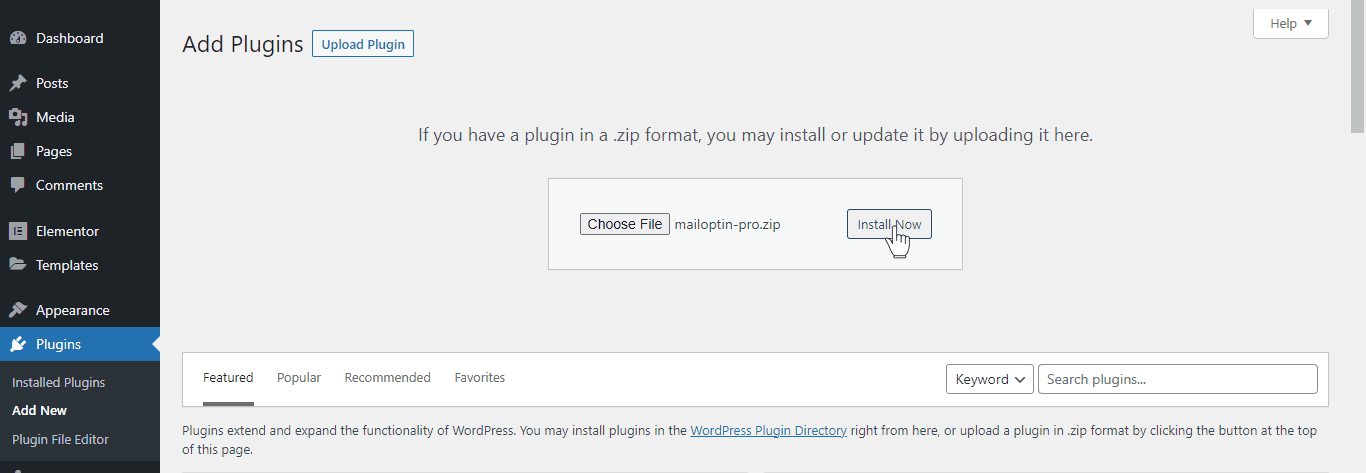
Once you’ve completed the purchase, log in to your WordPress admin dashboard. Next, navigate to the Plugins page, click the Add New button, and select Upload Plugin.
Then, click Choose File to select the downloaded plugin ZIP file, and click Install Now.
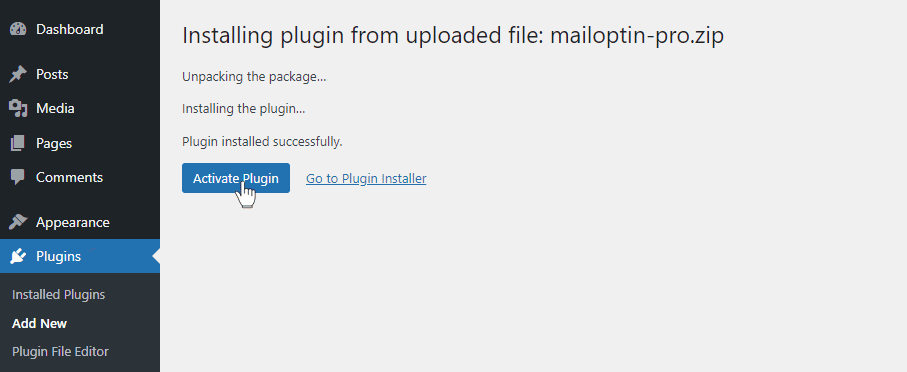
After installing the plugin, activate it by clicking ‘Activate Plugin’.
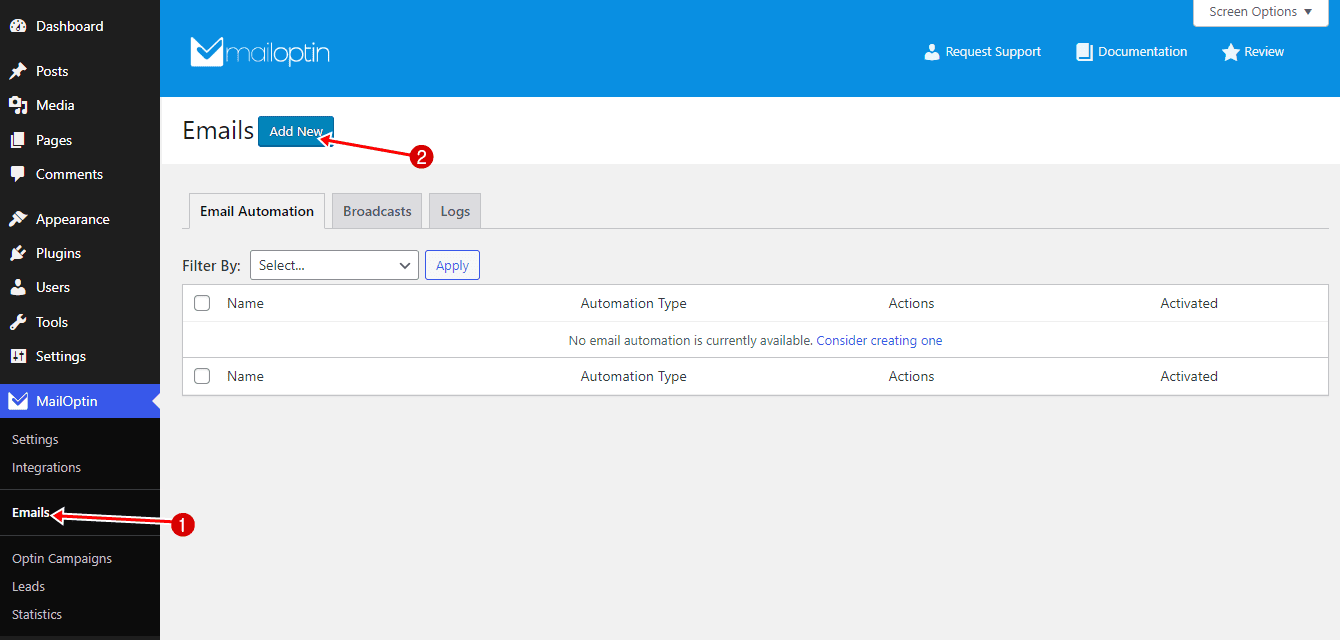
Next, navigate to MailOptin >> Emails, and click the Add New button.
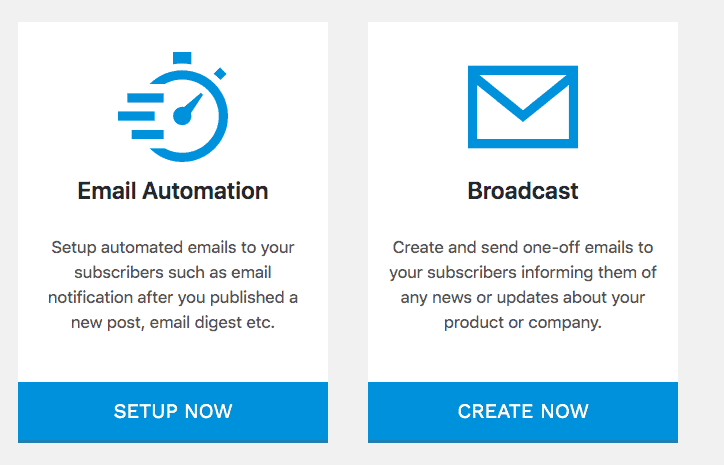
Then select Broadcast.
Enter an email subject and select a template.
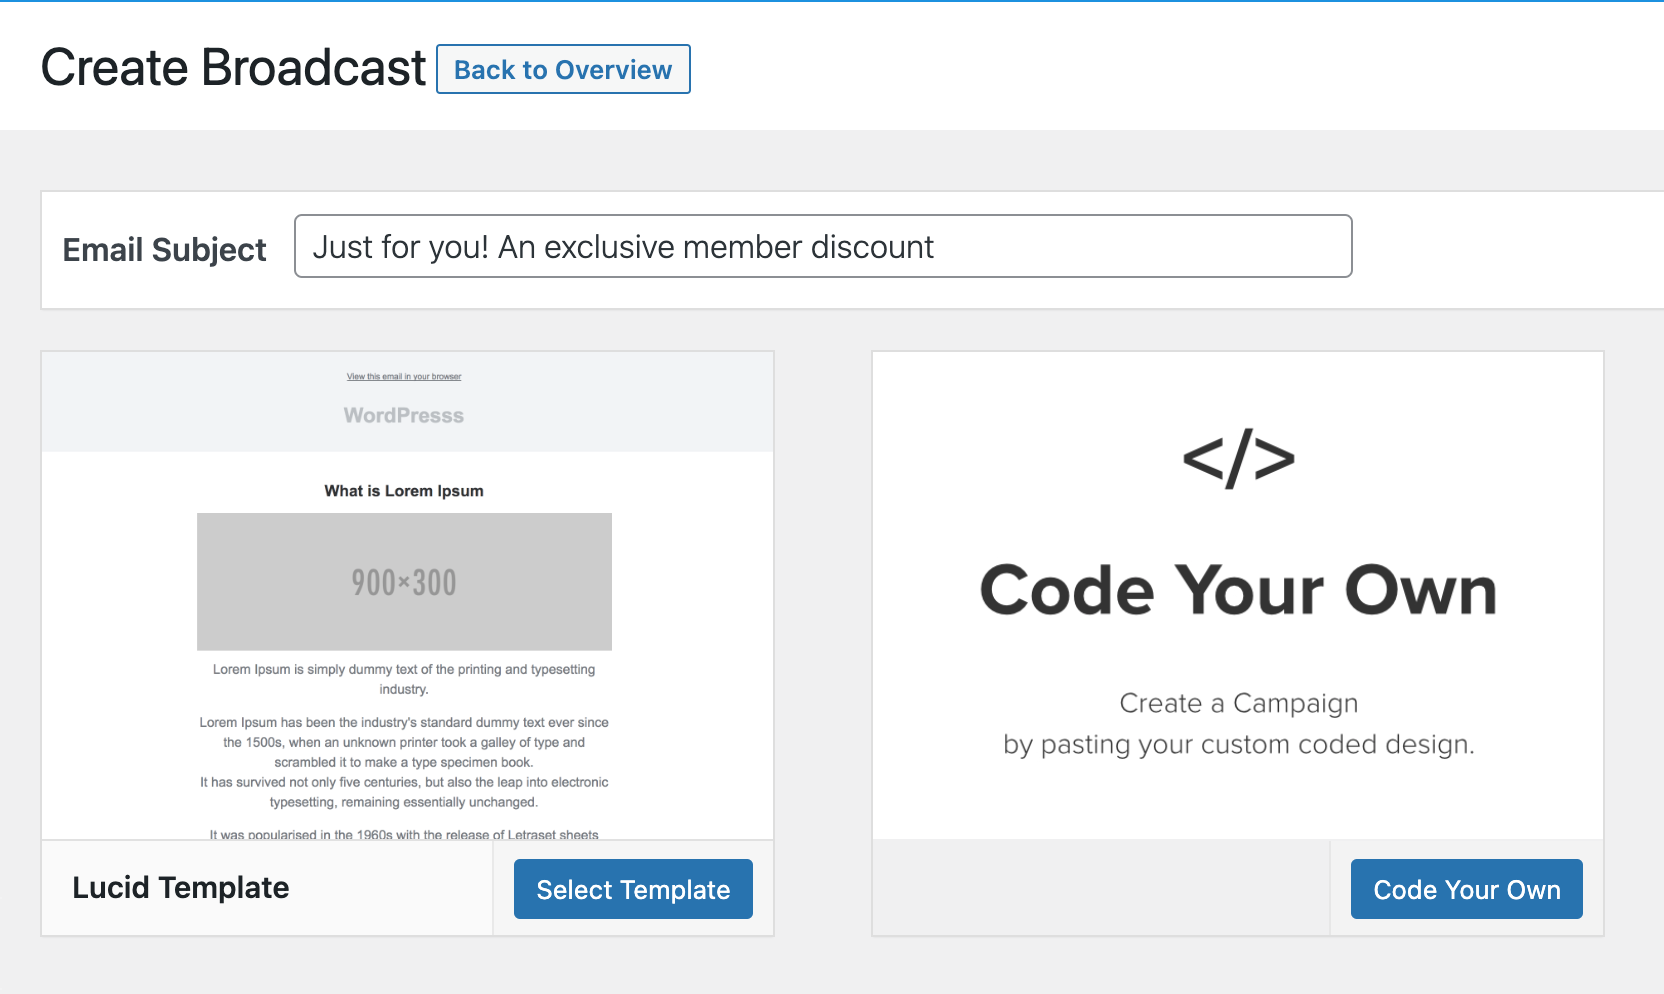
After selecting an email template, MailOptin will open the email builder.
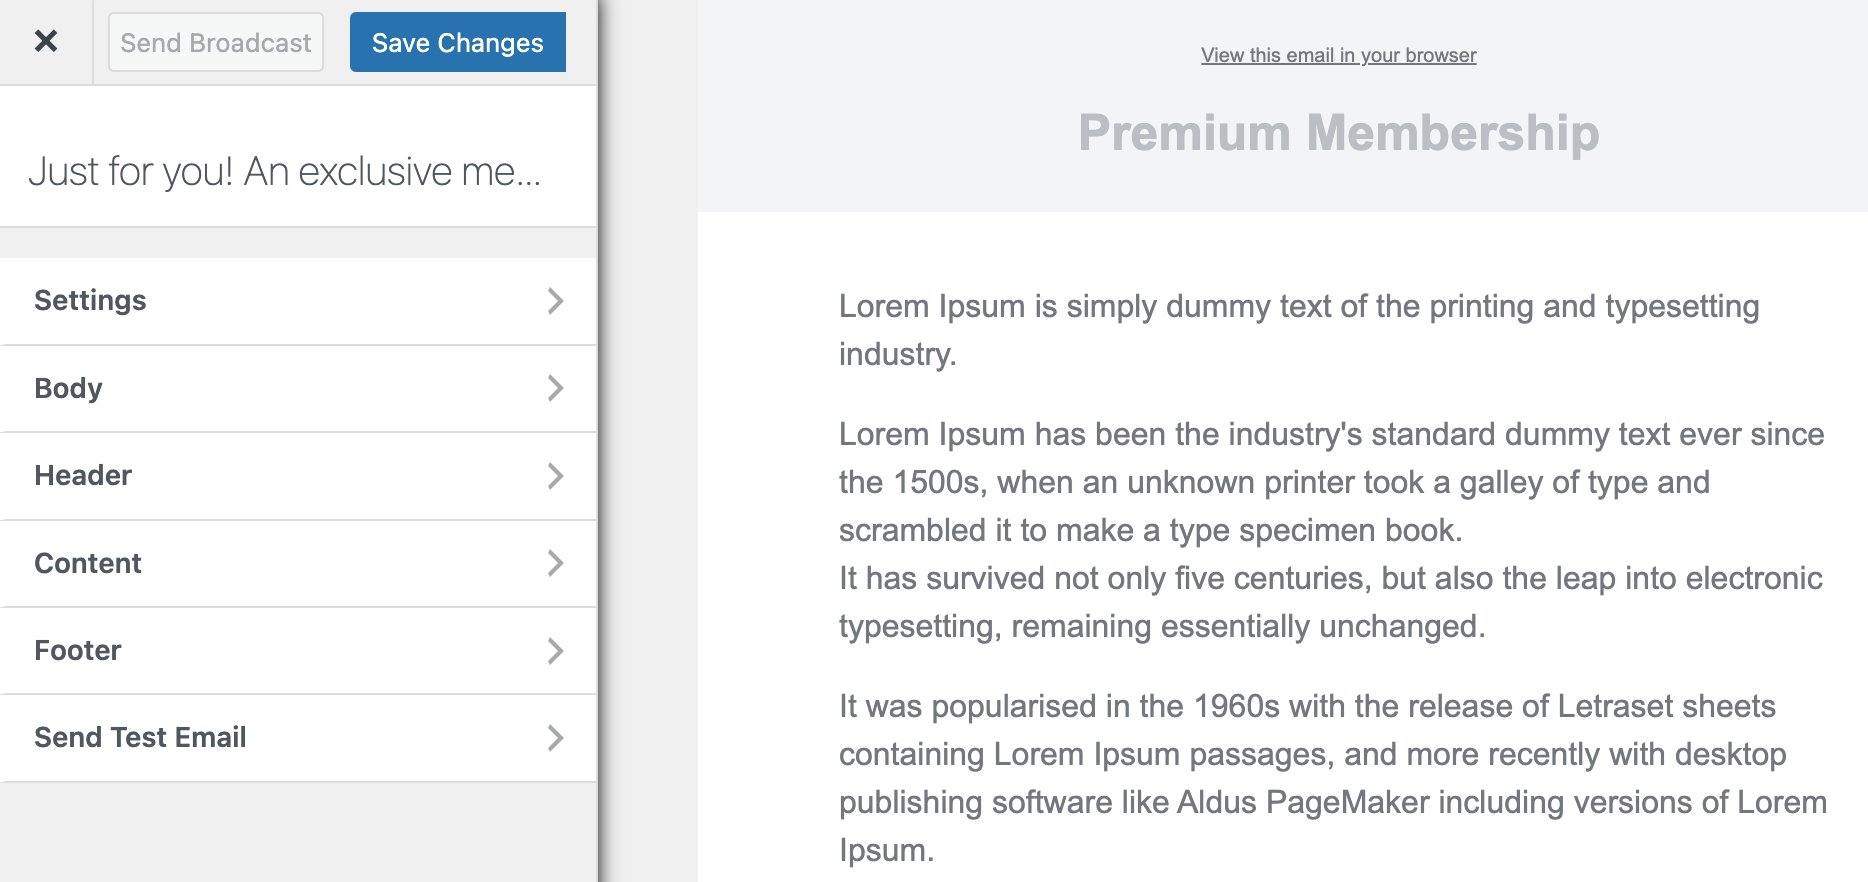
The builder has several panels, including Settings, Body, Header, Content, Footer, and Send Test Email.
The Settings panel allows you to modify the email’s subject and connect the email with the users you want to send it to.
The Body panel lets you change the look of the email template, including the background color, content background color, and text color. You can also add custom CSS to the email template using this panel.
The Header panel allows you to set an image that appears at the top of the email or remove the header if you wish.
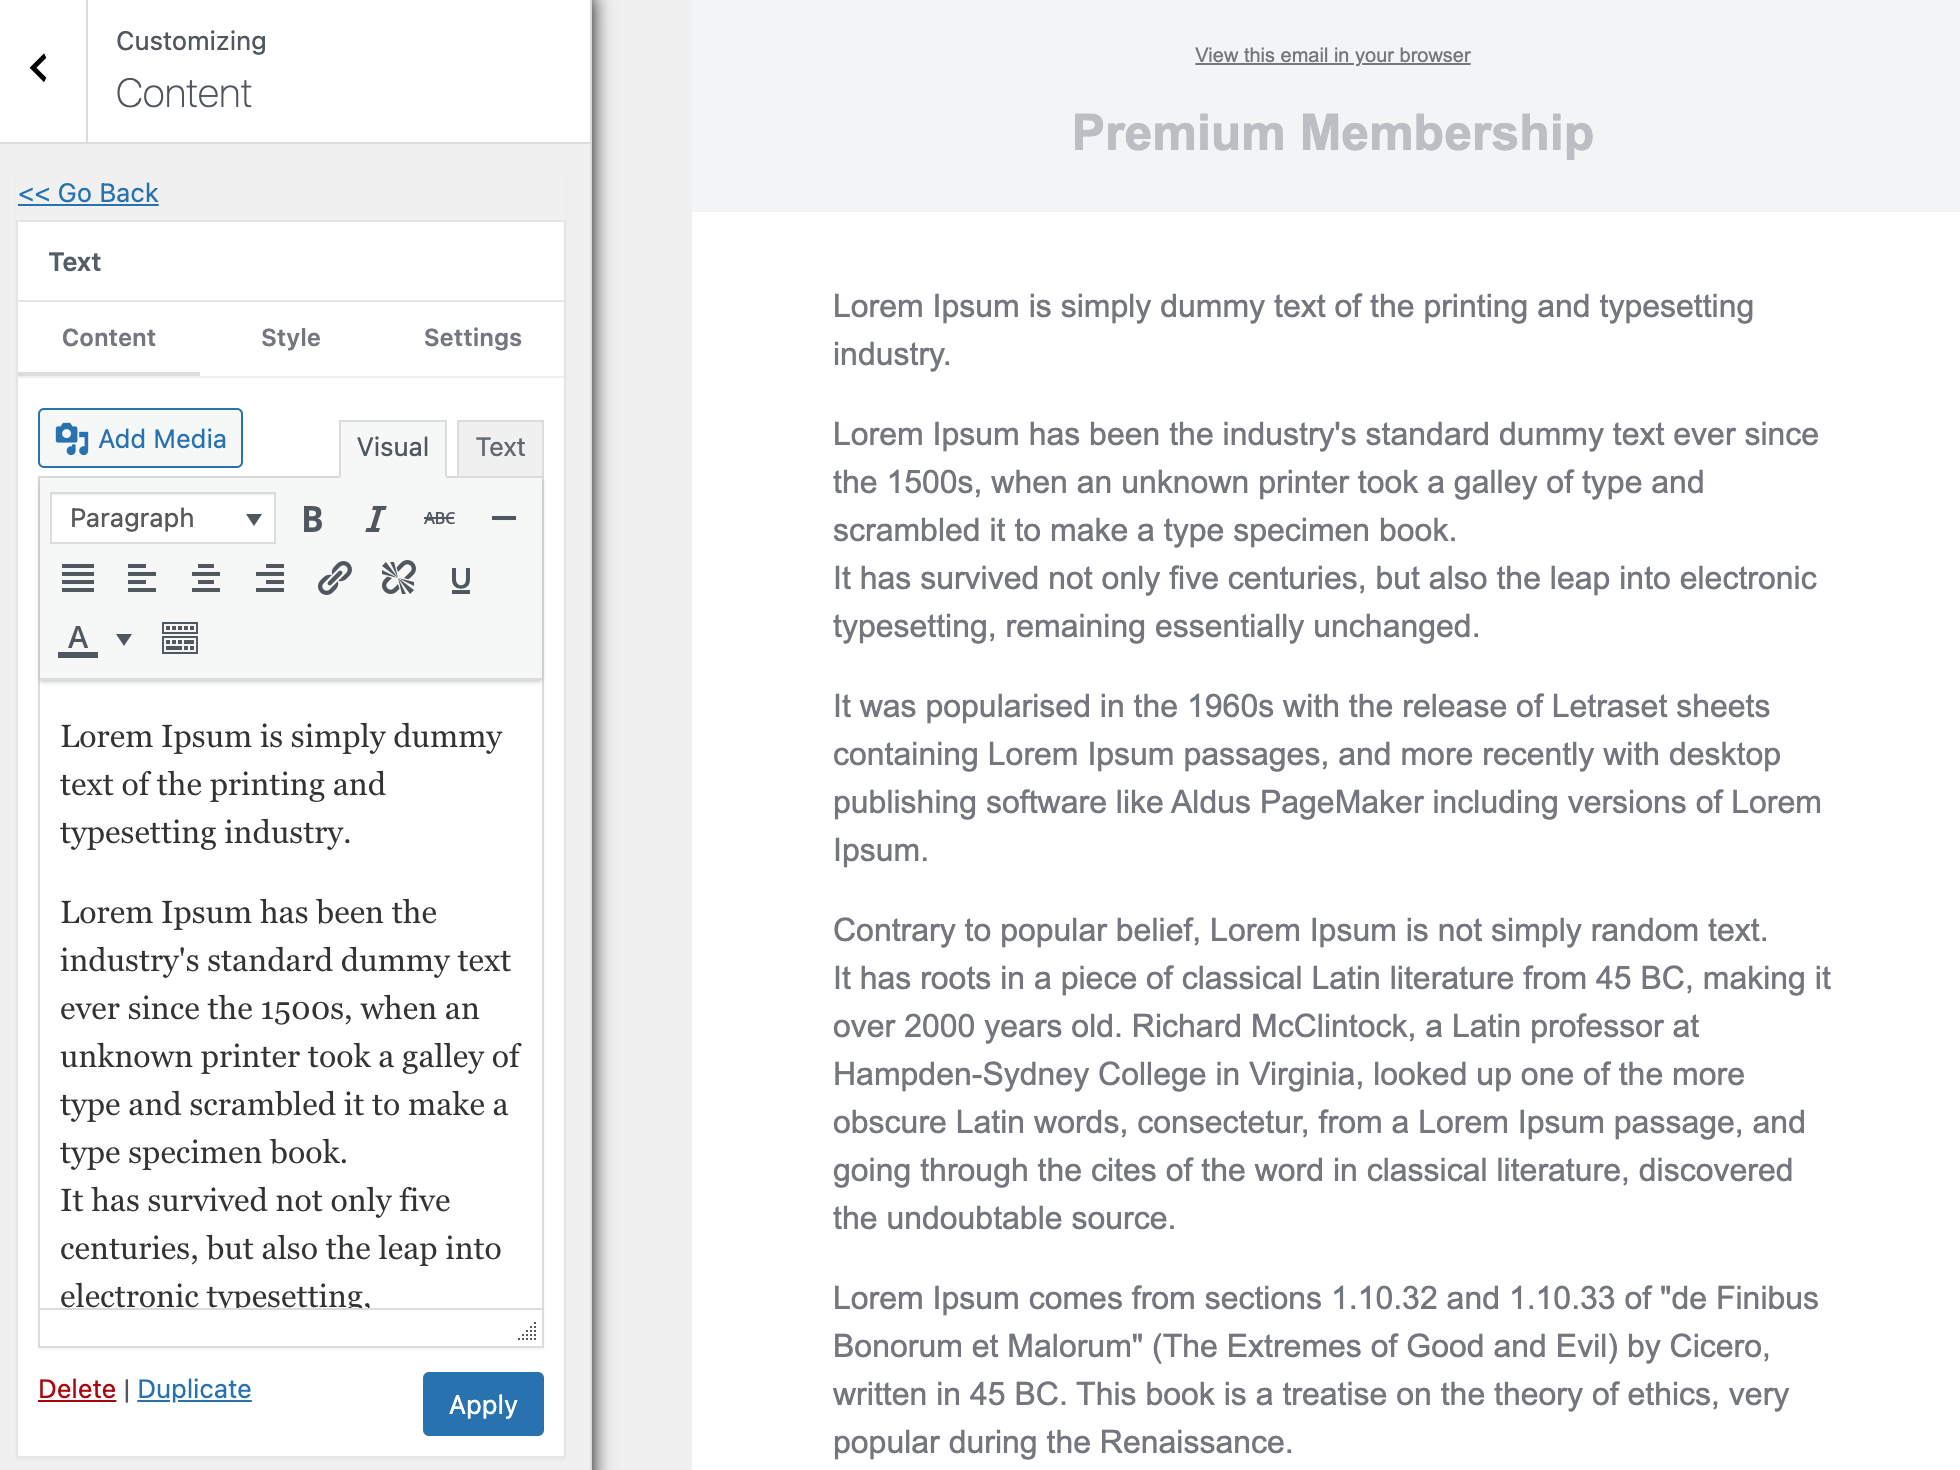
The Content panel is where you can edit the content of the email, change the style, and block settings.
The Footer panel lets you add a mailing address, copyright message, and unsubscription link or remove the MailOptin logo or the footer altogether.
Finally, the Send Test Email panel allows you to send a test email to anyone, including yourself.
Open the content panel to craft and style the email message or body to your heart’s content.
When you finish the email content, open the Settings panel to set up the recipient.
Select Tutor LMS as the connection or recipient.
If you only want to send the email to users enrolled in specific courses, use the “Restrict to Courses” setting.
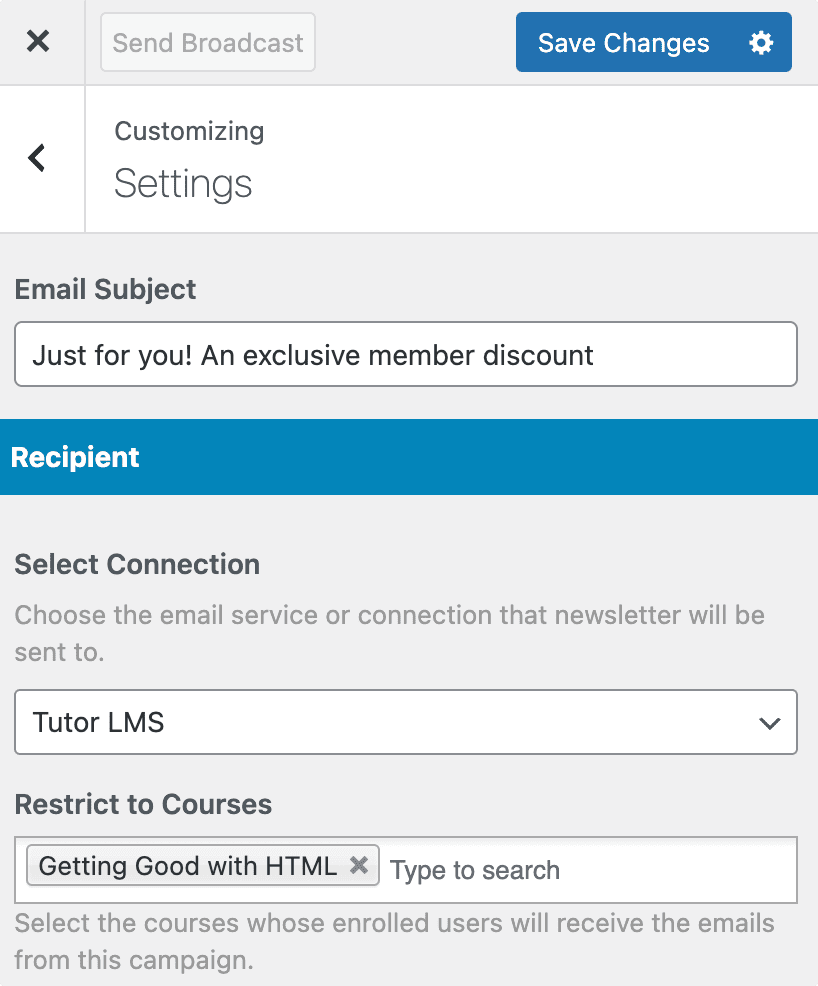
When you are done, click the “Save Changes” button to enable the “Send Broadcast” button that you will click when you finally decide it’s time to send the email.
Easy peasy.
Setting Up Automated Emails to Tutor LMS Users
With MailOptin, you can set up email automation to send emails to your Tutor LMS users whenever you publish a new post or article. You can also set up a daily, weekly, and monthly email digest of your published posts for your course users.
Setting Up New Published Post Email Automation
To get started, go to MailOptin >> Emails and click the Add New button. Select “Email Automation”
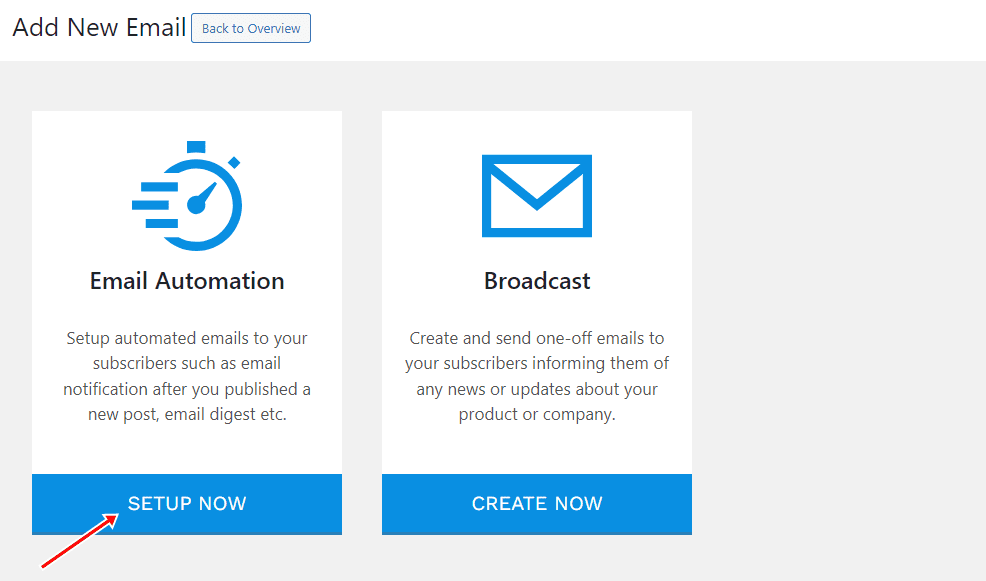
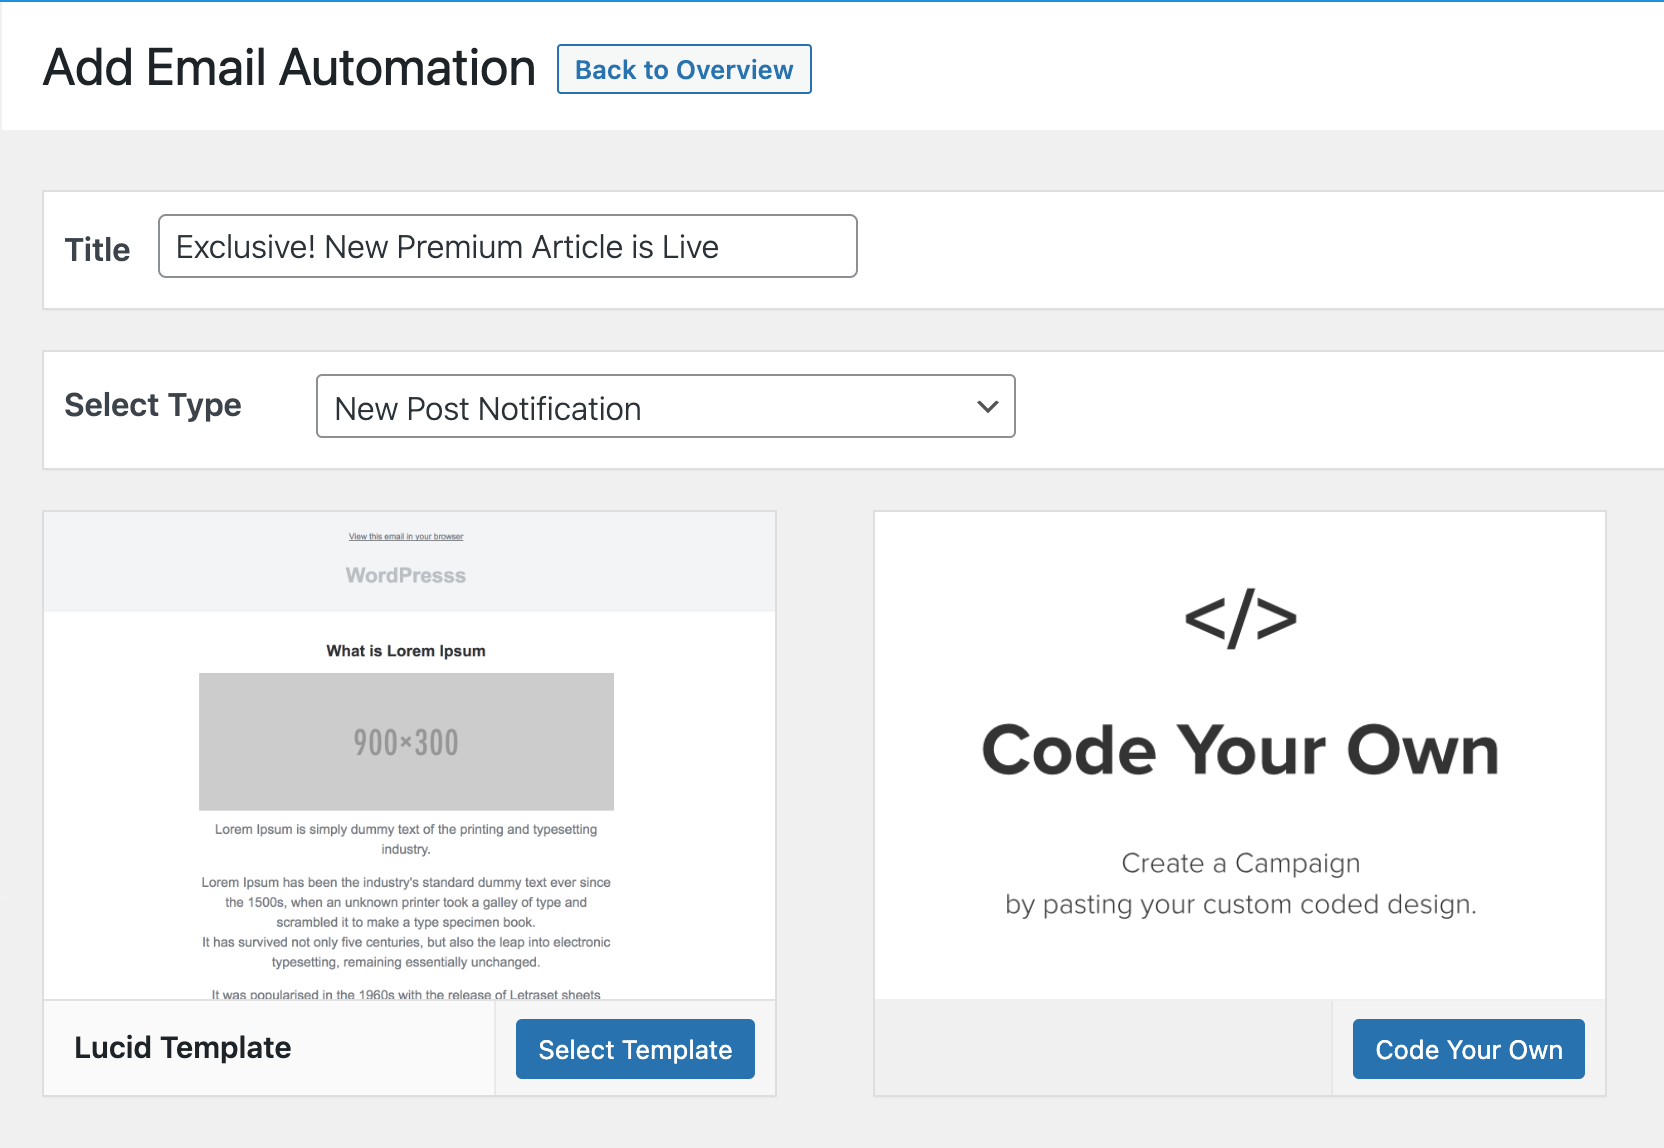
Enter a title for the automation, select “New Post Notification, ” and select an email template to open the email builder.
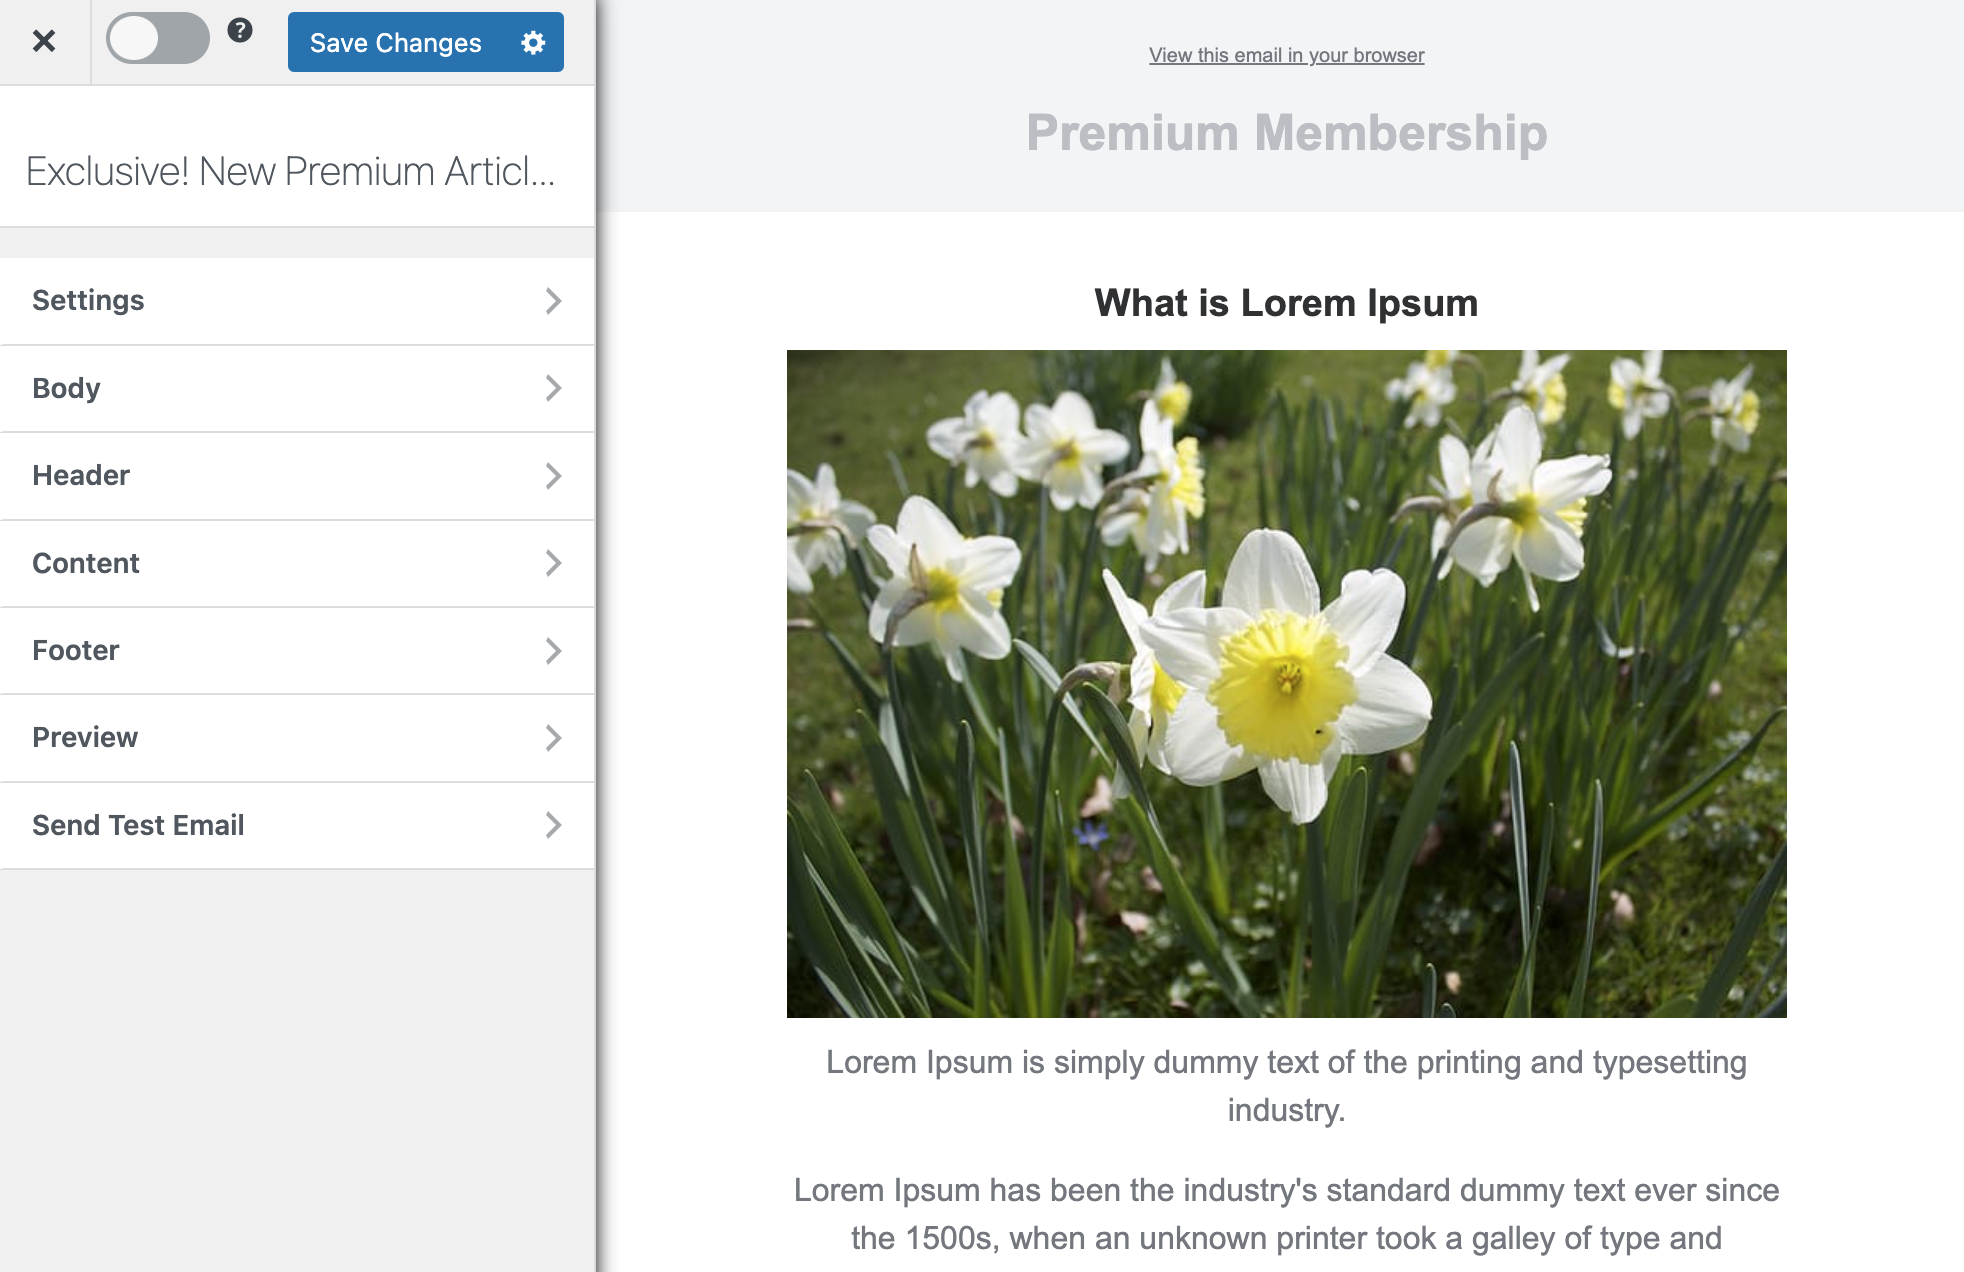
On the email builder, use the Body, Header, Content, and Footer panels to customize the email template to your heart’s content. You can change colors, add a header image, add custom content, and more.
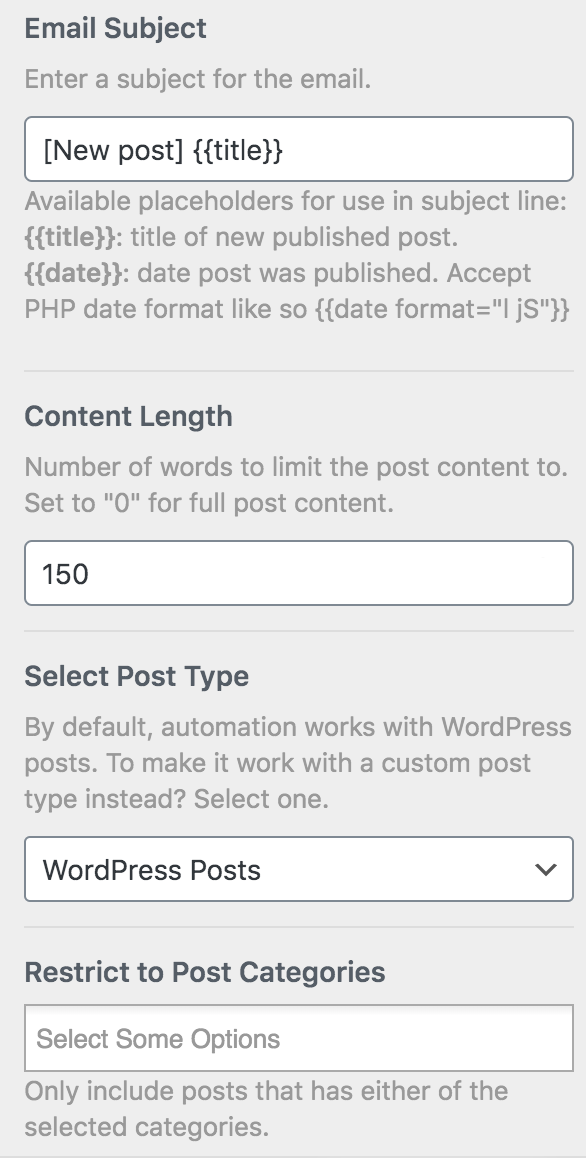
The Settings panel is where the actual setup is done. Open it to set up the email subject and the maximum content length. You can also restrict the automation to specific categories, tags, and authors. This is ideal if you want to email when blog posts are added to a particular category in WordPress.
Next, scroll down to the Recipient section and select ‘Tutor LMS’.
If you only want to email users enrolled in specific courses, use the “Restrict to Courses” setting.
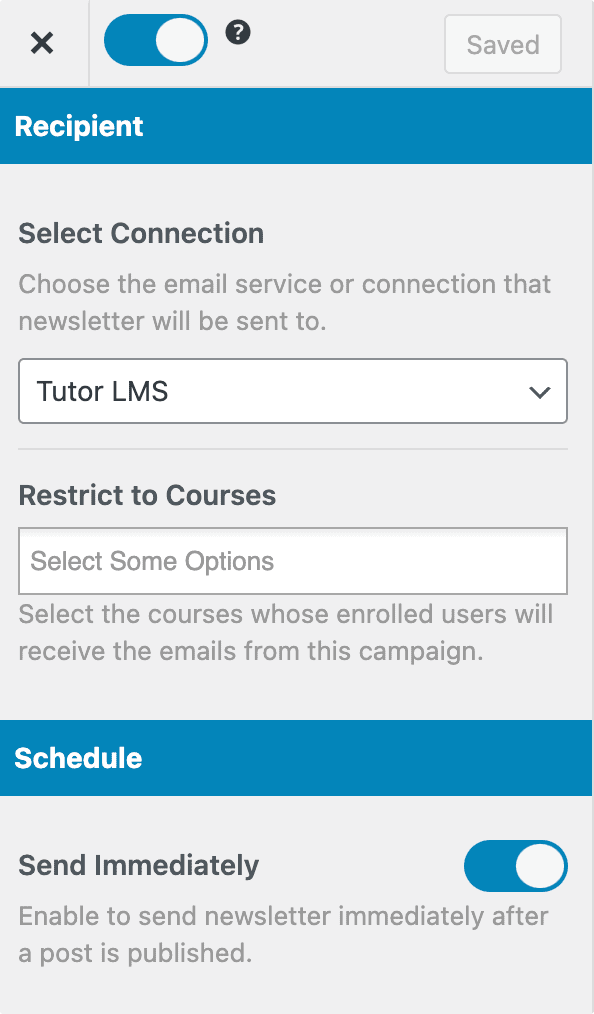
When you are done, click the Save Changes button at the top right corner and then toggle the activation switch.
![]()
Setting Up Email Digest Automation
Similar to the New Post Notification setup explained above, when creating the automation, select “Posts Email Digest” and choose a template.
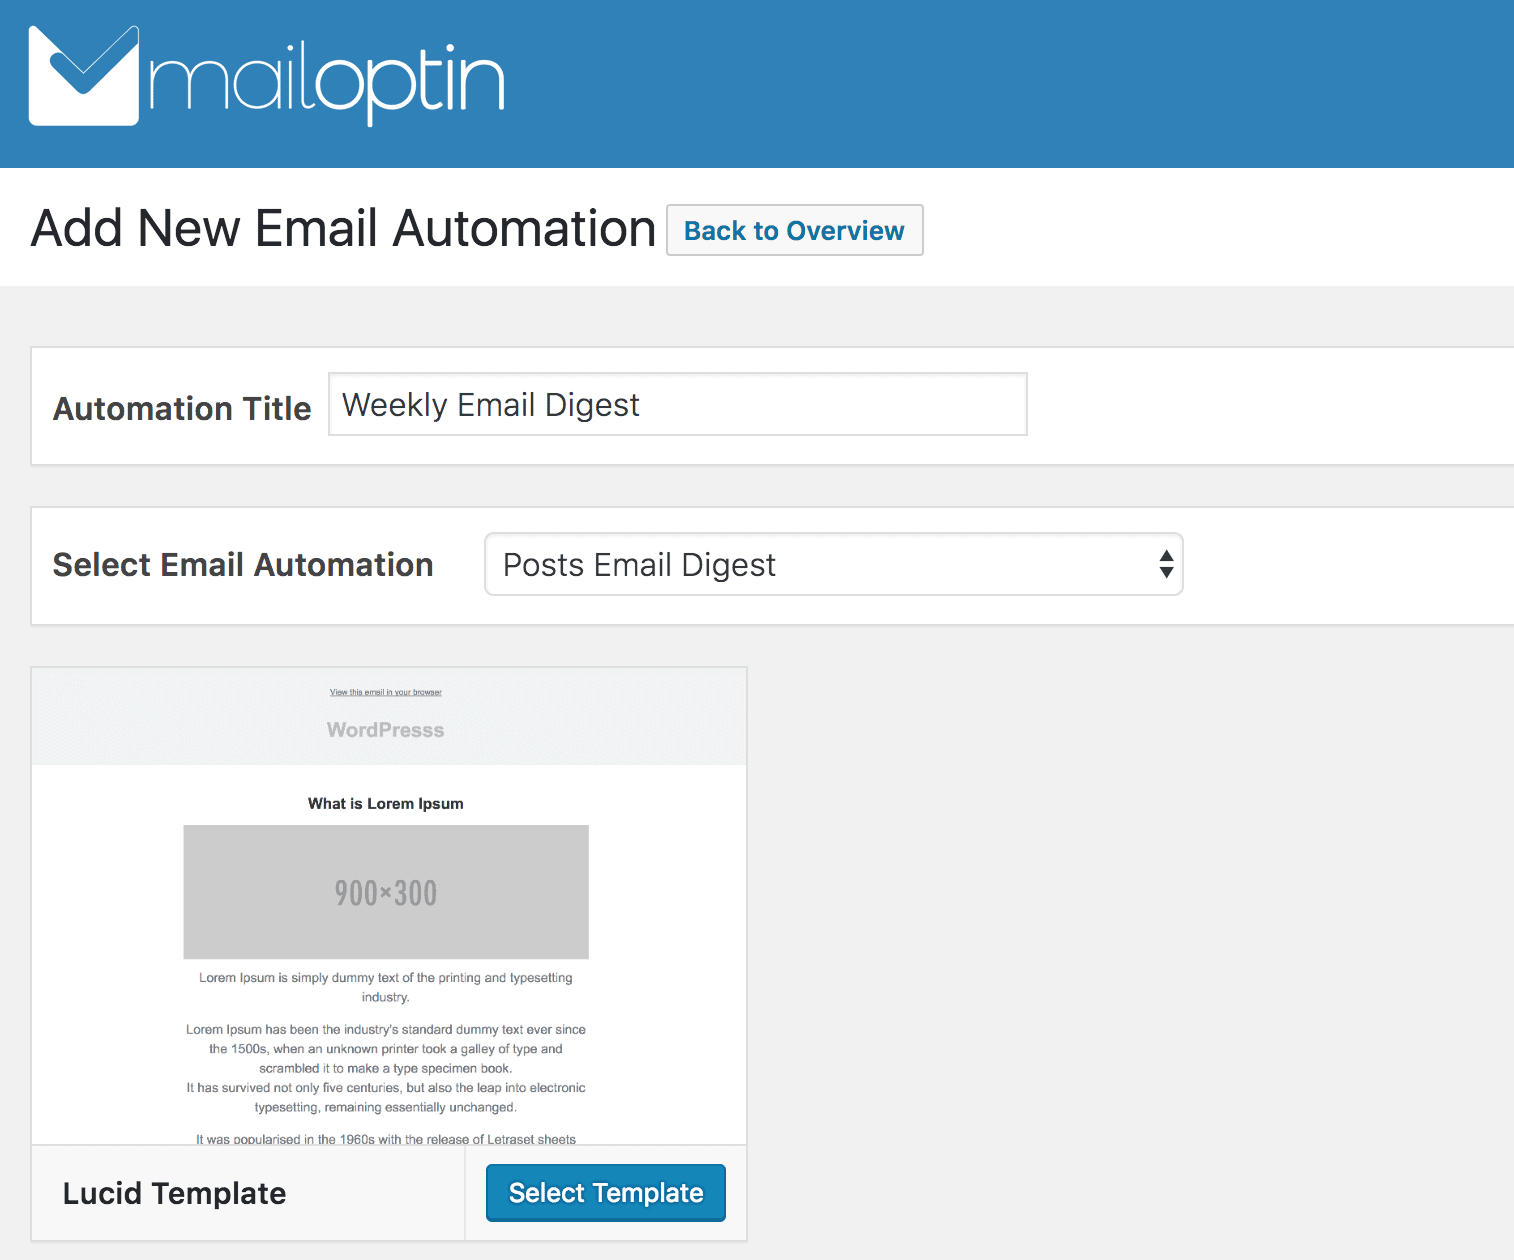
Set up and craft the email content and settings. In the recipient section, select Tutor LMS and the course whose users you would love to send the automated emails to.
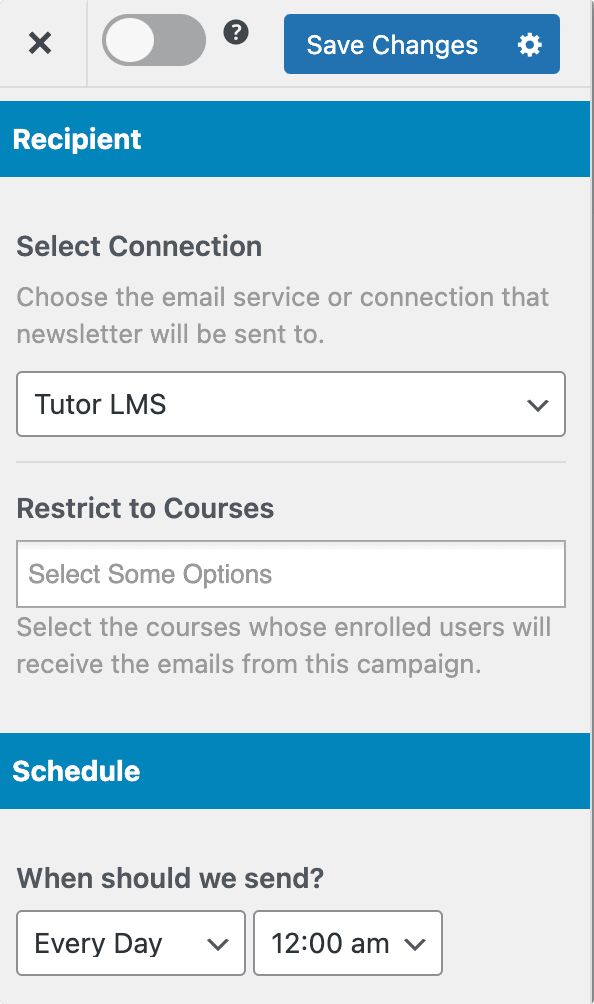
Use the Schedule section to decide when to send the email, whether daily, weekly, or monthly.
Remember to save your changes and activate the automation.
Since you are sending emails to WordPress users, you can use the following placeholders in your email message.
- {{username}} – User’s username
- {{useremail}} – User’s email address
- {{firstname}} – User’s first name
- {{lastname}} – User’s last name
- {{displayname}} – User’s display name
- {{websiteurl}} – User’s website URL.
Note: If you use email marketing software with your Tutor LMS course website, MailOptin allows you to subscribe Tutor LMS users to your email list after they sign up or enroll in a course.
Conclusion
Sending targeted emails to your Tutor LMS users is a crucial step in maintaining engagement, promoting your courses, and ultimately driving revenue. With the seamless integration of MailOptin and Tutor LMS, you can efficiently manage and automate your email marketing efforts directly from your WordPress site.
By following the steps outlined in this guide, you can easily send emails to your Tutor LMS users in WordPress, keeping them informed and motivated throughout their learning journey.
Start implementing these strategies today, and watch as your course engagement and sales soar!
