How to Send Emails to LifterLMS Users in WordPress
Do you want to learn how to send emails to LifterLMS users in WordPress?
Effective communication with your course participants is crucial for the success of your online learning platform. Whether you need to send course updates, promotional offers, or important announcements, reaching your LifterLMS users through email can significantly enhance engagement and retention rates.
In this guide, we’ll show you how to effortlessly send bulk emails to your LifterLMS users or students in WordPress using the MailOptin plugin.
Why Send Emails to Your LifterLMS Users?
Sending emails to your LifterLMS users is crucial to managing an effective online learning platform. Here’s why it’s essential:
Enhance Course Engagement: Emails help keep your students engaged with their enrolled courses. Whether it’s reminding them of upcoming lessons and assignments or encouraging them to continue where they left off, consistent communication via email keeps your learners motivated and on track.
Deliver Important Course Updates: If there are changes to your course content, schedules, or platform features, email is the quickest way to inform your students. Keeping your learners up-to-date with the latest information ensures they’re always aware of what’s happening, fostering a sense of trust and reliability.
Promote New Courses and Offers: Emails are a powerful tool for promoting new courses, special offers, or discounts. By targeting your existing LifterLMS users with relevant promotions, you can increase course enrollments and generate more revenue from your platform.
Build a Learning Community: Emails can help foster community among your LifterLMS users. By sharing success stories, upcoming events, or group activities, you encourage student interaction and collaboration, which can enhance the overall learning experience.
Gather Valuable Feedback: Emails provide an excellent opportunity to gather feedback from your students. Whether through surveys, polls, or direct responses, you can gain insights into how your courses are being received and identify areas for improvement.
Sending Emails to Your LifterLMS Users
To send emails to your users and students in LifterLMS, begin by purchasing a MailOptin plan and download the plugin from the welcome email or your MailOptin account.
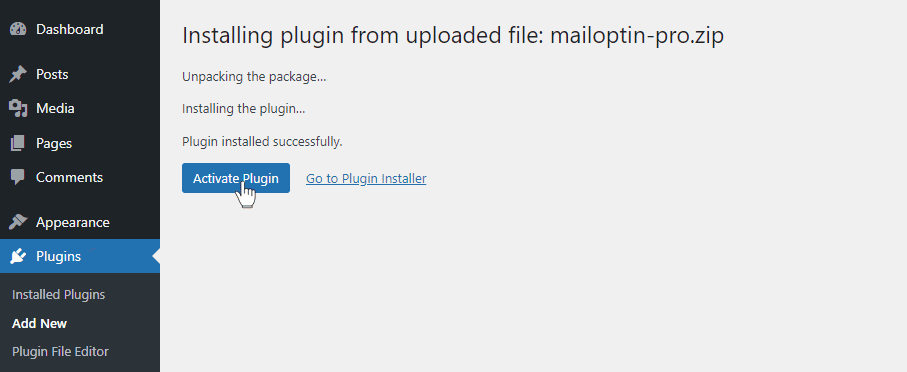
Next, upload and install the plugin on your WordPress website.

Once installed, click “Activate” to activate the plugin.
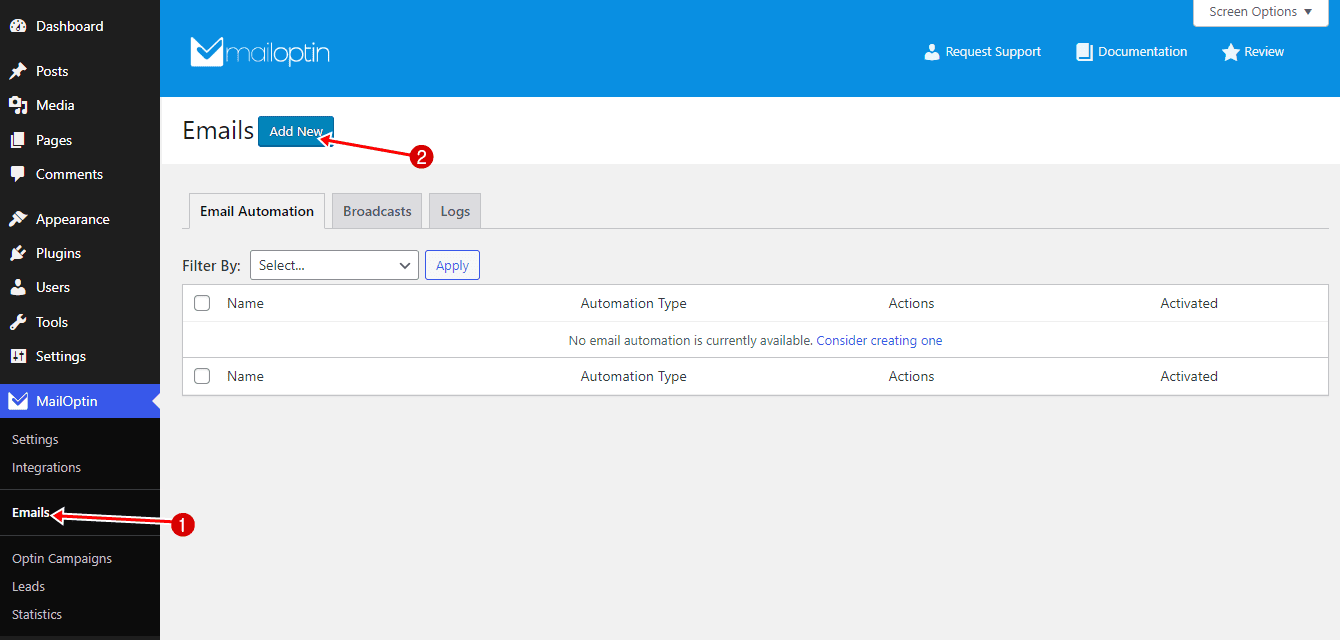
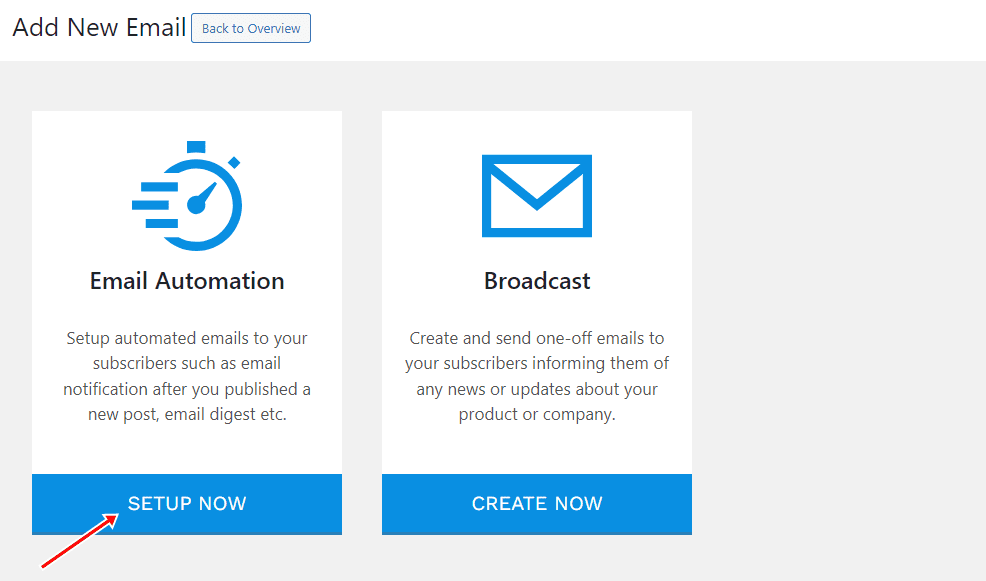
Next, navigate to MailOptin >> Emails, click the Add New button
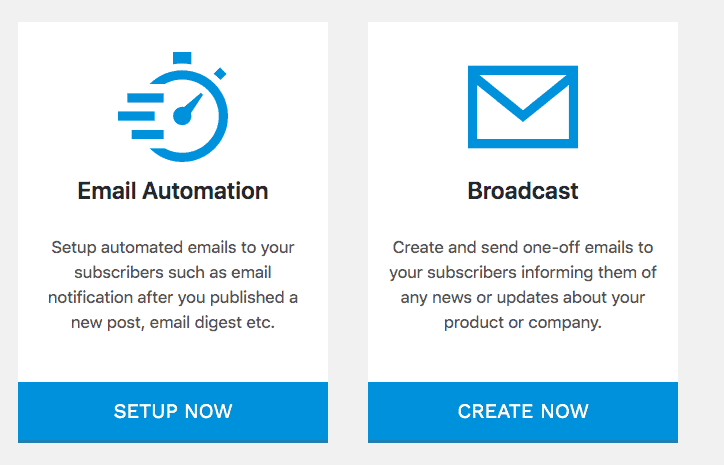
Then select Broadcast.
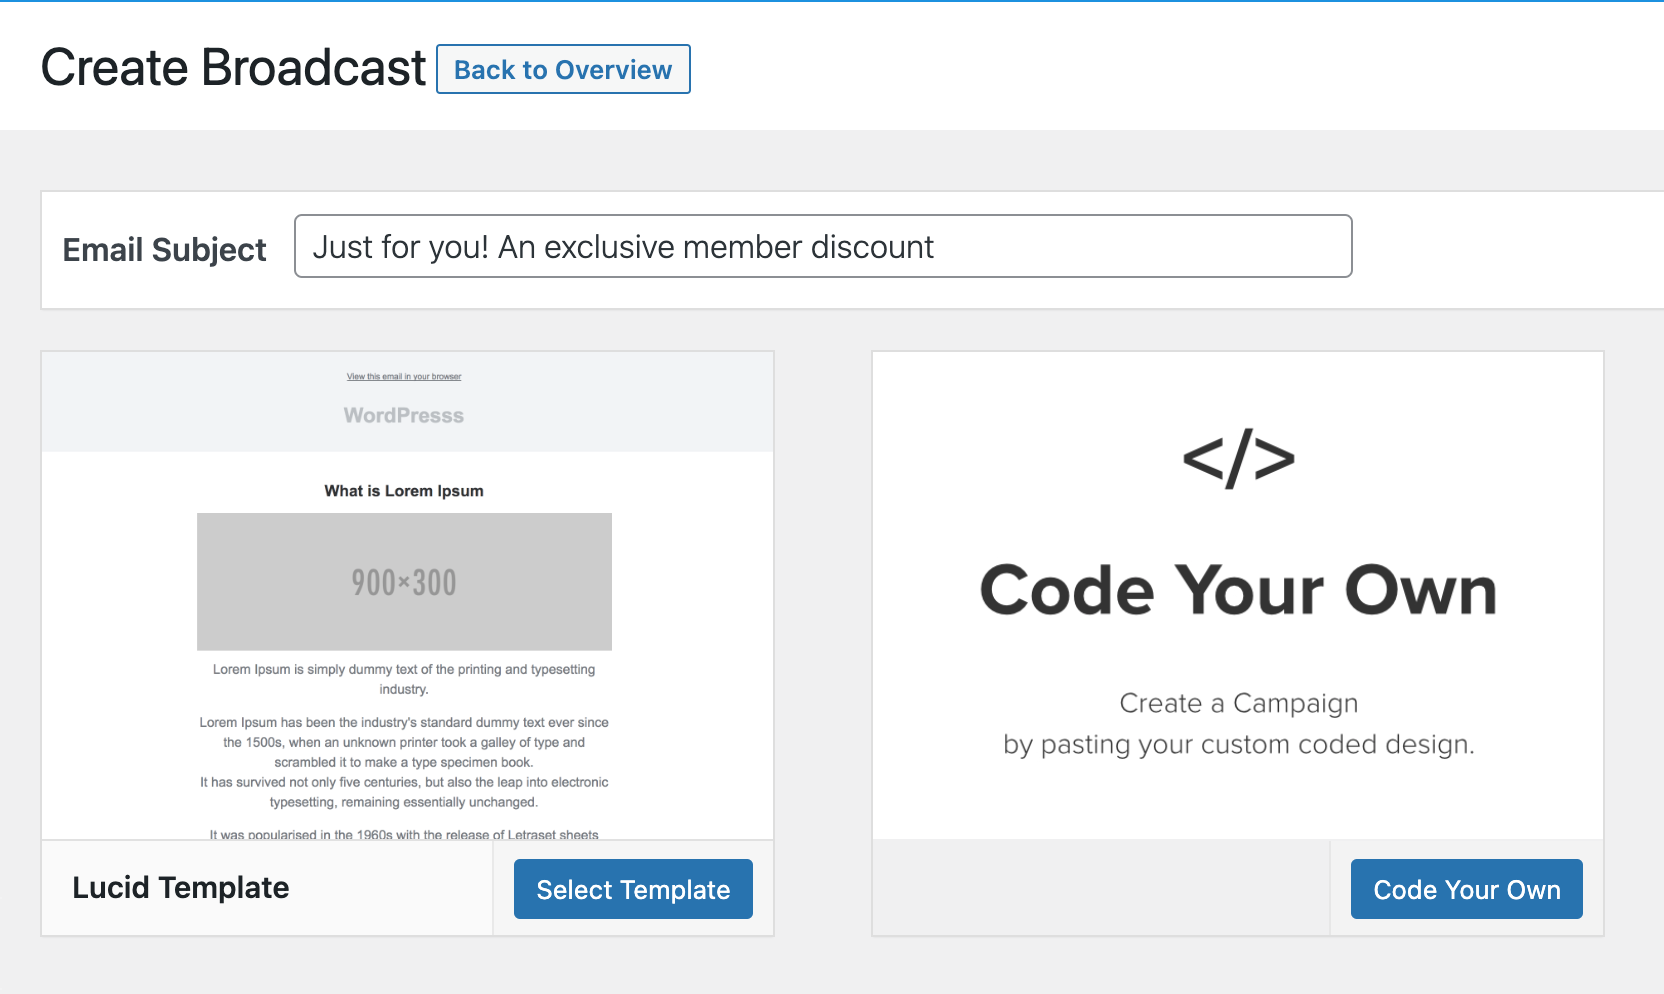
Enter an email subject and select a template.
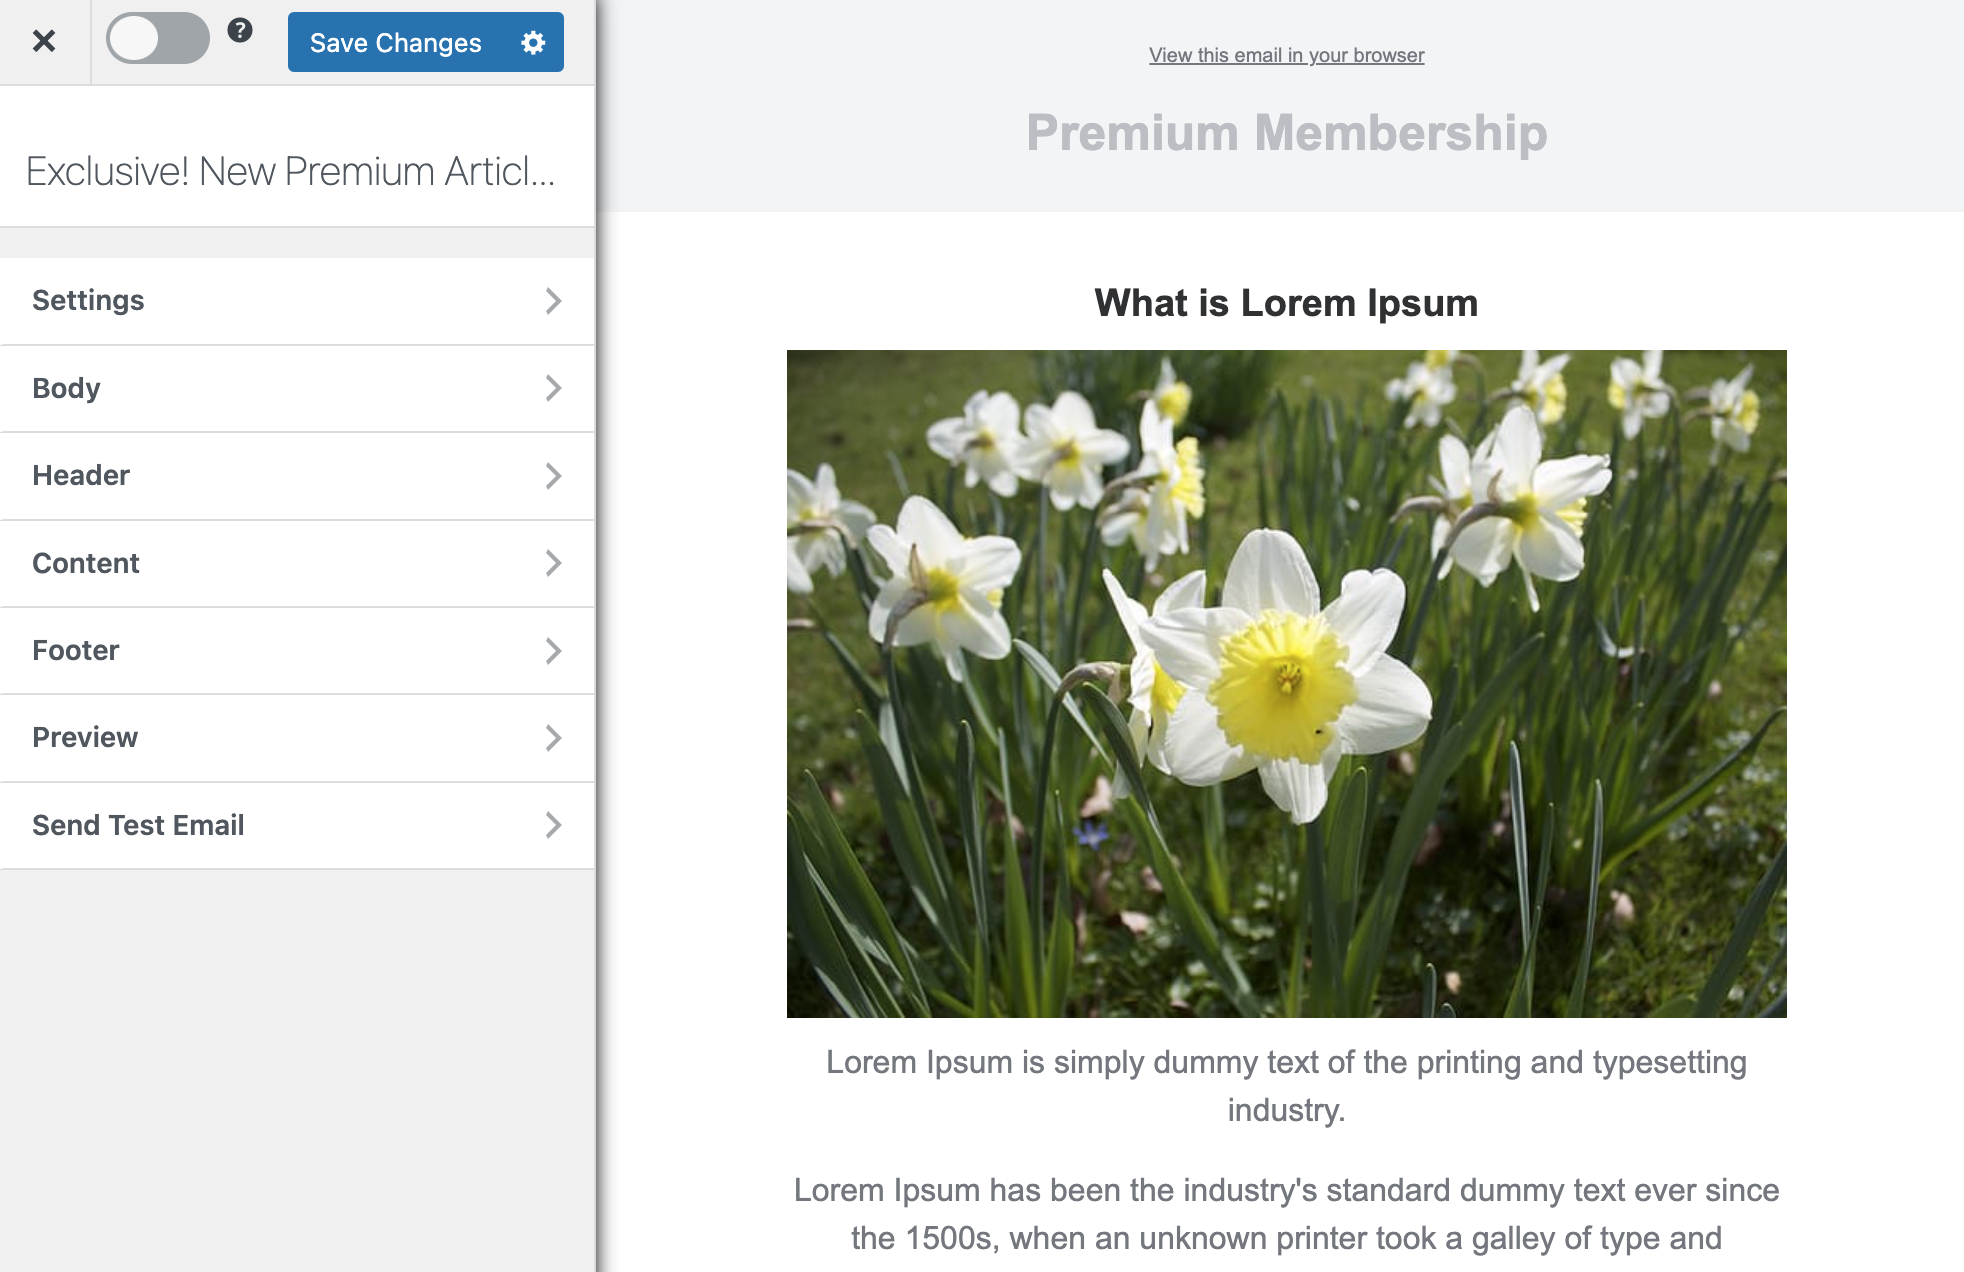
After selecting an email template, you will open the email builder.
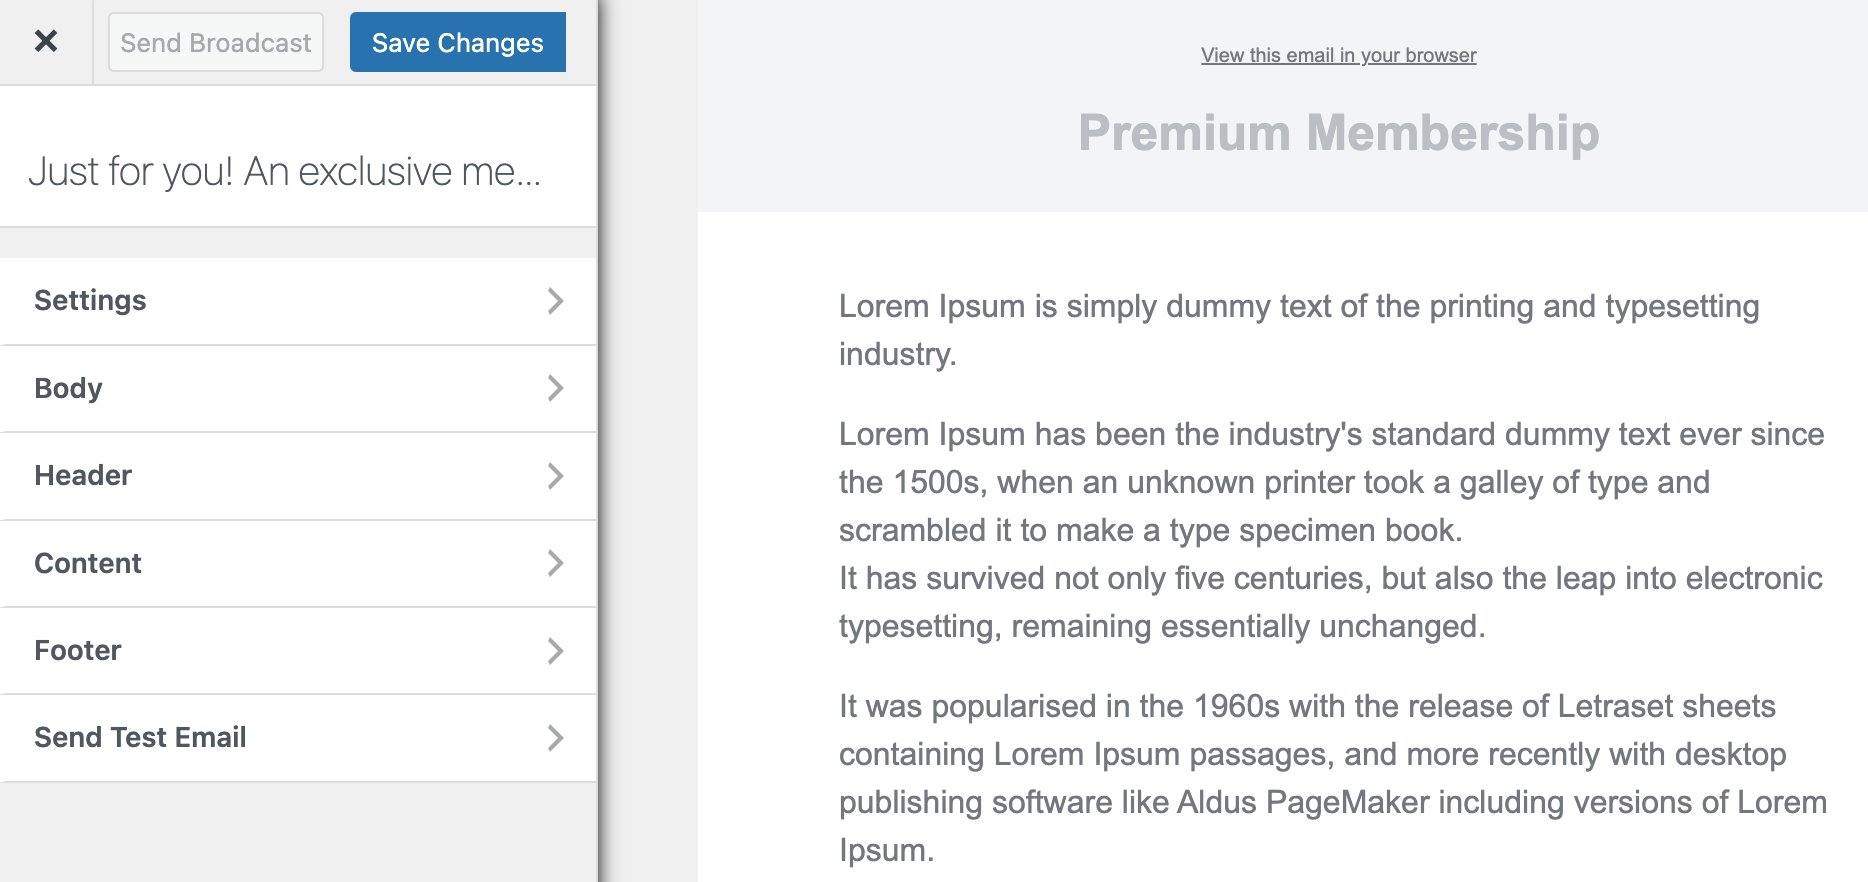
The builder has several panels, including Settings, Body, Header, Content, Footer, and Send Test Email.
The Settings panel allows you to modify the email’s subject and connect the email with the users you want to send it to.
The Body panel lets you change the look of the email template, including the background color, content background color, and text color. You can also add custom CSS to the email template using this panel.
The Header panel allows you to set an image that appears at the top of the email or remove the header if you wish.
The Content panel is where you can edit the content of the email, change the style, and block settings.
The Footer panel lets you add a mailing address, copyright message, and unsubscription link or remove the MailOptin logo or the footer altogether.
Finally, the Send Test Email panel allows you to send a test email to anyone, including yourself.
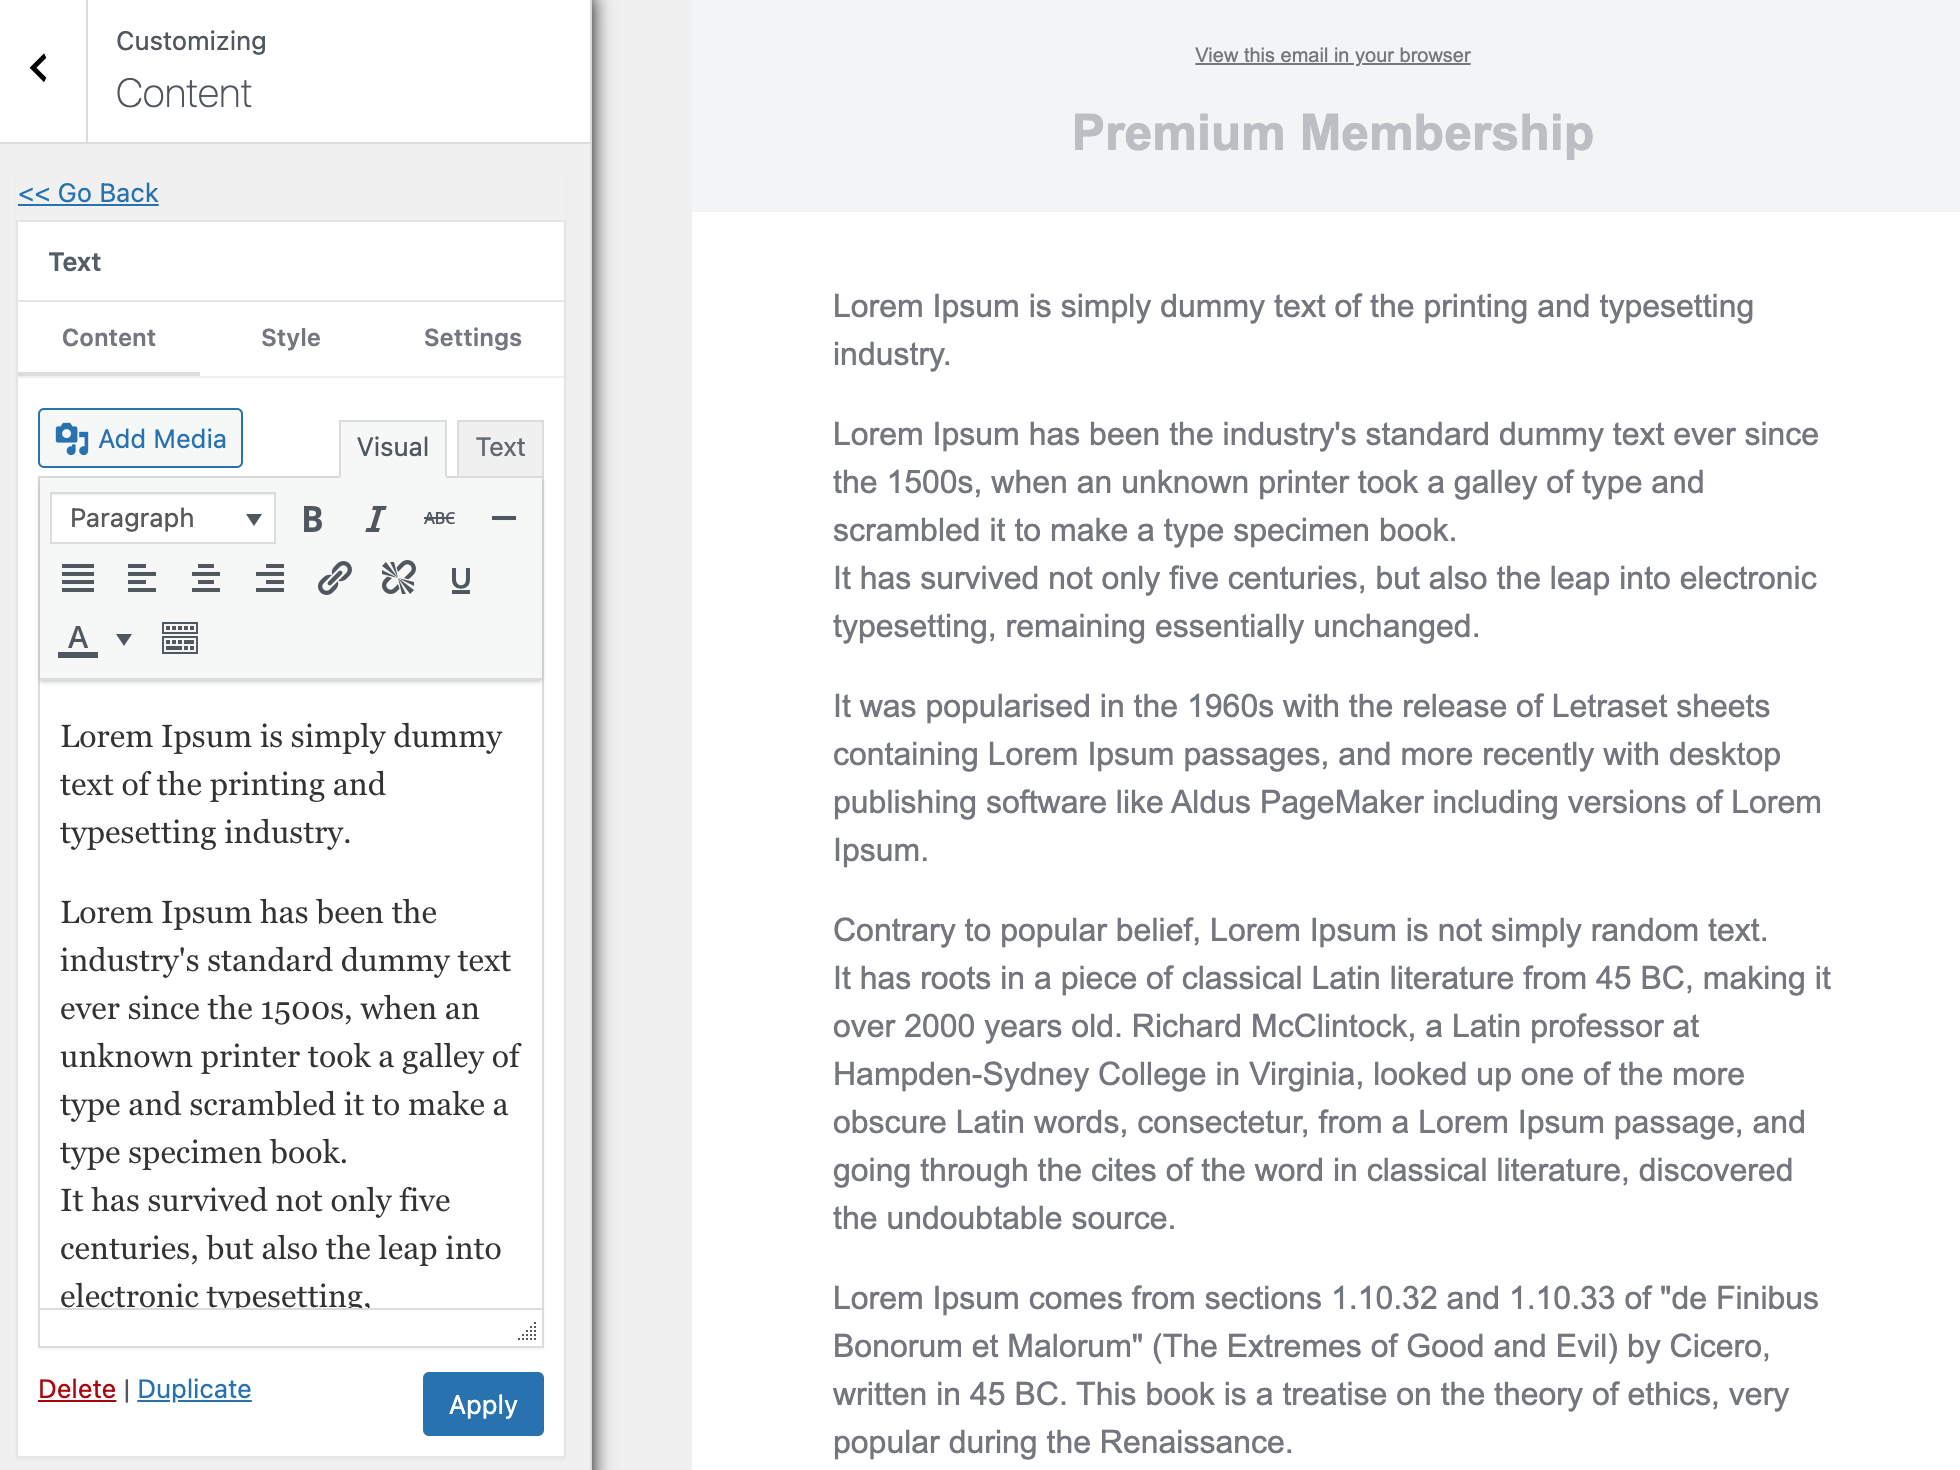
Open the content panel to craft and style the email message or body to your heart’s content.
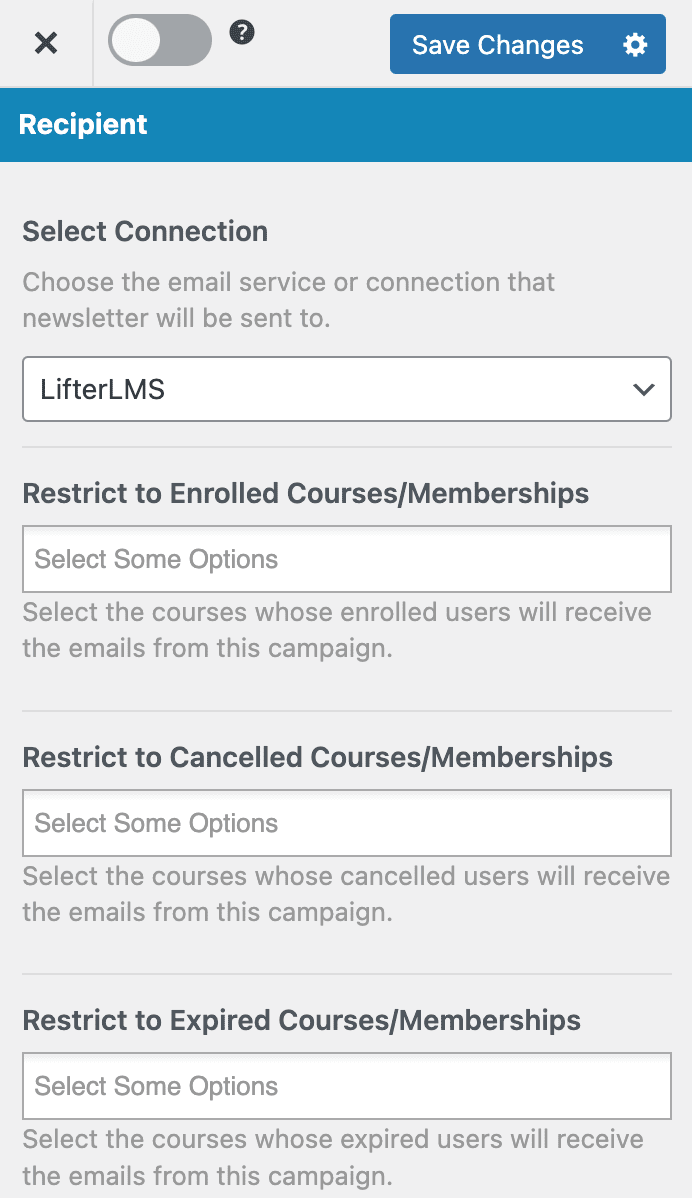
When you finish the email content, open the Settings panel to set up the recipient.
Select LifterLMS as the connection or recipient, and the courses or memberships whose enrolled, canceled, and expired users or students will receive emails from the campaign.
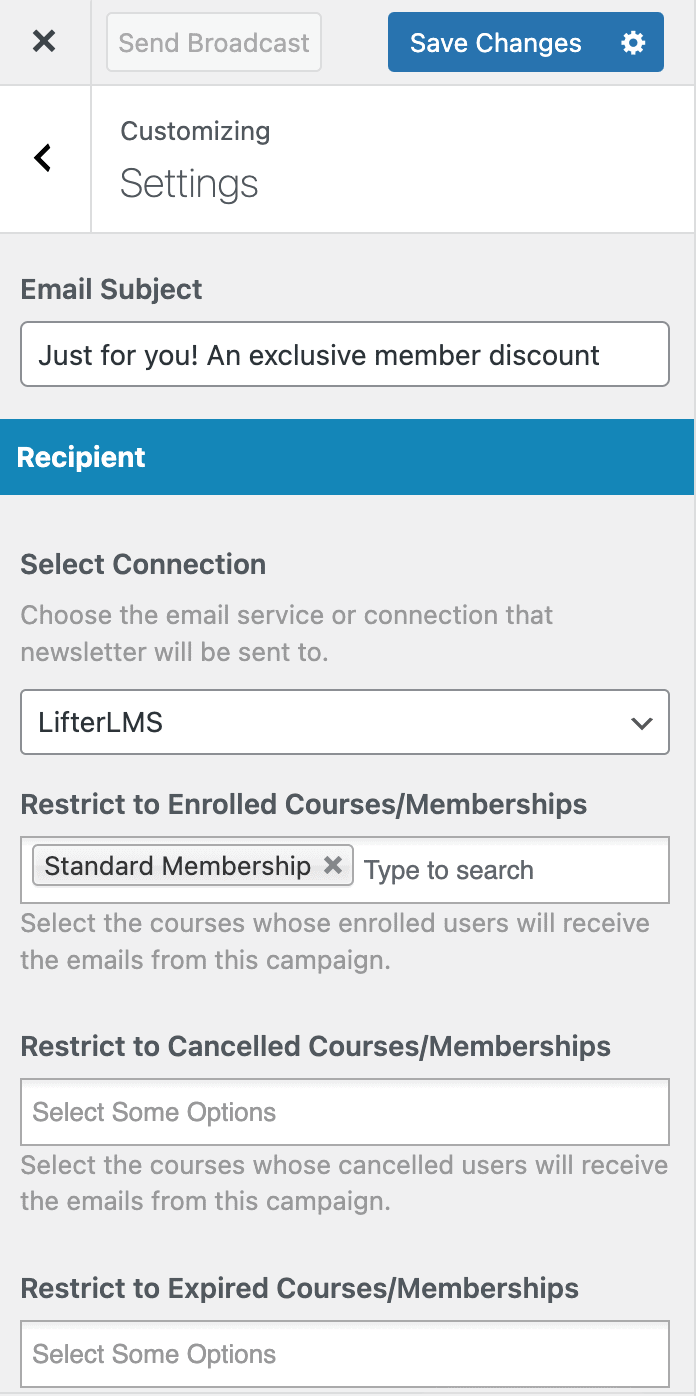
When you are done, click the “Save Changes” button to enable the “Send Broadcast” button that you will click when you finally decide it’s time to send the email.
Easy peasy.
Setting Up Automated Emails to LifterLMS Users
With MailOptin, you can set up email automation to send emails to your LifterLMS users whenever you publish a new post or article. You can also set up a daily, weekly, and monthly email digest of your published posts for your course users.
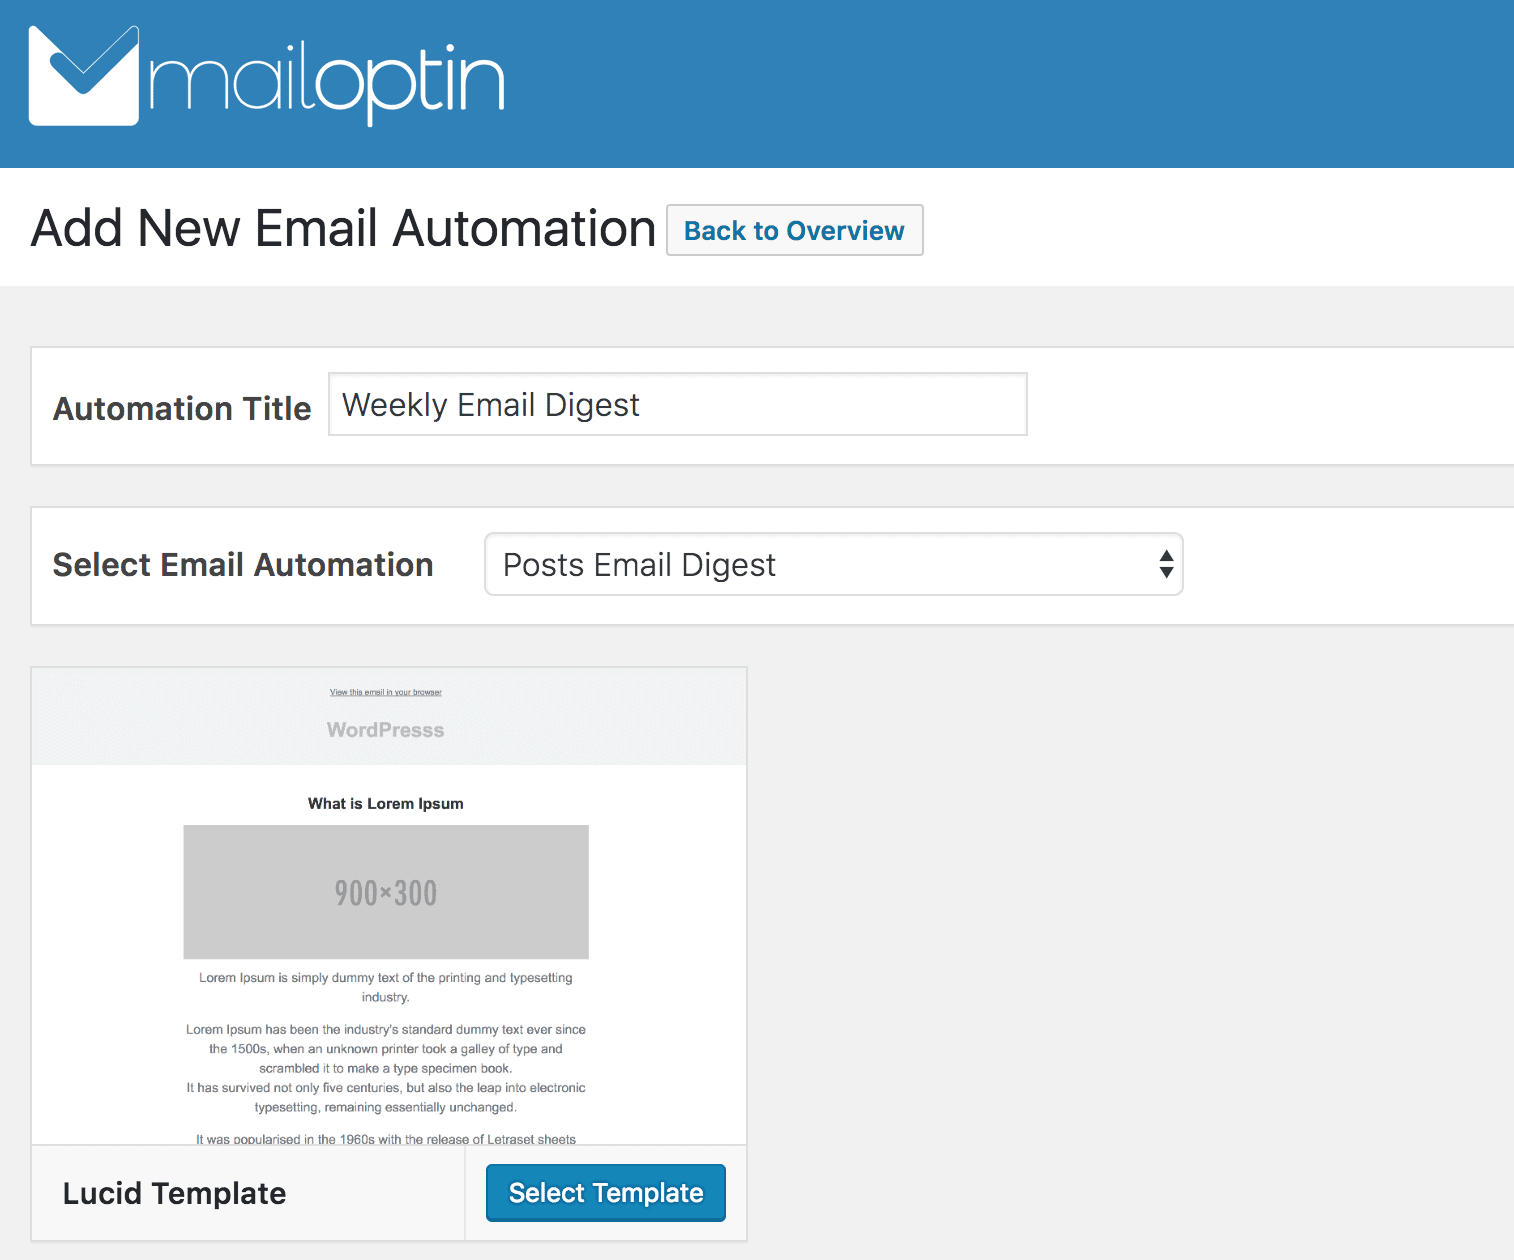
Setting Up New Published Post Email Automation
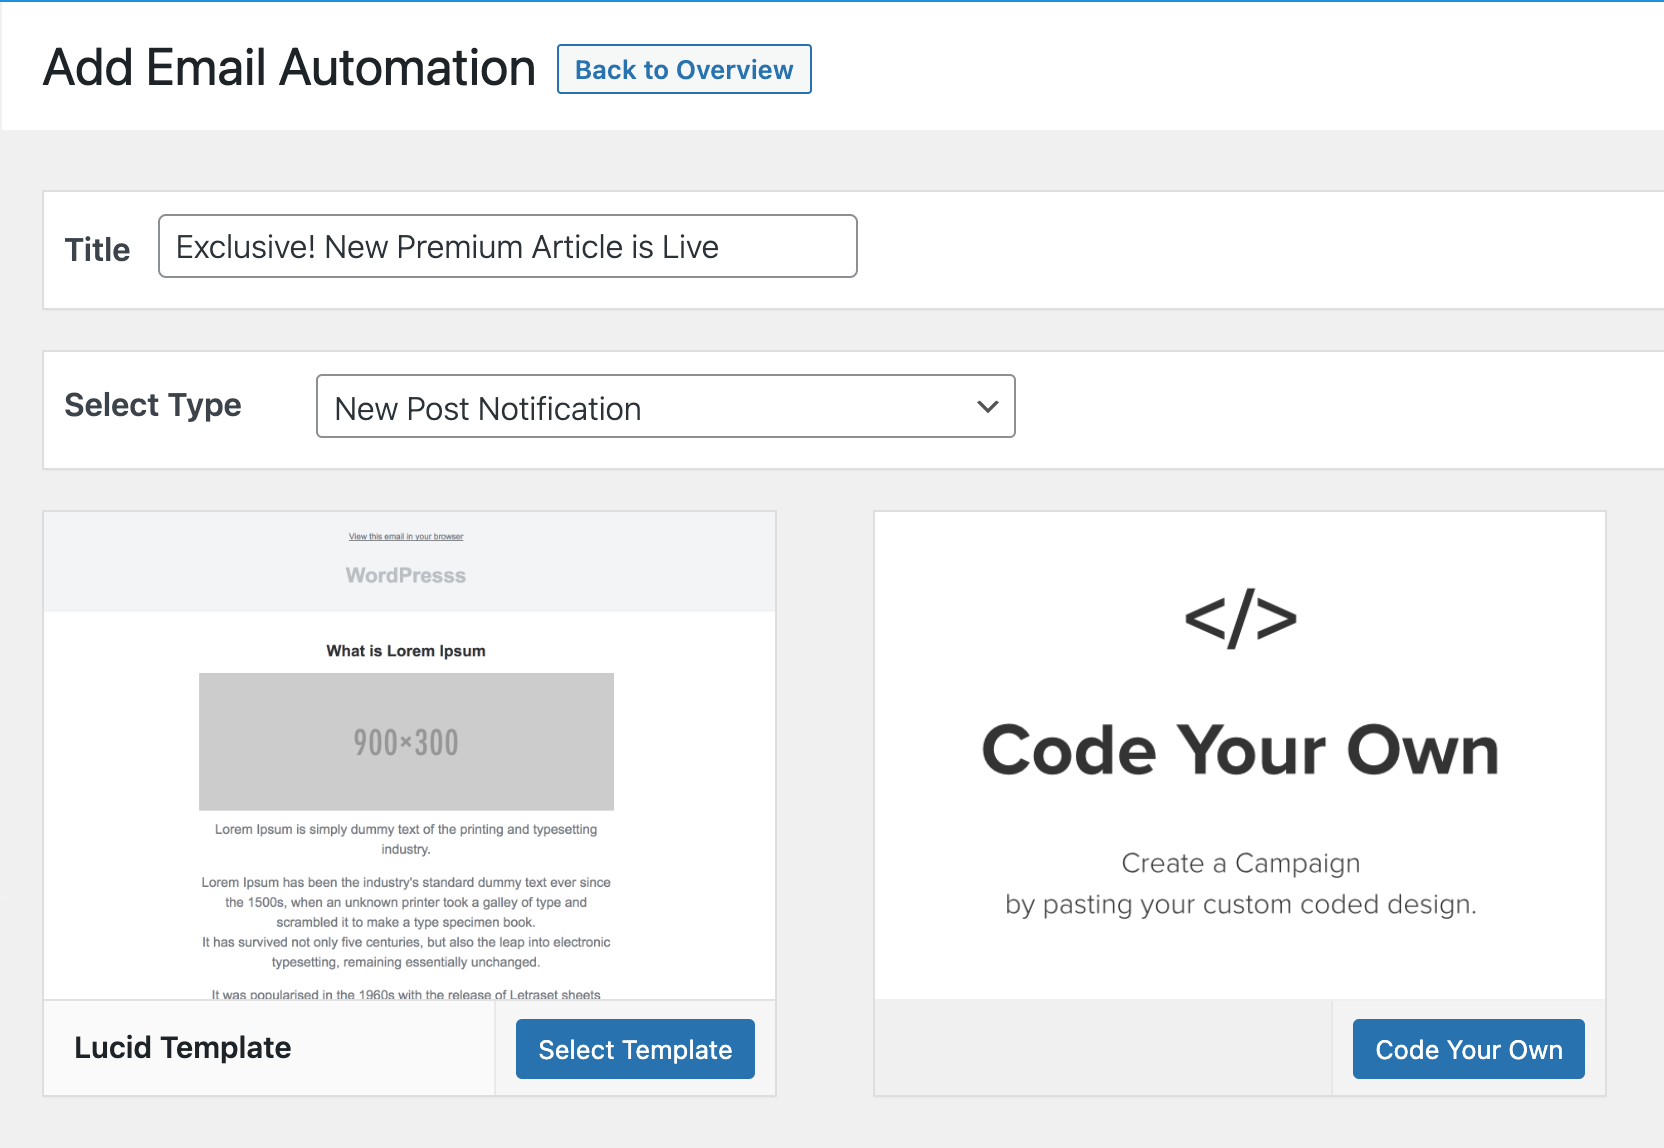
Go to MailOptin >> Emails and click the Add New button to get started. Select “Email Automation”
Enter a title for the automation, select “New Post Notification, ” and select an email template to open the email builder.
On the email builder, use the Body, Header, Content, and Footer panels to customize the email template to your heart’s content. You can change colors, add a header image, add custom content, and more.
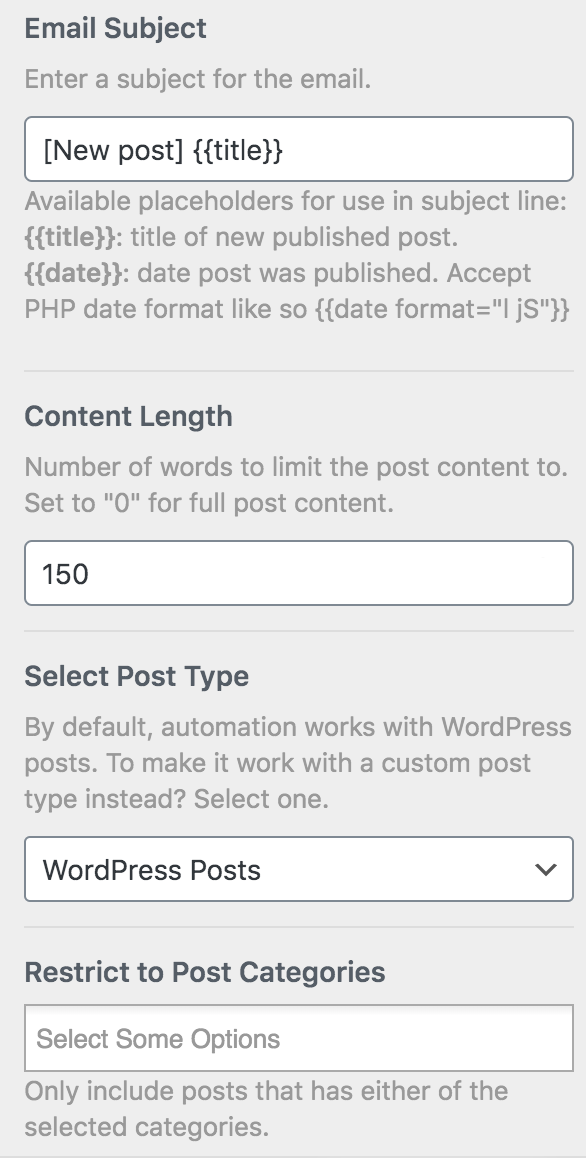
The Settings panel is where the actual setup is done. Open it to set up the email subject and the maximum content length. You can also restrict the automation to specific categories, tags, and authors. This is ideal if you want to email when blog posts are added to a particular category in WordPress.
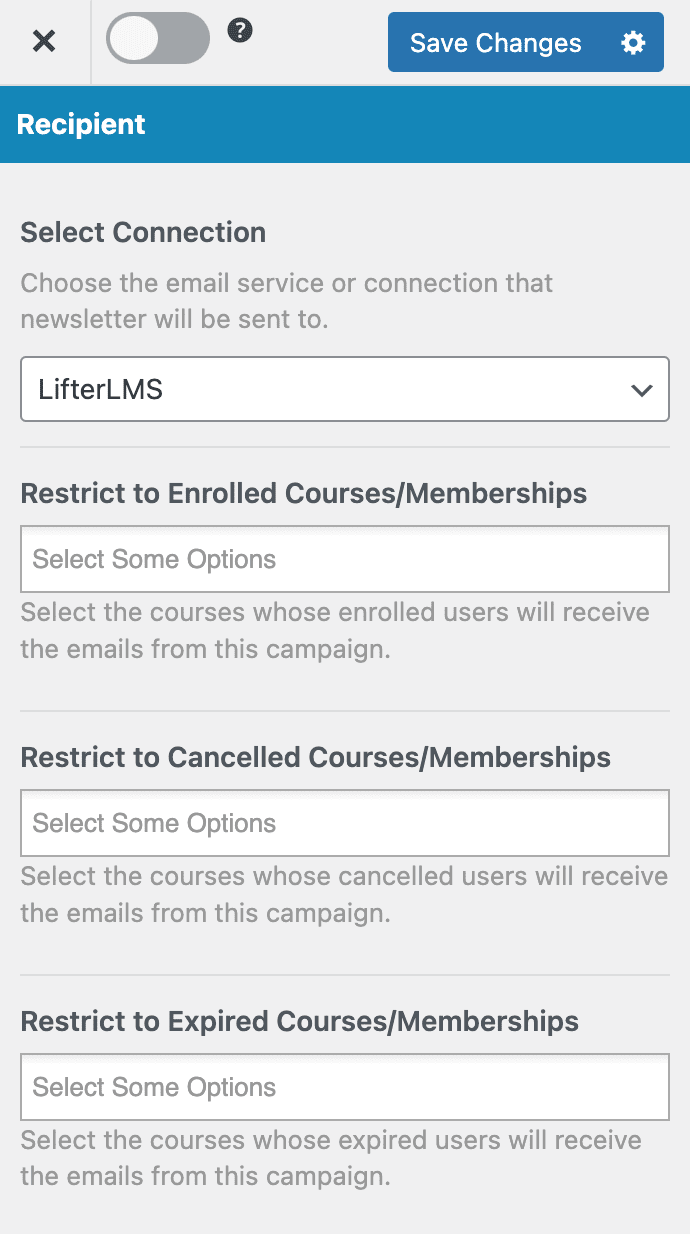
Next, scroll down to the Recipient section. Select ‘LifterLMS’ as the connection or recipient, and the courses or memberships whose enrolled, canceled, and expired users or students will receive emails from the campaign.
When you are done, click the Save Changes button at the top right corner and then toggle the activation switch to the right to enable the automation.
Setting Up Email Digest Automation
Similar to the New Post Notification setup explained above, when creating the automation, select “Posts Email Digest” and choose a template.
Set up and craft the email content and settings. In the recipient section, select LifterLMS and the course or group whose users you would love to send the automated emails to.
Use the Schedule section to decide when to send out the email, which could be daily, weekly, or monthly.
Remember to save your changes and activate the automation.
Since you are sending emails to WordPress users, you can use the following placeholders in your email message.
- {{username}} – User’s username
- {{useremail}} – User’s email address
- {{firstname}} – User’s first name
- {{lastname}} – User’s last name
- {{displayname}} – User’s display name
- {{websiteurl}} – User’s website URL.
Note: With MailOptin, you can effortlessly subscribe LifterLMS users to your email list after they sign up or enroll in a course, providing a convenient way to leverage email marketing with your LifterLMS course website.
Conclusion
Now that you’ve learned how to send emails to your LifterLMS users with MailOptin, it’s time to implement it.
Imagine the impact of reaching out to your students with personalized messages, timely course updates, and irresistible offers. Picture your engagement rates soaring as learners eagerly open your emails, excited to see the valuable content you’ve shared.
Don’t wait—take action now and get the MailOptin plugin today.