Setup WordPress New Post Notification To Mailchimp Email List
Are you looking for an effortless way to keep your subscribers up to date with your latest blog content? With MailOptin, you can automatically send emails to your Mailchimp audience or email list whenever you publish a new post on your WordPress website.
This article will walk you through setting up new post notifications to your Mailchimp email list in WordPress using MailOptin, ensuring your audience is always informed and engaged with your fresh content.
Setting Up WordPress Post Automation Email to Mailchimp Audience
Below are the steps to set up New Post Notification email automation or alert feature (a.k.a Post2Email, RSS-to-Email) in MailOptin to Mailchimp, eliminating the need to manually create newsletters for every new post you publish on your WordPress site.
Begin by purchasing a MailOptin plan and download the plugin from the welcome email or your MailOptin account.
Next, upload and install the plugin on your WordPress website.
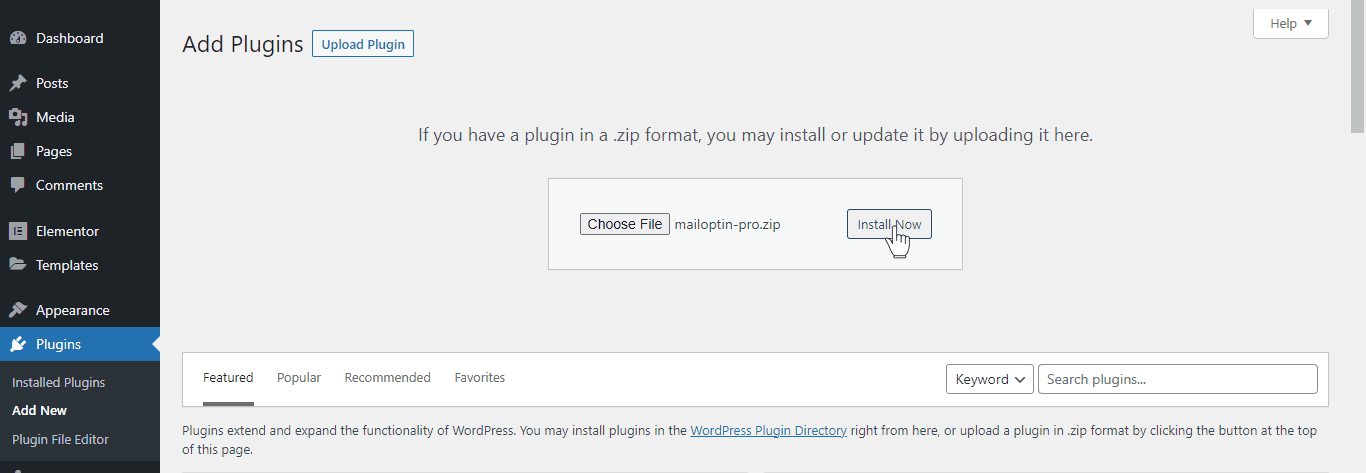
Once installed, click “Activate” to activate the plugin.
Connecting MailOptin to Mailchimp
Next is to connect MailOptin to your Mailchimp account. To do this, go to the Integrations settings page by clicking the sidebar menu link or the top menu tabs.
In the Mailchimp Connection section, click the link to your Mailchimp account below the API key text field.

You will then be redirected to Mailchimp, where you will be required to log in to your account. Your Mailchimp API key is shown to you in the image below.
Copy your Mailchimp API key, paste it into the ‘Enter API Key’ field, and click ‘Save Changes’ to save.
Creating the New Post Notification Automation
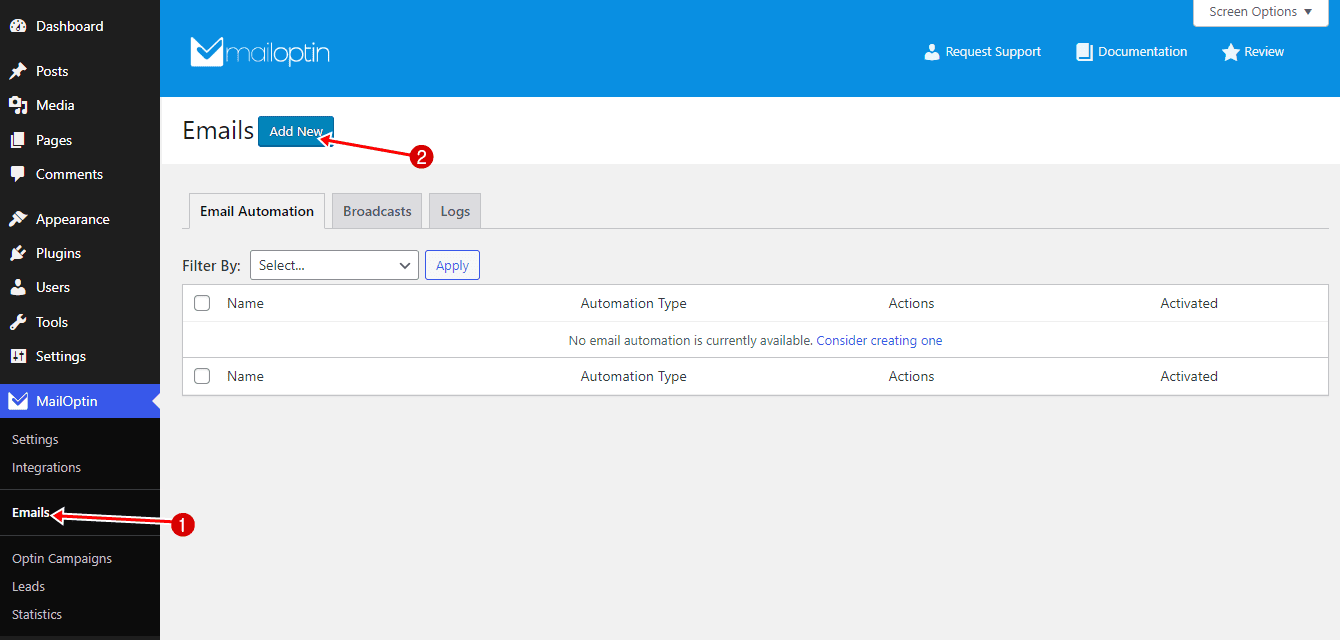
Go to MailOptin >Email > Add New.
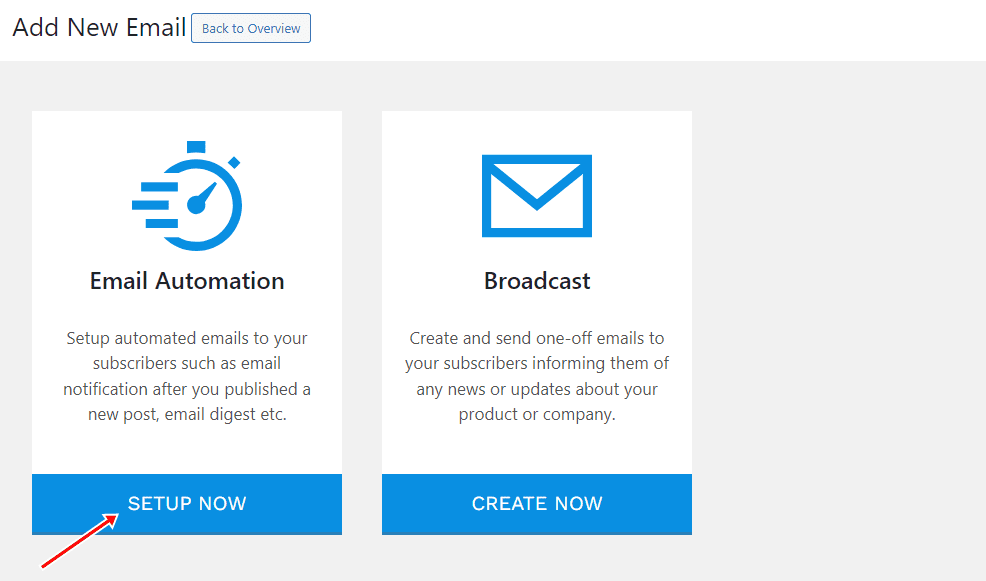
Next, click on ‘Setup Now’ under Email Automation.
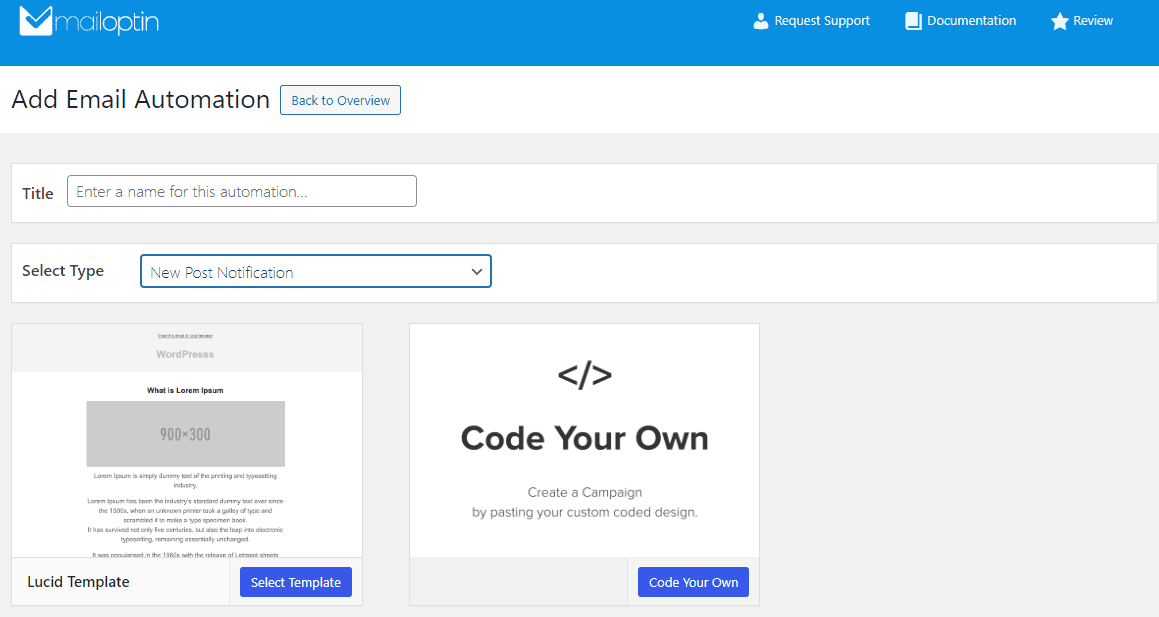
Enter your “Automation Title” and “Select Automation Type” > “New Post Notification” > Select Template.
Here’s how to use your own custom email template.
After selecting your template, you will be taken to the email customizer page, where you can configure the WordPress new post automation settings, such as choosing the post type, categories, and tags the post must belong to. You can also customize the template page, template header, and template content and even send a test email to your email address.
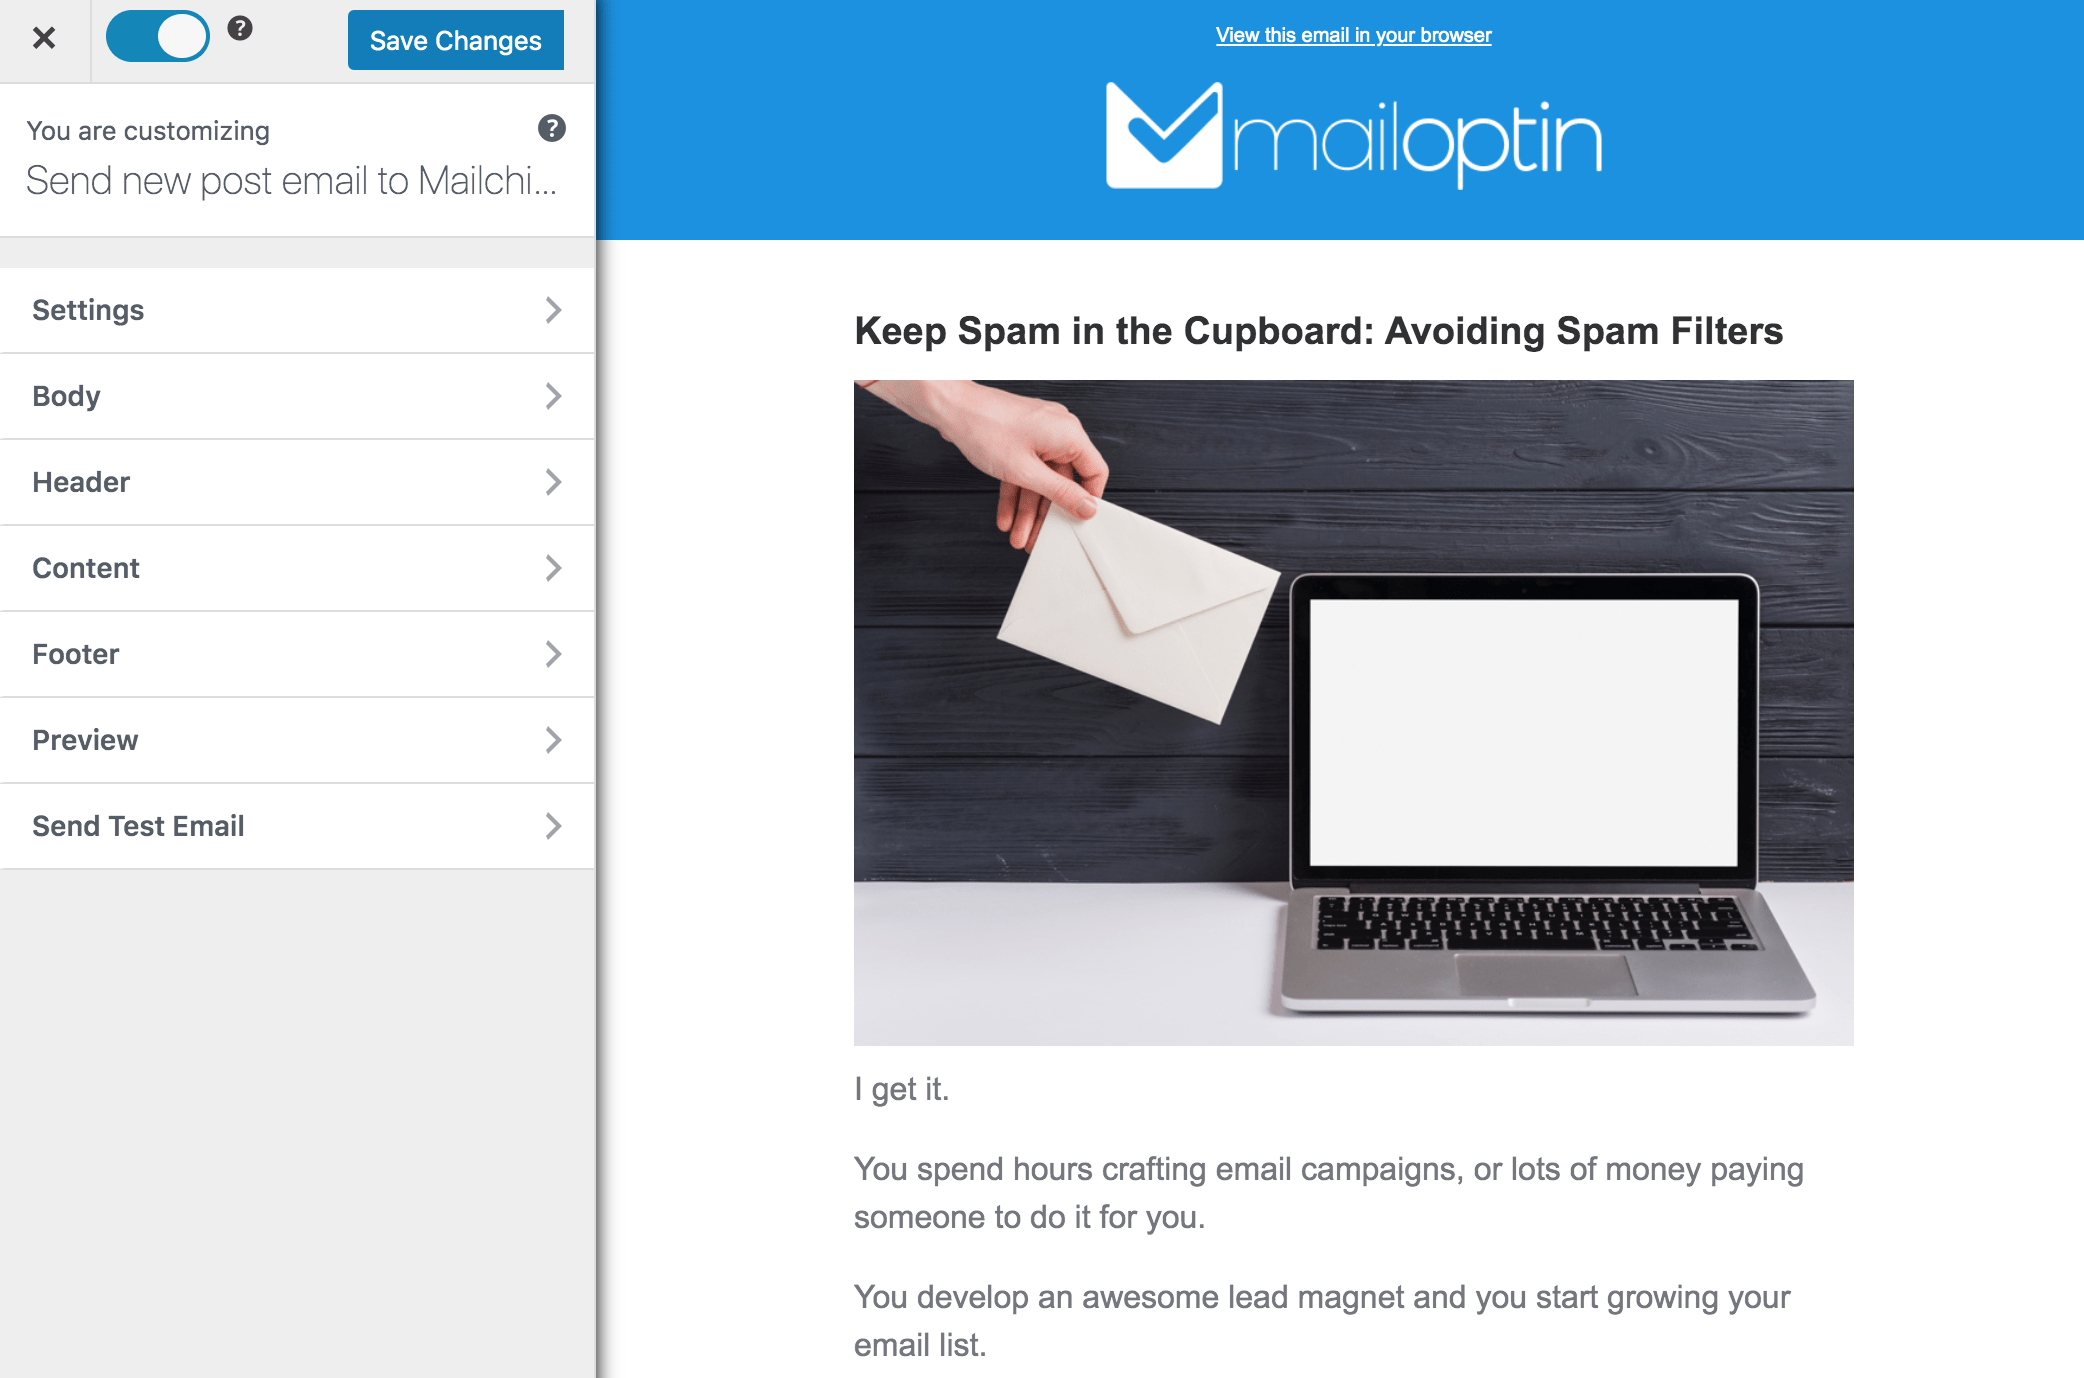
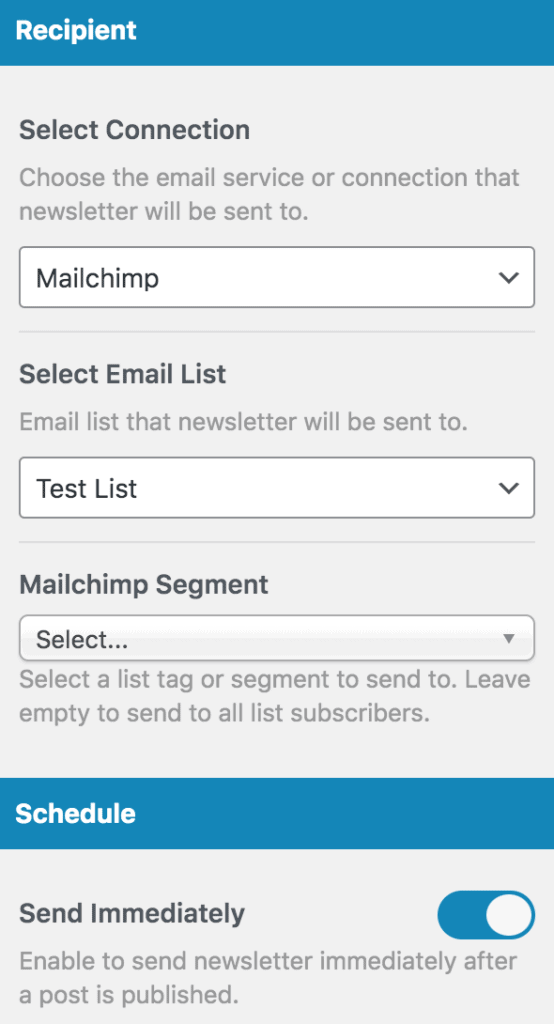
For this process to work without issues, you need to open the Settings panel and select “Mailchimp” as your connection.
Next, select a specific email list to which you will send the new post newsletters. You can also send them to a saved segment (Mailchimp group/interests) of your list.
Decide whether to send the newsletters immediately after posting by checking “Send immediately” or schedule them to be sent minutes, hours, or days after publication.
You can create as much automation as you need to send to different email lists based on the categories and tags the post belongs to.
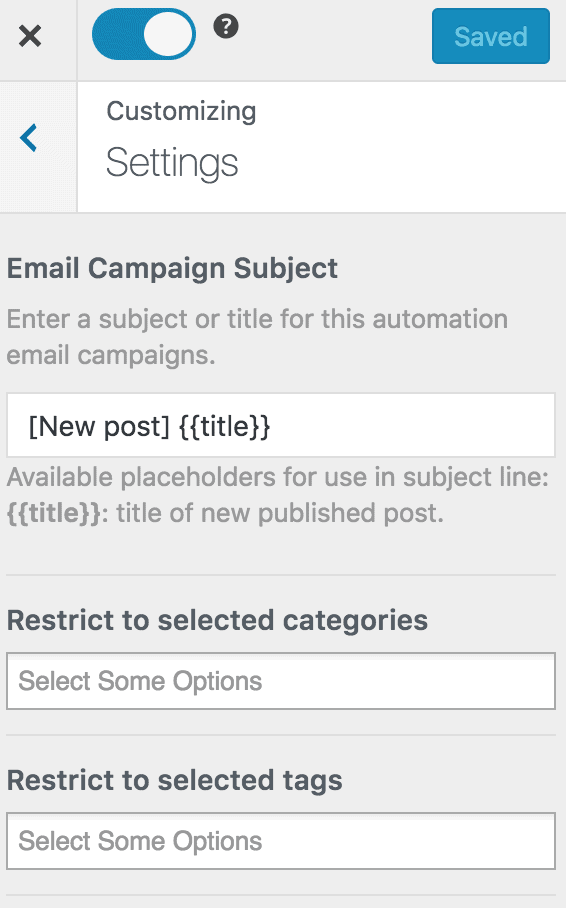
The new post email automation to Mailchimp setup is now complete.
Every time MailOptin sends a new post newsletter to your list, you will see the record in Mailchimp, as shown in the image below.

You can also decide to send a daily, weekly or monthly round up of published posts instead of immediately after posts are published.
Using MailOptin to set up WordPress new post notifications for your Mailchimp email list lets you automate your email marketing efforts, ensuring subscribers receive your latest content without manual intervention. This saves you time and helps maintain a consistent connection with your audience, driving more traffic to your website and increasing reader engagement.
You may also want to check out our article on creating WordPress Mailchimp email signup forms.
