Setup Email Autoresponder in WordPress after User Signup to List
Do you want to create an email autoresponder for your WordPress site?
Creating an email autoresponder on your WordPress site effectively makes a strong first impression and engages your website visitors. It can deliver personalized messages, provide valuable content, or even offer exclusive promotions.
With MailOptin, you can automatically send a welcome email to your subscribers immediately after they sign up for your list in WordPress. This feature is handy if your email service provider (ESP) lacks such automation. Even if your ESP has an “automatic email after signup” feature, you can use MailOptin to send different emails to subscribers based on the opt-in campaign they sign up through instead of sending a generic email to all users.
Below is a customer request to us on how an autoresponder will solve her problem:
Can we send an automatic email with MailChimp based on the particular form submitted, since each optin is a recipe and I’d want to send them the right one and put them in the recipe group of my list. So I can’t really set up an automation based on the list or group because they will be coming in via different recipe blog posts.
In this article, we’ll show you how to set up an email autoresponder using MailOptin and explore the benefits and steps in creating this powerful tool.
Benefits of Using Email Autoresponders
Immediate Engagement: Autoresponders will ensure that new subscribers receive a prompt welcome message when they sign up for your list, which is a positive initial interaction.
Time Efficiency: Autoresponders save you time and effort by automating the sending of welcome emails and follow-ups, allowing you to focus on other aspects of your business.
Improved Customer Experience: By sending timely and relevant messages, autoresponders enhance the overall experience for subscribers, making them feel valued and engaged.
Increased Conversion Rates: Effective use of autoresponders can lead to higher conversion rates by nurturing leads and guiding them through the customer journey with targeted content and calls to action.
Creating Email Autoresponder After Optin in WordPress
Follow these steps to create an email autoresponder that is sent after users submit your WordPress email signup form created via MailOptin:
Step 1: Install and Activate MailOptin Plugin
Begin by installing the MailOptin plugin on your WordPress website. To do this, go to the pricing page and buy a plan that fits your needs.
After you purchase a plan, log in to your account. Under the Account Dashboard, click Download Plugin to get the zip file.
Next, log in to your WordPress admin dashboard and go to the Plugins page. Click the Add New button and then Upload Plugin.
Then, click Choose File to select the downloaded plugin zip file, and click Install Now.

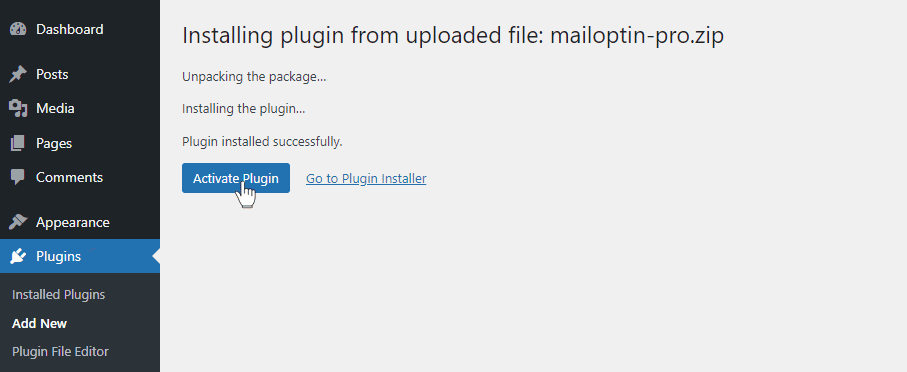
After you install the plugin, you can activate it simply by clicking the ‘Activate Plugin’ button.
Step 2: Set Up the WordPress Email Autoresponder
To set up an email autoresponder, create an optin campaign if you don’t have one already or edit an existing one.
Open the After Conversion panel and click the “Configure Autoresponder” button.
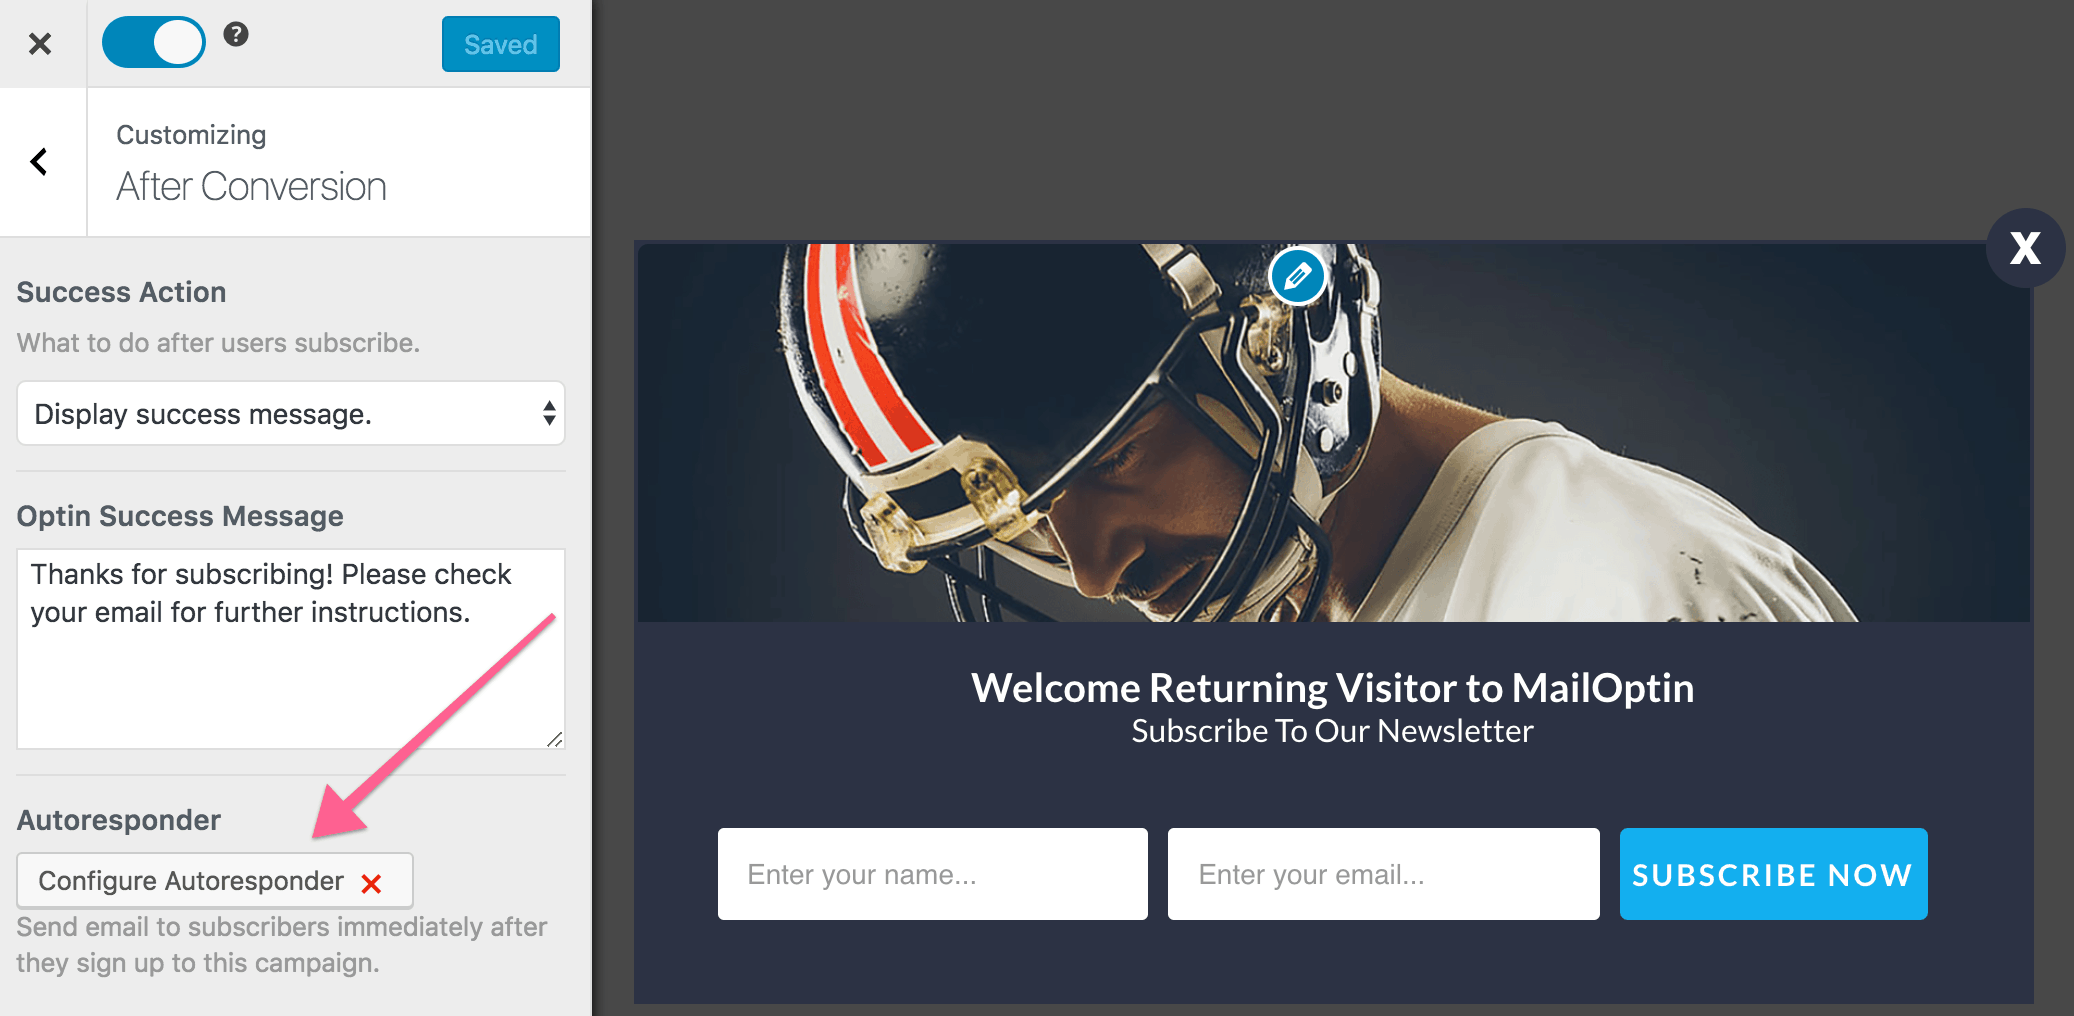
In the resulting modal that is displayed, activate the autoresponder and set up the content of the email. The UI is intuitive and easy to set up.
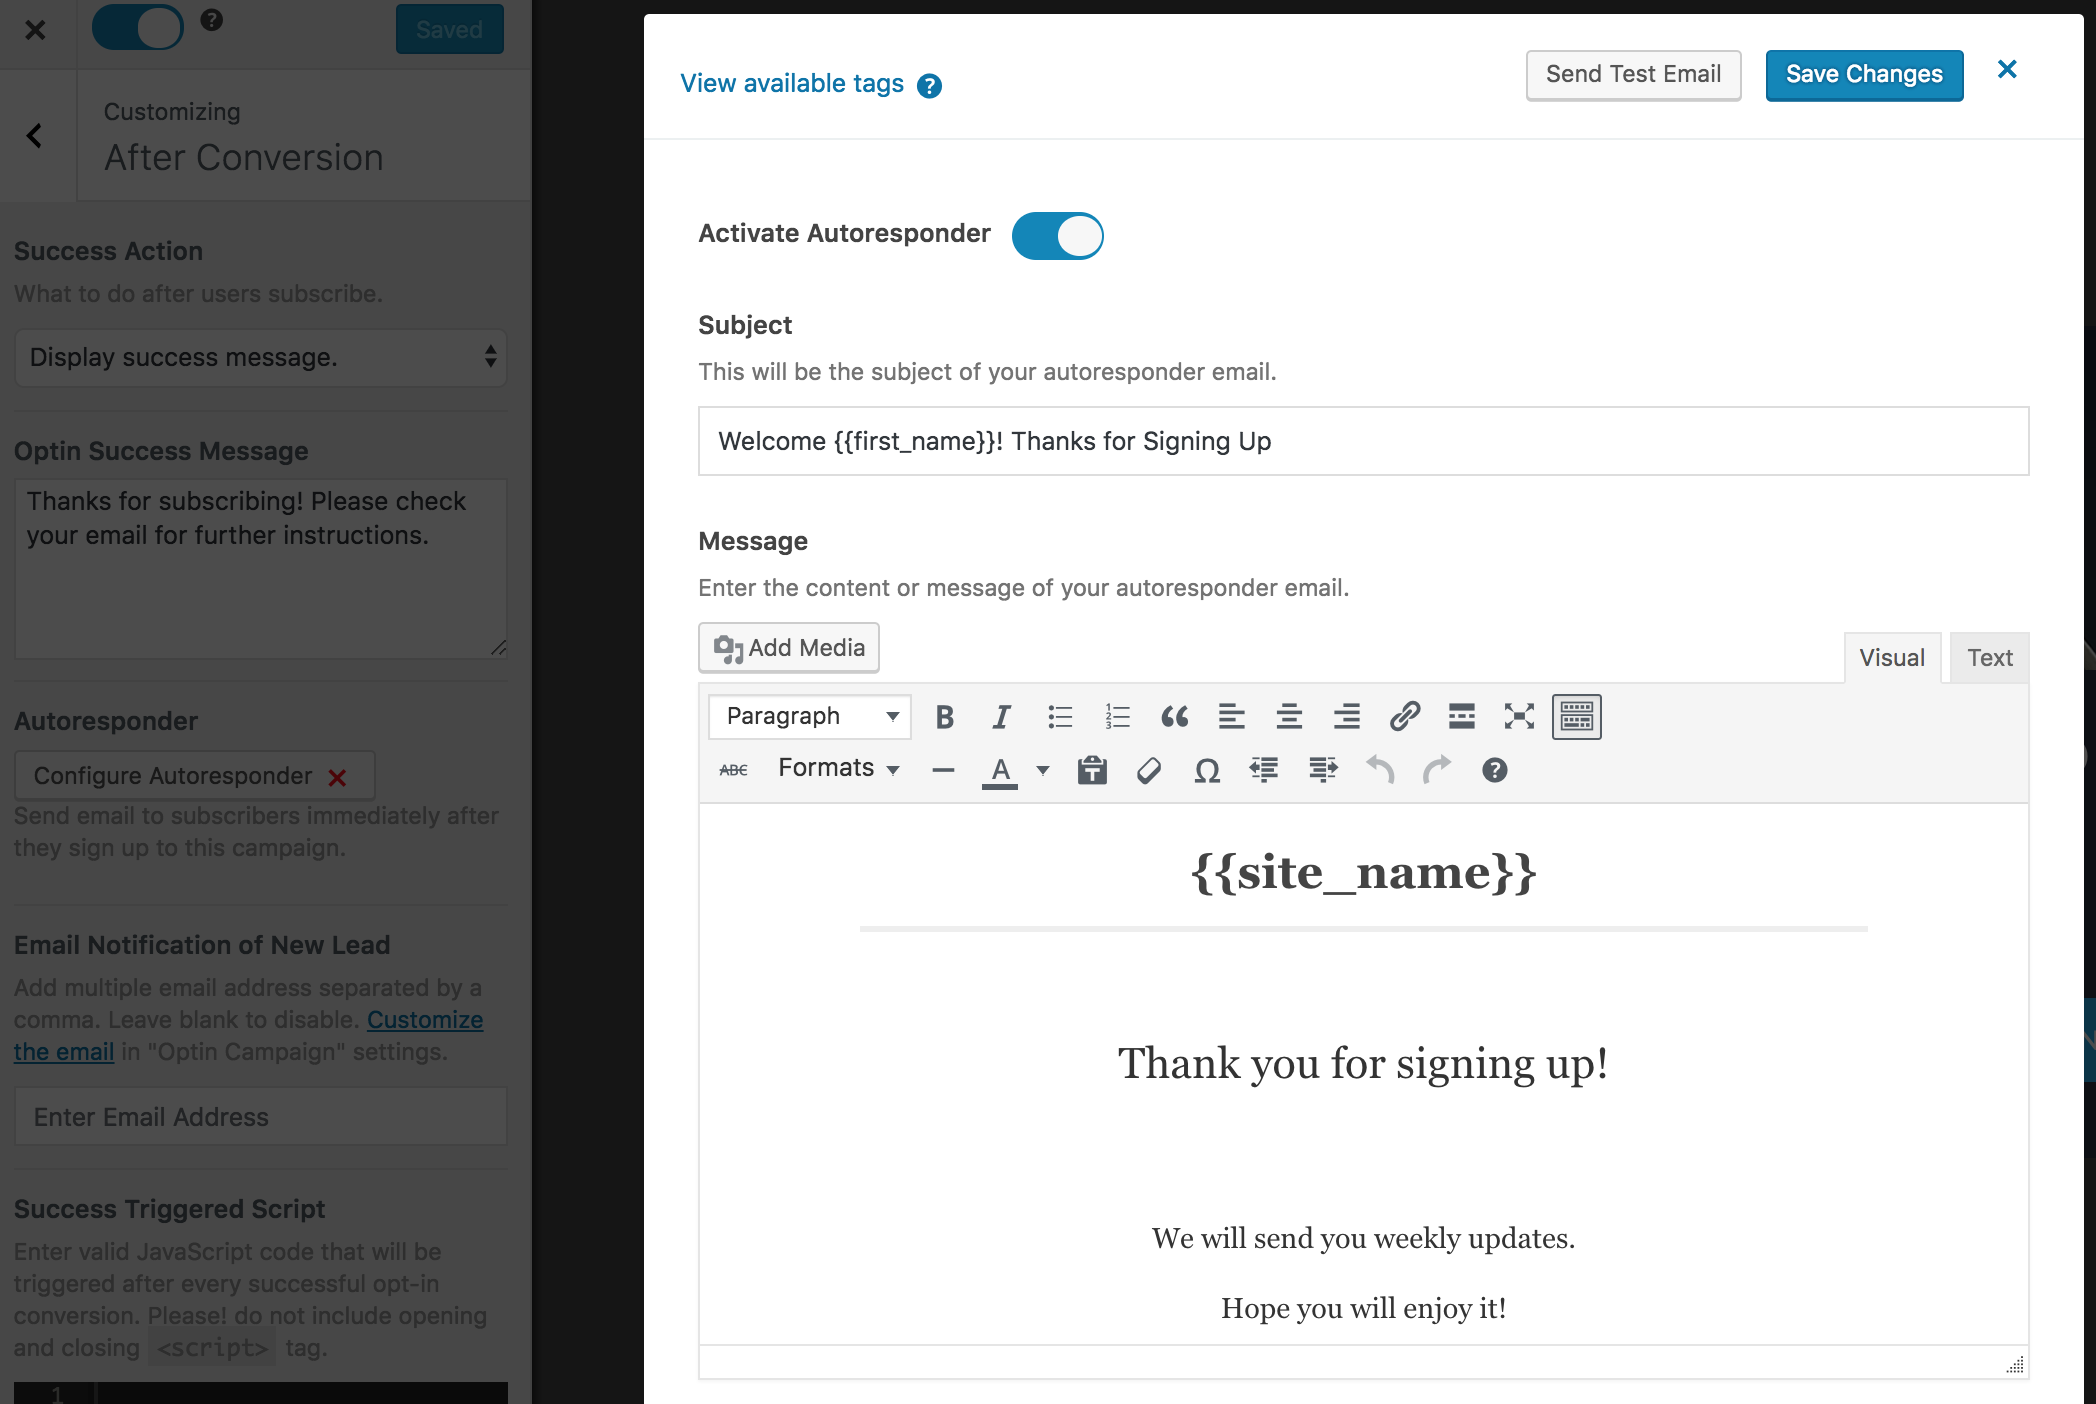
You can personalize the autoresponder email using the following tags.
{{first_name}} : First name of subscriber.
{{last_name}} : Last name of subscriber.
{{email}} : Email address of subscriber.
{{site_name}} : Site title or name.
Remember to save the changes when you are done. You can click “Send Test Email” to receive a copy of the email for preview purposes.
Tips for Effective Email Autoresponders
To maximize the effectiveness of your email autoresponders, consider these tips:
Personalize Your Messages: Address subscribers by name and design content based on their interests or actions to increase engagement.
Keep it Concise: Ensure your emails are straightforward and to the point. Avoid overwhelming subscribers with lengthy content.
Include a Clear Call to Action (CTA): Guide subscribers on what to do next, whether it’s visiting your website, downloading a resource, or making a purchase.
Setup Email Autoresponder in WordPress Today!
Creating an email autoresponder in WordPress is a powerful way to engage and nurture your subscribers.
By following the steps outlined in this article, you can set up an effective autoresponder using MailOptin that delivers personalized messages, saves you time, and enhances the overall experience for your audience.
For more tips and tutorials, check out our other articles on sending post-email digests and setting up new post notifications.