How to Connect WordPress to Google Sheets
Do you want to connect WordPress to Google Sheets to send form data to a spreadsheet when a user submits an optin form on your site?
Google Sheets is a cloud-based spreadsheet application by Google that allows users to create, edit, and collaborate on spreadsheets in real time.
MailOptin seamlessly integrates with Google Sheets to subscribe users, leads, and email subscribers to your spreadsheet. The way it works with MailOptin is each optin form will have its own Google Sheets, and every submission will be appended as a new row.
Follow the step-by-step guide below to connect MailOptin with your Google Sheets account.
Connecting WordPress to Google Sheets
To connect WordPress to Google Sheets, log in to Google Cloud Console to create a project.
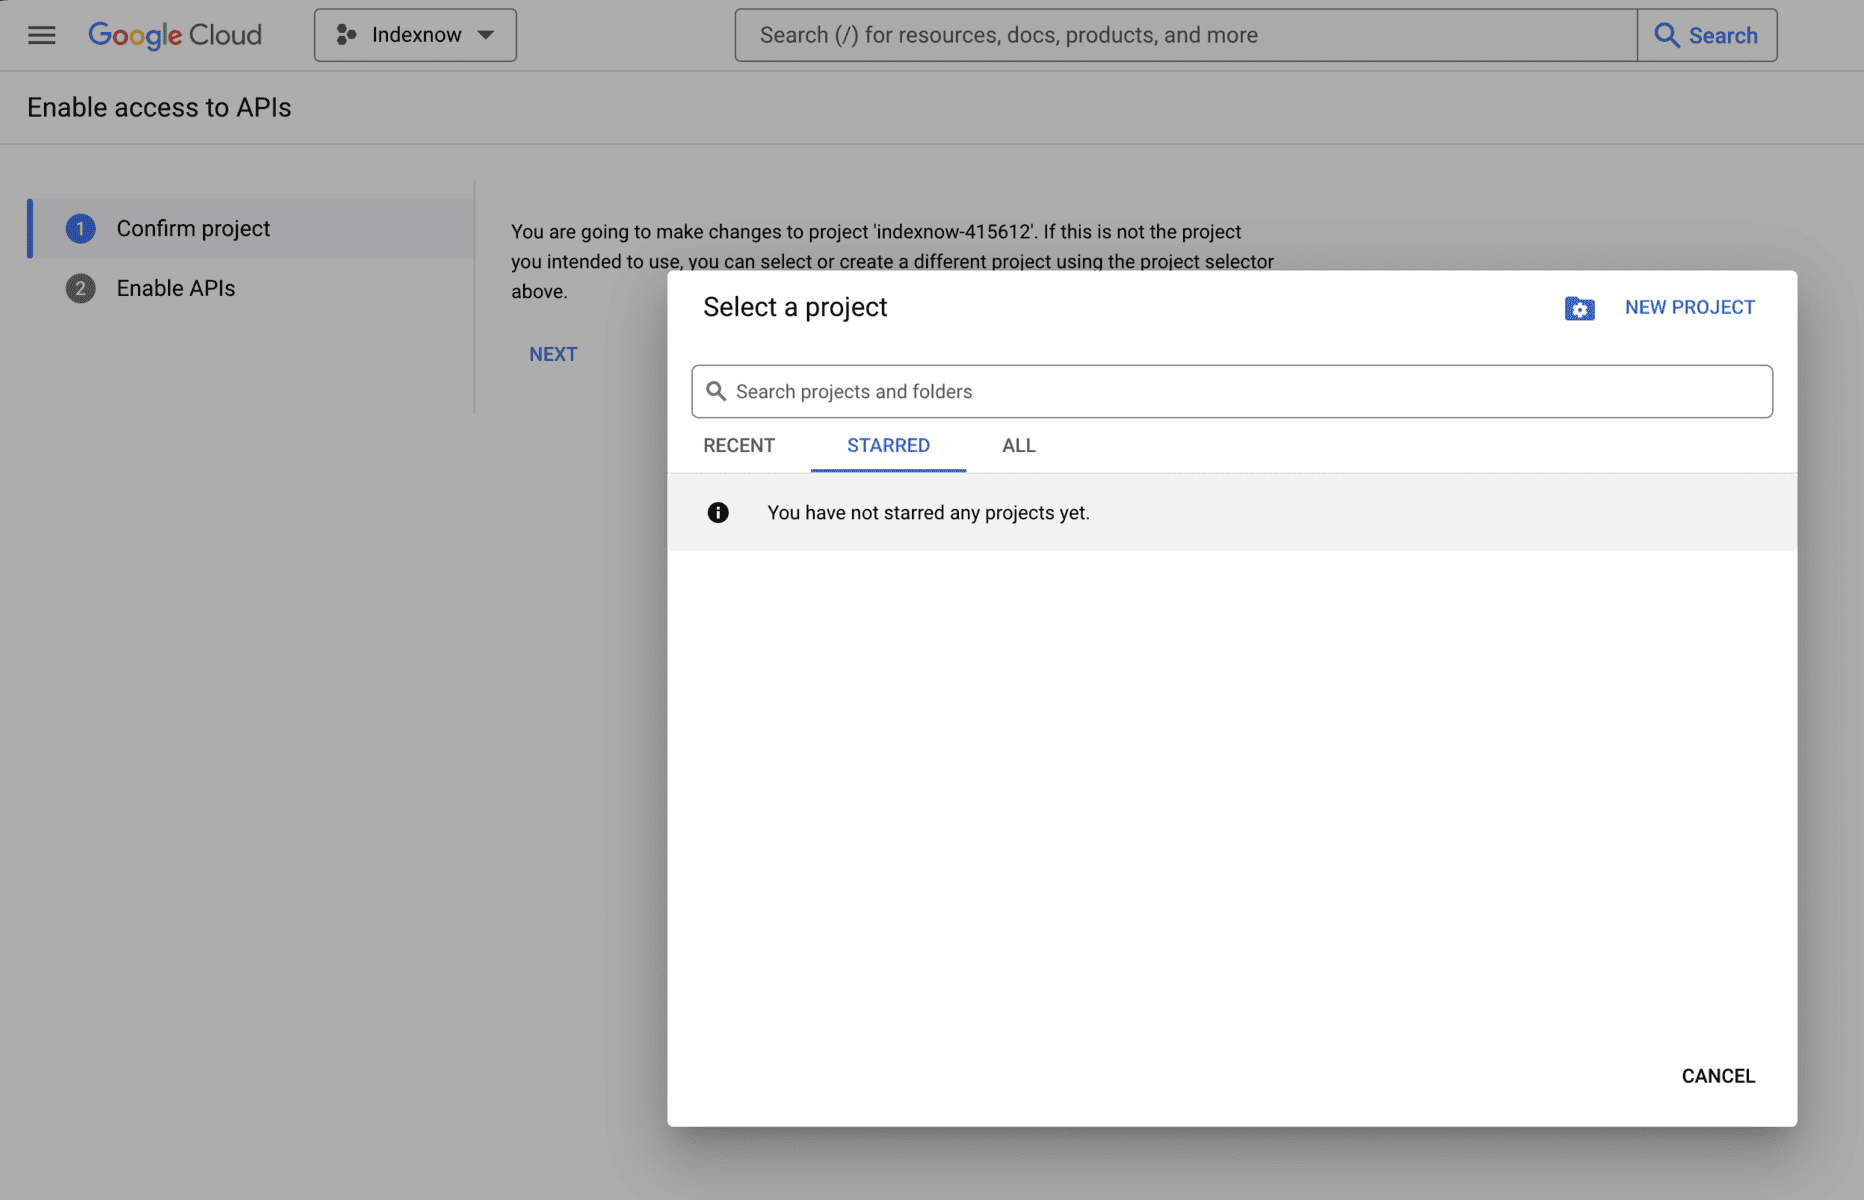
To create a new project, select the project dropdown menu at the page’s top-left corner, near the Google Cloud logo, and choose the “New Project” option.
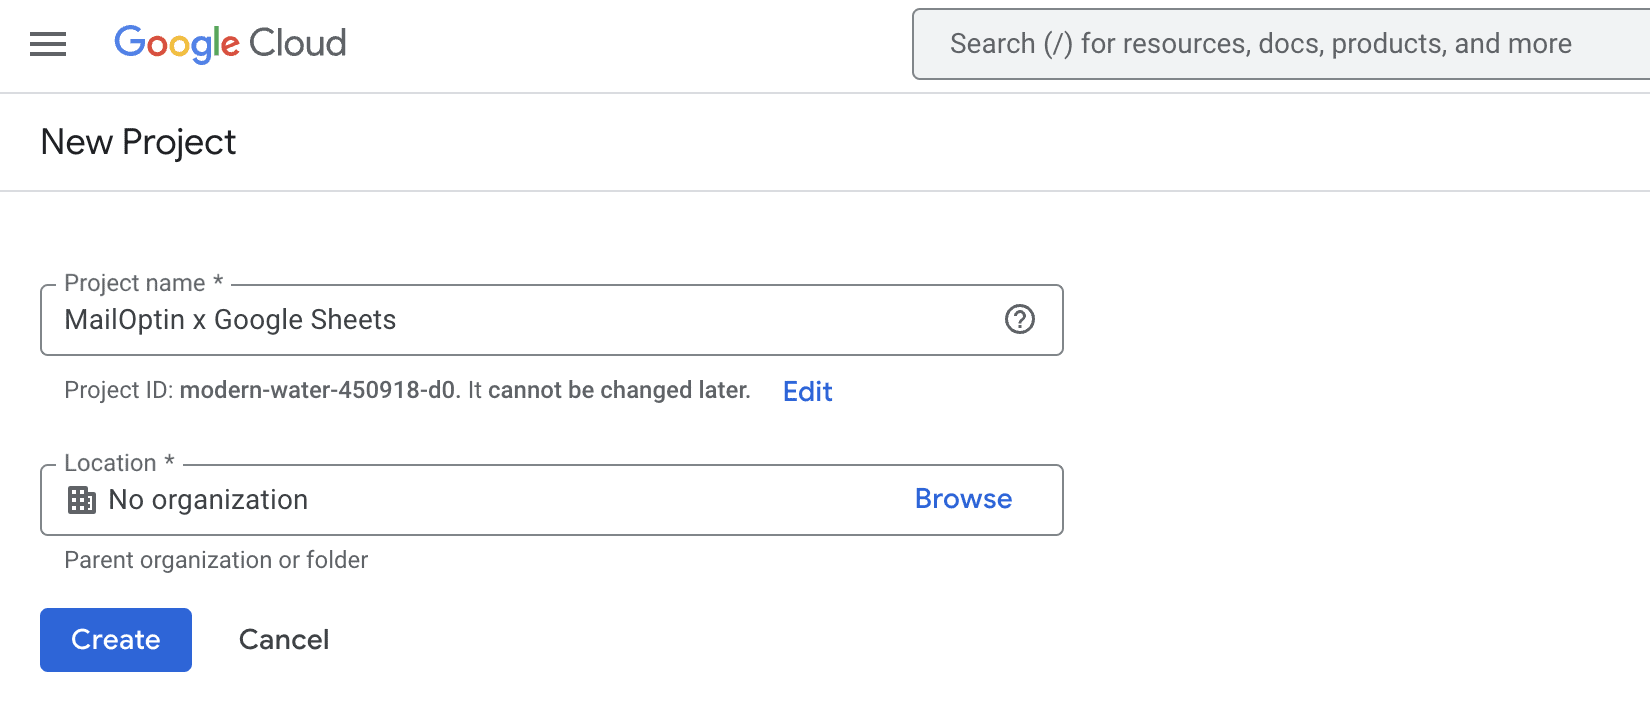
Enter a name for the project, and optionally select an organization as a location and submit the form. It is important to create a project to connect WordPress to Google Sheets.
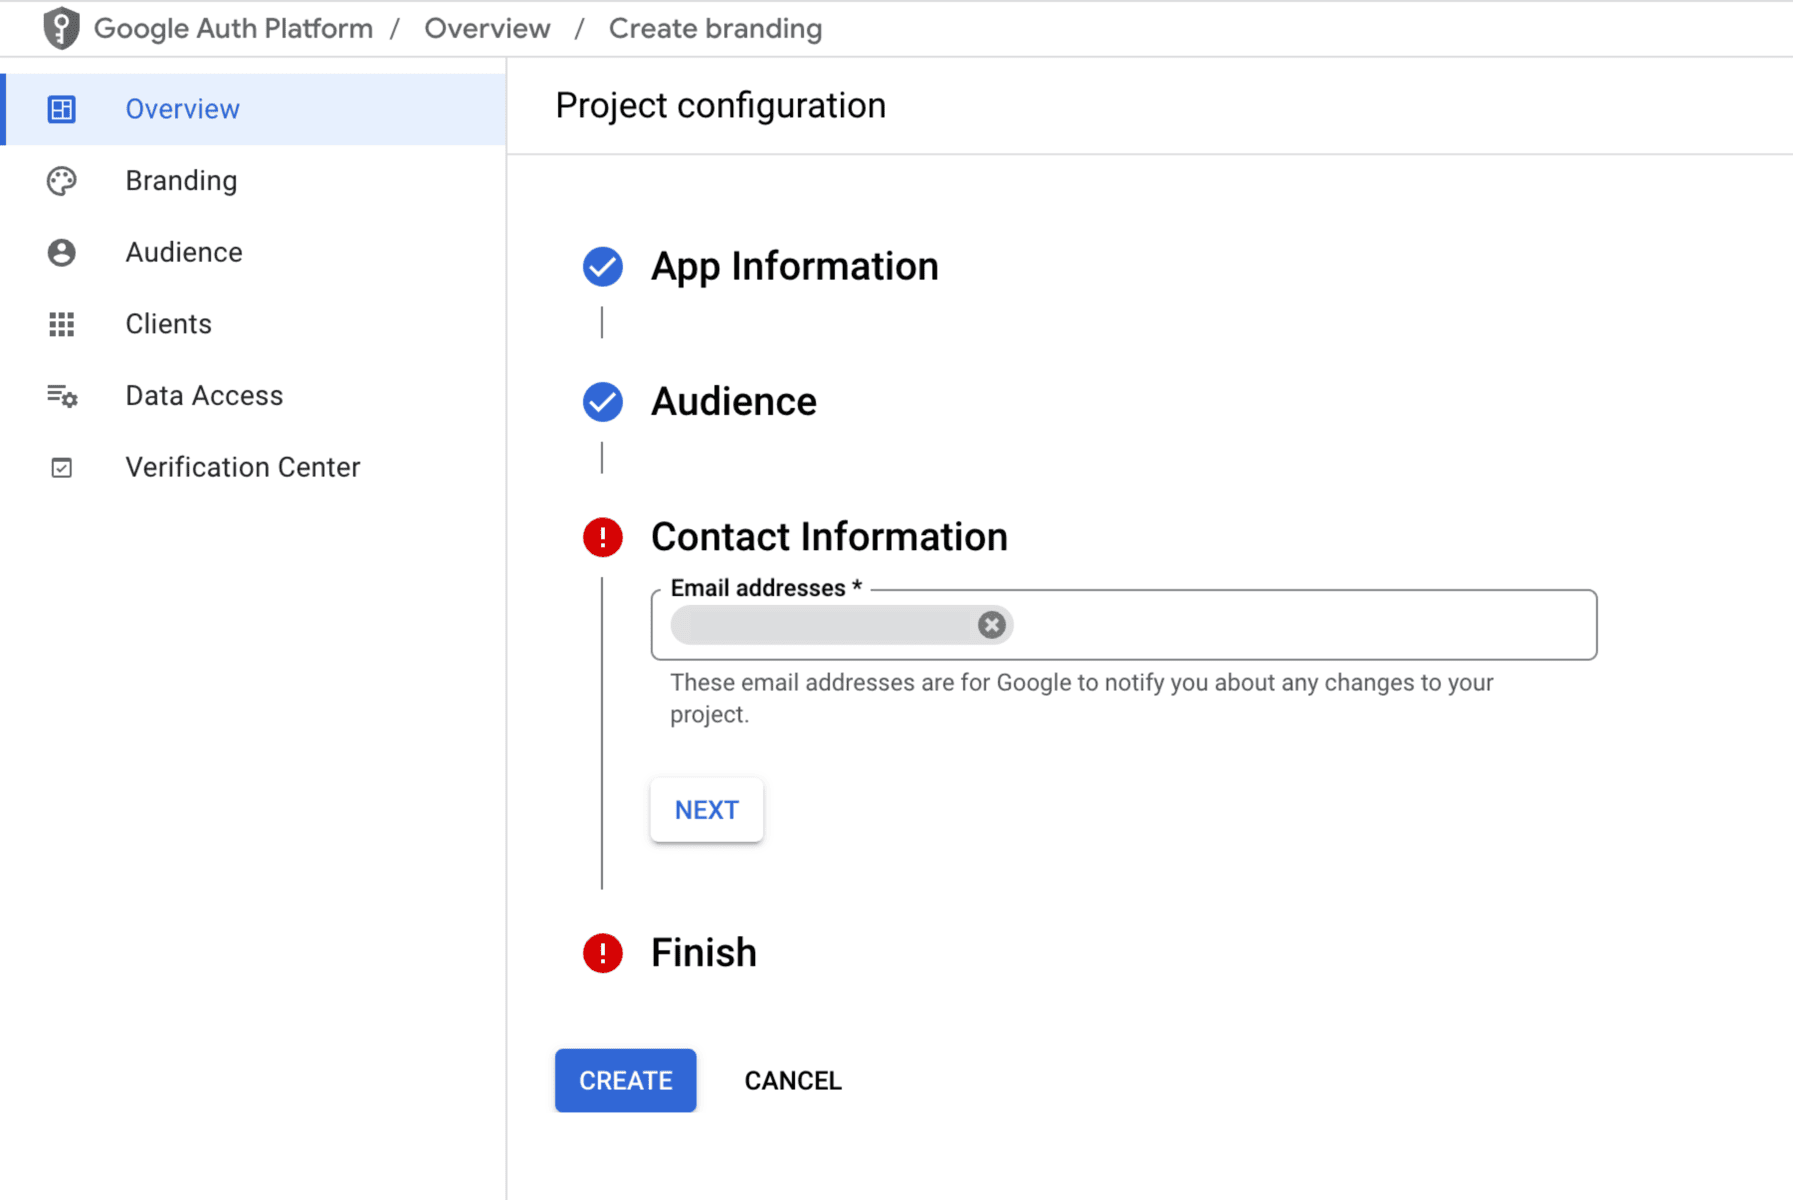
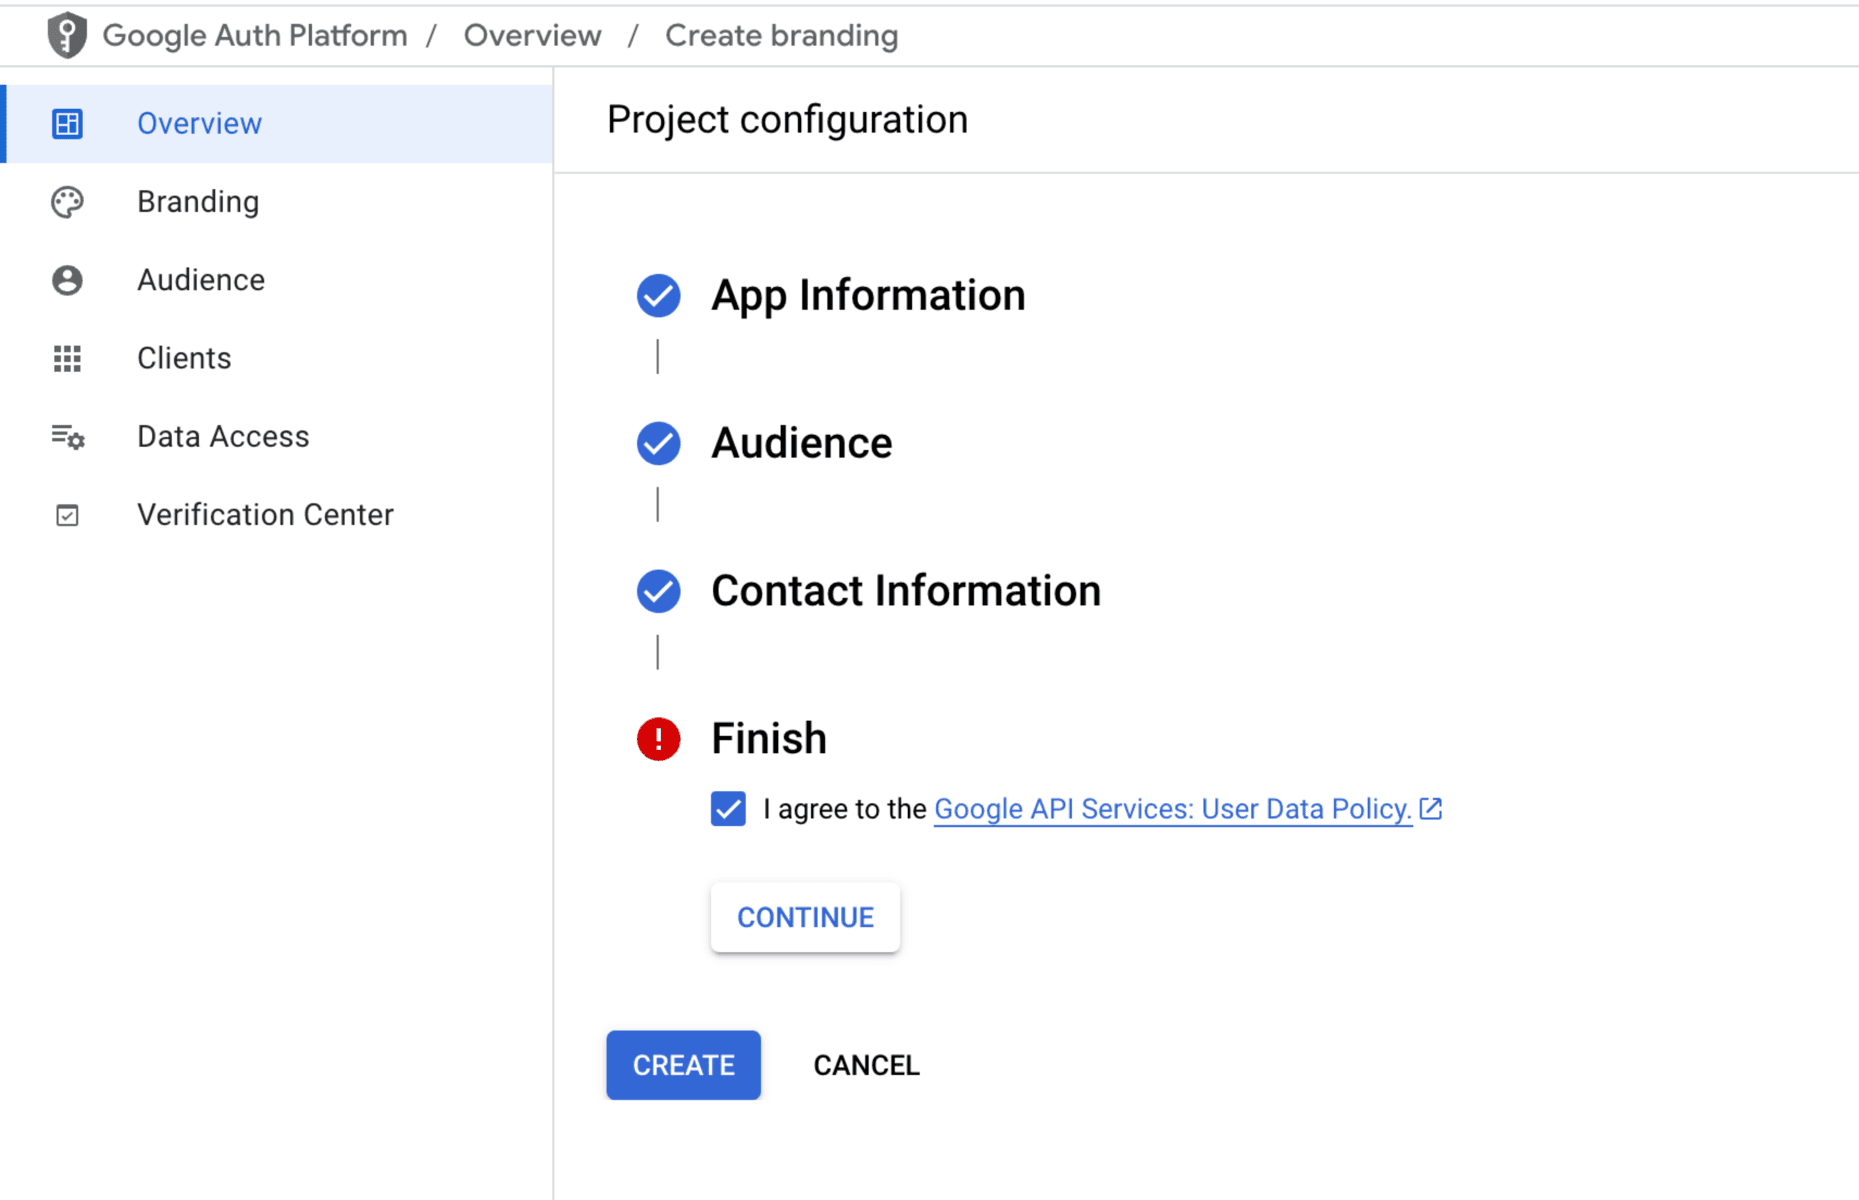
After creating the project, click the Get Started button and fill out the App information.

Select External as the audience.

For the Contact information, you can just enter your email address.
Finally, agree to the Google API Services policy and click the Create button.
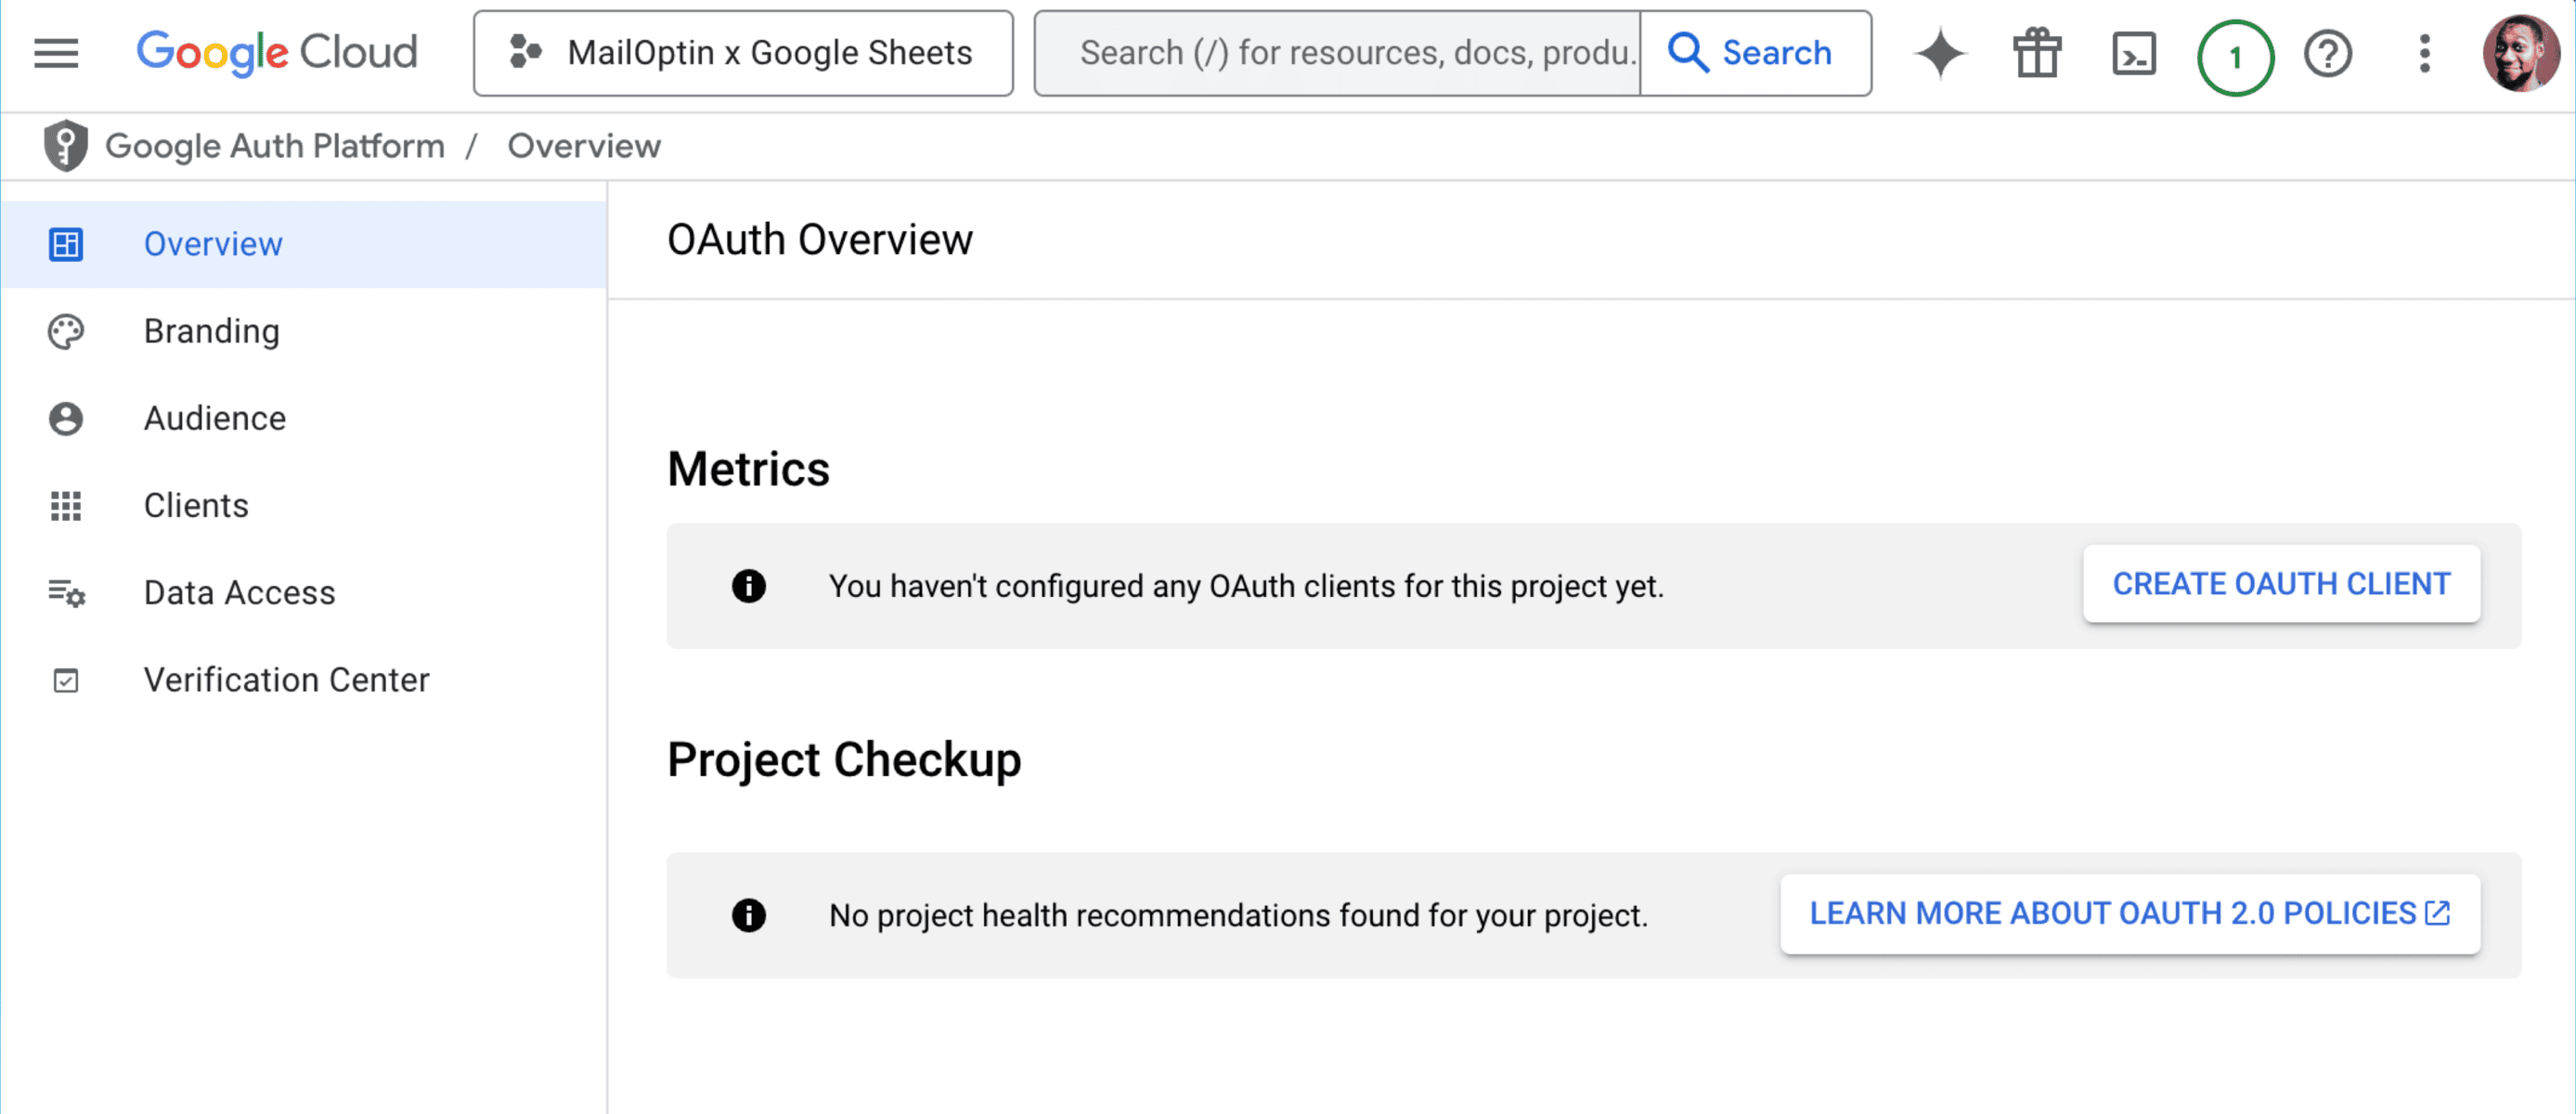
Next is to create an OAuth client, as it is important to connect Google Sheets to WordPress.
On the Overview page, Click the “Create Oauth Client” or go to Clients >> Create Client.
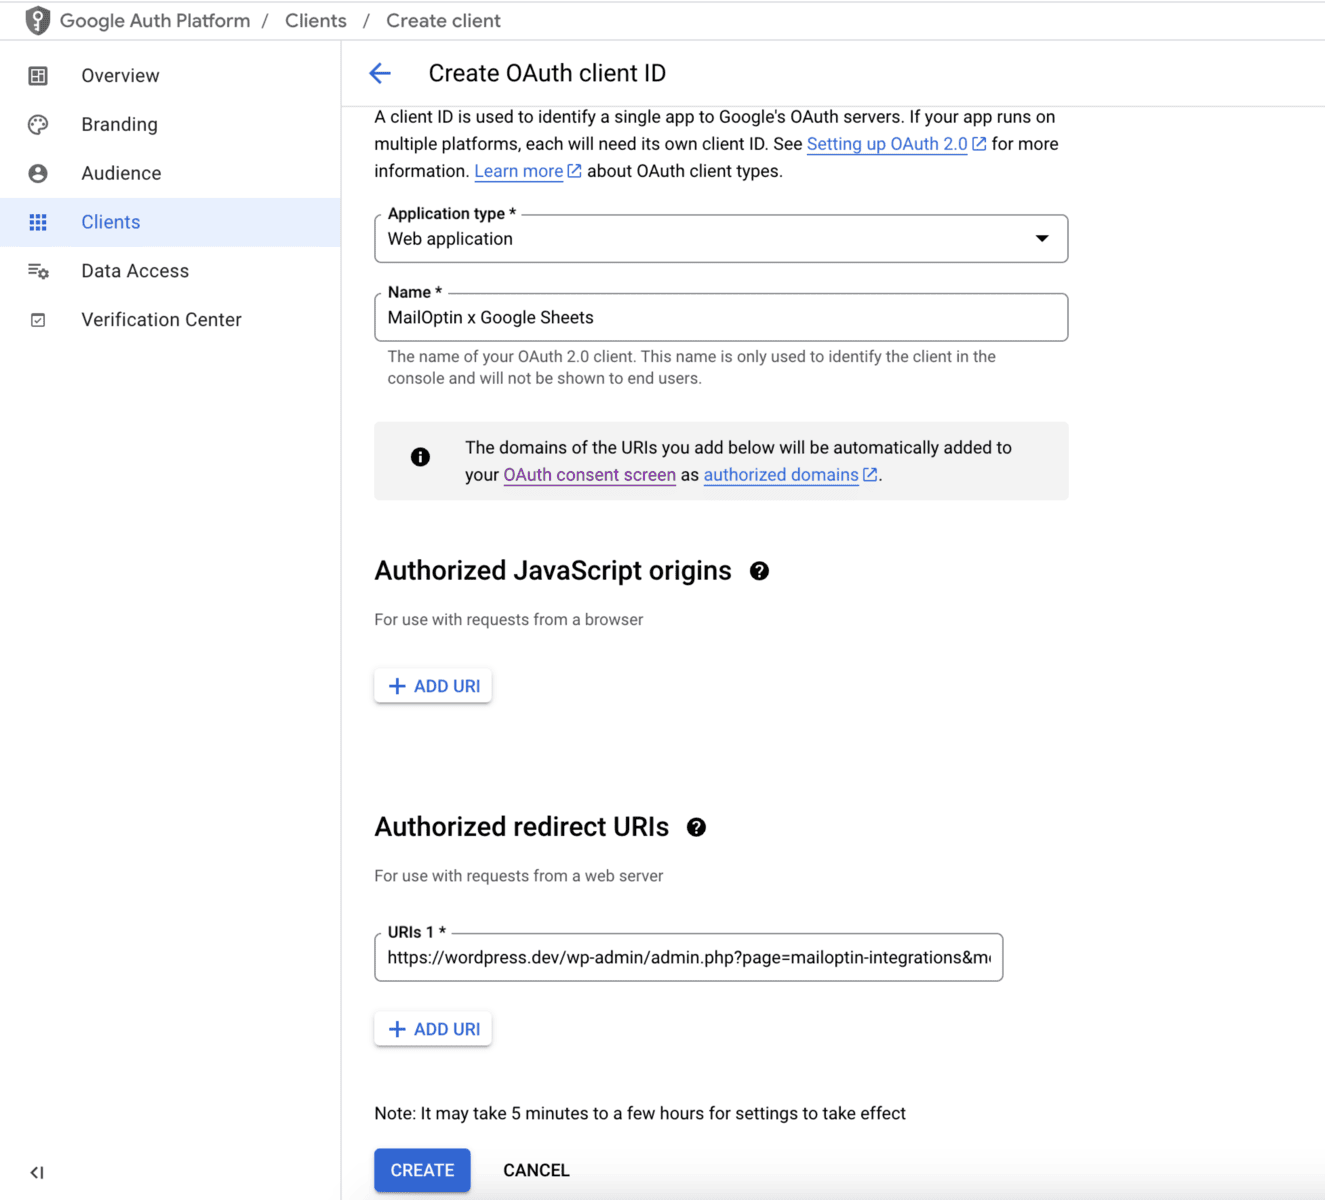
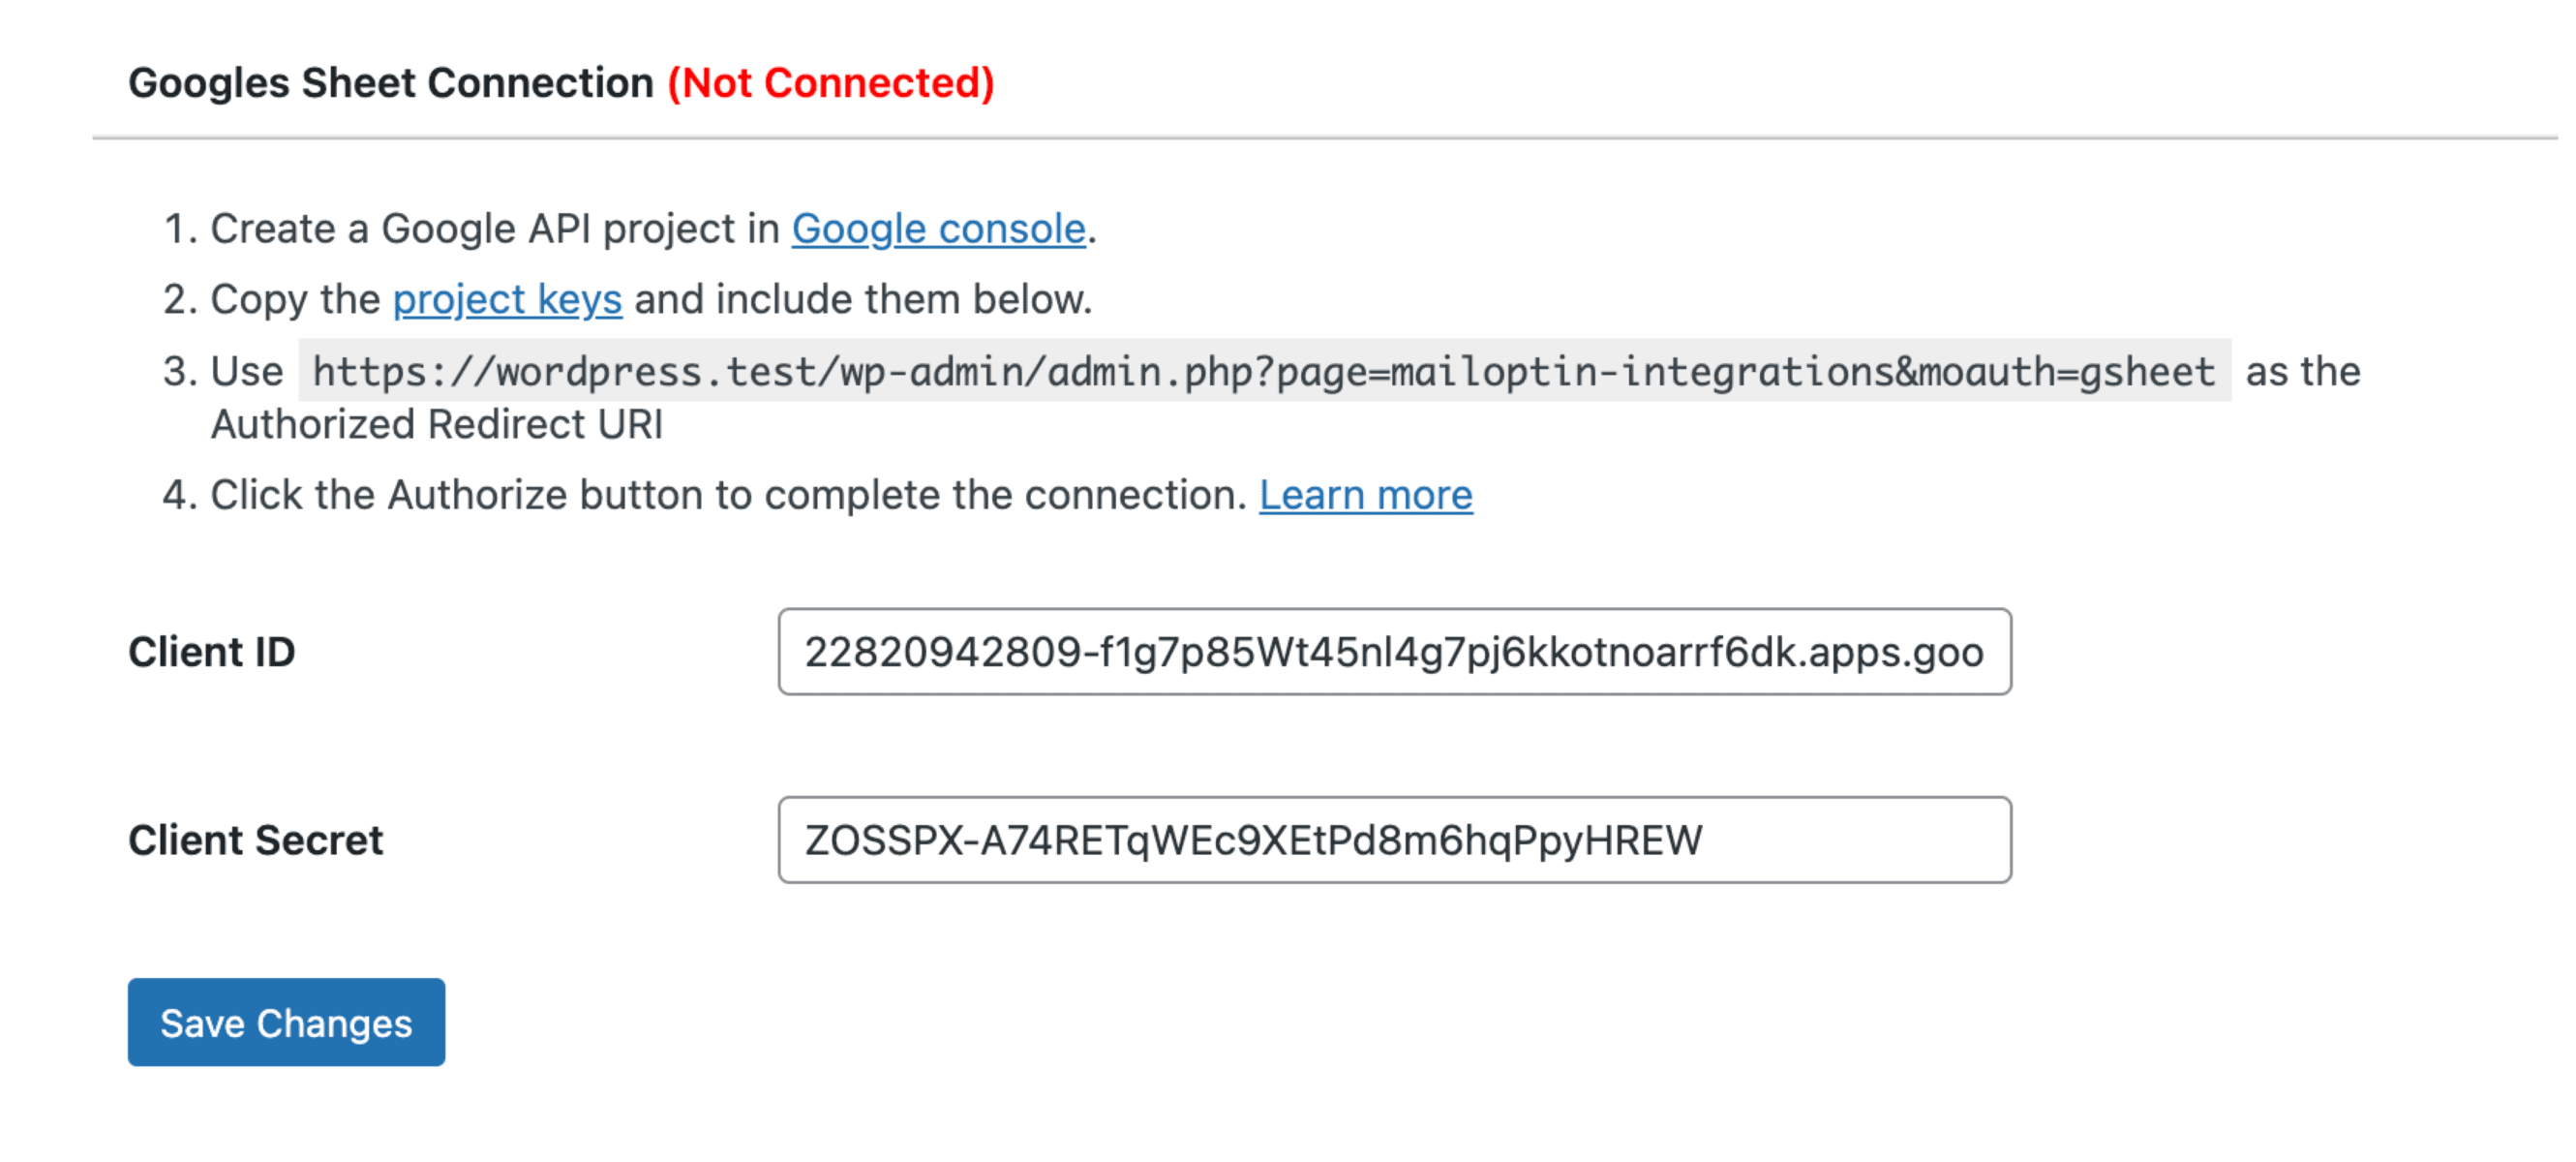
Select “Web application” as the “Application type” and enter a name for the OAuth client ID. Enter “https://wordpress.test/wp-admin/admin.php?page=mailoptin-integrations&moauth=gsheet” as an authorized redirect URI and hit the Create button. Don’t forget to replace “wordpress.test” with your domain name.
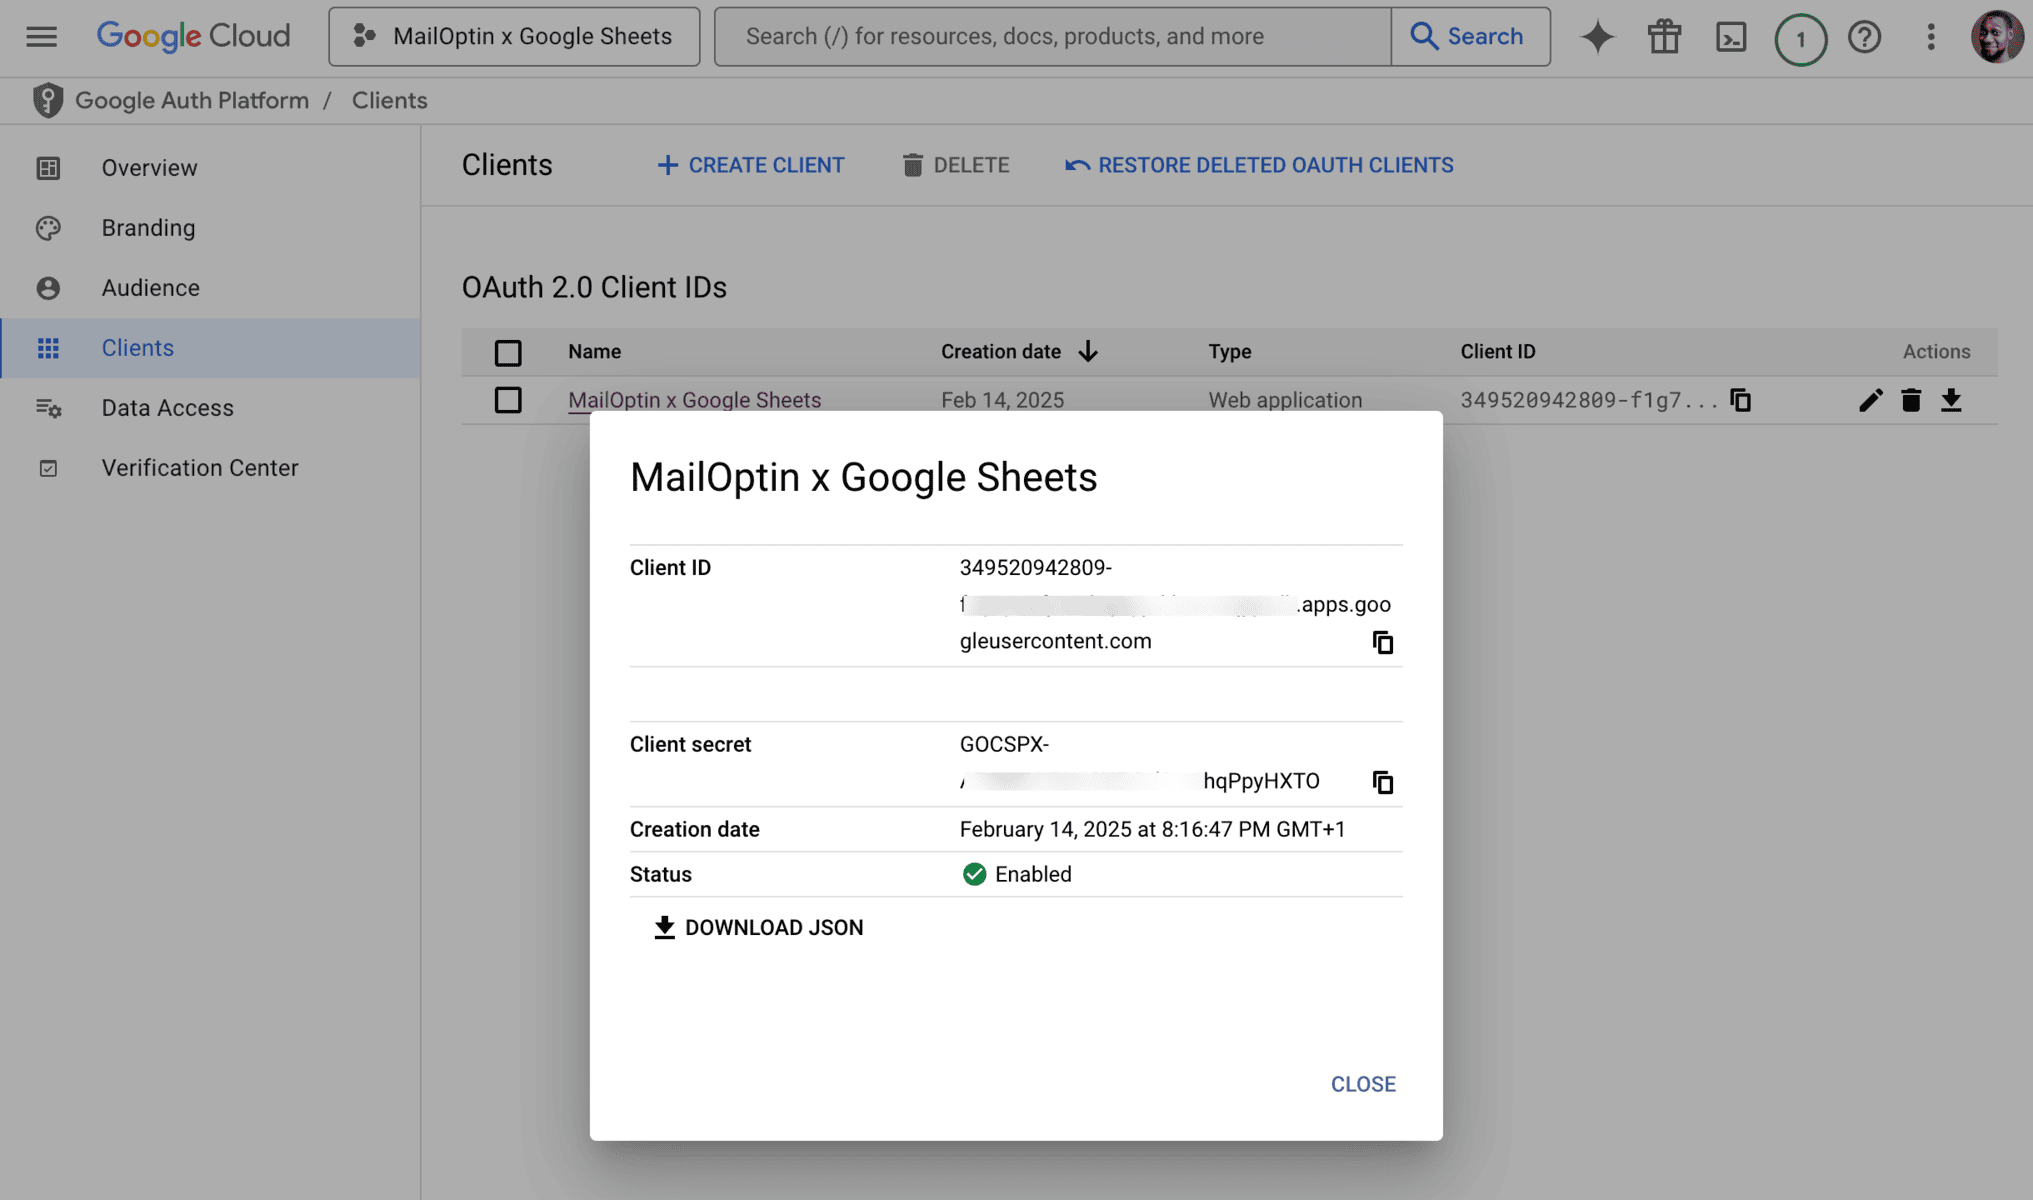
Click on the Download icon to reveal your Client ID and Client Secret. Copy it somewhere, as we will be needing it when connecting WordPress to Google Sheets via MailOptin.
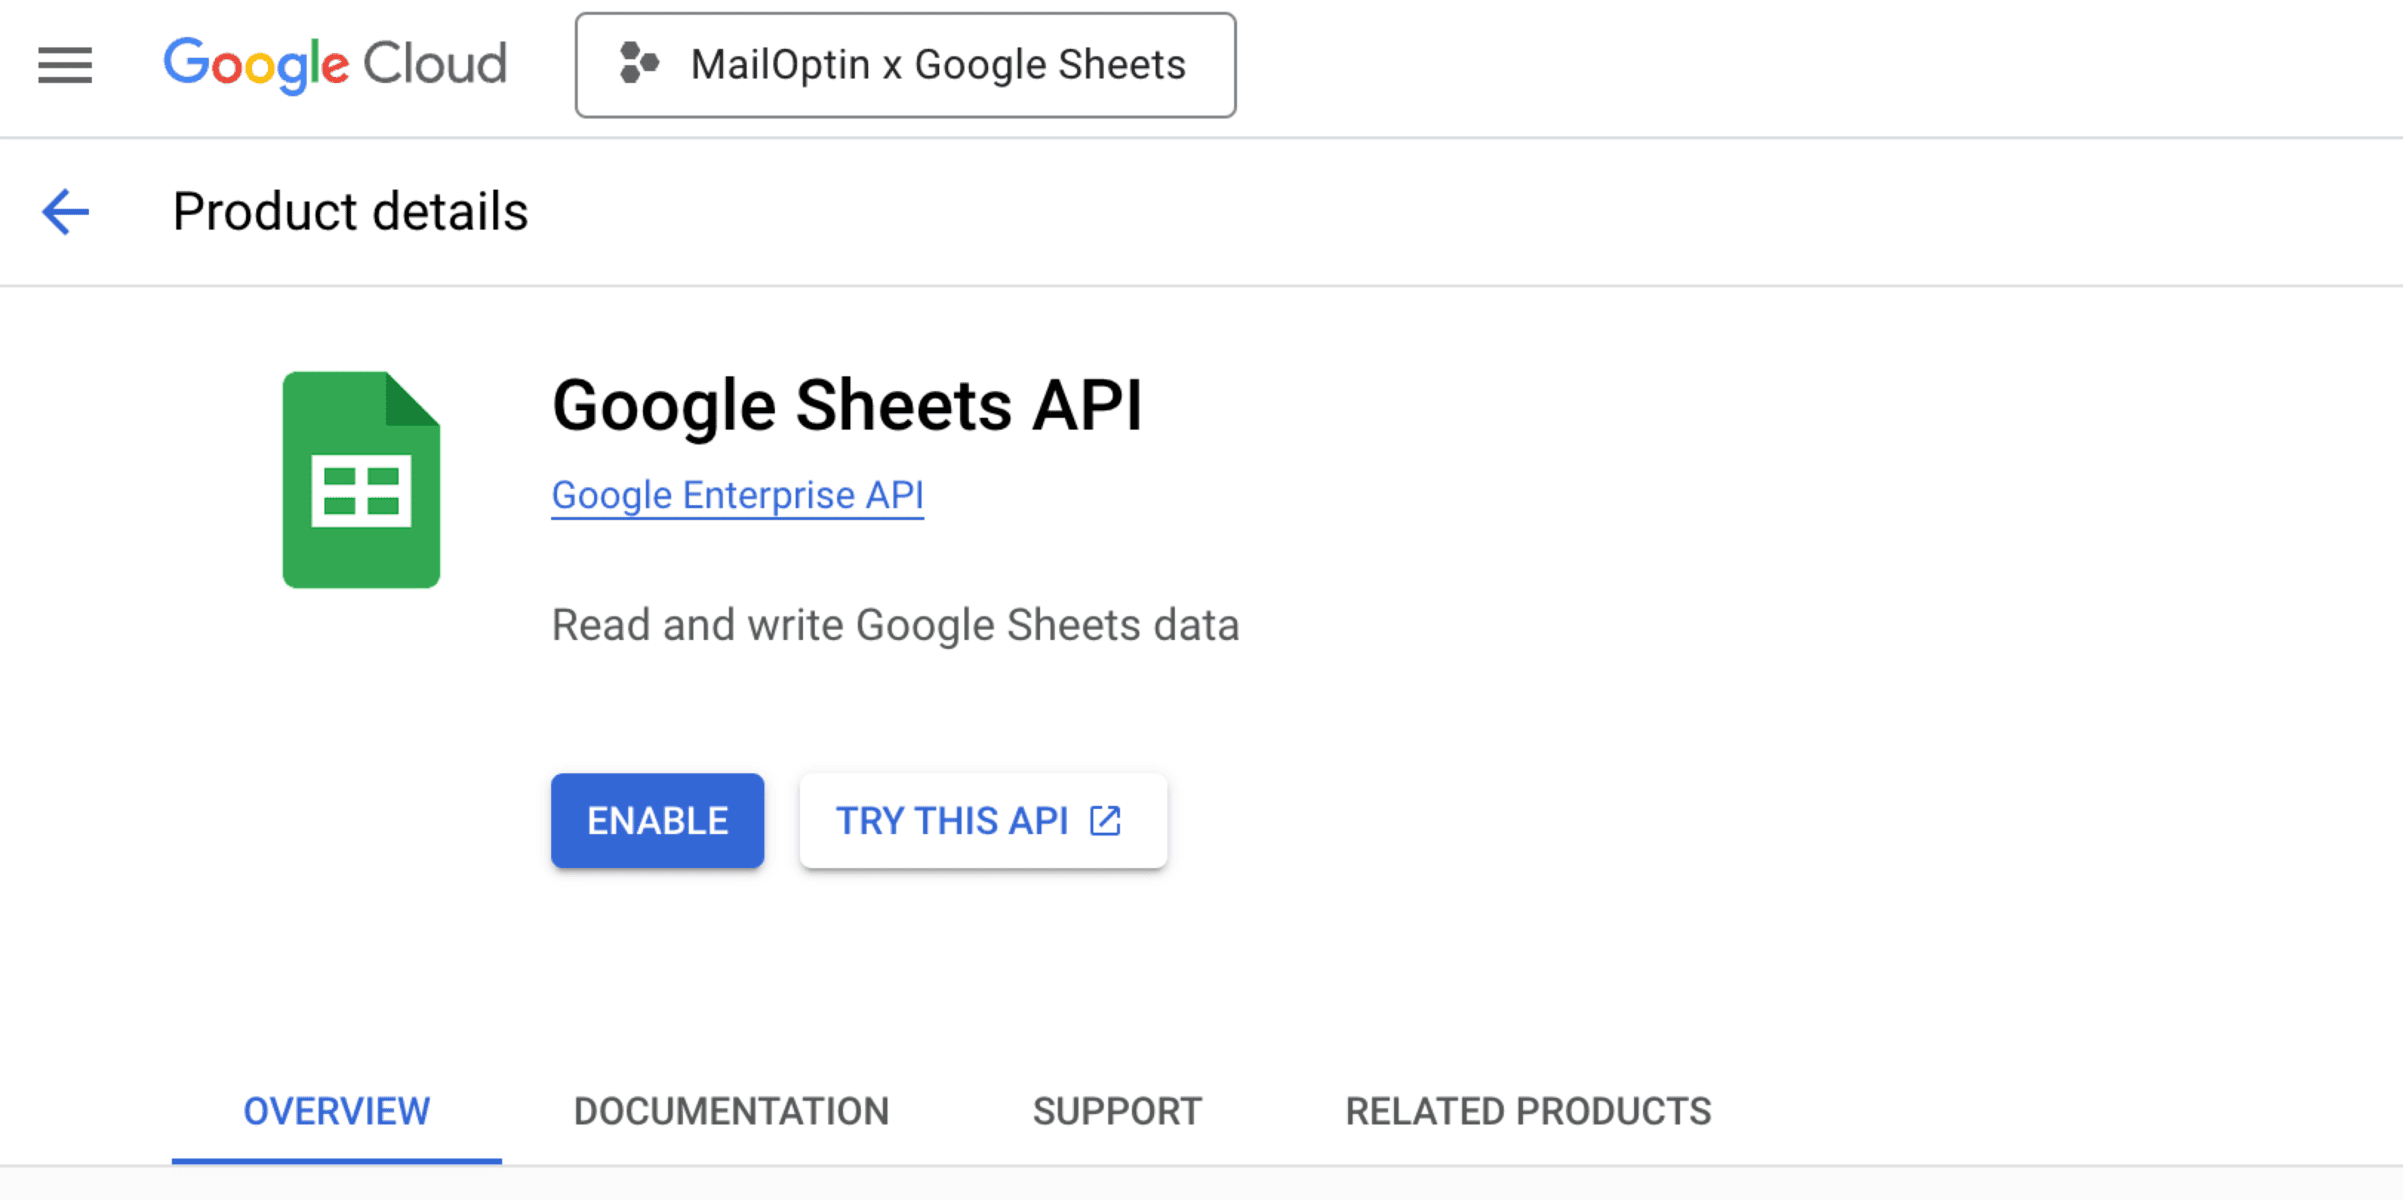
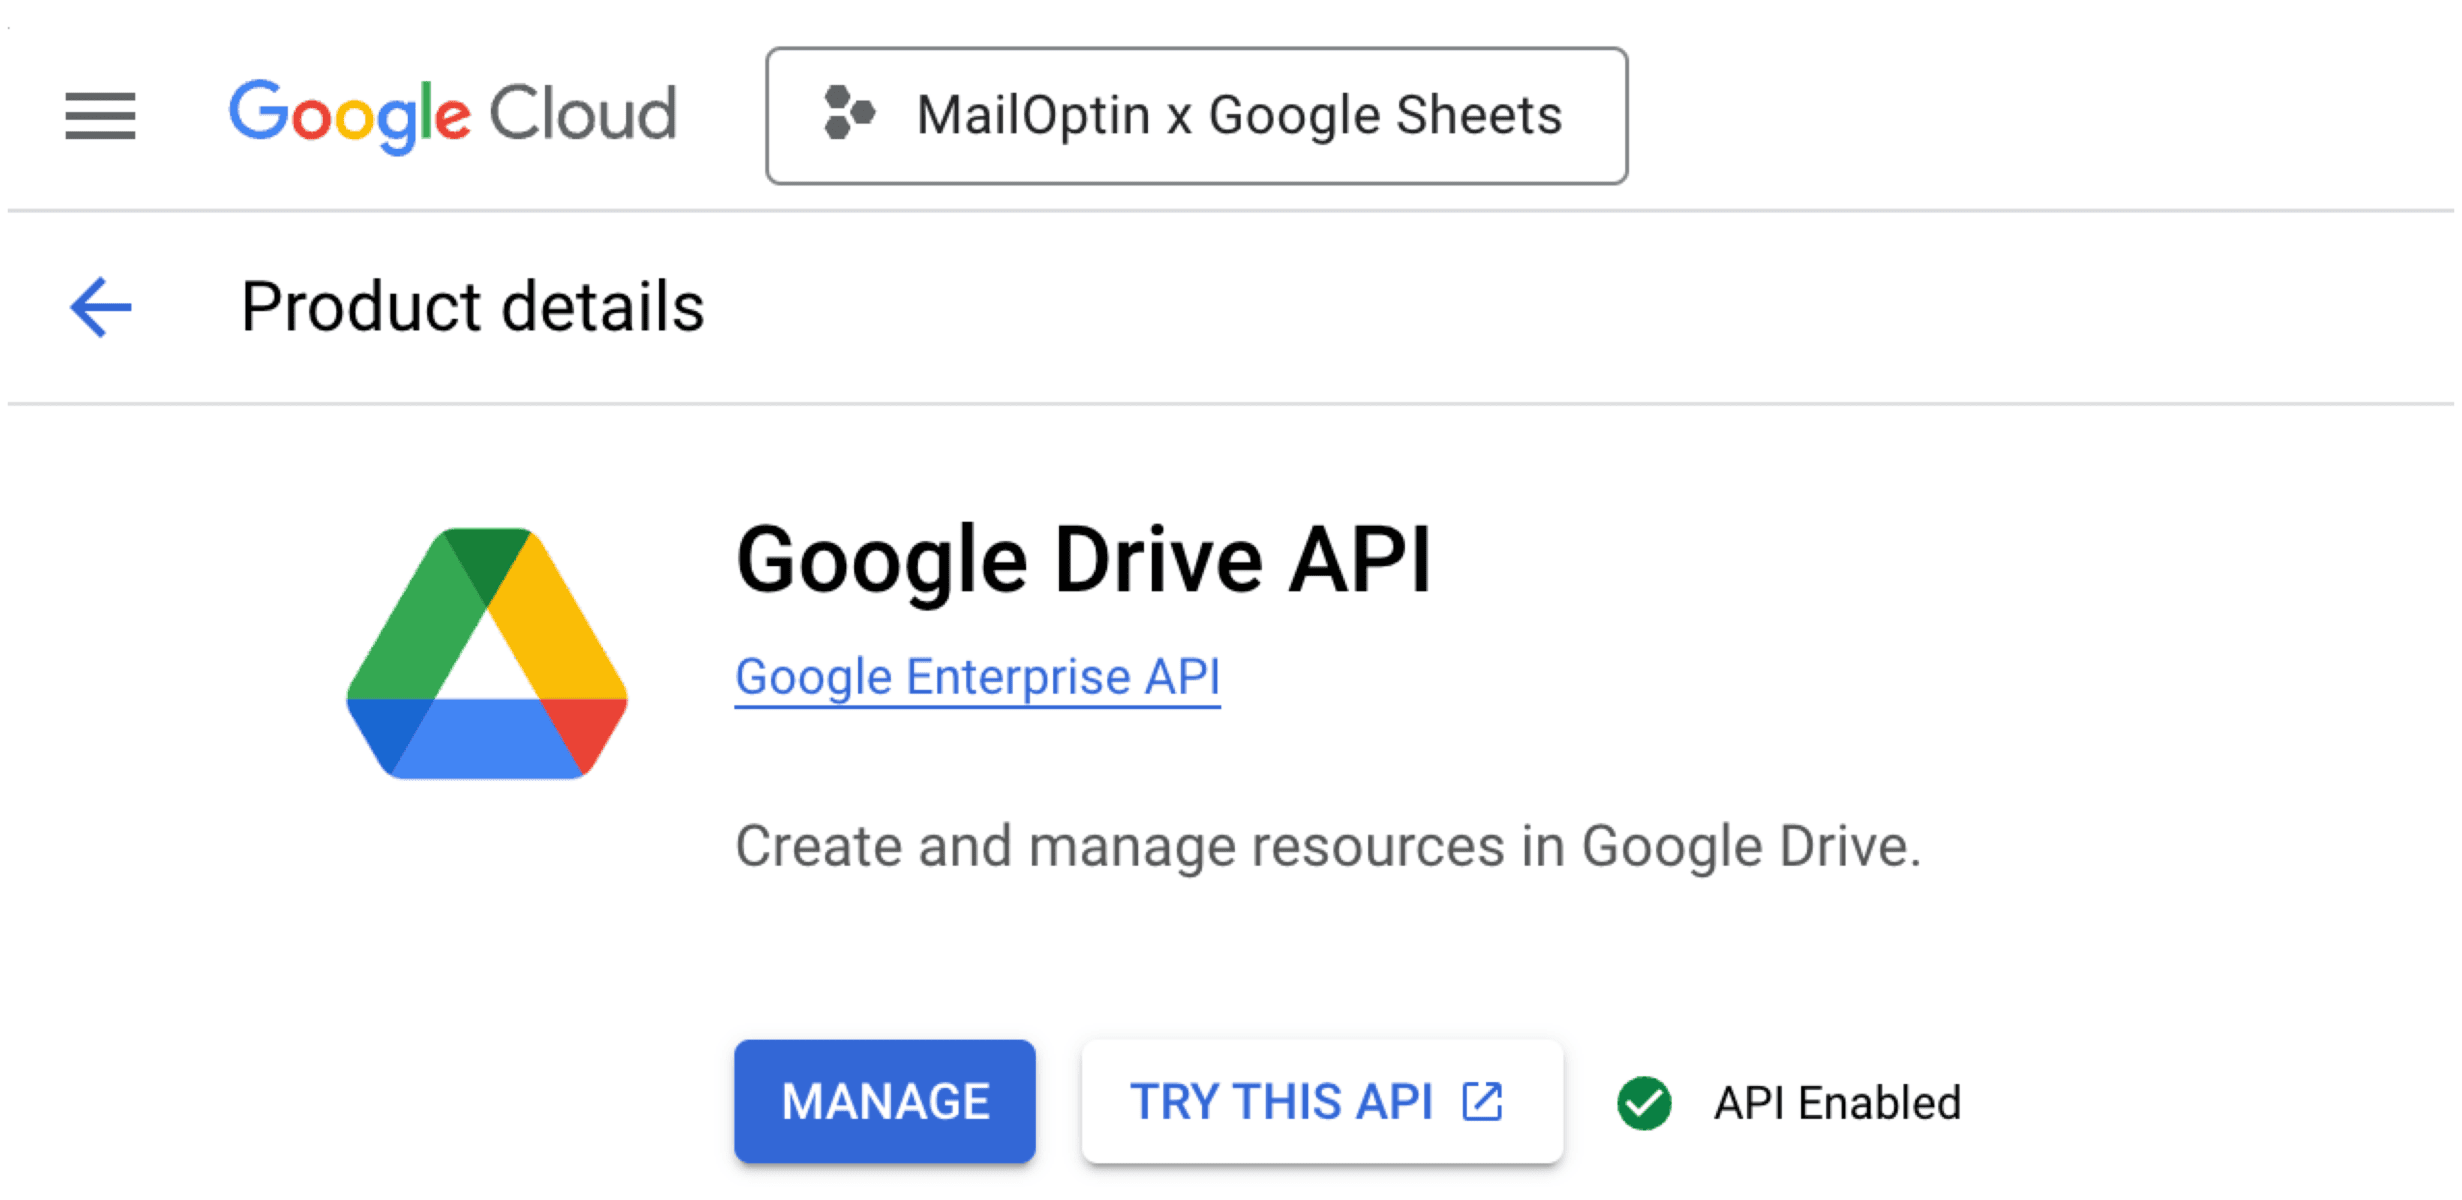
Navigate to the API Library page or click on https://console.cloud.google.com/apis/library. Search and enable the following APIs: Google Drive API and “Google Sheets API”.
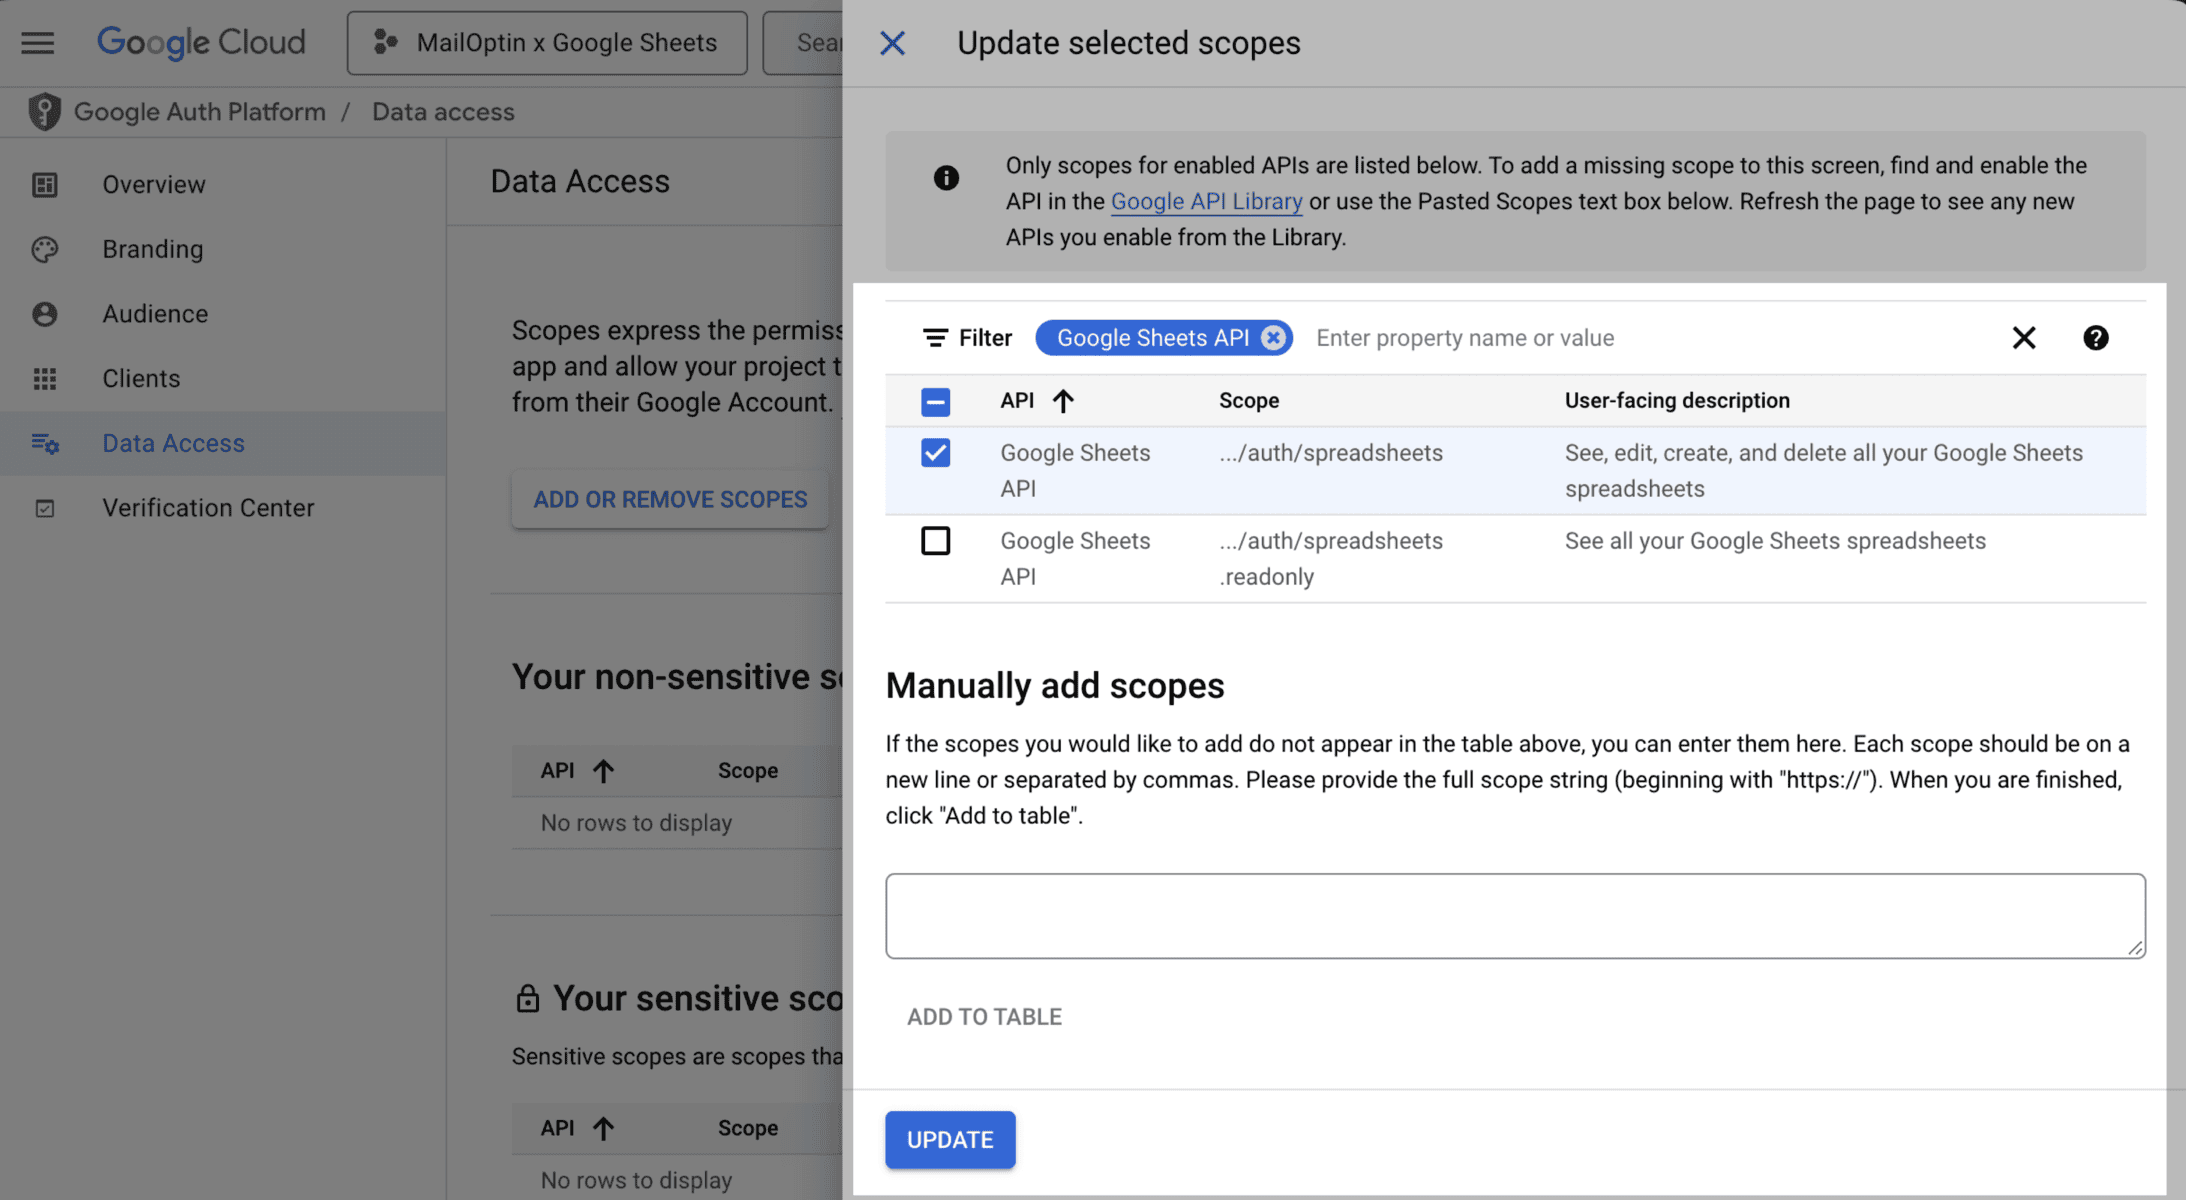
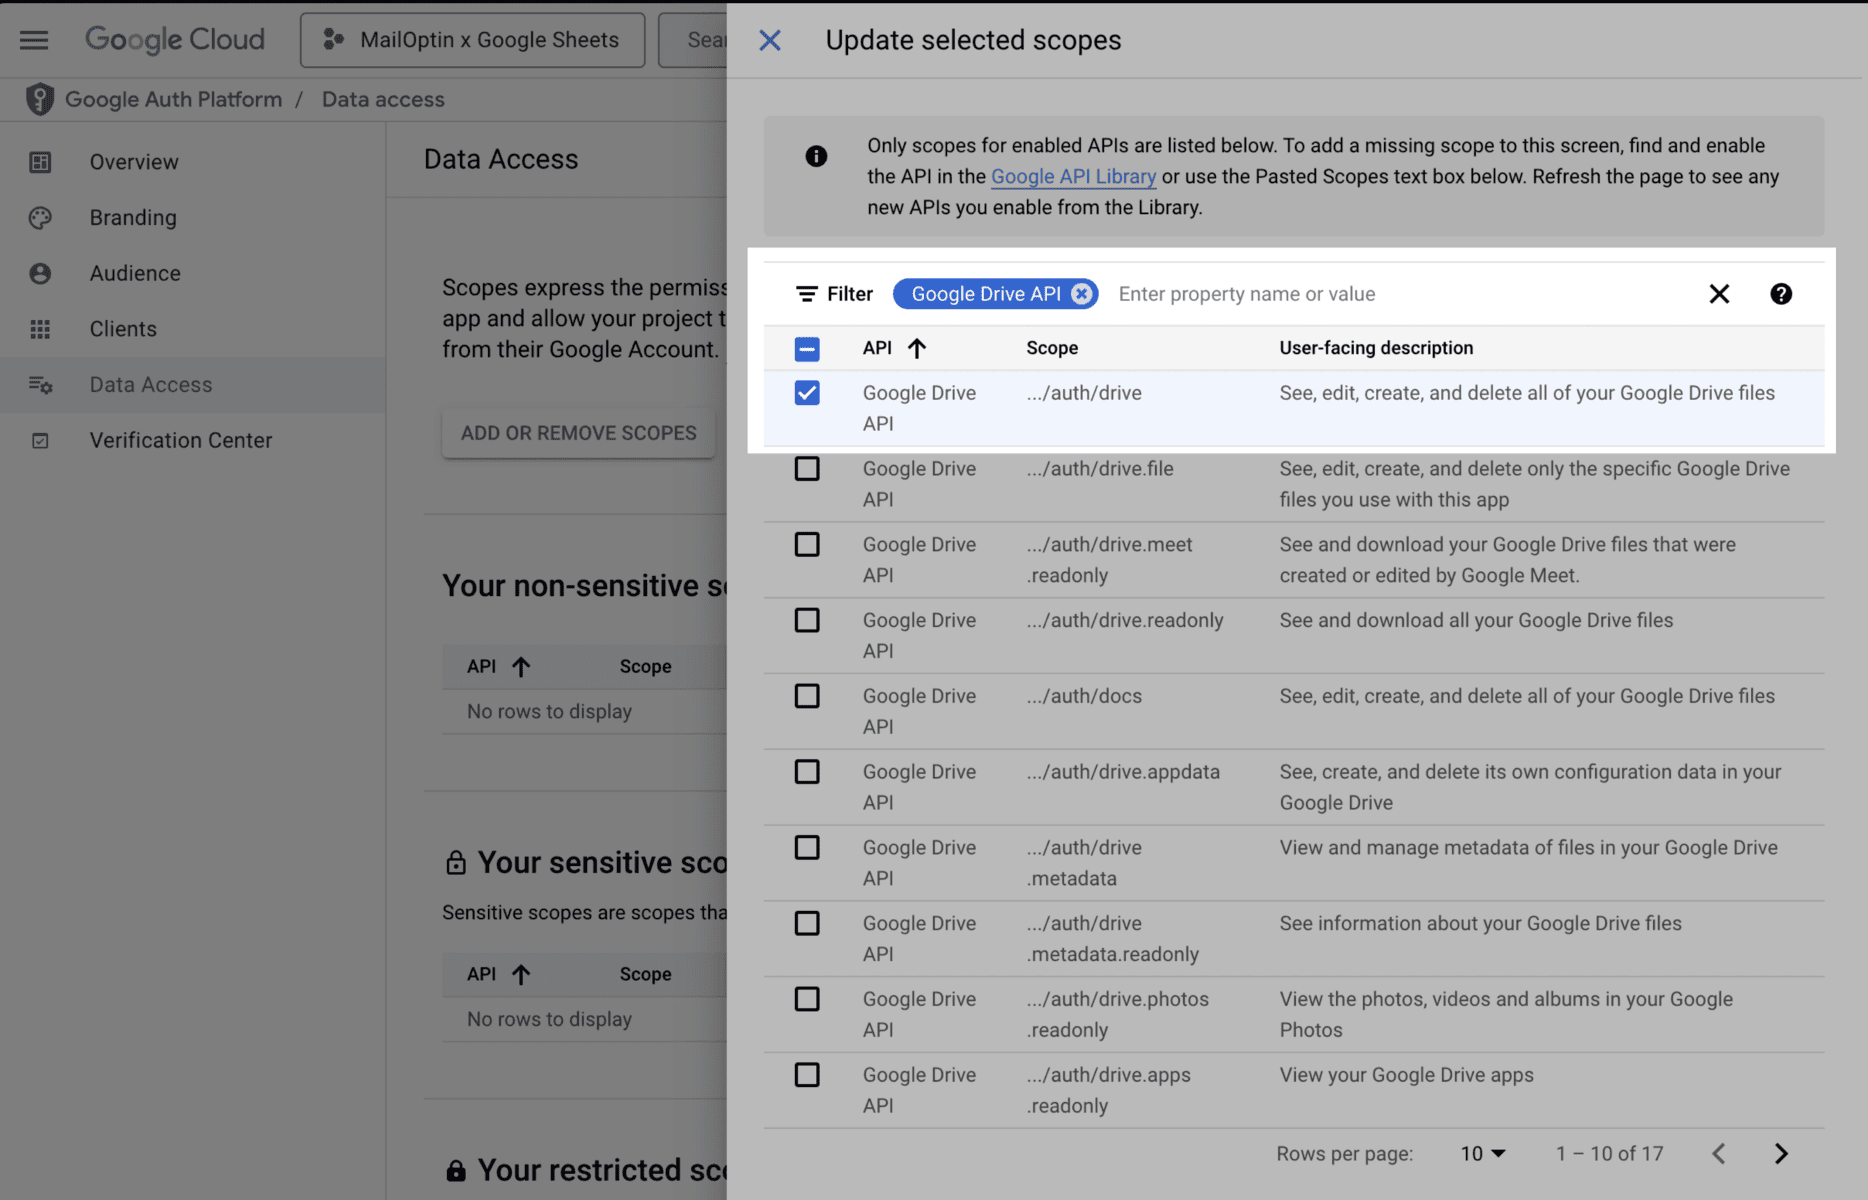
Next is to navigate to Google Auth Platform >> Data Access, click on “ADD OR REMOVE SCOPES”, select “Google Drive API: ./auth/drive” and “Google Sheets API: ./auth/spreadsheets” and save the changes.
The last step is to navigate to Google Auth Platform >> Audience and publish the application.

Integrating the Google OAuth Credentials with MailOptin
To complete connecting WordPress with Google Sheets, go to the Integrations settings page by clicking the sidebar menu link or the top menu tabs.

Open the Google Sheets Connection section, enter the Client ID and Client Secret of the OAuth application you created, and save.
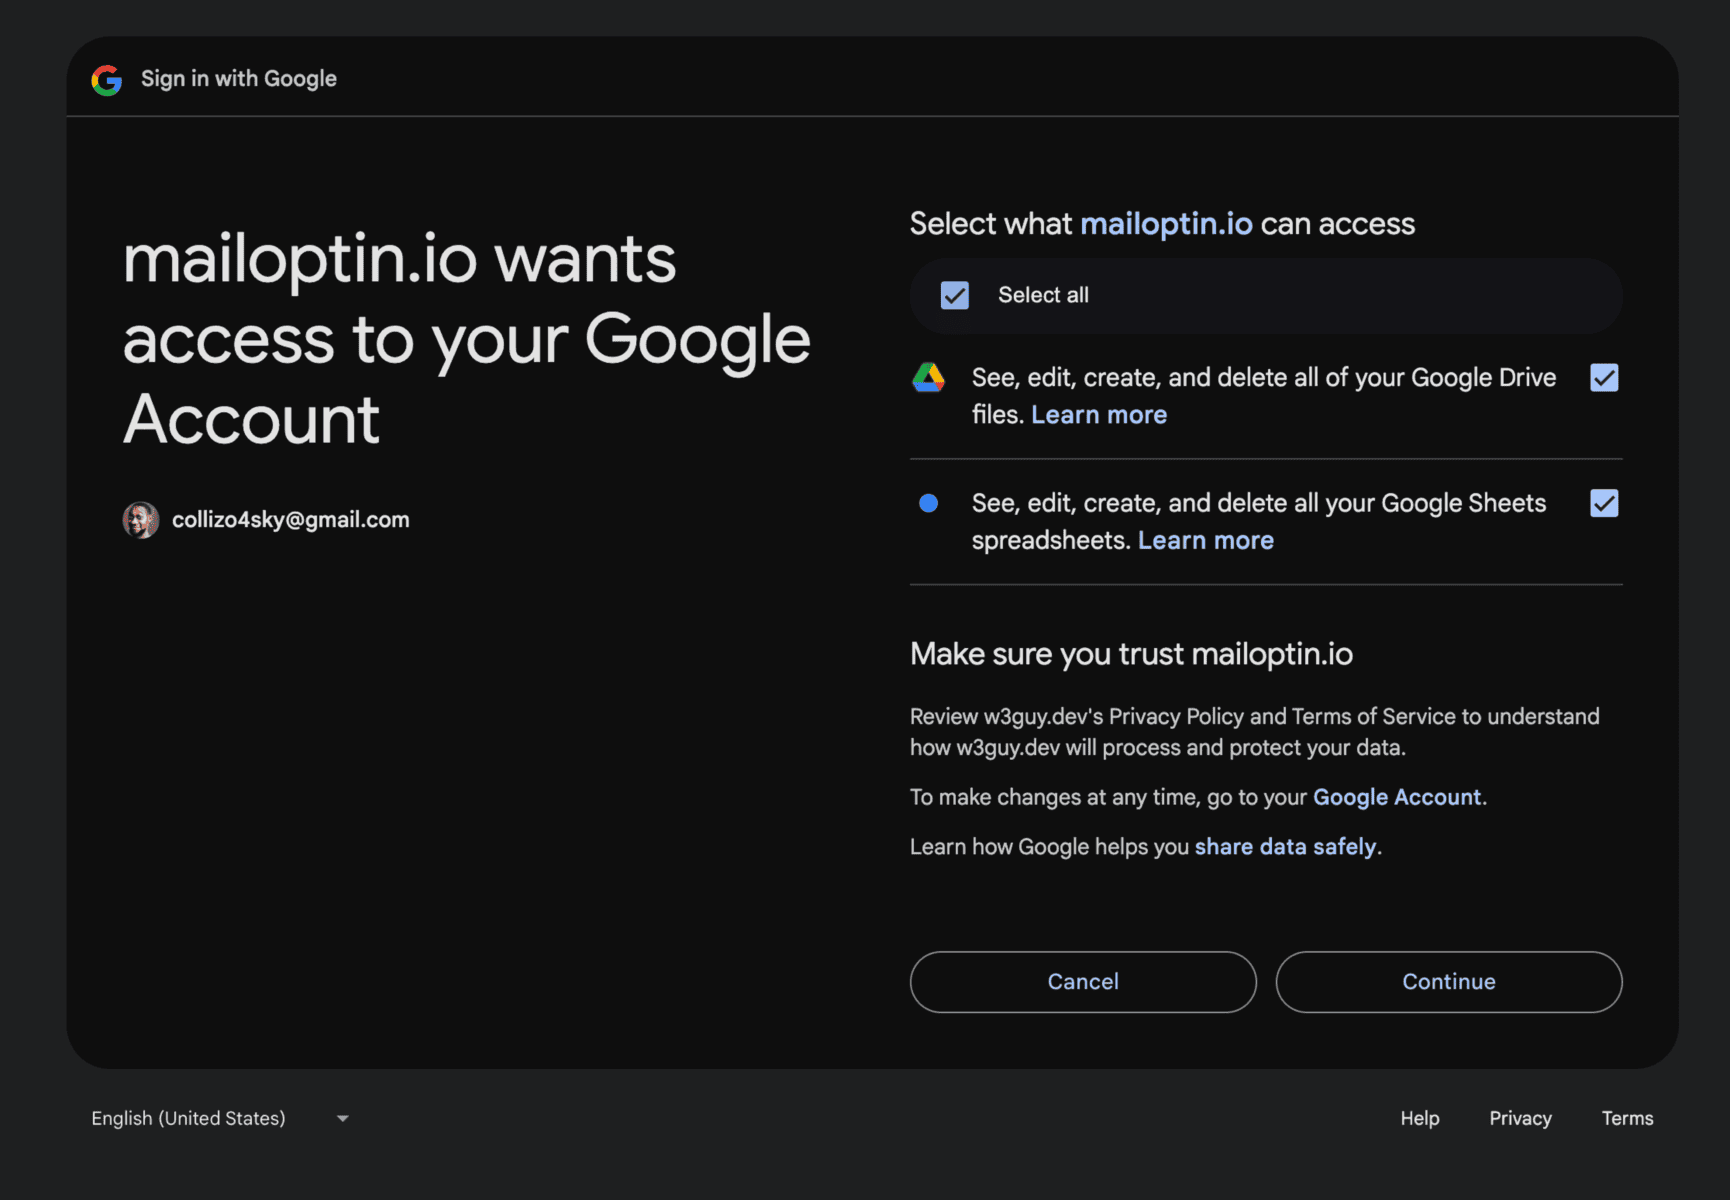
Click the “Authorize Your Account” button.

You will be redirected to a Google-hosted page to complete the authorization.
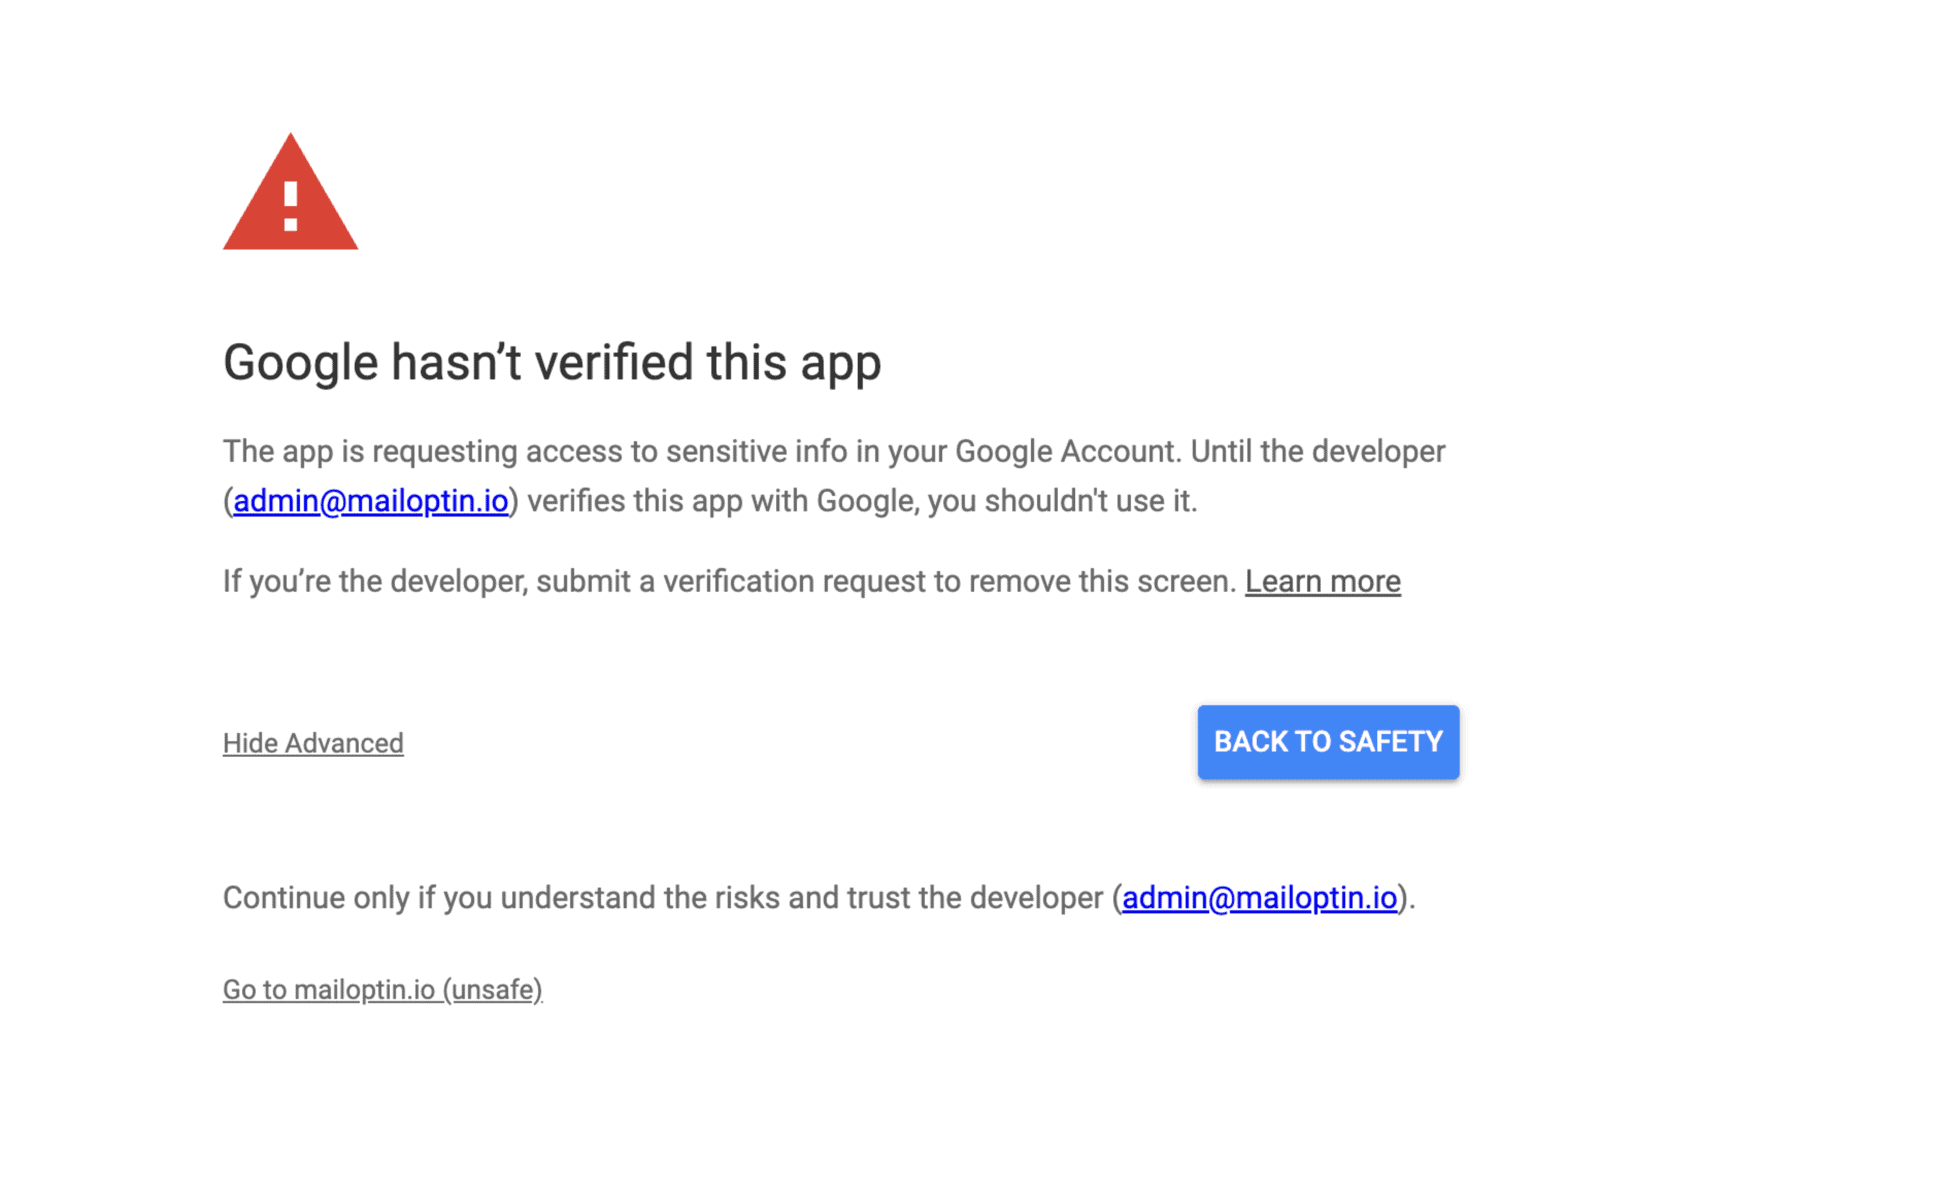
Unverified App Warning – Safe to Ignore
While setting up your Google Cloud project and authorizing access, you may see a “This app isn’t verified” warning from Google. Don’t worry—this is completely normal and safe.
Google requires public apps (used by many people) to go through a verification process, especially when requesting sensitive permissions. However, since this setup is for your own use—where you (as the admin) are creating and authorizing your own app under your own Google account—verification is not needed.
Google has confirmed that for private, admin-only apps like this, you can safely skip the verification and continue using it. Simply click “Advanced” → “Go to [Your App]” when prompted, and everything will work as expected.
✅ Your data stays private. This integration runs under your own Google account and does not share access with anyone else.
✅ No impact on functionality. The warning does not affect how the plugin works.
After the authorization process, you should see the connection is successful in MailOptin.

We hope this article helped you learn how to connect WordPress to Google Sheets so you can start syncing leads and subscribers to specific spreadsheet files in Google Sheets.