Adding Google reCAPTCHA to WordPress Forms

Do you want to add Google reCAPTCHA to your WordPress forms to stop spam bots from filling out your form?
With the increasing sophistication of automated bots, protecting your website from spam, fraud, and abuse is more important than ever. This is where Google reCAPTCHA comes into play.
Google reCAPTCHA is a free service that protects your website from spam and abuse by distinguishing between human and automated access to your site. It ensures that your website interactions are genuine, thereby preserving the integrity and security of your data.
MailOptin offers seamless integration with Google reCAPTCHA, providing an extra layer of security to your WordPress optin forms by filtering out malicious activities and ensuring that your form submissions are legitimate.
Getting Started with MailOptin
MailOptin is a lead generation plugin that converts website visitors into subscribers and WordPress users, sends one-off newsletters, and creates automated, event-triggered follow-up emails—all within WordPress.
MailOptin supports Google reCAPTCHA versions 2 and 3, providing enhanced security for your forms.
reCAPTCHA is of different types. However, MailOptin only supports versions 3 and 2 (“I’m not a robot” Checkbox), and you can only use one in all your forms.
reCAPTCHA v2 (“I’m not a robot” Checkbox)
This version requires the user to click a checkbox indicating the user is not a robot. This will either pass the user immediately (with No CAPTCHA) or challenge them to validate whether or not they are human.

reCAPTCHA v3
To avoid asking for user interaction, Google will monitor the user’s behavior on your site to look for what it considers suspicious activity. Then, reCAPTCHA will assign them a score. You will decide the score needed to allow your forms to be submitted. If a user’s reCAPTCHA score does not meet your requirements, they will have no way to submit your form.

To integrate either of the Google reCAPTCHA versions above into your MailOptin optin forms, follow these steps:
Step 1: Install and Activate MailOptin
Start by purchasing a MailOptin plan and download the plugin from the welcome email or your MailOptin account.
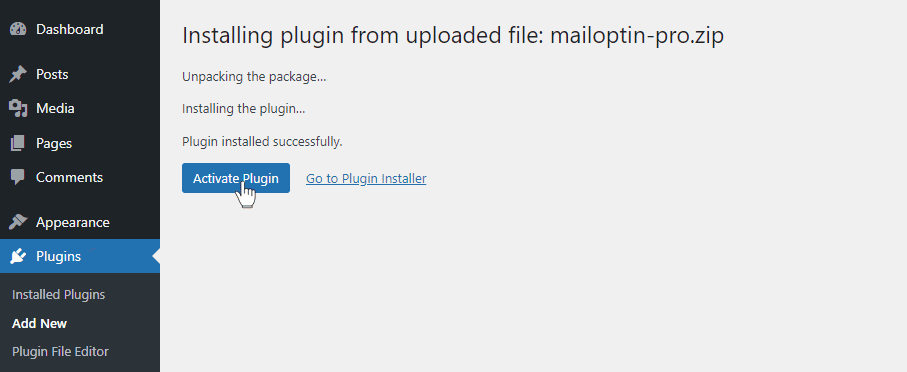
Next, upload and install the plugin on your WordPress website.

Once installed, click “Activate” to activate the plugin.
Step 2: Generating reCAPTCHA Keys in Google
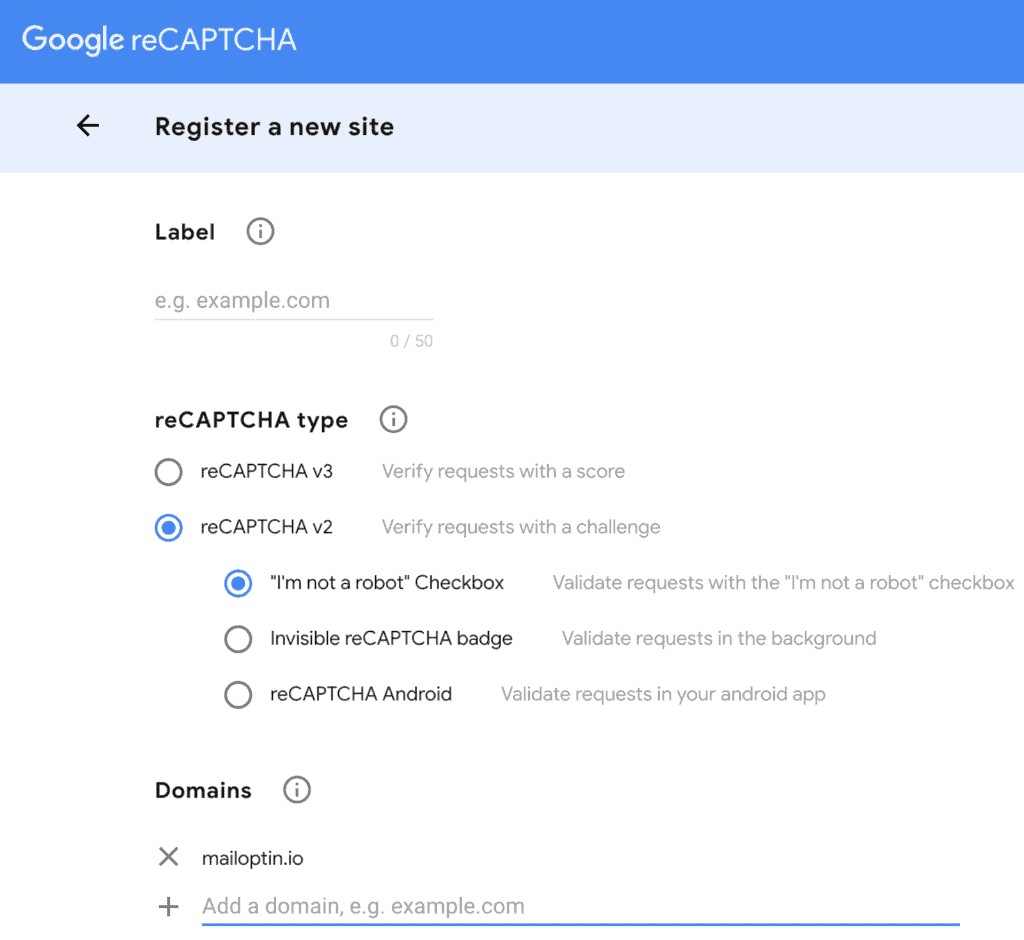
Go to the Google reCAPTCHA site. You will be prompted to log in if you aren’t.
Enter a label used to identify the site in the future, select the reCAPTCHA type, enter the domain name of your website, and submit.
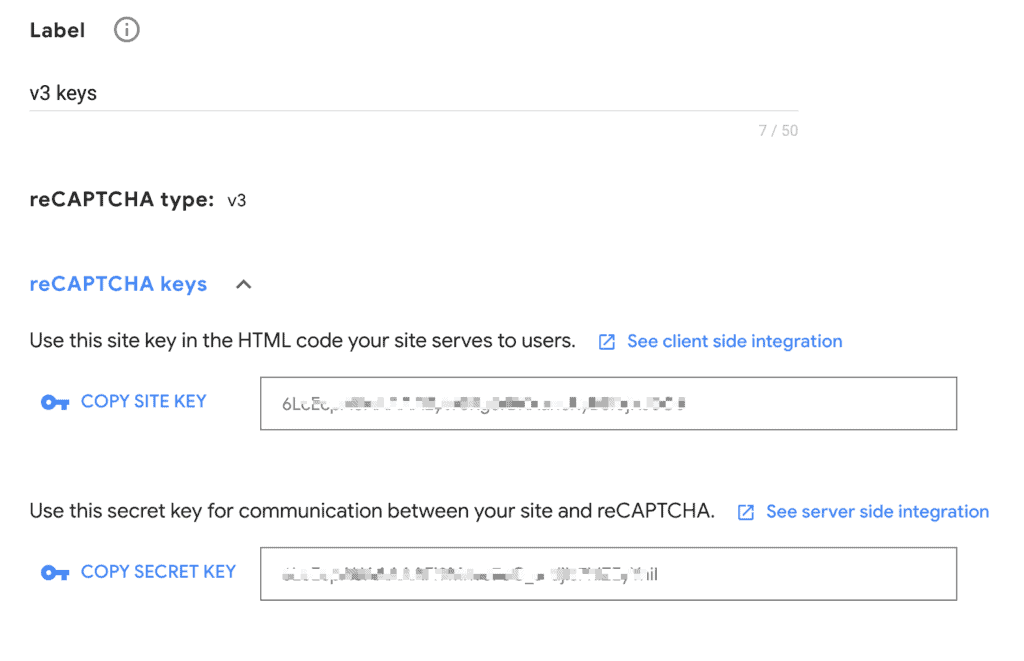
After registering, you should see a page with the keys for your website.
Step 3: Saving the reCAPTCHA Keys in MailOptin
Log into your WordPress site and go to MailOptin » Settings. Then, click on the reCAPTCHA tab.
Select the reCAPTCHA type and enter your Site Key and Secret Key.
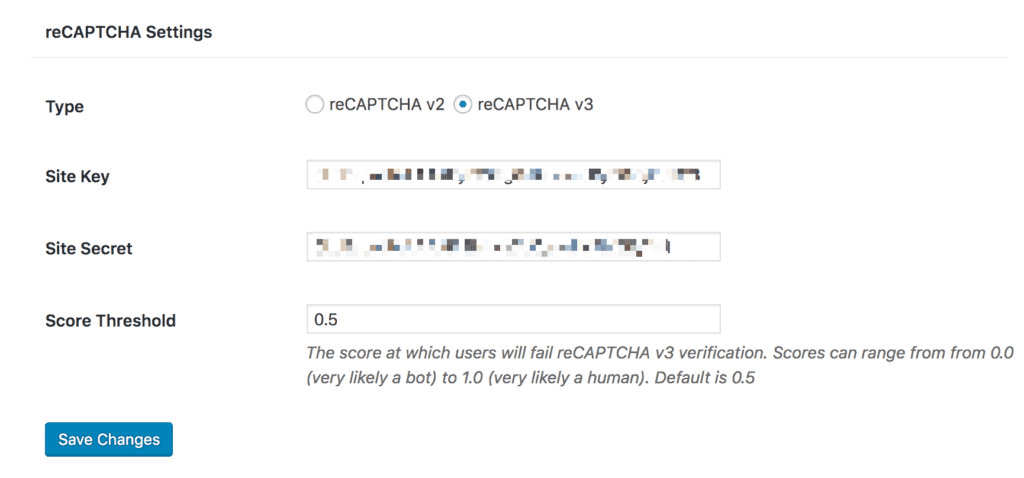
Click on the Save Changes button to store your settings.
Step 4: Adding reCAPTCHA to a Form
Open the form to which you want to add reCAPTCHA and go to the “Fields” panel.
Add a new field and select reCAPTCHA v2 or reCAPTCHA v3 as the field type.
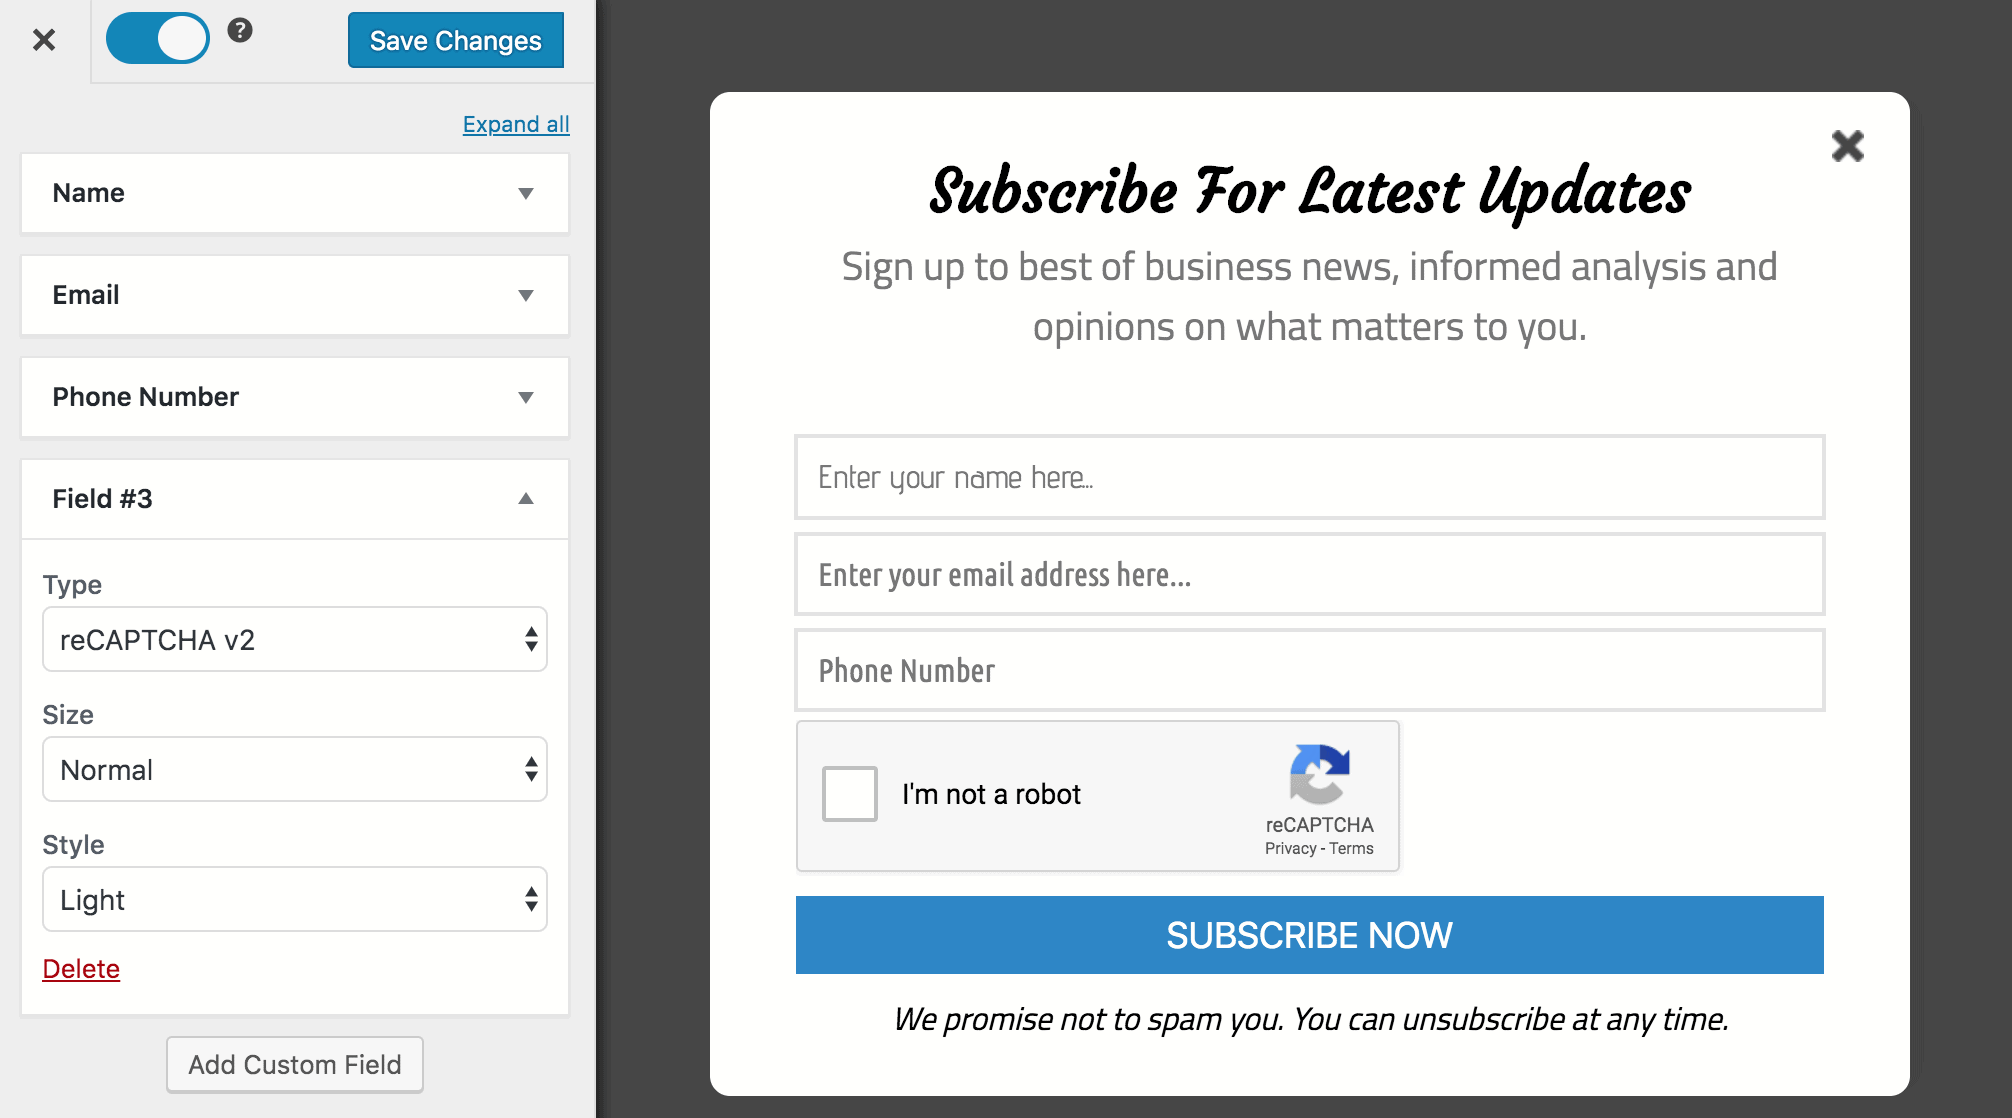
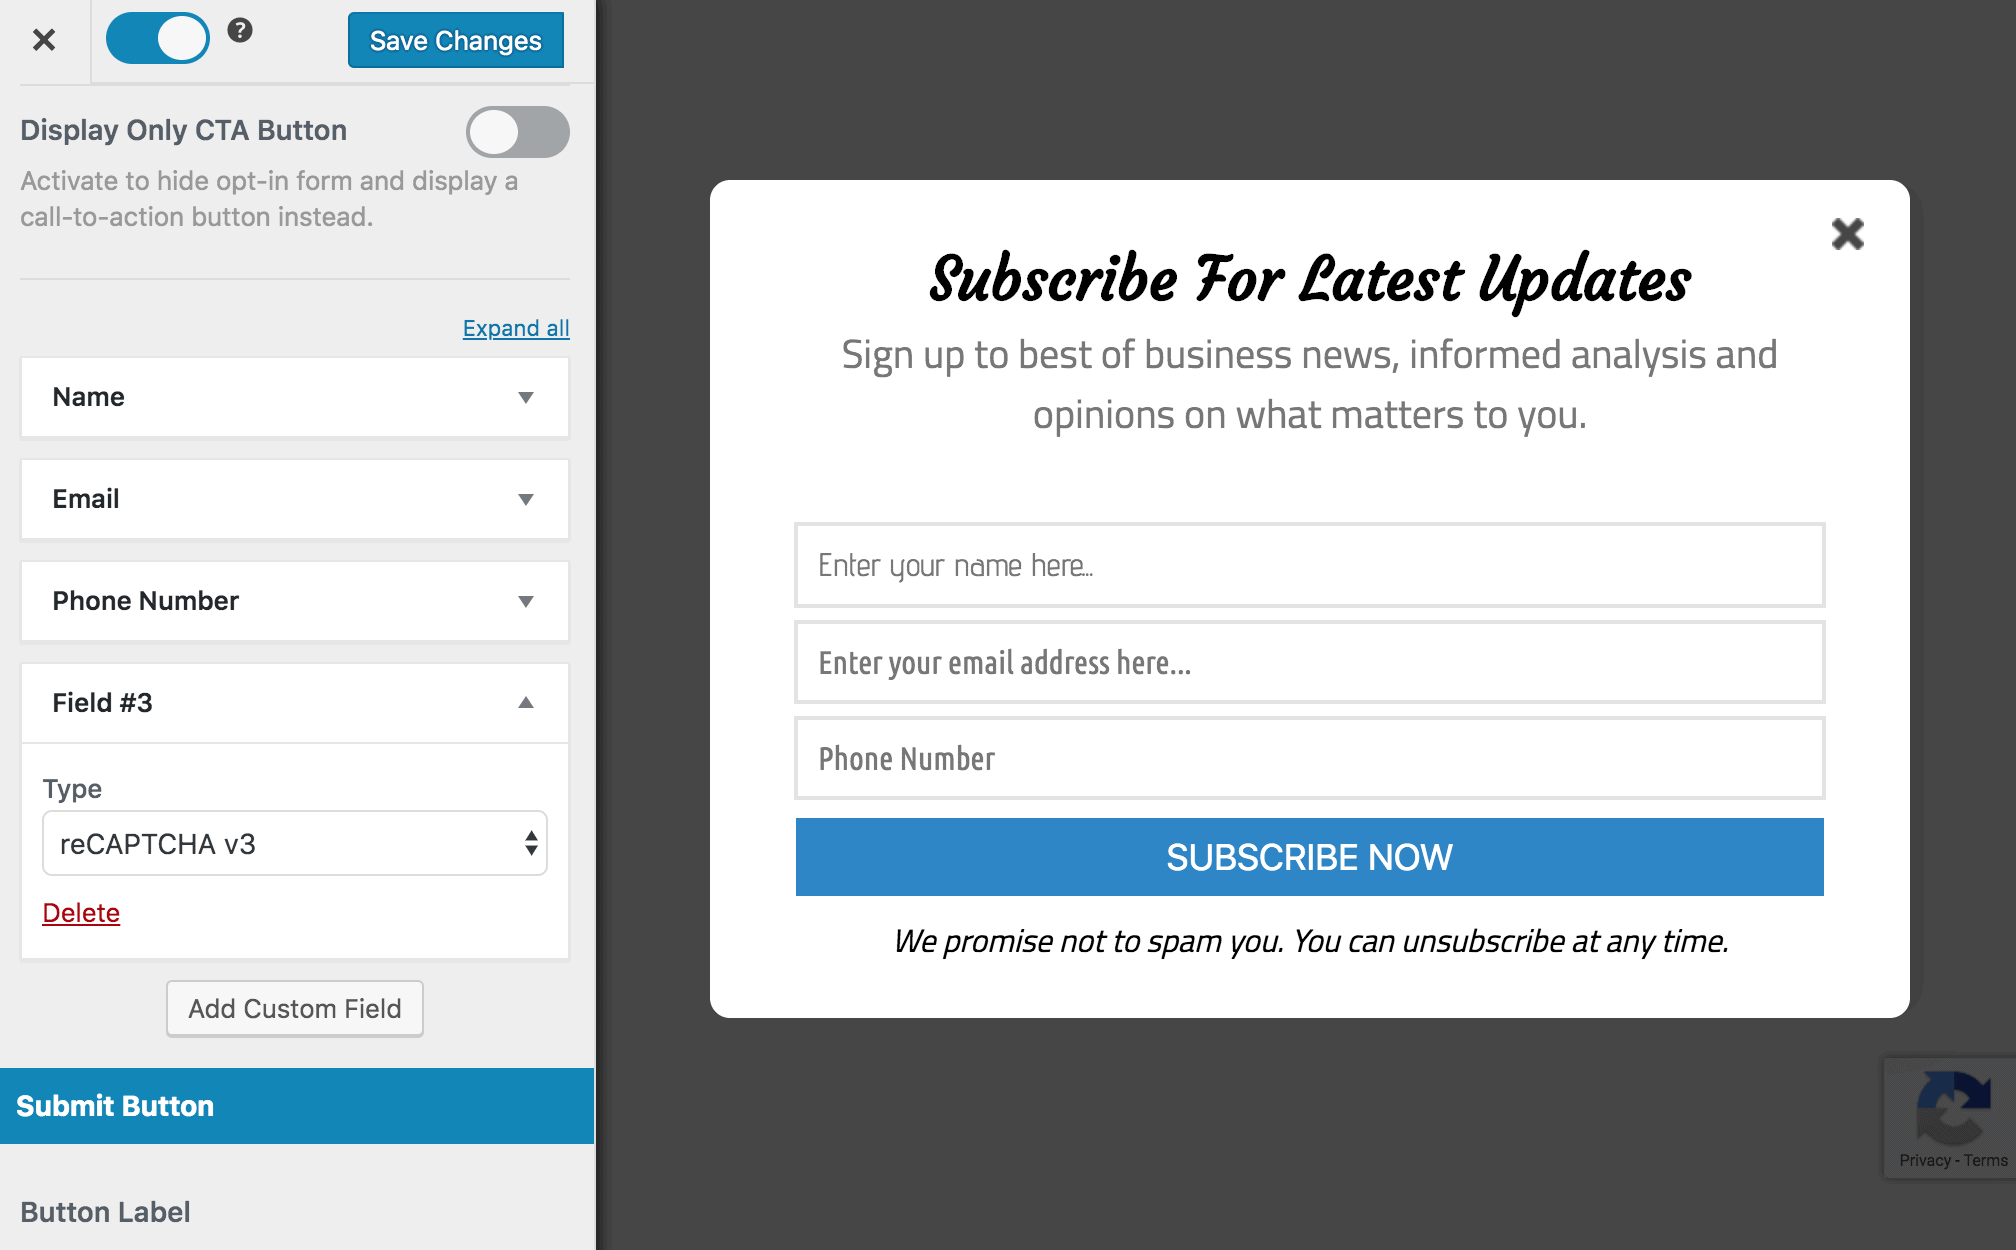
Finally, save the changes.
Preview the form on your site, and you should see the reCAPTCHA (in the case of v2) or the badge at the bottom right corner (for v3).
Secure your WordPress forms with Google reCAPTCHA
Integrating Google reCAPTCHA with MailOptin can fortify your WordPress email signup forms against malicious activities and ensure a seamless and secure experience for your visitors.
We hope this article has helped you learn how to integrate Google reCAPTCHA with your WordPress optin forms using MailOptin.