How to Put WordPress in Maintenance Mode & Capture Leads
Wondering how to put WordPress into maintenance mode?
Whether you are trying to troubleshoot a bug or rebrand your website, you don’t want to ruin your visitor experience while carrying out any of those activities. Besides, presenting a broken website to your visitors affects your site’s credibility, which can impact future traffic negatively.
Putting your WordPress site in maintenance mode allows you to show a message explaining why the website is down. You can even provide a timeframe for when the maintenance will be done, offer an alternate URL to visit, or collect emails via an opt-in form to notify users when the website is up and running.
In this tutorial, we will show you how to put WordPress into maintenance mode.
Do You Need to Set Up Maintenance Mode?
Putting WordPress into maintenance mode is risky. When visitors see the mode enabled on your site, they will immediately abandon your site. Search engines will start noticing user behavior and they will conclude that either the quality of your site has dropped or your site is showing malicious content. Therefore we have 2 recommendations: restrict access to your content or use a staging site.
If you are revamping a couple of pages, then why not restrict those pages from public view while you work on them. ProfilePress helps you restrict posts and pages on your WordPress website.
But if restricting content is not your cup of tea then consider using a staging site. A staging site is a replica of your live site. You can work on the staging site for weeks without affecting the live site at all. And when you are ready, merge the staging site with the live site.
How to Put WordPress into Maintenance Mode?
There are three different ways in which you can put WordPress into maintenance mode. Those are:
- Setup Manually
- Setup Via Hosting
- Setup Maintenance Mode Using a Plugin
- Setup Using a Page Builder
In the section, we will cover each of these methods. You can proceed with whichever method you find comfortable. But first, take a backup of your entire website.
Every method that we have covered below will require you to make changes to your website. The manual method involves editing your theme and .htaccess file. A single mistake can break your website.
Both the plugin and page builder method involves installing a plugin and as we know, new plugins are known to break websites.
Therefore, take a backup of your entire site. If something goes wrong, you can restore your site back to normal and try a different method.
Now let’s dive into the steps.
1. Setup Maintenance Mode Manually
To manually set up a maintenance mode, you have to insert a code snippet into your theme.
On your WordPress website, go to Appearance > Theme File Editor > function.php. Scroll to the end of the editor and add the following code:
function wp_maintenance_mode() {

if (!current_user_can('edit_themes') || !is_user_logged_in()) {

wp_die('<h1>Under Maintenance</h1><br />Website under planned maintenance. Please check back later.');

}

}

add_action('get_header', 'wp_maintenance_mode');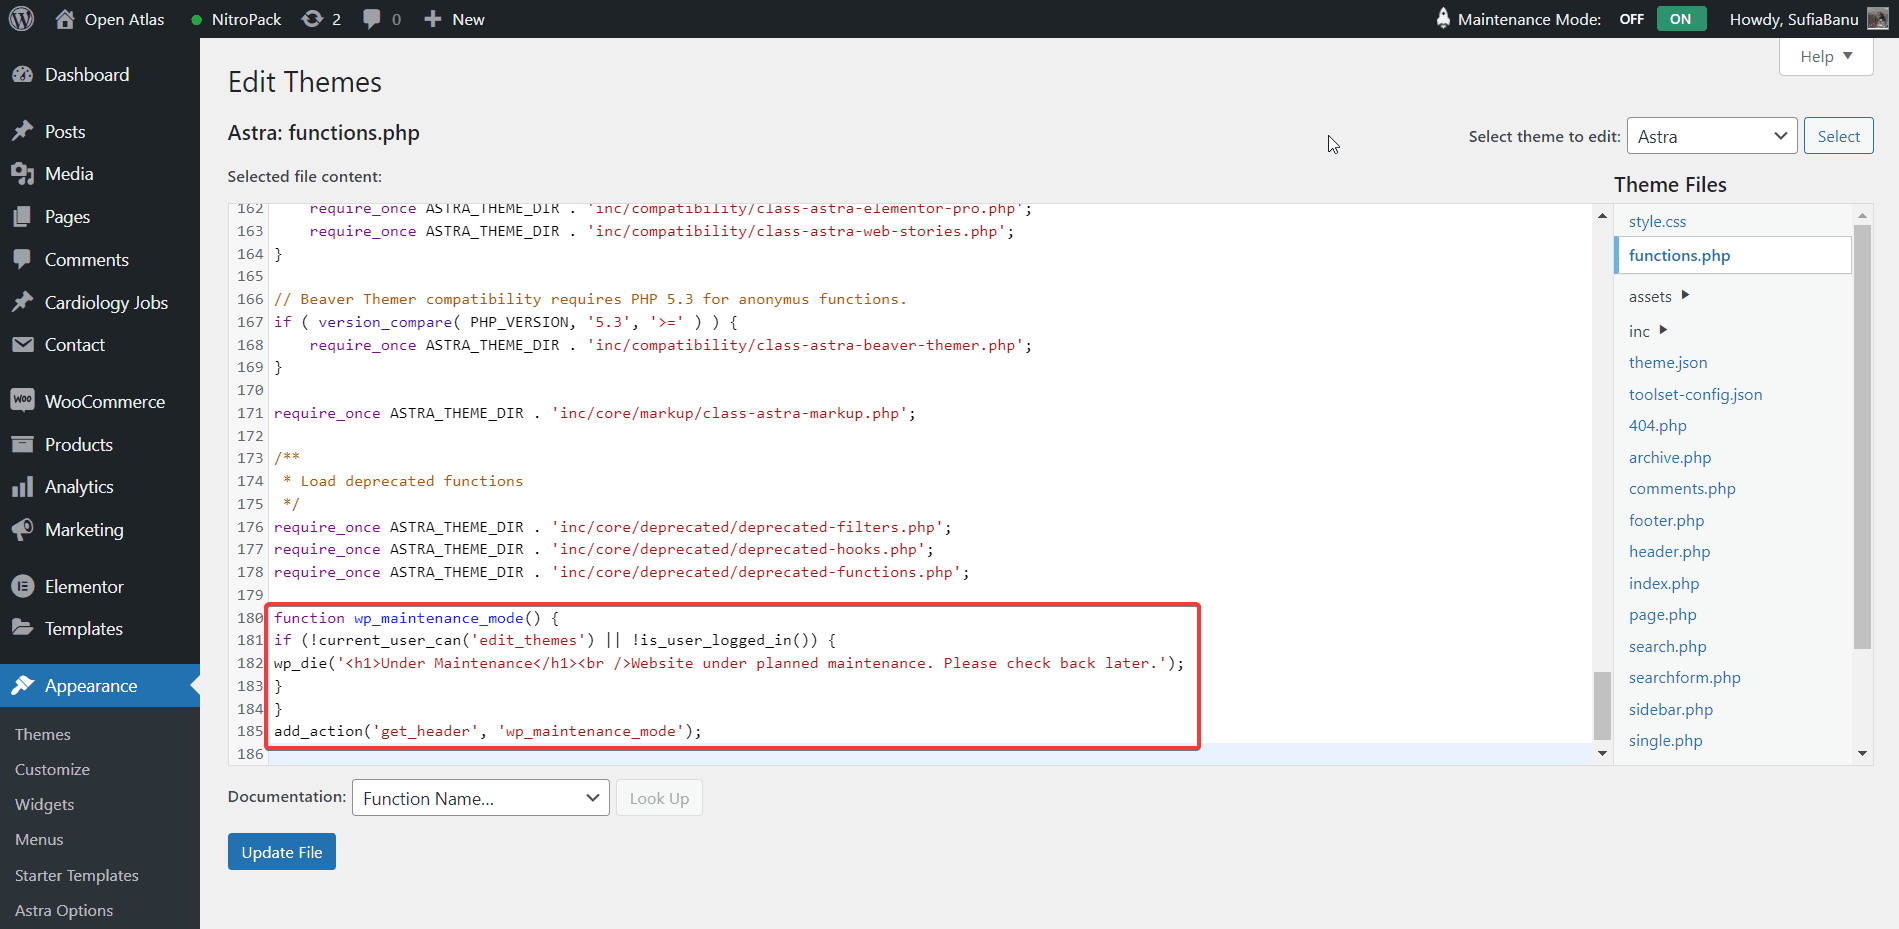
Don’t forget to save the settings and then check your website. You should see a blank page with a single sentence: “Website under planned maintenance. Please check back later.”
If your website seems normal, it could be because your browsing is showing you a cached version of the site.
Whenever you visit a site, your browser makes a copy of the site and shows you the copied version (i.e. cached version). This is done to mitigate slow networks and present the internet user with the information they are looking for as quickly as possible. So try clearing your browser cache and then check the site again.
To deactivate the maintenance mode, all you need to do is remove the code and update the file. That’s it.
The manual method is perfect for anyone who wants to put up a simple maintenance mode message. Some of you probably want the maintenance mode to reflect your branding or send your visitors to a different URL or collect emails via an opt-in form. In that case, use a plugin to put WordPress into maintenance mode.
2. Setup Maintenance Mode Via Hosting
Some hosting providers like Hostinger offer the ability to set a maintenance mode with the click of a button. You will need to check with your hosting provider and see if they offer a maintenance mode. If they do then they should be able to help you set it up.
3. Setup Maintenance Mode Using a Plugin to Capture Subscribers
There are plenty of WordPress maintenance mode plugins to choose from. Some of the most popular plugins are:
- CMP – Coming Soon & Maintenance Plugin by NiteoThemes
- WP Maintenance Mode & Coming Soon By Themeisle
- Coming Soon & Maintenance Mode by Colorlib
- Minimal Coming Soon – Coming Soon Page By WebFactory Ltd
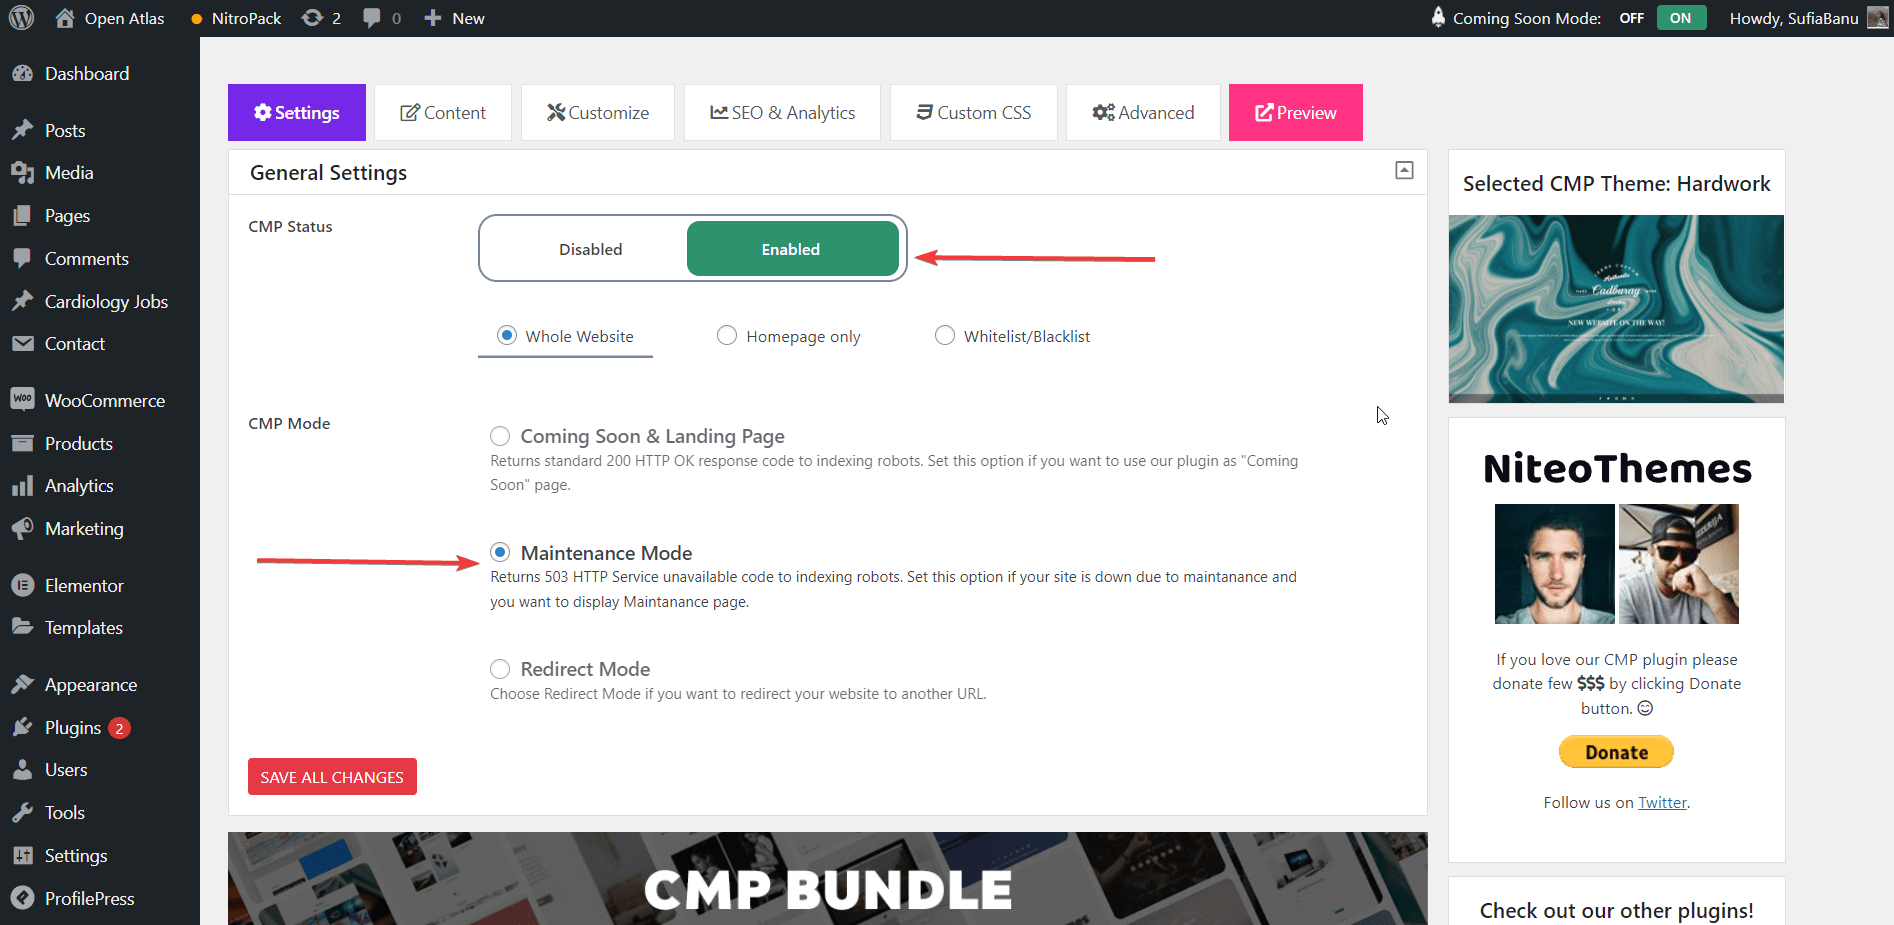
We tried CMP – Coming Soon & Maintenance Plugin by NiteoThemes on our demo site. All you have to do is install and activate the plugin on your website. Then go to CMP Settings toggle the Enable button, select Maintenance Mode, and save changes. That’s it.
You can change the look and feel of the maintenance mode through the Content and Customize option.
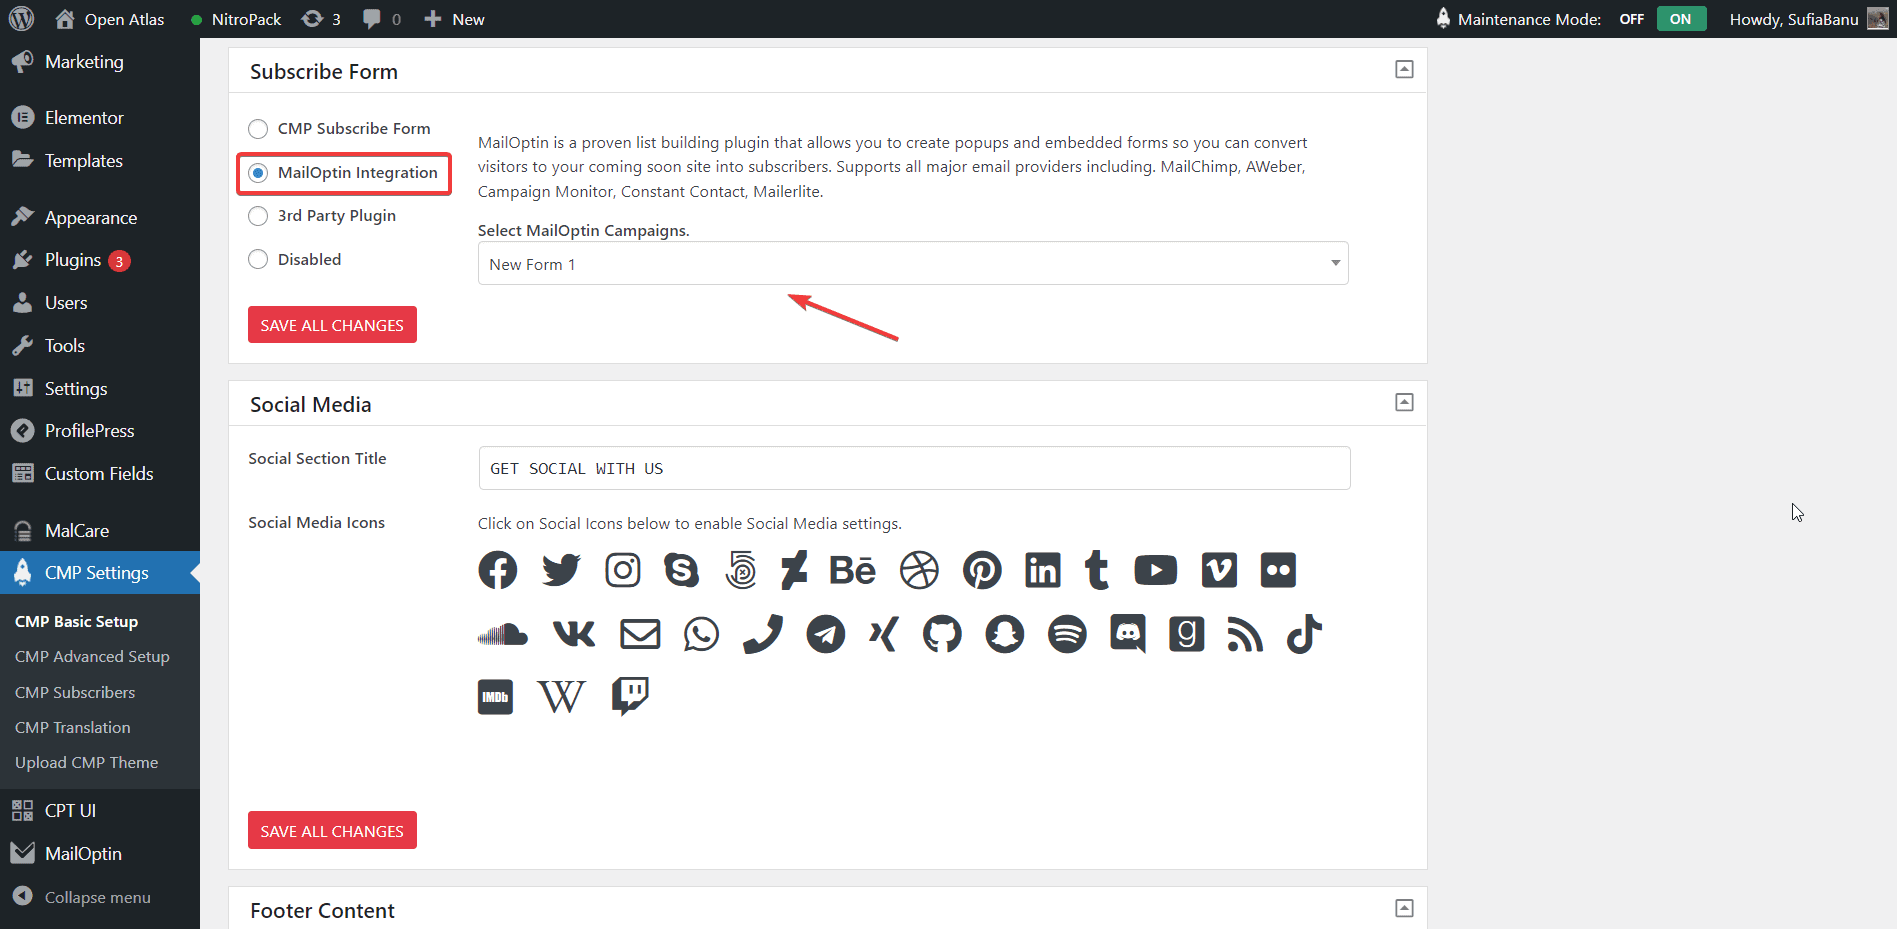
On our demo site, we also added an email opt-in form to our maintenance page using MailOptin. We recommend that you create an opt-in form using MailOptin. When the form is ready, go back to CMP Settings > Content. Then, scroll down to the Subscribe Form option and select MailOptin Integration and from the drop-down menu, choose the opt-in form you just created.
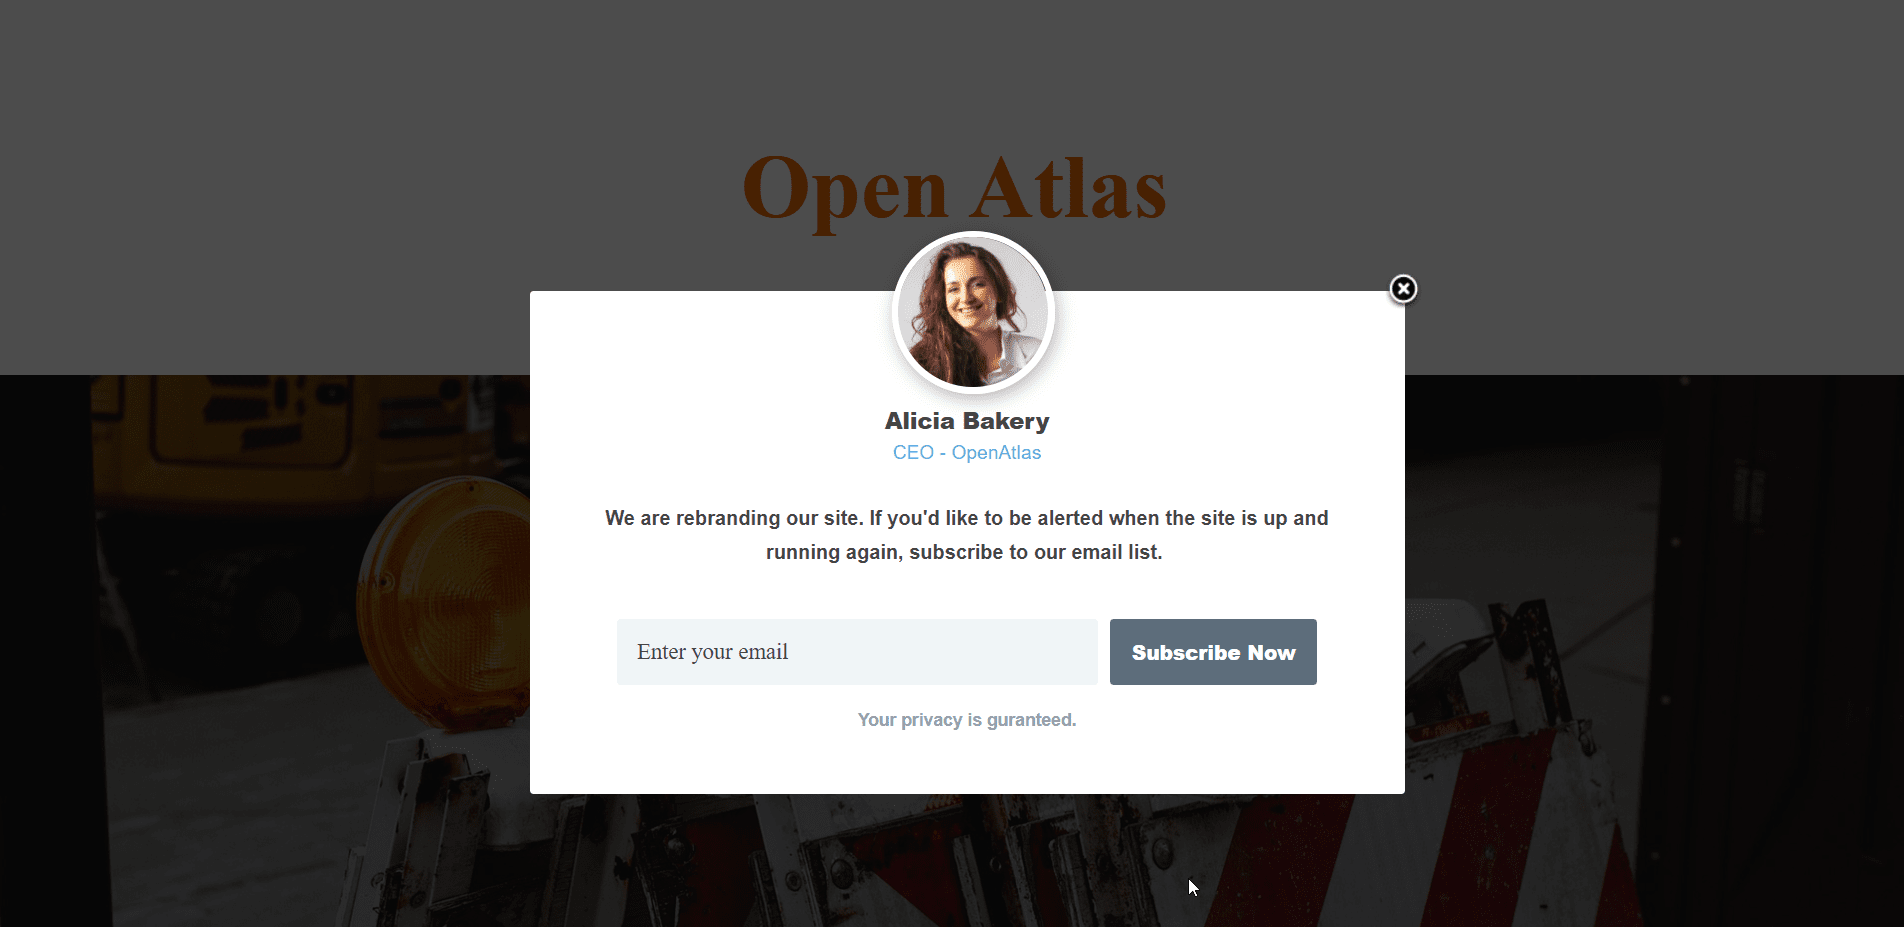
That’s it. Your website will start showing the form to visitors. Here’s how it looks on our demo site:
4. Setup Maintenance Mode Using a Page Builder
Many page builders like Elementor or Beaver Builders offer an advanced feature called Maintenance Mode. Typically, this feature is part of a premium plan. So if you have a premium page builder installed on your website, check if they have the feature.
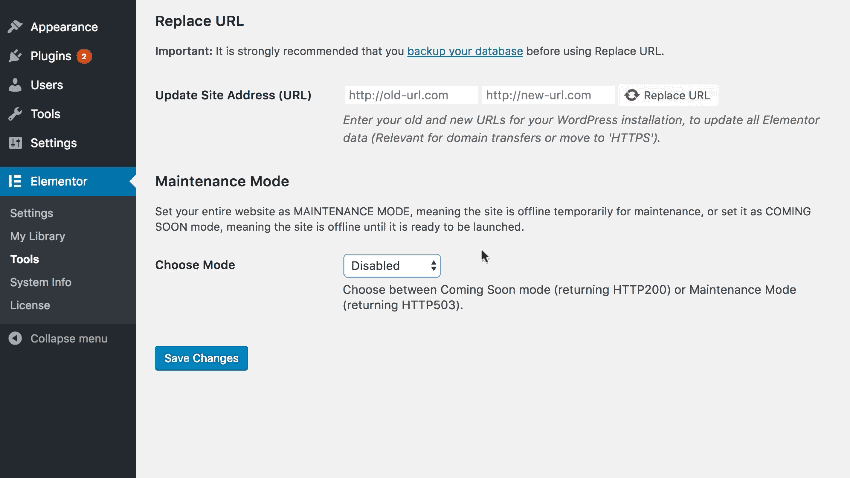
For instance, if you have Elementor installed on your website, then go to Elementor > Tools > Maintenance Mode. Go to Choose Template and select a template. This template will be shown to visitors when they come to your website. If you don’t have a template ready, you can simply create one by clicking on the create one link.
After selecting the template, go to Choose Mode. From the drop-down menu, select Enabled and then save your settings.
Troubleshooting Issues
As you enable maintenance mode on your WordPress website, some of you are likely to face problems. In this section, we are addressing how to fix the most common problems you will face after activating maintenance mode on your WordPress website.
1. Unable to Access wp-admin After Activating Maintenance Mode
If you are using a maintenance mode plugin, then you might find yourself locked out of your own website. Some plugins disable the wp-admin and create a new page (wp-login) to log in. We recommend trying the following URL: yoursite.com/wp-login
Don’t forget to replace ‘yoursite’ with the name of your website.
If that doesn’t work, then it’s best to remove the maintenance mode plugin from your website. You can do this via your hosting account.
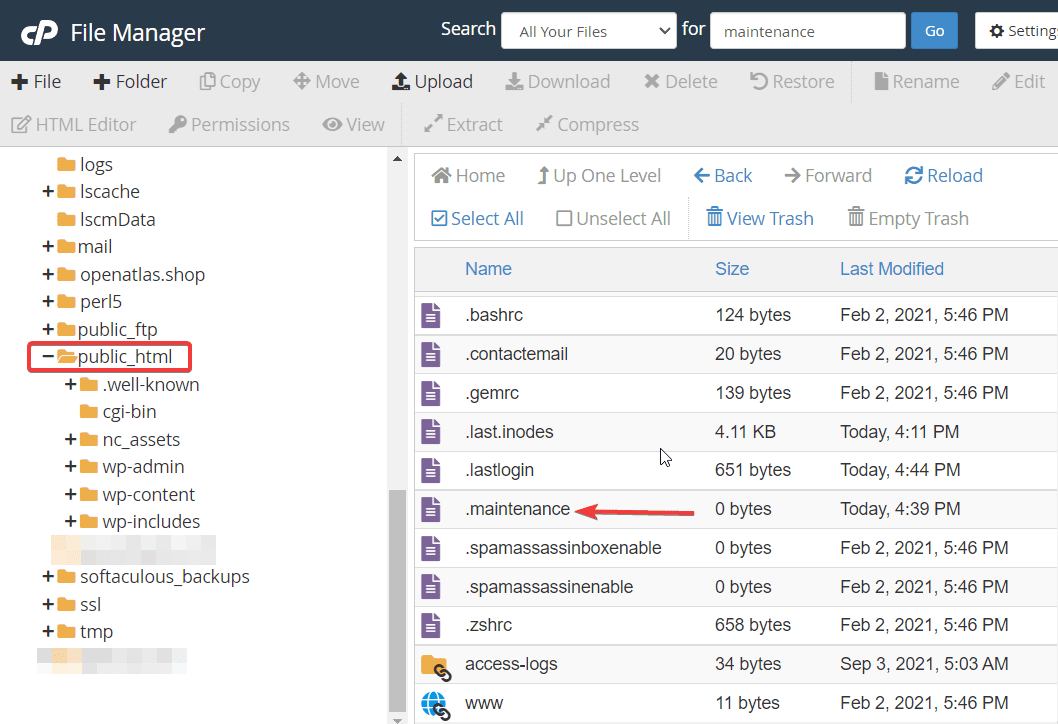
Login to your hosting account and go to cPanel > File Manager > public_html > wp-content > plugins. Select the maintenance mode plugin installed on your site, right-click and choose Delete. This should deactivate your plugin.
2. Unable to Deactivate Maintenance Mode
Regardless of which method you used to activate the coming soon mode, sometimes, you’ll find it hard to deactivate it. This happens due to caching issue. Your website is most likely back to normal but your browser is showing you a cached version of your site. So clear the cache and check the site again.
To clear the cache for Google Chrome, you will need to select the Three Dots icon on the top right corner of the browser. Then go to More tools > Clear browsing data. A popup will appear. Make sure you are selecting only the Cached images and files option. Then click on Clear browsing data. That’s it. You have cleared your browser cache.
If you are using a different browser this guide will help you: How to clear browser cache.
![]()
3. Google Search Engine Shows Maintenance Mode After Deactivation
After you deactivate your site’s maintenance mode, Google may keep showing search engine users that your site is on maintenance mode. In that case, we recommend waiting patiently for Google to crawl your site again. When Googlebot learns that your website is back to normal they update the search results.
Some of you are probably wondering if requesting to reindex your site using Google Search Console could hasten the process. We don’t recommend this method because of the following reason.
To reindex the site, you will need to delete the site from Google Seach Console and then add it back to the search console. We have reindexed sites a few times in this manner and didn’t lose any of the performance data. But we don’t know if the same thing will happen with your site. What if you end up losing all your performance data? Hence, we recommend waiting for Google to recrawl your site and update the search engine on its own.
Conclusion
Putting WordPress into maintenance mode is a great way to inform visitors what’s going on with the website. There are several ways in which you can set up a maintenance mode on your WordPress website. You can do it manually or use a plugin or a page builder.
A manual method is recommended for those who are comfortable adding a code snippet in the backend of the site. Otherwise, the plugin or the page builder method is the best way forward. The plugin and the page builder method are convenient for those who would like to add a countdown timer or an opt-in form on the website.
We hope you found our guide helpful. For more such tutorials, check out our blog.