How to Create a Custom WordPress Dashboard
Do you want to create a custom dashboard for your WordPress site?
WordPress is a powerful platform that empowers users to create and manage websites. While the default WordPress dashboard provides extensive functionality, there are instances where users may seek customization to better align with their needs or those of their clients.
Creating a custom WordPress dashboard can streamline workflows, improve user experience, and enhance the overall aesthetic of your website. While it’s possible to do this using custom code and other customizable options, using a plugin is simpler.
Today, I will guide you through creating a custom WordPress Dashboard using the Ultimate Dashboard plugin.
Understanding the WordPress Dashboard
The WordPress dashboard is the primary interface for managing a WordPress website. It is the first page that appears when a user logs into the backend of their website. The default dashboard includes a variety of widgets and sections that provide an overview of recent activity, upcoming events, and site performance. It also offers quick access to frequently used settings and tools, such as posts, media, pages, and plugins.
Why Create a Custom WordPress Dashboard?
The default WordPress dashboard is designed to be user-friendly and functional for many users. However, there are several reasons why you might want to create a custom dashboard:
Brand Identity: Customizing the dashboard allows you to incorporate your brand’s colors, logo, and design elements, creating a cohesive look and feel across your website.
Simplify User Experience: You can remove unnecessary clutter and provide quick access to the most important features.
Streamline Workflows: By organizing dashboard widgets and menu items based on user roles or tasks, you can make it easier for users to find what they need and complete tasks more efficiently.
Add Custom Functionality: You can integrate custom widgets, tools, and features directly into the dashboard, providing users with access to specialized functionality without having to leave the WordPress admin area.
Introducing the Ultimate Dashboard Plugin
The Ultimate Dashboard plugin is a powerful tool designed to enhance the functionality and aesthetics of the WordPress admin dashboard. It allows users to add custom widgets, admin pages, branding elements, and more to the WordPress dashboard. This plugin is user-friendly and does not require coding knowledge, making it accessible to users of all skill levels.
The Ultimate Dashboard plugin comes packed with a lot of features. Some of the features include:
- The ability to Remove Dashboard Widgets
- Create Your Own Widgets
- Customize the Login Page
- Clean Up the WordPress Admin Area
- Add Custom CSS
- Create Custom Admin Pages
- Replace the WordPress Dashboard Headline
- Change the WordPress welcome panel and content
- Change the WordPress “Howdy” text
- Set a custom WordPress dashboard headline
- Hide the WordPress admin bar from the frontend
- Remove the “Help” tab
- Remove the “Screen Options” tab
- Customize the WordPress footer & version text
- Hide the WordPress Admin Bar
- Export and Import Dashboard Widgets and Settings
- Define Colors and Layouts
Note: There is a pro version of this plugin available. It gives you more freedom and control over the widgets, adds more white-label features, and provides extra tools. If you need this, you can go ahead and check it out.
Installing the Ultimate Dashboard Plugin
Start by logging into your WordPress admin dashboard. Next, navigate to the ‘Plugins’ section and click ‘Add New.’
Search for ‘Ultimate Dashboard’ in the search bar.

Once you see the plugin, click on ‘Install Now’ and then click on Activate.
Setting up a Custom WordPress Dashboard
After installing and activating the Ultimate Dashboard plugin on your WordPress website, the next step is to configure the Settings.
To do this, click on Ultimate Dashboard > Settings in the left-hand menu area of the dashboard.
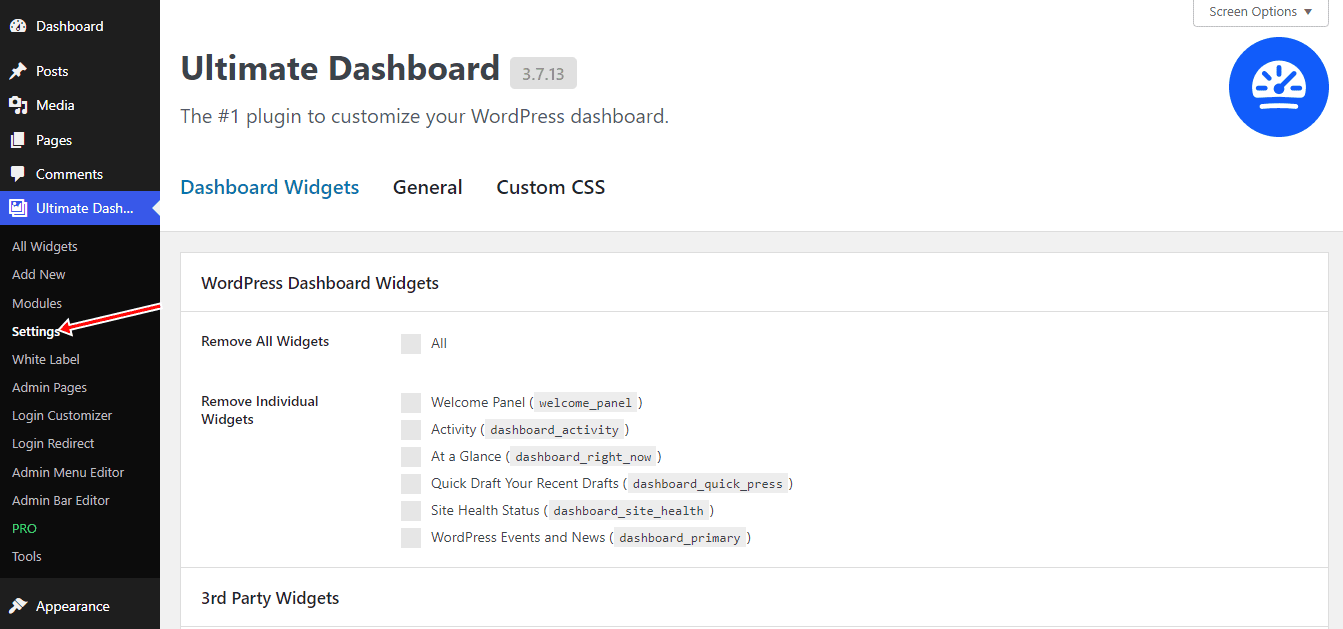
In this setting page, you have three areas that you can edit, which are:
- Dashboard Widgets
- General
- Custom CSS.
Dashboard Widgets
In this section, you can find the option to:
- Remove All Widgets: This option allows you to remove all widgets.
- Remove Individual Widgets: This option will enable you to select the widgets you wish to remove.
- Remove 3rd Party Widgets: This option allows you to remove widgets created by other plugins.
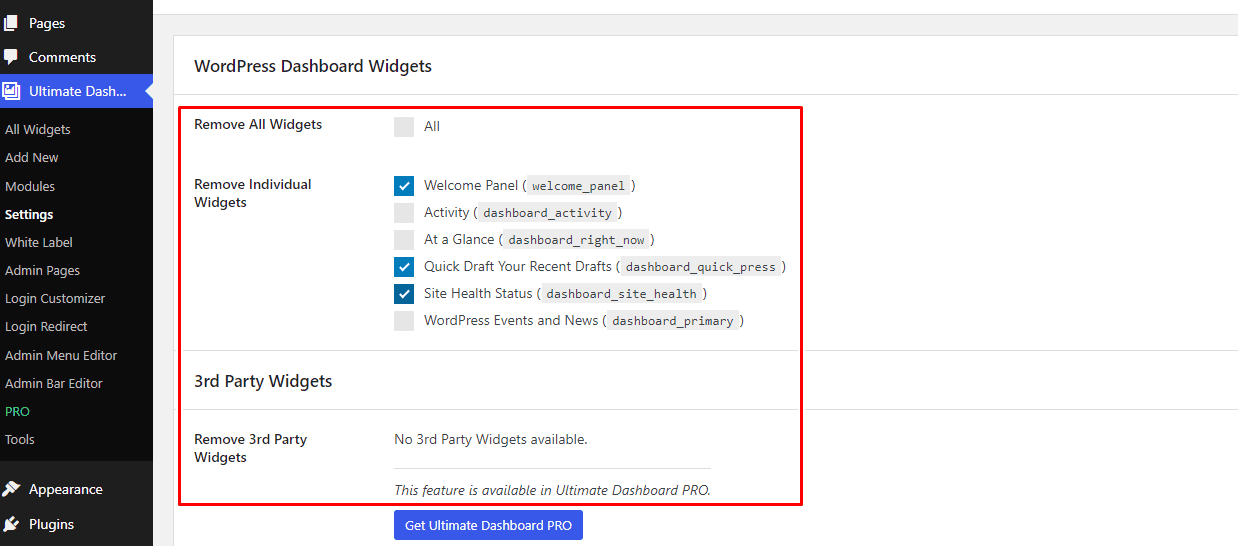
Note: The widgets displayed will be based on the plugins and other settings currently active on your site. Therefore, the list you see may differ from the one shown above.
Scroll down further, and you will find the ‘Dashboard Widget Styling’ section. Here, you can customize the Icon/Text and Headline Color. Additionally, there is the ‘Welcome Panel’ section, which enables you to use placeholder tags to display certain information dynamically.
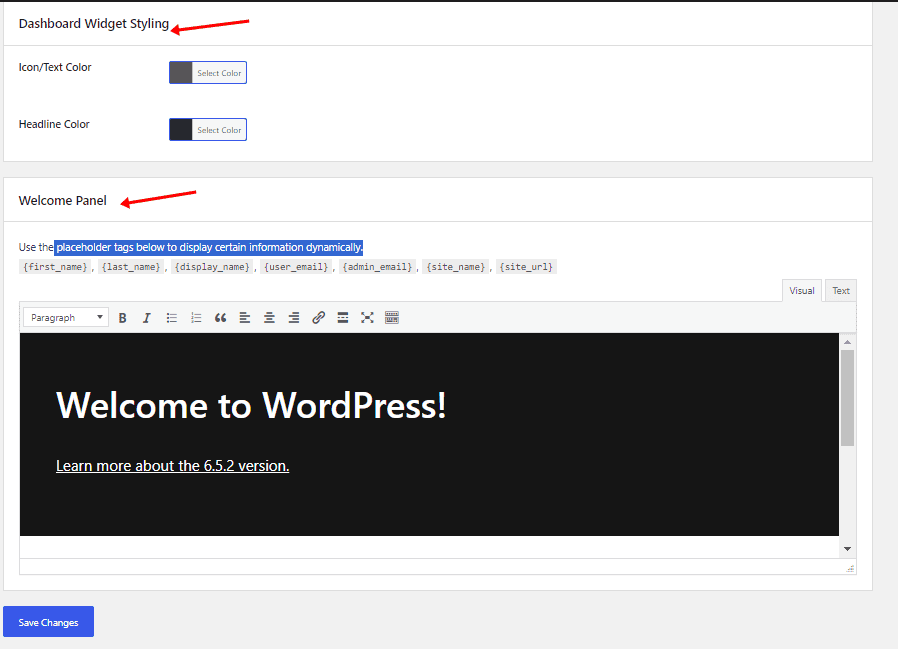
Please make sure to configure these settings according to your preferences, and remember to save your changes.
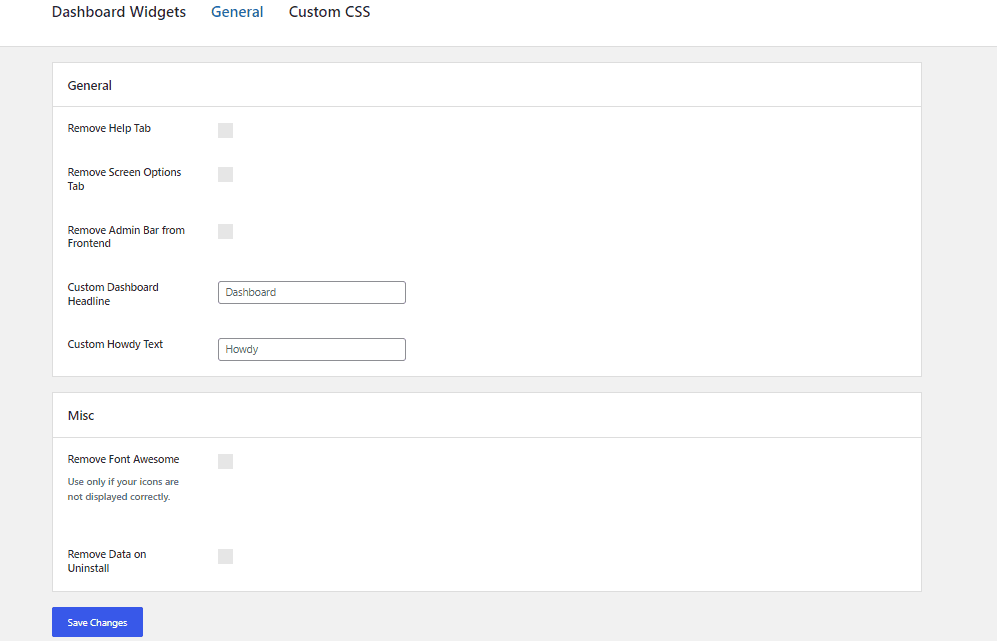
General
In the General section, you have the option to:
- Remove the Help Tab
- Remove the Screen Options Tab
- Remove the Admin Bar from Frontend
- Set a Custom Dashboard Headline
- Customize the Howdy Text
- Remove Font Awesome
- Remove Data on Uninstall
Custom CSS
If you’re familiar with CSS, you can customize your dashboard, admin area, and login page here. This section enables you to add Custom Dashboard CSS, Custom Admin CSS, and Custom Login CSS.
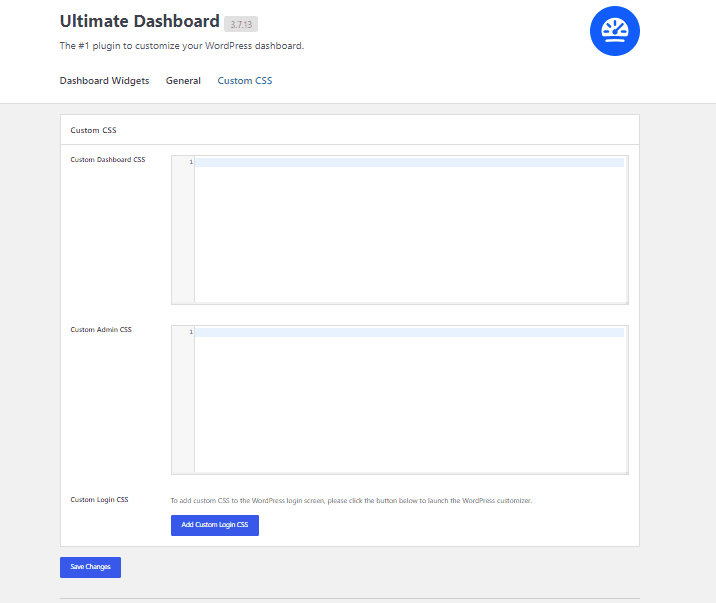
Once finished, click the “Save Changes” button to apply your customizations.
Setting Up Modules
Now that all your plugin settings have been configured, you can choose the sections you want to access from the modules page.
Click on ‘Modules’ in the left-hand menu under the main Ultimate Dashboard tab.
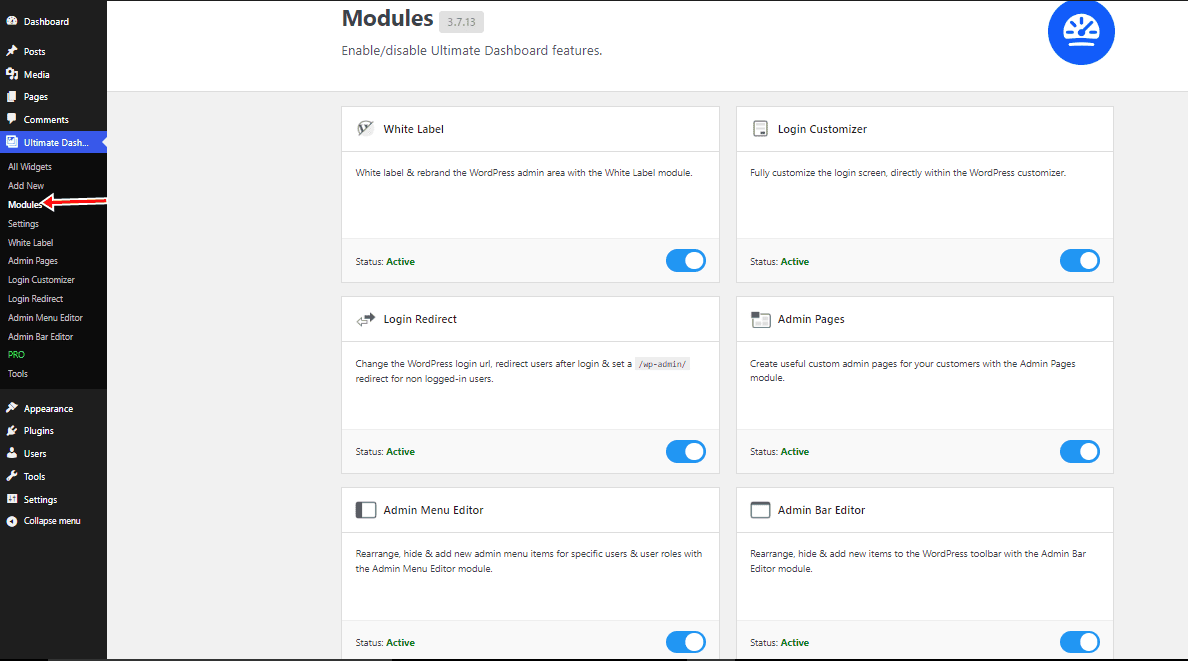
From here, you can activate or deactivate all the modules you want to be able to customize. You can see they are all activated by default.
Configure and Style Modules
Now, it is time to configure and style the modules you want. You will find links to all available modules in the left-side menu area. Click on any of those links to customize each module according to your site’s needs.
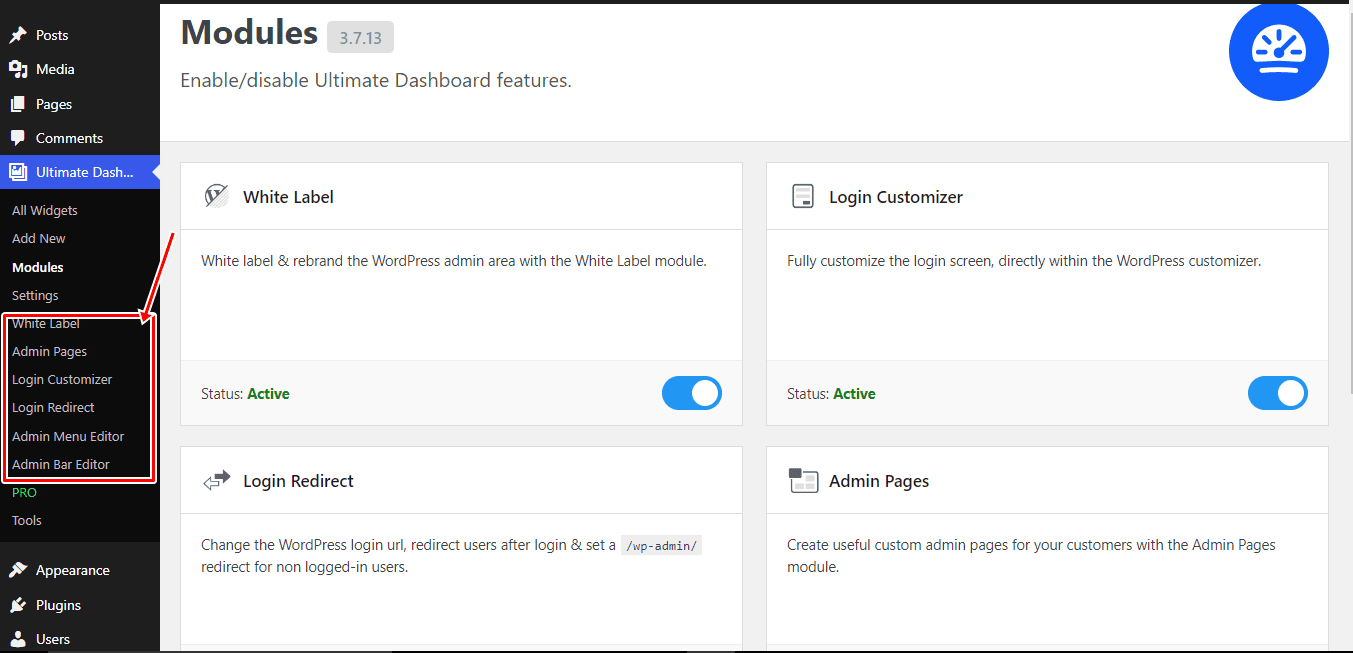
In this case, we are in the ‘White Label’ module. You can see that there are settings available to configure for this particular module. Please go ahead and configure these settings as you’d like.
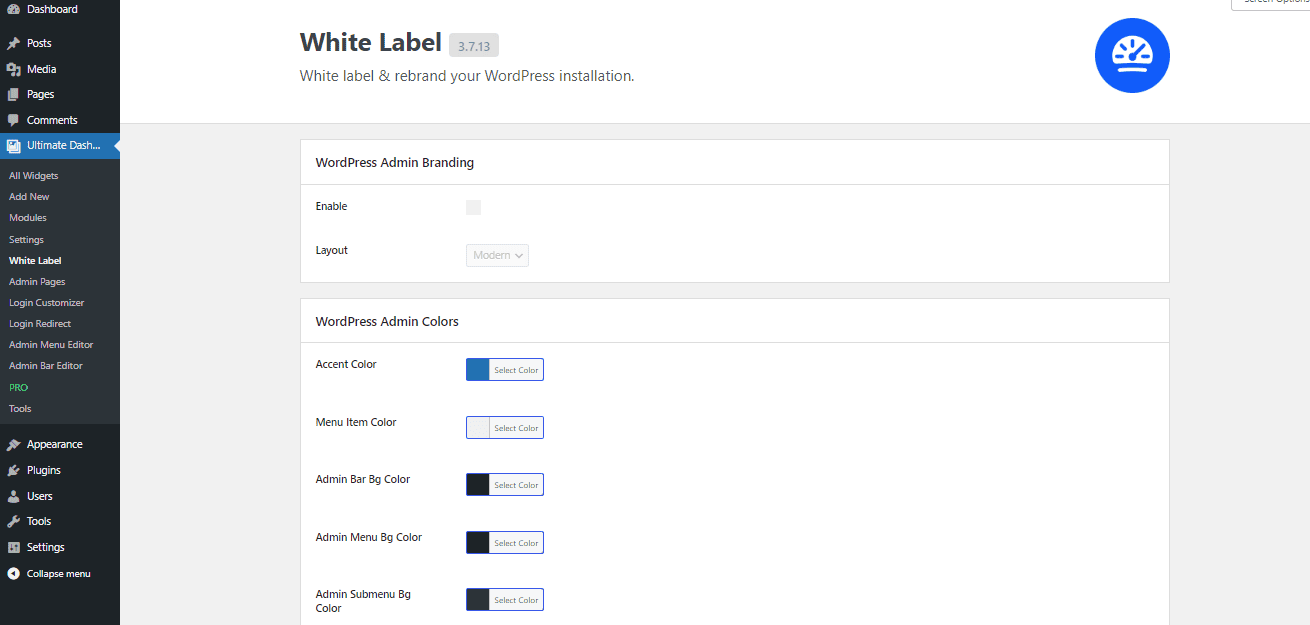
Note: You can perform the same action for the other modules. Click on the module link you wish to configure and proceed accordingly.
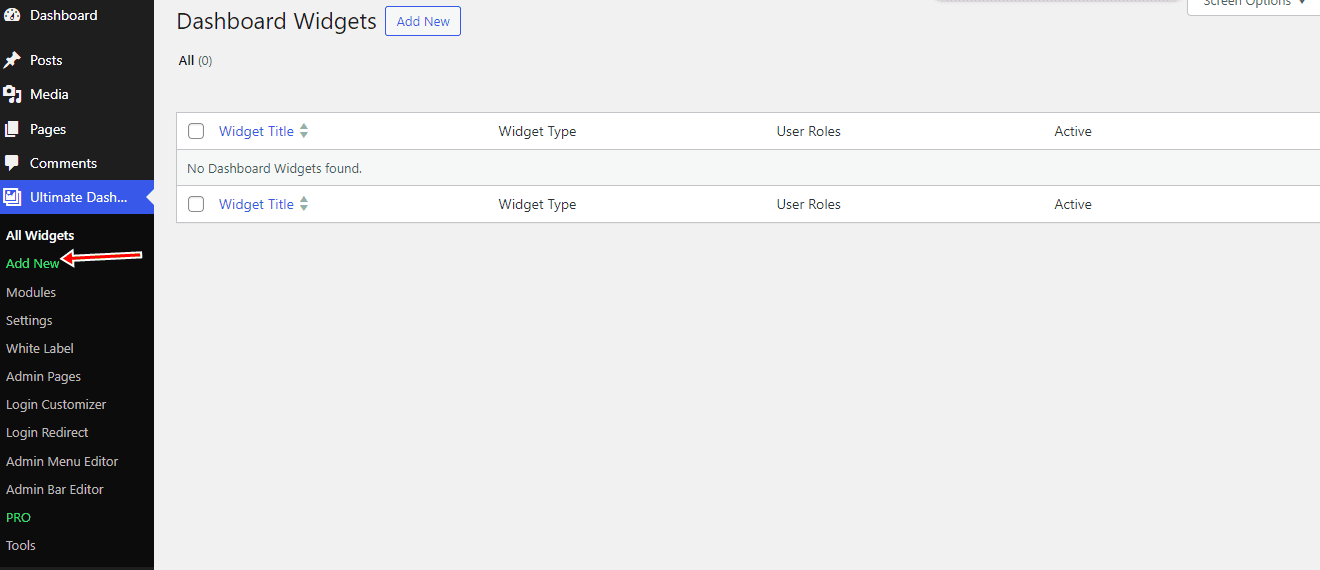
How to Add Widgets
In this section, I will guide you through adding widgets. You can begin by clicking on the “Add New” tab located in the left menu area, which is under the main “Ultimate Dashboard” link.
Once the widget editor opens up, you can input all the relevant widget information. This will typically include:
- Title
- Widget Type
- Icon
- Tooltips
- Links

When you are finished adding what you want, publish the widget, and it will automatically be available to place on the admin homepage of the dashboard.
Repeat this step as many times as you want to create as many different, customized, unique dashboard widgets as you desire. You will see them available on the main page, and you can drag and drop them to position them as desired.
Ultimate Dashboard Additional Options
In addition to the primary features, Ultimate Dashboard offers additional options to enhance your dashboard experience.
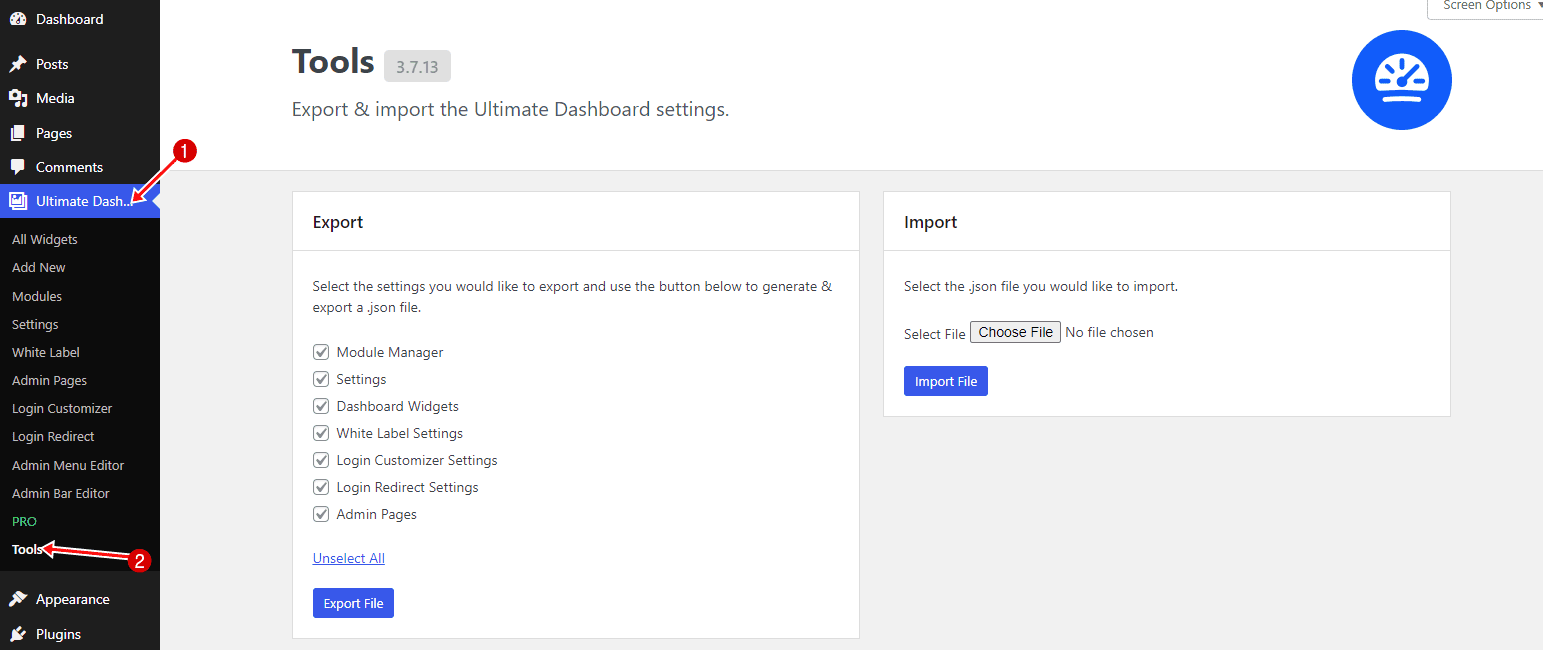
One of these options is the “Tools” link, which allows you to export and import widgets from one site to another. This feature can be handy when replicating your dashboard setup across multiple sites.
To access the Tools section, click the “Ultimate Dashboard” menu.
Then, scroll down and click on the “Tools” option.
Furthermore, you can explore the “Pro” tab if you want to access even more features. Here, you’ll find a range of additional functionalities available with the Pro version of Ultimate Dashboard.
Ultimate Dashboard Pro Features
Elevate your WordPress dashboard experience with the following advanced functionalities:
Remove 3rd Party Widgets: Say goodbye to clutter. This feature gives you the ability to remove unwanted third-party widgets that clutter your WordPress dashboard.
PRO Widgets: Ultimate Dashboard Pro offers additional widgets such as Video Widgets, Contact Widgets, User Access, and User Role Access, allowing enhanced dashboard customization.
Advanced Login Customizer: Choose from various layouts and customize every detail of your WordPress login screen with this feature.
User Role Access: This feature allows you to manage user access by restricting widgets and admin pages to specific user roles or individual users.
Page Builder Support: This feature allows you to replace the entire WordPress dashboard with saved layouts from Elementor, Beaver Builder, Bricks, Oxygen (Beta), Breakdance, Divi, or Brizy, or use them alongside Ultimate Dashboard widgets.
WordPress Multisite Support: Built with WordPress multisite in mind, Ultimate Dashboard Pro allows you to declare a blueprint site on your network. All subsites inherit widgets, white label settings, and more from the main site.
White Label WordPress: This feature allows you to fully customize the WordPress admin area with your branding, including custom color schemes, classic and modern layouts, custom admin bar logos, and more.
Admin Menu Editor: This feature allows you to hide, rearrange, or add custom menu items, icons, and controls for each user role.
Admin Bar Editor: This feature allows you to rearrange, hide, or add custom top and sub-level menu items to the WordPress admin bar, creating a fully customized experience.
Custom Admin Pages: This feature allows you to create custom top-level and sub-menu admin pages using HTML, CSS, Gutenberg, Elementor, Beaver Builder, Bricks, Oxygen (Beta), Breakdance, Divi, or Brizy.
With these premium features, upgrading to Ultimate Dashboard Pro is a smart move. It provides excellent customization options and enhances your WordPress dashboard experience.
Ready to set up a custom WordPress dashboard?
Having a customized WordPress dashboard makes managing your website not only more efficient but also more enjoyable both for you and your clients. Rather than sticking with the default WordPress dashboard, you can customize it to your preferences, adjusting settings, colors, and branding to reflect your unique identity.
The Ultimate Dashboard plugin provides a straightforward yet powerful solution for creating custom WordPress dashboards. With its customizable widgets, admin pages, and branding elements, you can perfectly brand the dashboard to your heart’s content.
Throughout this guide, we’ve outlined a step-by-step approach to creating a custom dashboard in WordPress using Ultimate Dashboard. We trust this guide has been informative and empowering, enabling you to create a custom dashboard that meets your website’s requirements and user expectations.
Get the Ultimate Dashboard plugin today!