Setup WordPress New Post Notification To E-goi Contact List
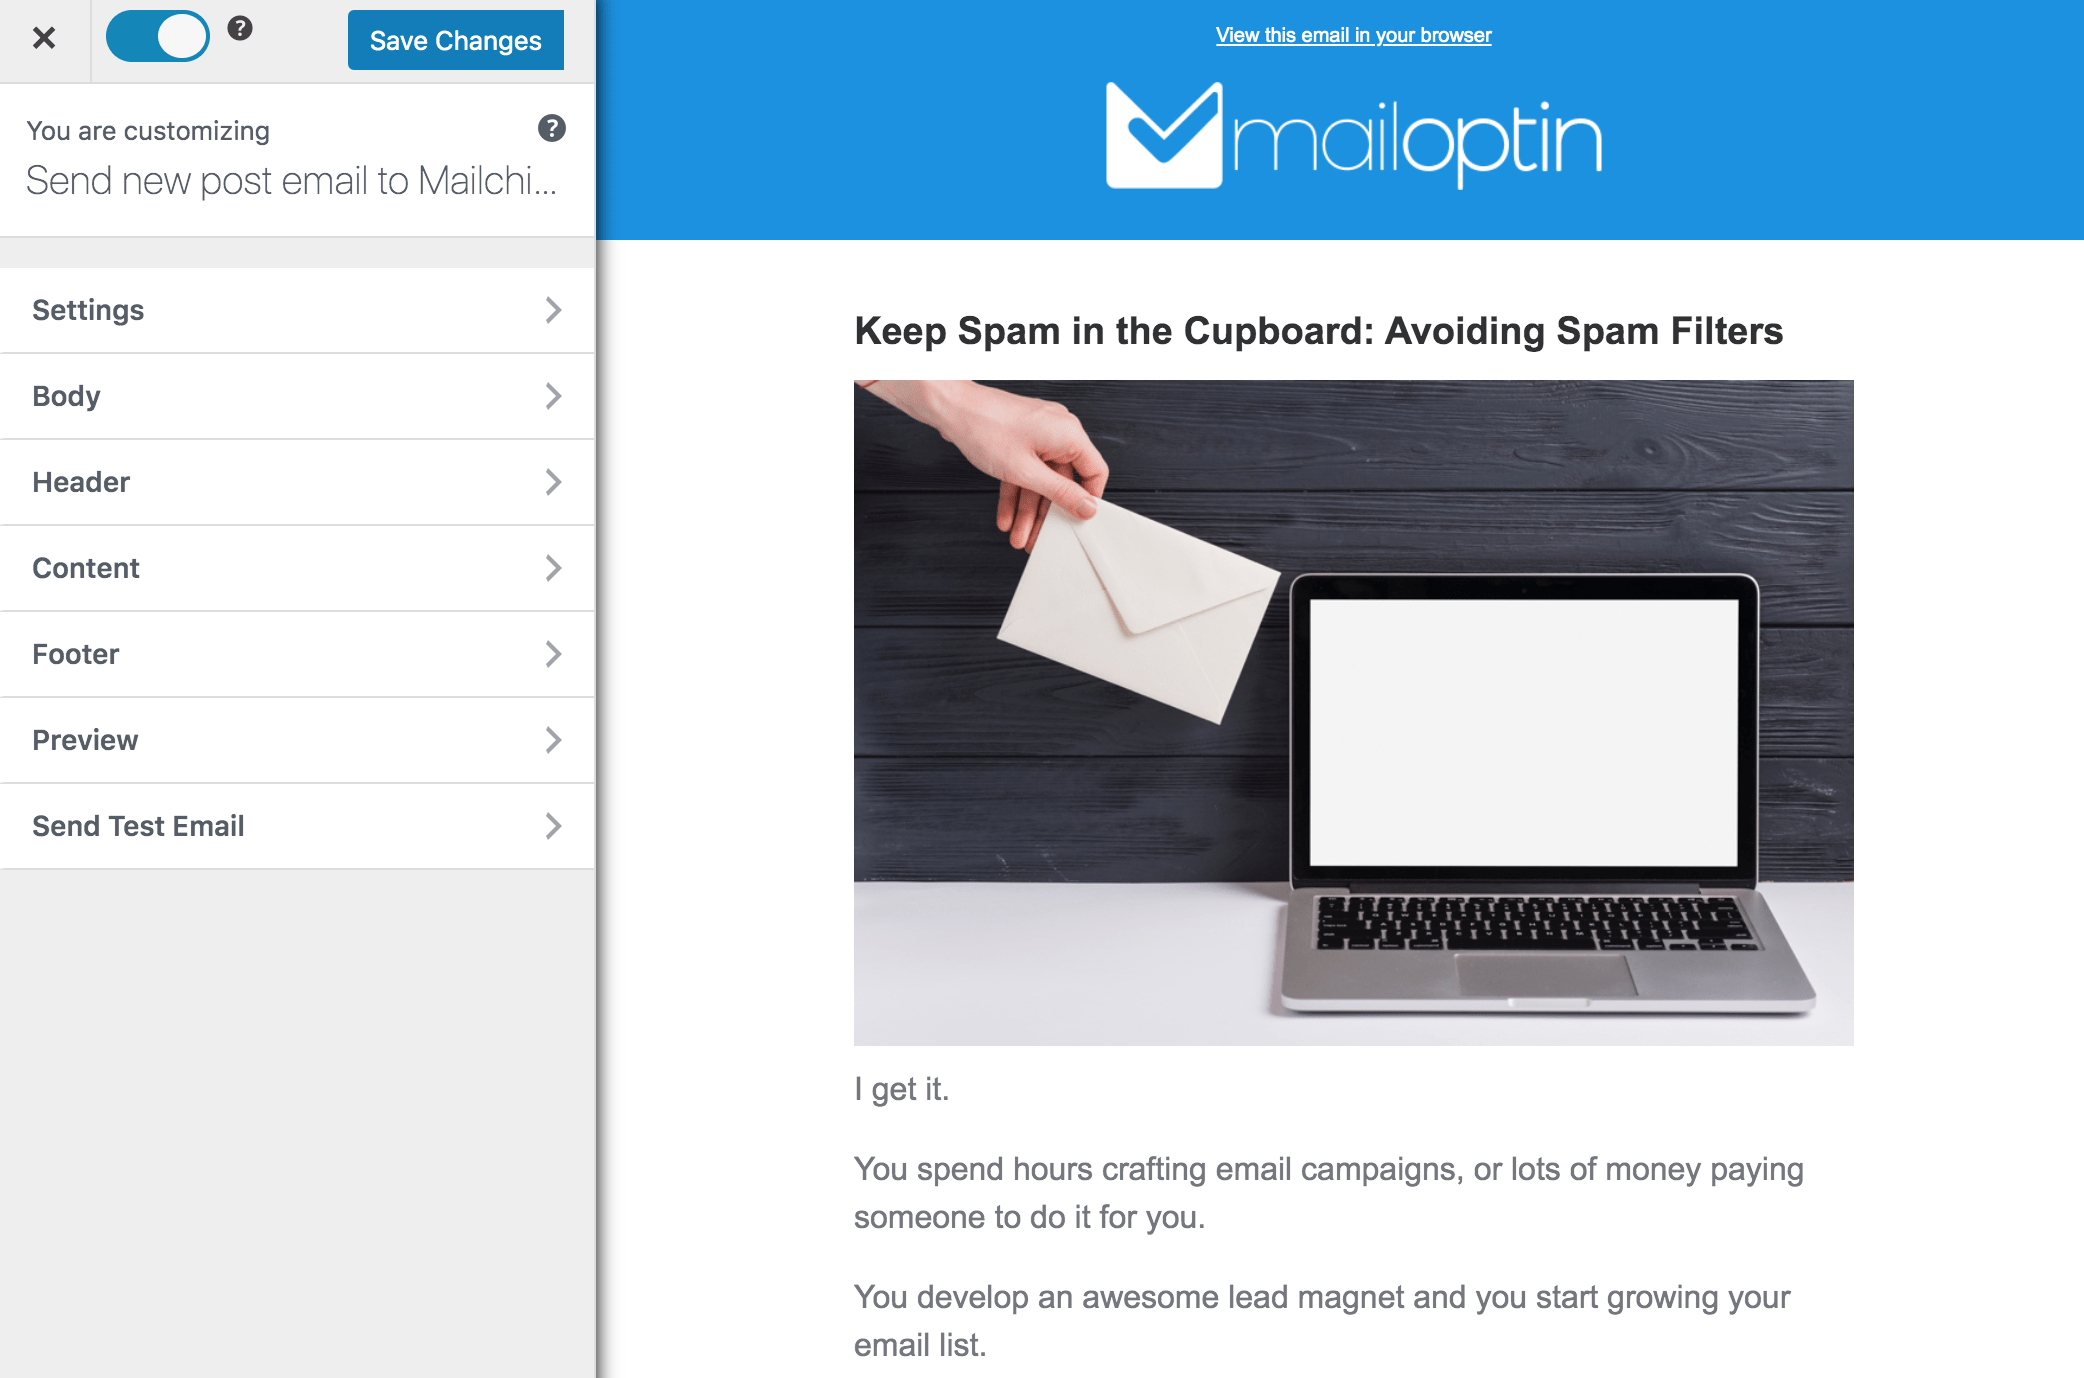
Do you want to automatically send WordPress new post notifications to your E-goi contact list?
Keeping your subscribers updated with your latest content is key to building a loyal audience and driving continuous traffic to your website. Whether managing a blog, running an online store, or sharing important updates, timely notifications ensure your readers are always in the loop.
In this tutorial, you’ll learn how to set up WordPress new post notifications using the MailOptin plugin so your E-goi contact list is instantly notified whenever you publish fresh content.
Let’s dive in and ensure your audience never misses your latest updates.
Step 1: Install and Activate MailOptin Plugin
Begin by purchasing a copy of the MailOptin plugin.
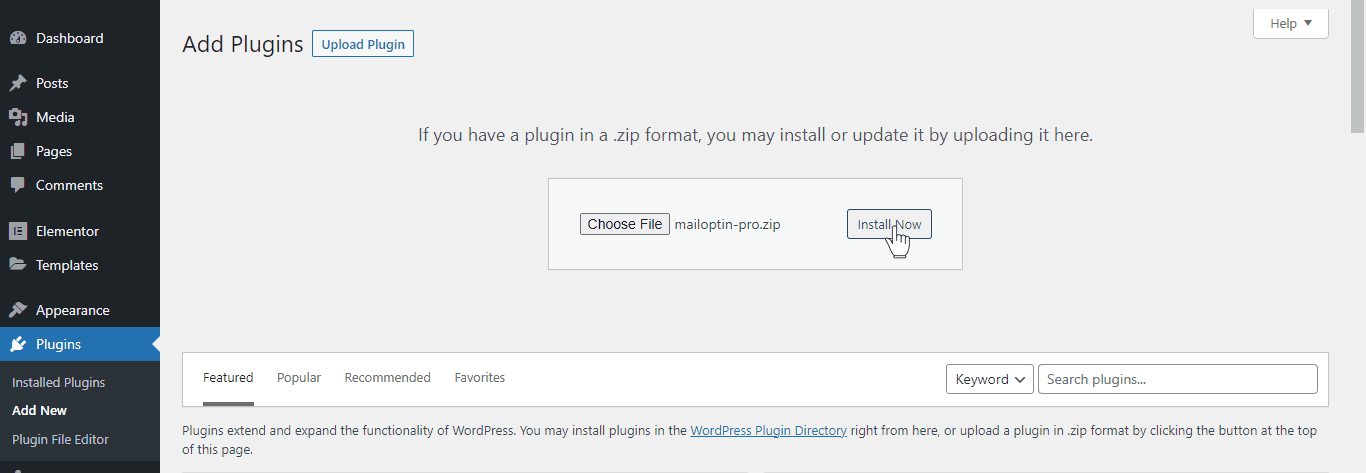
After your purchase, log in to your WordPress admin dashboard and navigate to the Plugins page. Click on the “Add New” button and click “Upload Plugin. ”
Upload the zip file, install, and activate the plugin on your WordPress site.
Step 2: Connect MailOptin to E-goi
Next, you need to connect MailOptin to your E-goi account. Log in to your E-goi account, head to your user menu in the upper right corner, and click Integrations.
Return to your WordPress dashboard and go to MailOptin > Integrations.
Open the E-goi Connection section, enter your API key, and save the changes. After saving, choose a verified sender and save again.

Step 3: Setting Up the WordPress New Post Notifications to E-goi
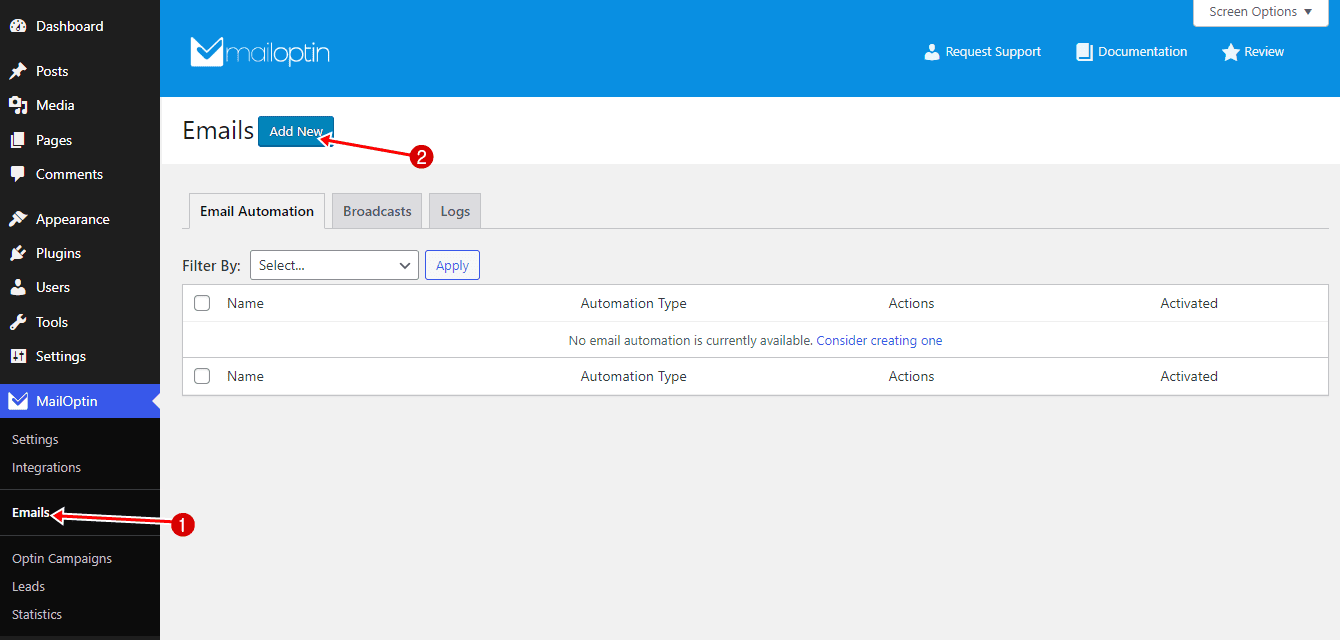
To set up new post notification automation to your E-goi contact list, go to MailOptin >Email > Add New.
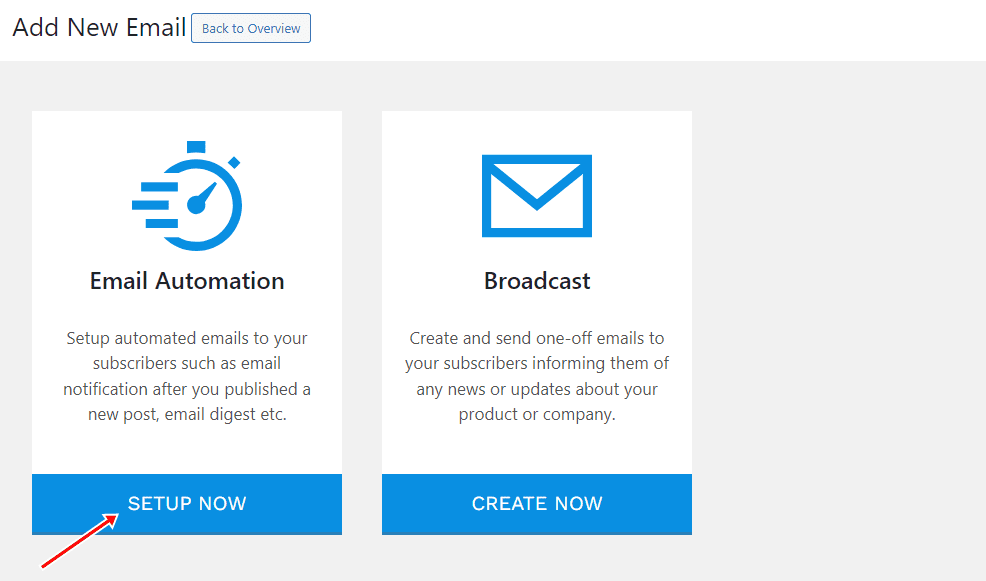
Locate the Email Automation card and click the Setup Now button below.
Next, enter your “Automation Title” and “Select Automation Type”> “New Post Notification”> Select Template.
Here’s how to use your own custom email template.
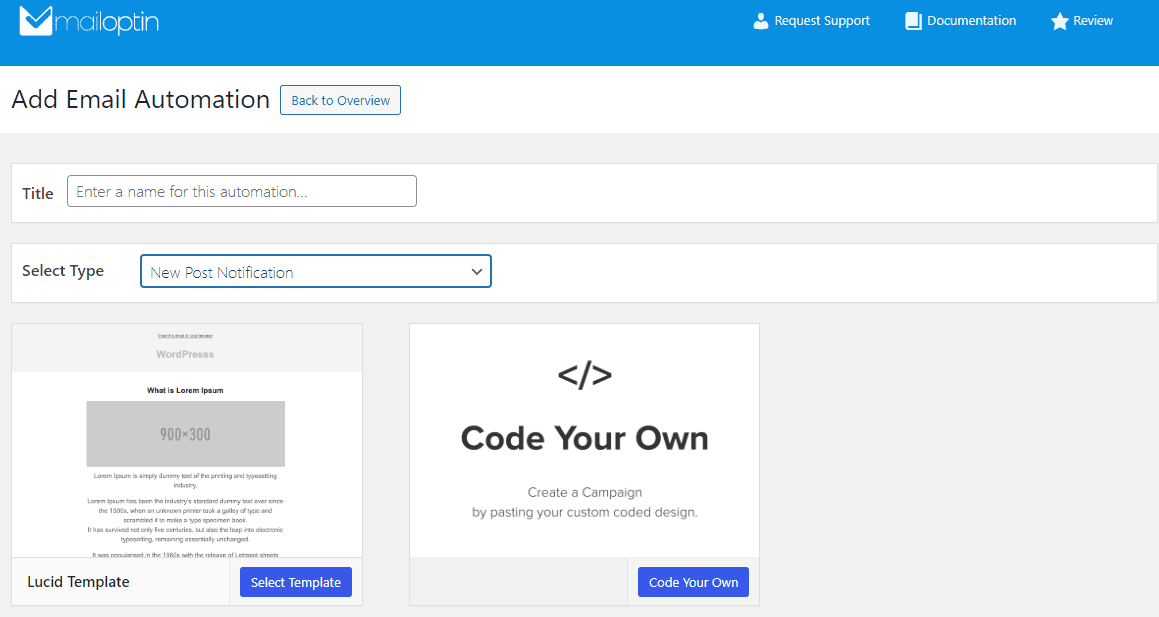
After selecting your template, you will be taken to the email customizer page, where you can configure the automation settings, template page, template header, template content, and even send a test email to your email address.

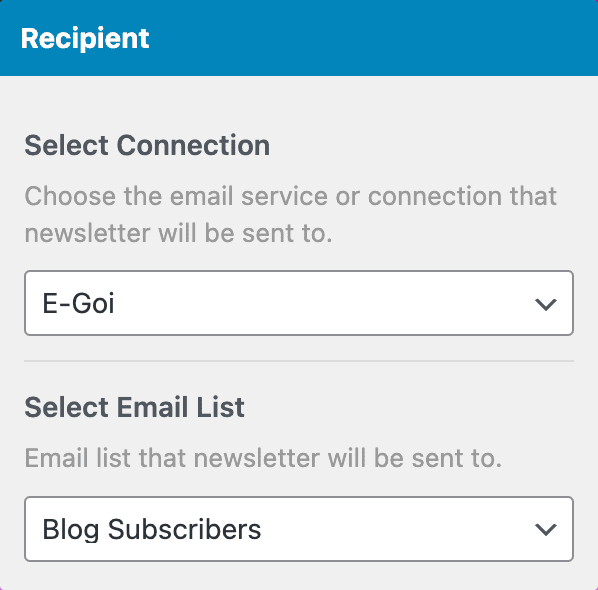
For this process to work without issues, click the “Campaign/Automation Settings” and select E-goi as your connection.
Then, select a specific email list to which the new post newsletters will be sent. You can also decide to send the newsletters immediately after posting by checking “Send immediately” or scheduling it to be sent minutes, hours, or days after publication.
You can create as many automations as you want to be sent to a different email list based on the categories and tags the post belongs to.
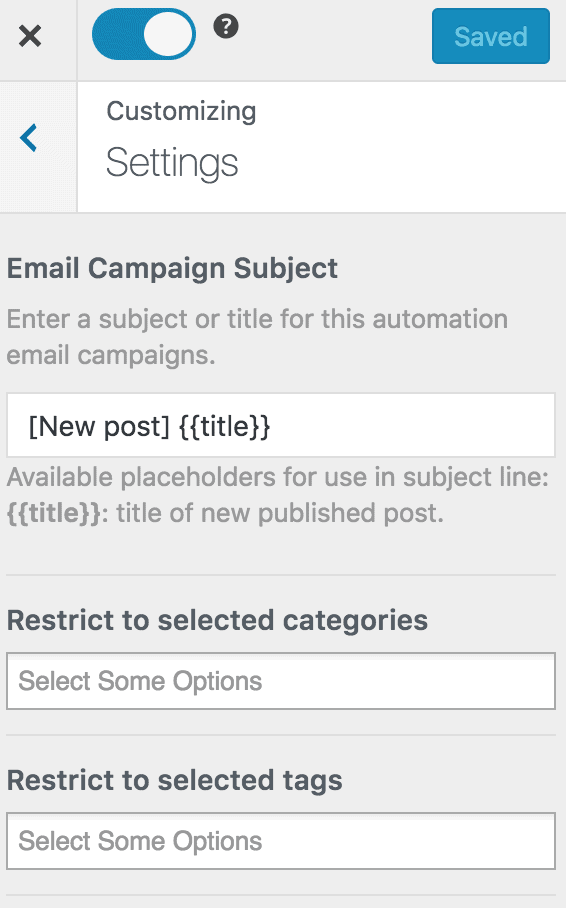
When you’ve finished setting up your new automation campaign, activate it by clicking the activation switch at the top of the page. Finally, click the Save Changes button to save your new automation campaign.
![]()
When MailOptin sends a new post newsletter to your list, you will see the record in E-goi.
Conclusion
This article helped you learn how to set up WordPress new post email automation that delivers your latest content to your E-goi contact list whenever you publish a new post on your website.
By implementing this powerful system, you’ll unlock several vital benefits:
Time Efficiency: No more manual emails or tedious processes. Your new content is automatically shared as soon as it’s published, saving you precious time and energy.
Consistent Engagement: Your subscribers will always be in the loop, receiving timely updates about your latest posts. This consistent communication helps maintain interest and encourages regular visits to your site.
Increased Traffic: By promptly notifying your E-goi contacts about new content, you create more opportunities for readers to visit your site, potentially boosting your traffic and engagement metrics.
Customization: With MailOptin’s flexible templates and settings, you can design your notifications to match your brand’s voice and style, creating a seamless experience for your readers.
Get started with MailOptin today and take your content distribution to the next level!
