
Do you want to learn how to display different popup, messages, and optin forms to new or returning visitors?
Many websites show the same signup form to everyone, yet visitors behave differently depending on their familiarity with the site.
A first-time visitor often needs a welcome incentive, while a returning visitor may respond better to reminders, exclusive updates, or special offers. When both groups see identical messages, engagement drops, and valuable opportunities are missed.
In this guide, you will learn the benefits of showing different popups, slide-ins, promotional messages, and optin campaigns to new and returning visitors and how to display targeted opt-in forms using MailOptin, helping you present the right message to the right audience.
Benefits of Showing Different Opt-In Forms to New and Returning Visitors
Displaying the same optin form to every visitor may seem convenient, but it often reduces engagement. New visitors and returning visitors arrive with different expectations, levels of trust, and intentions. When each group sees a message that matches their stage in the journey, signup rates improve naturally.
One major benefit is higher relevance. First-time visitors are still discovering your website, so they respond better to welcome offers, introductory guides, or first-purchase discounts. Returning visitors, however, already know your content or products. Showing them advanced resources, loyalty offers, or reminders encourages them to take the next step rather than repeating the same welcome message.
Another benefit is improved user experience. Visitors are less likely to feel interrupted when forms appear at the right moment with meaningful offers. For example, returning visitors who already subscribed should not keep seeing the same newsletter invitation. Instead, presenting an upgrade offer or exclusive content keeps the interaction fresh and engaging.
Displaying different forms also increases conversion opportunities. Each visit offers an opportunity to move the visitor closer to becoming a subscriber or customer. A new visitor may join your mailing list through a welcome popup, while a returning visitor may respond to a limited-time promotion. By presenting different offers, you create multiple entry points that capture more leads over time.
Finally, separating campaigns for new and returning visitors provides clearer performance insights. You can measure which offers attract first-time visitors and which messages convert repeat visitors. These insights make it easier to adjust campaigns and continue improving signup performance as your traffic grows.
Steps to Display Optin Forms to New or Returning Visitors in WordPress
Follow the steps below to show different opt-in forms to new and returning visitors using MailOptin.
Step 1: Install and Activate MailOptin
To begin, go to the pricing page, purchase a license, and download the plugin to your computer.
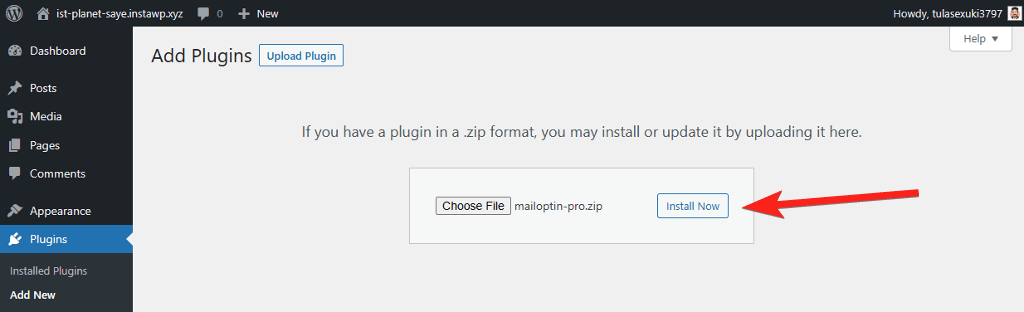
Next, log in to your WordPress admin dashboard and navigate to Plugins > Add New.
Click Upload Plugin, then click Choose File to select the downloaded plugin ZIP file. After that, click Install Now.
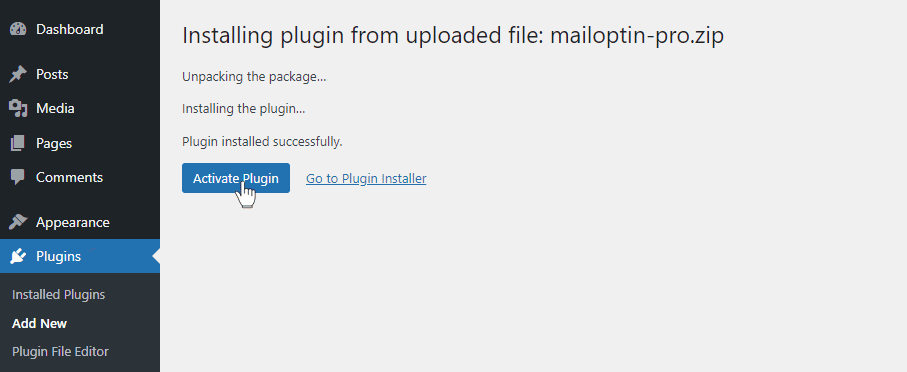
Once the installation is complete, activate the plugin by clicking Activate Plugin.
Step 2: Create an OptIn Form
To do this, go to MailOptin > Optin Campaigns in your WordPress dashboard and click Add New.

Next, you will be asked to enter a name for your optin campaign.
Choose any name that helps you identify the form easily, such as “Newsletter Subscribe” or “Popup Signup.”
After naming the campaign, select the Lightbox opt-in type.

MailOptin provides several professionally designed optin templates that you can choose from. Browse the available templates and select the one that best matches your campaign’s look and purpose.
After selecting the lightbox template you want to use, you will be redirected to the form builder.

Next, customize the form by editing the text, adjusting the design, and connecting your preferred email marketing service.
Once you have finished customizing the form, you can go ahead and set the display rules.
For more detailed instructions on customizing your form, check out our guide on how to create a WordPress popup form.
Step 3: Configure Display Rules
After creating and customizing your opt-in form, the next step is to set up Display Rules. This section controls when and to whom your opt-in form appears, ensuring it reaches the right visitors.
To set this up, go to Customize > Display Rules, then scroll through the list of available rules and locate New vs Returning Visitors.
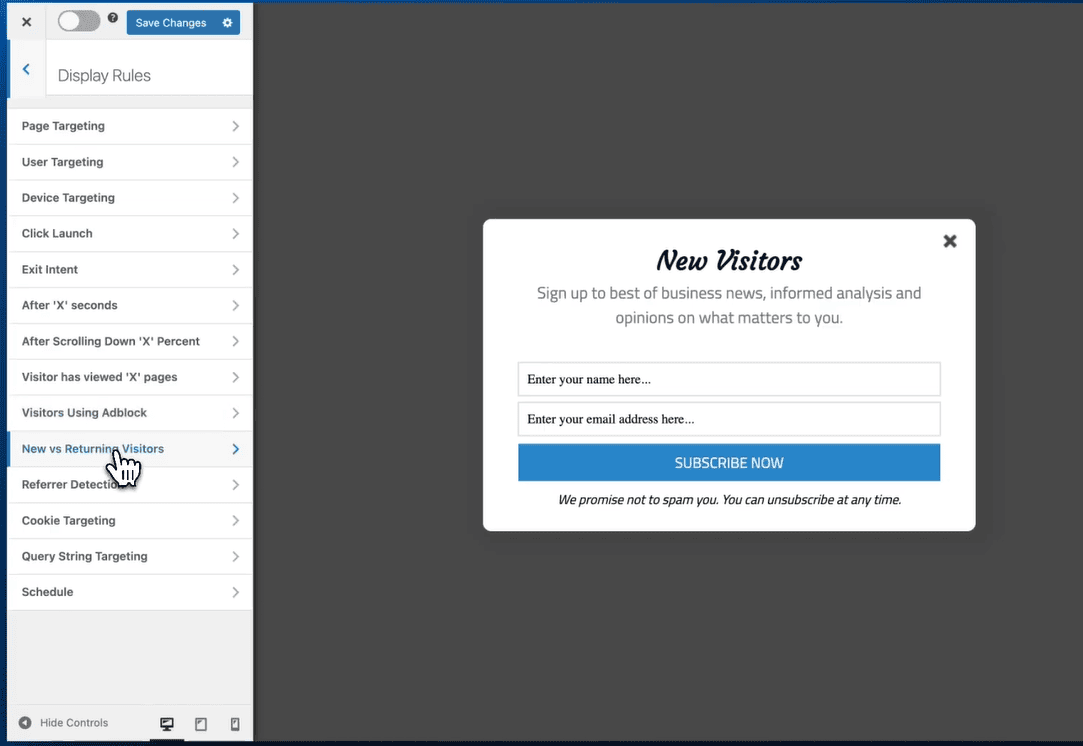
Click on the New vs Returning Visitors option to open its settings panel.
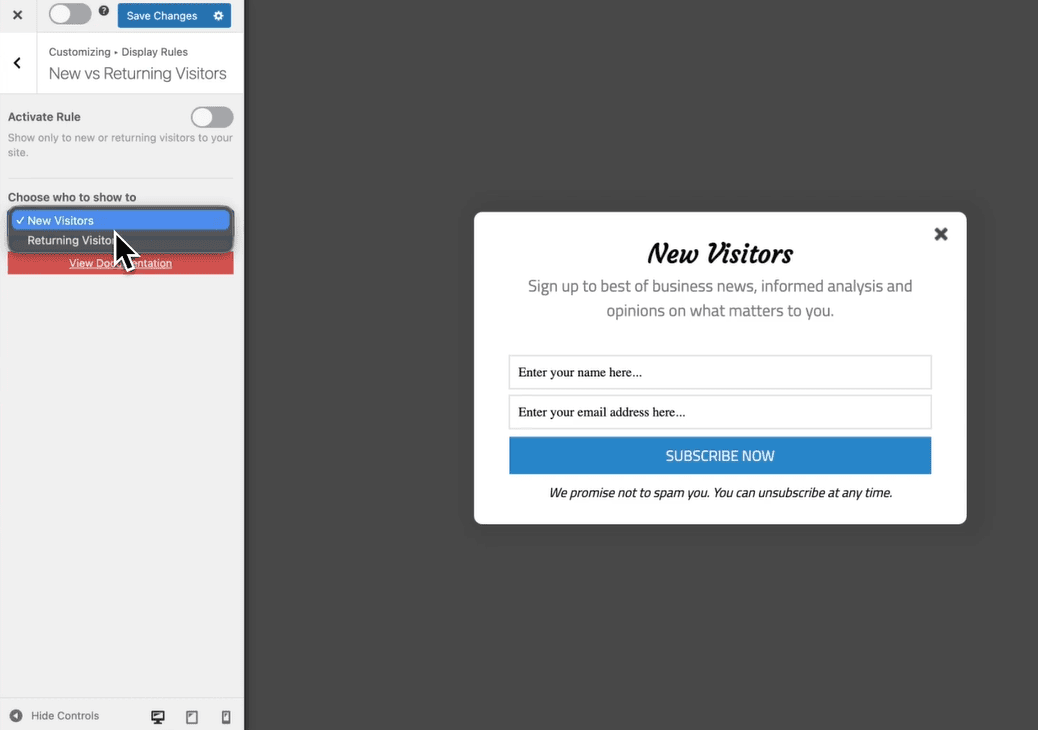
In the settings panel, you will see a drop-down menu where you can choose whether the form appears to new or returning visitors.
Selecting the right option ensures that each visitor sees the most relevant message.
When you’re done, you can activate the rule by toggling the Activate Rule button.
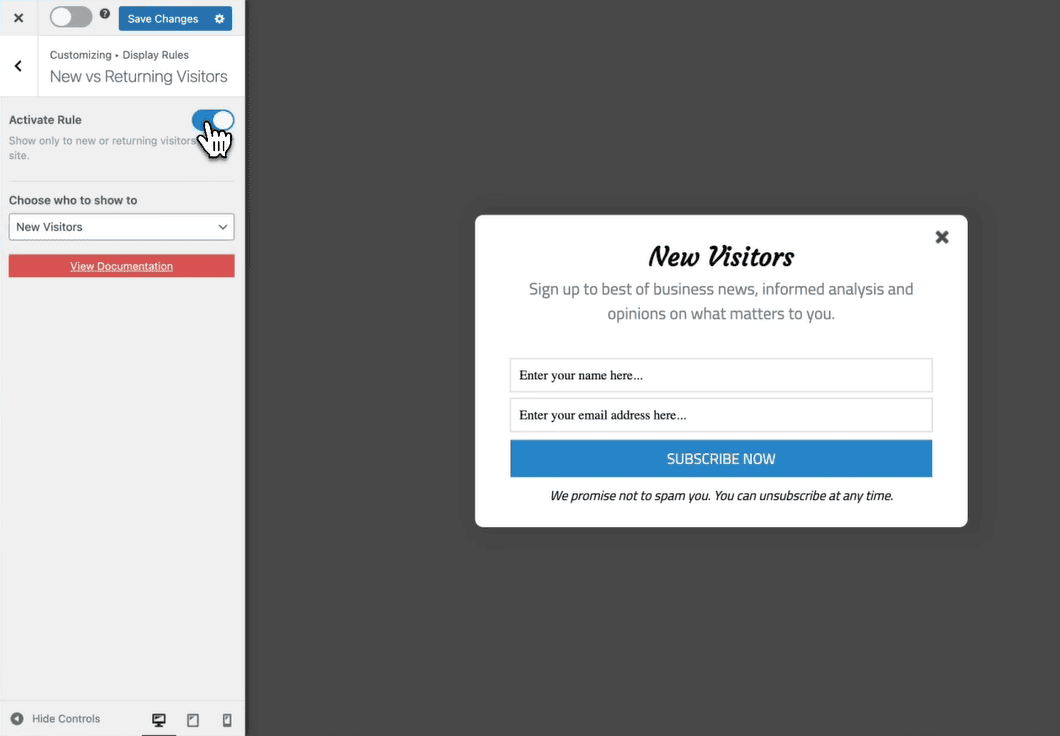
- A blue toggle means the rule is active.
- A grey toggle indicates the rule is inactive.
Finally, click Save Changes to apply your settings.
Your optin form will now display only to the selected visitor type (whether they are new to your website or returning), making your campaigns more targeted and effective.
You can repeat the same process to create another opt-in campaign for the other visitor group. This way, you can show different offers to new and returning visitors, boosting engagement and increasing conversions over time.
Display Campaigns To New Or Returning Visitors On Your Site Today
Displaying optin forms, popups, discounts, and promotional messages to new and returning visitors allows you to deliver the right message to the right audience.
By targeting visitors based on their familiarity with your site, you can improve engagement, boost email signups, and create a more personalized experience for every user.
Now that you know how to implement this feature on your site, you can activate it today. If you encounter any problems, don’t hesitate to contact us for assistance.