How to Set Up WordPress New Post Email To Sendy List
Do you want to automatically send WordPress new post notifications to your Sendy list?
Keeping your subscribers engaged and informed about your latest content is crucial for maintaining a vibrant online community. However, manually sending emails every time you publish can be time-consuming and prone to human error. That’s where the powerful combination of MailOptin and Sendy comes in.
MailOptin is a versatile WordPress plugin that seamlessly integrates with various email marketing services, including Sendy. By leveraging this integration, you can automate notifying subscribers about new posts, ensuring they get fresh content. This saves you valuable time and helps drive traffic back to your website and boost engagement.
In this step-by-step guide, we’ll walk you through setting up WordPress new post notifications to your Sendy list using the MailOptin plugin.
To get started:
Step 1: Install and Activate MailOptin Plugin
Begin by purchasing a copy of the MailOptin plugin.
After your purchase, log in to your WordPress admin dashboard and navigate to the Plugins page. Click on the “Add New” button and click “Upload Plugin. ”
Upload the zip file, install, and activate the plugin on your WordPress site.

Step 2: Connect MailOptin to Sendy
Next, you need to connect MailOptin to your Sendy account. To do this, go to the Integrations settings page by clicking the sidebar menu link or the top menu tabs.
In the Sendy Connection section, enter the URL where your Sendy installation is hosted, along with your API key, which can be found at `http://your-installation-domain-name.com/settings`. Additionally, provide the name and ID of your email list.
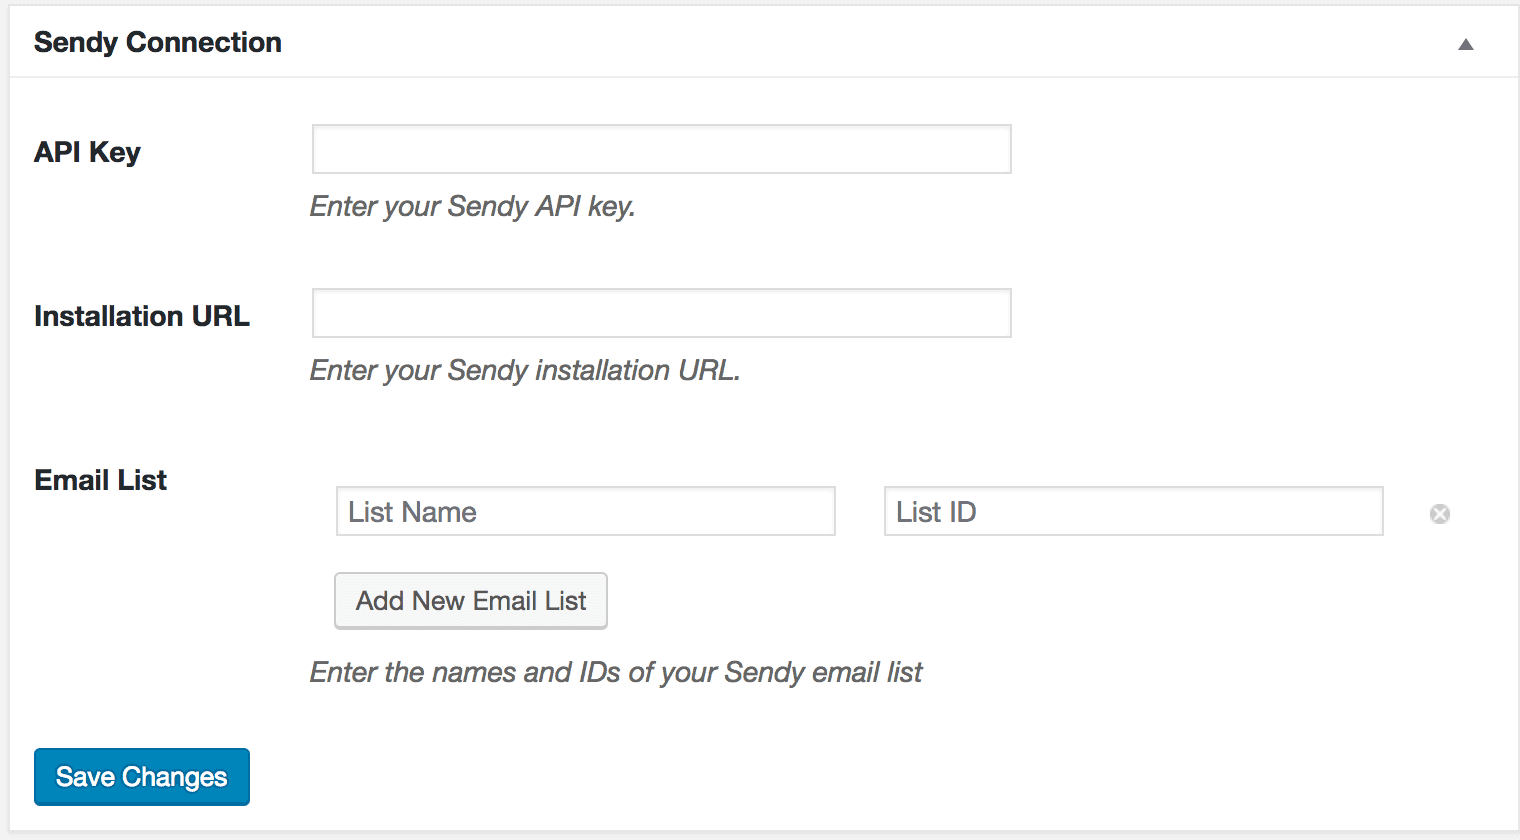
To add more email lists, click the “Add New Email List” button and enter the name and ID of the list.
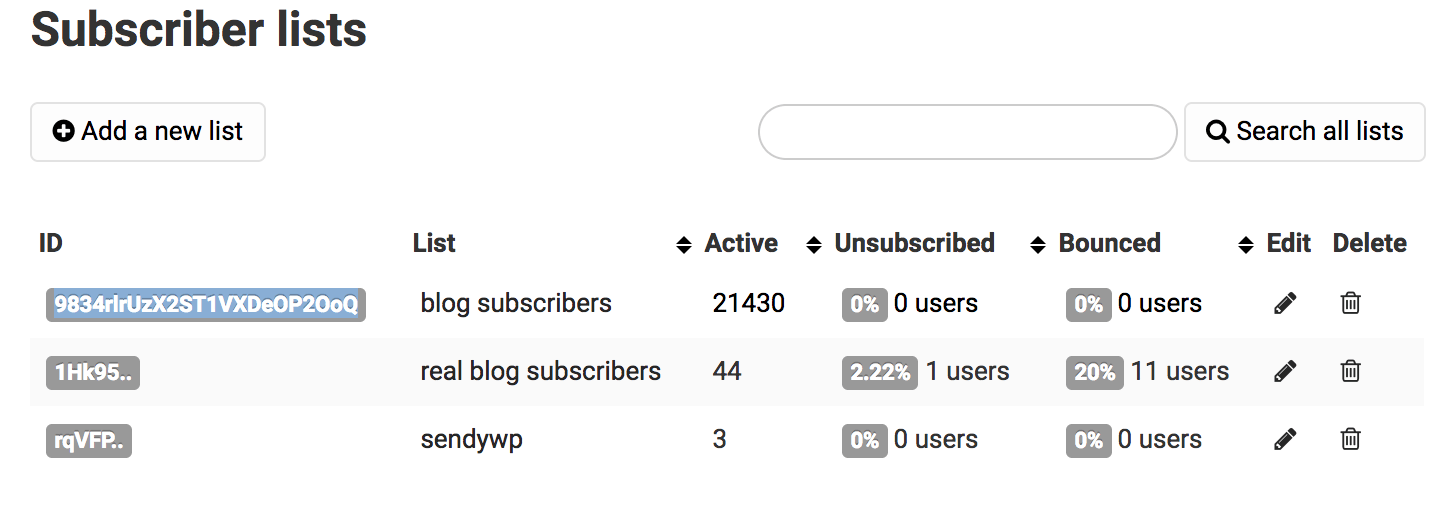
Not sure where to find your List ID? Log into your Sendy URL, and you can find it here:
Finally, click the “Save Changes” button to save.
Step 3: Setting Up the WordPress New Post Notifications to Sendy
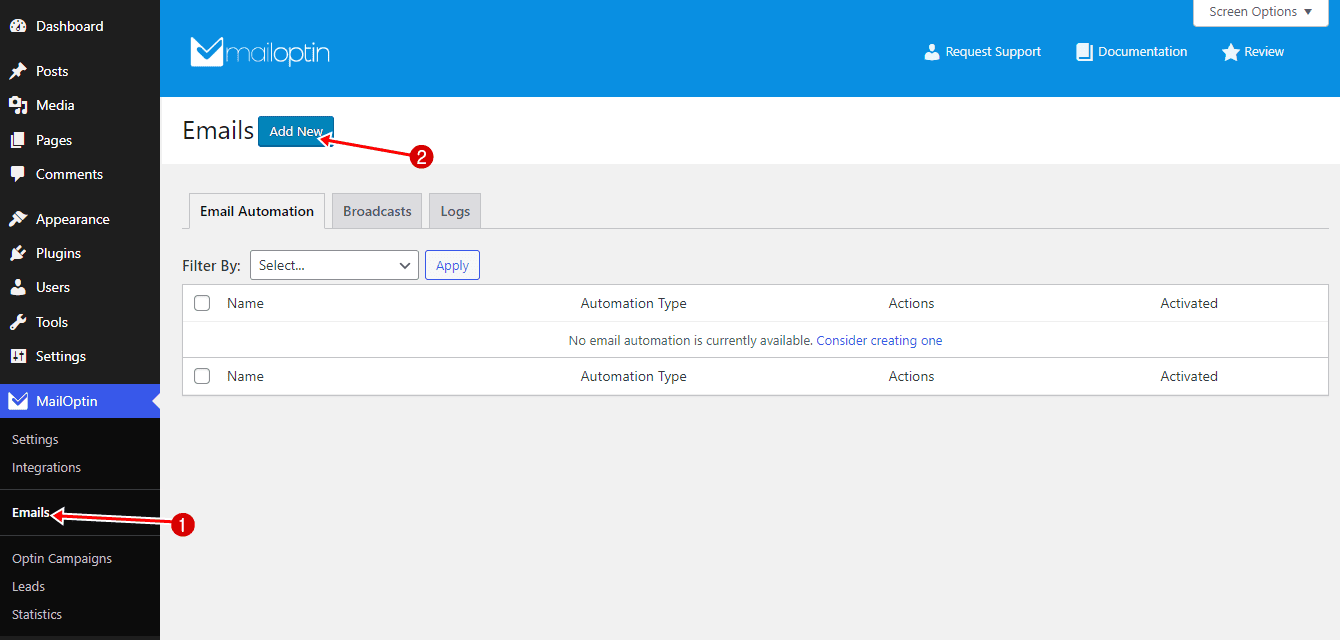
To set up new post notification automation to your Sendy list subscribers, go to MailOptin >Email > Add New.
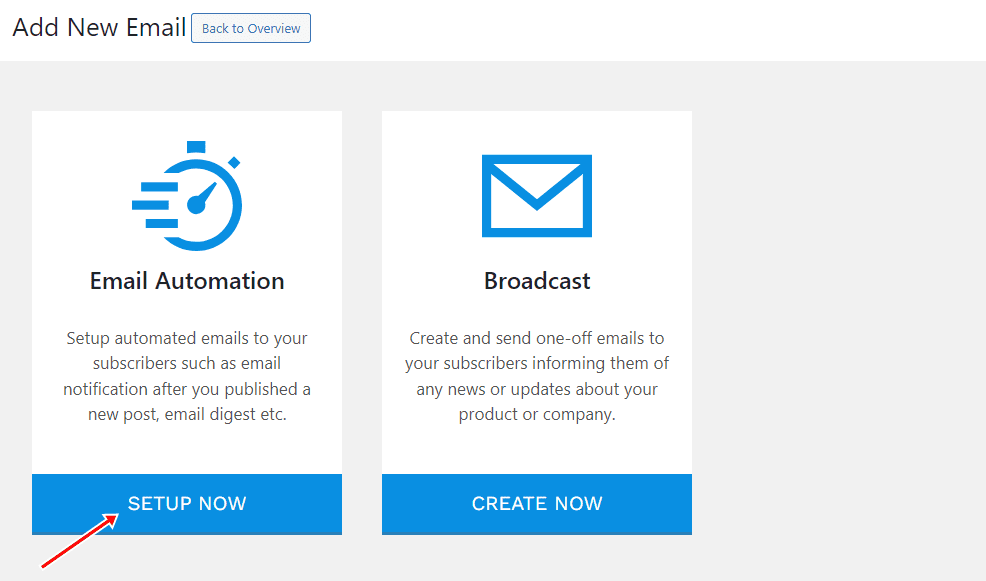
Next, click on ‘Setup Now’ under Email Automation.
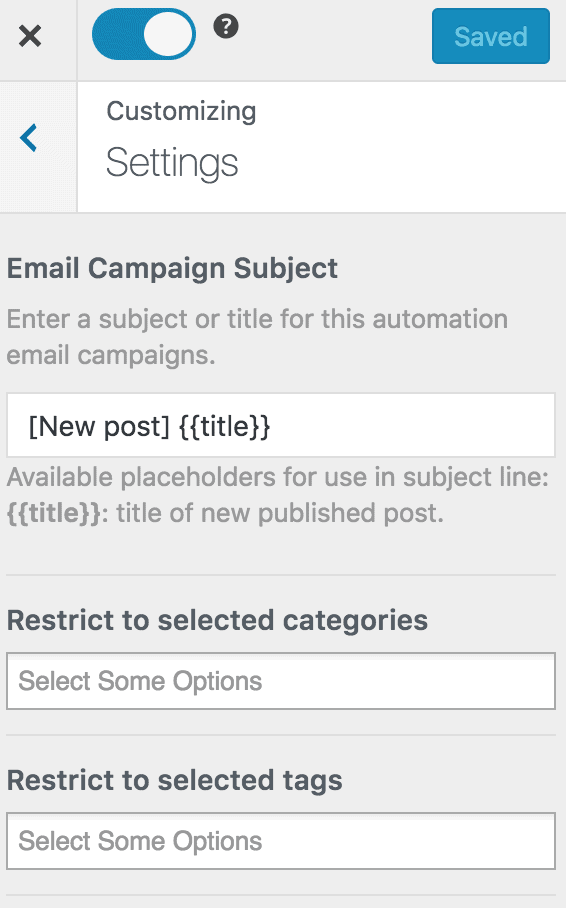
Enter a campaign title, select the type ‘New Post Notification,’ and choose a template.
Here’s how to use your own custom-coded email template.

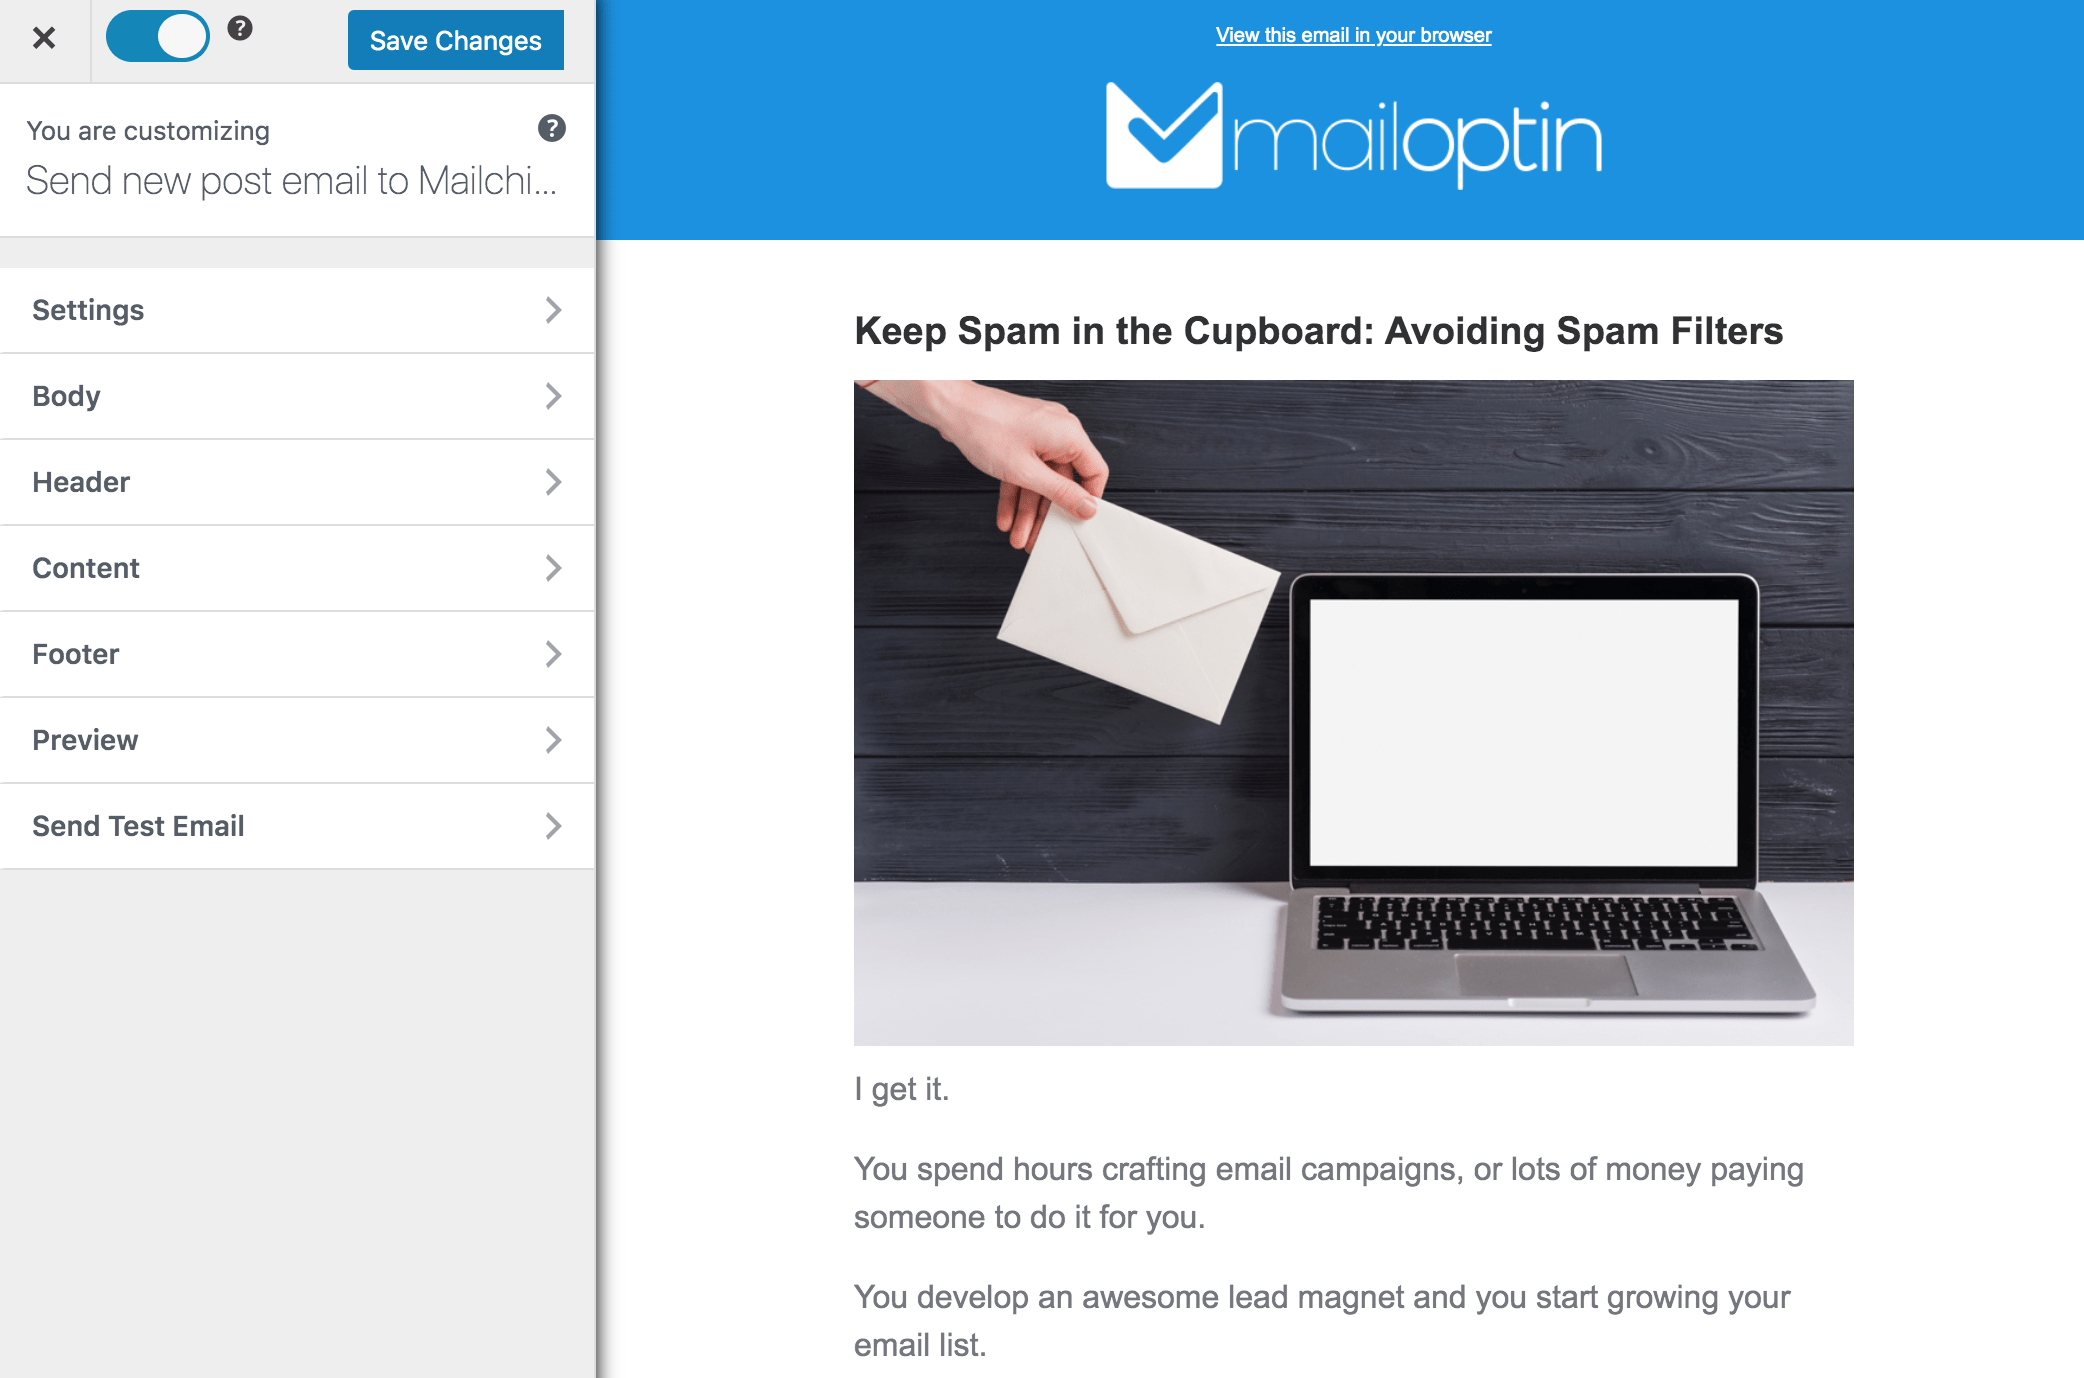
After selecting your template, you will be taken to the email customizer page, where you can configure the automation settings, template page, template header, template content, and even send a test email to your email address.
For this process to work without any problem, you will need to open the Settings panel and select “Sendy” as your connection. Then, select a specific email list to which the new post email will be sent.
It is also possible to send the newsletters immediately after publishing your post by checking “Send immediately” or scheduling it to be sent minutes, hours, or days after publication.
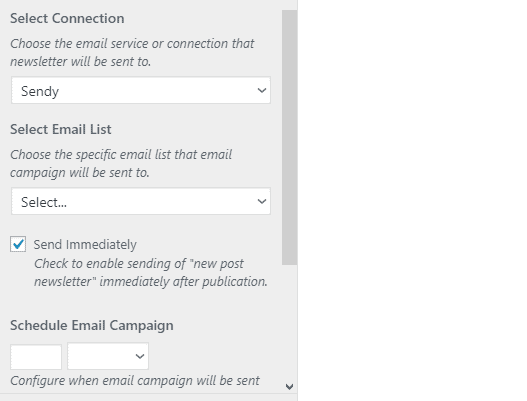
You can create as many automations as you want to be sent to different email lists based on the categories and tags the post belongs to.
The setup is now complete. Finally, save your changes and activate the automation.
In conclusion, setting up WordPress new post notifications to your Sendy list using the MailOptin plugin is a powerful way to keep your subscribers engaged and informed. By automating this process, you can guarantee that your audience always receives your latest content while saving yourself the time and effort of sending manual emails.
Let us know if you have any questions or comments.