Setup WordPress New Post Notification To Elastic Email List
Would you like to learn how to set up WordPress new post notifications to your Elastic email list?
Imagine you’ve just published a thoughtfully written blog post you’re eager to share with your audience. As you click the “publish” button, you feel a wave of anticipation – how many people will read it? Will they engage with the content?
Instead of anxiously waiting, what if you could ensure that your loyal readers receive a well-designed email informing them about your new post without having to do anything?
You can achieve that by setting up WordPress new post notifications to your Elastic Email list using MailOptin. This powerful combination of tools allows you to bridge the gap between your WordPress site and your email subscribers, ensuring that your content reaches its intended audience quickly and efficiently.
This tutorial will walk you through setting up WordPress new post notifications and leveraging the powerful MailOptin plugin.
Setting Up WordPress New Post Notification To Your Elastic Email List
Below are the steps to set up New Post Notification email automation or alert feature (a.k.a Post2Email, RSS-to-Email) in MailOptin to Elastic Email, eliminating the need to manually create newsletters for every new post you publish on your WordPress site.
Begin by purchasing a MailOptin plan and download the plugin from the welcome email or your MailOptin account.
Next, upload and install the plugin on your WordPress website.

Once installed, click “Activate” to activate the plugin.
Connecting MailOptin to Elastic Email
Next, connect MailOptin to your Elastic Email account. To do this, log in to your Elastic Email account, navigate to Settings, and create an additional API key.
Enter a name for the API key and select ‘Full access’ as the permission level.
Click ‘Save’ to reveal your API key. Copy the API key, return to your WordPress dashboard, and navigate to MailOptin > Integration.
Open the Elastic Email Connection section and enter the API key you just created.
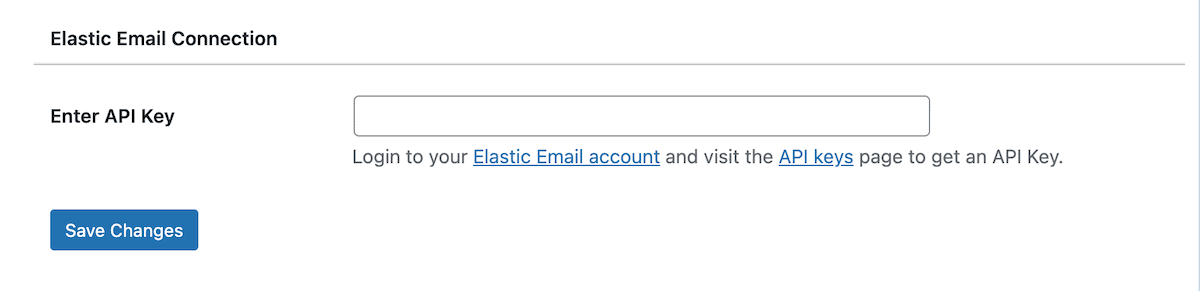
Next, click the ‘Save Changes’ button.
Creating the New Post Notification Automation
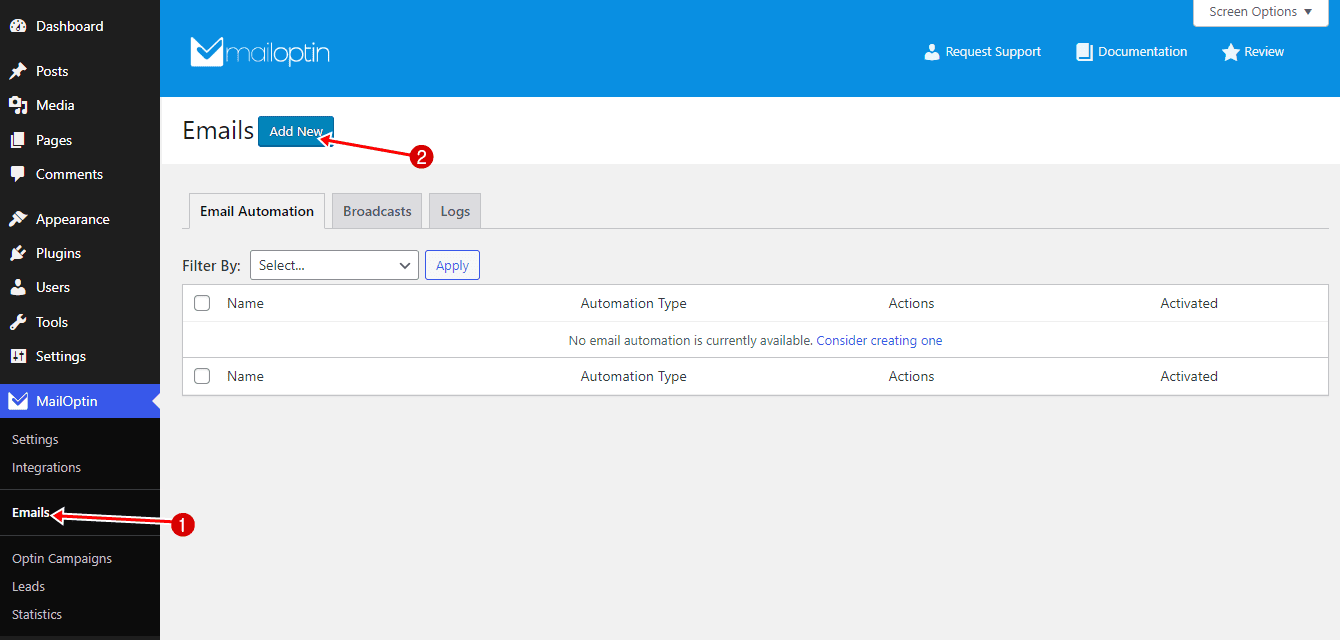
Go to MailOptin >Email > Add New.
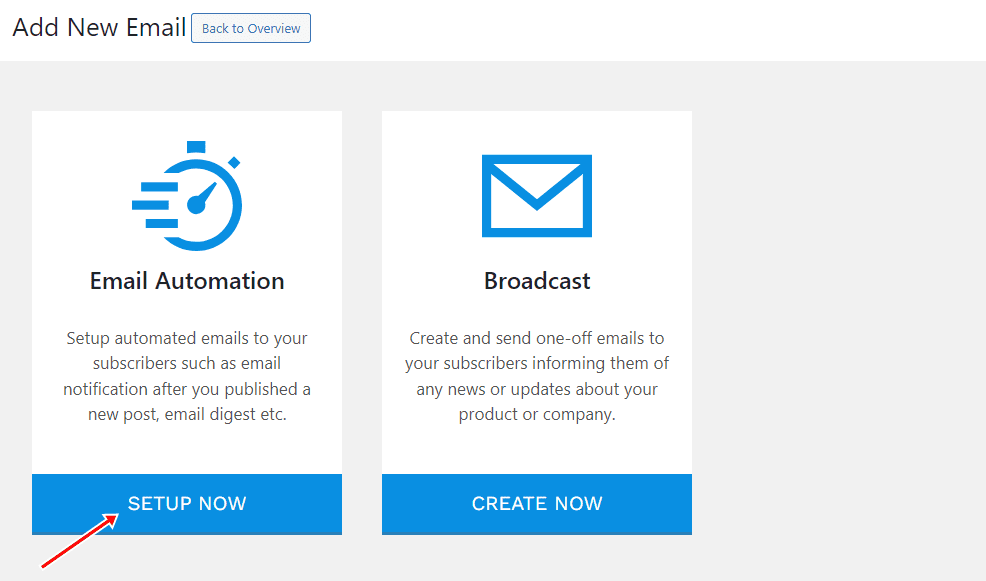
Then, click on ‘Setup Now’ under Email Automation.
Enter your “Automation Title” and “Select Automation Type”> “New Post Notification”> Select Template.
Here’s how to use your own custom email template.

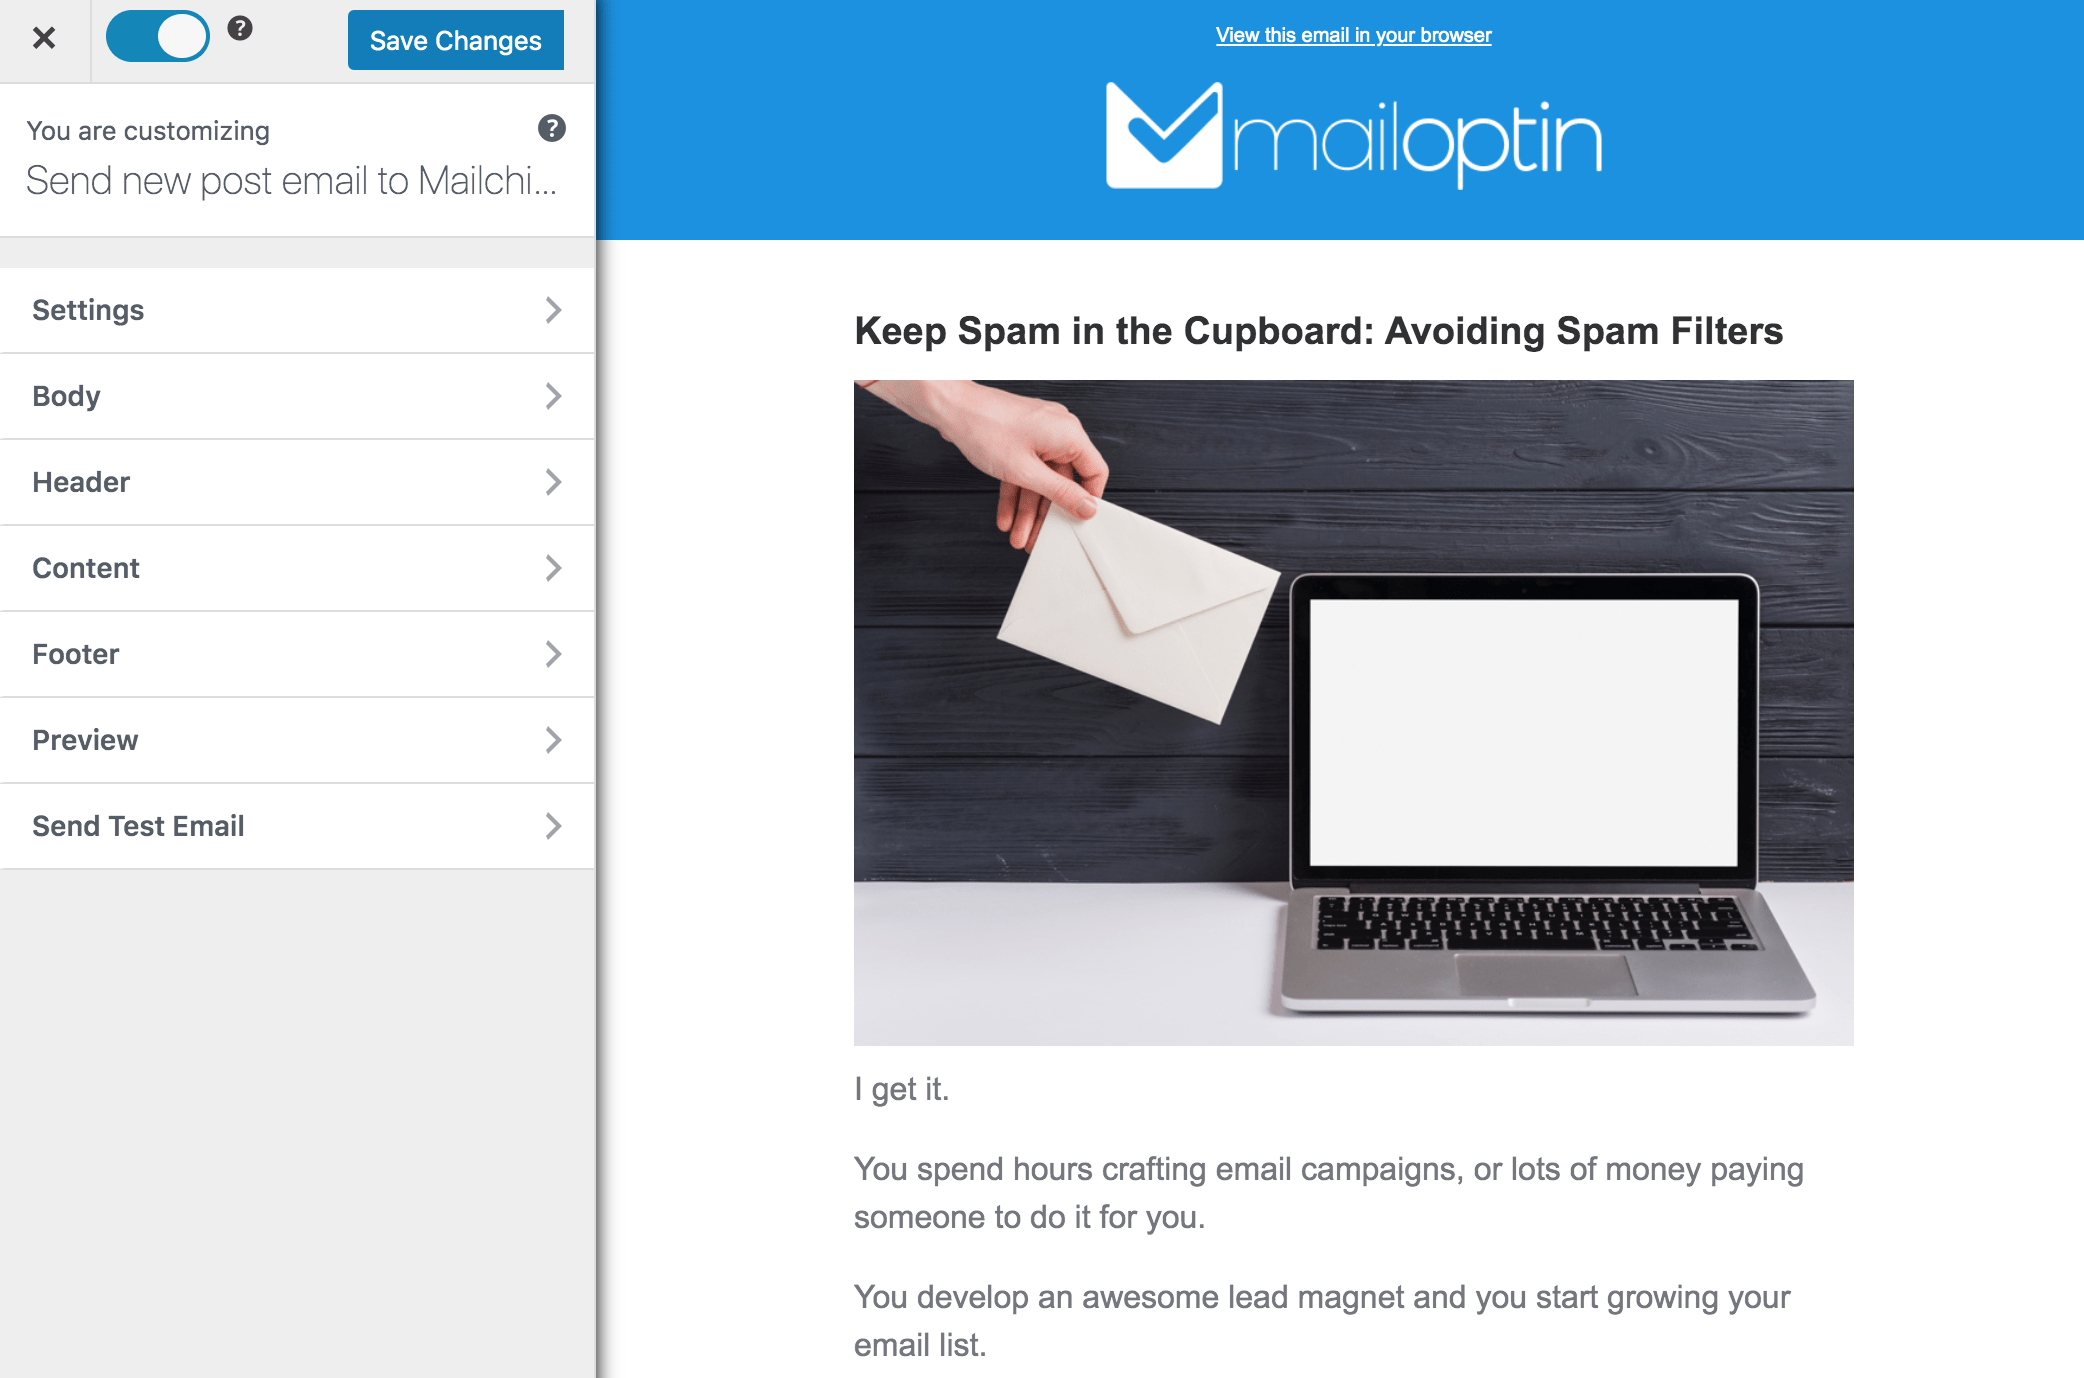
After selecting your template, you will be taken to the email customizer page, where you can configure the automation settings, template page, template header, template content, and even send a test email to your email address.
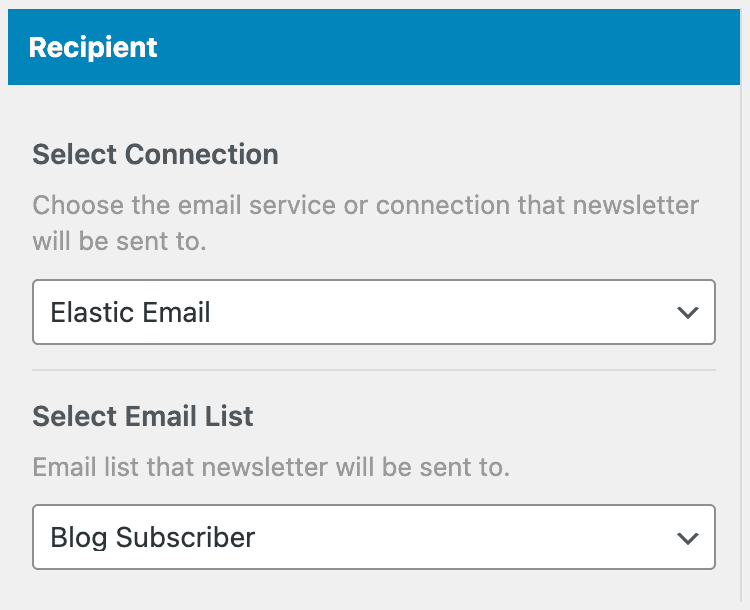
Open the Settings panel and select Elastic Email as your connection.
Then, select a specific email list to which the new post newsletters will be sent. You can also decide to send the newsletters immediately after posting by checking “Send immediately” or scheduling it to be sent minutes, hours, or days after publication.
You can create as many automations as you want to be sent to a different email list based on the categories and tags the post belongs to.
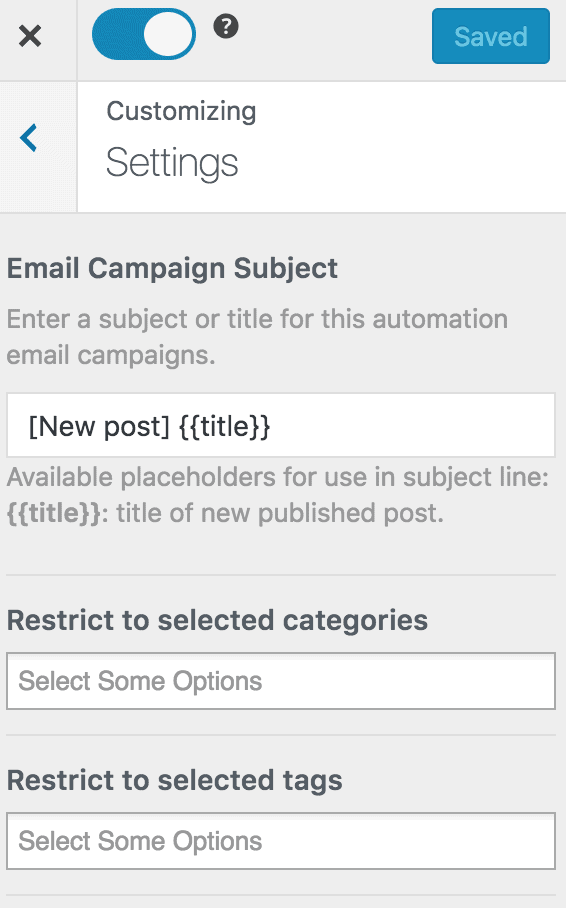
Once you’ve set up your new automation campaign, you can activate it by toggling the activation switch at the top of the page.
![]()
Finally, click the ‘Save Changes’ button to secure your new automation settings.
Note: When MailOptin sends a new post newsletter to your list, you will see the record in Elastic Email.
We hope this tutorial has helped you set up WordPress new post notifications to your Elastic Email list using the MailOptin plugin.
Gone are the days of crossing your fingers and hoping for the best. Every time you craft a masterpiece and send it out into the digital world, you can almost hear the collective ‘ping’ of notifications landing in your subscribers’ inboxes.
With your new post-notification system in place, all that’s left is creating content that inspires, informs, and delights.