Add Newsletter Subscription Checkbox to WordPress Comment Form
If you run a WordPress-powered news website or blog that allows visitors and users to leave comments on articles or posts you publish, you need to start building an email list of your commenters. You can increase your website engagement and pageviews and generate more sales with an email list by sending them links to relevant articles, sending discounts, new offers, products, etc. This is a proven strategy to encourage your readers to return to your website.
When a user leaves a comment on your site, MailOptin can automatically add them to a specific email list in your email marketing or newsletter software. In addition, MailOptin’s comment form integration can let people sign up for your list with a simple checkbox.
Supported CRM and email marketing platforms by MailOptin, include MailChimp, Salesforce, Microsoft Dynamics 365, Drip, AWeber, ConvertKit, MailerLite, Constant Contact, GetResponse, Sendy, Campaign Monitor, ActiveCampaign, Brevo (Sendinblue), Gist, Klaviyo, Sendlane, Mailster, Vertical Response, Mailjet, HubSpot, Ontraport, Moosend, MailPoet, Zoho CRM, Zoho Campaigns, Keap Max Classic (Infusionsoft), HighLevel, Omnisend, Flodesk, Beehiiv, Benchmark Email, SendFox, iContact, Mailgun, E-goi, SendGrid Email Marketing, Elastic Email, GoDaddy Email Marketing, weMail, FluentCRM, CleverReach, NewsMAN, Facebook custom audience..
Subscribing WordPress Commenters to Email Marketing List
Follow the steps below to add visitors and users who leave a comment on your site after submitting the WordPress comment form to a specific email list. But first, please make sure your store has the MailOptin plugin activated.
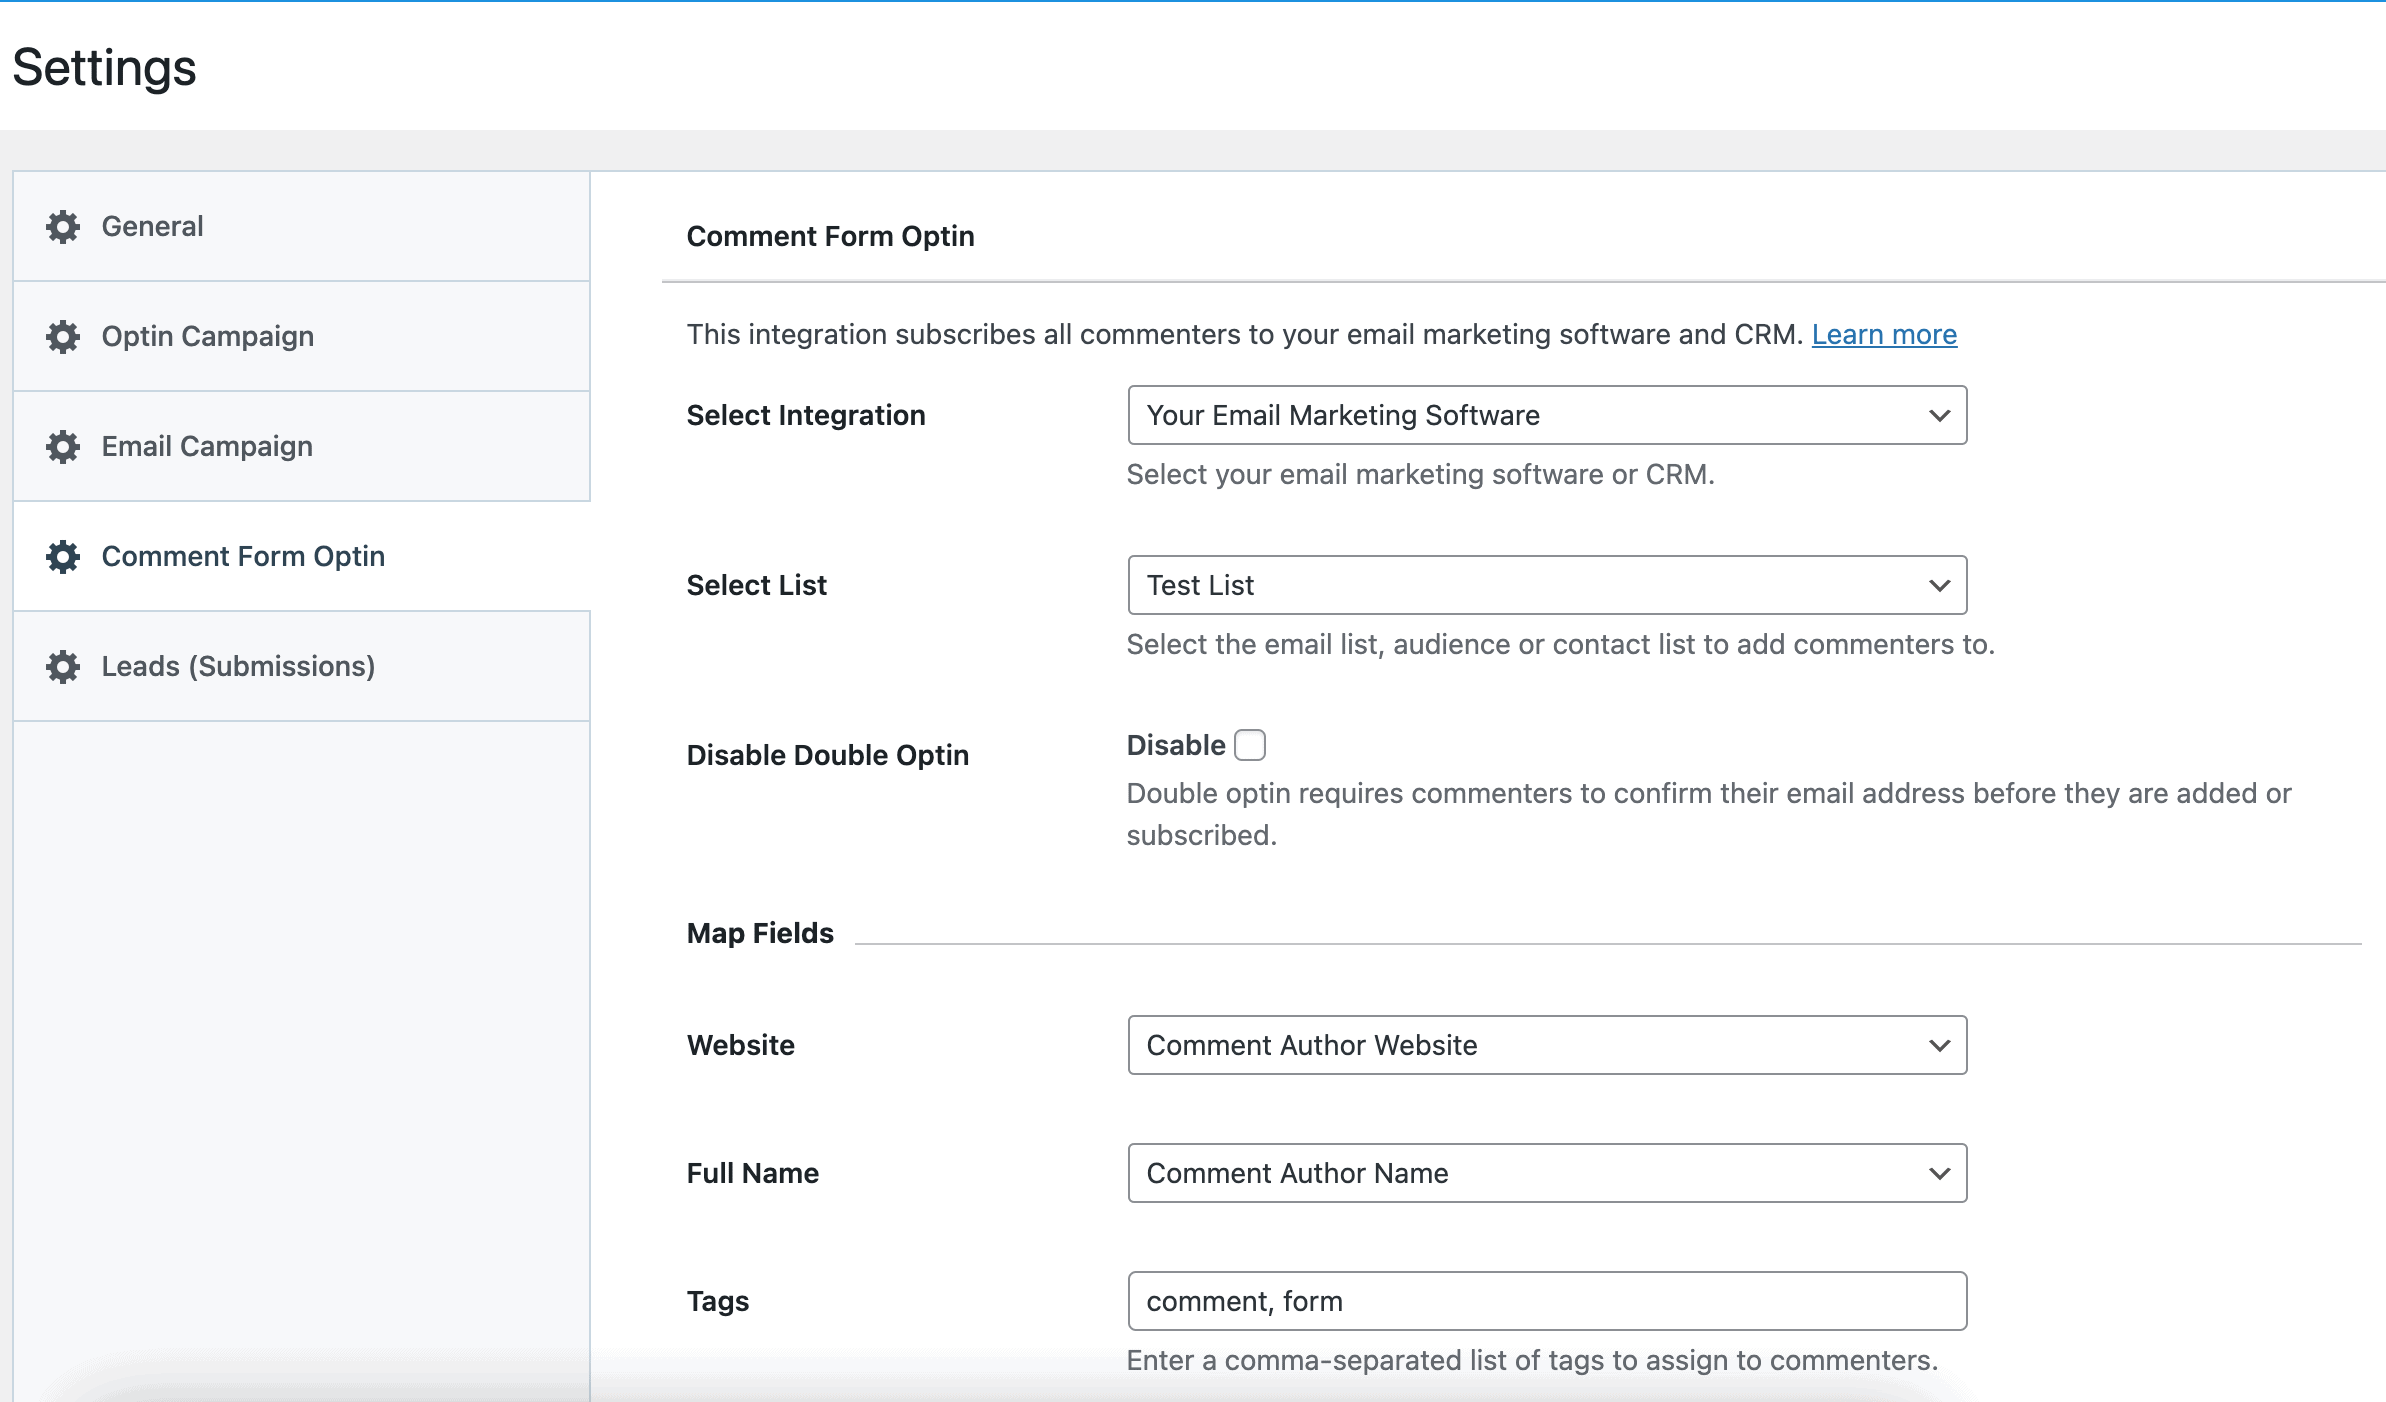
Go to MailOptin >> Settings >> Comment Form Optin.
Select your email marketing software (e.g., Mailchimp, AWeber, MailerLite, etc.) and the email list to add customers to.
If you don’t use an email marketing service, you can save your students in WordPress by selecting “MailOptin Leads” as your integration. Learn more about MailOptin Leads.
You also can pass additional or extra user data about your students besides their names and email addresses by mapping their profile information to the corresponding custom fields in your email marketing software.
You can also specify or select custom tags to assign to them.
Finally, save your changes.
Setting Up Newsletter Subscription Optin Checkbox
By default, MailOptin automatically subscribes all commenters to your email list after they submit the leave a comment. Please follow the guide below to add an optin checkbox to the WordPress comment form to ask permission from users before adding them to your email marketing list.
On the “Comment Form Optin” panel in MailOptin Settings, change the Subscribe Users setting to “Ask for permission” and configure the optin checkbox label.
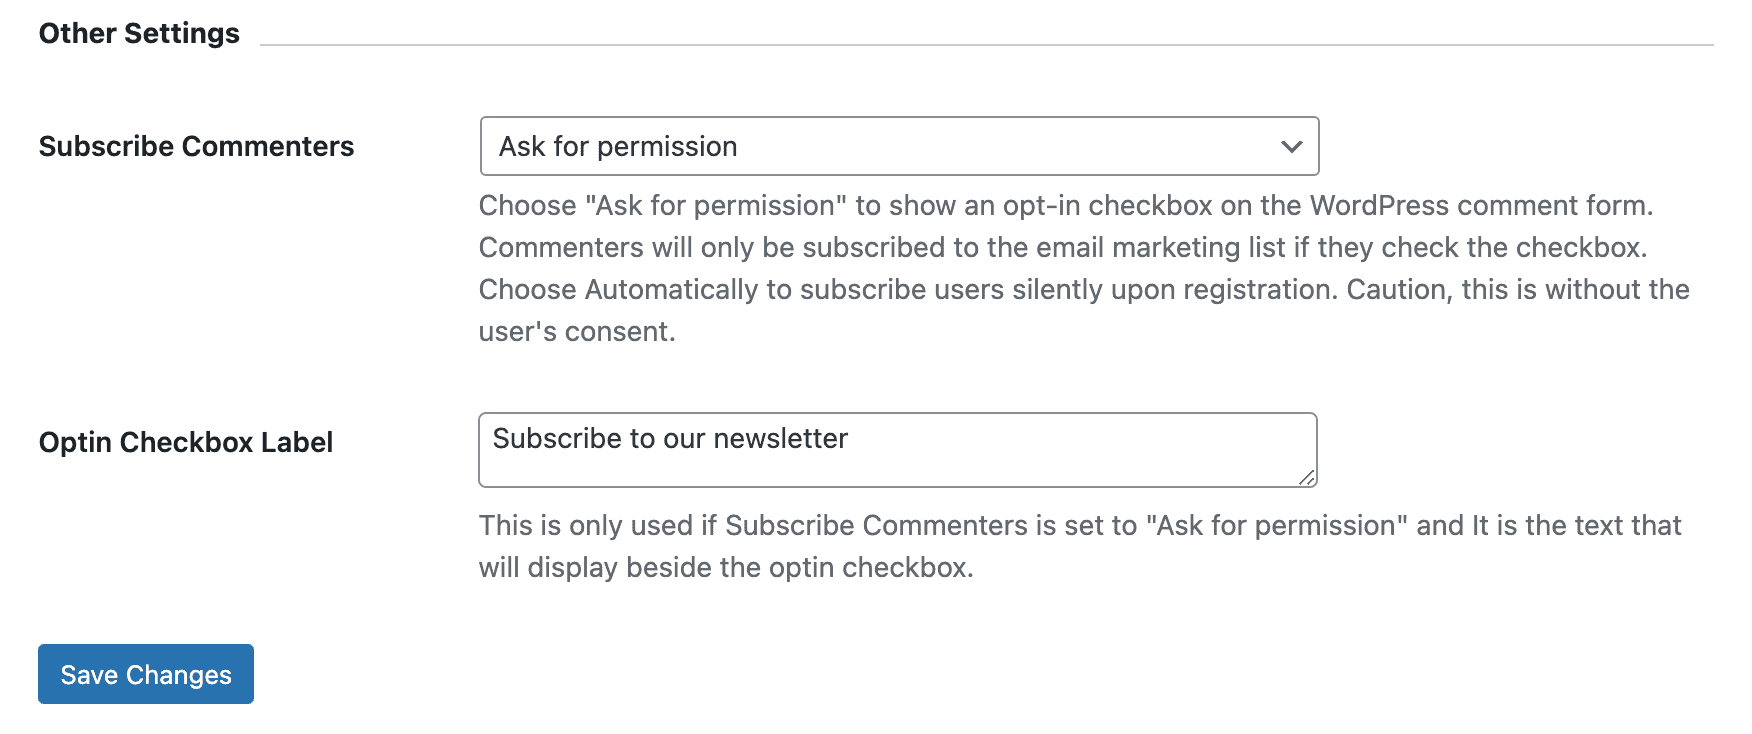
Please remember to save your changes.
When a visitor or a logged-in user leaves a comment on your WordPress blog or website, they will see an optin checkbox nudging them to subscribe to your email list.

It’s that easy to automatically subscribe WordPress users to your email list or let them opt-in to contact lists and assign tags to them.
Conclusion
MailOptin is the easiest way to subscribe or add users and visitors who leave blog comments to your email marketing software, including Mailchimp, AWeber, Constant Contact, MailerLite, and more. It takes the hassle out of manually copying and pasting email addresses while ensuring it’s GDPR-friendly, thanks to the optin checkbox feature.