WordPress New Post Notification To GetResponse List Contacts
The New Post Notification email automation feature in MailOptin is a very important tool for email list builders. In this tutorial, we will learn how to set up new post notification to your email list contacts on GetResponse, it will go a long way in saving you stress of having to manually creating newsletters for every new post you publish on your WordPress site.
For every new post you publish, MailOptin will automatically send the new post newsletter to your mailing list on your behalf.
Follow the guide below to learn how to set it up.
Ensure you’ve connected MailOptin with your GetResponse account. If you haven’t done that, go ahead and do it before coming back to this tutorial.
Click “Email Automations” > Create New.
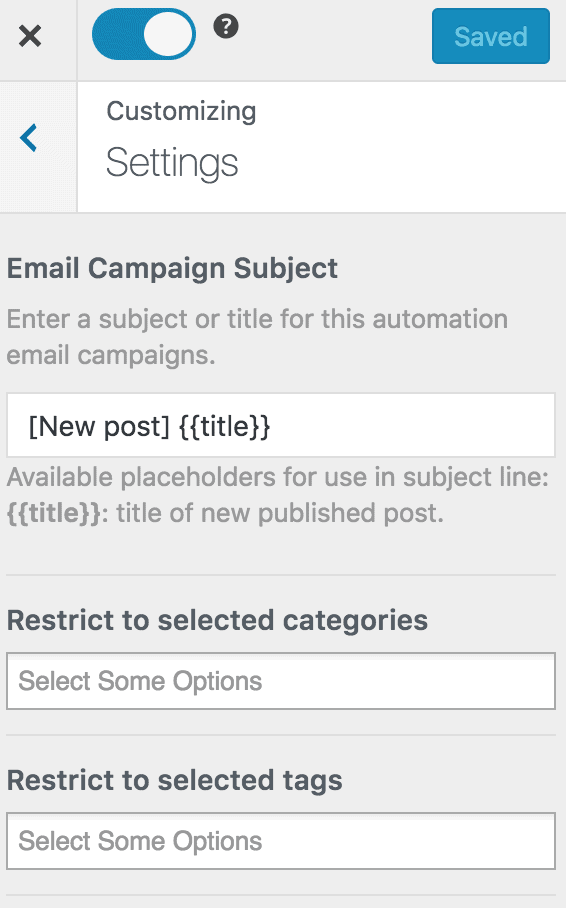
Enter your “Automation Title” and “Select Automation Type” > “New Post Notification” > Select Template.
Here’s how to use your own custom email template.
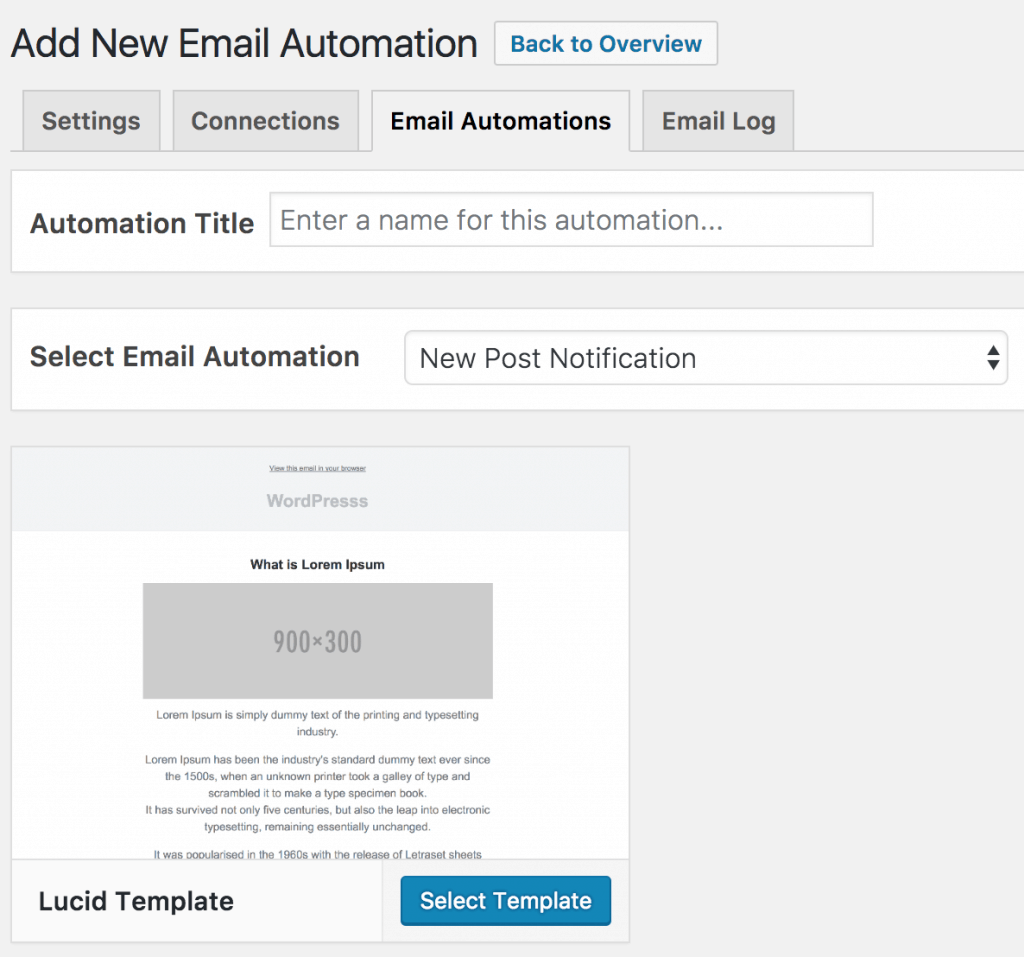
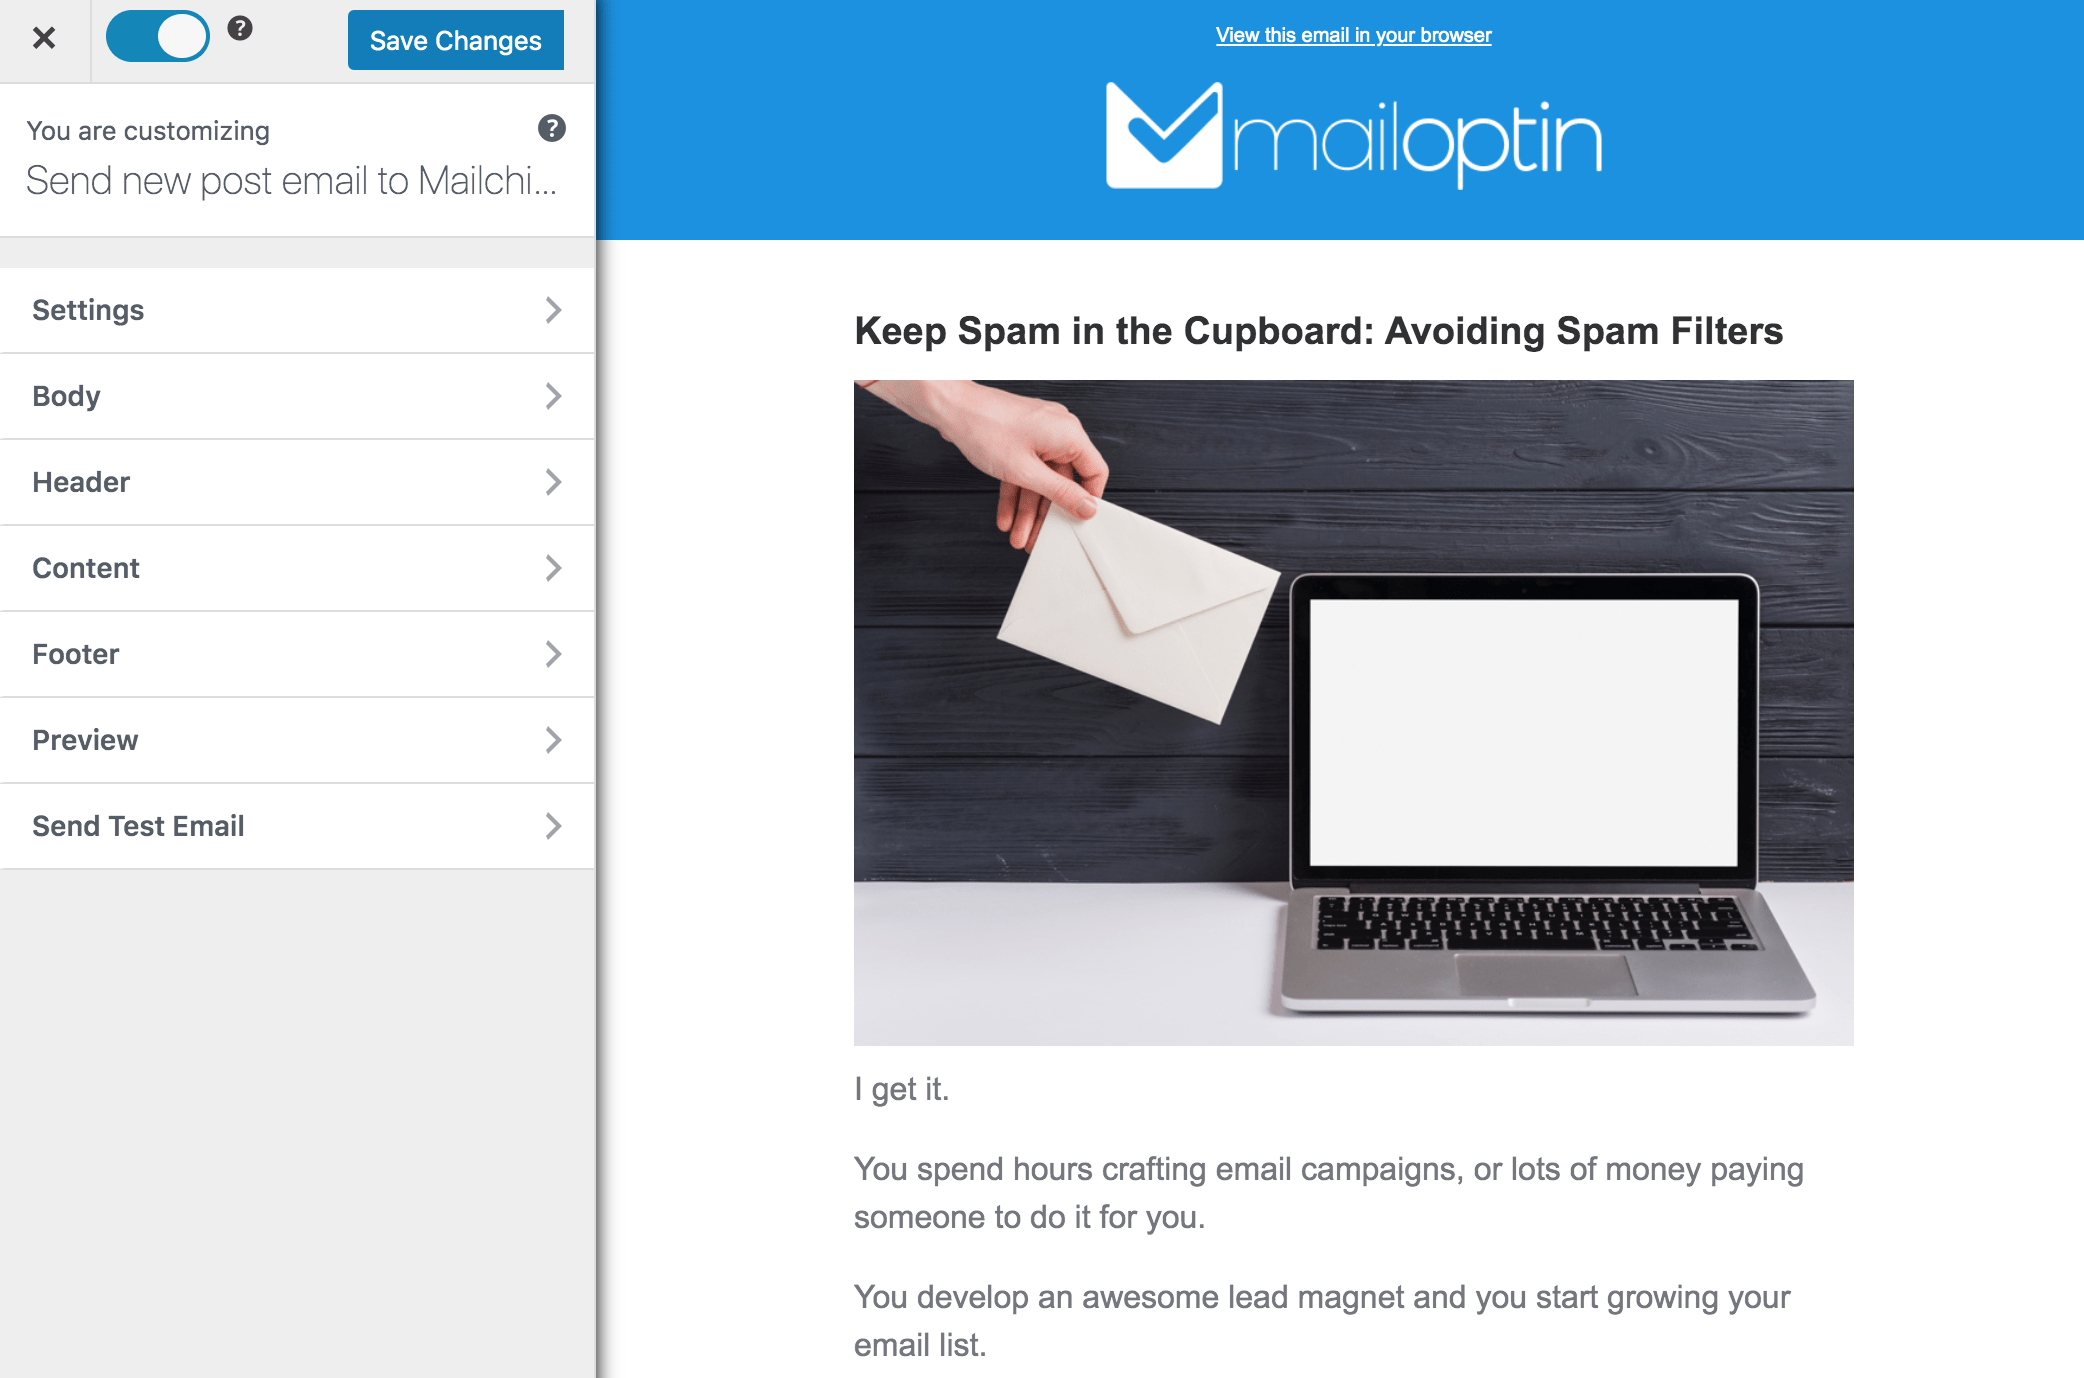
After selecting your template, you will be taken to the email customizer page where you can configure the automation settings, template page, template header, template content and even send test email to your email address.
For this process to work without issues, you need to click the “Campaign/Automation Settings” and select “GetResponse” as your connection.
Then select a specific email list to send the email to.
You can also decide to send the newsletters immediately after post publication by checking “Send immediately” or schedule it to be sent minutes, hours or days after post publication.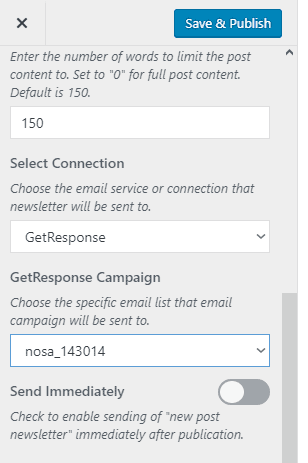
Note that you can create as many automations to be sent to different email list base on the categories and tags the post belong to.
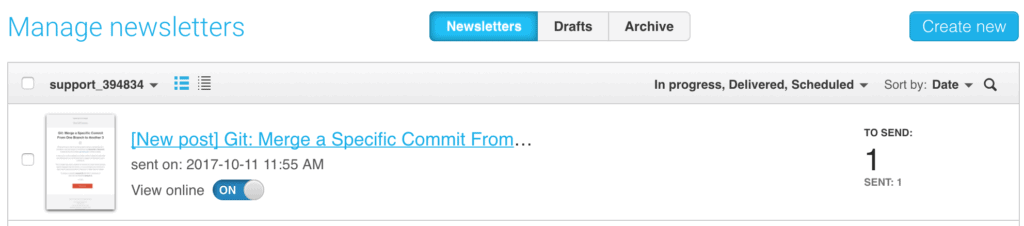
Set up is now complete.
Every time MailOptin sends a new post newsletter to your list, you will see the record in your GetResponse dashboard.
Take Note
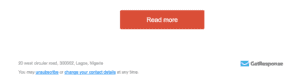
By default, GetResponse include it badge as well as your contact address and a link for subscribers to unsubscribe from your list in all newsletters they send.
To remove the badge, follow this guide.
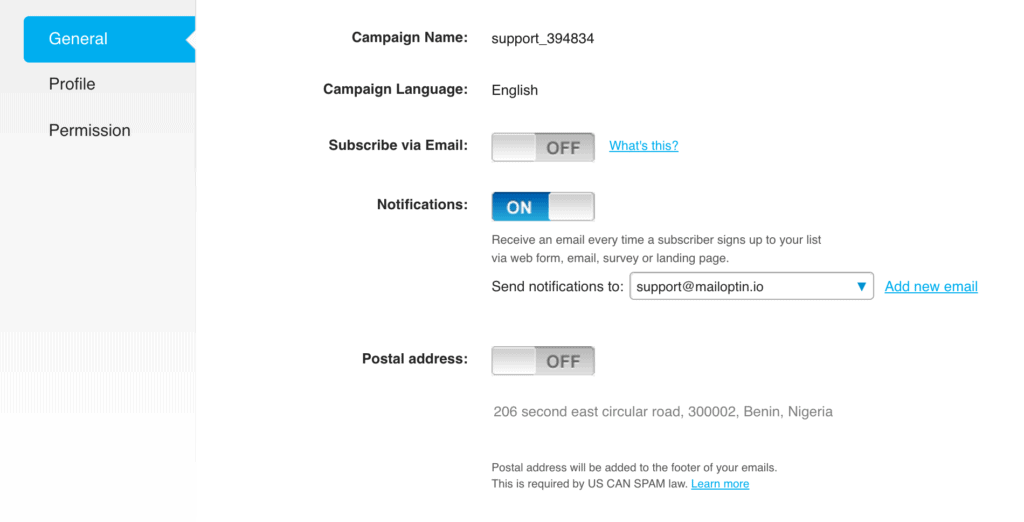
By default, we include the contact information you saved in Email Campaign Settings to the footer of every new publish post newsletter body as per Anti-Spam Policy. Since we already added a contact information, it’s only rational you disable that of GetResponse to prevent duplication. To do this, follow the short guide below.
- In your GetResponse dashboard, click on the gear/wheel icon in the upper right corner next to ‘Your current campaign’.

- Go to Campaign Settings > General tab and toggle the “Postal address” setting off.
P.S You can’t remove the GetResponse automatically added unsubscribe link.
You can also decide to send a daily, weekly or monthly round up of published posts instead of immediately after posts are published.
Let us know if you have any question or comment.