How to Schedule Optin Campaign Base on Date & Time
To schedule an optin means to create an optin like you normally do in MailOptin, but set a specific time frame when the optin will be shown on your website.
This is very useful if you run time-based promotions in your website. For example, if you are having a special 50% sales promotions for two hours or two days, you can use the Schedule feature in MailOptin to display a specific optin form within the scheduled period.
To set up a “Schedule” on MailOptin:
Navigate to “Optin Campaign” tab
Go to “Customize” > “Display Rules”
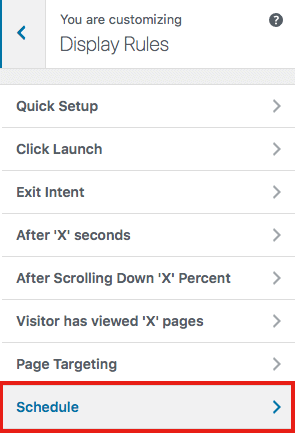
Click “Schedule”
In the “Schedule” settings page, you will find “Start Time” and “End Time.” Use the different fields to set the “Start Time” and “End Time.”
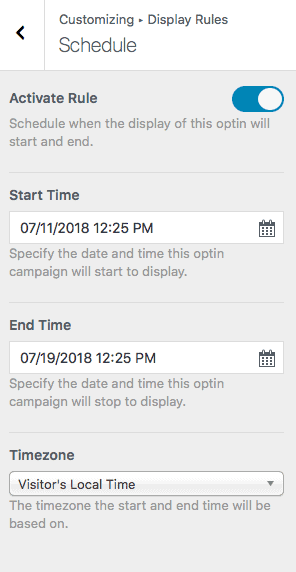
Now, you need to enable this rule. Right on the settings page, you will find “Activate Rule” on the top, toggle the button to turn it on or off. In its grey state, the feature is turned off, when it changes to blue after you toggle it, it means the feature has been enabled.
Timezone:
The timezone settings allows you to set the timezone you are going to work with. This is a very important feature during to variation in timezone all over the world. You can decide to use a specific timezone or allow MailOptin use visitors local timezone.
One you have completed all the options in this page. Click “Save Changes”.
Your scheduled optin is now live.