How to Display WordPress Popup & Optin After X Seconds (Time Delay)
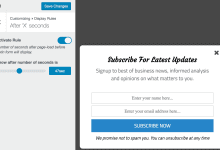
Do you want to display timed popups & opt-in on your WordPress site?
Strategically timing the display of your popups and opt-ins can significantly impact user engagement and conversions. Just imagine being able to present your WordPress popups and opt-in forms at the perfect moment without interrupting your visitors’ browsing experience. That’s where the MailOptin plugin comes in.
MailOptin is an excellent lead generation, email automation, and newsletters plugin. With its Time on Site Optin trigger feature, you can instantly show your opt-in forms to your visitors or display them after they’ve been on your site for a specific time.
In this guide, we’ll explore using the MailOptin plugin to display popups and opt-ins after a specified number of seconds.
Why Timing Matters in Popup Display
Timing is crucial in the effectiveness of popup display on your WordPress website. The success of your popups and opt-in forms depends heavily on striking the right balance between capturing attention and respecting the user’s browsing experience.
If you show them too soon, you risk interrupting the user’s browsing experience or appearing too pushy. Visitors may feel overwhelmed or annoyed, leading to a negative perception of your site. On the other hand, if you wait too long to display your popups, you might miss out on capturing their attention altogether.
By strategically timing the display of popups and opt-ins after a specific duration, you can strike the right balance between engagement and user experience. Waiting until visitors have spent time on your site shows they are invested in your content. This makes them more receptive to your message. It allows them to familiarize themselves with your site’s offerings before being presented with an opt-in opportunity, increasing the likelihood of them taking action.
Steps to Display Popups & Opt-ins After X Seconds
Follow these simple steps to set up your WordPress popups and opt-ins to appear after a specific number of seconds:
Step 1: Install and Activate MailOptin Plugin
Begin by installing and activating the MailOptin plugin on your WordPress website. You can find it in the WordPress plugin repository or download it from the MailOptin website. Once installed and activated, you will have access to its features.
Step 2: Create a New Optin Campaign
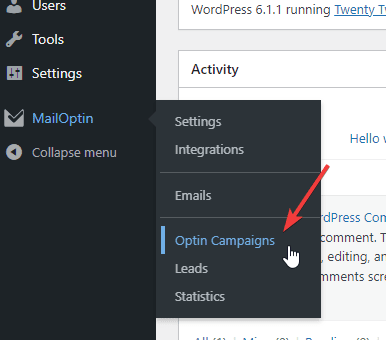
First, go to MailOptin > Optin Campaigns:
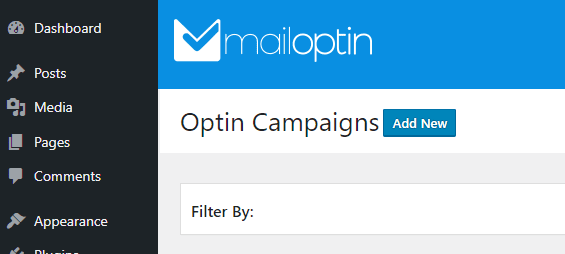
Click the Add New button to create a new popup:
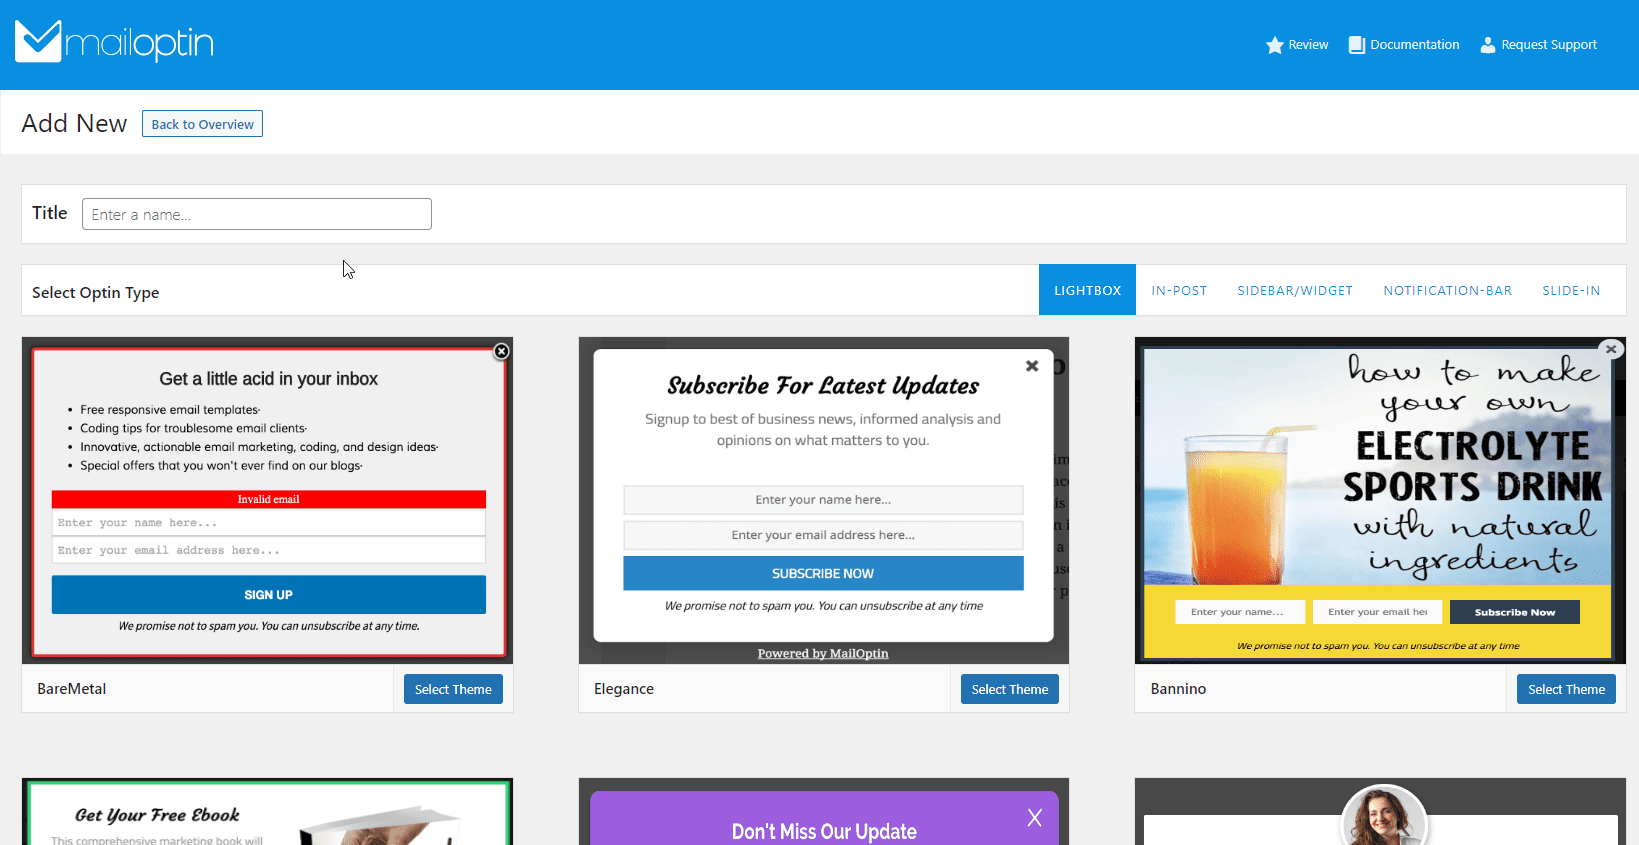
Next, enter a name for your new popup and select a design:
This will take you to the optin campaign builder page:
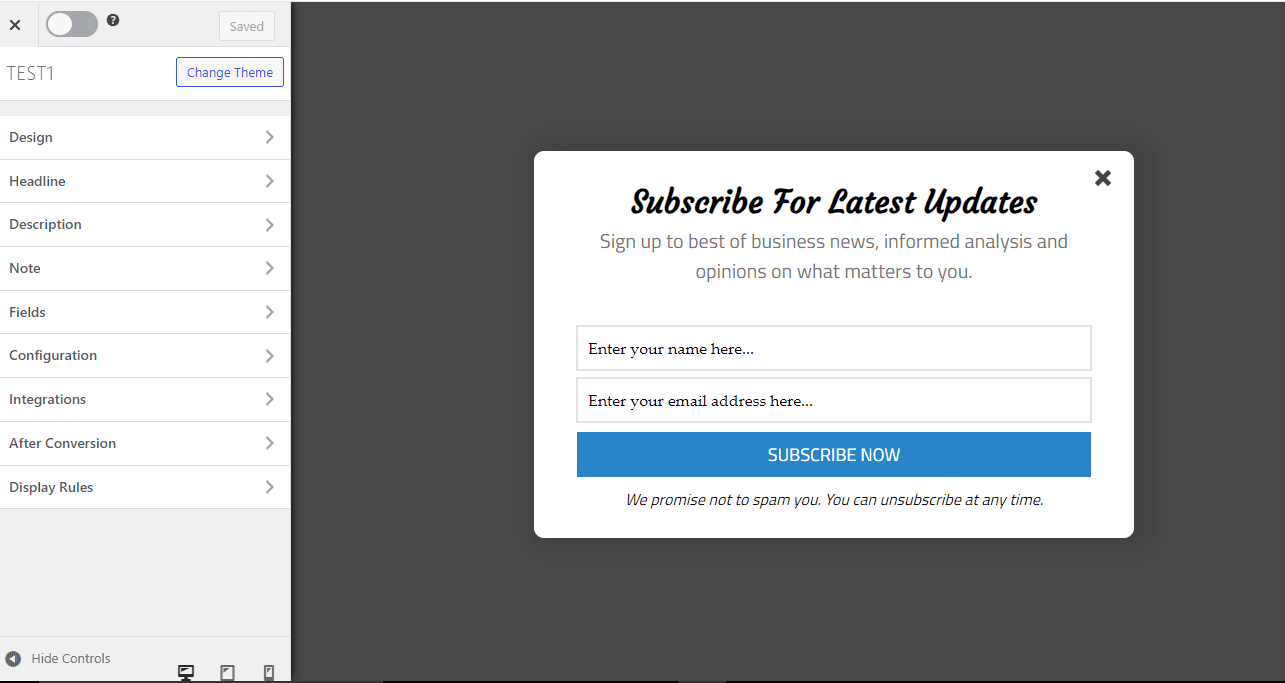
This page allows you to customize all aspects of the design of your popup.
Step 3: Enable The Time on Site Optin trigger
After customizing the design of your optin to match your website’s style, the next step is to activate the Time on Site Optin Trigger.
To do this, navigate to the Display Rules > After ‘X’ seconds and activate the rule.
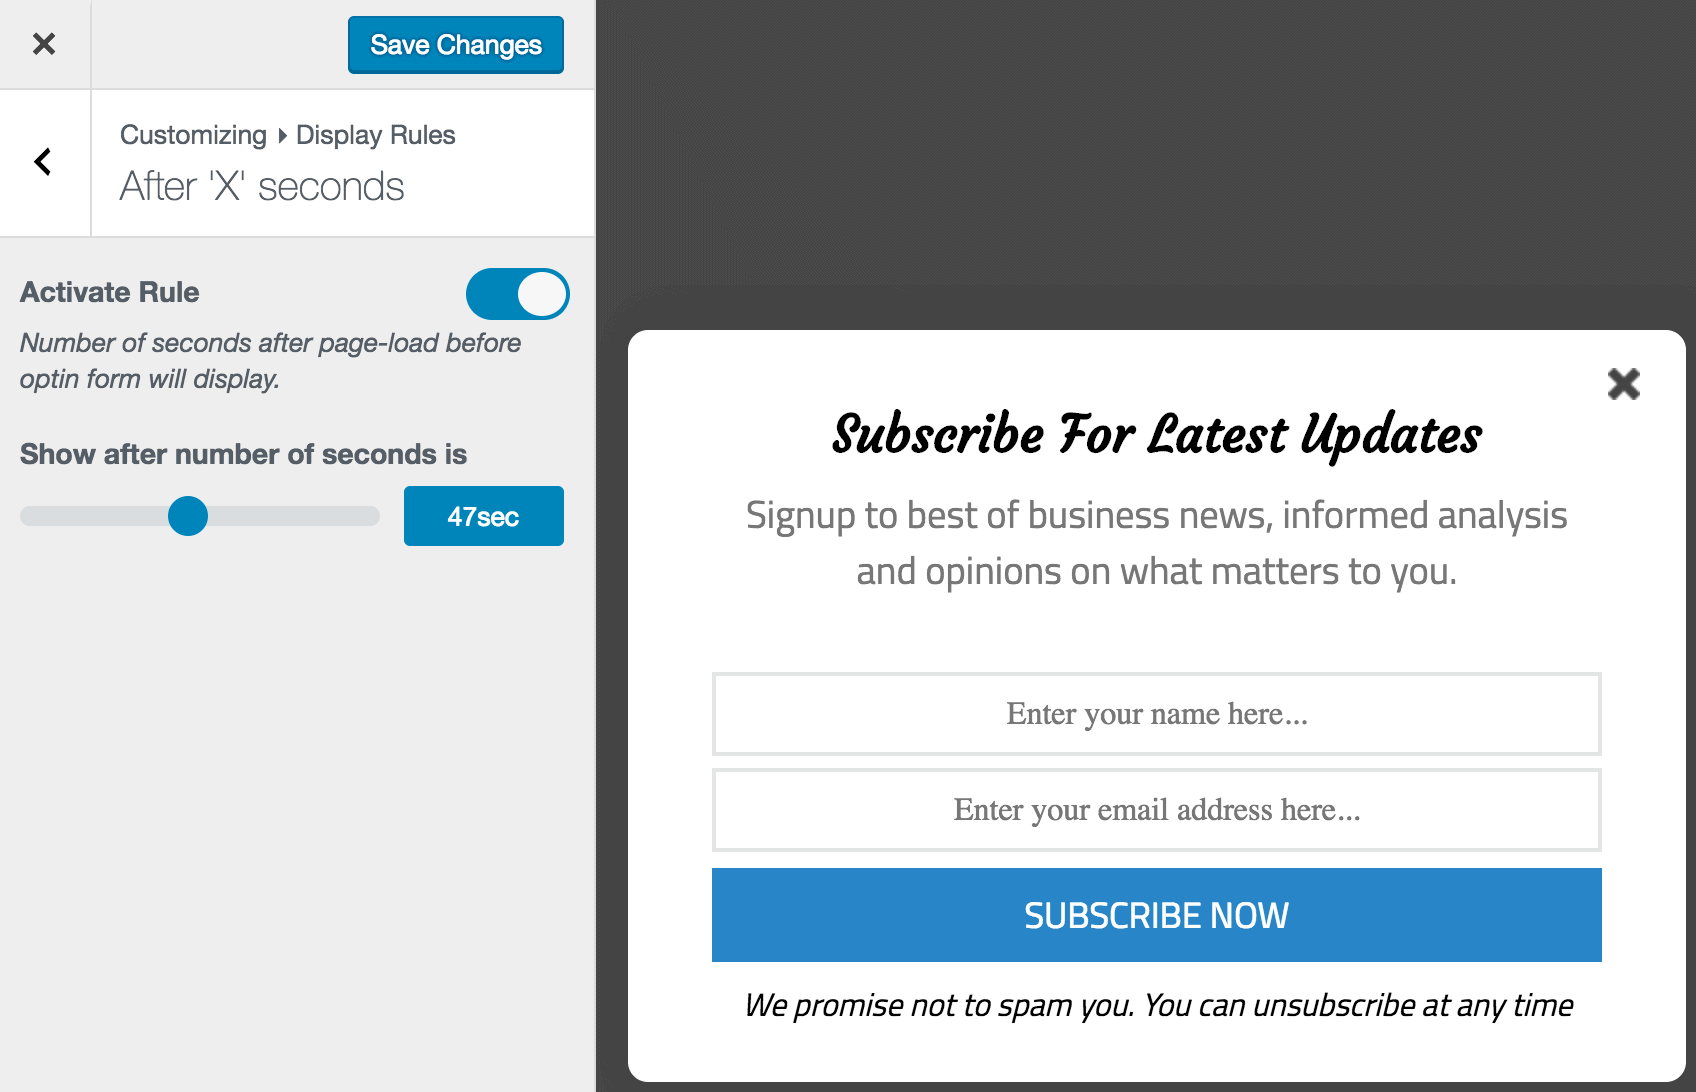
Set the desired number of seconds, after which you want the opt-in to display. For this example, we set ours for 47 seconds, which means our popup will display to website visitors and users after 47 seconds.
Once you’re satisfied with the settings and design of your opt-in, save your campaign and publish it to make it live on your website.
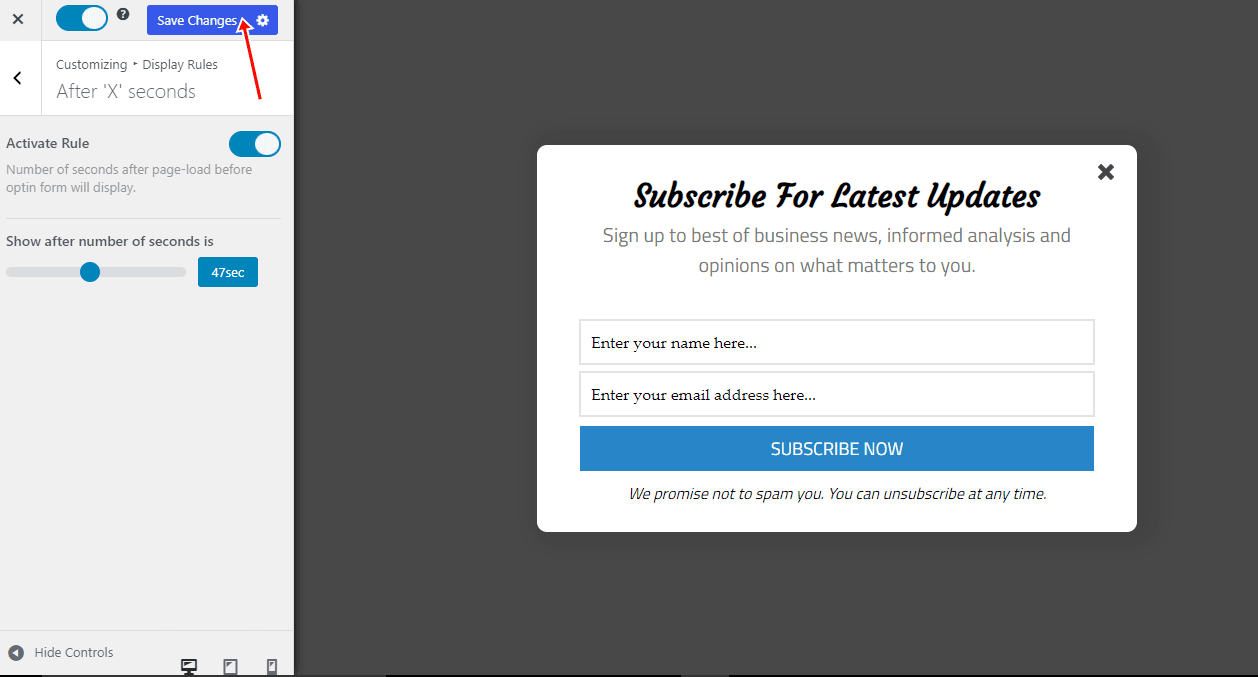
Visitors will now see the opt-in after the specified number of seconds, helping you capture their attention and encourage engagement.
That’s how to display WordPress popup & optin after X seconds
Using the MailOptin plugin to display WordPress popups and opt-in forms after a certain number of seconds can significantly boost user engagement, conversions, and email list growth.
Now that you have the tools and knowledge to integrate timed popups and opt-ins into your WordPress site, it’s time to take action. I’d like you to implement these strategies today to enhance your website’s effectiveness and achieve your goals.
Get started with MailOptin today!
