How to Send Emails to LearnDash Users in WordPress
LearnDash is a WordPress plugin that allows users to create and sell courses online. It is a popular choice among educators and trainers who want to create engaging and interactive learning experiences for their students. LearnDash provides features such as course progress tracking, quizzes, certificates, and more. In addition, it is easy to use and can be integrated with other WordPress plugins and tools, making it a versatile and robust option for creating online courses.
Why Send Emails to your Users?
Sending emails to users who have taken your courses regularly is essential for several reasons. Not only is email one of the most cost-effective forms of marketing on the internet, but it also allows you to quickly and easily engage them. Additionally, sending emails can be a valuable tool for promoting your products and services and can ultimately help increase your revenues.
This tutorial will teach you how to bulk email your LearnDash users or students in WordPress without requiring expensive email marketing software.
Sending Emails to Your LearnDash Users
Follow the guide below to send a broadcast or bulk email to LearnDash users enrolled in specific courses or groups in WordPress.
First, please make sure you have MailOptin installed and activated.
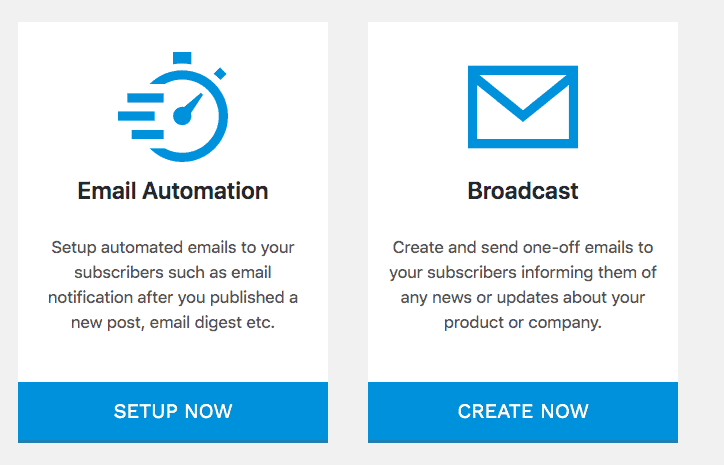
In the WordPress Dashboard, navigate to MailOptin >> Emails, click the Add New button, and select Broadcast.
Enter an email subject and select a template
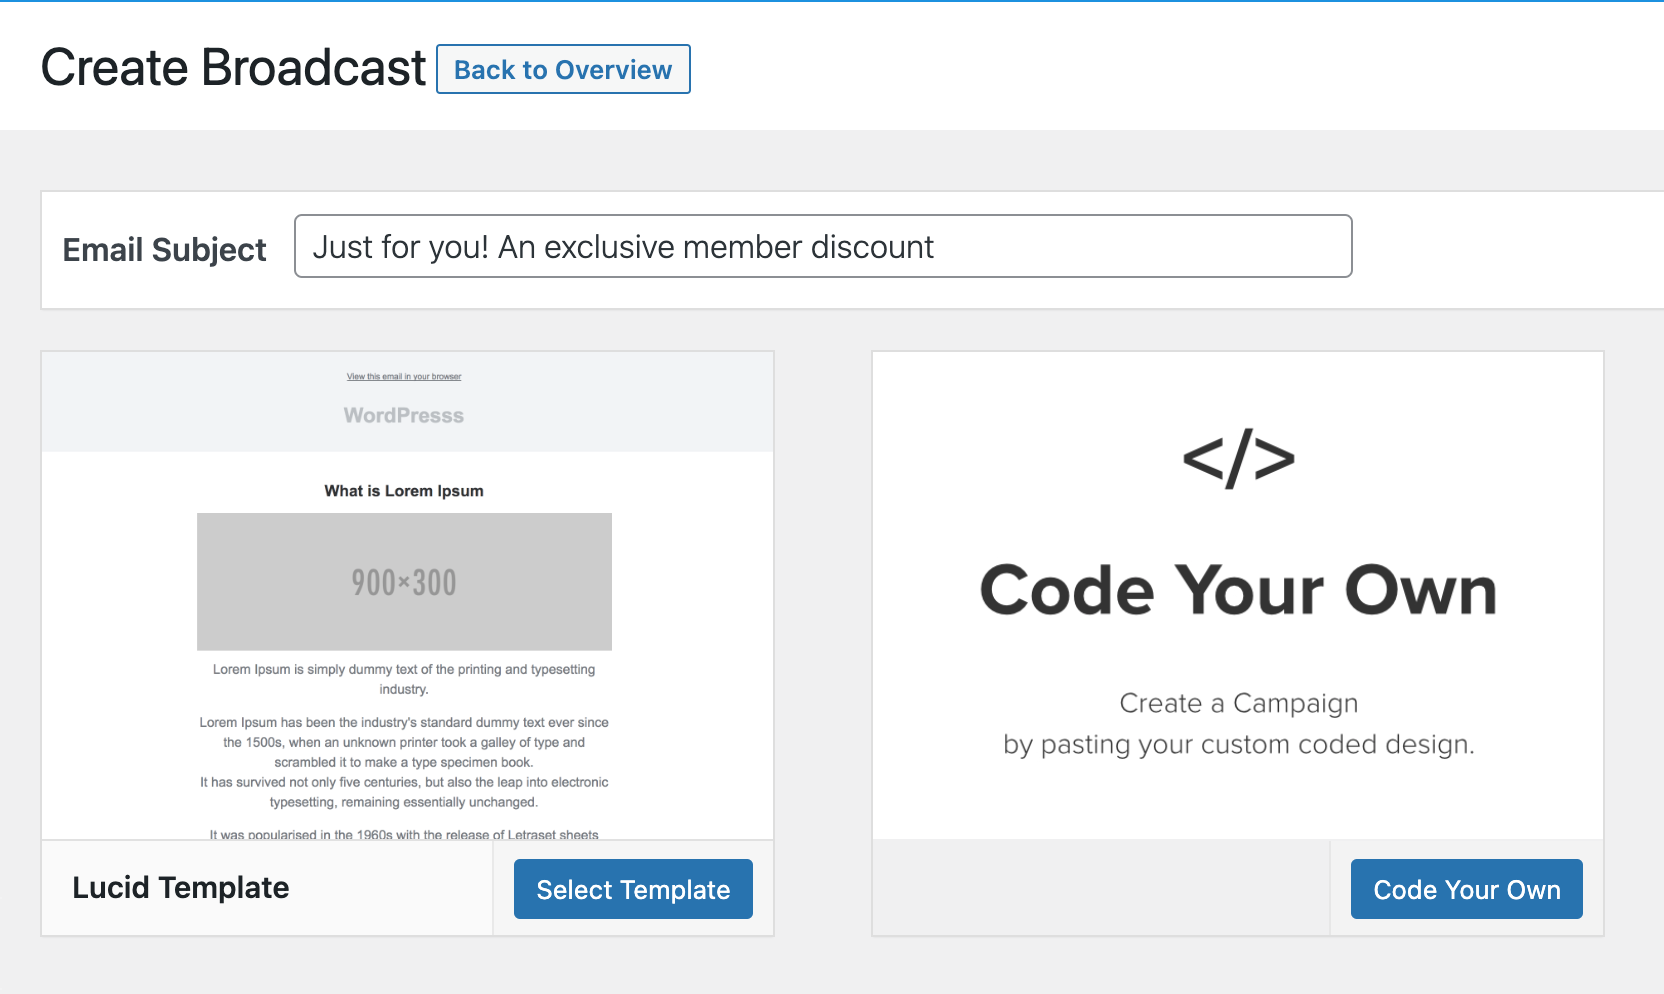
After you’ve selected an email template, you will then open the email builder.
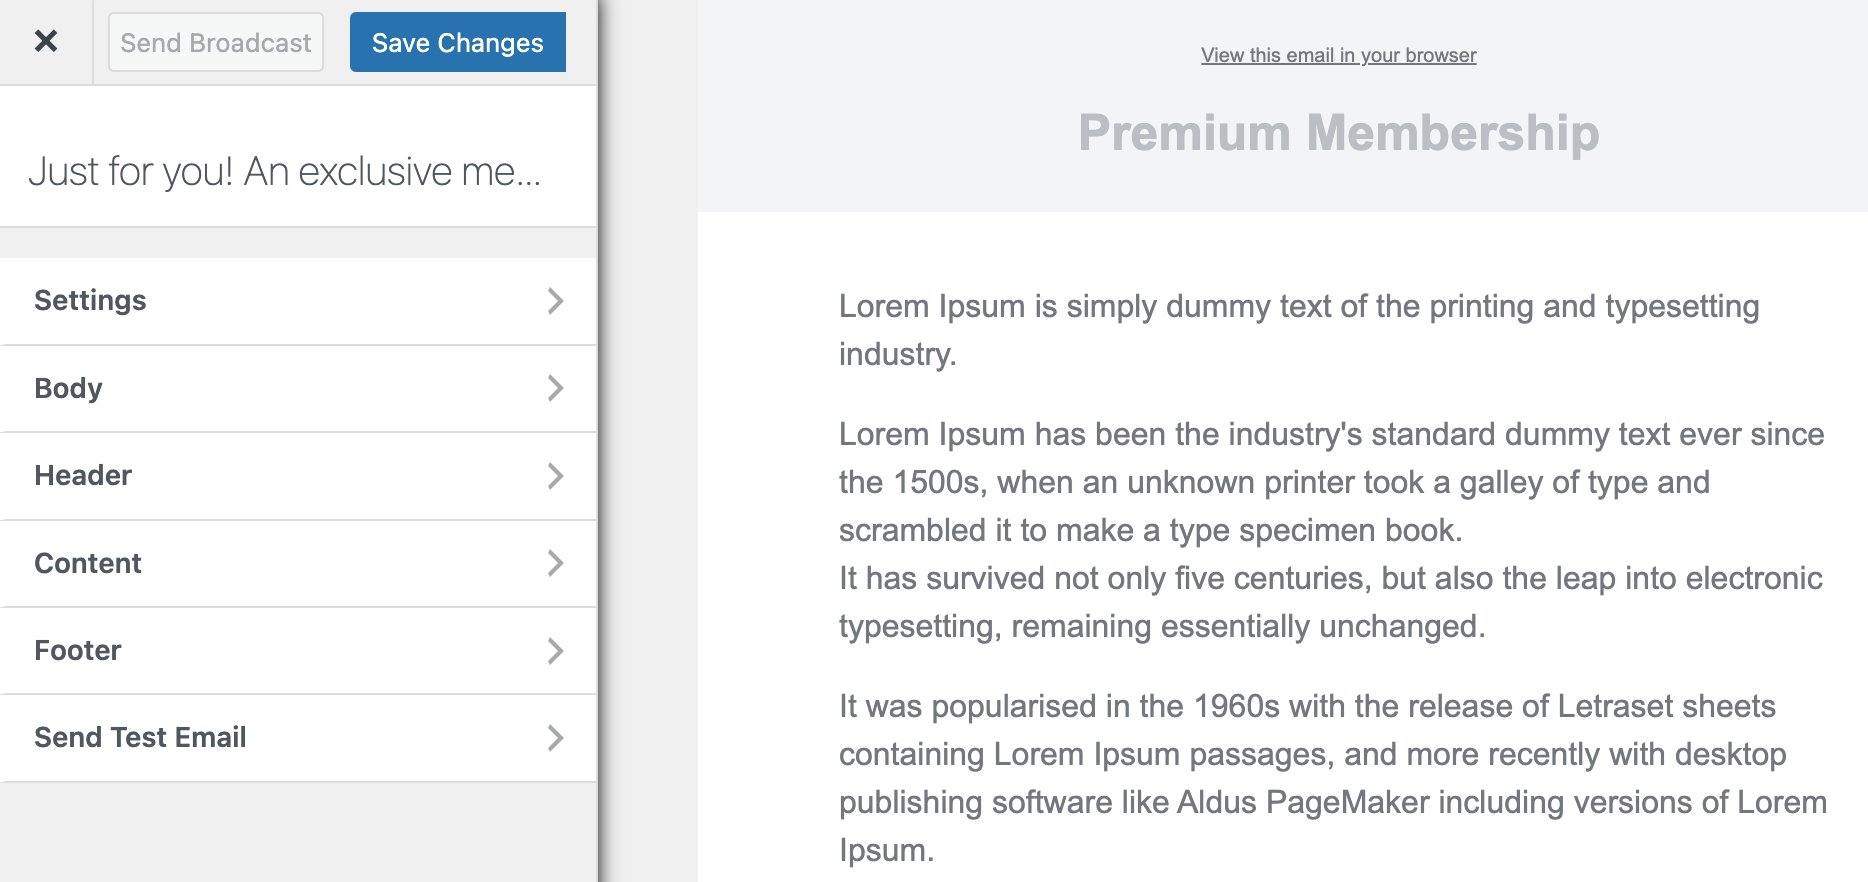
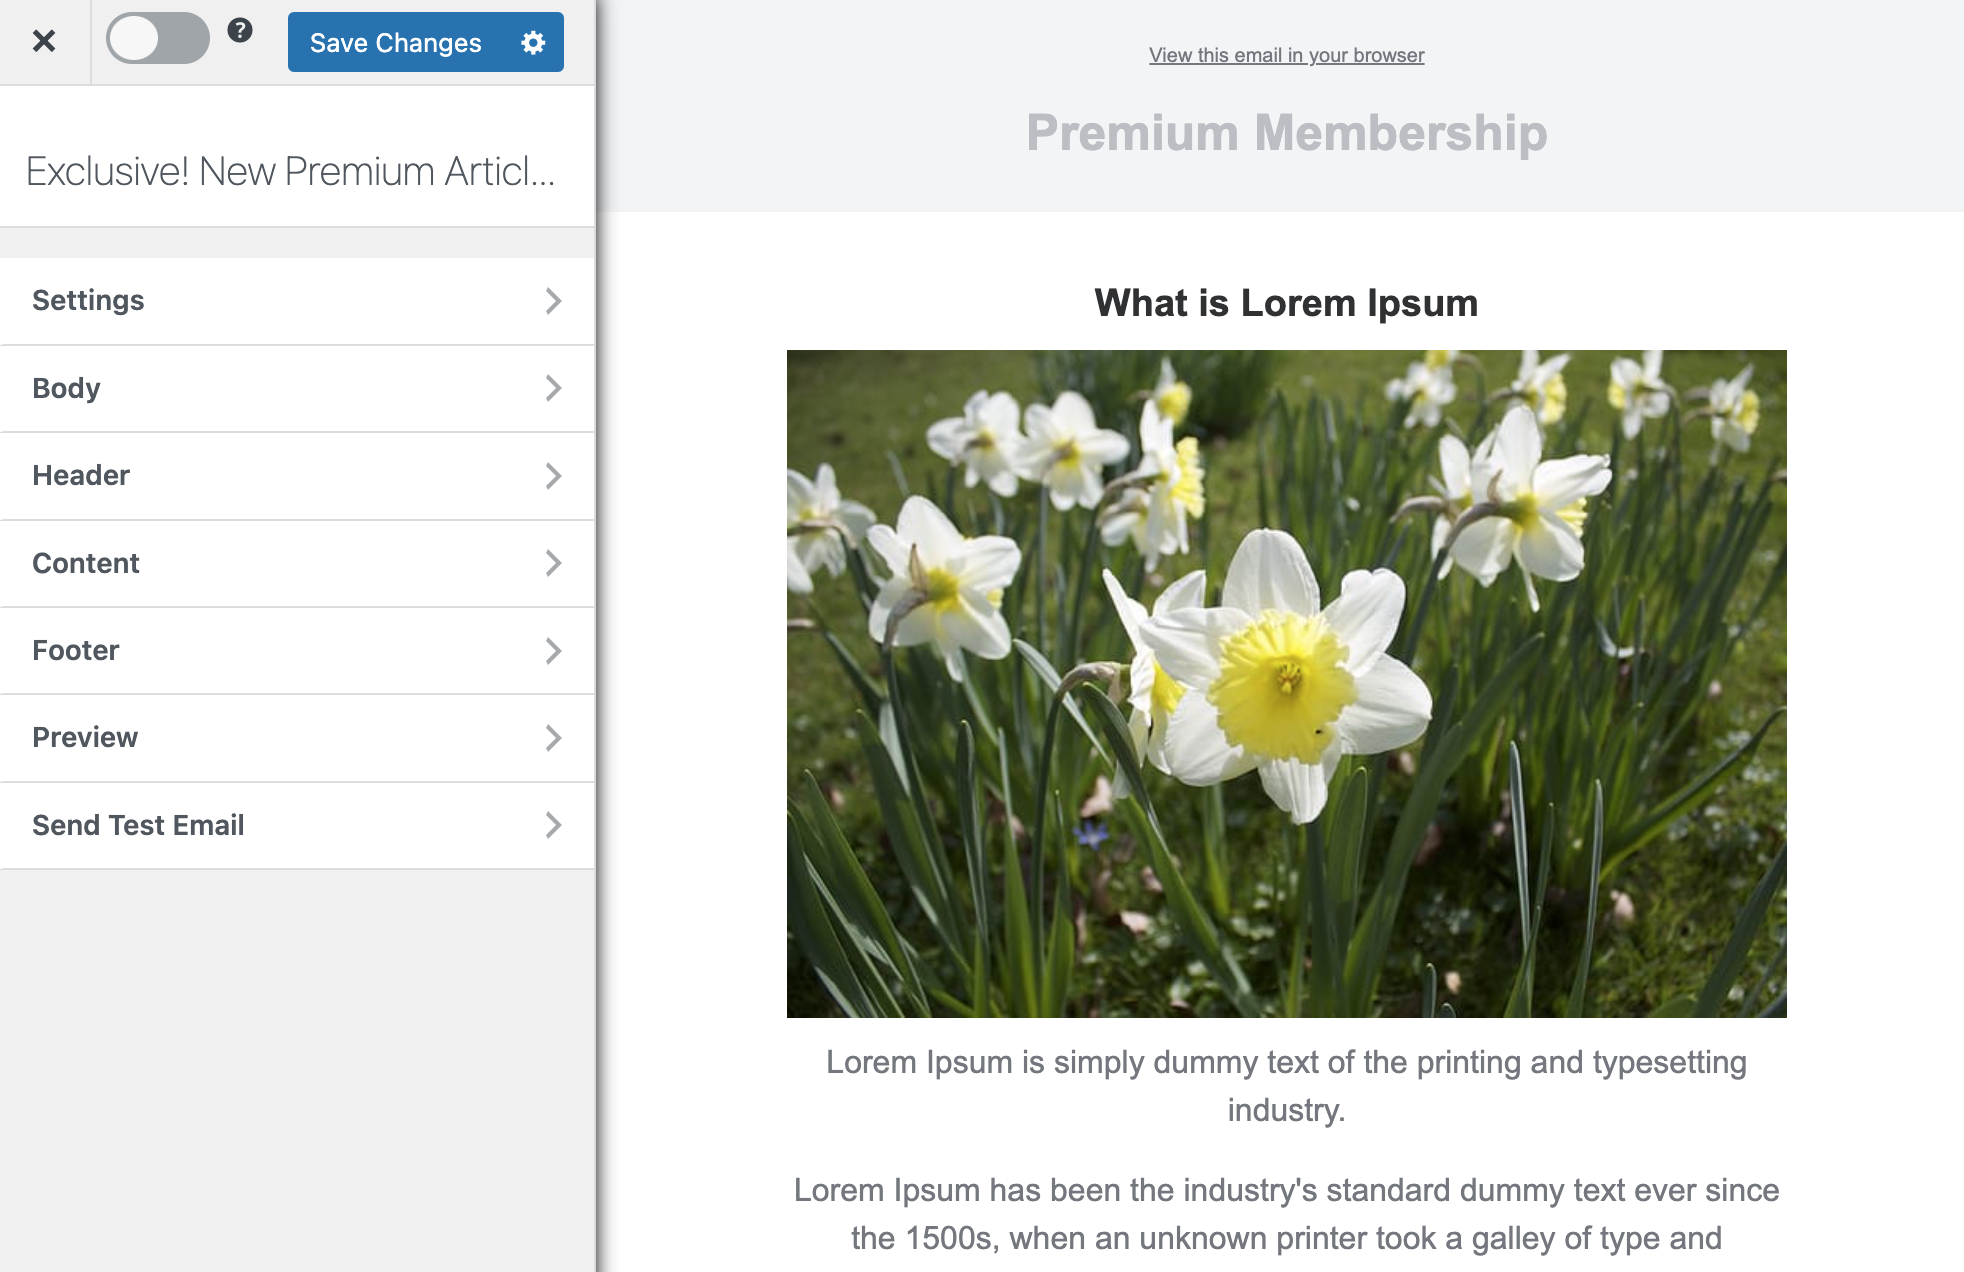
The builder has several panels, including Settings, Body, Header, Content, Footer, and Send Test Email.
The Settings panel allows you to modify the email’s subject and connect the email with the users you want to send it to.
The Body panel lets you change the look of the email template, including the background color, content background color, and text color. You can also add custom CSS to the email template using this panel.
The Header panel allows you to set an image that appears at the top of the email or remove the header if you wish.
The Content panel is where you can edit the content of the email and change the style, and block settings.
The Footer panel lets you add a mailing address, copyright message, and unsubscription link or remove the MailOptin logo or the footer altogether.
Finally, the Send Test Email panel allows you to send a test email to anyone, including yourself.
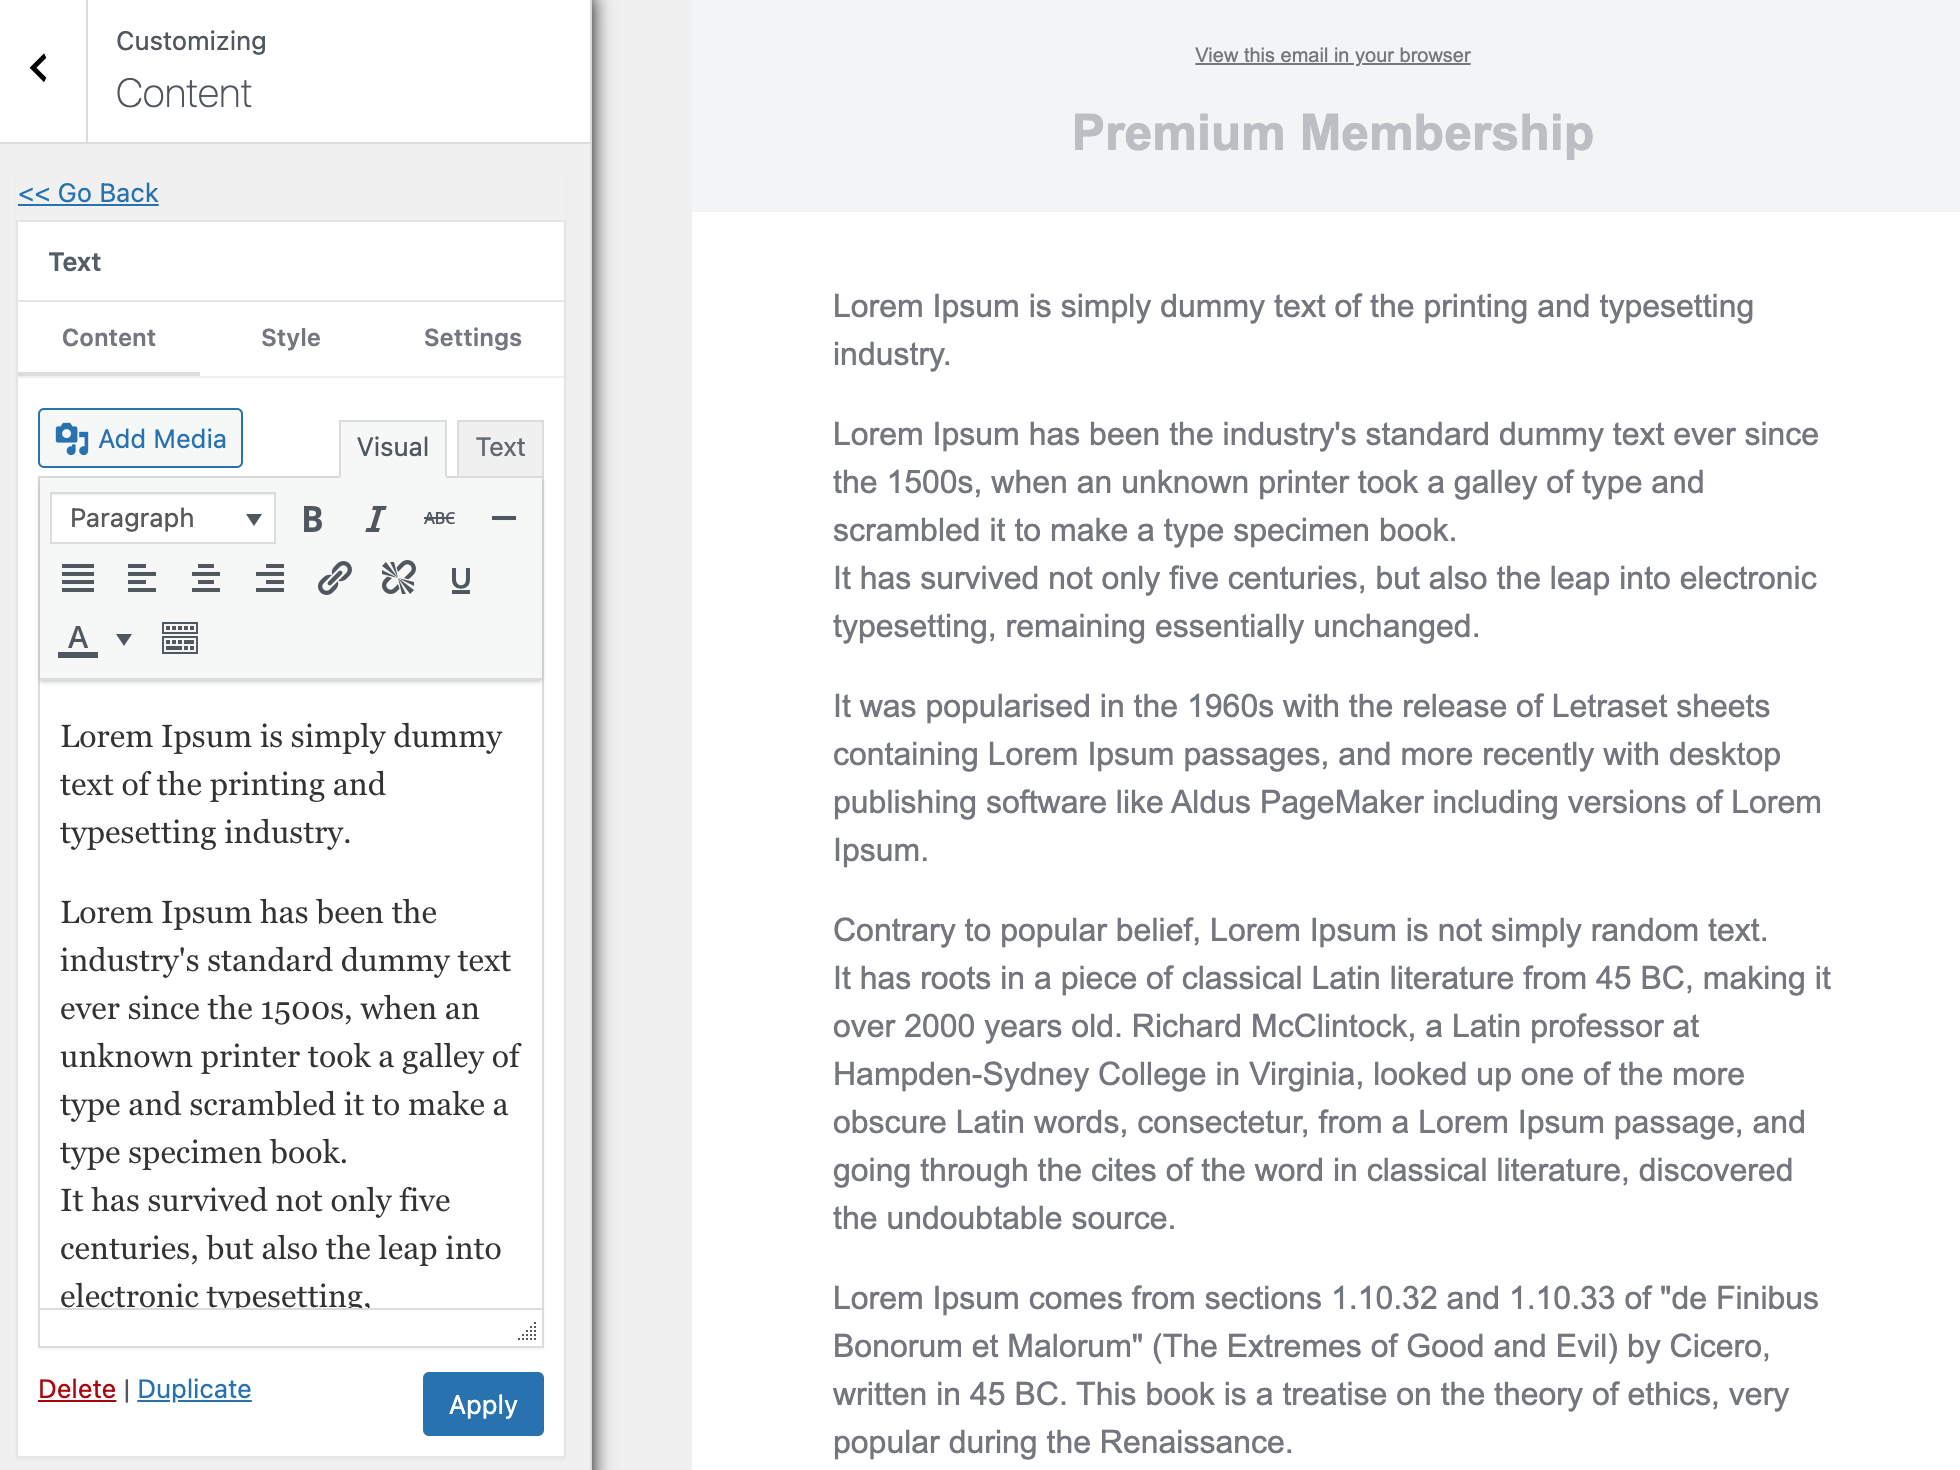
Open the content panel to craft and style the email message or body to your heart’s content.
When you finish the email content, open the Settings panel to set up the recipient.
Select LearnDash as the connection or recipient.
If you only want to send the email to users enrolled in specific courses, use the “Restrict to Courses” setting. And if you’re going to email users that belong to particular groups, use the “Restrict to Groups” setting.
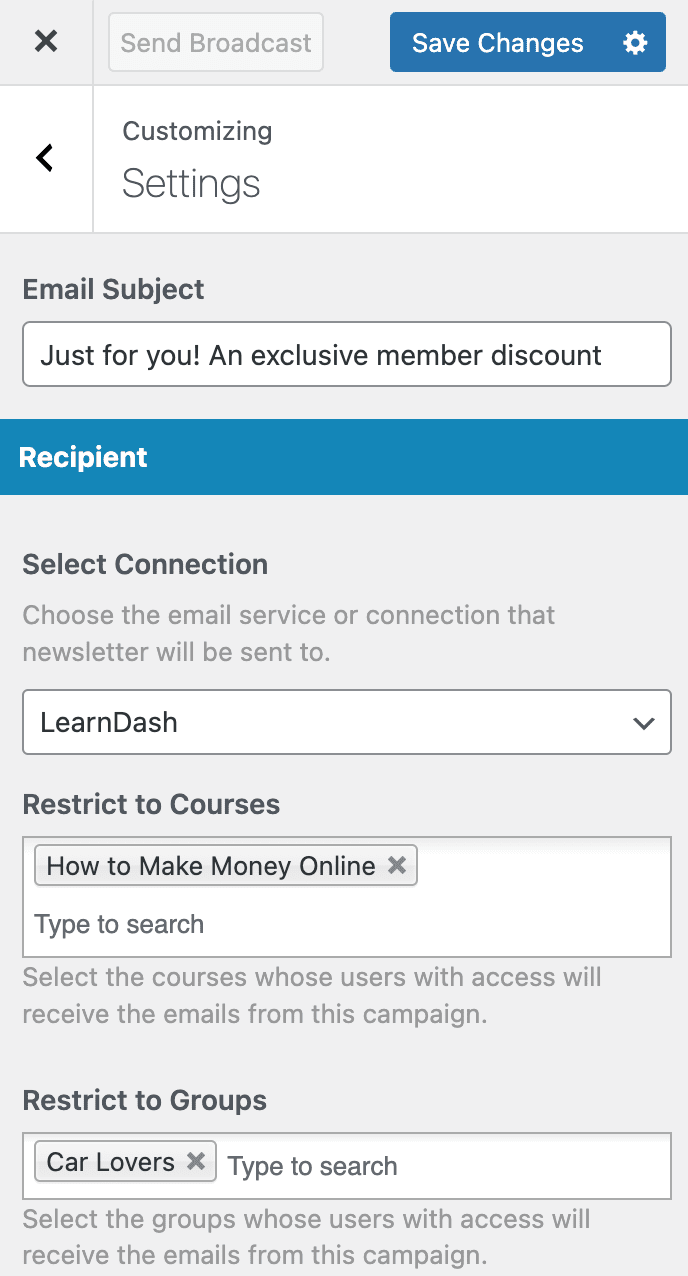
When you are done, click the “Save Changes” button to enable the “Send Broadcast” button that you will click when you finally decide it’s time to send the email.
Easy peasy.
Setting Up Automated Emails to LearnDash Users
With MailOptin, you can set up email automation to send emails to your paid subscribers or users whenever you publish a new post or article. You can also set up a daily, weekly, and monthly email digest of your published posts for your course users.
See also: Send email digest or roundup of new LearnDash courses
Setting Up New Published Post Email Automation
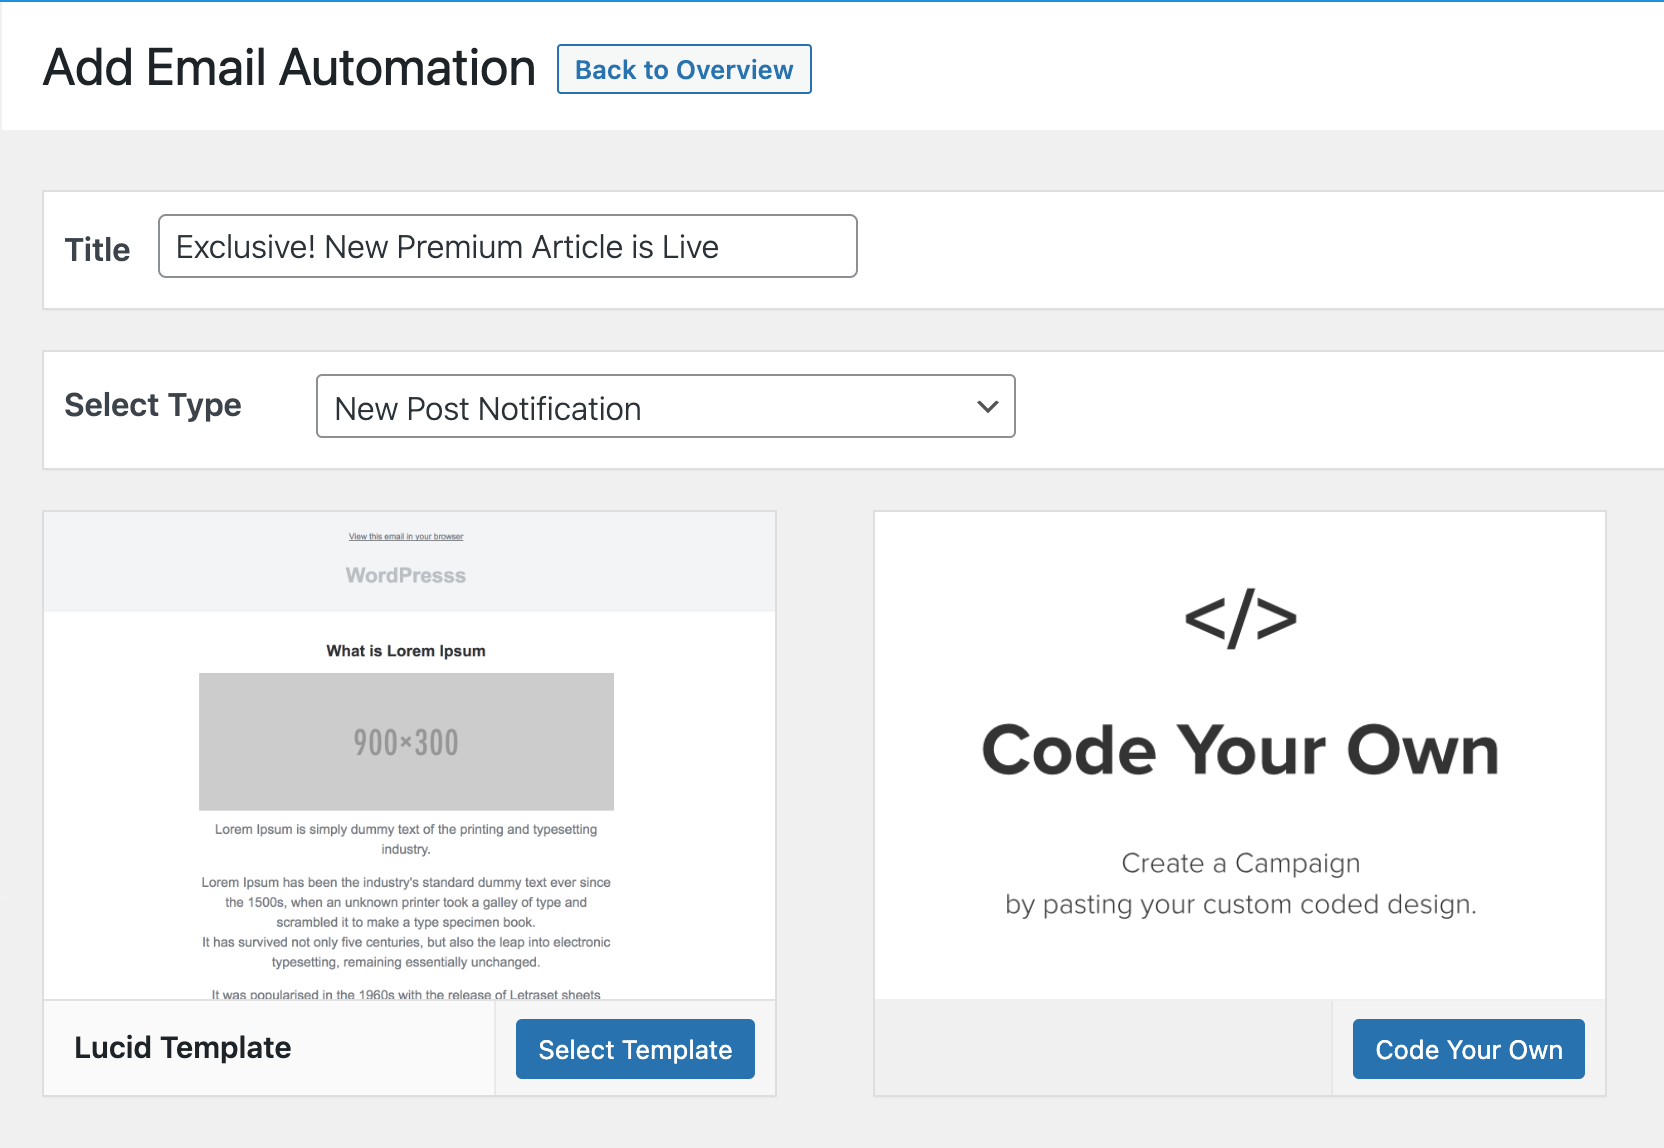
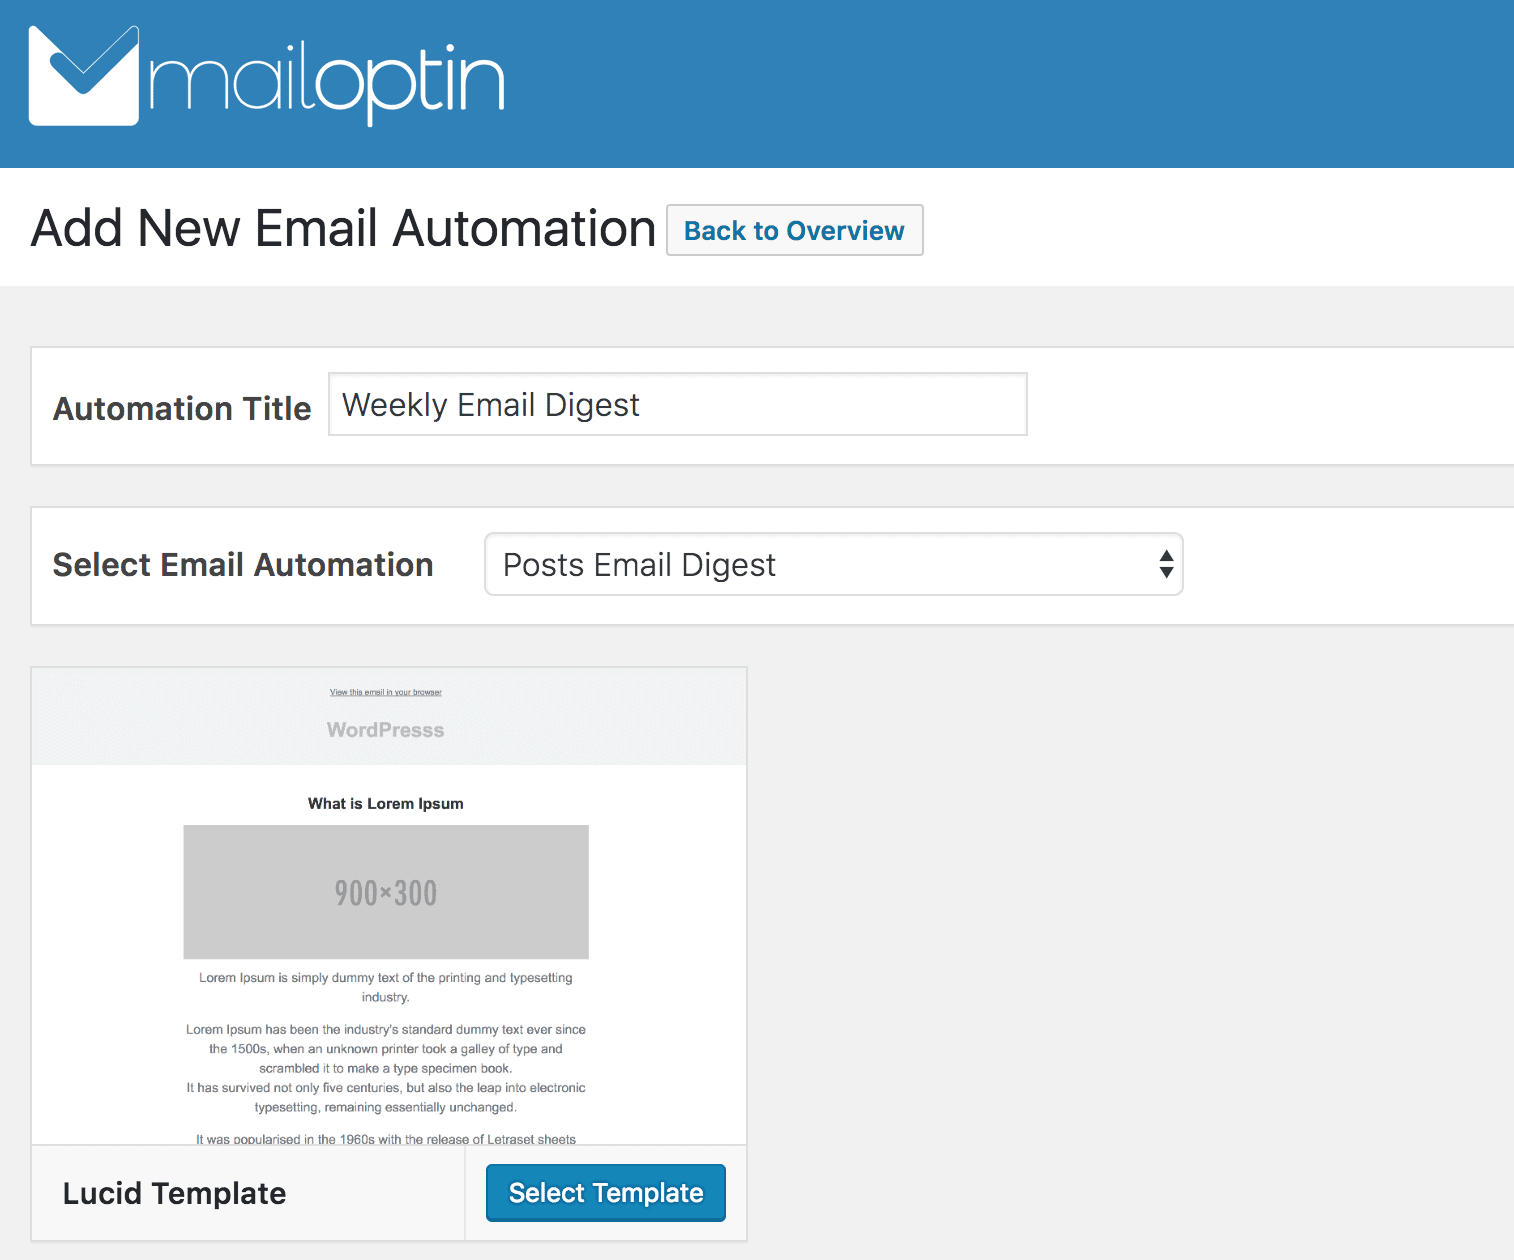
To get started, go to MailOptin >> Emails and click the Add New button. Select “Email Automation”
Enter a title for the automation, select “New Post Notification, ” and select an email template to open the email builder.
On the email builder, use the Body, Header, Content, and Footer panels to customize the email template to your heart’s content. You can change colors, add a header image, add custom content, and more.
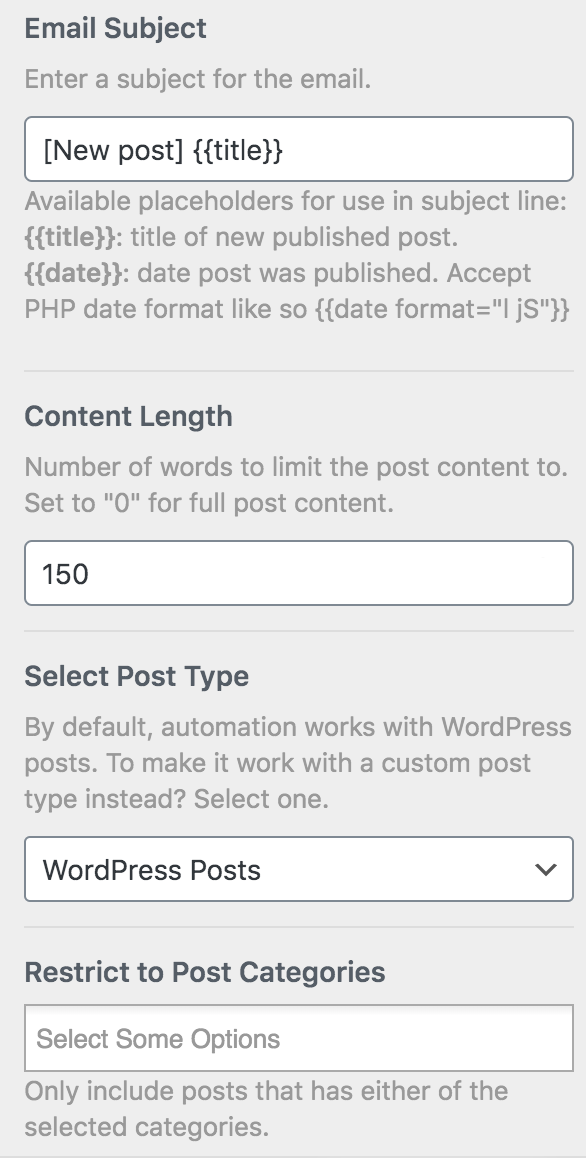
The Settings panel is where the actual setup is done. Open it to set up the email subject and the maximum content length. You can also restrict the automation to specific categories, tags, and authors. This is ideal if you want to email when blog posts are added to a particular category in WordPress.
Next, scroll down to the Recipient section, and select ‘LearnDash’.
If you only want to send the email to users enrolled in specific courses, use the “Restrict to Courses” setting. And if you’re going to email users that belong to specific groups, use the “Restrict to Groups” setting.

When you are done, click the Save Changes button at the top right corner and then toggle the activation switch to the right to enable the automation.
Setting Up Email Digest Automation
Similar to the New Post Notification setup explained above, when creating the automation, select “Posts Email Digest” and choose a template.
Set up and craft the email content and settings. In the recipient section, select LearnDash and the course or group whose users you would love to send the automated emails to.
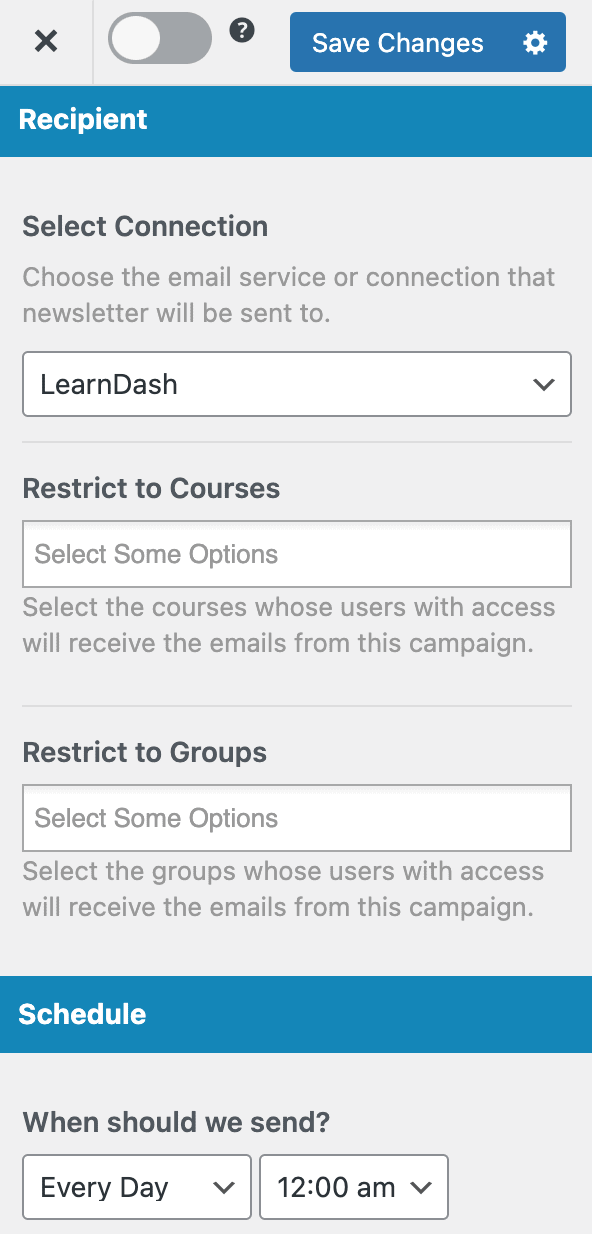
Use the Schedule section to decide when to send out the email, which could be daily, weekly, or monthly.
Remember to save your changes and activate the automation.
Since you are sending emails to WordPress users, you can use the following placeholders in your email message.
- {{username}} – User’s username
- {{useremail}} – User’s email address
- {{firstname}} – User’s first name
- {{lastname}} – User’s last name
- {{displayname}} – User’s display name
- {{websiteurl}} – User’s website URL.
Conclusion
Sending newsletters or broadcasts to the users of your LearnDash-powered course site can be a beneficial tool for any website owner as long as it is done responsibly without spamming. It can be beneficial for both the user and the site owner.
MailOptin’s integration with LearnDash makes it easy to contact all your users without hassle.
Suppose you are using email marketing software with your LearnDash course website. In that case, MailOptin lets you subscribe LearnDash users to your email list after they signup or enroll in a course or join a group.